Note: **Enter the following commands one by one and wait for the command to complete.**
##### I. Check RouterOS version**Make sure that the version of RouterOS is 7+**
```shell system/package/print ``` ##### ##### II. Enabling HTTPS Create your own root CA on your router ``` /certificate add name=LocalCA common-name=LocalCA key-usage=key-cert-sign,crl-sign ``` ##### ##### III. Sign the newly created CA certificate ``` /certificate sign LocalCA ``` ##### ##### IV. Create a new certificate for Webfig (non-root certificate)Note: as common-name=XXX.XXX.XXX.XXX You enter public IP adddress of the router.
``` /certificate add name=Webfig common-name=XXX.XXX.XXX.XXX ``` ##### ##### V. Sign the newly created certificate for Webfig ``` /certificate sign Webfig ca=LocalCA ``` ##### ##### VI. Enable SSL (*www-ssl)* and specify to use the newly created certificate for Webfig ``` /ip service set www-ssl certificate=Webfig disabled=no ``` ##### ##### VII. Enable api-ssl and specify to use the newly created certificate for Webfig ``` /ip service set api-ssl certificate=Webfig disabled=no ``` ##### ##### VIII. Enable VPN server To enable the VPN server [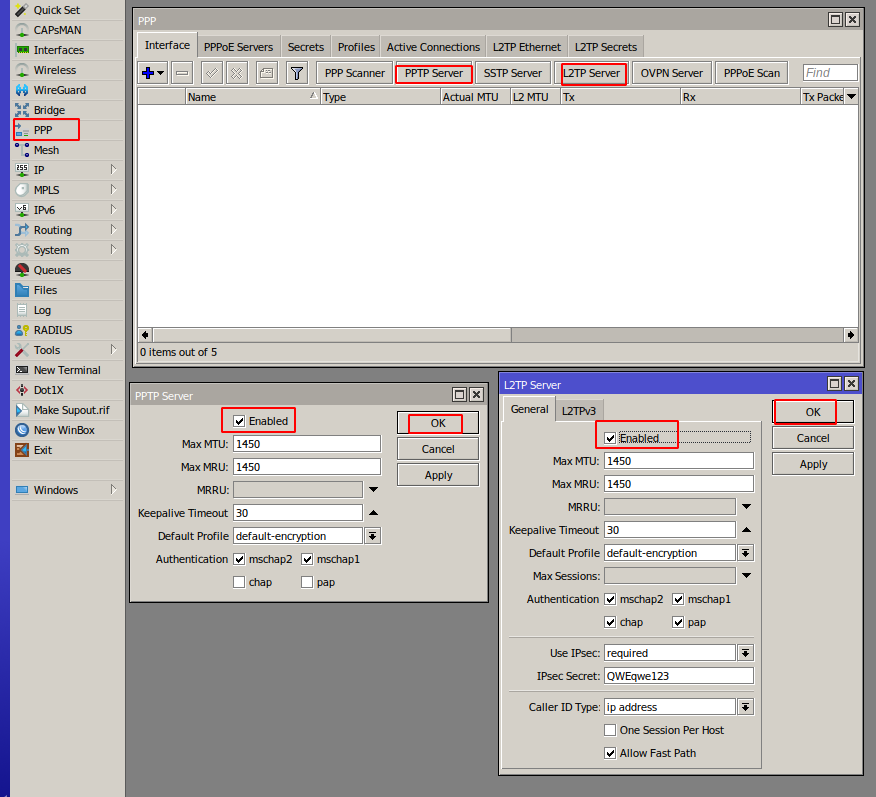](https://doc.puq.info/uploads/images/gallery/2022-10/image-1666164439793.png)