How to start using
Requirements
Installed and correctly configured WHMCS
Module tested on WHMCS 8.1 version
NextCloud server account with WebDAV access - this module works properly only with NextCloud, for now.
The system requires use and has been fully tested with NEXTCLOUD, a recognized opensource software. You can use your own Nextcloud installation or use our free solution available at this link: https://crm.puq.pl/store/za-darmo
For the correct operation of the module, PHP parameters are required:
PHP >= 7.2
file_uploads On
post_max_size 80M ;(Be guided by the size of the PDF files)
upload_max_filesize 80M ;(Be guided by the size of the PDF files)
max_file_uploads 40
Installation
At this stage, the module does not include a standalone installer.
The installation consists in uploading the module files to the appropriate addons directory in the WHMCS installation and then activating the plug-in.
Installation requires basic knowledge. If you are a WHMCS user and you do not have access to the server where WHMCS is installed, you will not be able to install the module.
Access to the server terminal with WHMCS installation or the ability to upload files via FTP is required.
Attention!!! We remind you - for the correct operation of the module you need a WebDAV server / account from NextCloud. Failure to do so makes it impossible to use the system.
PDF files are stored on the NextCloud server and cataloged by type and date of the document (date entered in the document, example: date of invoice receipt)
To install the module, copy the module folder to the WHMCS "modules/addons" folder.
git clone https://github.com/PUQ-sp-z-o-o/puq_commitments_forecaster.git
cp -r puq_commitments_forecaster WHMCS_DIR/modules/addons
or
wget https://cf.puq.info/whmcs-module/puq_cf_WHMCS-latest.tar.gz
tar -xzvf puq_cf_WHMCS-latest.tar.gz
cp -r puq_commitments_forecaster WHMCS_DIR/modules/addons/
Activation
In the WHMCS administrator panel, browse to:
System Settings -> Addons ModulesActivate the module by clicking the "Activate" button in the "Commitments forecaster" module.

Activating the module automatically creates tables in the WHMCS database with the prefix "puq_"
Deactivation
Attention!!!
Deactivating a module automatically deletes the tables in the database associated with that module.
In the WHMCS administrator panel, browse to:
System Settings -> Addons ModulesDeactivate the module by clicking the "Deactivate" button in the "Commitments forecaster" module.

Configuration of module parameters
In the WHMCS administrator panel, browse to:
System Settings -> Addons Modules -> Commitments forecasterClick the "Configure" button
Enter your NextCloud server login details:
WebDAV URL HTTPS:// - {SERVER}/remote.php/dav/files/{USER}/
Note: link without "https: //" and at the end "/"
WebDAV user
WebDAV password
Access Control - select the user groups that must have access to the module.
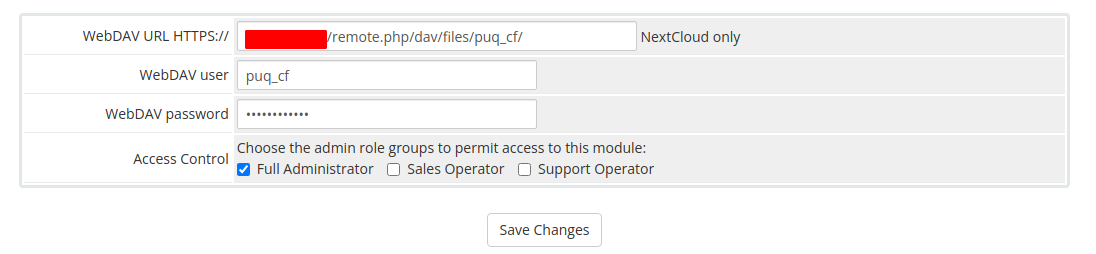
After entering all the data, click the "Save Changes" button