If you do not have a **Service Group** where you want to place the new service, you need to create a new **Service Group**
##### 1. Log in to the administrative area of your **[WISECP](https://puqcloud.com/link.php?id=78)**. ##### 2. Create New Service Group Go to ``` Services -> Service Management -> Add Group ``` [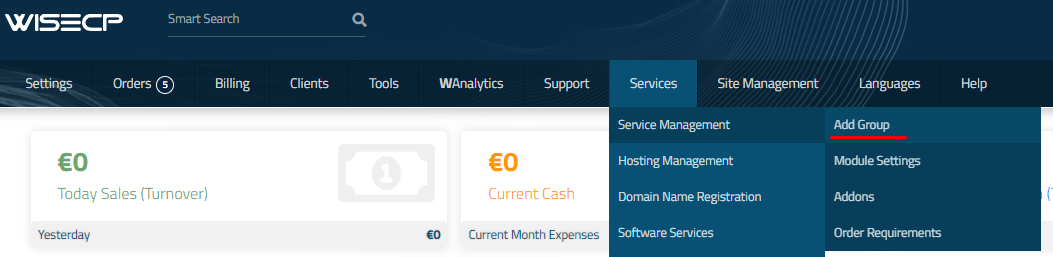](https://doc.puq.info/uploads/images/gallery/2023-11/image-1700487270737.png) Enter all the necessary data and click the '**Create Group**' button. [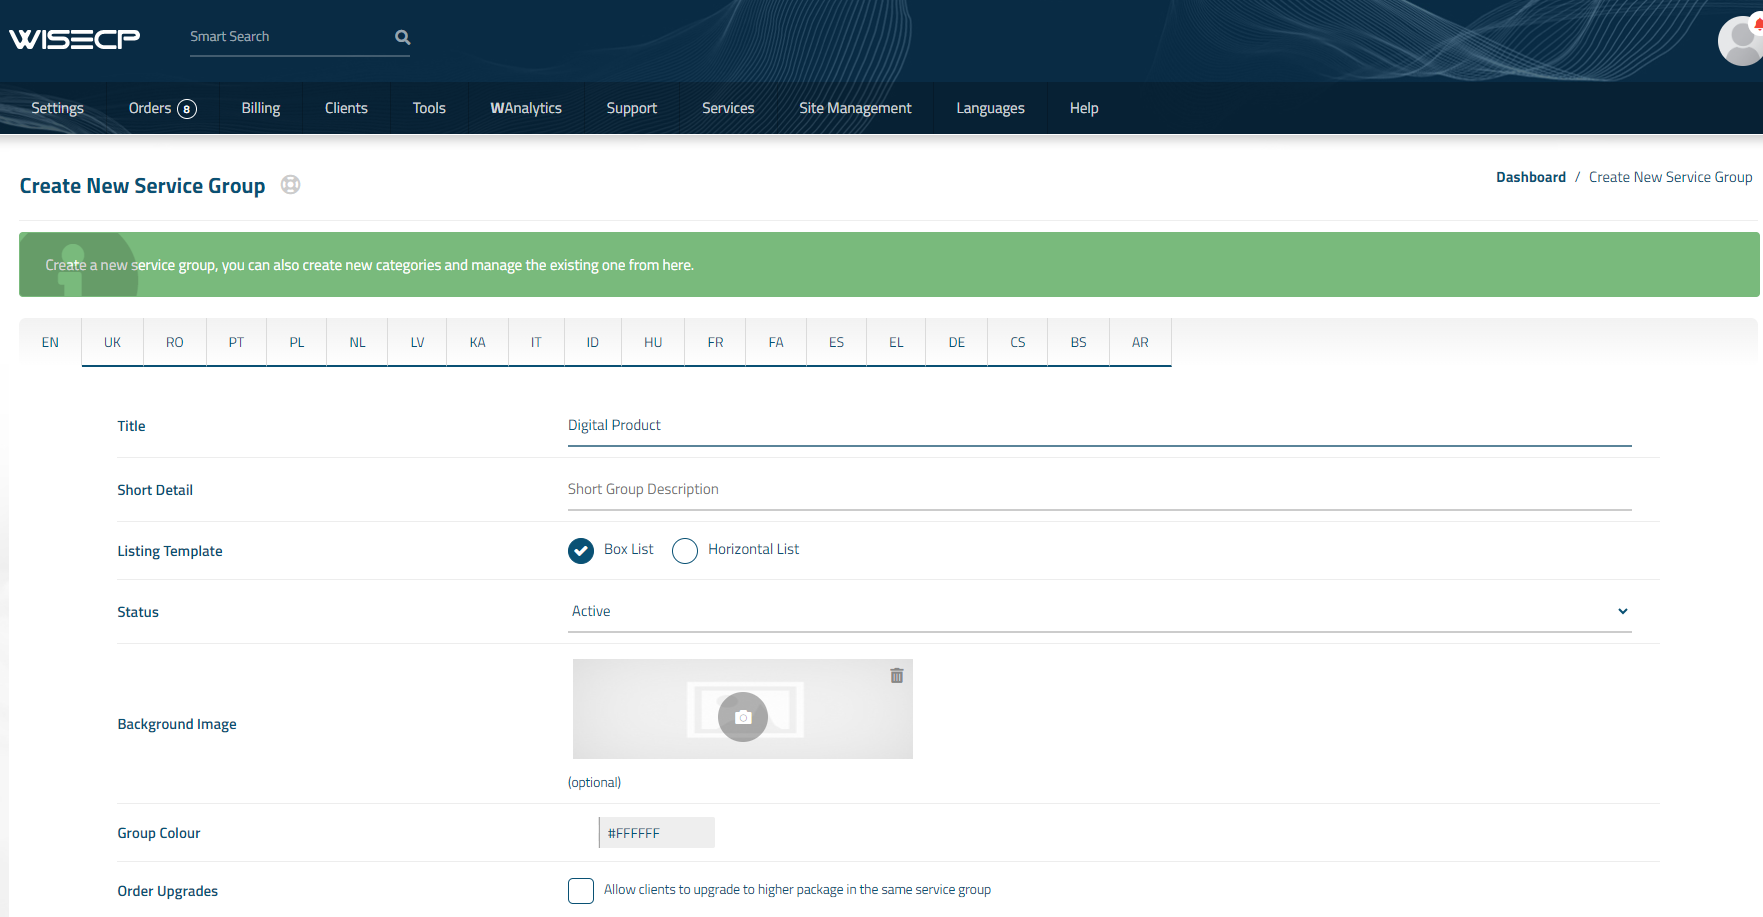](https://doc.puq.info/uploads/images/gallery/2024-06/image-1717998384709.png) ##### 3. Adding a New Service Go to ``` Services -> our service group where you need to add the new service. ``` [](https://doc.puq.info/uploads/images/gallery/2024-06/image-1717998544123.png) In the opened window, click the '**Create New Service**' button. [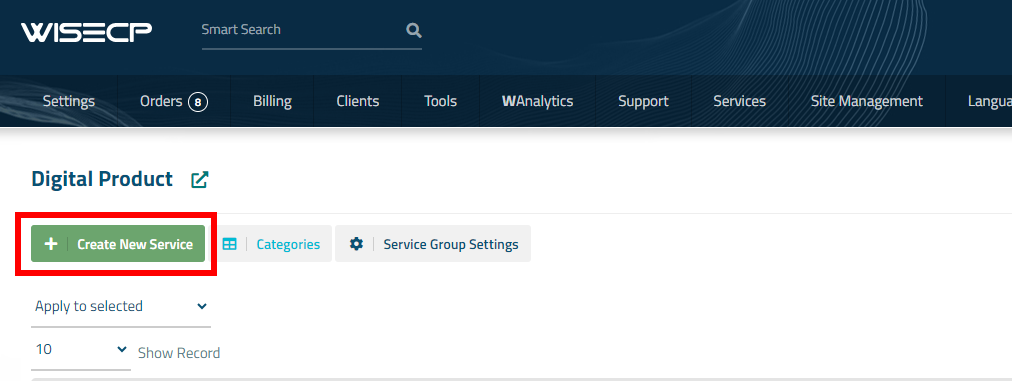](https://doc.puq.info/uploads/images/gallery/2024-06/image-1717998587516.png) On the opened page, enter all the necessary details for your new service and navigate to the '**Core**' tab. Select the '**PUQ Digital Product**' module from the drop-down list of modules. [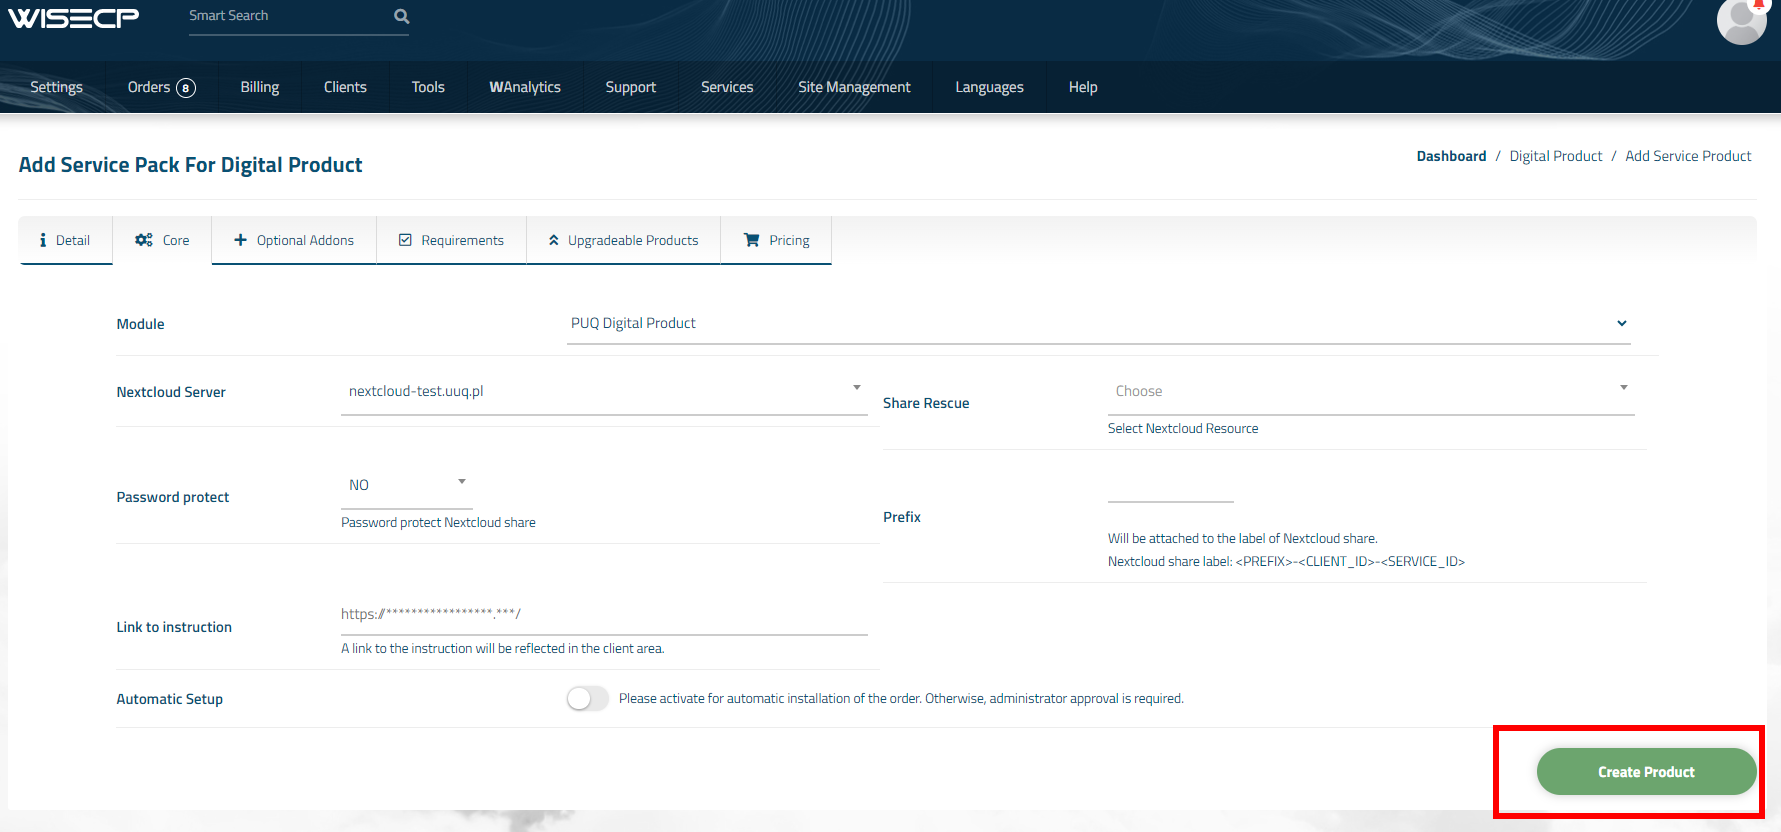](https://doc.puq.info/uploads/images/gallery/2024-06/image-1717998663461.png) ##### 4. Fill in the configuration options according to your preferences. - **Nextcloud Server** Select from the drop-down list the server on which you have the Digital Product - **Share Rescue:** **ATTENTION**: here the data is updated after saving, you must save the product before making a choice here, select a folder on the server and save the changes. - **Password protect:** If you need to protect the shared resource with a password, select YES - **Prefix:** The prefix is required to identify the client's shared link. An entry with the structure <PREFIX>-<CLIENT\_ID>-<SERVICE\_ID> will be added to the description of the shared link on the nextcloud server to facilitate searching if necessary - **Link to instruction:** Link to the instruction, if filled out, it will be reflected in the client area - **Automatic Setup:** Please activate for automatic installation of the order. Otherwise, administrator approval is required.