Installation and configuration guide
- WHMCS setup(install/update)
- Setup guide: Emby setup
- Setup guide: WHMCS setup
- Add server (Emby server)
- Product Configuration
- Add new library/item in Emby
- Getting Access Hash (API key)
WHMCS setup(install/update)
Emby module WHMCS
Order now | Download | FAQ
Module is coded ionCube v13
Supported php version:
- php 7.4 WHMCS 8.11.0 -
- php 8.1 WHMCS 8.11.0 +
- php 8.2 WHMCS 8.11.0 +
To install and update a module, you must perform one and the same action.
1. Download the latest version of the module.
PHP 8.2
wget http://download.puqcloud.com/WHMCS/servers/PUQ_WHMCS-Emby/php82/PUQ_WHMCS-Emby-latest.zipPHP 8.1
wget http://download.puqcloud.com/WHMCS/servers/PUQ_WHMCS-Emby/php81/PUQ_WHMCS-Emby-latest.zipPHP 7.4
wget http://download.puqcloud.com/WHMCS/servers/PUQ_WHMCS-Emby/php74/PUQ_WHMCS-Emby-latest.zipAll versions are available via link: http://download.puqcloud.com/WHMCS/servers/PUQ_WHMCS-Emby/
2. Unzip the archive with the module.
unzip PUQ_WHMCS-Emby-latest.zip3. Copy and Replace "puqEmby" to "WHMCS_WEB_DIR/modules/servers/"
Setup guide: Emby setup
Emby module WHMCS
Order now | Download | FAQ
1. Install Emby on your server
To simplify deployment and help automate this for as many users as possible, we provide a BASH script to handle repo installation as well as installing Emby. All you need to do is run this command on your system
wget https://github.com/MediaBrowser/Emby.Releases/releases/download/4.7.14.0/emby-server-deb_4.7.14.0_amd64.debdpkg -i emby-server-deb_4.7.14.0_amd64.deb2. SSL certificate generation:
sudo apt install nginx certbot python3-certbot-nginxsudo certbot --nginx --agree-tos --redirect --hsts --staple-ocsp --email YOUR_EMAIL -d DOMAIN_NAMEecho "0 0 * * * root certbot renew --quiet --no-self-upgrade --post-hook 'systemctl reload nginx'" | sudo tee -a /etc/cron.d/renew_certbot
3. Configure nginx from a subdomain
Create a file named nginx.conf.
cd /etc/nginx/conf.d/
nano nginx.conf
Then, insert the following text, replacing DOMAIN_NAME with your domain.
# Uncomment the commented sections after you have acquired a SSL Certificate
server {
        listen 80;
        #listen [::]:80;
        server_name DOMAIN_NAME;

        # Uncomment to redirect HTTP to HTTPS
        return 302 https://$host$request_uri;
}

server {
        listen 443 ssl http2;
        #listen [::]:443 ssl http2;
        server_name DOMAIN_NAME;

        ## The default `client_max_body_size` is 1M, this might not be enough for some posters, etc.
        client_max_body_size 20M;

        # use a variable to store the upstream proxy
        # in this example we are using a hostname which is resolved via DNS
        # (if you aren't using DNS remove the resolver line and change the variable to point to an IP address e.g `set $emby 127.0.0.1`)
        set $emby 127.0.0.1;
        resolver 127.0.0.1 valid=30;

        ssl_certificate /etc/letsencrypt/live/DOMAIN_NAME/fullchain.pem;
        ssl_certificate_key /etc/letsencrypt/live/DOMAIN_NAME/privkey.pem;
        include /etc/letsencrypt/options-ssl-nginx.conf;
        ssl_dhparam /etc/letsencrypt/ssl-dhparams.pem;
        add_header Strict-Transport-Security "max-age=31536000" always;
        ssl_trusted_certificate /etc/letsencrypt/live/DOMAIN_NAME/chain.pem;
        ssl_stapling on;
        ssl_stapling_verify on;

        # Security / XSS Mitigation Headers
        # NOTE: X-Frame-Options may cause issues with the webOS app
        add_header X-Frame-Options "SAMEORIGIN";
        add_header X-XSS-Protection "0"; # Do NOT enable. This is obsolete/dangerous
        add_header X-Content-Type-Options "nosniff";

        # COOP/COEP. Disable if you use external plugins/images/assets
        add_header Cross-Origin-Opener-Policy "same-origin" always;
        add_header Cross-Origin-Embedder-Policy "require-corp" always;
        add_header Cross-Origin-Resource-Policy "same-origin" always;

        # Permissions policy. May cause issues on some clients
        add_header Permissions-Policy "accelerometer=(), ambient-light-sensor=(), battery=(), bluetooth=(), camera=(), clipboard-read=(), display-capture=(), document-domain=(), encrypted-media=(), gamepad=(), geolocation=(), gyroscope=(), hid=(), idle-detection=(), interest-cohort=(), keyboard-map=(), local-fonts=(), magnetometer=(), microphone=(), payment=(), publickey-credentials-get=(), serial=(), sync-xhr=(), usb=(), xr-spatial-tracking=()" always;

        # Tell browsers to use per-origin process isolation
        add_header Origin-Agent-Cluster "?1" always;


        # Content Security Policy
        # See: https://developer.mozilla.org/en-US/docs/Web/HTTP/CSP
        # Enforces https content and restricts JS/CSS to origin
        # External Javascript (such as cast_sender.js for Chromecast) must be whitelisted.
        # NOTE: The default CSP headers may cause issues with the webOS app
        #add_header Content-Security-Policy "default-src https: data: blob: http://image.tmdb.org; style-src 'self' 'unsafe-inline'; script-src 'self' 'unsafe-inline' https://www.gstatic.com https://www.youtube.com blob:; worker-src 'self' blob:; connect-src 'self'; object-src 'none'; frame-ancestors 'self'";

        location = / {
                return 302 http://$host/web/;
                #return 302 https://$host/web/;
        }

        location / {
                # Proxy main Emby traffic
                proxy_pass http://$emby:8096;
                proxy_set_header Host $host;
                proxy_set_header X-Real-IP $remote_addr;
                proxy_set_header X-Forwarded-For $proxy_add_x_forwarded_for;
                proxy_set_header X-Forwarded-Proto $scheme;
                proxy_set_header X-Forwarded-Protocol $scheme;
                proxy_set_header X-Forwarded-Host $http_host;

                # Disable buffering when the nginx proxy gets very resource heavy upon streaming
                proxy_buffering off;
        }

        # location block for /web - This is purely for aesthetics so /web/#!/ works instead of having to go to /web/index.html/#!/
        location = /web/ {
                # Proxy main Emby traffic
                proxy_pass http://$emby:8096/web/index.html;
                proxy_set_header Host $host;
                proxy_set_header X-Real-IP $remote_addr;
                proxy_set_header X-Forwarded-For $proxy_add_x_forwarded_for;
                proxy_set_header X-Forwarded-Proto $scheme;
                proxy_set_header X-Forwarded-Protocol $scheme;
                proxy_set_header X-Forwarded-Host $http_host;
        }

        location /socket {
                # Proxy Emby Websockets traffic
                proxy_pass http://$emby:8096;
                proxy_http_version 1.1;
                proxy_set_header Upgrade $http_upgrade;
                proxy_set_header Connection "upgrade";
                proxy_set_header Host $host;
                proxy_set_header X-Real-IP $remote_addr;
                proxy_set_header X-Forwarded-For $proxy_add_x_forwarded_for;
                proxy_set_header X-Forwarded-Proto $scheme;
                proxy_set_header X-Forwarded-Protocol $scheme;
                proxy_set_header X-Forwarded-Host $http_host;
        }
}
Restarting nginx
sudo service nginx restartSetup guide: WHMCS setup
Emby module WHMCS
Order now | Download | FAQ
1. Download the latest version of the module.
PHP 8.1
wget http://download.puqcloud.com/WHMCS/servers/PUQ_WHMCS-Emby/PUQ_WHMCS-Emby-latest.zipPHP 7.4
wget http://download.puqcloud.com/WHMCS/servers/PUQ_WHMCS-Emby/php74/PUQ_WHMCS-Emby-latest.zipAll versions are available via link: http://download.puqcloud.com/WHMCS/servers/PUQ_WHMCS-Emby/
2. Unzip the archive with the module.
unzip PUQ_WHMCS-Emby-latest.zip3. Copy "puqEmby" to "WHMCS_WEB_DIR/modules/servers/"
4. Create new server Emby in WHMCS (System Settings->Products/Services->Servers)
System Settings->Servers->Add New Server- Enter the correct Name and Hostname

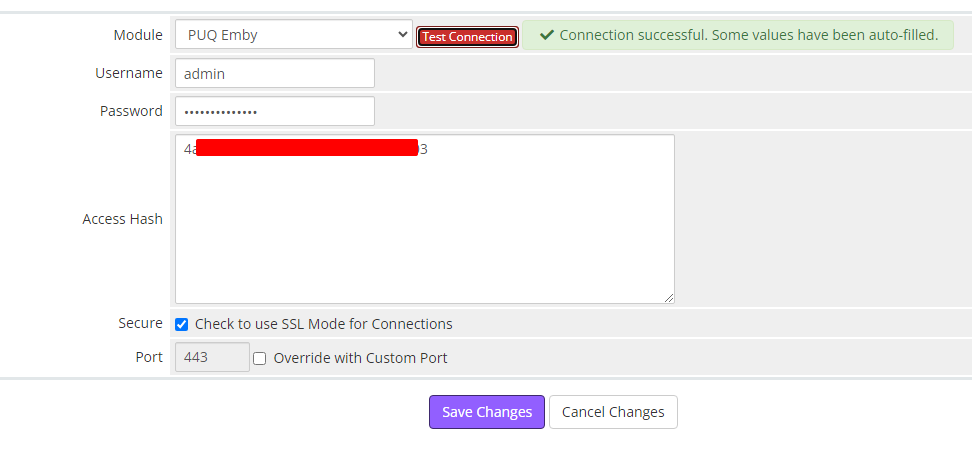
- In the Server Details section, select the "PUQ Emby" module and enter the correct username, password and access hash (API key) for the Emby web interface.
- To check, click the "Test connection" button
5. Create a new Products/Services
System Settings->Products/Services->Create a New ProductIn the Module settings section, select the "PUQ Emby" module
- License key: A pre-purchased license key for the "PUQ Emby" module. For the module to work correctly, the key must be active
Libraries:
- Use All Libraries: Choosing all of libraries from your Jellyfin server
- Libraries: The libraries you want to make available to customers of this product.
(IMPORTANT! Start a new line for each new library)
Example:
"Movies
Beginner`s Programming Course
Comedy"
IMPORTANT!
If you have a folder named "-", please enter it not as the first one or rename it.
If you don't want any folder to be accessible, type "-".
User Configuration:
- Streaming bitrate limit: An optional per-stream bitrate limit for all out of network devices. This is useful to prevent devices from requesting a higher bitrate than your internet connection can handle. This may result in increased CPU load on your server in order to transcode videos on the fly to a lower bitrate.
- Remote control: Remote control of shared devices (DLNA devices are considered shared until a user begins controlling them)
- Media downloads: Users can download media and store it on their devices. This is not the same as a sync feature. Book libraries require this enabled to function properly.
- Subtitle Downloading: Allow subtitle downloading
- Camera upload: If allowed, and if enabled in Emby mobile apps, users can automatically upload photos and videos taken from their camera to this Emby Server
- Media conversion: Grant or deny access to the convert media feature.
- Social media sharing: Only web pages containing media information are shared. Media files are never shared publicly. Shares are time-limited and will expire after 30 days.
- User Preference Access: Allow this user to change their password and profile image
- Username prefix/Username suffix: Necessary in order to generate a username for the service, in the format: prefix<client_id>-<service_id>suffix
Allow playback (Restricting access to transcoding may cause playback failures in clients due to unsupported media formats)
- media
- audio that requires transcoding
- video that requires transcoding
- video that requires conversion without re-encoding
Feature access:
- Allow Live TV access
- Allow Live TV recording management
- Force transcoding of remote media sources such as Live TV
Links
- Link to instruction: Link to the instruction, if filled out, it will be reflected in the client area
Client Area
-
Show Password – Show the service password in the client area.
-
Password Generation – Set the password length and the allowed letters/numbers/symbols for the password.
Format:"8:234abcdABCD", where8is the password length, and everything after the colon represents the allowed characters. -
Username Format – Define the format for username generation:
-
-
Standard – prefix-client_id-service_id-suffix
-
Custom – username generated by a custom rule
-
-
-
Custom Username – Set a rule for generating a custom username.
Add server (Emby server)
Emby module WHMCS
Order now | Download | FAQ
Add a new server to the system WHMCS.
System Settings->Servers->Add New Server- Enter the correct Name and Hostname
- In the Server Details section, select the "PUQ Emby" module and enter the correct username, password and access hash (API key) for the Emby web interface
- To check, click the "Test connection" button
Product Configuration
Emby module WHMCS
Order now | Download | FAQ
Create a new Products/Services
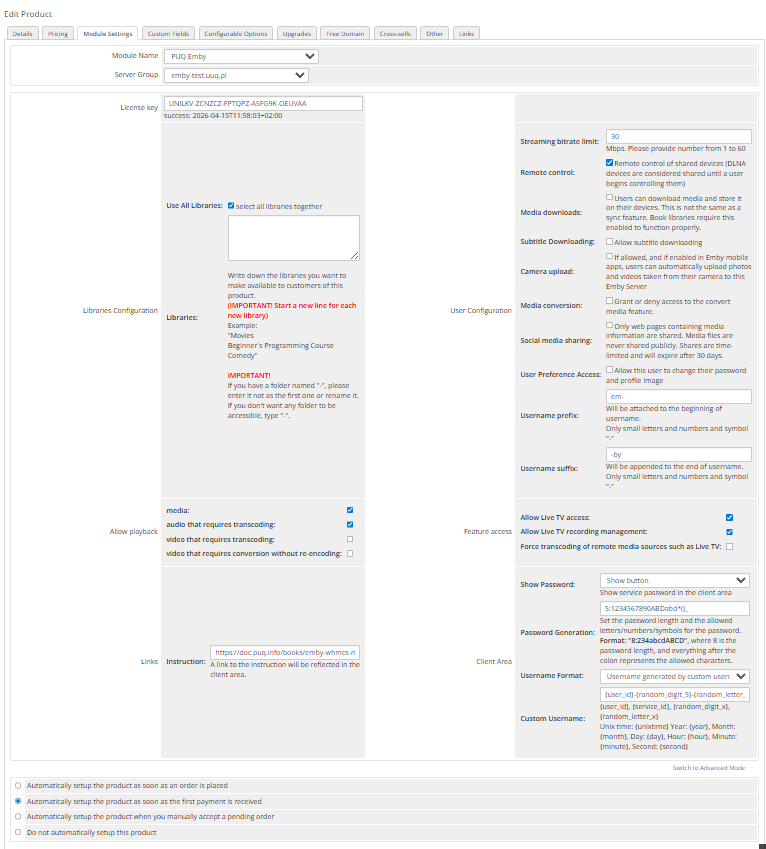
System Settings->Products/Services->Create a New ProductIn the Module settings section, select the "PUQ Emby" module
- License key: A pre-purchased license key for the "PUQ Emby" module. For the module to work correctly, the key must be active
Libraries:
- Use All Libraries: Choosing all of libraries from your Jellyfin server
- Libraries: The libraries you want to make available to customers of this product.
(IMPORTANT! Start a new line for each new library)
Example:
"Movies
Beginner`s Programming Course
Comedy"
IMPORTANT!
If you have a folder named "-", please enter it not as the first one or rename it.
If you want to select all folders together, simply leave the field EMPTY.
If you don't want any folder to be accessible, type "-".
User Configuration:
- Streaming bitrate limit: An optional per-stream bitrate limit for all out of network devices. This is useful to prevent devices from requesting a higher bitrate than your internet connection can handle. This may result in increased CPU load on your server in order to transcode videos on the fly to a lower bitrate.
- Remote control: Remote control of shared devices (DLNA devices are considered shared until a user begins controlling them)
- Media downloads: Users can download media and store it on their devices. This is not the same as a sync feature. Book libraries require this enabled to function properly.
- Subtitle Downloading: Allow subtitle downloading
- Camera upload: If allowed, and if enabled in Emby mobile apps, users can automatically upload photos and videos taken from their camera to this Emby Server
- Media conversion: Grant or deny access to the convert media feature.
- Social media sharing: Only web pages containing media information are shared. Media files are never shared publicly. Shares are time-limited and will expire after 30 days.
- User Preference Access: Allow this user to change their password and profile image
- Username prefix/Username suffix: Necessary in order to generate a username for the service, in the format: prefix<client_id>-<service_id>suffix
Allow playback (Restricting access to transcoding may cause playback failures in clients due to unsupported media formats)
- media
- audio that requires transcoding
- video that requires transcoding
- video that requires conversion without re-encoding
Feature access:
- Allow Live TV access
- Allow Live TV recording management
- Force transcoding of remote media sources such as Live TV
Links
- Link to instruction: Link to the instruction, if filled out, it will be reflected in the client area
Client Area
-
Show Password – Show the service password in the client area.
-
Password Generation – Set the password length and the allowed letters/numbers/symbols for the password.
Format:"8:234abcdABCD", where8is the password length, and everything after the colon represents the allowed characters. -
Username Format – Define the format for username generation:
-
-
Standard – prefix-client_id-service_id-suffix
-
Custom – username generated by a custom rule
-
-
-
Custom Username – Set a rule for generating a custom username.
Add new library/item in Emby
Emby module WHMCS
Order now | Download | FAQ
New library:
To create a new library, you should to create a folder in your Emby server.
cd mntmkdir LIBRARY_NAMELIBRARY_NAME - The name of the new library.
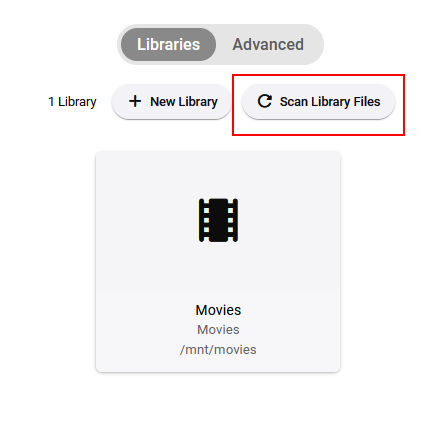
After creating a folder, let's create a library in Emby:
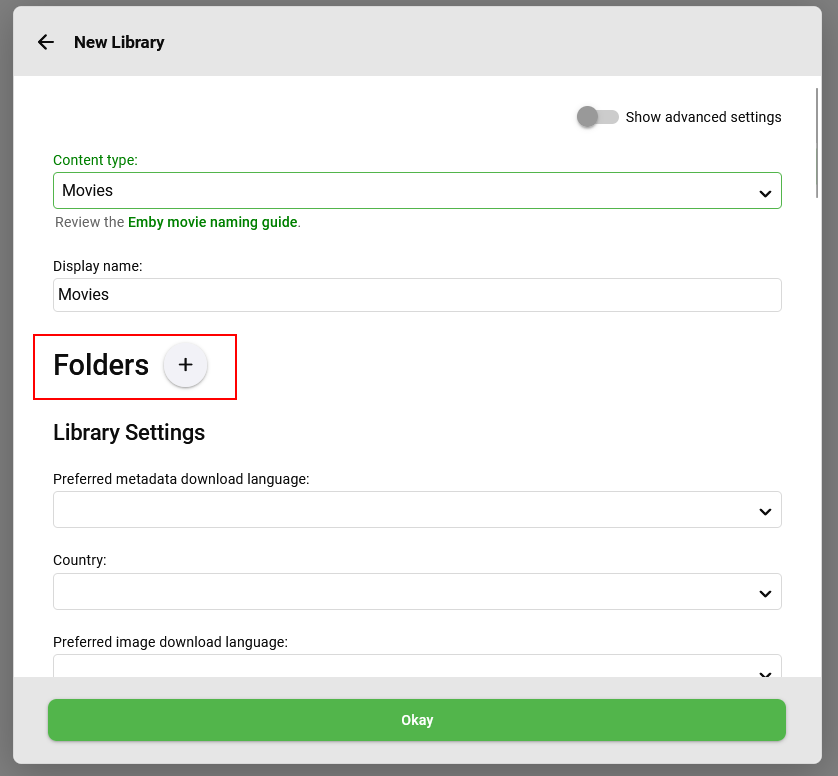
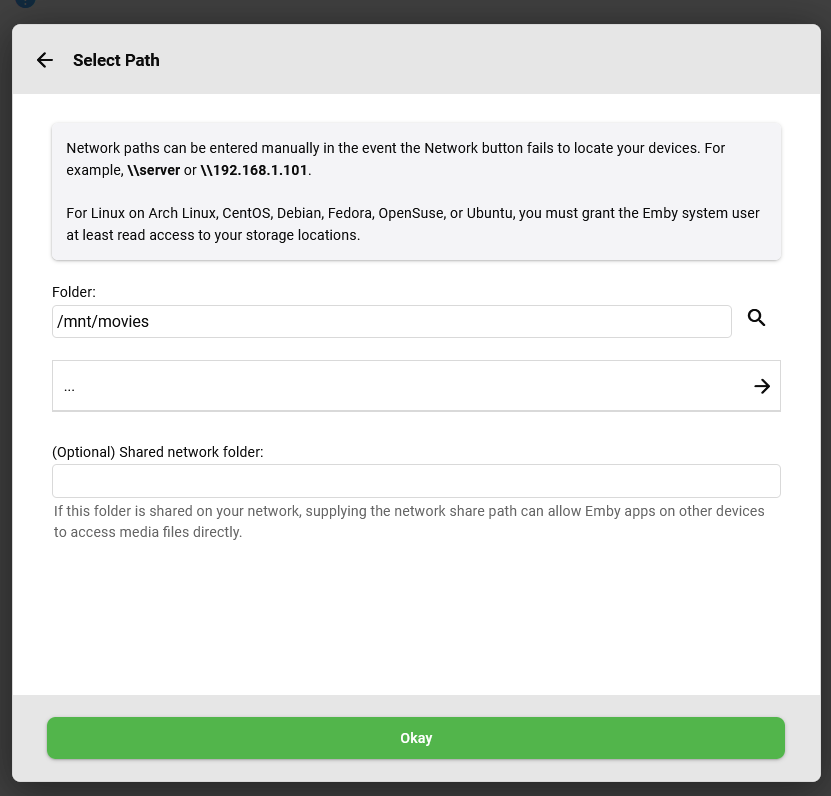
Add a new library:
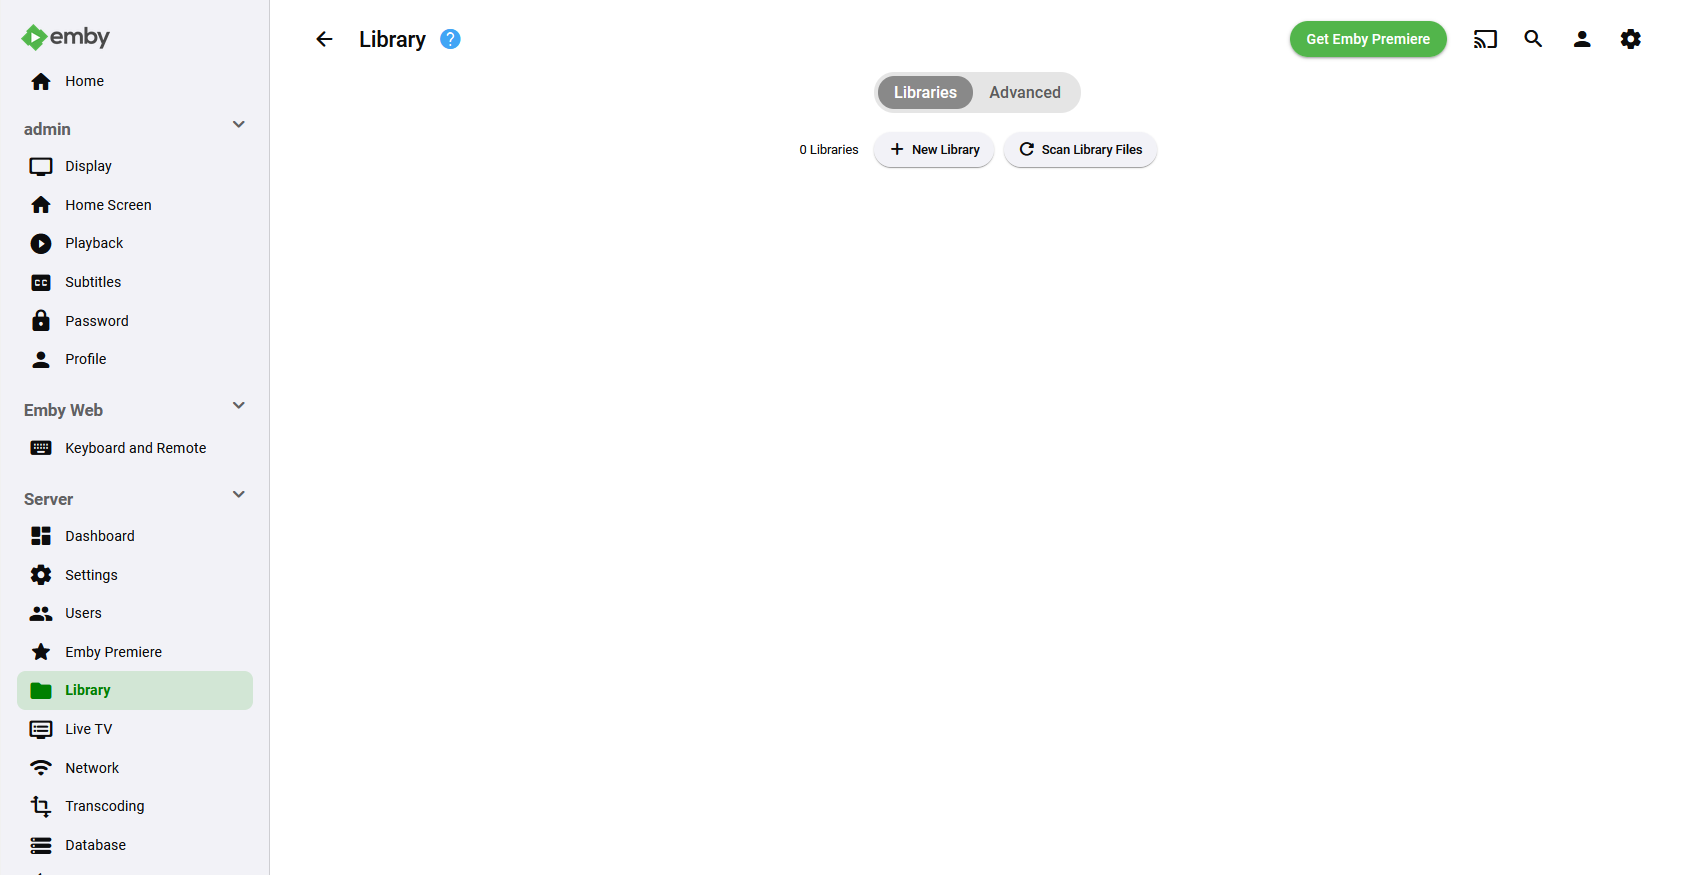
Assign the appropriate folder to this library:
New item:
To download a new item, navigate to the root of your project "/" and enter the following commands:
cd mnt/LIBRARY_NAMEwget DOWNLOAD_ITEM_URLLIBRARY_NAME - The name of the library.
DOWNLOAD_ITEM_URL - The download URL of the item you want to upload to the server.
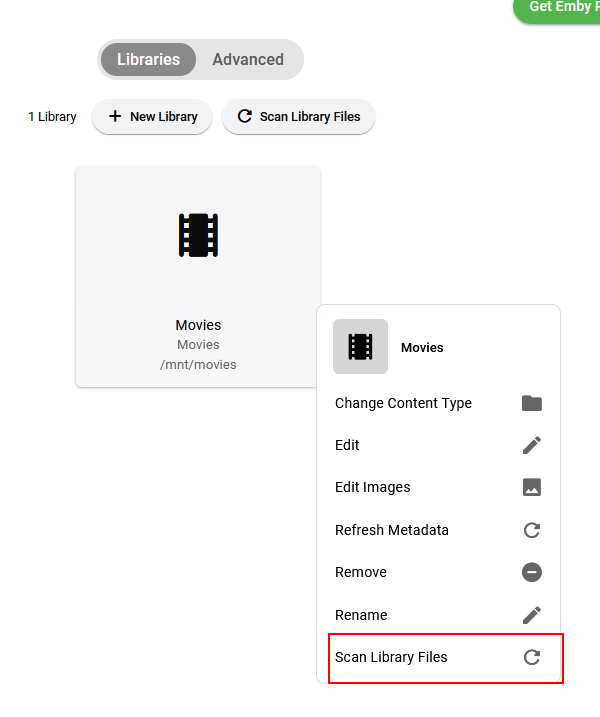
After all
Scan all libraries by clicking on the "Scan All Libraries" button, or scan the specific library by clicking on the three dots and selecting "Scan Library."
Getting Access Hash (API key)
Emby module WHMCS
Order now | Download | FAQ
Dashboard -> API KeysCreate a new API Key
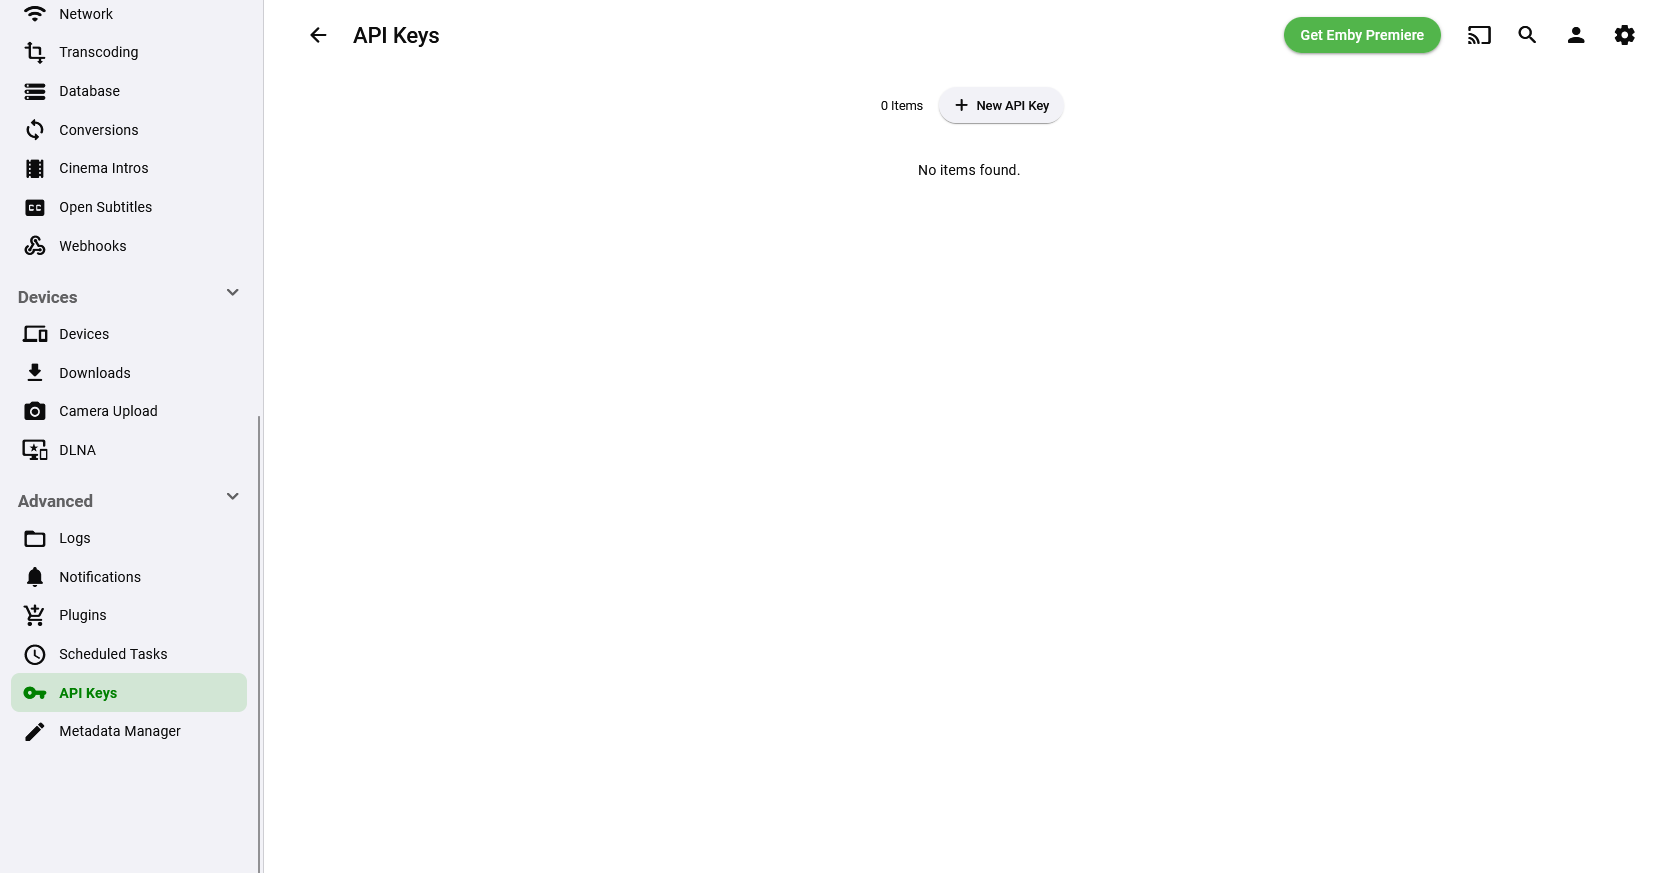
Whrite an App Name
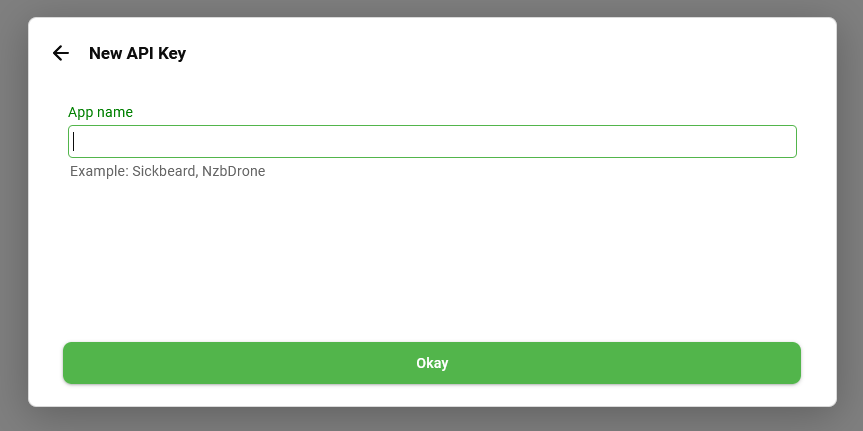
Now you can getting an API key
