Installation and configuration guide
- WHMCS setup(install/update)
- Basic concepts and requirements
- Setup guide: Install HestiaCP on server
- Setup guide: WHMCS preparation and configuration
- Setup guide: Downloading backups description and configuration
- Setup guide: Filemanager preparation and configuration
- Add server (HestiaCP)
- Product Configuration
- Email Template (puqHestiaCP end of place email)
- Email Template (puqHestiaCP Database email reset password/username)
- Email Template (puqHestiaCP Database is ready)
- Email Template (puqHestiaCP Reset email password)
- Email Template (puqHestiaCP e-Mail Account is ready)
- Email Template (puqHestiaCP Reset FTP password)
- Email Template (puqHestiaCP FTP User is ready)
- Email Template (puqHestiaCP Reset service password)
WHMCS setup(install/update)
HestiaCP module WHMCS
Order now | Download | FAQ
Module is coded ionCube v13
Supported php version:
- php 7.4 WHMCS 8.11.0 -
- php 8.1 WHMCS 8.11.0 +
- php 8.2 WHMCS 8.11.0 +
To install and update a module, you must perform one and the same action.
1. Download the latest version of the module.
PHP 8.2
wget http://download.puqcloud.com/WHMCS/servers/PUQ_WHMCS-HestiaCP/php82/PUQ_WHMCS-HestiaCP-latest.zipPHP 8.1
wget http://download.puqcloud.com/WHMCS/servers/PUQ_WHMCS-HestiaCP/php81/PUQ_WHMCS-HestiaCP-latest.zipPHP 7.4
wget http://download.puqcloud.com/WHMCS/servers/PUQ_WHMCS-HestiaCP/php74/PUQ_WHMCS-HestiaCP-latest.zipAll versions are available via link: http://download.puqcloud.com/WHMCS/servers/PUQ_WHMCS-HestiaCP/
2. Unzip the archive with the module
unzip PUQ_WHMCS-HestiaCP-latest.zip3. Copy and Replace "puqHestiaCP" to "WHMCS_WEB_DIR/modules/servers/"
Basic concepts and requirements
HestiaCP module WHMCS
Order now | Download | FAQ
Requirements for the successful operation of the module
- Minimal WHMCS version 8+
- HestiaCP minimal version: 1 +
HestiaCP configuration:
Attention! To deploy a custom package, you must set the interface language for the account administrator to English.
WHMCS Configuration:
Attention! Let's Encrypt certificate generation takes longer than any other request.
In order to avoid the "Troubleshooting an Argument 1 passed ... must be an instance of PDOStatement Error" error, some configuration changes must be made.
Let's go to:
nano /etc/mysql/my.cnfThe changes are by 30 sec or more:
wait_timeout=30
long_query_time=30
After changing the configuration, you need to restart the service:
service mysql restartThe logic of the module.
Important! When you change the package settings in the module settings in WHMCS, the settings on the server will not be applied to already deployed packages. In order to apply the settings to the existing packages on the server, you can refresh parameters by click on the "Change Package" button for any client who has this package. New changes will be also applied as soon as a new service in this package is ordered.
Note! The custom package that you have configured in WHMCS will only be deployed if the "Use the package parameters" setting is enabled. And if the "Use the package parameters" setting is unchecked, the package from the "Chose pakage on server" dropdown list of packages will be used.
Creating a new Hosting Account.
- After the client has ordered and paid for the hosting service, as well as previously entered the domain, the following will be performed:
- Checking the license of the module
- Getting available lists of packages from the server to avoid conflicts when deploying a custom package.
- If the custom package does not exist and custom package deployment is enabled:
- Deploy the package with the create function,
- Create a user account, the username is generated, either by the standard WHMCS method or by the Custom method, the way to generate a unique username,
- If the custom package exists on the server and custom package deployment is enabled:
- Deploy the package with the change function,
- Create a user account, the username is generated, either by the standard WHMCS method or by the Custom method, the way to generate a unique username,
- If custom package deployment is disabled:
- Create a user using a package from the drop-down list that is available in the settings, the username is generated, either by the standard WHMCS method or by the Custom method, the way to generate a unique username,
- If the custom package does not exist and custom package deployment is enabled:
- Add a new domain, if possible.
- Additional actions provided by the settings.
Package change
- After you click on the change package button, the following actions will be performed:
- License check
- Getting a list of server packages to avoid conflicts during deployment of a custom package
- If custom package deployment is enabled:
- If package:
- Already exists Edit package using the Edit Existing Package function
- Does not exist then Create a new package using the create new package function
- If package:
- If the deployment of a custom package is disabled, then the package is changed using the drop-down list in the module settings.
- If custom package deployment is enabled:
The logic of the filemanager.
The file manager that comes with the module is a regular web application that connects to the server via the FTP protocol via a secure communication channel and allows you to interactively manage files, manage archives, and also edit text files.
After the user clicks on the button connects to the file manager, tokenization data will be sent to the remote server where they will be received, and the user will be able to perform actions with his profile.
Note for the administrator. The file manager can be deployed on any hosting account with php7.4, it is also worth considering how resource intensive your use will be.
It is important to use a secure connection with an SSL certificate to keep users safe!
Setup guide: Install HestiaCP on server
HestiaCP module WHMCS
Order now | Download | FAQ
 Hestia Control Panel
Step 1: Make sure that your server is running a supported operating system (amd64 or arm64):
- Debian 10
- Debian 11
- Ubuntu 18.04 LTS
- Ubuntu 20.04 LTS
- Ubuntu 22.04 LTS
Step 2: Log in as the system user (root):
You'll need to connect to your server as root, either directly from the console or remotely using SSH.
Step 3: Download the installer:
wget https://raw.githubusercontent.com/hestiacp/hestiacp/release/install/hst-install.sh
Step 4: Run the installer and follow the prompts:
bash hst-install.sh
To perform an unattended installation (with defaults):
bash hst-install.sh --interactive no --email email@domain.tld --password p4ssw0rd --hostname hostname.domain.tld -f
Or modify your installation with for exmaple:
bash hst-install.sh --apache no --postgresql yes --clamav no --spamassassin no
Will install Hestia without Apache2, ClamAV and Spamassassin How ever it will install Postgresql as additional feature
More options or examples can be found in the Documentation or use the Install string generator
Reporting bugs and issues:
If something isn't working as expected on HestiaCP, please report the issue to our development team on GitHub.
Please include:
- Hestia Control Panel version/release
- Operating system distribution and release/version
- Options specified during installation (if applicable)
- A detailed description of the issue, with any relevant logs or files as well.
License
Hestia Control Panel is open-source and licensed under GPLv3.
Setup guide: WHMCS preparation and configuration
HestiaCP module WHMCS
Order now | Download | FAQ
1. Download the latest version of the module.
PHP 8.X
wget http://download.puqcloud.com/WHMCS/servers/PUQ_WHMCS-HestiaCP/PUQ_WHMCS-HestiaCP-latest.zipPHP 7.4
wget http://download.puqcloud.com/WHMCS/servers/PUQ_WHMCS-HestiaCP/php74/PUQ_WHMCS-HestiaCP-latest.zipAll versions are available via link: http://download.puqcloud.com/WHMCS/servers/PUQ_WHMCS-HestiaCP/
2. Unzip the archive with the module
unzip PUQ_WHMCS-HestiaCP-latest.zip3. Copy "puqHestiaCP" to "WHMCS_WEB_DIR/modules/servers/"
4. Create new server HestiaCP in WHMCS (System Settings->Products/Services->Servers)
System Settings->Servers->Add New Server- Enter the correct Name and Hostname and IP Addres
- In the Server Details section, select the "PUQ HestiaCP" module and enter the correct username and password for the HestoaCP server.
- To check, click the "Test connection" button
5. Create a new Products/Services
System Settings->Products/Services->Create a New Product
In the Module settings section, select the "PUQ HestiaCP" module
- License key: A pre-purchased license key for the "PUQ HestiaCP" module. For the module to work correctly, the key must be active
- Chose pakage on server: The list of packages is pulled from the server. Will be used when the "Use the package parameters" option is not selected. And also if for some reason it will not be possible to create a custom package.
Attention! To deploy a custom package, you must set the interface language for the account administrator to English.
- Use the package parameters: The option allows you to make a choice of settings. Whether you want to use the packages already configured on the server or upload a customized custom package. Use the package parameters entered below, and create the package if it does not exist on the server. And if there is a package, then change its values to those entered below.
- Filemanager settings: File manager settings
- Hostname: The hostname of the file manager
- Pakage configuration: Setting up a custom package
- Name pakage: The package name entered will be used to configure the custom package if the option is selected "Use the package parameters"
- Custom username: A new name will be generated each time the create account function is called.
The custom name will be generated as follows, where PREFIX_ will only be present if the field is set: PREFIX_[*random_x4*]_[*user_id*]_[*service_id*] - Prefix username: This is prefix of your users. May remain empty. This will work when the Custom username option is enabled, also when the user has not ordered a domain and the username field is left blank, the username is invalid
- Quota: The disk quota that is given to the user in the system. Set in megabytes
- Bandwidth: Bandwidth Limit that is given to the user in the system. Set in megabytes
- WEB Pakage configuration: Setting up a web section for a custom package
- Web Domains: The number of web domains allowed per user in the package
- Web Aliases: The number of web aliases allowed for each domain in the package
- SSH Access: Selecting a user access template for SSH Access. The list is loaded from the connected server
- Databases Pakage configuration: Section for database configuration in a custom package
- Databases: The number of databases allowed for the user
- DNS Pakage configuration: DNS section configuration for custom package
- DNS Zones: The number of DNS zones allowed in the package for the user
- DNS Records: The number of DNS records in each domain zone allowed in the package for the user
- Name Servers: Nameservers configuration in custom package
- System Pakage configuration: System settings section, custom package
- Cron Jobs: The number of cron jobs that are allowed for the user
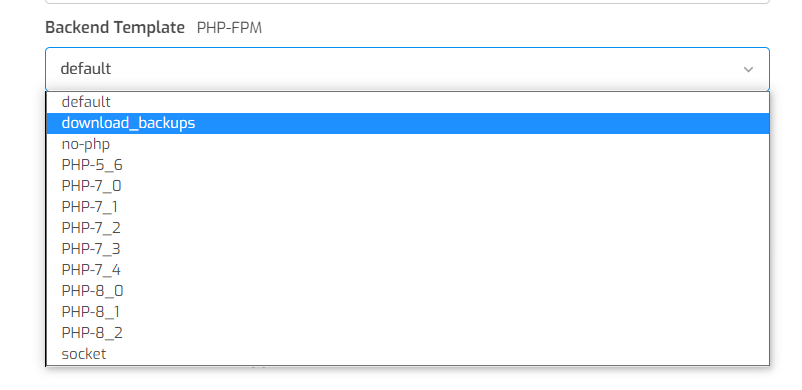
- Template settings: If you want to control the display of templates in Client Area, activate this option. Your template name should be default.tpl, no-php.tpl, socket.tpl, PHP-5_6.tpl, PHP-7_0.tpl, PHP-7_1.tpl, PHP-7_2.tpl, PHP-7_3.tpl, PHP-7_4.tpl, PHP-8_0.tpl, PHP-8_1.tpl, PHP-8_2.tpl, "custom_name".tpl this name will be displayed in Client Area. And match your "custom_name" in "custom_name".tpl on HestiaCP server. Each of the templates is activated separately.
Attention! If the specified heatplate name is not found on the server, then the heatplate will not be available to Client Area. If the option is disabled, all templates available on the server will be available for selection by the client!
- Backups: Backup configuration in custom package
- Backups: The number of backup copies that are allowed for the user
- Allow custom download backups: this setting activates a mechanism that will allow you to download backups directly from your WHMCS account, using the "Download" button
In order for the user to be able to download a backup using this method, it is necessary to add the folder where the backups are stored to the open_basedir in the configuration of your PHP template. By default, the folder where backups are stored is not included, and you are likely to receive an error: Got error 'PHP message: PHP Warning: finfo_file(): open_basedir restriction in effect. File(/backup/*******.tar) is not within the allowed path(s)... To give PHP access to the backup folder, you need to create a custom template by copying your preferred one, and then add the desired directory to the php_admin_value[open_basedir] variable.
- Backup directory: in this setting, you must write the absolute path of the folder in which backups are stored on the server
- Custom script name: if you want to change the name of the script, you can enter the name here
- Path for deploying the download script: path to deploy the download script to the server
- Mail Package configuration: Mail settings section, custom package
- Mail Domains: Number of email domains allowed for a user
- Mail Accounts: Number of email accounts per email domain allowed for a user
- Rate limit: Email limit per hour
- Web templates: Choosing a template Web Template APACHE2. The list of templates is loaded from the server
- Web templates backend: Choosing a Backend Template PHP-FPM. The list of templates is loaded from the server
- Proxy templates: Choosing a Proxy Template NGINX. The list of templates is loaded from the server
- Dns templates: Choosing a DNS Template BIND9. The list of templates is loaded from the server
- Client configuration: The permissions that will be active in the client area and more
- Email configuration: Setting up email templates. Selection of pre-prepared templates to inform the user about some actions
- Reset service password email template: When resetting the service password
- FTP User is ready email template: When a new FTP user was created
- Reset FTP password email template: When the FTP user password was changed
- e-Mail Account is ready email template: When a new mail account was created
- Reset email password email template: When the password is changed in the mail account
- Database is ready email template: When the new database is created
- Reset database password/username email template: When the database password or username has been changed
- End of place email email template: When the space in the account is already running out
- Reset service password email template: When resetting the service password
5. WHMCS configuration
Attention! Let's Encrypt certificate generation takes longer than any other request.
In order to avoid the "Troubleshooting an Argument 1 passed ... must be an instance of PDOStatement Error" error, some configuration changes must be made.
Let's go to:
nano /etc/mysql/my.cnfThe changes are by 30 sec or more:
wait_timeout=30
long_query_time=30
After changing the configuration, you need to restart the service:
service mysql restart
Setup guide: Downloading backups description and configuration
HestiaCP module WHMCS
Order now | Download | FAQ
In order to gain the ability to download backups directly from the WHMCS billing system, you can use this functionality. This feature is implemented by deploying a custom script to the root directory of the administrator's website. Once the script is created, users will be able to download backups by exchanging tokens and hashes between the billing system.
Note: Only the admin account has access to the backup files. Only those sites that were created in the administrator account will have access to backups
In order for the backup to be downloaded, it is necessary to create a new template based on the existing one with a suitable configuration for example:
1. Copy an existing template with a custom name
cp /usr/local/hestia/data/templates/web/php-fpm/PHP-8_1.tpl /usr/local/hestia/data/templates/web/php-fpm/download_backups.tpl2. Let's edit the created template, add a directory with backups to the line with php_admin_value[open_basedir], at the end of the line
nano /usr/local/hestia/data/templates/web/php-fpm/download_backups.tplThe line will look something like this:
php_admin_value[open_basedir] = /home/%user%/.composer:/home/%user%/web/%domain%/public_html:/home/%user%/web/%domain%/private:/home/%user%/web/%domain%/public_shtml:/home/%user%/tmp:/tmp:/var/www/html:/bin:/usr/bin:/usr/local/bin:/usr/share:/opt:/backup3. Activate the template on the server
Setup guide: Filemanager preparation and configuration
Order now | Download | FAQ
1. Simple installation Filemanager
1. Prepare hosting for the file manager.
Minimum Requirements: PHP 7.2.5+ (with php-zip extension)
2. Download the latest version filemanager from the module folder.
wget https://download.puqcloud.com/WHMCS/servers/PUQ_WHMCS-HestiaCP/filemanager/filemanager_latest.zipAll versions are available via link: http://download.puqcloud.com/WHMCS/servers/PUQ_WHMCS-HestiaCP/filemanager/
2. Unzip the archive with the Filemanager and upload them to your PHP server
unzip filemanager_latest.zip3. Make sure your webserver can read and write to ../repository/ and ../private/ folders
4. Set the website document root to ../dist/ directory. This is also known as 'public' folder
NOTE: For security reasons filegator/dist is the ONLY folder you want to be exposed through the web. Everything else should be outside of your web root, this way people can’t access any of your important files through the browser. If you run the script from the root folder, you will see the message 'Development mode' as a security warning.
2. Advanced installation Filemanager
1. Installing a file manager
The original instructions for installing and configuring the file manager https://docs.filegator.io/install.html
Minimum Requirements: PHP 7.2.5+ (with php-zip extension)
Download precompiled build
Precompiled build is created for non-developers. In this version, the frontend (html, css and javascript) is compiled for you and the source code is removed so the final archive contains only minimum files.
-
-
- Download the latest release
- Unzip files and upload them to your PHP server
- Make sure your webserver can read and write to
filegator/repository/andfilegator/private/folders - Set the website document root to
filegator/dist/directory. This is also known as 'public' folder - Visit web page, if something goes wrong check
filegator/private/logs/app.log
-
NOTE: For security reasons filegator/dist is the ONLY folder you want to be exposed through the web. Everything else should be outside of your web root, this way people can’t access any of your important files through the browser. If you run the script from the root folder, you will see the message 'Development mode' as a security warning.
Install on fresh Ubuntu 18.04 or Debian 10.3
On a new server login as root and enter this into the shell:
apt update
apt install -y wget unzip php apache2 libapache2-mod-php php-zip php-mbstring php-dom php-xml

cd /var/www/
wget https://github.com/filegator/static/raw/master/builds/filegator_latest.zip
unzip filegator_latest.zip && rm filegator_latest.zip

chown -R www-data:www-data filegator/
chmod -R 775 filegator/

echo "
<VirtualHost *:80>
    DocumentRoot /var/www/filegator/dist
</VirtualHost>
" >> /etc/apache2/sites-available/filegator.conf

a2dissite 000-default.conf
a2ensite filegator.conf
systemctl restart apache2

exit
Open your browser and go to http://your_server_ip_address
Show your support
-
-
- Please star this repository on GitHub if this project helped you!
-
Upgrade instructions
-
-
- Backup everythig
- Download the latest version
- Replace all files and folders except
repository/andprivate/
-
Which versions am I running? Look for APP_VERSION inside dist/index.php file
2. Installing API script and file manager configuration script
1. Download the latest version API script and file manager configuration script from the module folder.
wget http://download.puqcloud.com/WHMCS/servers/PUQ_WHMCS-HestiaCP/filemanager/api/Filegator-api-for-HestiaCP-module.zipAll versions are available via link: http://download.puqcloud.com/WHMCS/servers/PUQ_WHMCS-HestiaCP/filemanager/api/
2. Unzip the archive with the API script and file manager configuration script and upload them to your PHP server
unzip Filegator-api-for-HestiaCP-module.zipAttention! The configuration.php file must be located in the root folder of your file manager. The api.php file must be located in the /dist folder of your file manager.
Add server (HestiaCP)
HestiaCP module WHMCS
Order now | Download | FAQ
Add a new server to the system WHMCS.
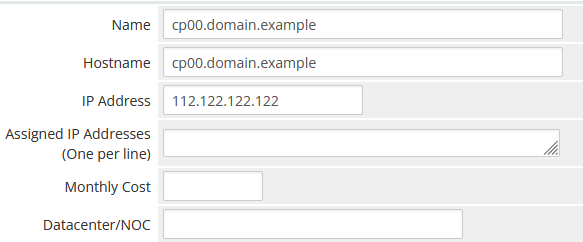
System Settings->Servers->Add New Server- Enter the correct Name and Hostname and IP Addres
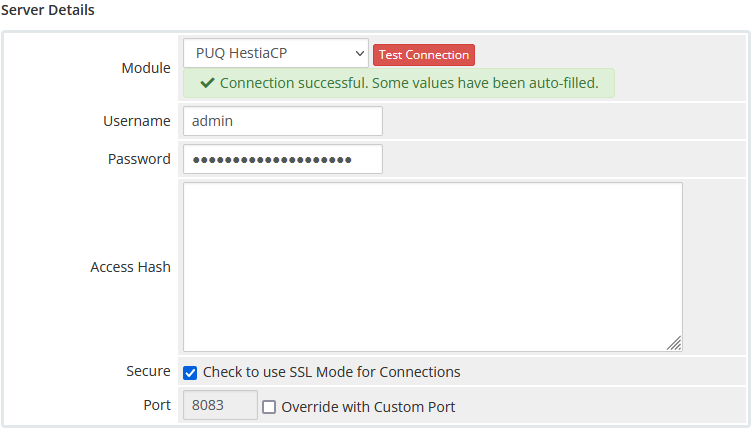
- In the Server Details section, select the "PUQ HestiaCP" module and enter the correct username and password for the HestoaCP server.
- To check, click the "Test connection" button
Product Configuration
HestiaCP module WHMCS
Order now | Download | FAQ
Add new product to WHMCS
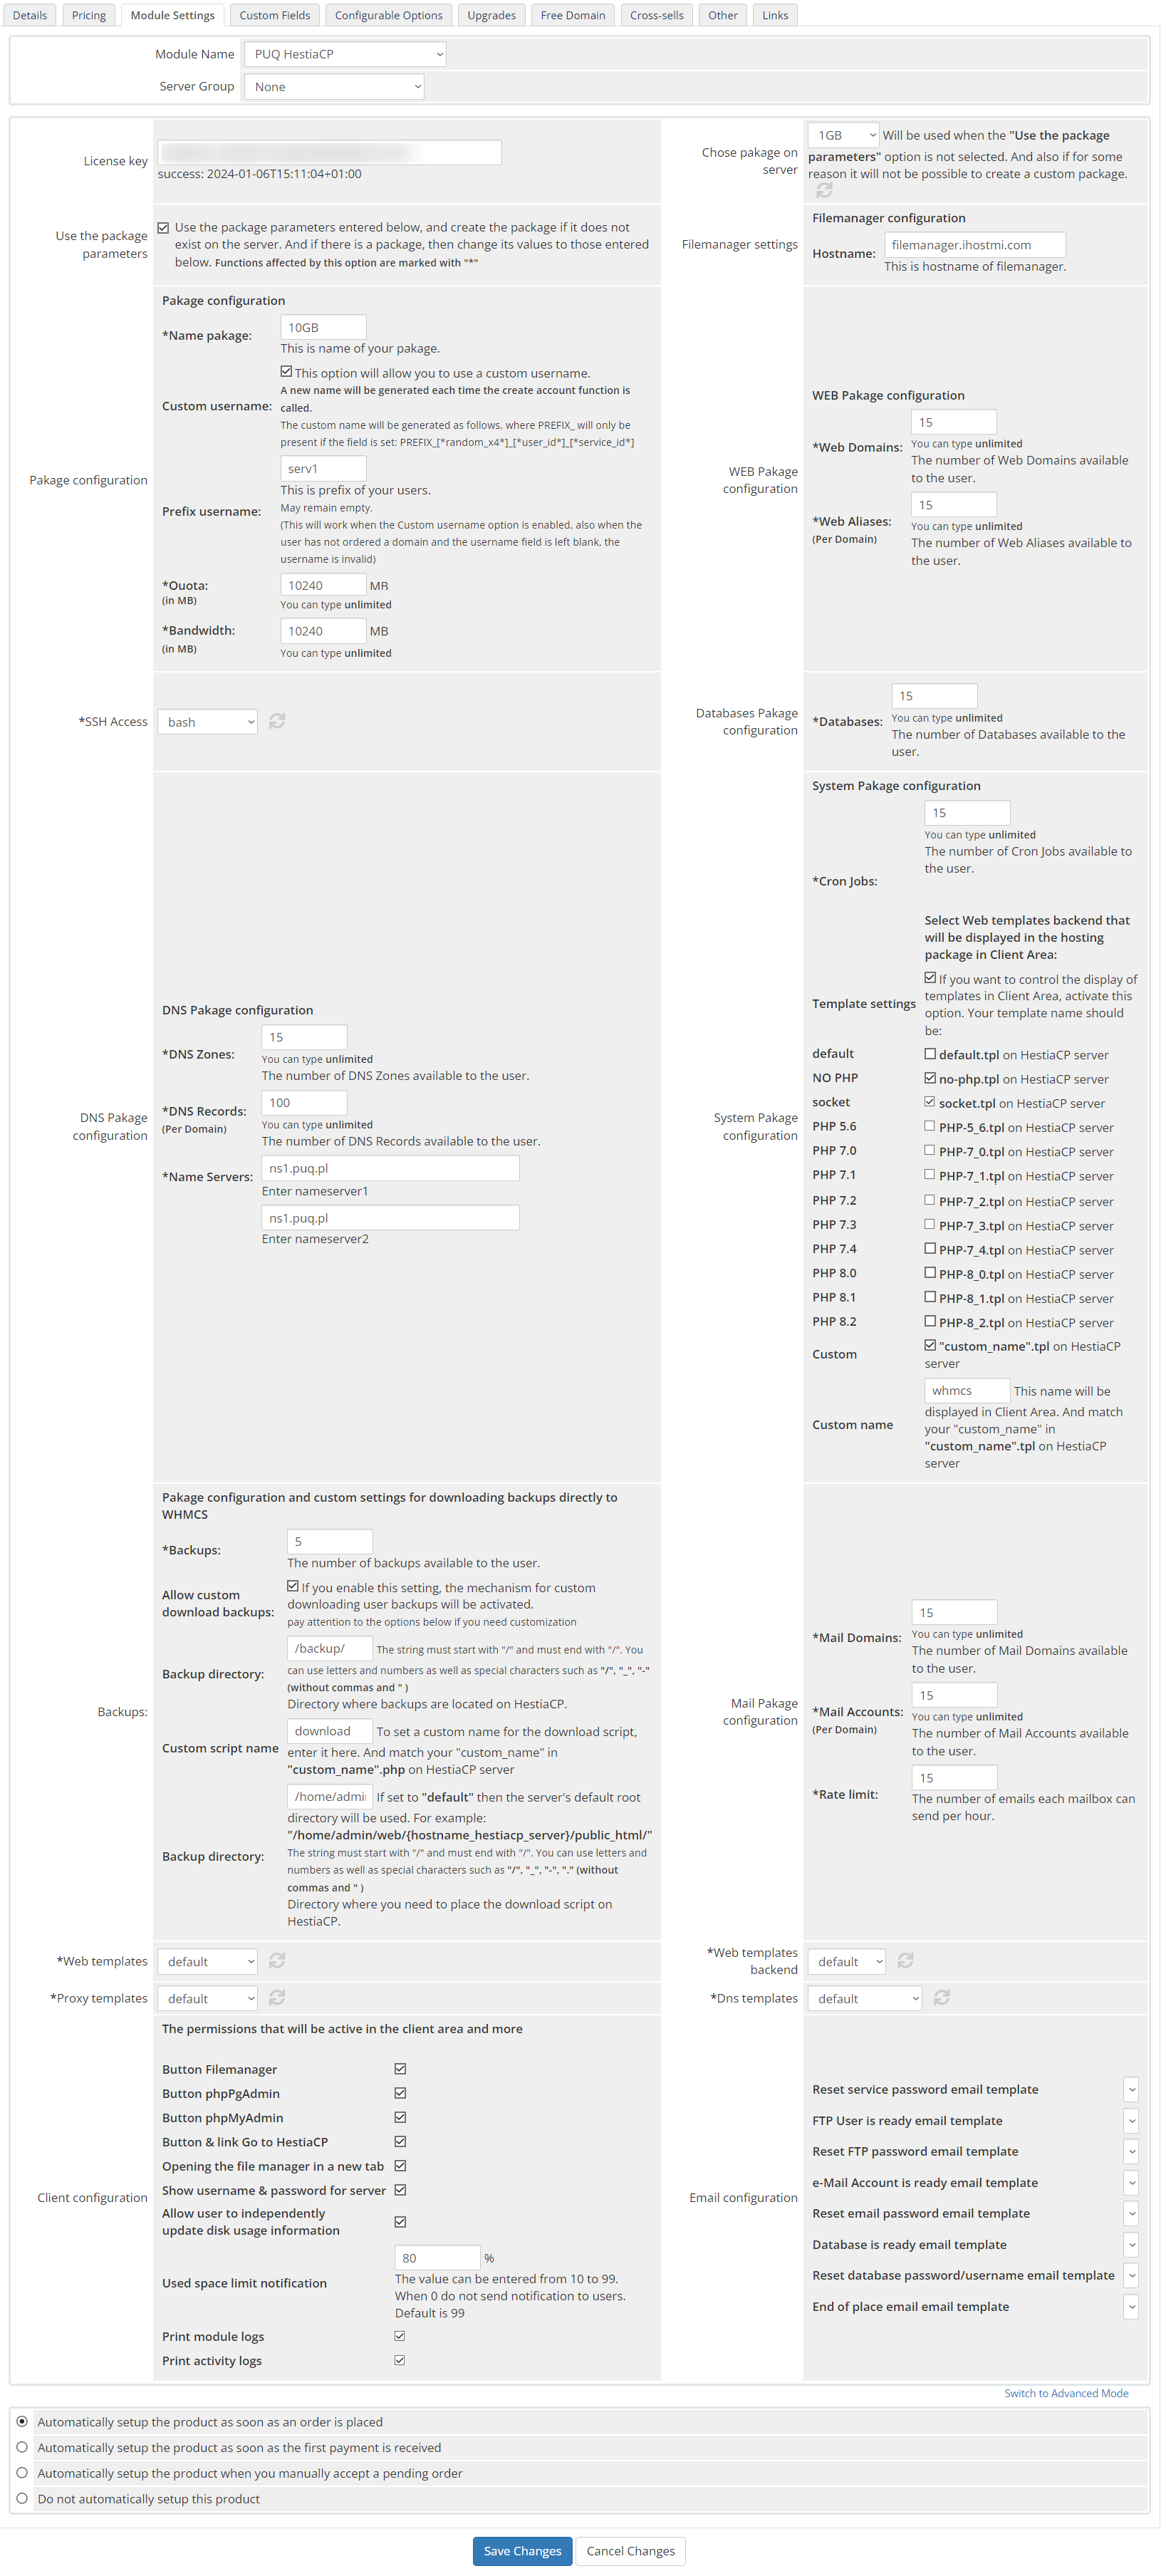
System Settings->Products/Services->Create a New ProductIn the Module settings section, select the "PUQ HestiaCP" module

- License key: A pre-purchased license key for the "PUQ HestiaCP" module. For the module to work correctly, the key must be active
- Chose pakage on server: The list of packages is pulled from the server. Will be used when the "Use the package parameters" option is not selected. And also if for some reason it will not be possible to create a custom package.
Attention! To deploy a custom package, you must set the interface language for the account administrator to English.
- Use the package parameters: The option allows you to make a choice of settings. Whether you want to use the packages already configured on the server or upload a customized custom package. Use the package parameters entered below, and create the package if it does not exist on the server. And if there is a package, then change its values to those entered below.
- Filemanager settings: File manager settings
- Hostname: The hostname of the file manager
- Pakage configuration: Setting up a custom package
- Name pakage: The package name entered will be used to configure the custom package if the option is selected "Use the package parameters"
- Custom username: A new name will be generated each time the create account function is called.
The custom name will be generated as follows, where PREFIX_ will only be present if the field is set: PREFIX_[*random_x4*]_[*user_id*]_[*service_id*] - Prefix username: This is prefix of your users. May remain empty. This will work when the Custom username option is enabled, also when the user has not ordered a domain and the username field is left blank, the username is invalid
- Quota: The disk quota that is given to the user in the system. Set in megabytes
- Bandwidth: Bandwidth Limit that is given to the user in the system. Set in megabytes
- WEB Pakage configuration: Setting up a web section for a custom package
- Web Domains: The number of web domains allowed per user in the package
- Web Aliases: The number of web aliases allowed for each domain in the package
- SSH Access: Selecting a user access template for SSH Access. The list is loaded from the connected server
- Databases Pakage configuration: Section for database configuration in a custom package
- Databases: The number of databases allowed for the user
- DNS Pakage configuration: DNS section configuration for custom package
- DNS Zones: The number of DNS zones allowed in the package for the user
- DNS Records: The number of DNS records in each domain zone allowed in the package for the user
- Name Servers: Nameservers configuration in custom package
- System Pakage configuration: System settings section, custom package
- Cron Jobs: The number of cron jobs that are allowed for the user
- Template settings: If you want to control the display of templates in Client Area, activate this option. Your template name should be default.tpl, no-php.tpl, socket.tpl, PHP-5_6.tpl, PHP-7_0.tpl, PHP-7_1.tpl, PHP-7_2.tpl, PHP-7_3.tpl, PHP-7_4.tpl, PHP-8_0.tpl, PHP-8_1.tpl, "custom_name".tpl this name will be displayed in Client Area. And match your "custom_name" in "custom_name".tpl on HestiaCP server. Each of the templates is activated separately.
Attention! If the specified heatplate name is not found on the server, then the heatplate will not be available to Client Area. If the option is disabled, all templates available on the server will be available for selection by the client!
- Backups: Backup configuration in custom package
- Backups: The number of backup copies that are allowed for the user
- Allow custom download backups: this setting activates a mechanism that will allow you to download backups directly from your WHMCS account, using the "Download" button
In order for the user to be able to download a backup using this method, it is necessary to add the folder where the backups are stored to the open_basedir in the configuration of your PHP template. By default, the folder where backups are stored is not included, and you are likely to receive an error: Got error 'PHP message: PHP Warning: finfo_file(): open_basedir restriction in effect. File(/backup/*******.tar) is not within the allowed path(s)... To give PHP access to the backup folder, you need to create a custom template by copying your preferred one, and then add the desired directory to the php_admin_value[open_basedir] variable.
- Backup directory: in this setting, you must write the absolute path of the folder in which backups are stored on the server
- Custom script name: if you want to change the name of the script, you can enter the name here
- Path for deploying the download script: path to deploy the download script to the server
- Mail Pakage configuration: Mail settings section, custom package
- Mail Domains: Number of email domains allowed for a user
- Mail Accounts: Number of email accounts per email domain allowed for a user
- Rate limit: Email limit per hour
- Web templates: Choosing a template Web Template APACHE2. The list of templates is loaded from the server
- Web templates backend: Choosing a Backend Template PHP-FPM. The list of templates is loaded from the server
- Proxy templates: Choosing a Proxy Template NGINX. The list of templates is loaded from the server
- Dns templates: Choosing a DNS Template BIND9. The list of templates is loaded from the server
- Client configuration: The permissions that will be active in the client area and more
- Email configuration: Setting up email templates. Selection of pre-prepared templates to inform the user about some actions
- Reset service password email template: When resetting the service password
- FTP User is ready email template: When a new FTP user was created
- Reset FTP password email template: When the FTP user password was changed
- e-Mail Account is ready email template: When a new mail account was created
- Reset email password email template: When the password is changed in the mail account
- Database is ready email template: When the new database is created
- Reset database password/username email template: When the database password or username has been changed
- End of place email email template: When the space in the account is already running out
- Reset service password email template: When resetting the service password
Email Template (puqHestiaCP end of place email)
HestiaCP module WHMCS
Order now | Download | FAQ
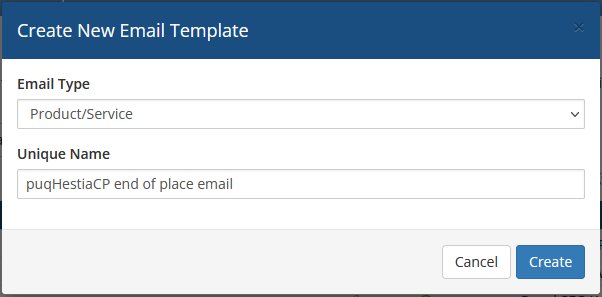
Create an email template for customer notifications.
System Settings->Email Templates->Create New Email Template- Email Type: Product/service
Unique Name: puqHestiaCP end of place email
Subject:
Space in your hosting account {$user} is running outBody:
Dear {$client_name},


You are running out of free space in the Product/Service: {$service_product_name}.

You have already used {$used_spase_procentes} percent of space.

Total free space used: {$used_spase}

Maximum allowable space up to: {$disk_quota}


{$signature}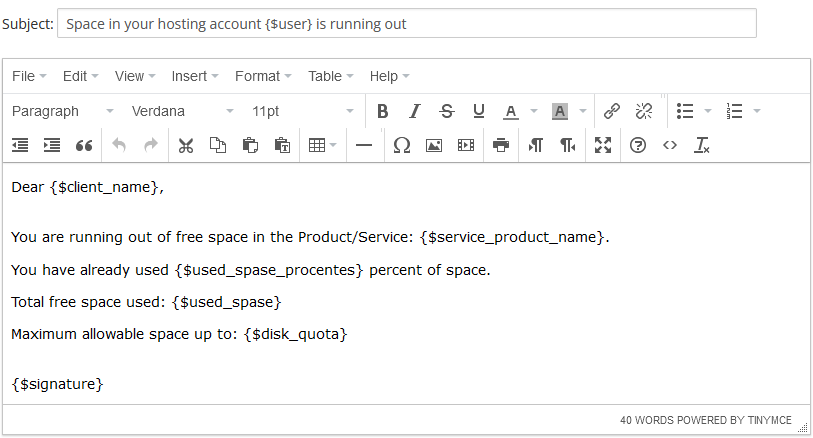
Email Template (puqHestiaCP Database email reset password/username)
HestiaCP module WHMCS
Order now | Download | FAQ
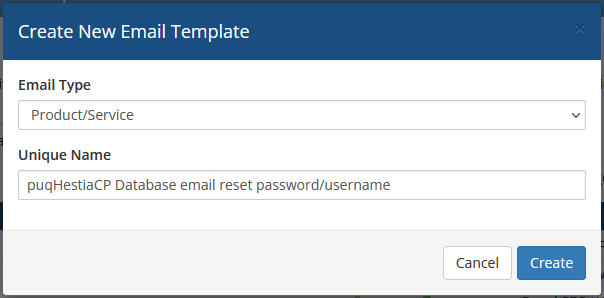
Create an email template for customer notifications.
System Settings->Email Templates->Create New Email Template- Email Type: Product/service
Unique Name: puqHestiaCP Database email reset password/username
Subject:
On Database {$dbname} change password or usernameBody:
Dear {$client_name},


Password or Username of Database has been change. Below is the user logging data.

Database Name: {$dbname}
Database Username: {$dbusername}
Password: {$dbpassword}

{$signature}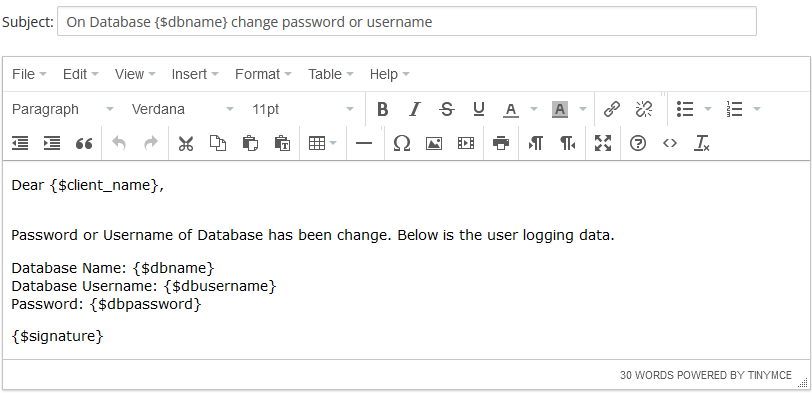
Email Template (puqHestiaCP Database is ready)
HestiaCP module WHMCS
Order now | Download | FAQ
Create an email template for customer notifications.
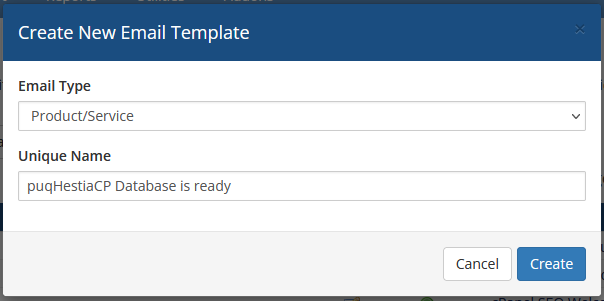
System Settings->Email Templates->Create New Email Template- Email Type: Product/service
Unique Name: puqHestiaCP Database is ready
Subject:
New Database {$dbname} is readyBody:
Dear {$client_name},


You have created a new Database on Product/Service: {$service_product_name}. Below is the user logging data.

Database Name: {$dbname}
Database Username: {$dbusername}
Password: {$dbpassword}
Type: {$type}
Charset: {$charset}

{$signature}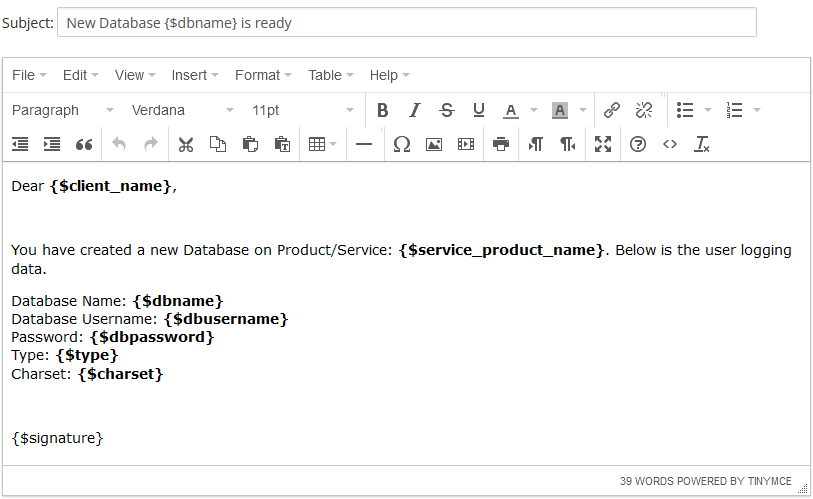
Email Template (puqHestiaCP Reset email password)
HestiaCP module WHMCS
Order now | Download | FAQ
Create an email template for customer notifications.
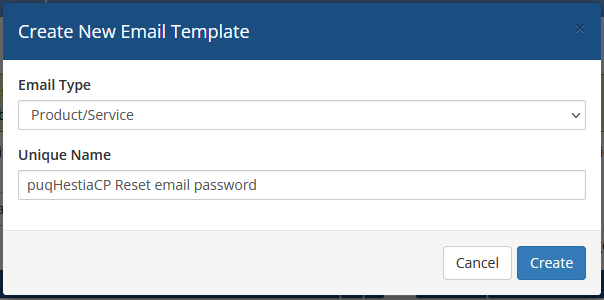
System Settings->Email Templates->Create New Email Template- Email Type: Product/service
Unique Name: puqHestiaCP Reset email password
 Subject:
Password has been change for e-Mail Account {$email}Body:
Dear {$client_name},


Yor password has been change for e-Mail account {$email} on Product/Service: {$service_product_name}.
Below is the user logging data.

Hostname: {$hostname}
Email: {$email}
Password: {$password}
Webmail: http://webmail.{$hostname}
Hostname: mail.{$hostname}


IMAP SETTINGS
Authentication: Normal Password
SSL/TLS: Port 993
STARTTLS: Port 143
No encryption: Port 143

POP3 SETTINGS
Authentication: Normal Password
SSL/TLS: Port 995
STARTTLS: Port 110
No encryption: Port 110

SMTP SETTINGS
Authentication: Normal Password
SSL/TLS: Port 465
STARTTLS: Port 587
No encryption: Port 25


{$signature}
Email Template (puqHestiaCP e-Mail Account is ready)
HestiaCP module WHMCS
Order now | Download | FAQ
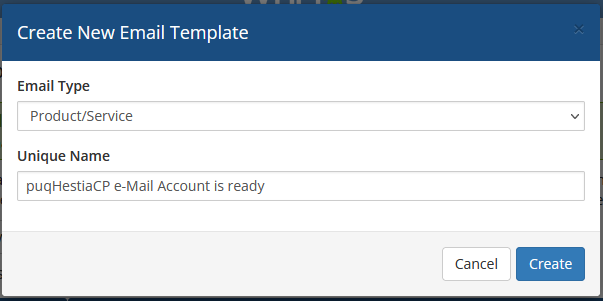
Create an email template for customer notifications.
System Settings->Email Templates->Create New Email Template- Email Type: Product/service
- Unique Name: puqHestiaCP e-Mail Account is ready
 Subject:
e-Mail Account {$email} is readyBody:
Dear {$client_name},


You have created a new e-Mail account on Product/Service: {$service_product_name}.
Below is the user logging data.

Hostname: {$hostname}
Email: {$email}
Password: {$password}
Webmail: http://webmail.{$hostname}
Hostname: mail.{$hostname}


IMAP SETTINGS
Authentication: Normal Password
SSL/TLS: Port 993
STARTTLS: Port 143
No encryption: Port 143

POP3 SETTINGS
Authentication: Normal Password
SSL/TLS: Port 995
STARTTLS: Port 110
No encryption: Port 110

SMTP SETTINGS
Authentication: Normal Password
SSL/TLS: Port 465
STARTTLS: Port 587
No encryption: Port 25


{$signature}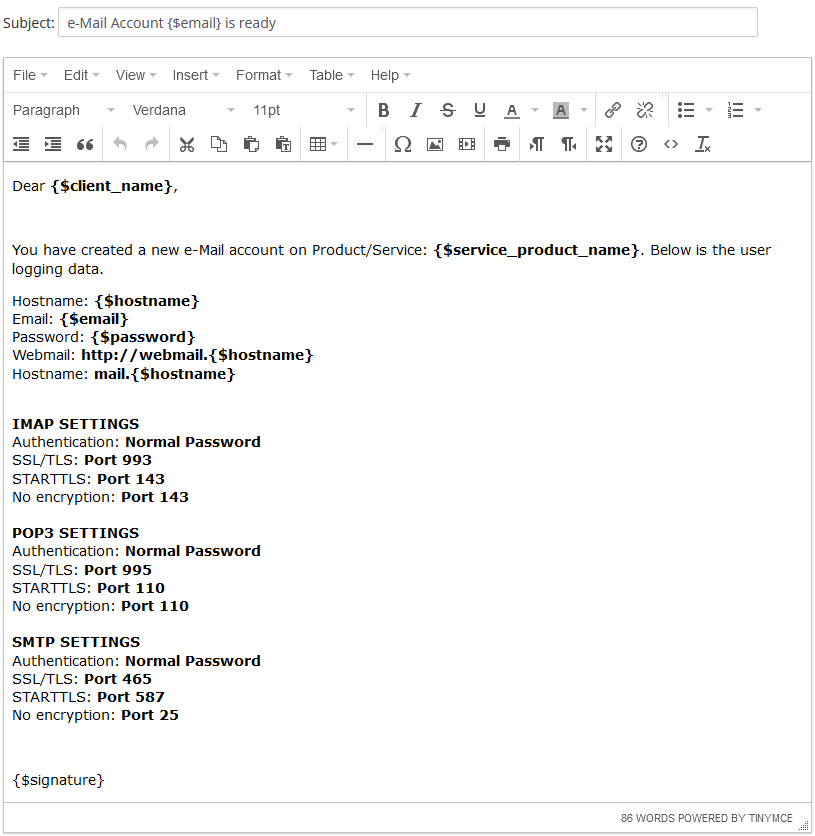
Email Template (puqHestiaCP Reset FTP password)
HestiaCP module WHMCS
Order now | Download | FAQ
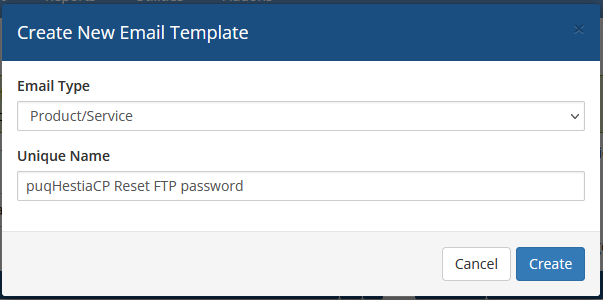
Create an email template for customer notifications.
System Settings->Email Templates->Create New Email Template- Email Type: Product/service
Unique Name: puqHestiaCP Reset FTP password
 Subject:
For FTP user {$user} on domain {$domain} password has been changeBody:
Dear {$client_name},


Has been change password for user {$user} on Product/Service: {$service_product_name}.
Below is the user logging data.

Server: {$domain}
User: {$user}
New password: {$password}
Port:21

{$signature}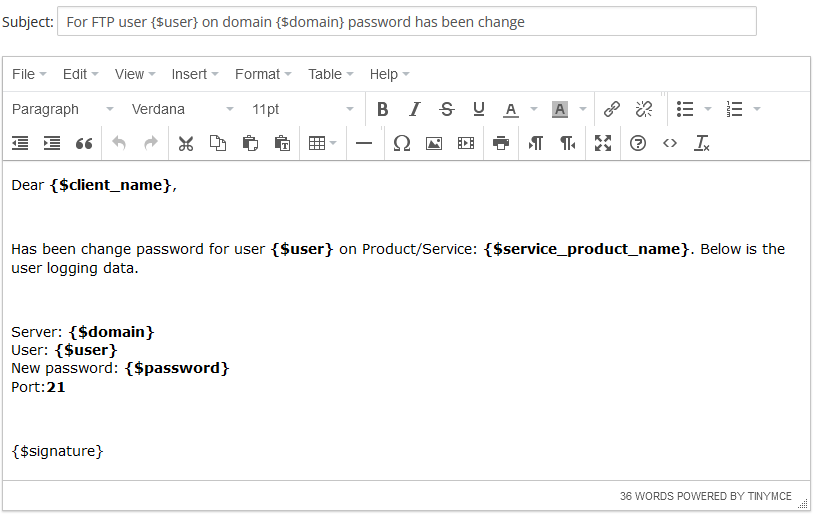
Email Template (puqHestiaCP FTP User is ready)
HestiaCP module WHMCS
Order now | Download | FAQ
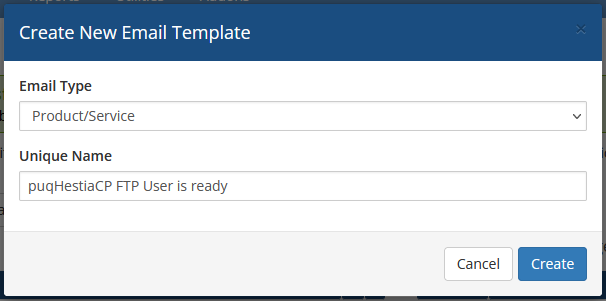
Create an email template for customer notifications.
System Settings->Email Templates->Create New Email Template- Email Type: Product/service
Unique Name: puqHestiaCP FTP User is ready
 Subject:
New FTP user has been createdBody:
Dear {$client_name},


You have created a new FTP user on Product/Service: {$service_product_name}.
Below is the user logging data.

Server: {$server}
User: {$user}
Password: {$password}
Port: 21

{$signature}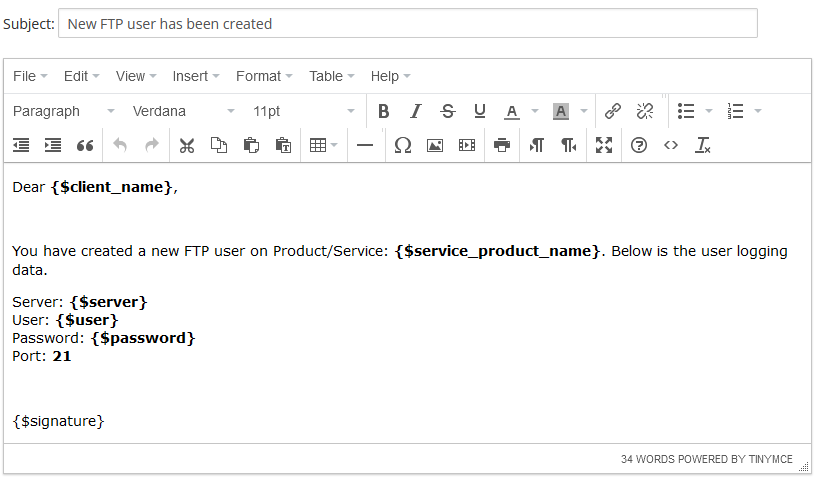
Email Template (puqHestiaCP Reset service password)
HestiaCP module WHMCS
Order now | Download | FAQ
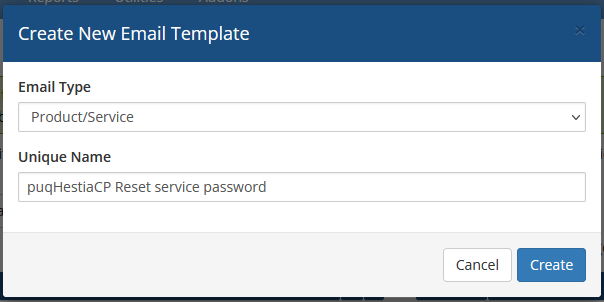
Create an email template for customer notifications.
System Settings->Email Templates->Create New Email Template- Email Type: Product/service
- Unique Name: puqHestiaCP Reset service password
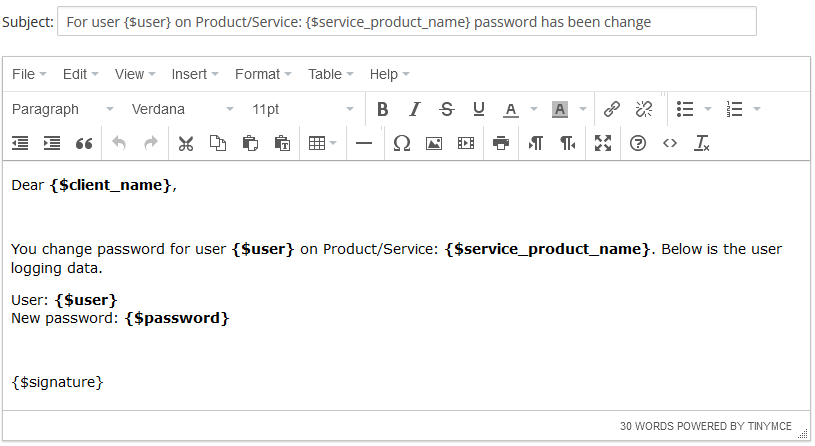
 Subject:
For user {$user} on Product/Service: {$service_product_name} password has been changeBody:
Dear {$client_name},


You change password for user {$user} on Product/Service: {$service_product_name}. Below is the user logging data.

User: {$user}
New password: {$password}


{$signature}