Hetzner Datacenter WHMCS module
The Hetzner WHMCS module enables seamless integration with Hetzner Cloud services, enabling automated provisioning, management, and billing of cloud servers directly from the WHMCS platform. This module supports a wide range of features, including server creation, suspension, resumption, termination, and various server management tasks such as reboot, reset, and remote console access. In addition, it offers features such as IP address monitoring, bandwidth monitoring, backup and snapshot management, making it a complete solution for reselling Hetzner Cloud services.
- Description
- Changelog
- Installation and configuration guide
- WHMCS setup(install/update)
- Basic concepts and requirements
- Setup guide: WHMCS preparation and configuration
- Add server (Hetzner)
- Product Configuration
- Email Template (puqHetznerDatacenter Custom Welcome Email)
- Email Template (puqHetznerDatacenter Custom start stop service Email)
- Email Template (puqHetznerDatacenter Custom reset password Email)
- Email Template (puqHetznerDatacenter Custom snaphot action service Email)
- Email Template (puqHetznerDatacenter Custom backup action service Email)
- Email Template (puqHetznerDatacenter Custom ISO action service Email)
- Email Template (puqHetznerDatacenter Custom reinstall action service Email)
- Configurable Option
- Client Area
- Home screen
- Charts Section Description
- Reinstall Section Description
- Snapshots Section Description
- Backups Section Description
- ISO Mount Section Description
- Reset Password Section Description
- Upgrade/Downgrade Options Section Description
- Admin Area
Description
Hetzner Datacenter module WHMCS
Order now | Download | FAQ
The module, fully installed and correctly implemented in the system, offers the following functionalities.
Module Functions:
- Auto create and deploy cloud servers
- Suspend / Unsuspend / Terminate / Change Package / Change Password
- Backup and snapshot management; reinstall from snapshot/backup
- ISO mount & installation (if enabled)
- SSH key management
- Custom email notifications
- Multilingual support (English, Ukrainian, Polish, etc.)
- Client area controls for server lifecycle, console access and metrics
- Automatic Pricing & Rounding: bulk price generation by currencies & billing periods, Net/Gross base, percentage margin, live preview table, ISO-4217 round-up policy, unified UI/server logic
- Daily Cron price sync: uses saved bulk pricing config, Hetzner Cloud API currency, creates missing
tblpricingrows, detailed Module Log with trace IDs - Admin stock tools: “Clear and Reset” for
stockcontrol/qty,restore_saved_stockcontrol(AJAX) with robust logging - Metric billing: billing for Floating IPs, Bandwidth Usage (GB) and Snapshot Usage (GB)
Available options in the admin panel:
- Create / Suspend / Unsuspend / Terminate servers
- Change Package and Change Password
- Select server type, location, image, placement group, SSH keys, networks and firewalls
- Allow/deny client features: console (VNC/NC), charts, reset password, ISO, reinstall, choose backup/snapshot on reinstall
- PTR visibility toggle; “Username as root”; hide inputs in client area; custom “Link to instruction”
- Automatic Pricing UI: set Base price (Net/Gross), Percentage margin, select currencies & billing periods, view live Preview table, Apply Bulk Pricing
- Automatically apply price daily: cron-based price refresh using Hetzner base prices and WHMCS currency rates
- Rounding policy: always round up to ISO-4217 minor units; monthly → round → multiply by period → round
- Admin stock tools: “Clear and Reset” button and
restore_saved_stockcontrolAJAX action - Metric Billing configuration for Floating IPv4/IPv6, Bandwidth (GB), Snapshot Usage (GB)
Available options in the client panel:
- Server lifecycle (start, stop, reboot) and access to remote console
- Backup and snapshot management
- ISO mount/unmount (if allowed)
- Reinstall from image, snapshot or backup (if allowed)
- Reset root password (if allowed)
- View server details, resources and usage charts (if enabled)
- PTR control (if not hidden) and quick link to instruction
WHMCS minimal version: 8+


Changelog
Hetzner Datacenter module WHMCS
Order now | Download | FAQ
v2.1.1 Released 08-10-2025
-
noVNC Console Connection
-
Fixed:
action.statusnow correctly accepts bothrunningandsuccess. -
Fixed: Properly parses
wss_urlto prevent duplicated host entries in the WSS URL (AJAX handler).
-
-
Cloud-init Pipeline
-
Changed:
_CreateAccountnow decodespackage_settings.user_datafrom Base64 before performing variable replacement; passes a plain#cloud-configstring to the API. -
Changed:
requestConsolenow validates the presence of bothwss_urlandpasswordinstead of relying solely on strict status checks.
-
-
Deep Diagnostic Logging
-
Added:
replaceCloudInitConfigVariablesnow logs input shape, detected placeholders, replacements map, output structure, and full finaluser_data. -
Added:
createServerlogs presence, length, and headers ofuser_data, all request parameters (safe view), and structured API response (server/action).
-
v2.1 Released 06-10-2025
- Automatic Pricing UI
- Added bulk selection of currencies and billing periods with instant preview table.
- Added Base price (Net/Gross) selector and percentage margin input.
- Preview recalculates immediately when Base price or Percentage changes.
- Added “Automatically apply price daily” toggle.
- Data storage & compatibility
- Improved merge logic to prevent overwriting other saved fields.
- Bulk pricing logic (AJAX)
- Automatically updates or creates missing
tblpricingrows based on selected currencies and billing periods. - Applies Hetzner base price, margin, WHMCS currency rates, and period multipliers with rounding up to currency precision.
- Automatically updates or creates missing
- Daily Cron automation
- Extended
DailyCronJobto respect saved bulk pricing configuration. - Fetches fresh Hetzner base price once per run and applies to all selected currencies and periods.
- Creates missing
tblpricingrows and logs detailed status for each action.
- Extended
- Currency and rounding policy
- Using Hetzner Cloud API currency (
/pricing.currency) instead of hard-coded EUR. - Introduced rule: always round UP according to ISO-4217 minor units (0/2/3 decimals).
- Unified logic: monthly price is rounded first, then multiplied by period factor and rounded again.
- Both JS preview and server-side calculation now follow identical rounding logic.
- Using Hetzner Cloud API currency (
- Improved server selection UI
- Expanded dropdown descriptions:
name – architecture – cores – memory – disk.
- Expanded dropdown descriptions:
- Admin tools for stock management
- Added “Clear and Reset” button in product configuration to restore
stockcontrolandqtyvalues.
- Added “Clear and Reset” button in product configuration to restore
- Fixes and resilience
-
Fixed issues with potentially lost or overwritten settings.
- Handled HTML-encoded inputs safely.
-
v2.0.3 Released 03-05-2025
- Added automatic initialization of the database table during module installation and fixed related issues.
- General optimization and stability improvements.
v2.0.2 Released 04-04-2025
- Automatically restores product settings if the server becomes available again.
- Added logic for store and revert product data.
- Refined retrieval and storage of
stockcontrolandqtyfor quicker recovery. - Optimized
- Fix some bugs
v2.0.1 Released 17-10-2024
- Added the ability to set the user as root in the package settings.
- The Public Network DNS PTR list will be copied into the domain field if the field is empty.
- Fix a bug preventing the use of SSH keys.
- Fix a bug in handling cloud-init when saving a package.
v2.0 Released 24-09-2024
Module is coded ionCube v13
Supported php version:
- php 7.4 WHMCS 8.11.0 -
- php 8.1 WHMCS 8.11.0 +
- php 8.2 WHMCS 8.11.0 +
v1.0 Released 02-09-2024
First version
Installation and configuration guide
WHMCS setup(install/update)
Hetzner Datacenter module WHMCS
Order now | Download | FAQ
Module is coded ionCube v13
Supported php version:
- php 7.4 WHMCS 8.11.0 -
- php 8.1 WHMCS 8.11.0 +
- php 8.2 WHMCS 8.11.0 +
To install and update a module, you must perform one and the same action.
1. Download the latest version of the module.
PHP 8.2
wget http://download.puqcloud.com/WHMCS/servers/PUQ_WHMCS-HetznerDatacenter/php82/PUQ_WHMCS-HetznerDatacenter-latest.zipPHP 8.1
wget http://download.puqcloud.com/WHMCS/servers/PUQ_WHMCS-HetznerDatacenter/php81/PUQ_WHMCS-HetznerDatacenter-latest.zipPHP 7.4
wget http://download.puqcloud.com/WHMCS/servers/PUQ_WHMCS-HetznerDatacenter/php74/PUQ_WHMCS-HetznerDatacenter-latest.zipAll versions are available via link: http://download.puqcloud.com/WHMCS/servers/PUQ_WHMCS-HetznerDatacenter/
2. Unzip the archive with the module
unzip PUQ_WHMCS-HestiaCP-latest.zip3. Copy and Replace "puqHetznerDatacenter" to "WHMCS_WEB_DIR/modules/servers/"
Basic concepts and requirements
Hetzner Datacenter module WHMCS
Order now | Download | FAQ
Requirements for the successful operation of the module
- Minimal WHMCS version 8+
- Hetzner API
The logic of the module.
You can offer your clients virtual machines from Hetzner. The module allows you to deploy almost any service based on Hetzner.
Creating a new Account.
- Checking the module license
- Generating the server name in the format
NameServer-[*user_id*]-[*service_id*] - Generating data to create a server
- Sending data via API and creating a server
Package change
- The package change function allows you to enable and disable backups
Suspending an Account
- Checking the module license
- Selecting the suspension method: server shutdown or enabling firewall rules
- Executing the suspension via API
Unsuspending an Account
- Checking the module license
- Selecting the restoration method: server power on or restoring firewall rules
- Executing the restoration via API
Terminating an Account
- Checking the module license
- Deleting the server via API
- Updating information in the WHMCS database
Client Area
The module provides clients with the ability to manage virtual machines through the WHMCS client area, including functions for creating, suspending, restoring, and deleting servers, as well as managing backups and snapshots.
Automatic Pricing & Rounding — how prices are generated
The module can automatically calculate and maintain product prices. You define the rules once; the module keeps prices in sync.
- Base price source: Hetzner Cloud API pricing (currency is taken from
/pricing.currency), not hard-coded EUR. - Base mode: Choose Net or Gross as the starting point for calculations.
- Margin: Set a percentage margin; it is applied to the Hetzner base price.
- Currencies & periods (bulk): Select one or more currencies and billing cycles (Monthly, Quarterly, Semi-Annually, Annually, Biennially). A live preview table shows resulting prices before saving.
- Rounding policy (unified): Always round up to ISO-4217 minor units (0/2/3 decimals). The monthly price is rounded first; then it’s multiplied by the period factor and rounded again. The UI preview and server-side logic are identical.
- Apply Bulk Pricing: Creates or updates the necessary
tblpricingrows in WHMCS for the selected currencies and periods. - Daily sync (cron): When enabled, the module fetches fresh Hetzner base prices once per run and automatically re-applies your margin and rounding rules, keeping prices consistent every day.
- Persistence & safety: Your bulk pricing configuration is stored per product and merged safely so other saved fields are not overwritten. Detailed actions are logged to the Module Log with
traceId.
Notes: setup fees are not changed by automatic pricing; only recurring prices are updated according to your selection. Make sure WHMCS currency rates are configured.
Stock Control & Availability — automatic enable/disable
The module can manage product availability based on the Hetzner API. If a configuration becomes unavailable at the provider, the product is automatically marked as out of stock; when it reappears, availability is restored.
- Provider awareness: On scheduled sync and on admin actions, the module checks availability of server types, images, placement groups and networks returned by the Hetzner API.
- Auto disable: If a previously offered configuration is no longer available in the API, the module enables WHMCS
stockcontrolfor the affected product and setsqtyto0— the offer becomes unavailable to order. - Auto enable: When the configuration becomes available again in the API, the module restores
stockcontrol/qtyto the last saved values, re-enabling orders. - Manual recovery tools: In the product settings there is a Clear and Reset button and an AJAX action
restore_saved_stockcontrolto restore values from the saved record. Logged states: input, not_found, updated_product, deleted_saved, done, error. - Safety first: The module never deletes your custom settings; it only toggles availability and qty according to provider state. All changes are written to the Module Log.
Scope: stock control affects ordering only. Existing services are not terminated or suspended because of provider stock changes.
Setup guide: WHMCS preparation and configuration
Hetzner Datacenter module WHMCS
Order now | Download | FAQ
1. Download the latest version of the module.
PHP 8.X
wget http://download.puqcloud.com/WHMCS/servers/PUQ_WHMCS-HetznerDatacenter/PUQ_WHMCS-HetznerDatacenter-latest.zipPHP 7.4
wget http://download.puqcloud.com/WHMCS/servers/PUQ_WHMCS-HetznerDatacenter/php74/PUQ_WHMCS-HetznerDatacenter-latest.zipAll versions are available via link: http://download.puqcloud.com/WHMCS/servers/PUQ_WHMCS-HetznerDatacenter/
2. Unzip the archive with the module
unzip PUQ_WHMCS-HetznerDatacenter-latest.zip3. Copy "HetznerDatacenter" to "WHMCS_WEB_DIR/modules/servers/"
4. Create new server HetznerDatacenter in WHMCS (System Settings -> Products/Services -> Servers)
System Settings->Servers->Add New Server- Enter the correct Name and API url
api.hetzner.cloud
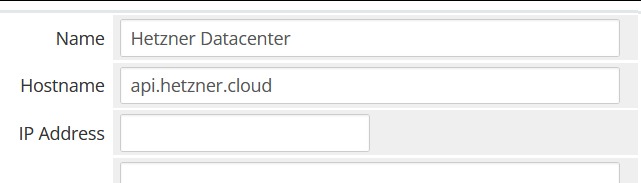
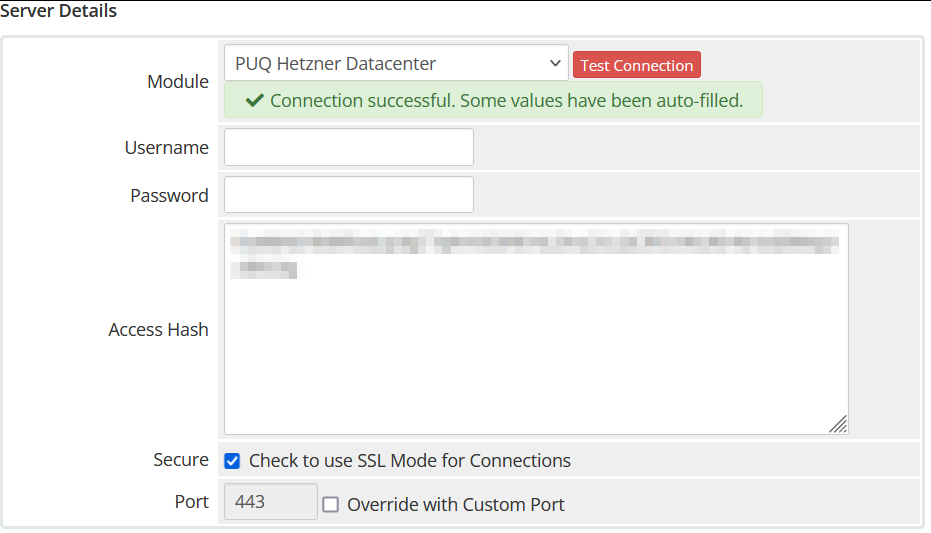
- In the Server Details section, select the "PUQ Hetzner Datacenter" module and enter the correct api key and for the Hetzner API. To get an API key, go to the Hetzner console -> Security -> API tokens -> Generate API token
- To check, click the "Test connection" button
6. Create a new server Group
For the module to work correctly, you need to create a group and add our server that we created to it. If you want to use several projects, you need to create your own server for each project and create a group and add one server to one group.
System Settings->Products/Services->Create New Group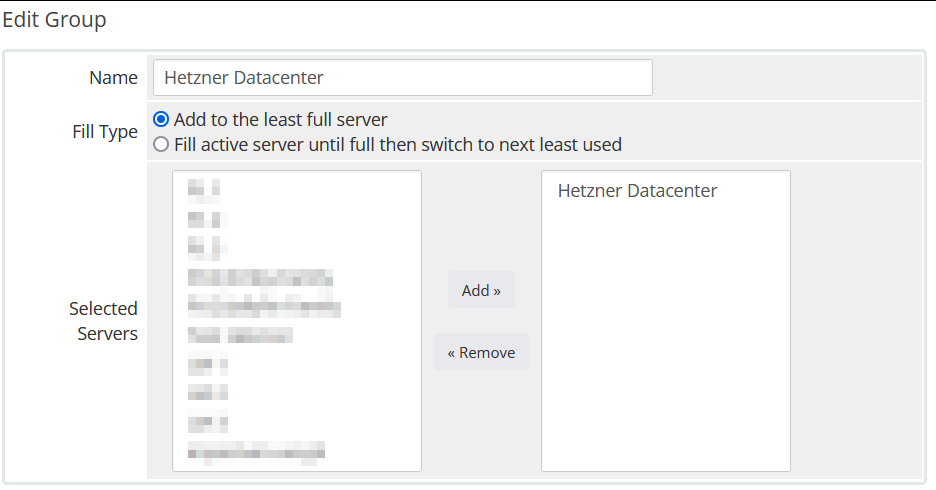
6. Create a new Products/Services
System Settings->Products/Services->Create a New Product
In the Module settings section, select the "PUQ Hetzner Datacenter" module
Please note that you need to select a group with a configured server, so we can separate services by projects in the Hetzner console
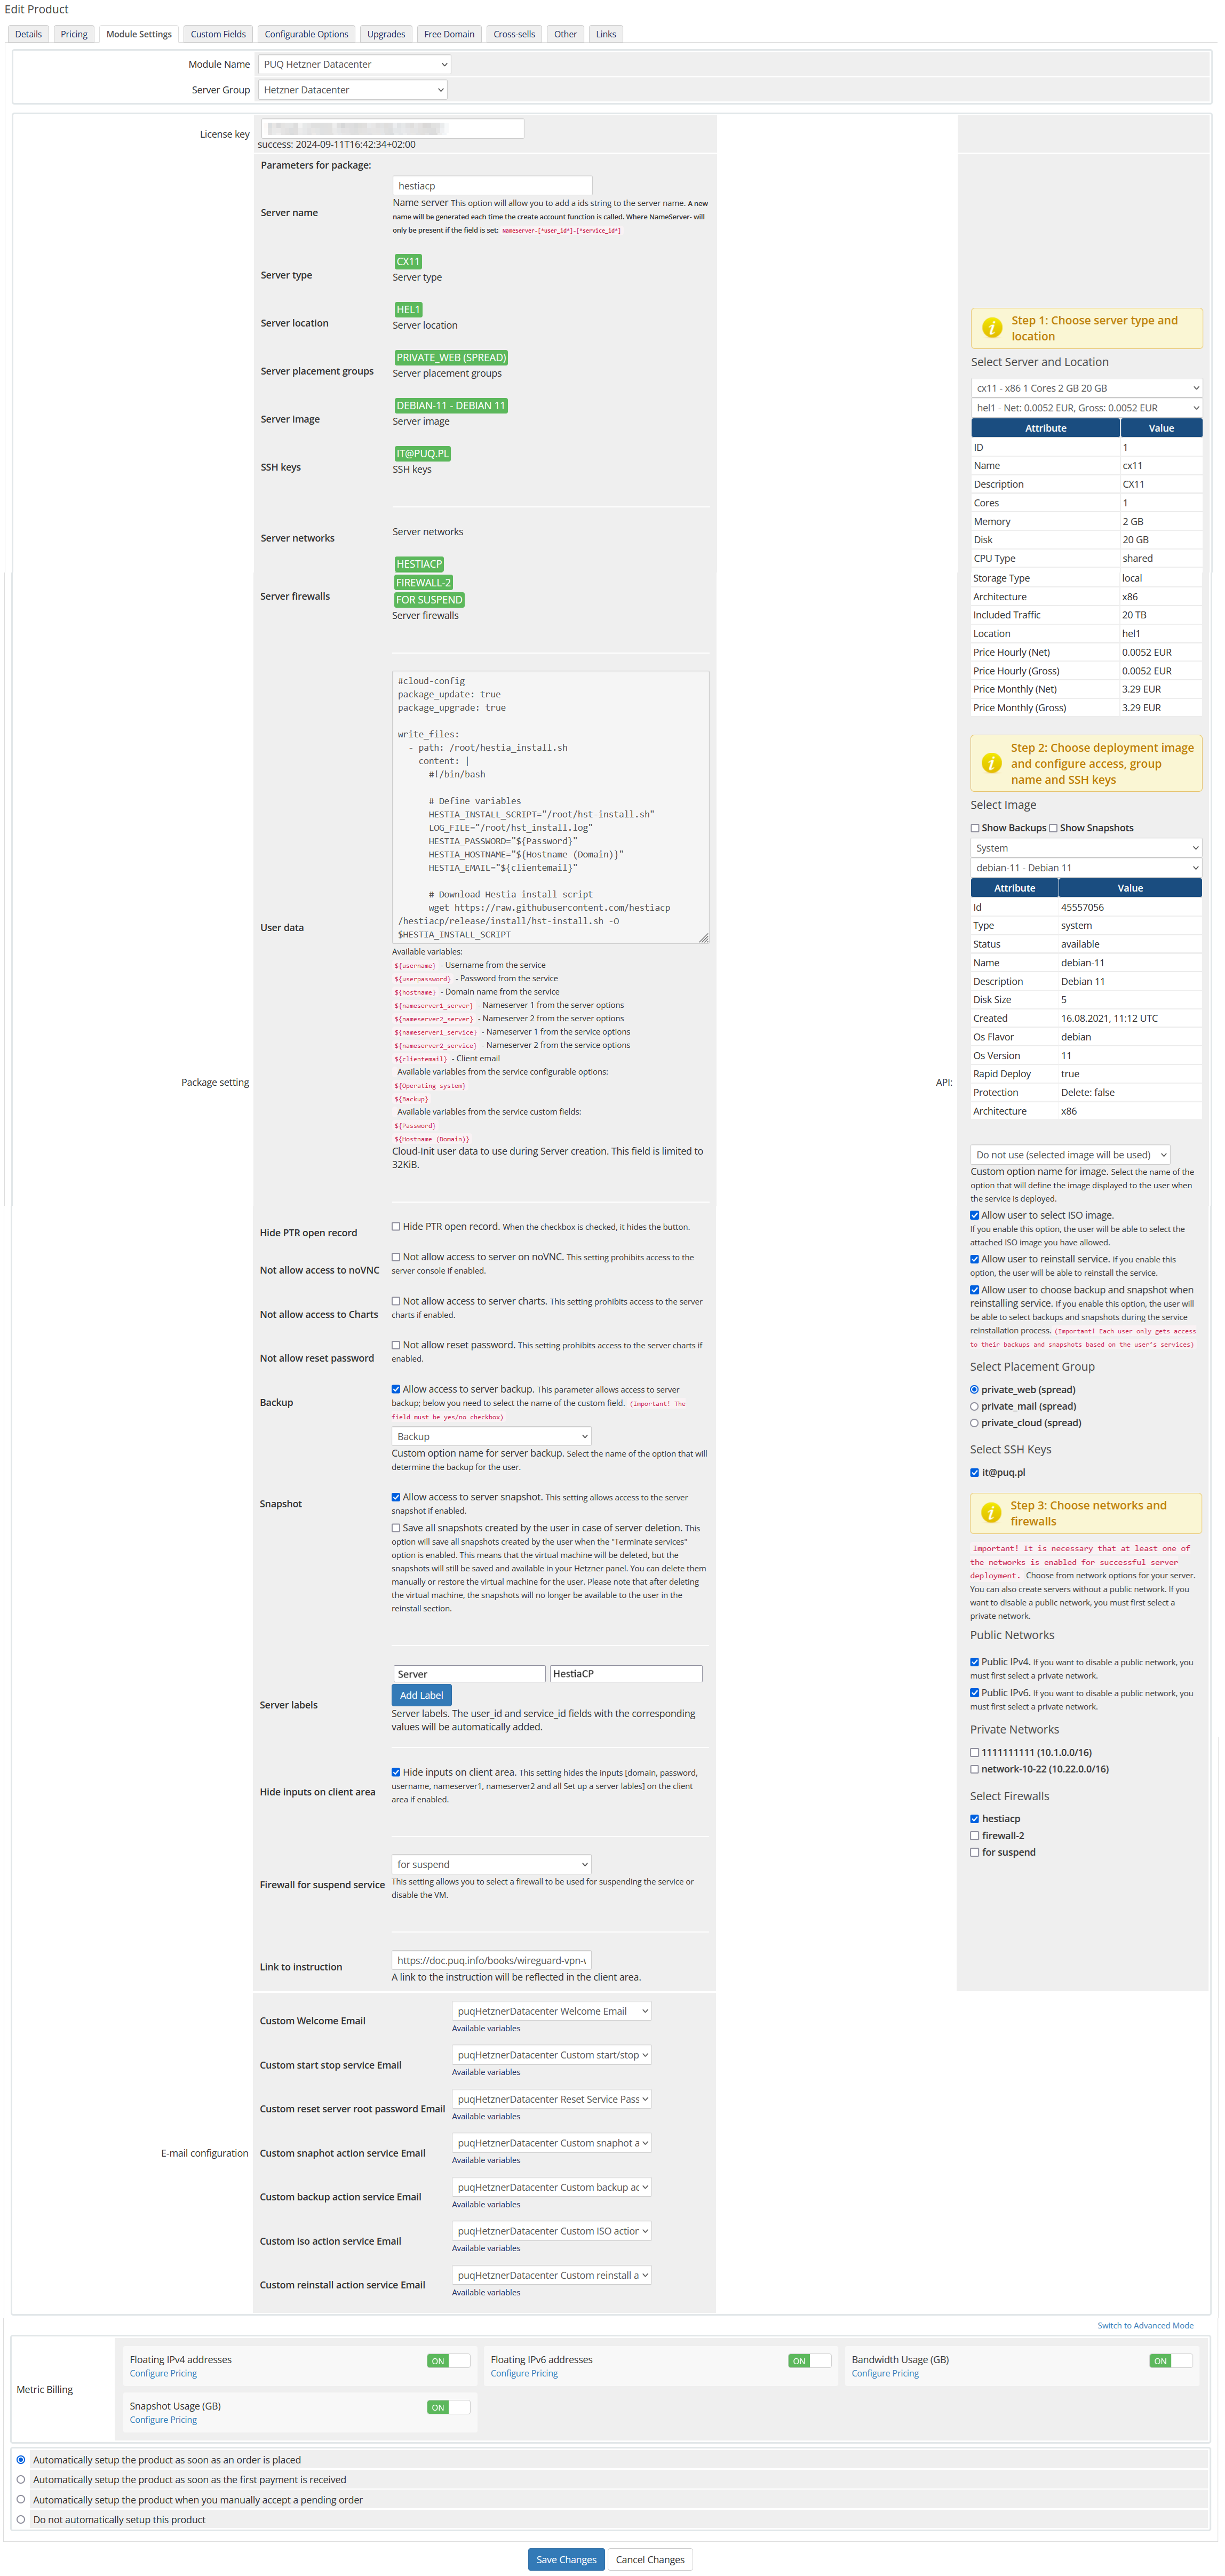
Package Settings
License key: A pre-purchased license key for the "PUQ Hetzner Datacenter" module. For the module to work correctly, the key must be active.
Server name: This option allows you to add a prefix string to the server name. A new name will be generated each time the create account function is called. When NameServer will only be present if the field is set: NameServer-[*user_id*]-[*service_id*].
Server type: The type of server to be deployed. This is selected from the available server types provided by Hetzner. This field is automatically populated based on your selection from Select Server and Location.
Server location: The physical location of the server. This is selected from the available locations provided by Hetzner. This field is automatically populated based on your selection from Select Server and Location.
Server placement groups: The placement groups for the server. This allows you to specify how the server should be grouped within the data center. This field is automatically populated based on your selection from the Select Placement Group.
Server image: The operating system image to be used for the server. This is selected from the available images provided by Hetzner. This field is automatically populated based on the selection from Select Image.
SSH keys: The SSH keys to be used for accessing the server. You can add multiple SSH keys. This field is automatically populated based on your selection from Select SSH Keys.
Server networks: The networks to which the server will be connected. This field is automatically populated based on your selection from Private Networks.
Server firewalls: The firewall rules to be applied to the server. You can select from predefined firewall rules or create custom ones. This field is automatically populated based on your selection from Select Firewalls.
User data: Custom user data to use during server creation. This field is limited to 32KB. You can use this to provide cloud-init configuration scripts or other initialization data.
Package setting: Additional settings for the package, including:
- Hide PTR open record: Hide PTR open record. When the checkbox is checked, it hides the button.
- Not allow access to server on VNC/NC: This setting prohibits access to the server console if enabled.
- Not allow access to Charts: This setting prohibits access to the server charts if enabled.
- Not allow reset password: This setting prohibits access to the server charts if enabled.
- Backup: Allow access to server backup. The parameter allows access to server backups. You need to select the name of the custom field. (Default: Backup)
- Snapshot: Allow access to server snapshot. The setting allows access to the server snapshot if enabled.
- Server labels: Add labels to the server. The user_id and service_id fields with the corresponding values will be automatically added.
- Hide inputs on client area: Hide inputs in client area. This setting hides the inputs (domain, password, username, nameserver1, and nameserver2) and sets up a server label(s) in the client area if enabled.
- Firewall for suspend service: This setting allows you to select a firewall to be used for suspending the service or disable the VM.
- Link to instruction: A link to the instruction will be reflected in the client area.
API Settings
Select Server and Location: Choose the server type and location from the available options provided by Hetzner.
Select Image: Choose the operating system image for the server from the available options provided by Hetzner.
Custom option name for image: Specify a custom option name for the server image if needed.
Allow user to select ISO image: Enable this option to allow users to select an ISO image.
Allow user to reinstall service: Enable this option to allow users to reinstall the service from the client area.
Allow user to choose backup and snapshot when reinstalling service: Enable this option to allow users to choose a backup and snapshot when reinstalling the service.
Select Placement Group: Choose the placement group for the server from the available options provided by Hetzner.
Select SSH Keys: Choose the SSH keys to be used for accessing the server from the available options provided by Hetzner.
Public Networks: Configure the public network settings for the server. This includes enabling or disabling public IPv4 and IPv6 addresses.
Private Networks: Configure the private network settings for the server.
Select Firewalls: Choose the firewall rules to be applied to the server from the available options provided by Hetzner.
Email configuration: Setting up email templates. Selection of pre-prepared templates to inform the user about some actions:
- Custom Welcome Email: Template for the welcome email.
- Custom start stop service Email: Template for the start/stop service email.
- Custom reset server password Email: Template for the reset server password email.
- Custom snapshot action Email: Template for the snapshot action email.
- Custom backup action Email: Template for the backup action email.
- Custom ISO action Email: Template for the ISO action email.
- Custom reinstall action service Email: Template for the reinstall action service email.
Metric Billing: Configuration for metric billing, including:
- Floating IPv4 addresses: Configure pricing for floating IPv4 addresses.
- Floating IPv6 addresses: Configure pricing for floating IPv6 addresses.
- Bandwidth Usage (GB): Configure pricing for bandwidth usage.
- Snapshot Usage (GB): Configure pricing for snapshot usage.
Add server (Hetzner)
Hetzner Datacenter module WHMCS
Order now | Download | FAQ
Add a new server to the system WHMCS.
System Settings->Servers->Add New Server- Enter the correct Name and API url
api.hetzner.cloud
- In the Server Details section, select the "PUQ Hetzner Datacenter" module and enter the correct api key and for the Hetzner API. To get an API key, go to the Hetzner console -> Security -> API tokens -> Generate API token
- To check, click the "Test connection" button
Product Configuration
Hetzner Datacenter module WHMCS
Order now | Download | FAQ
Add new product to WHMCS
System Settings → Products/Services → Create a New ProductIn the Module settings section, select the "PUQ Hetzner Datacenter" module.
Package Settings
License key: A pre-purchased license key for the "PUQ Hetzner Datacenter" module. The key must be active.
Server name: Adds a prefix to the generated server name. A new name is generated on create. Format: NameServer-[*user_id*]-[*service_id*].
Server type: Type of server to deploy. Auto-filled from the Select Server and Location panel.
Server location: Physical location. Auto-filled from Select Server and Location.
Server placement groups: Placement group for the server. Auto-filled from Select Placement Group.
Server image: OS image to use. Auto-filled from Select Image.
SSH keys: Keys for server access. Auto-filled from Select SSH Keys.
Server networks: Networks to attach. Auto-filled from Private Networks.
Server firewalls: Firewall profiles to apply. Auto-filled from Select Firewalls.
User data: Custom cloud-init or init script used during server creation (limit 32KB).
Package setting: Additional options:
- Hide PTR open record: Hides PTR control button.
- Not allow access to server on VNC/NC: Blocks access to the server console.
- Not allow access to Charts: Hides resource charts.
- Not allow reset password: Disables password reset.
- Backup: Allows access to server backups (select the custom field name; default: Backup).
- Snapshot: Allows access to server snapshots.
- Server labels: Adds labels;
user_idandservice_idare added automatically. - Hide inputs on client area: Hides inputs (domain, password, username, nameserver1/2) and sets server label(s).
- Username as root: Use
rootas the administrative username (or keep image defaults). - Firewall for suspend service: Select a firewall profile used when suspending the service (or disabling the VM).
- Link to instruction: A documentation link shown in the client area.
Automatic Pricing & Rounding (UI)
The right-hand panel includes a new Automatic Pricing UI for consistent price management.
- Base price (Net/Gross): Displays Hetzner base price; choose Net or Gross.
- Percentage margin: Set a markup applied to Hetzner base price.
- Automatic price generation – How it works? Collapsible help explaining rules and examples.
- Select currencies: Bulk select one or multiple currencies.
- Select periods: Bulk select billing cycles (Hourly, Monthly, Quarterly, Semi-Annually, Annually, Biennially).
- Preview table: Live recalculation per currency and period before applying.
- Apply Bulk Pricing: Writes or creates
tblpricingrows according to selection. - Automatically apply price daily: Enables cron-based daily sync using saved configuration.
- Rounding policy: Always round up to ISO-4217 minor units (0/2/3 decimals). Monthly price is rounded first; then multiplied by the period factor and rounded again. JS preview and server-side logic are identical.
- Currency source: Uses Hetzner Cloud API
/pricing.currency(not hard-coded EUR). - Expanded server dropdowns: Server selectors show name – architecture – cores – memory – disk.
API Settings
Select Server and Location: Choose server type and region from Hetzner’s catalog (Step 1).
Select Image: Choose OS image or snapshot (Step 2).
Custom option name for image: (Optional) Provide a custom option label for the image selector.
Allow user to select ISO image: Let users choose an ISO for boot/install.
Allow user to reinstall service: Enables one-click reinstall from the client area.
Allow user to choose backup and snapshot when reinstalling service: Allow selecting a backup/snapshot during reinstall.
Select Placement Group: Pick a placement group for spreading/affinity (Step 2/3).
Select SSH Keys: Choose keys for access.
Public Networks: Enable/disable public IPv4/IPv6.
Private Networks: Attach private networks.
Select Firewalls: Choose firewall rules to apply.
Admin Tools for Stock Management
- Clear and Reset: Button in the product configuration that restores
stockcontrolandqtyto saved values. - Restore saved stockcontrol: Internal action that recovers data from the stored record and removes the obsolete entry. Actions are logged (input, not_found, updated_product, deleted_saved, done, error).
Email configuration:
Choose pre-built templates to notify users about actions:
- Custom Welcome Email
- Custom start stop service Email
- Custom reset server password Email
- Custom snapshot action Email
- Custom backup action Email
- Custom ISO action Email
- Custom reinstall action service Email
Metric Billing:
- Floating IPv4 addresses: Configure pricing.
- Floating IPv6 addresses: Configure pricing.
- Bandwidth Usage (GB): Configure pricing.
- Snapshot Usage (GB): Configure pricing.
Email Template (puqHetznerDatacenter Custom Welcome Email)
Hetzner Datacenter module WHMCS
Order now | Download | FAQ
Create an email template for customer notifications.
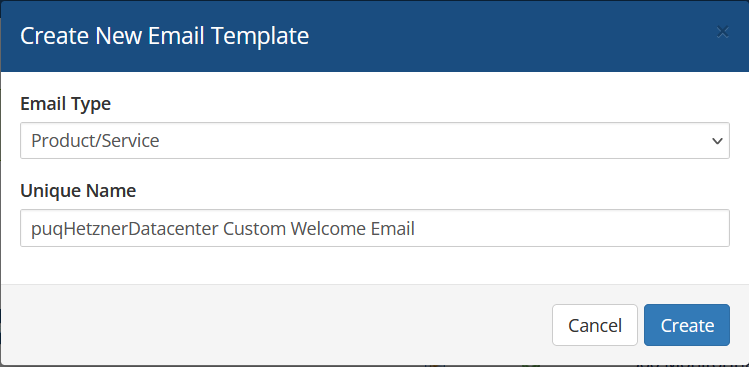
System Settings->Email Templates->Create New Email Template- Email Type: Product/service
Unique Name: puqHetznerDatacenter Custom Welcome Email
Subject:
Your Server is Now Ready for UseBody:
Dear {$client_name},
Congratulations! Your server has been successfully deployed and is ready for you to begin configuring.
Server Details:
IPv4 DNS PTR: {$ipv4_dns_ptr}
IPv4 IP: {$ipv4_ip}
IPv6 IP: {$ipv6_ip}
Server Cores: {$server_cores}
Server Memory: {$server_memory}
Server Disk: {$server_disk}
Root Password: {$root_password}
Accessing Your Server
To begin managing your new server, you will need to connect via SSH (Secure Shell). Here’s how you can do that:
Open an SSH client on your computer. For Windows, we recommend using PuTTY, while macOS and Linux users can use the built-in Terminal application.
Connect to your server by executing the following command in your terminal or SSH client:
ssh root@{$ipv4_ip}
When prompted, enter the root password provided below:
Root Password: {$root_password}
Once connected, you’ll have full access to your server’s console and can monitor the installation.
Need Assistance?
If you have any questions or encounter any issues during this process, please do not hesitate to reach out to our support team. We are here to help! You can submit a support ticket via the following link: Submit a Ticket.
Thank you for choosing us as your hosting provider. We’re excited to be part of your journey and are committed to ensuring your experience is successful.
Kind regards,
{$signature}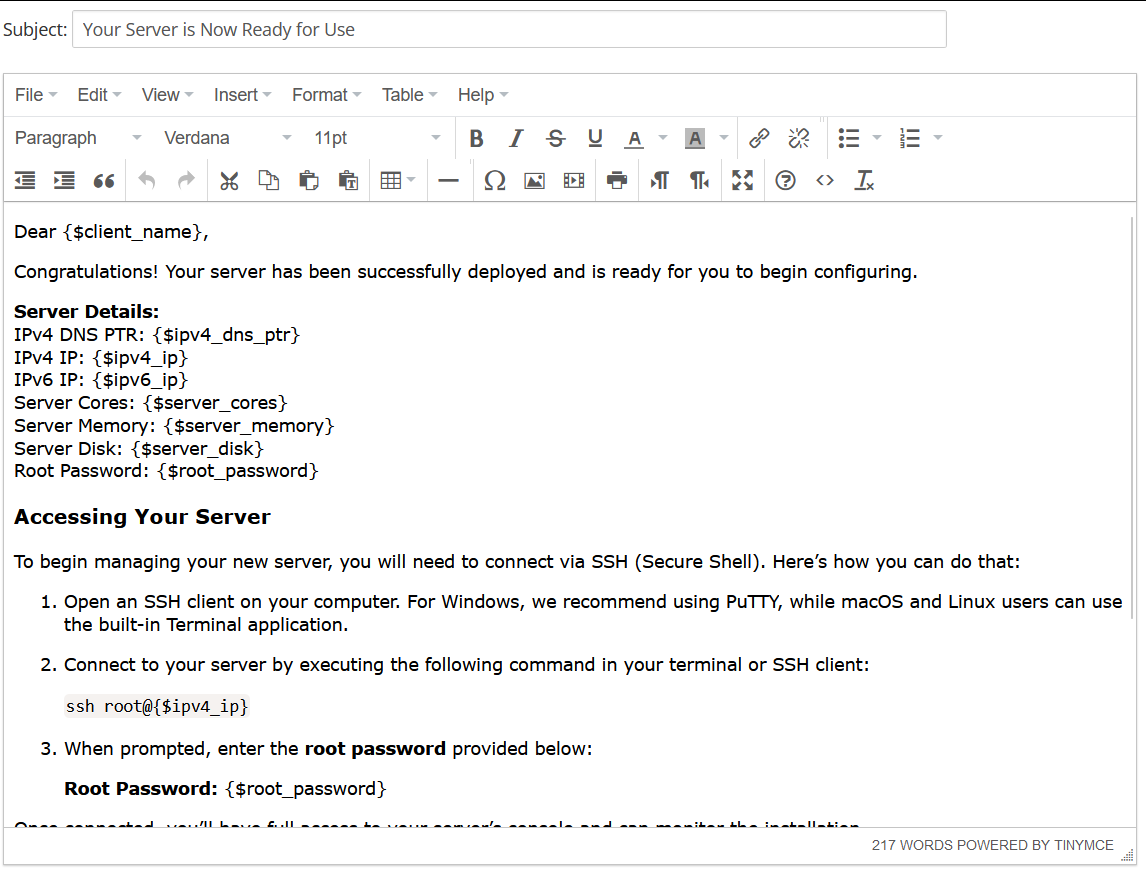
Email Template (puqHetznerDatacenter Custom start stop service Email)
Hetzner Datacenter module WHMCS
Order now | Download | FAQ
Create an email template for customer notifications.
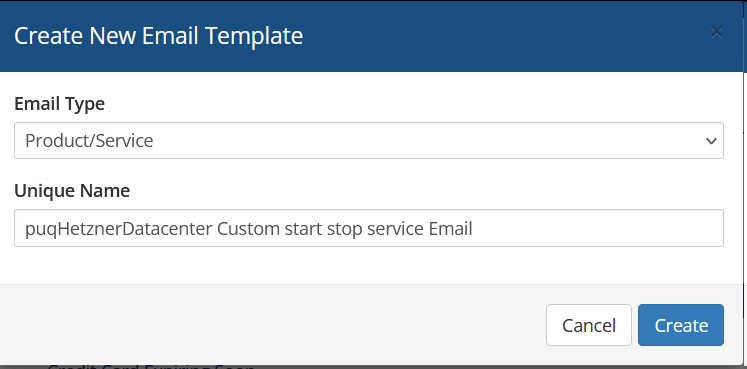
System Settings->Email Templates->Create New Email Template- Email Type: Product/service
Unique Name: puqHetznerDatacenter Custom start stop service Email
Subject:
{if $server_action eq "start"}Your Server Has Been Successfully Started{/if}{if $server_action eq "stop"}Important: Your Server Has Been Stopped{/if}Body:
Dear {$client_name},
{if $server_action eq "start"}Your server has been successfully started.{/if}{if $server_action eq "stop"}Your server has been stopped.{/if}
Product/Service: {$service_product_name}
If you have any questions or need further assistance, do not hesitate to contact our support team.
Thank you for choosing us.
{$signature}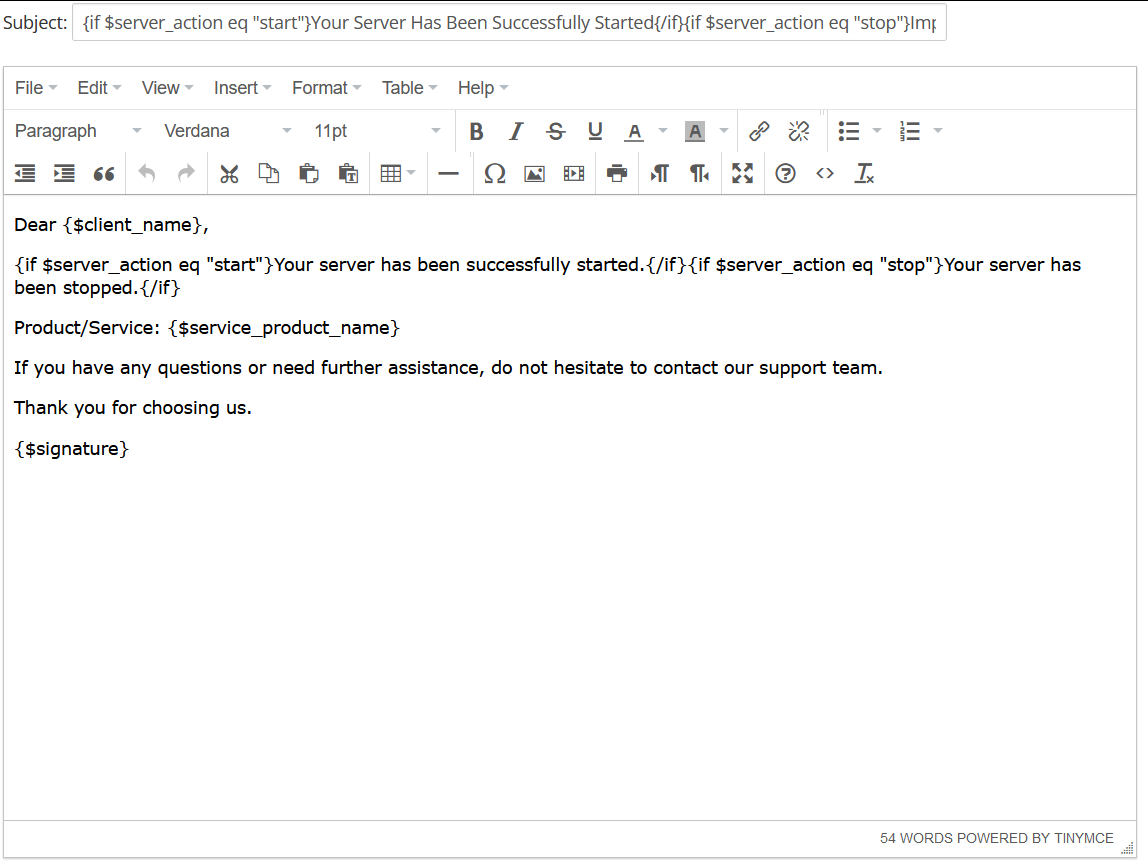
Email Template (puqHetznerDatacenter Custom reset password Email)
Hetzner Datacenter module WHMCS
Order now | Download | FAQ
Create an email template for customer notifications.
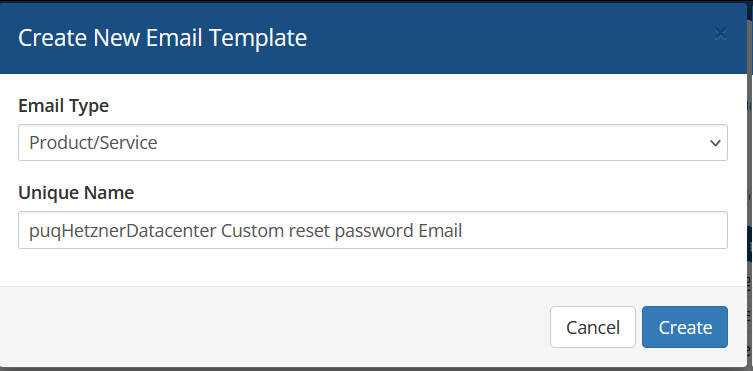
System Settings->Email Templates->Create New Email Template- Email Type: Product/service
Unique Name: puqHetznerDatacenter Custom reset password Email
Subject:
For user {$user} on Product/Service: {$service_product_name} password has been changeBody:
Dear {$client_name},
You change password for user {$user} on Product/Service: {$service_product_name}. Below is the user logging data.
User: {$user}
New password: {$password}
{$signature}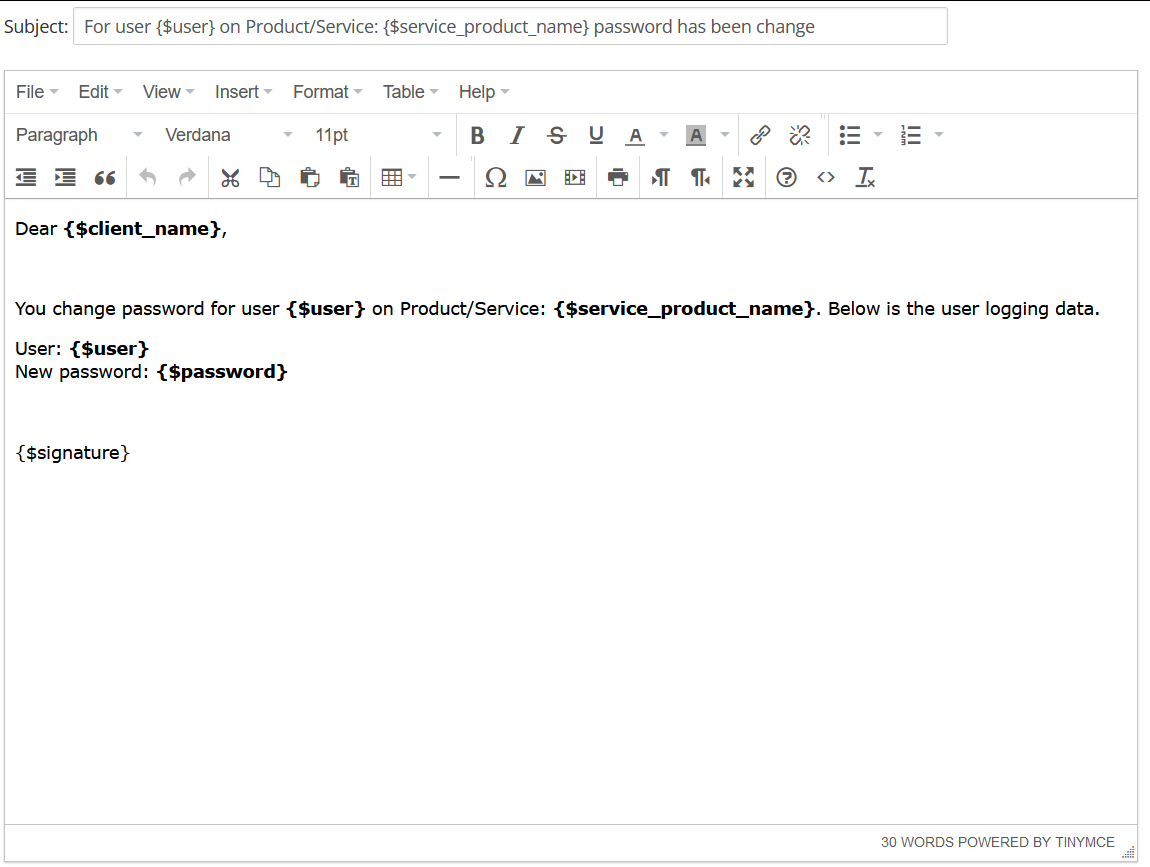
Email Template (puqHetznerDatacenter Custom snaphot action service Email)
Hetzner Datacenter module WHMCS
Order now | Download | FAQ
Create an email template for customer notifications.
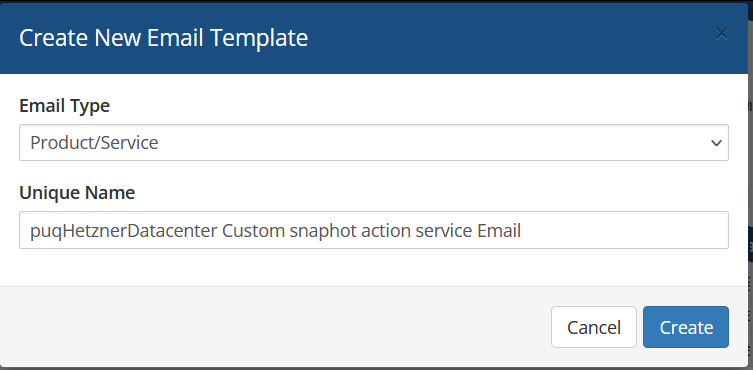
System Settings->Email Templates->Create New Email Template- Email Type: Product/service
Unique Name: puqHetznerDatacenter Custom snaphot action service Email
Subject:
{if $snapshot_action eq "create"}Snapshot started create Successfully{/if}{if $snapshot_action eq "remove"}Snapshot Removed Successfully{/if}{if $snapshot_action eq "rollback"}A restore from your snapshot has been initiated{/if}Body:
Dear {$client_name},
{if $snapshot_action eq "create"}Snapshot creation started.{/if}{if $snapshot_action eq "remove"}Your snapshot has been successfully removed.{/if}{if $snapshot_action eq "rollback"}A restore from your snapshot has been initiated.{/if}
{if $snapshot_id}Snapshot ID: {$snapshot_id}{/if}
{if $snapshot_description}Snapshot Description: {$snapshot_description}{/if}
{if $service_product_name}Service name: {$service_product_name}{/if}
If you have any questions or need further assistance, do not hesitate to contact our support team.
Thank you for choosing us.
{$signature}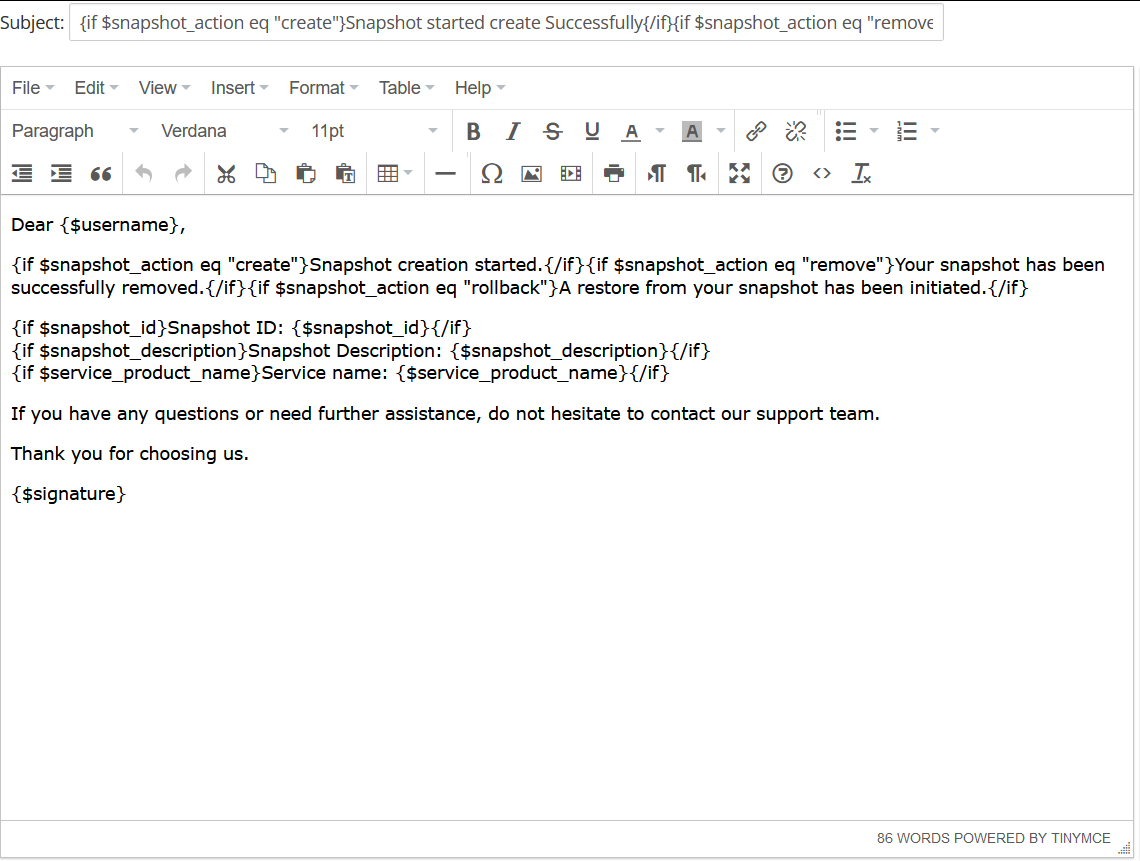
Email Template (puqHetznerDatacenter Custom backup action service Email)
Hetzner Datacenter module WHMCS
Order now | Download | FAQ
Create an email template for customer notifications.
System Settings->Email Templates->Create New Email Template- Email Type: Product/service
Unique Name: puqHetznerDatacenter Custom backup action service Email

Subject:
{if $backup_action eq "enable"}Backup Enabled Successfully{/if}{if $backup_action eq "disable"}Backup Disabled Successfully{/if}{if $backup_action eq "create"}Backup Creation Initiated Successfully{/if}{if $backup_action eq "remove"}Backup Removed Successfully{/if}{if $backup_action eq "restore"}Backup Restoration Initiated Successfully{/if}Body:
Dear {$client_name},
{if $backup_action eq "enable"}Your backup has been successfully enabled.{/if}{if $backup_action eq "disable"}Your backup has been successfully disabled.{/if}{if $backup_action eq "create"}The creation of your backup has been successfully initiated.{/if}{if $backup_action eq "remove"}Your backup has been successfully removed.{/if}{if $backup_action eq "restore"}The restoration of your backup has been successfully initiated.{/if}
{if $backup_id}Backup ID: {$backup_id}{/if}
{if $backup_description}Backup Description: {$backup_description}{/if}
If you have any questions or need further assistance, do not hesitate to contact our support team.
Thank you for choosing us.
{$signature}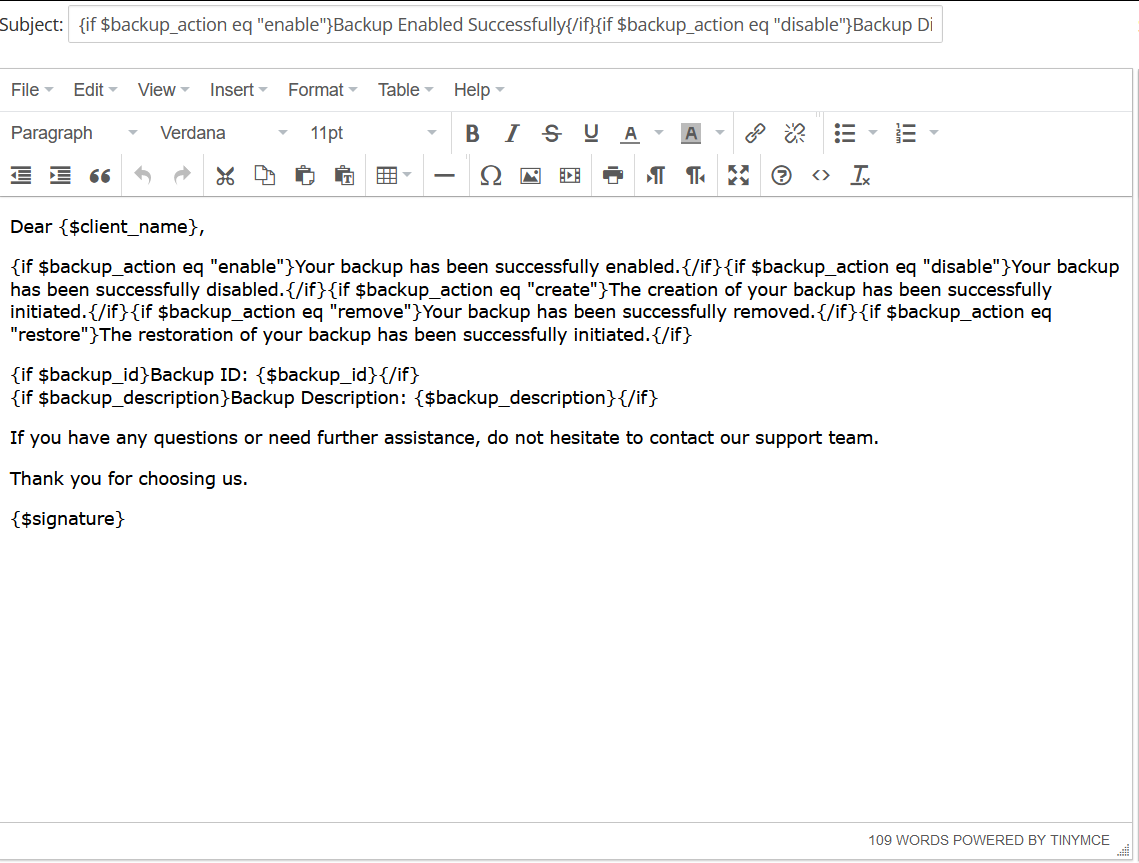
Email Template (puqHetznerDatacenter Custom ISO action service Email)
Hetzner Datacenter module WHMCS
Order now | Download | FAQ
Create an email template for customer notifications.
System Settings->Email Templates->Create New Email Template- Email Type: Product/service
Unique Name: puqHetznerDatacenter Custom ISO action service Email
Subject:
{if $iso_action eq "mount"}ISO Mounted Successfully{/if}{if $iso_action eq "unmount"}ISO Unmounted Successfully{/if}Body:
Dear {$client_name},
{if $iso_action eq "mount"}Your ISO has been successfully mounted.{/if}{if $iso_action eq "unmount"}Your ISO has been successfully unmounted.{/if}
{if $iso_id}ISO ID: {$iso_id}{/if}
{if $iso_name}ISO Name: {$iso_name}{/if}
{if $iso_description}ISO Description: {$iso_description}{/if}
If you have any questions or need further assistance, do not hesitate to contact our support team.
Thank you for choosing us.
{$signature}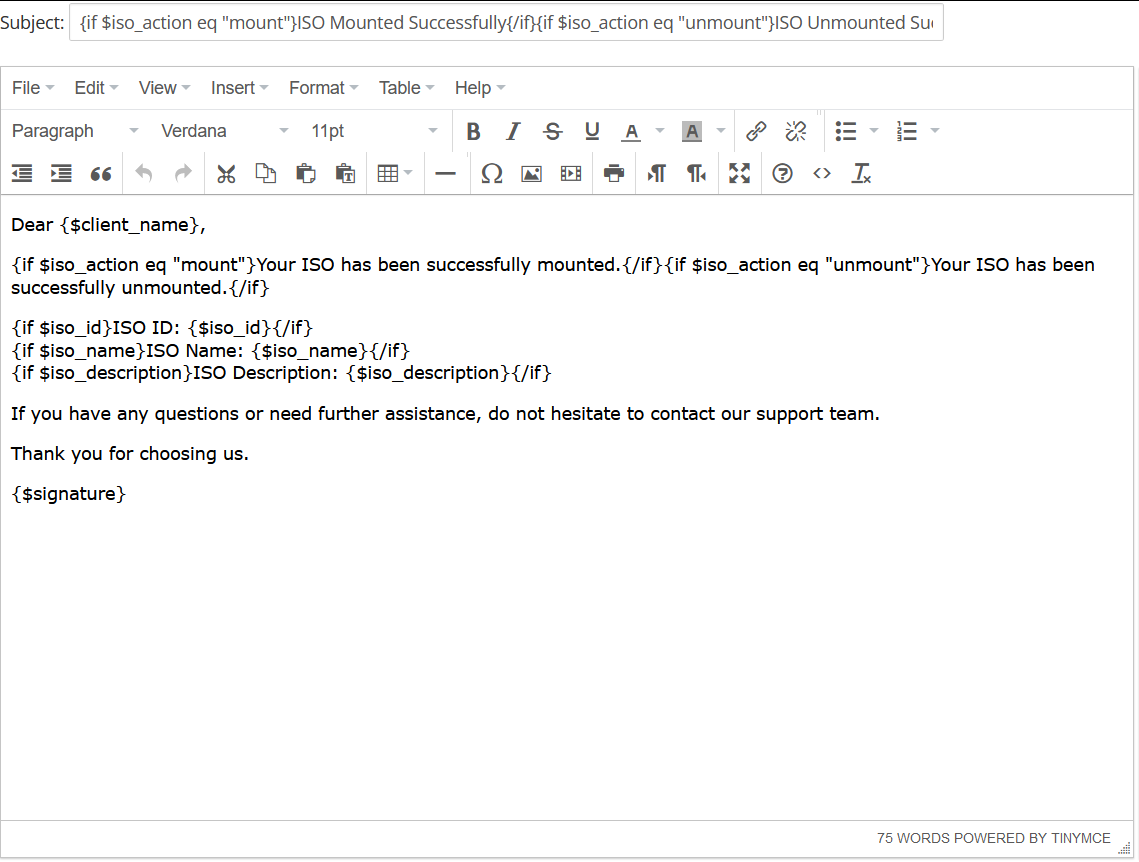
Email Template (puqHetznerDatacenter Custom reinstall action service Email)
Hetzner Datacenter module WHMCS
Order now | Download | FAQ
Create an email template for customer notifications.
System Settings->Email Templates->Create New Email Template- Email Type: Product/service
Unique Name: puqHetznerDatacenter Custom reinstall action service Email
Subject:
Server Rebuild Initiated SuccessfullyBody:
Dear {$client_name},
We are pleased to inform you that the rebuild of your server has been successfully initiated. The server will be rebuilt using the following image:
Image Name: {$image_name}
Image Description: {$image_description}
Disk Size: {$image_disk_size} GB
Architecture: {$image_architecture}
Image Type: {$image_type}
Please be patient as the rebuild process completes. If you have any questions or need further assistance, do not hesitate to contact our support team.
Thank you for choosing us.
{$signature}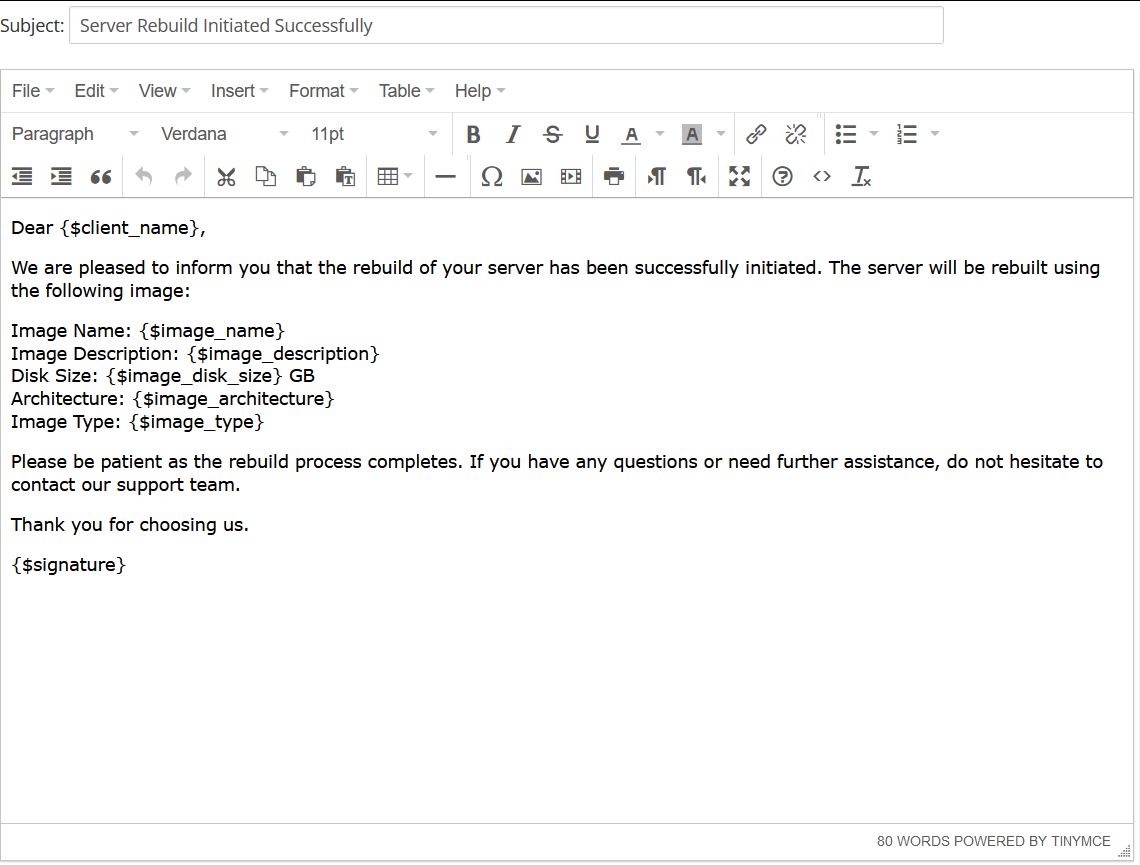
Configurable Option
Hetzner Datacenter module WHMCS
Order now | Download | FAQ
Overview
Configurable Options in WHMCS allow clients to choose specific configurations while ordering a product. In the PUQ Hetzner Datacenter module, these options are used to select an Operating System image and enable Backup access.
What this does
WHMCS Configurable Options let clients choose parameters during order. In this module they are used to: (1) pick an Operating system image; (2) enable/disable Backup access.
Step 1 — Create a Configurable Option Group and link it to your product
- Go to
System Settings → Products/Services → Configurable Optionsand click Create a New Group. - Set Group Name (e.g., “hetzner”) and Description (optional).
- In Assigned Products select your Hetzner product (e.g., “Hetzner Datacenter – Hetzner product”).
- Click Save Changes.
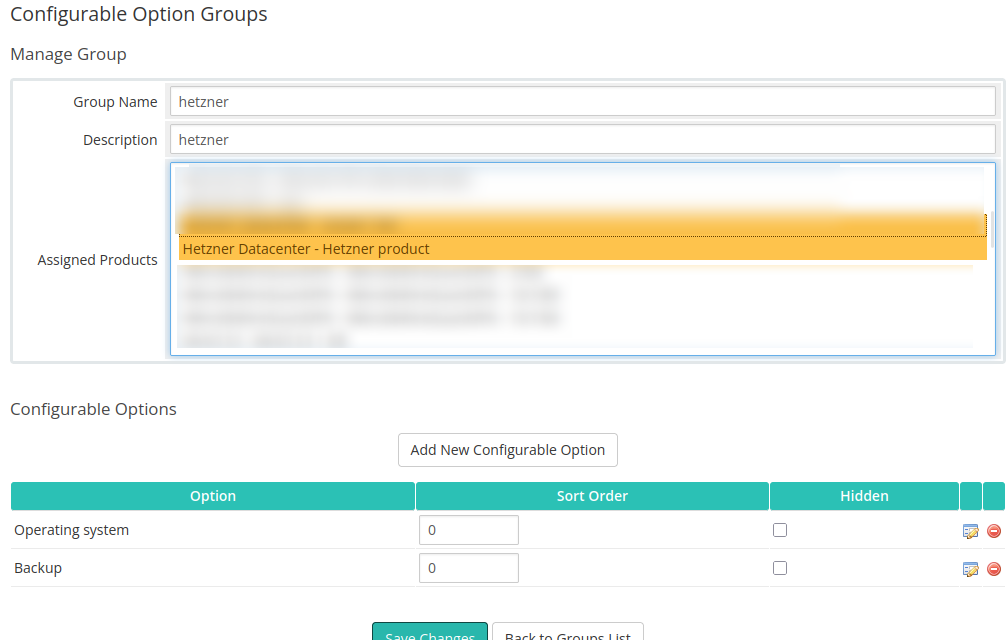
Step 2 — Add options inside the group
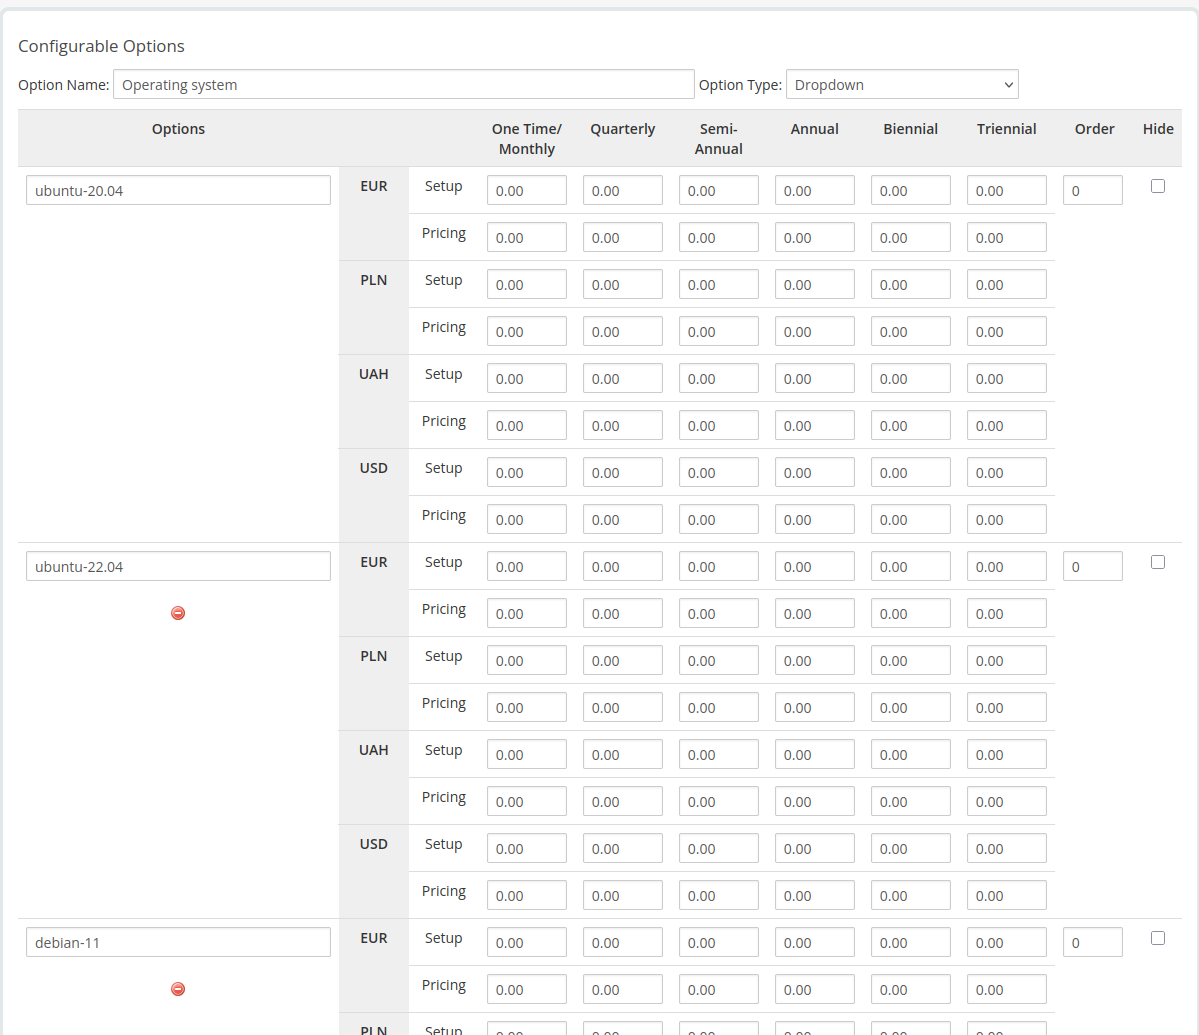
2.1 Operating system (Dropdown)
- Click Add New Configurable Option.
- Set Option Name: Operating system; Option Type: Dropdown.
- Add values (examples): ubuntu-20.04, ubuntu-22.04, debian-11 etc.
- Optionally define pricing per currency and billing cycle.
- Save.
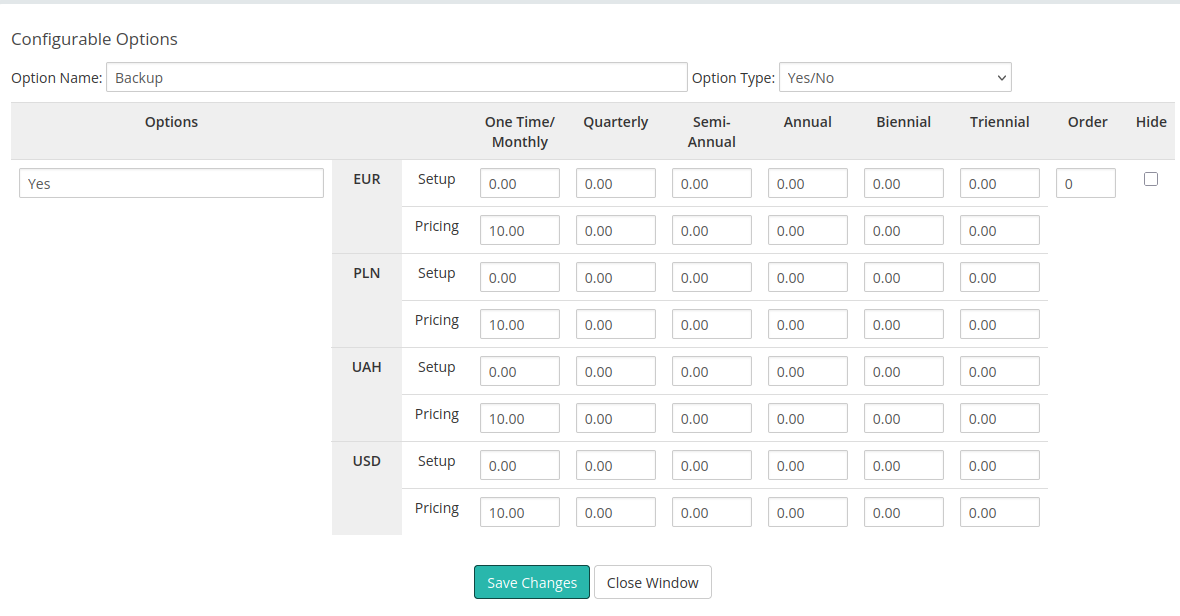
2.2 Backup (Yes/No)
- Click Add New Configurable Option again.
- Set Option Name: Backup; Option Type: Yes/No.
- Optionally add a price for enabling backup (per currency/cycle).
- Save.
Step 3 — Map these options in the module settings
Open your product → Module Settings (PUQ Hetzner Datacenter) and map the WHMCS options to the module controls:
- Custom option name for image — choose Operating system. This lets clients select the OS during order.

- Backup — tick Allow access to server backup and select the Backup option from the dropdown.

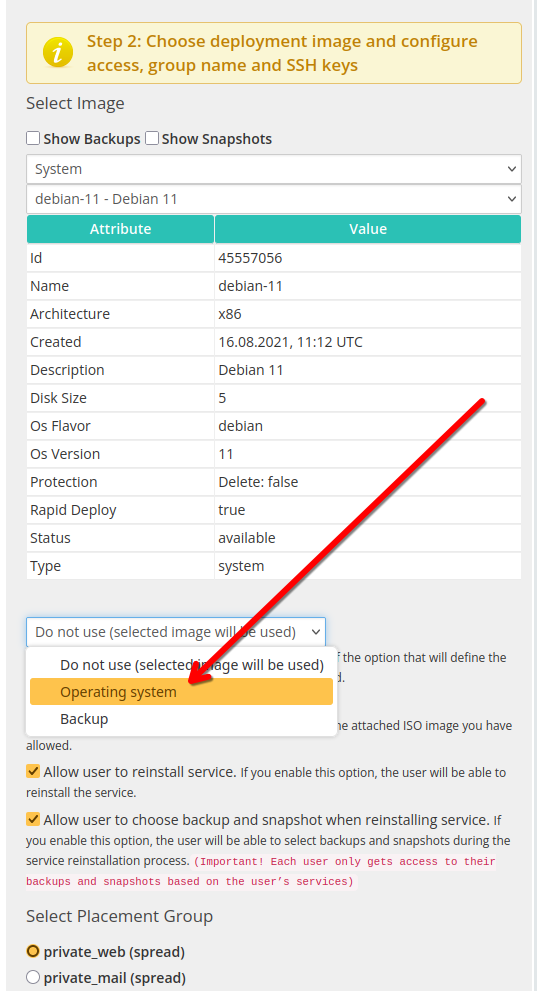

Available Operating Systems and Application Images
All available operating system and application images can be viewed in the dropdown list when selecting an ISO image in the product configuration.
This list is always dynamically updated from the Hetzner API, so it reflects the most recent system templates.
The module uses the Name field value (for example: debian-11).
Examples of available system images that can be added to the Operating system configurable option:
-
debian-11
-
debian-12
-
debian-13
-
ubuntu-20.04
-
ubuntu-22.04
-
ubuntu-24.04
-
centos-stream-9
-
centos-stream-10
-
rocky-8
-
rocky-9
-
rocky-10
-
alma-8
-
alma-9
-
alma-10
-
fedora-41
-
fedora-42
-
opensuse-15
In addition to standard operating systems, the Hetzner catalog also includes preconfigured application images.
These can also be added to the same configurable option group if you want to allow clients to deploy ready-to-use environments:
-
lamp
-
wordpress
-
jitsi
-
nextcloud
-
docker-ce
-
gitlab
-
prometheus-grafana
-
wireguard
-
owncast
-
photoprism
-
rustdesk
-
coolify
All these image names can be used directly in the Operating system dropdown when creating configurable options in WHMCS.
How it behaves for the client
- At order time, the client chooses an OS from Operating system and toggles Backup (Yes/No).
- The module deploys the server with the selected image. If Backup is enabled, backup management becomes available in the client area.
Naming rules (important)
- Option names in WHMCS must match those selected in the module: exactly Operating system and Backup.
- If you rename an option later, revisit the Module Settings and re-select it in the dropdowns.
Client Area
Home screen
Hetzner Datacenter module WHMCS
Order now | Download | FAQ
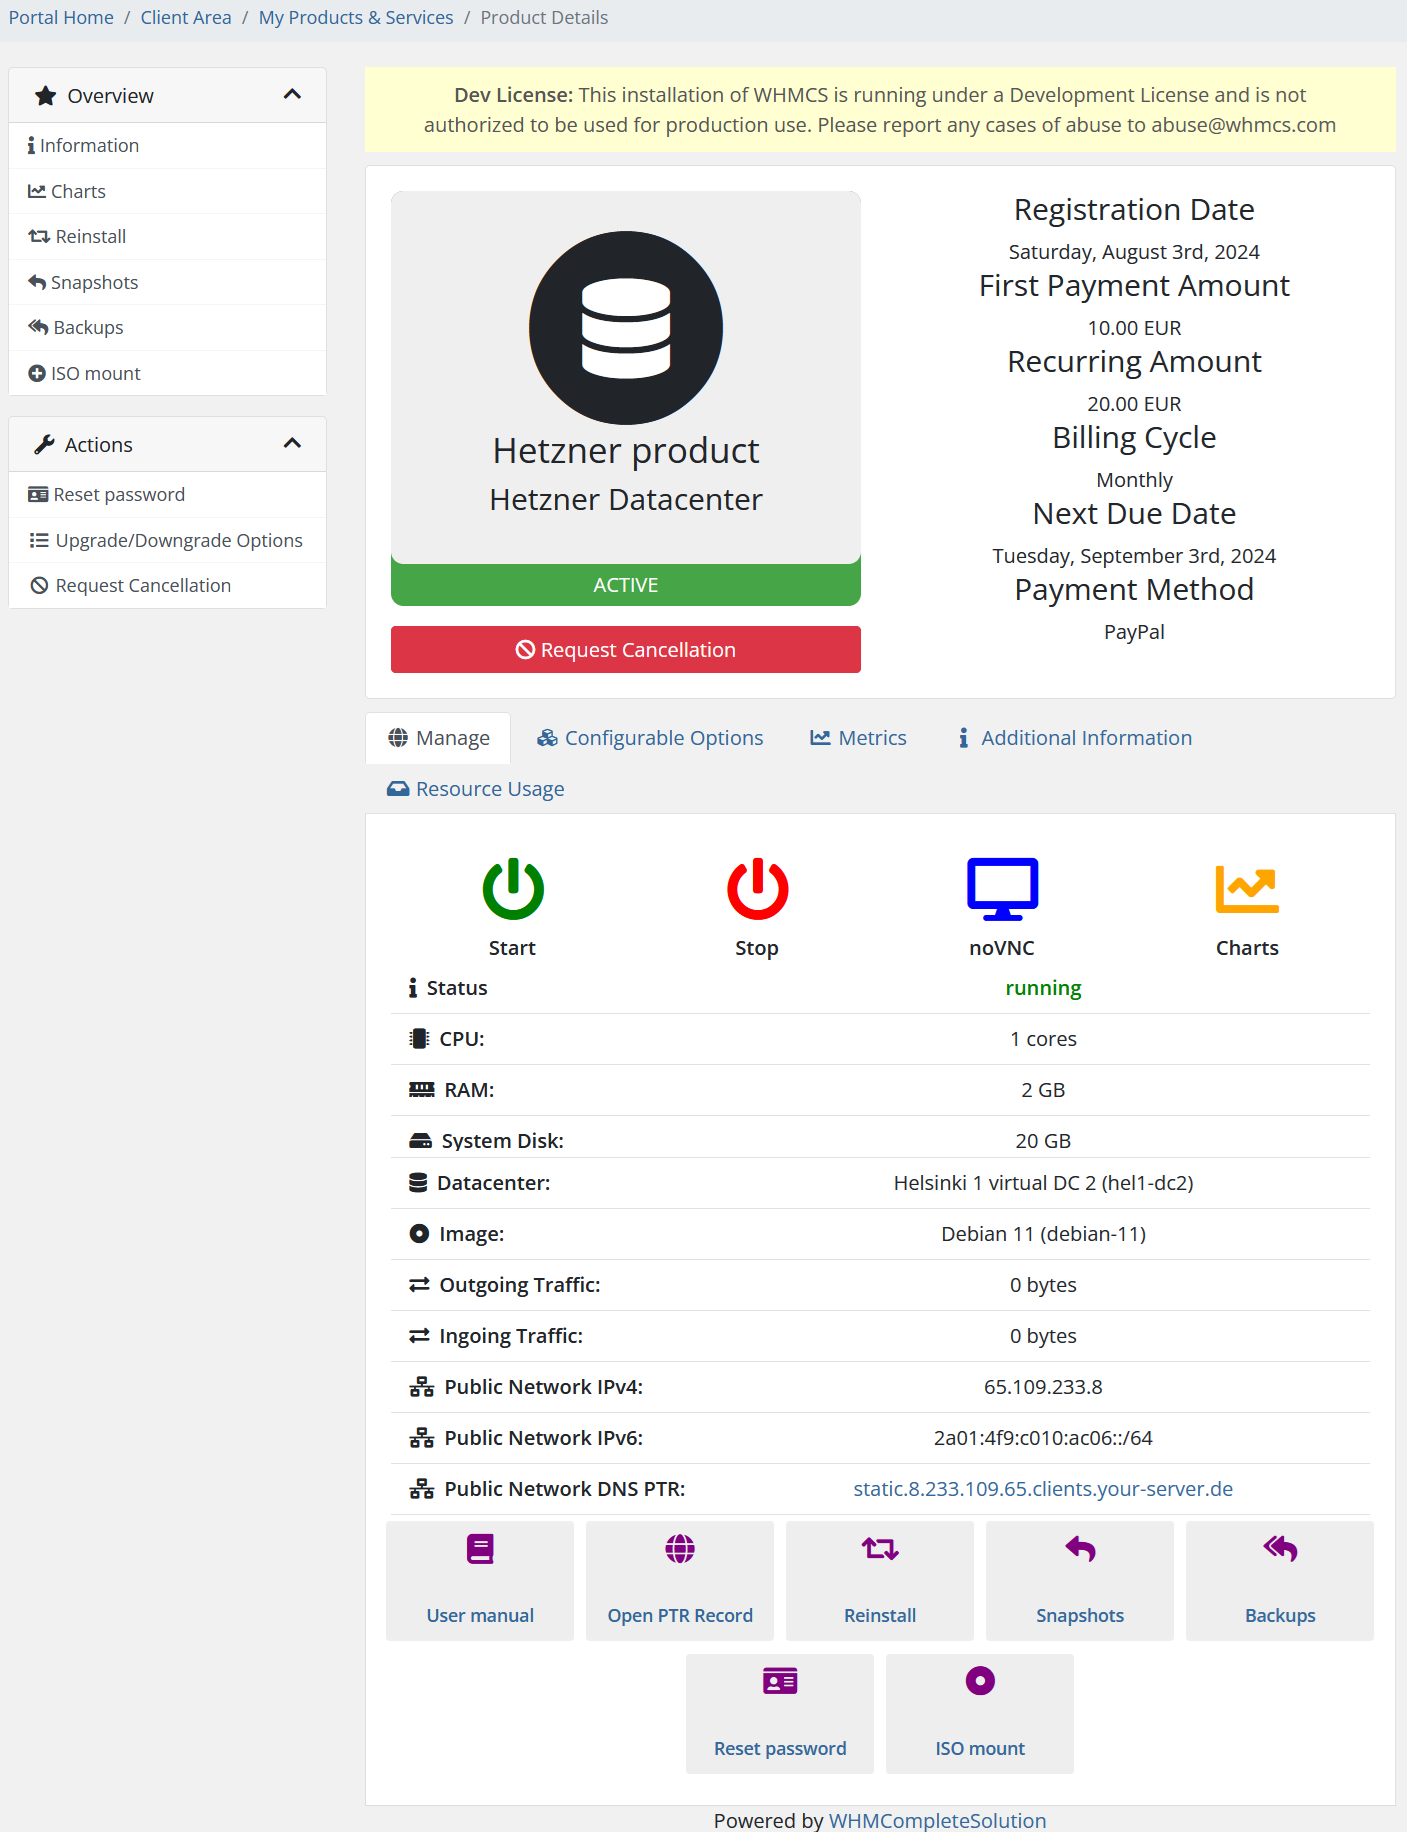
The end customer, after logging in to his own customer panel, has access to the following information and options:
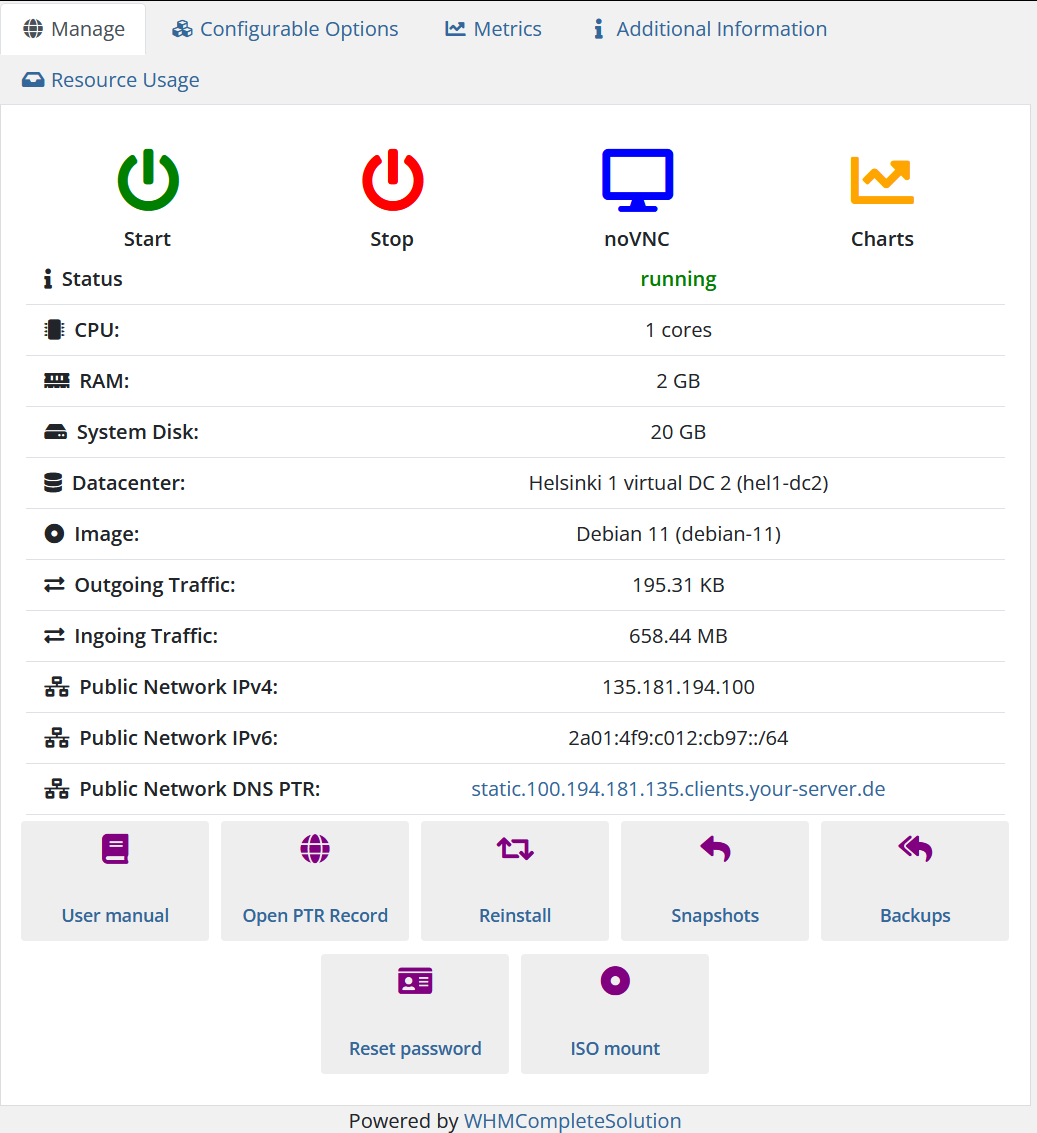
1. The Manage tab
2. Configurable Options tab
- Here the client will see a list of Configurable Options and their values.

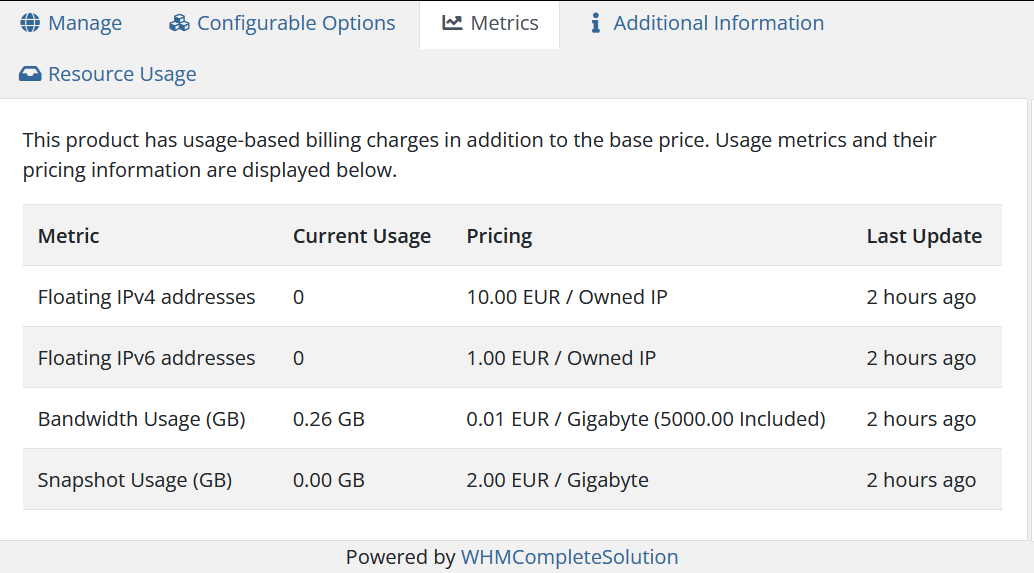
3. Metrics tab
The "Metrics" tab provides detailed information about usage-based billing for your server in addition to the base price. This section displays various usage metrics, the current usage levels, associated pricing, and the last time the data was updated.
Detailed Breakdown of Metrics:
-
Floating IPv4 addresses:
- Current Usage: The number of floating IPv4 addresses currently being used. (In this case, 0)
- Pricing: The cost associated with each owned floating IPv4 address. (In this case, 10.00 EUR per owned IP)
- Last Update: The timestamp showing when this data was last refreshed. (In this case, 4 hours ago)
-
Floating IPv6 addresses:
- Current Usage: The number of floating IPv6 addresses currently being used. (In this case, 0)
- Pricing: The cost associated with each owned floating IPv6 address. (In this case, 1.00 EUR per owned IP)
- Last Update: The timestamp showing when this data was last refreshed. (In this case, 4 hours ago)
-
Bandwidth Usage (GB):
- Current Usage: The amount of bandwidth used by the server. (In this case, 0.26 GB)
- Pricing: The cost per gigabyte of bandwidth used beyond the included allowance. (In this case, 0.01 EUR per GB, with 5000.00 GB included)
- Last Update: The timestamp showing when this data was last refreshed. (In this case, 4 hours ago)
-
Snapshot Usage (GB):
- Current Usage: The amount of storage used for server snapshots. (In this case, 0.00 GB)
- Pricing: The cost per gigabyte of snapshot storage used. (In this case, 2.00 EUR per GB)
- Last Update: The timestamp showing when this data was last refreshed. (In this case, 4 hours ago)
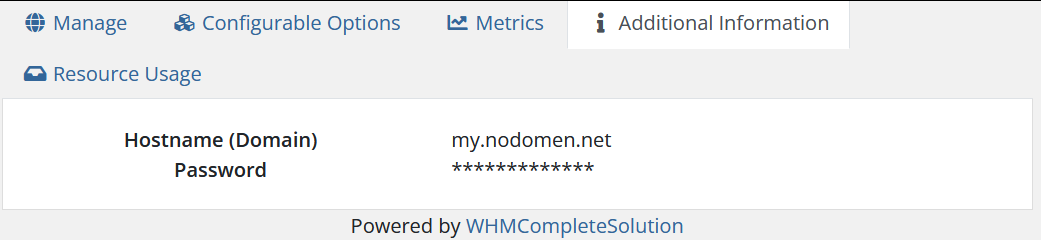
3. Additional Information tab
- Here the client will see a list of Custom Fields and their values.
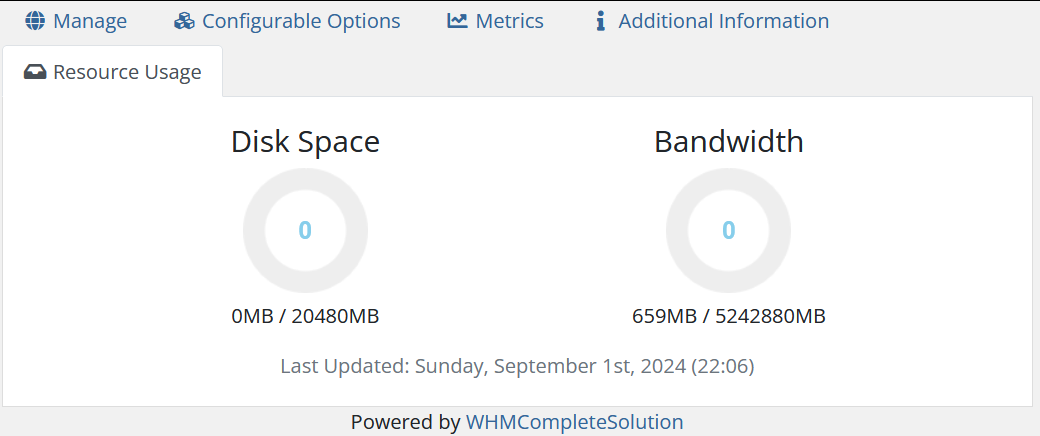
2. The Resource Usage tab
- Displays service usage statistics
Charts Section Description
Hetzner Datacenter module WHMCS
Order now | Download | FAQ
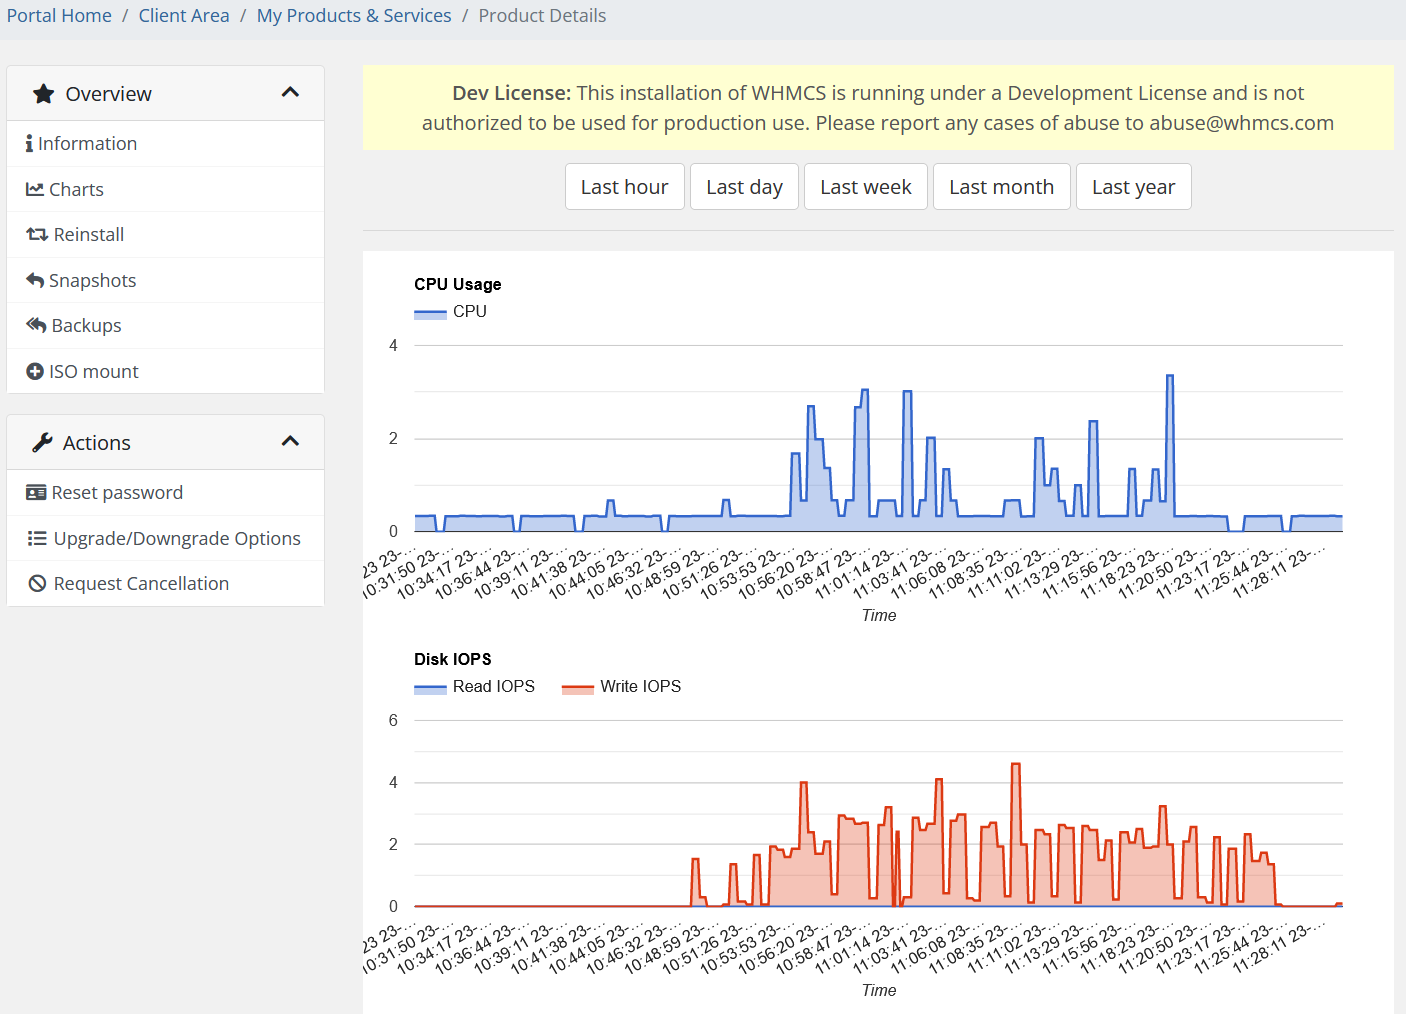
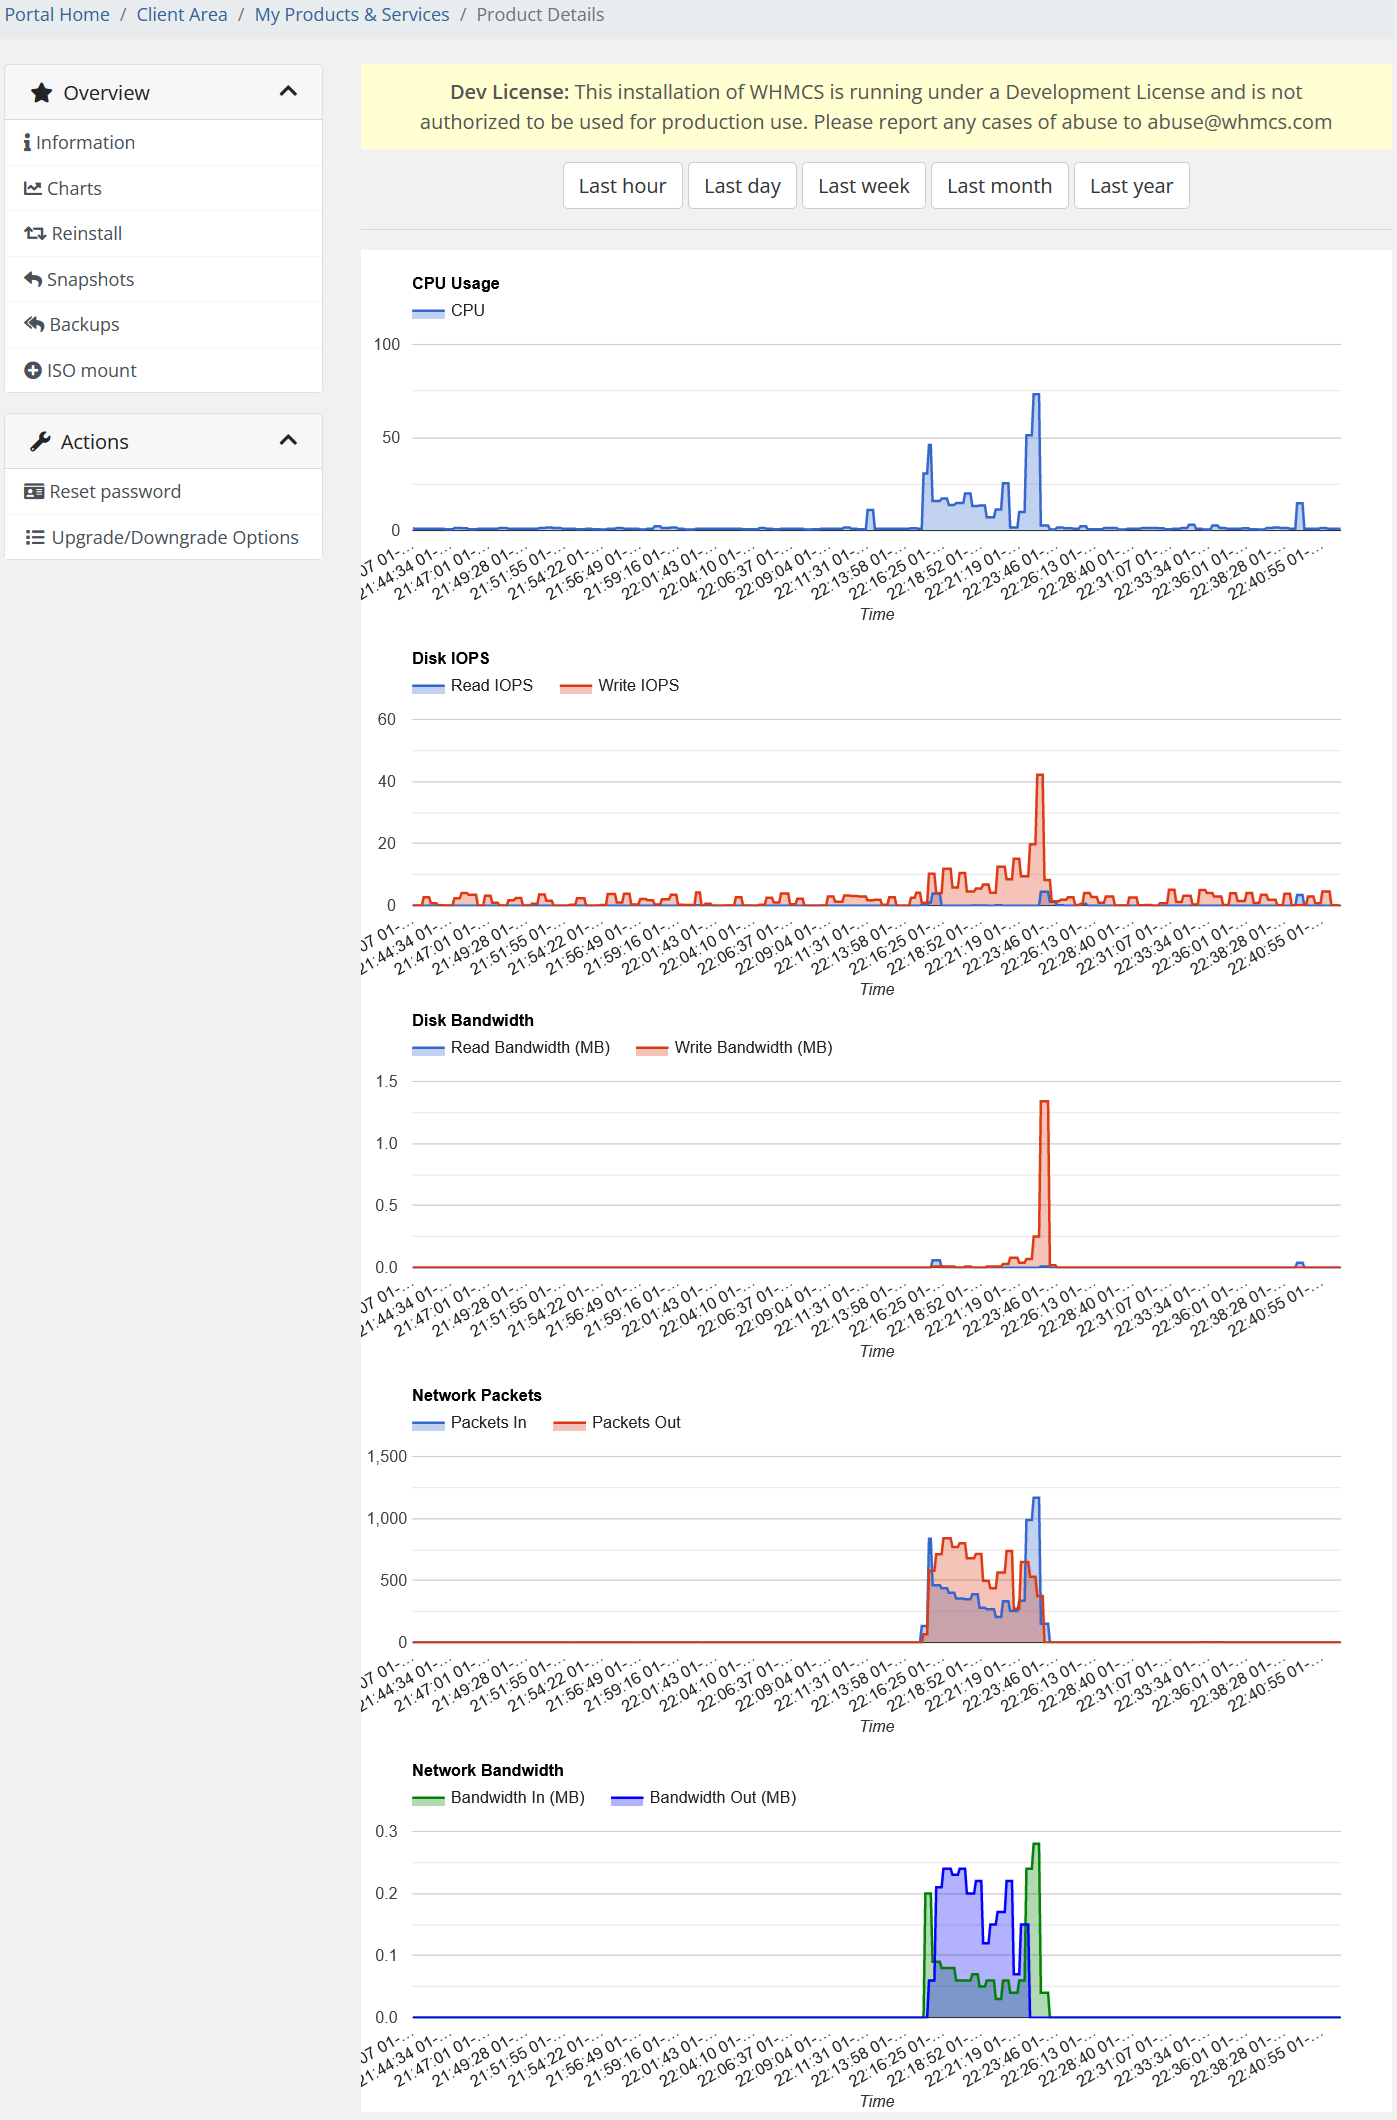
The "Charts" section provides visual representations of various performance metrics of your server over different time periods. This section is useful for monitoring and analyzing the server's resource usage and performance trends.
Available Time Frames:
At the top of the section, there are buttons that allow you to select the time frame for the displayed metrics:
- Last hour
- Last day
- Last week
- Last month
- Last year
Performance Metrics:
-
CPU Usage:
- Description: This chart shows the CPU usage over time, represented by a blue line. The vertical axis indicates the percentage of CPU usage, while the horizontal axis represents time.
- Purpose: Monitoring CPU usage helps to understand the server's processing load and identify periods of high or low activity.
-
Disk IOPS (Input/Output Operations Per Second):
- Description: This chart displays the disk IOPS, split into Read IOPS (blue) and Write IOPS (red). The vertical axis indicates the number of IOPS, and the horizontal axis represents time.
- Purpose: Tracking disk IOPS is important for understanding how frequently the disk is being accessed, which can affect the overall performance of the server, especially under high read/write operations.
-
Disk Bandwidth:
- Description: This chart shows the disk bandwidth usage, differentiated into Read Bandwidth (MB) (blue) and Write Bandwidth (MB) (red). The vertical axis shows the bandwidth in megabytes, and the horizontal axis represents time.
- Purpose: This metric helps to monitor the amount of data being read from or written to the disk, which is crucial for assessing the impact of disk operations on the server's performance.
-
Network Packets:
- Description: This chart displays the number of network packets processed by the server, with Packets In (blue) and Packets Out (red). The vertical axis shows the number of packets, and the horizontal axis represents time.
- Purpose: Tracking network packets allows you to monitor the volume of incoming and outgoing network traffic, which is essential for understanding network load and identifying any potential issues with connectivity or bandwidth.
-
Network Bandwidth:
- Description: This chart shows the network bandwidth usage, with Bandwidth In (MB) (green) and Bandwidth Out (MB) (blue). The vertical axis indicates the bandwidth in megabytes, while the horizontal axis represents time.
- Purpose: Monitoring network bandwidth usage helps to evaluate the server's network performance and ensure that it can handle the necessary data throughput without bottlenecks.
Reinstall Section Description
Hetzner Datacenter module WHMCS
Order now | Download | FAQ
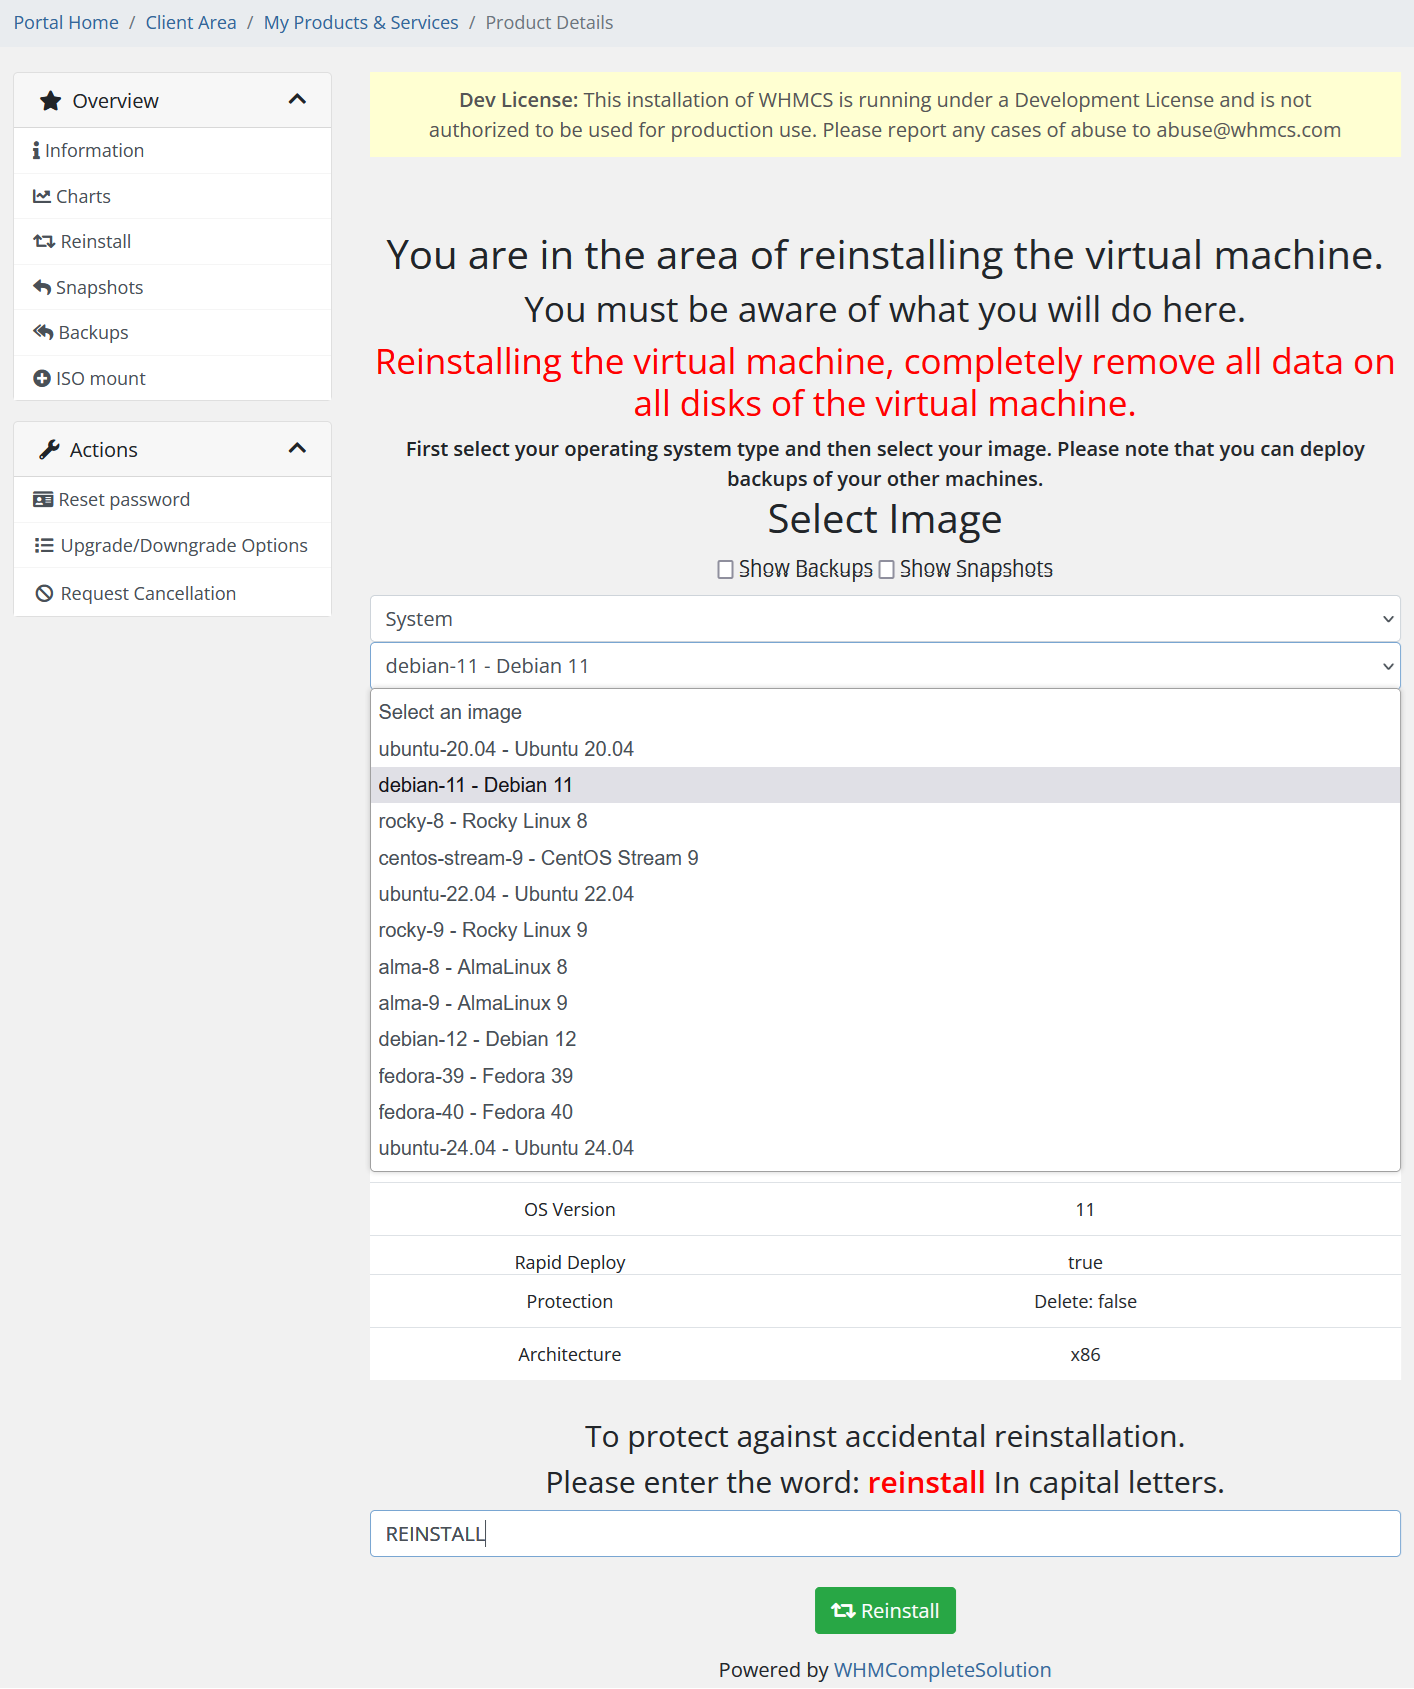
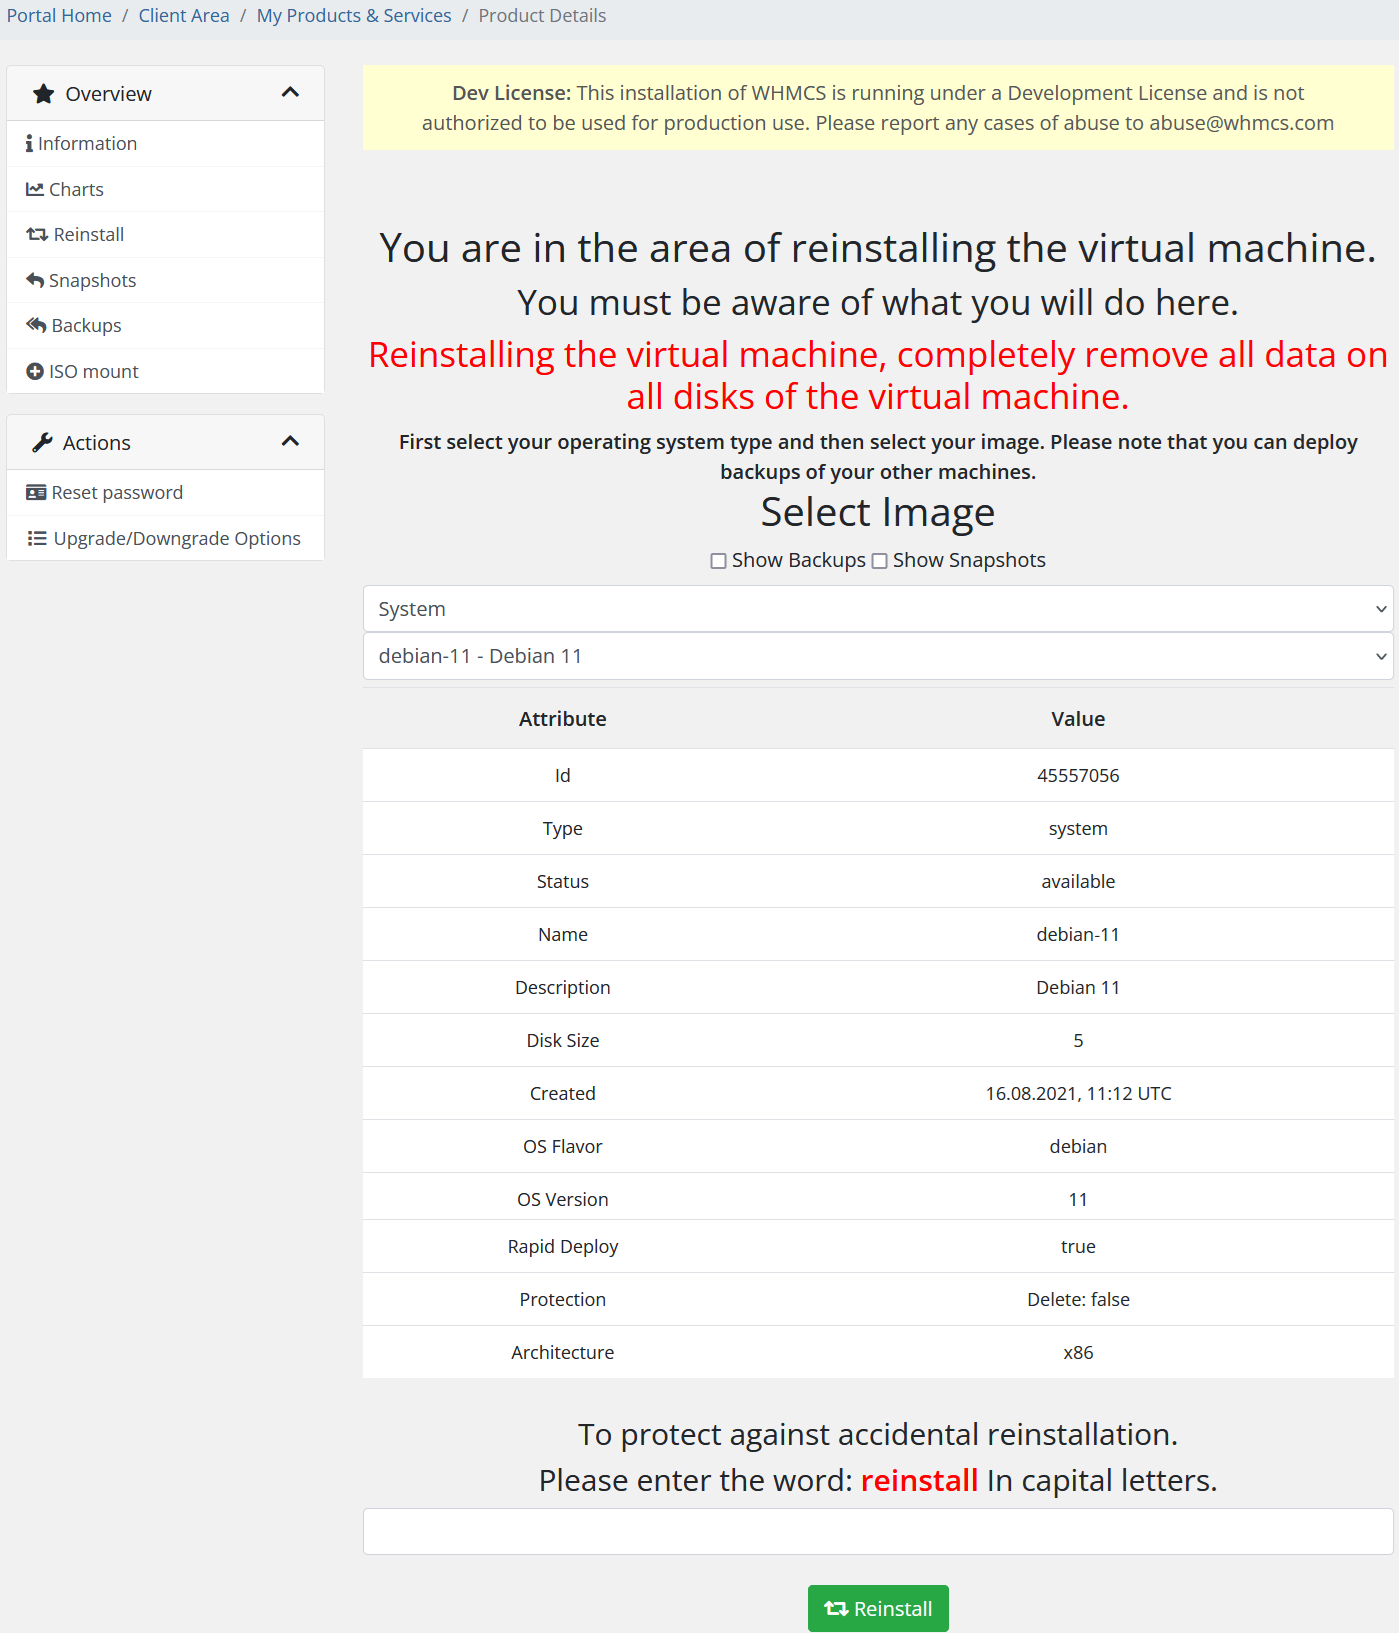
The "Reinstall" section is a critical area where you can perform a complete reinstallation of your virtual machine. This section includes several important warnings and steps to ensure that users understand the consequences of reinstalling the server.
Key Warnings:
- Reinstallation Warning: The section begins with a strong warning in red text stating that reinstalling the virtual machine will completely remove all data on all disks of the virtual machine. This is emphasized to prevent accidental data loss.
- Awareness Notice: There is a general reminder that you must be fully aware of what you are about to do before proceeding with the reinstallation.
Steps to Reinstall:
-
Select Image:
- Image Type: First, you need to select the type of operating system image you want to reinstall. This is done through a dropdown menu where you can select from available images.
- Available Options: There are options to show backups and snapshots by checking the corresponding boxes, allowing you to restore from a previous state if necessary.
-
Image Details:
-
Below the selection area, detailed information about the selected image is provided in a table format. The attributes include:
- Id: The unique identifier for the image.
- Type: The type of image (in this case, 'system').
- Status: The current availability status of the image.
- Name: The name of the selected image.
- Description: A brief description of the image.
- Disk Size: The size of the disk associated with the image.
- Created: The creation date and time of the image.
- OS Flavor: The flavor of the operating system (e.g., Debian).
- OS Version: The version of the operating system.
- Rapid Deploy: Indicates whether rapid deployment is enabled.
- Protection: Indicates whether delete protection is enabled.
- Architecture: The architecture of the image (e.g., x86).
-
Note: The attributes listed here are dynamic and may vary depending on the selected image or the server configuration. Users should carefully review these details before proceeding.
-
-
Confirmation:
- Protection Mechanism: To protect against accidental reinstallation, the user is required to type the word "REINSTALL" in capital letters in a provided text box. This step is mandatory and acts as a final confirmation that the user intends to proceed with the reinstallation.
-
Execute Reinstallation:
- Once the word is correctly entered, the green Reinstall button at the bottom can be clicked to initiate the reinstallation process. This action will completely wipe the server and install the selected operating system image.
Snapshots Section Description
Hetzner Datacenter module WHMCS
Order now | Download | FAQ
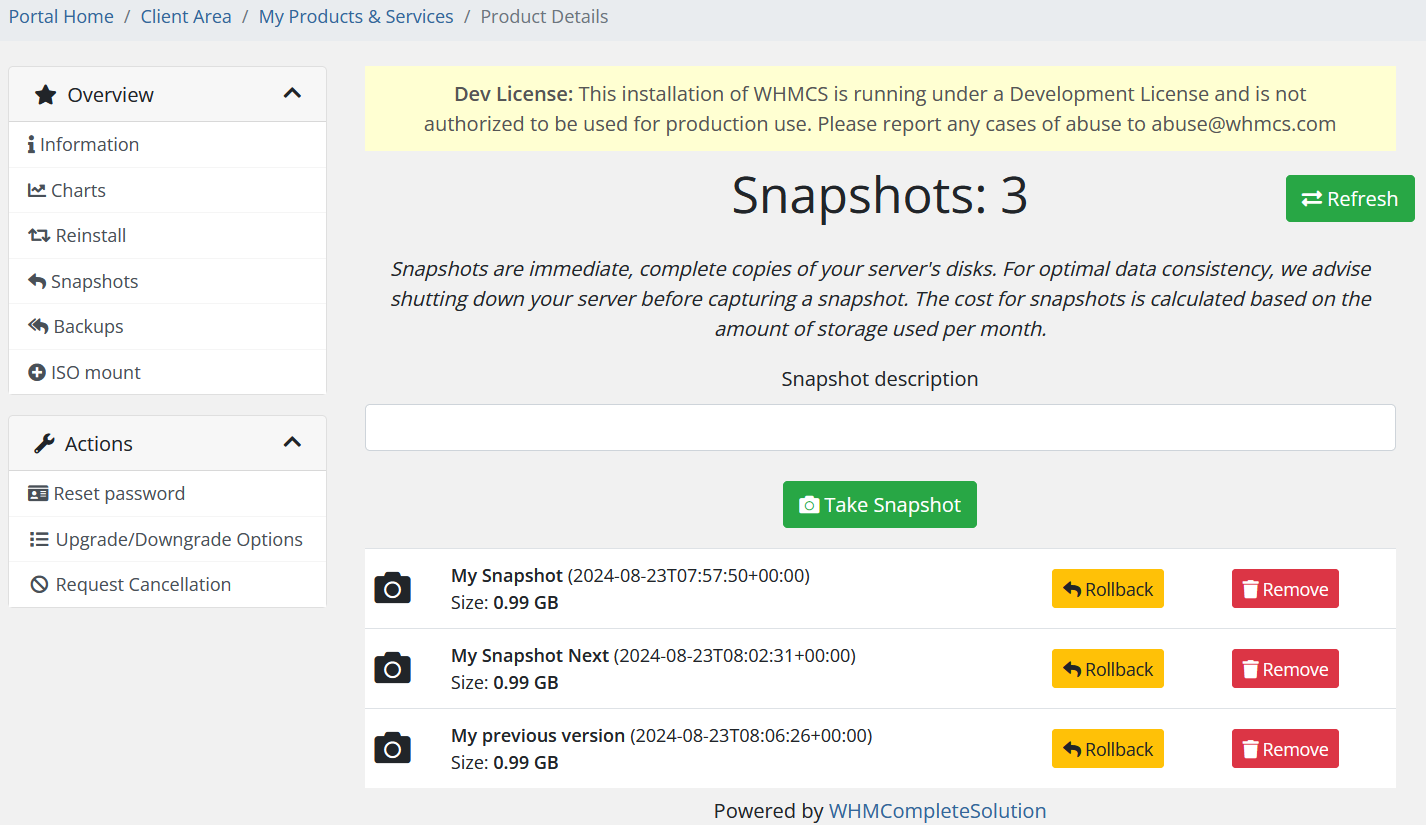
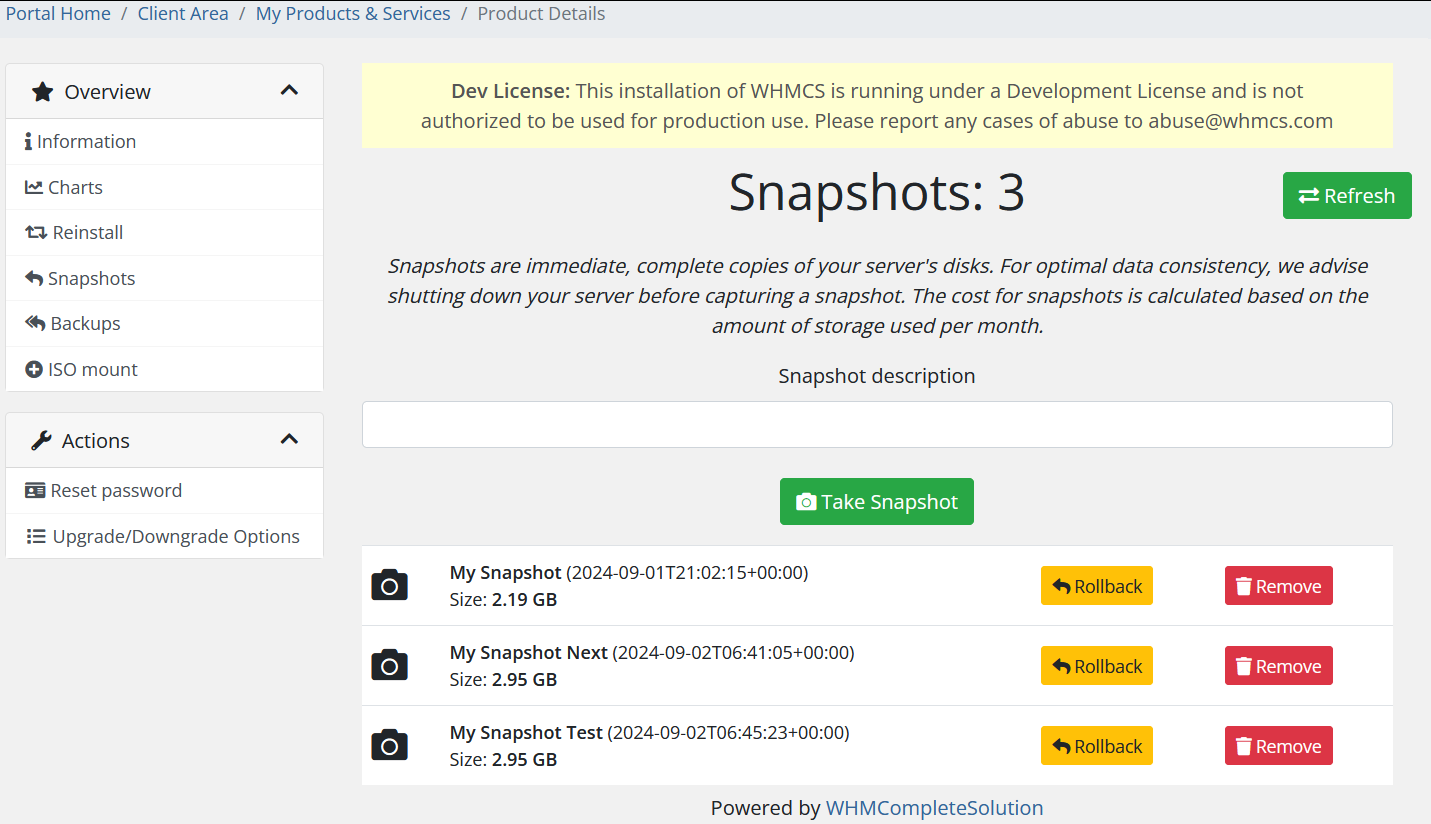
The "Snapshots" section allows you to manage snapshots of your server. Snapshots are immediate, complete copies of your server's disks, capturing the current state of the server. This is useful for backing up data or creating restore points before making significant changes to the system.
Key Features and Actions:
-
Snapshot Creation:
- Snapshot Description: There is a text box where you can enter a descriptive name for the snapshot you are about to create.
- Take Snapshot: The green Take Snapshot button allows you to create a new snapshot of the server. It’s recommended to shut down your server before capturing a snapshot to ensure data consistency.
-
Snapshot Management:
- The section lists all existing snapshots, showing the following details for each:
- Snapshot Name: The user-defined name of the snapshot (e.g., "My Snapshot").
- Timestamp: The date and time when the snapshot was created (e.g., 2024-09-01T21:02:15+00:00).
- Size: The amount of storage space used by the snapshot (e.g., 2.19 GB).
- The section lists all existing snapshots, showing the following details for each:
-
Actions for Each Snapshot:
- Rollback: The yellow Rollback button allows you to restore the server to the state it was in at the time the snapshot was taken. This is particularly useful if you encounter issues and need to revert to a previous stable state.
- Remove: The red Remove button allows you to delete the snapshot, freeing up the space it occupies. This action is irreversible, so it should be done with caution.
-
Refresh Button:
- Refresh: A green Refresh button at the top of the section allows you to update the list of snapshots, ensuring that the latest snapshots and any changes are displayed.
Important Notes:
- Cost Consideration: The cost for snapshots is calculated based on the amount of storage used per month. Therefore, it’s advisable to manage snapshots carefully to avoid unnecessary charges.
Backups Section Description
Hetzner Datacenter module WHMCS
Order now | Download | FAQ
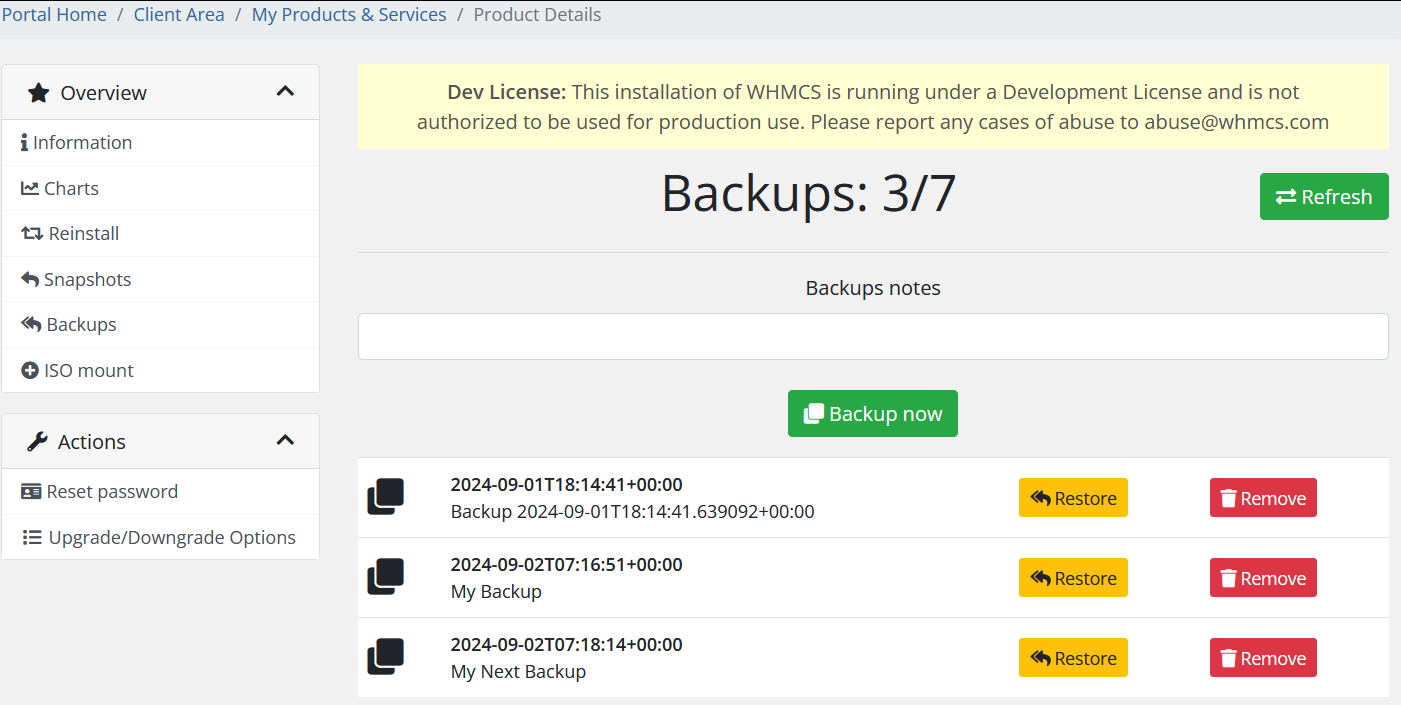
The "Backups" section is where you can manage and restore backups of your virtual machine. This section is crucial for maintaining data integrity and providing recovery options in case of system failure or other critical issues.
Key Features and Actions:
-
Backup Creation:
- Backup Notes: There is a text box labeled "Backups notes" where you can enter a description or notes for the backup you are about to create. This allows you to easily identify the purpose or specific details of the backup later on.
- Backup Now: The green Backup now button allows you to initiate a new backup of the current state of your virtual machine. This backup will include all data and settings at the time of creation.
-
Backup Management:
- The section lists all existing backups, providing the following details for each:
- Timestamp: The date and time when the backup was created (e.g., 2024-09-01T18:14:41+00:00).
- Backup Name: The user-defined name or automatically generated name for the backup (e.g., "Backup 2024-09-01T18:14:41.639092+00:00" or "My Backup").
- The section lists all existing backups, providing the following details for each:
-
Actions for Each Backup:
- Restore: The yellow Restore button allows you to restore the virtual machine to the state it was in when the backup was created. This will overwrite the current state of the machine with the backup, reverting any changes made since the backup was created.
- Remove: The red Remove button allows you to delete the backup. Deleting a backup will free up storage space, but this action is irreversible, so it should be done carefully.
-
Refresh Button:
- Refresh: A green Refresh button at the top of the section allows you to update the list of backups, ensuring that the most current backups and any recent changes are displayed.
ISO Mount Section Description
Hetzner Datacenter module WHMCS
Order now | Download | FAQ
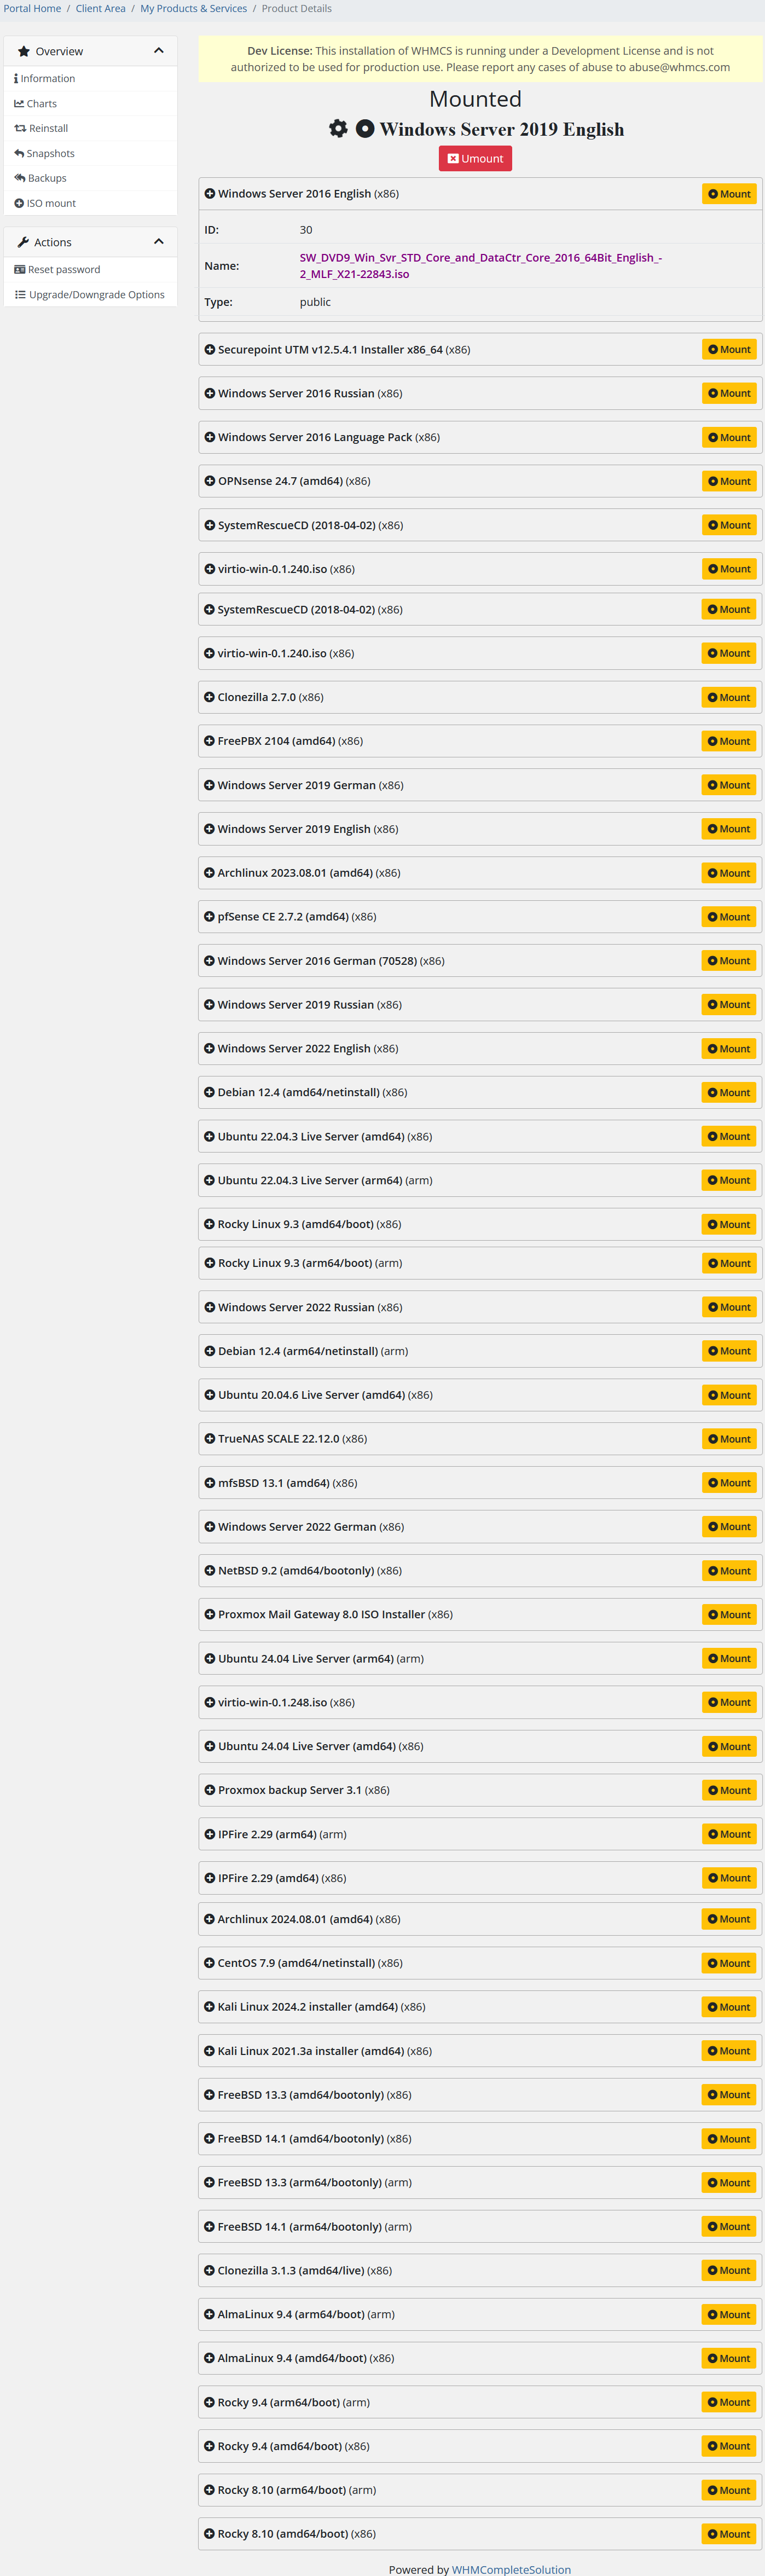
The "ISO Mount" section allows users to manage and mount ISO images to their virtual machine. These ISO images are used for installing operating systems, recovery tools, and various software packages on the server. The interface is designed to provide a list of available ISO images, along with the option to view additional details and mount or unmount these images.
Key Features and Actions:
-
Mounted ISO:
- At the top of the section, the currently mounted ISO image is displayed. In this example, Windows Server 2019 English is shown as the mounted image.
- Unmount Button: A red Unmount button is provided next to the mounted image, allowing users to unmount the ISO if they wish to detach it from the virtual machine.
-
Available ISO Images:
- Below the mounted ISO, a list of all available ISO images is displayed. Each ISO image is presented with the following information:
- Name: The name of the ISO image, such as "Windows Server 2016 English (x86)" or "Debian 12.4 (arm64/netinstall)".
- Mount Button: Each ISO has a yellow Mount button next to it, allowing users to mount the selected ISO image to the virtual machine.
- Expandable Details: Some ISO images have additional details that can be expanded by clicking on the image name. These details include:
- Id: A unique identifier for the ISO image.
- Name: The full name of the ISO file, including its path.
- Type: The type of the ISO image (e.g., public or private).
- Size: The size of the ISO image in gigabytes.
- Below the mounted ISO, a list of all available ISO images is displayed. Each ISO image is presented with the following information:
-
Managing ISO Images:
- Users can click the Mount button next to any ISO image to mount it to the virtual machine. Once mounted, the ISO can be used to boot the server or perform installations.
- If an ISO image is already mounted, mounting a new ISO will typically require unmounting the current image first.
-
Search and Navigation:
- The list of ISO images is scrollable, allowing users to navigate through all available options. This includes a variety of operating systems, recovery tools, and other software distributions.
Reset Password Section Description
Hetzner Datacenter module WHMCS
Order now | Download | FAQ
The "Reset Password" section allows users to reset the password of their virtual machine through an automated process. This section is designed to be a quick and convenient way to regain access to the server if the password has been lost or needs to be changed.
Key Information:
-
Important Warning:
- The section prominently displays a warning in red text, stating that the password reset procedure will only work if the packages responsible for the operation of
cloud-inithave not been removed from the virtual machine.cloud-initis a tool used to initialize cloud instances, and it must be present for the automated password reset to function correctly.
- The section prominently displays a warning in red text, stating that the password reset procedure will only work if the packages responsible for the operation of
-
Additional Instruction:
- Below the warning, there is an additional note in smaller text indicating that if the reset procedure was successful but the password was not changed, the user will need to manually connect to the virtual machine using the noVNC console, boot into safe mode, and change the password manually.
-
Reset Password Button:
- A green Reset password button is provided for users to initiate the password reset process. This button triggers the automated procedure that attempts to reset the virtual machine's password.

Upgrade/Downgrade Options Section Description
Hetzner Datacenter module WHMCS
Order now | Download | FAQ
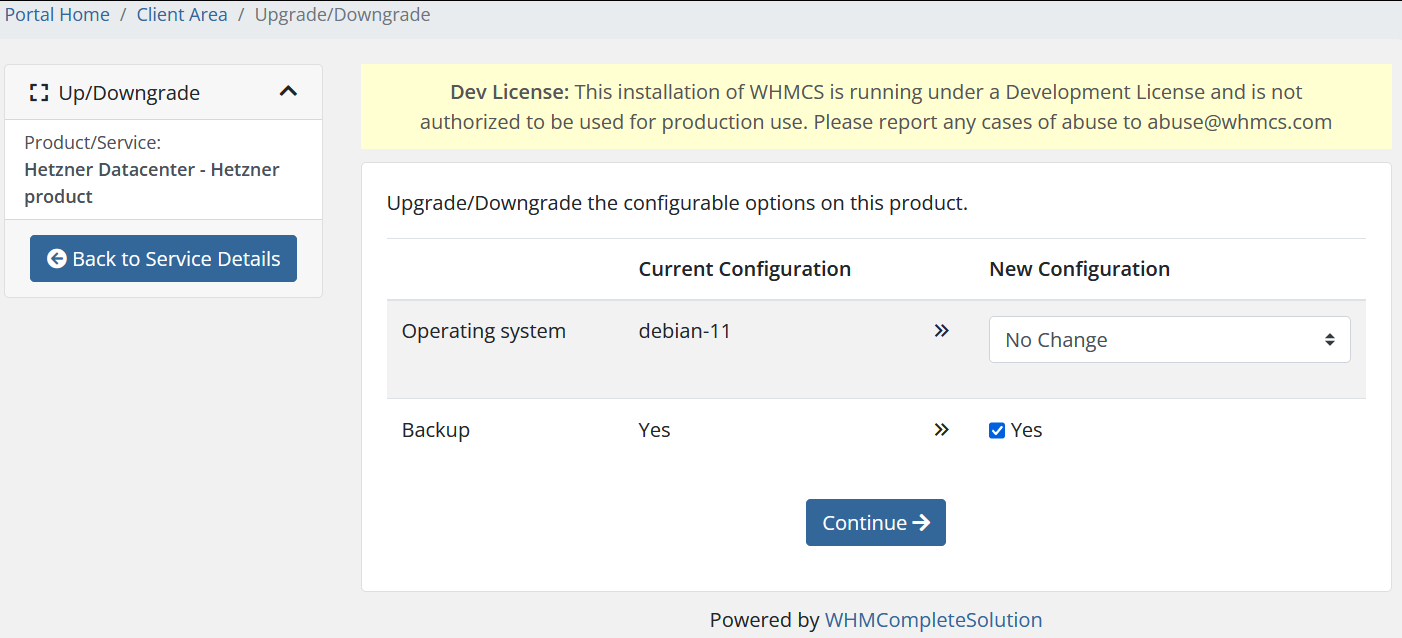
The "Upgrade/Downgrade Options" section allows users to modify the configurable options associated with their product or service. This interface is particularly useful for adjusting features like backup settings, among other configurable options.
Key Features and Actions:
-
Current Configuration:
- The section displays the current configuration of the product or service. This includes any active options or features that have been enabled or disabled. For example, the current status of the Backup option is shown here as "Yes" if it is enabled.
-
New Configuration:
- On the right side, the new configuration can be selected. Users can enable or disable options such as Backup by checking or unchecking the corresponding box. In this example, the Backup option is checked, indicating that backups will remain enabled or will be enabled if they were previously disabled.
-
Backup Option:
- Backup Toggle: This section specifically highlights the ability to toggle the backup feature on or off. By using this option, users can easily include or exclude backups as part of their service, directly influencing how their data is managed and protected.
- Enabling backups can provide crucial data recovery options, while disabling it can save costs if the user decides backups are no longer necessary.
-
Continue Button:
- Once the desired configuration changes have been made, users can click the Continue button to proceed with applying the changes. This action will update the service with the new settings.
Admin Area
Product Information
Hetzner Datacenter module WHMCS
Order now | Download | FAQ
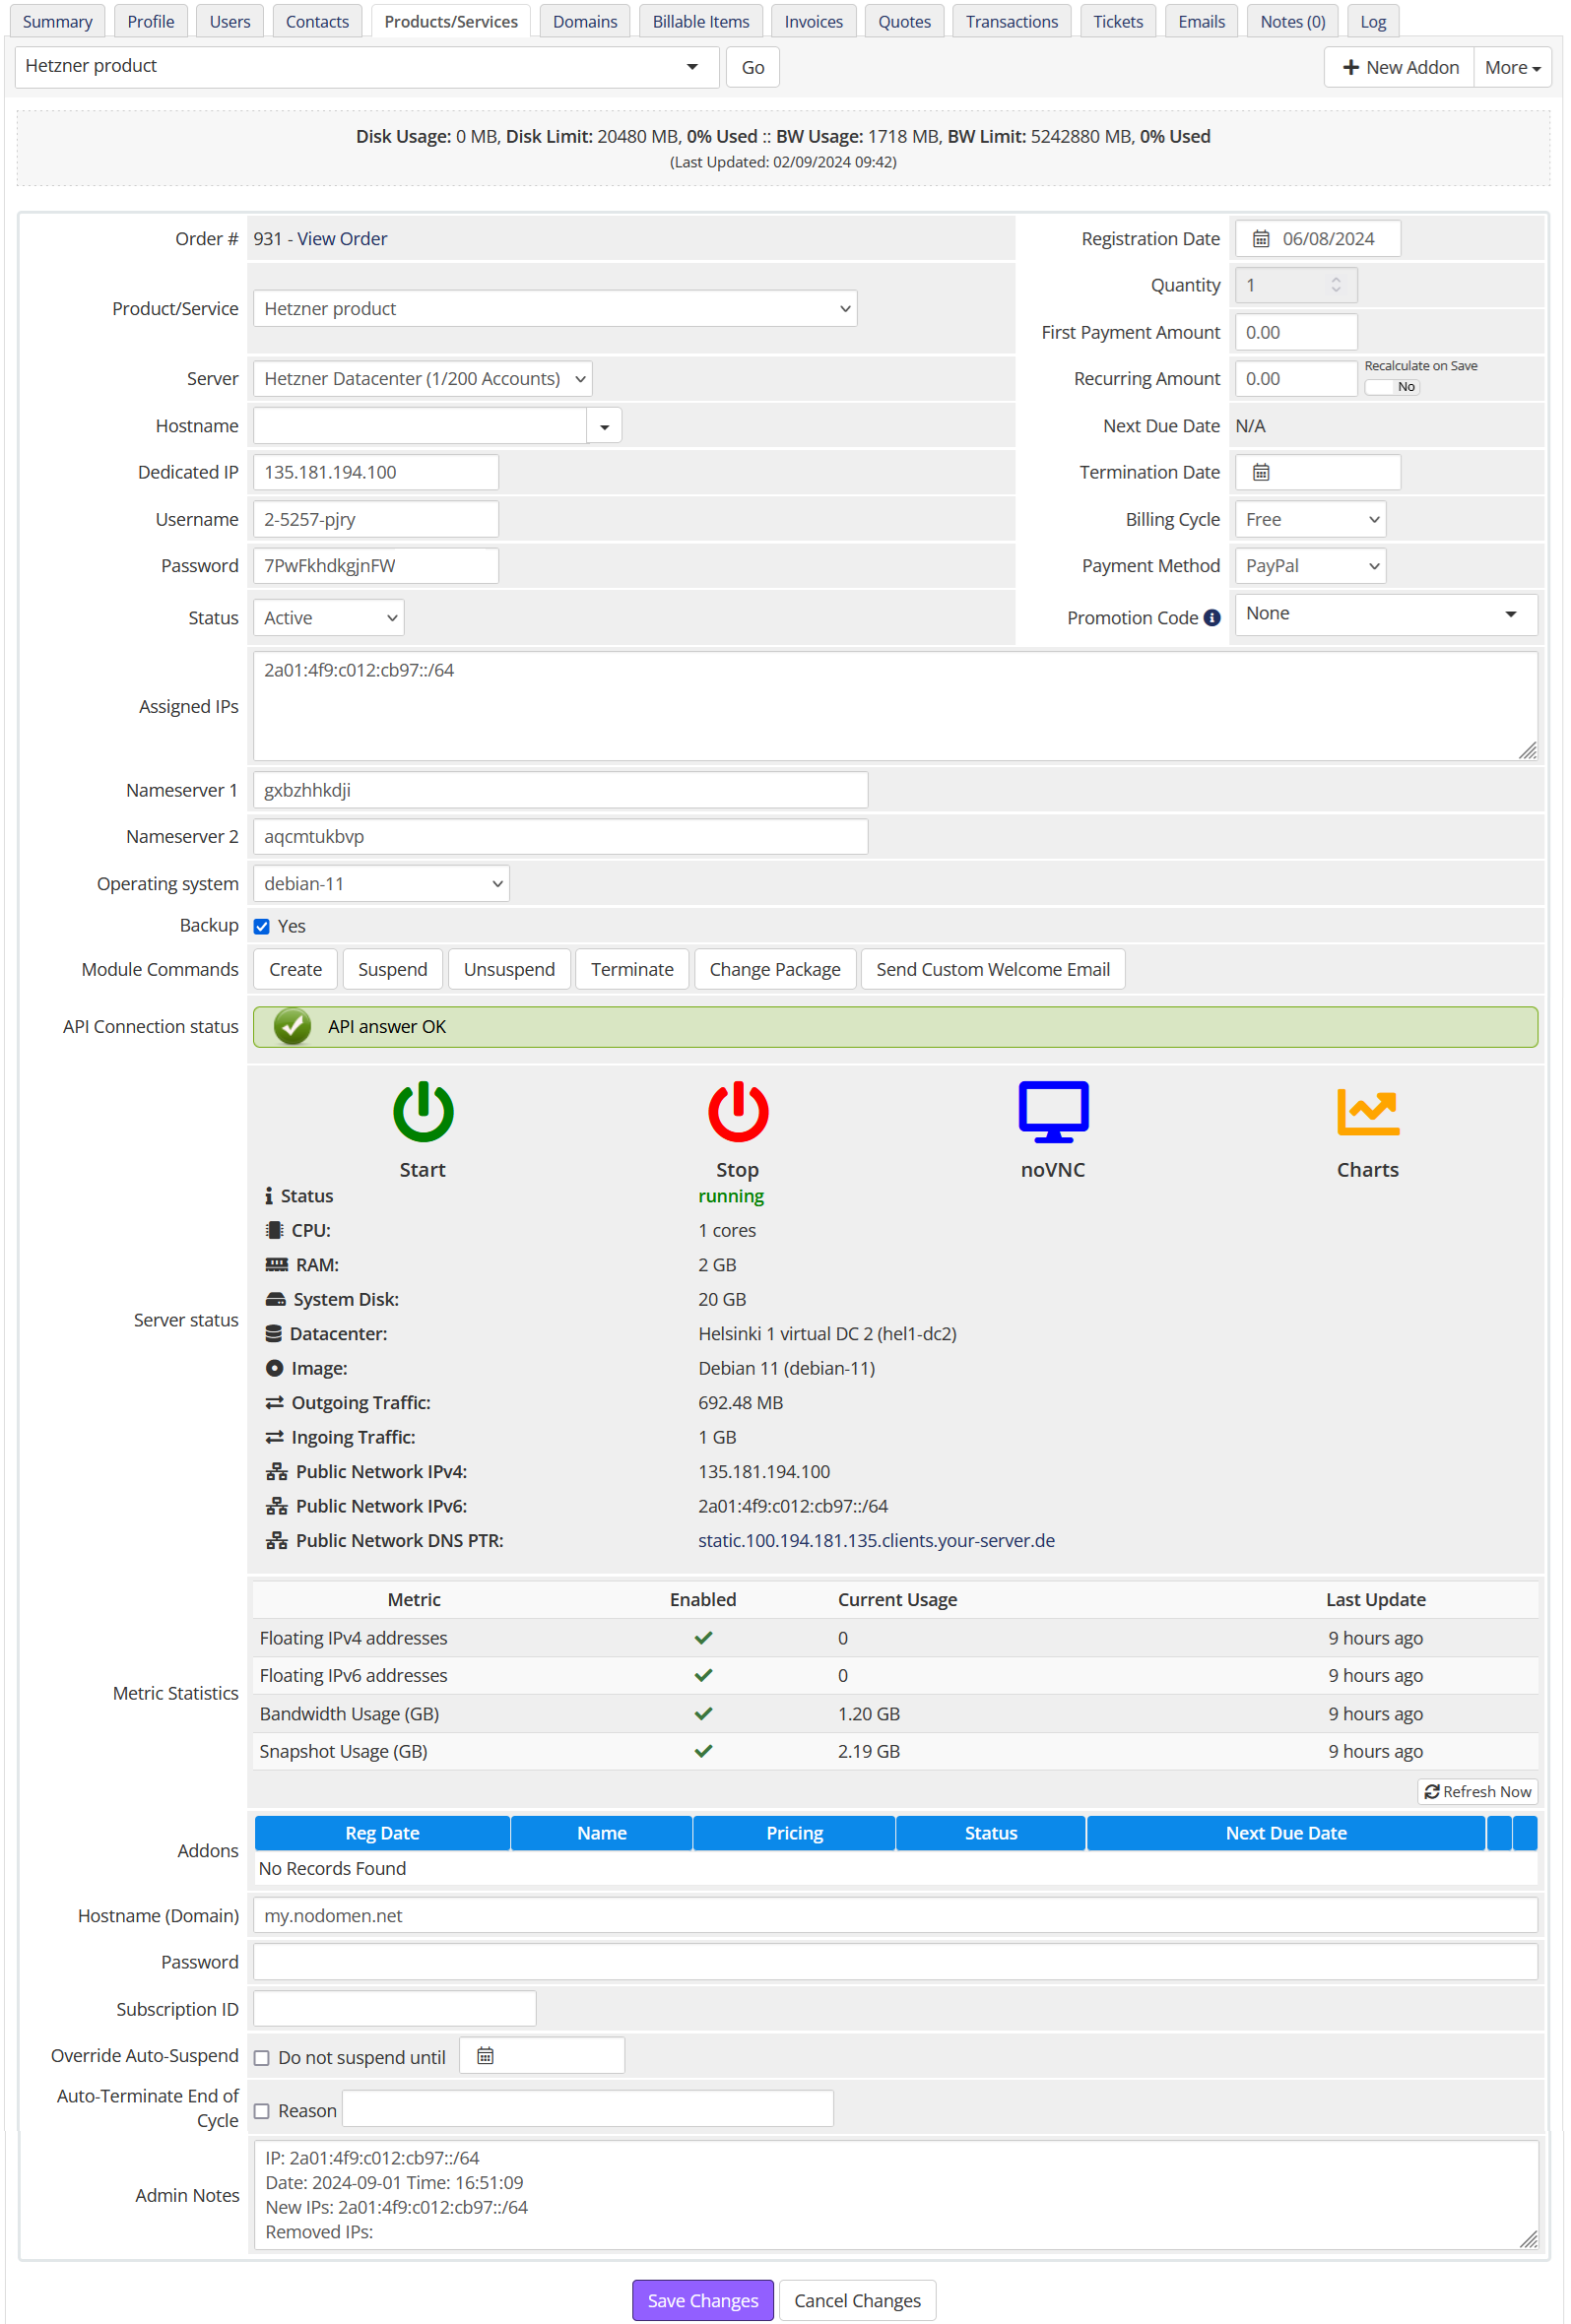
The "Product Information" section is a comprehensive dashboard that provides administrators with detailed information and control over a specific product or service associated with a user's account. This interface is critical for managing and troubleshooting the product, as well as for making configuration changes.
Key Elements:
-
Order Information:
- Order #: Displays the order number and provides a link to view the full order details.
- Product/Service: Specifies the name of the product or service (e.g., "Hetzner product").
- Server: Indicates the data center or server instance where the product is hosted.
-
User and Server Details:
- Hostname: The hostname assigned to the server.
- Dedicated IP: The public IP address assigned to the server.
- Username: The username associated with the server's access credentials.
- Password: The password field shows the encrypted password or a placeholder for the server’s access credentials.
- Status: The current status of the service (e.g., "Active").
- Assigned IPs: Lists both IPv4 and IPv6 addresses assigned to the server.
- Nameserver 1 & 2: The nameservers associated with the product.
- Operating System: The operating system installed on the server (e.g., "debian-11").
- Backup Option: Indicates whether the backup feature is enabled or disabled (in this case, "Yes").
-
Billing and Subscription Details:
- Registration Date: The date when the product or service was registered.
- Quantity: The quantity of the product or service being managed.
- First Payment Amount: The initial payment made for the service.
- Recurring Amount: The recurring cost associated with the service.
- Next Due Date: The next billing date for the service.
- Termination Date: If applicable, the date when the service is scheduled to be terminated.
- Billing Cycle: Indicates the billing cycle for the service (e.g., "Free").
- Payment Method: The payment method used for the service (e.g., "PayPal").
- Promotion Code: Displays any promotion code applied to the service.
-
Module Commands:
- API Connection Status: Displays the status of the API connection, which is necessary for managing the product through automated scripts or external systems. (e.g., "API answer OK").
- Commands: Provides buttons for creating, suspending, unsuspending, terminating the service, changing the package, and sending a custom welcome email.
-
Server Status:
- This section provides real-time status information about the server:
- Start/Stop: Indicates whether the server is running or stopped.
- CPU, RAM, and Disk Usage: Displays the resource usage statistics for the server.
- Datacenter: Indicates the data center location.
- Public Network IPs: Shows the public IPv4 and IPv6 addresses assigned to the server.
- Public Network DNS PTR: Displays the PTR record for reverse DNS.
- This section provides real-time status information about the server:
-
Metric Statistics:
- This section shows various usage metrics and their statuses, including:
- Floating IPv4/IPv6 addresses: Whether these are enabled and their current usage.
- Bandwidth Usage: The amount of bandwidth used.
- Snapshot Usage: The amount of disk space used by snapshots.
- A Refresh Now button allows updating the metrics to display the latest data.
- This section shows various usage metrics and their statuses, including:
-
Addons and Additional Information:
- Addons: Lists any additional services or features associated with the product.
- Hostname (Domain): Displays the domain associated with the product.
- Password: Shows the password or its placeholder.
- Subscription ID: Identifies the subscription tied to the service.
- Override Auto-Suspend: Allows the administrator to prevent the service from being automatically suspended.
- Auto-Terminate End of Cycle: Provides an option to terminate the service at the end of its billing cycle.
- Admin Notes: Allows the administrator to add any notes or information relevant to the management of the service.
-
Save or Cancel Changes:
- Save Changes: A purple button to save any changes made in this section.
- Cancel Changes: Allows the administrator to discard any modifications and revert to the previous settings.
IP Address Logging. The system now includes a mechanism that automatically tracks and logs all IP address changes. Every time a new IP address is added or an existing one is removed, a note is automatically added to the Admin Notes section. This note includes the date, time, and details of the IP changes. This feature ensures that all changes are documented for easy reference and auditing.
Product configuration in WHMCS
Hetzner Datacenter module WHMCS
Order now | Download | FAQ
License key: A pre-purchased license key for the "PUQ Hetzner Datacenter" module. For the module to work correctly, the key must be active.
Server name: This option allows you to add a prefix string to the server name. A new name will be generated each time the create account function is called. The NameServer will be present only if the field is set: NameServer-[*user_id*]-[*service_id*].
Server type: The type of server to be deployed. Selected from the available server types provided by Hetzner. This field is automatically populated based on your selection in Select Server and Location.
Server location: The physical location of the server. Selected from the available locations provided by Hetzner. This field is automatically populated based on your selection in Select Server and Location.
Server placement groups: Controls how the server should be grouped within the data center. This field is automatically populated based on your selection in Select Placement Group.
Server image: The operating system image to be used for the server. Automatically populated based on the selection in Select Image.
SSH keys: Keys used for accessing the server. Multiple keys can be added. Auto-populated based on the selection in Select SSH Keys.
Server networks: Networks to which the server will be connected. Auto-populated based on your selection in Private Networks.
Server firewalls: Firewall rules to be applied to the server. Select from predefined rules or create custom ones. Auto-populated based on the selection in Select Firewalls.
User data: Custom user data used during server creation (e.g., cloud-init). Field limit: 32KB.
Package setting: Additional settings for the package:
- Hide PTR open record: Hides the PTR control button in the client area.
- Not allow access to server on VNC/NC: Prohibits access to the server console.
- Not allow access to Charts: Hides server resource charts.
- Not allow reset password: Disables the password reset action for the service.
- Backup: Allows access to server backups. Select the name of the custom field (default: Backup).
- Snapshot: Allows access to server snapshots.
- Server labels: Adds labels to the server;
user_idandservice_idare added automatically. - Hide inputs on client area: Hides inputs (domain, password, username, nameserver1/2) and sets server label(s) in the client area.
- Firewall for suspend service: Select a firewall profile used when suspending the service (or disable the VM).
- Link to instruction: A documentation link displayed in the client area.
- Username as root: Use
rootas the administrative username (otherwise the image default is used).
Automatic Pricing & Rounding (UI)
The right-hand panel contains a live pricing tool for bulk price management. It keeps UI and backend pricing fully consistent.
- Base price (Net/Gross): Displays the Hetzner base price. Choose Net or Gross as a starting point.
- Percentage margin: Enter the markup applied to the Hetzner base price.
- Select currencies: Bulk-select one or more currencies for which prices will be generated.
- Select periods: Bulk-select billing cycles (Monthly, Quarterly, Semi-Annually, Annually, Biennially).
- Preview table: Prices recalculate instantly when Base price or Percentage changes.
- Apply Bulk Pricing: Updates or creates missing
tblpricingrows for the selected currencies and periods. - Automatically apply price daily: Enables daily synchronization via cron using the saved configuration.
- Rounding policy: Always round up according to ISO-4217 minor units (0/2/3 decimals). Monthly price is rounded first, then multiplied by the period factor and rounded again. The JS preview and server-side logic are identical.
- Currency source: Uses Hetzner Cloud API
/pricing.currency(no hard-coded EUR). Server JSON responses follow currency precision. - Expanded dropdown descriptions: Server selectors show name – architecture – cores – memory – disk for clarity.
Bulk pricing settings are persisted per product in available_servers_input (Base64 JSON) and merged safely without overwriting unrelated saved fields.
Daily Cron automation
- DailyCronJob respects the saved bulk pricing configuration.
- Fetches the latest Hetzner base price once per run and applies it to all selected currencies and periods.
- Creates missing
tblpricingrows and logs detailed status for each action (with trace identifiers in Module Log).
Admin Tools for Stock Management
- Clear and Reset: Restores
stockcontrolandqtyvalues in product configuration from the saved record. - restore_saved_stockcontrol (AJAX): Restores data from storage and removes the old entry. Logged states: input, not_found, updated_product, deleted_saved, done, error.
API Settings
Please pay attention to the order of filling in the API Settings section. Different locations expose different networks; some networks are not available in specific locations.
Select Server and Location: Choose the server type and location from the available options provided by Hetzner.
Select Image: Choose the operating system image for the server from the available options provided by Hetzner.
You can deploy services from your backups or snapshots to pre-configure solutions for clients.
Custom option name for image: Specify a custom option name for the server image if needed.
Custom option name for image is evaluated only during initial deployment. Pass the image name you want to use for server creation.
Allow user to select ISO image: Enable this option to allow users to select an ISO image.
Allow user to reinstall service: Enable this option to allow users to reinstall the service from the client area.
Allow user to choose backup and snapshot when reinstalling service: Enable this to let users select a backup/snapshot for reinstall.
When enabled, users can browse their snapshots and backups and reinstall the system directly from a chosen snapshot or backup.
Select Placement Group: Choose the placement group for the server from the available options provided by Hetzner.
Select SSH Keys: Choose the SSH keys used to access the server.
Public Networks: Configure public networking (enable/disable public IPv4 and IPv6).
If you turn off public networks, you must attach at least one private network.
Private Networks: Configure the private networks attached to the server.
Select Firewalls: Choose firewall rules to be applied to the server.
Email configuration:
Use pre-built templates to notify users about common actions:
- Custom Welcome Email
- Custom start stop service Email
- Custom reset server password Email
- Custom snapshot action Email
- Custom backup action Email
- Custom ISO action Email
- Custom reinstall action service Email
Metric Billing:
- Floating IPv4 addresses: Configure pricing for floating IPv4 addresses.
- Floating IPv6 addresses: Configure pricing for floating IPv6 addresses.
- Bandwidth Usage (GB): Configure pricing for bandwidth usage.
- Snapshot Usage (GB): Configure pricing for snapshot storage/usage.