Setup guide: WHMCS setup
Jellyfin module WHMCS
Order now | Download | FAQ
1. Download the latest version of the module.
PHP 8.1
wget http://download.puqcloud.com/WHMCS/servers/PUQ_WHMCS-Jellyfin/PUQ_WHMCS-Jellyfin-latest.zipPHP 7.4
wget http://download.puqcloud.com/WHMCS/servers/PUQ_WHMCS-Jellyfin/php74/PUQ_WHMCS-Jellyfin-latest.zipAll versions are available via link: http://download.puqcloud.com/WHMCS/servers/PUQ_WHMCS-Jellyfin/
2. Unzip the archive with the module.
unzip PUQ_WHMCS-Jellyfin-latest.zip3. Copy "puqJellyfin" to "WHMCS_WEB_DIR/modules/servers/"
4. Create new server Jellyfin in WHMCS (System Settings->Products/Services->Servers)
System Settings->Servers->Add New Server- Enter the correct Name and Hostname
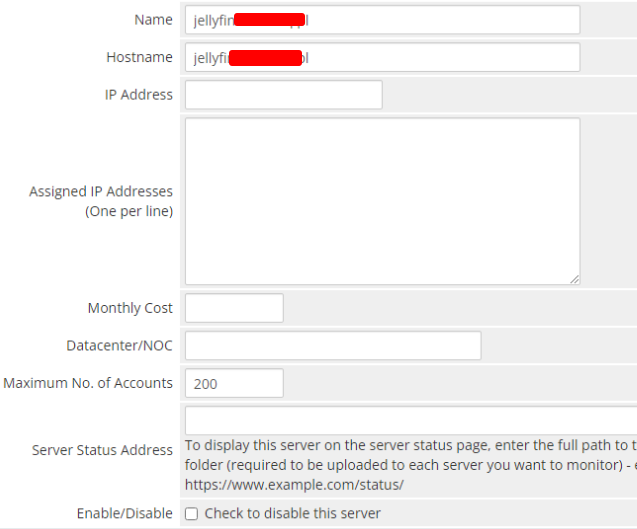
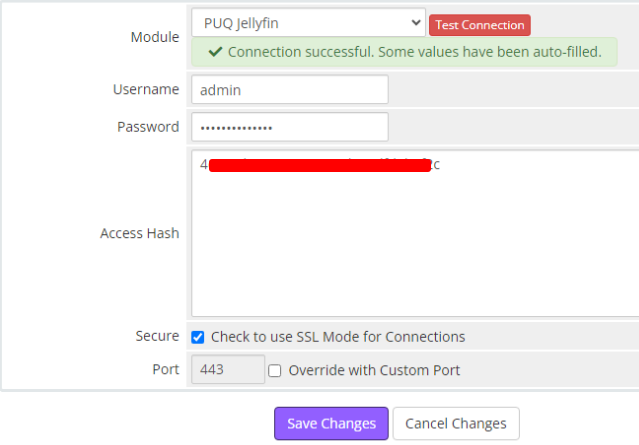
- In the Server Details section, select the "PUQ Jellyfin" module and enter the correct username, password and access hash (API key) for the Jellyfin web interface.
- To check, click the "Test connection" button
5. Create a new Products/Services
System Settings->Products/Services->Create a New ProductIn the Module settings section, select the "PUQ Jellyfin" module
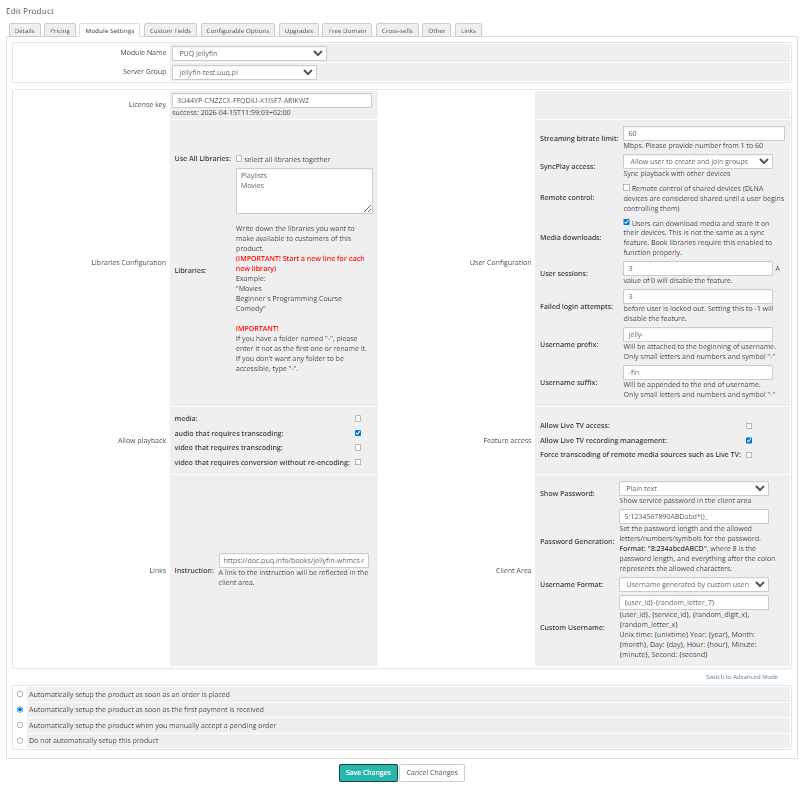
- License key: A pre-purchased license key for the "PUQ Jellyfin" module. For the module to work correctly, the key must be active
Libraries:
- Use All Libraries: Choosing all of libraries from your Jellyfin server
- Libraries: The libraries you want to make available to customers of this product.
(IMPORTANT! Start a new line for each new library)
Example:
"Movies
Beginner`s Programming Course
Comedy"
IMPORTANT!
If you have a folder named "-", please enter it not as the first one or rename it.
If you don't want any folder to be accessible, type "-".
User Configuration:
- Streaming bitrate limit: An optional per-stream bitrate limit for all out of network devices. This is useful to prevent devices from requesting a higher bitrate than your internet connection can handle. This may result in increased CPU load on your server in order to transcode videos on the fly to a lower bitrate.
- SyncPlay access: The SyncPlay feature enables to sync playback with other devices. Select the level of access this user has to the SyncPlay
- Remote control: Remote control of shared devices (DLNA devices are considered shared until a user begins controlling them)
- Media downloads: Users can download media and store it on their devices. This is not the same as a sync feature. Book libraries require this enabled to function properly.
- User sessions: Set the maximum number of simultaneous user sessions.
A value of 0 will disable the feature.
- Failed login attempts: Determine how many incorrect login tries can be made before lockout occurs.
A value of zero means inheriting the default of three tries for normal users and five for administrators. Setting this to -1 will disable the feature.
- Username prefix/Username suffix: Necessary in order to generate a username for the service, in the format: prefix<client_id>-<service_id>suffix
Allow playback (Restricting access to transcoding may cause playback failures in clients due to unsupported media formats)
- media
- audio that requires transcoding
- video that requires transcoding
- video that requires conversion without re-encoding
Feature access:
- Allow Live TV access
- Allow Live TV recording management
- Force transcoding of remote media sources such as Live TV
Links
- Link to instruction: Link to the instruction, if filled out, it will be reflected in the client area
Client Area
-
Show Password – Show the service password in the client area.
-
Password Generation – Set the password length and the allowed letters/numbers/symbols for the password.
Format:"8:234abcdABCD", where8is the password length, and everything after the colon represents the allowed characters. -
Username Format – Define the format for username generation:
-
-
Standard – prefix-client_id-service_id-suffix
-
Custom – username generated by a custom rule
-
-
-
Custom Username – Set a rule for generating a custom username.