Setup guide: WHMCS preparation and configuration
Mikrotik VPN module WHMCS
Order now | Download | FAQ
System requirements
The module is encoded with ionCube.
Requirements:
-
PHP 8.2 or higher
-
WHMCS 9.x or higher
-
ionCube Loader v13 or newer (v14, v15)
Older module versions for WHMCS 8
Older versions of the module are stored by PHP version in separate directories:
PHP 7.4
https://download.puqcloud.com/WHMCS/servers/PUQ_WHMCS-Mikrotik-VPN/php74/
PHP 8.1
https://download.puqcloud.com/WHMCS/servers/PUQ_WHMCS-Mikrotik-VPN/php81/
To install and update a module, you must perform one and the same action.
1. Download the latest version of the module.
wget https://download.puqcloud.com/WHMCS/servers/PUQ_WHMCS-Mikrotik-VPN/php82/PUQ_WHMCS-Mikrotik-VPN-latest.zipAll versions are available via link: http://download.puqcloud.com/WHMCS/servers/PUQ_WHMCS-Mikrotik-VPN/
2. Unzip the archive with the module.
unzip PUQ_WHMCS-Mikrotik-VPN-latest.zip 3. Copy and Replace "puqMikrotikVPN" to "WHMCS_WEB_DIR/modules/servers/"
4. Create new server Mikrotik in WHMCS (System Settings->Products/Services->Servers)
System Settings->Servers->Add New Server- Enter the correct Name and Hostname
- In the "Assigned IP Addresses field", enter a list of IP addresses that will be issued to users.

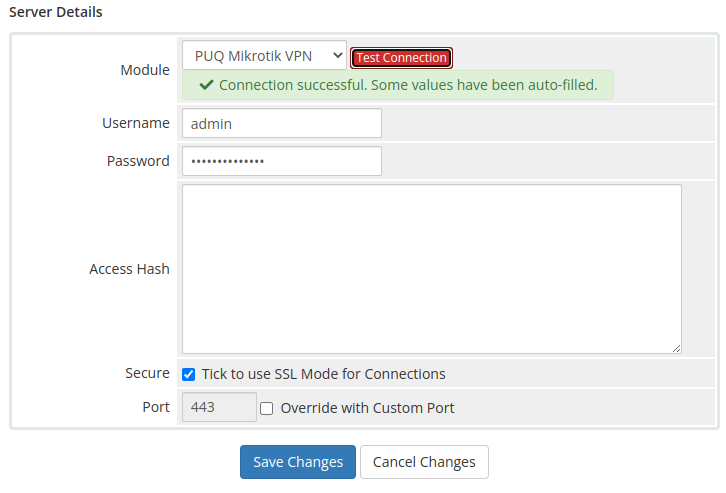
- In the Server Details section, select the "PUQ Mikrotik VPN" module and enter the correct username and password for the Mikrotik router.
- To check, click the "Test connection" button
5. Create a new Products/Services
System Settings->Products/Services->Create a New ProductIn the Module settings section, select the "PUQ mikrotik VPN" module
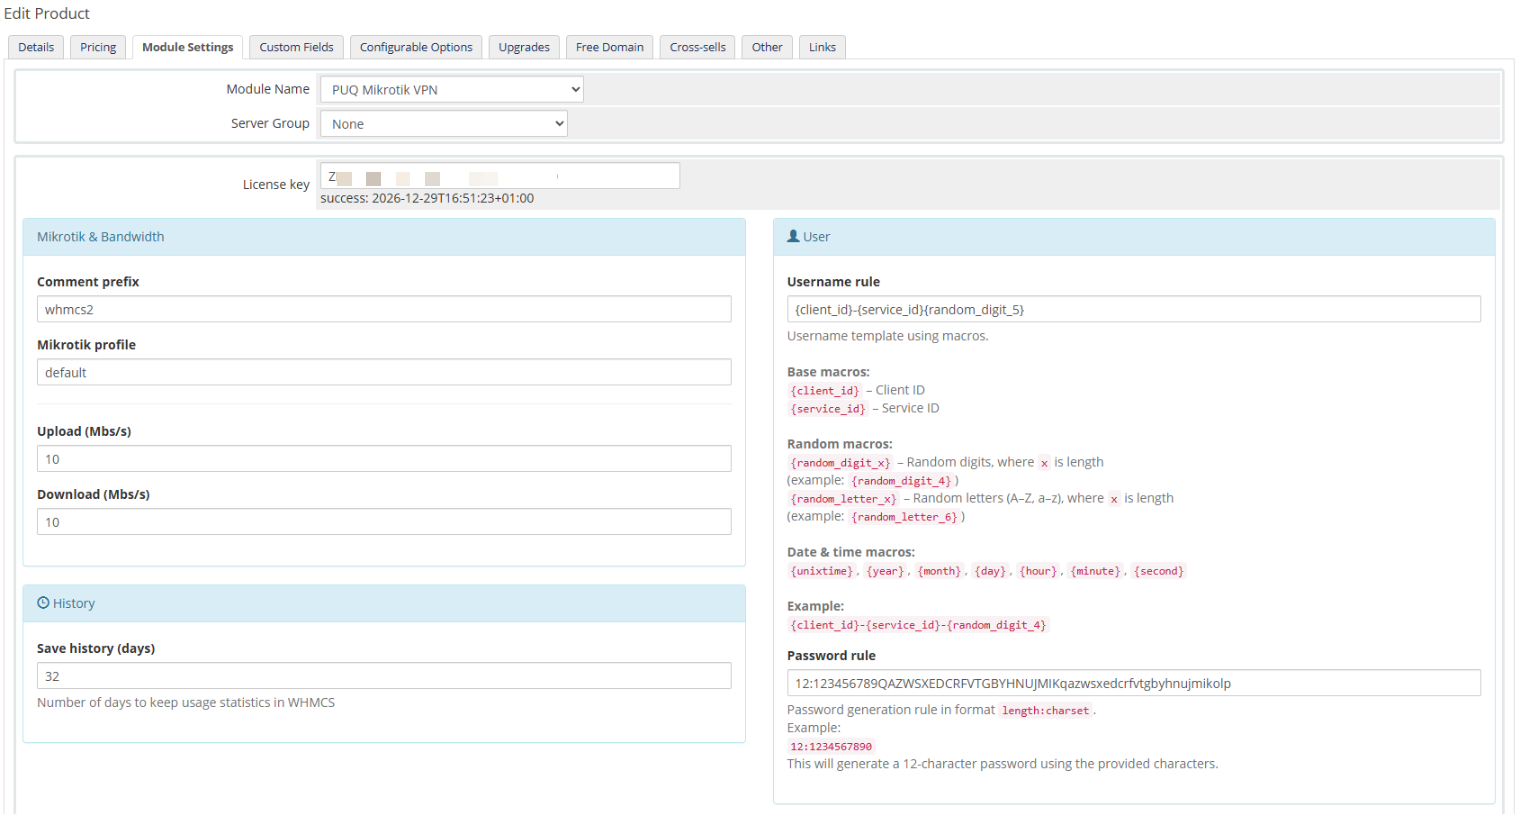
- License key: A pre-purchased license key for the "PUQ Mikrotik VPN" module. For the module to work correctly, the key must be active
- Comment PREFIX: The prefix that will be added to the VPN user's comment on the Mikrotik router
- Profile: PPP secret profile on mikrotik router
- Service: A service that will be available to a VPN user on a Mikrotik router
- Bandwidth Download: Download Bandwidth Limit in M/s
- Bandwidth Upload: Upload Bandwidth Limit M/s
- Traffic One Time/Monthly in GB/Traffic Quarterly in GB/Traffic Semi-Annually in GB/Traffic Annually in GB/Traffic Biennially in GB/Traffic Triennially in GB : Packet traffic that will be added to the balance every billing period, respectively
- Save traffic history (days): The number of days it takes to save user traffic usage statistics
- User notification traffic limit email template: The template of the letter that will be sent to the client if the remaining traffic is less than XXX
- Notification traffic remainder less than X GB: The amount of traffic on the client's balance below which a notification will be sent.
- Suspend exceeding traffic limit email template: The template of the letter that will be sent to the client if his traffic balance is 0 or less 0
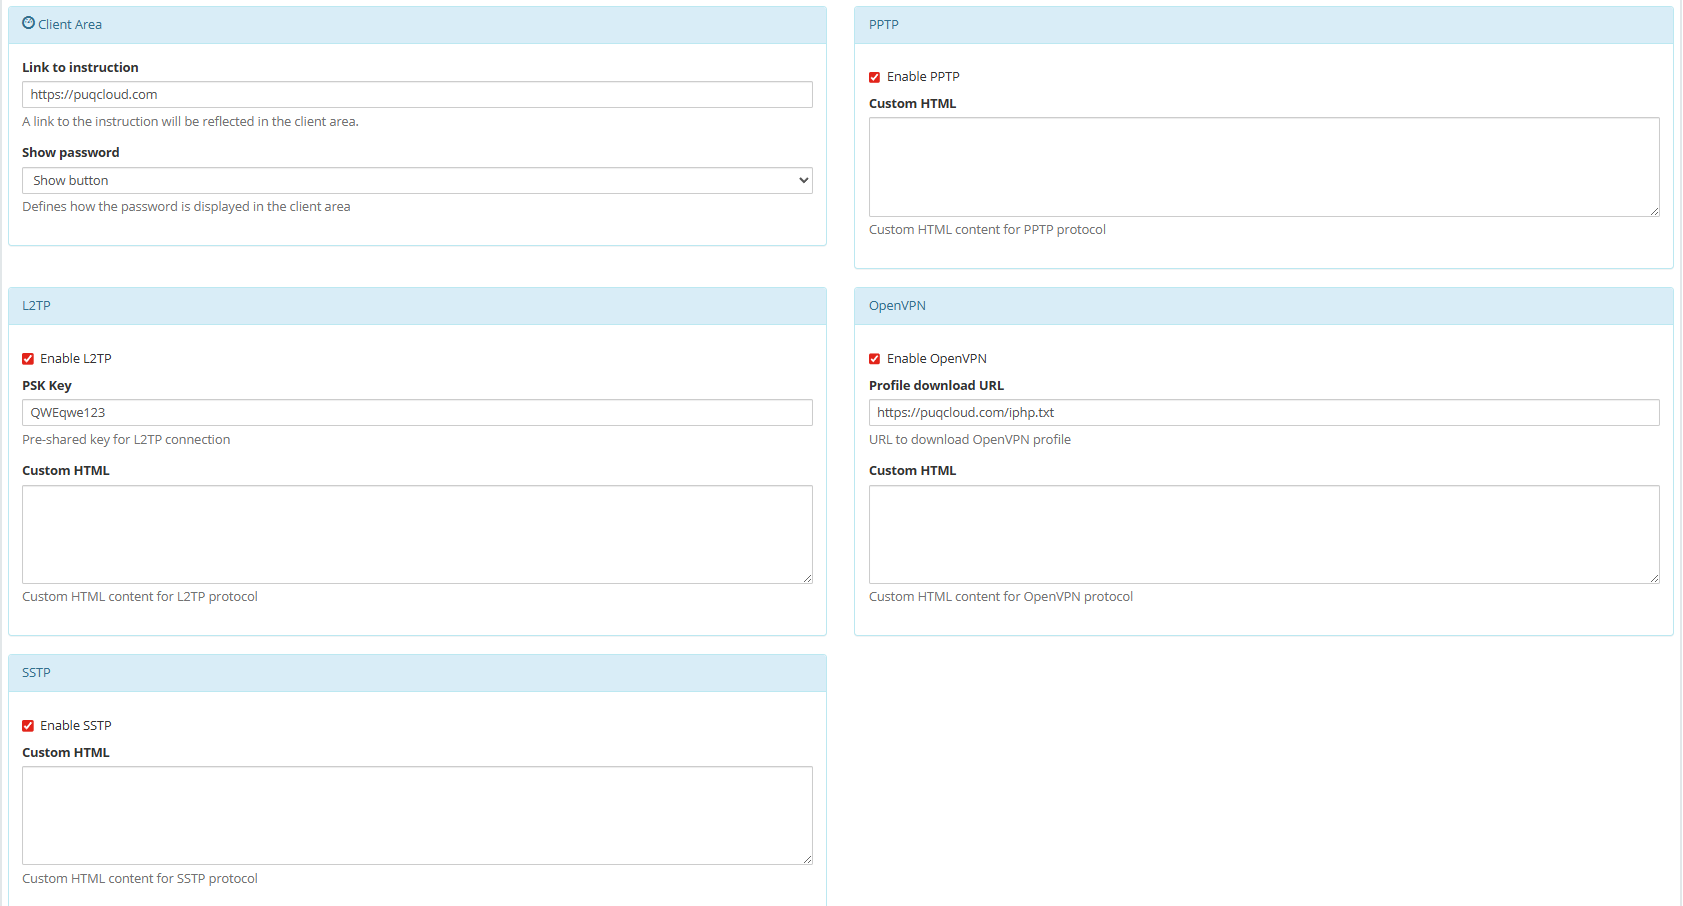
- Link to instruction: Link to the instruction, if filled out, it will be reflected in the client area
- Support PPtP/Support L2TP: If checked, it will be reflected in the client zone
- L2TP IPSec PSK key: it will be reflected in the client zone