# Client Area
# Product Home Screen
### Mikrotik WireGuard Business-VPN module **[WISECP](https://puqcloud.com/link.php?id=78)**
##### [Order now](https://puqcloud.com/index.php?rp=/store/wisecp-module-mikrotik-wireguard-business-vpn) | [Download](https://download.puqcloud.com/WISECP/Product/PUQ_WISECP-Mikrotik-WireGuard-Business-VPN/) | [FAQ](https://faq.puqcloud.com/)
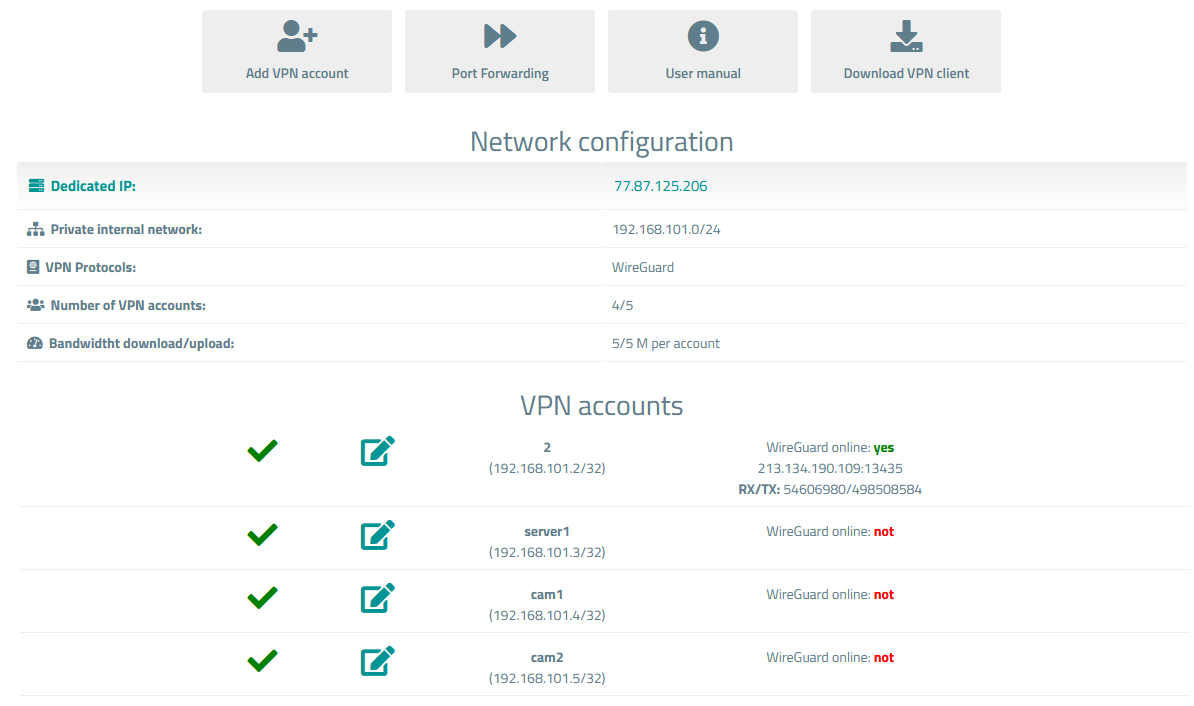
##### Available options in the client panel:
- VPN Account Creation Button
- Port Forwarding Management Button
- Links in the form of buttons to the instruction and VPN clients
- General information about the service
- List of VPN Users Encrypted by the Client with Status and Edit Button
##### Screenshot of the client area
[](https://doc.puq.info/uploads/images/gallery/2023-11/image-1700926025317.png)
# Add VPN account
### Mikrotik WireGuard Business-VPN module **[WISECP](https://puqcloud.com/link.php?id=78)**
##### [Order now](https://puqcloud.com/index.php?rp=/store/wisecp-module-mikrotik-wireguard-business-vpn) | [Download](https://download.puqcloud.com/WISECP/Product/PUQ_WISECP-Mikrotik-WireGuard-Business-VPN/) | [FAQ](https://faq.puqcloud.com/)
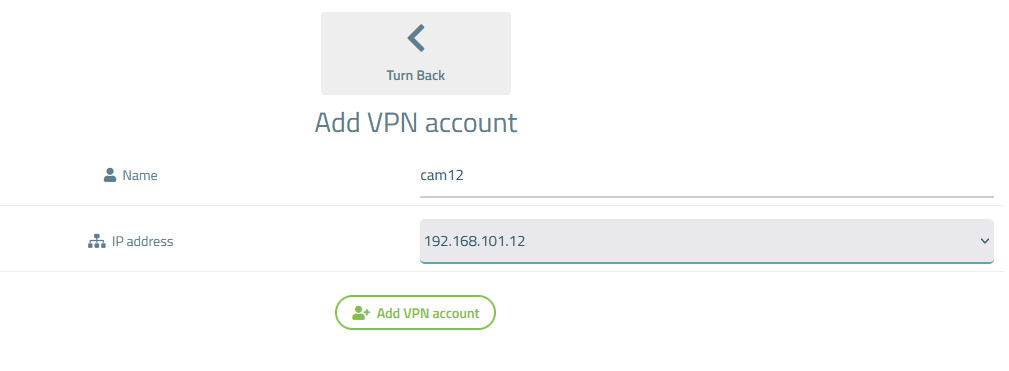
To create a new VPN account, you need to click on the **"Add VPN Account"** button on the main screen of the product.
[](https://doc.puq.info/uploads/images/gallery/2023-11/image-1700926595587.png)
In the opened window, you need to enter the account name for identification, as well as select an IP address for the account that the account will use. Don't forget to click the **"Add VPN Account"** button.
[](https://doc.puq.info/uploads/images/gallery/2023-11/image-1700926729715.png)
# Port Forwarding
### Mikrotik WireGuard Business-VPN module **[WISECP](https://puqcloud.com/link.php?id=78)**
##### [Order now](https://puqcloud.com/index.php?rp=/store/wisecp-module-mikrotik-wireguard-business-vpn) | [Download](https://download.puqcloud.com/WISECP/Product/PUQ_WISECP-Mikrotik-WireGuard-Business-VPN/) | [FAQ](https://faq.puqcloud.com/)
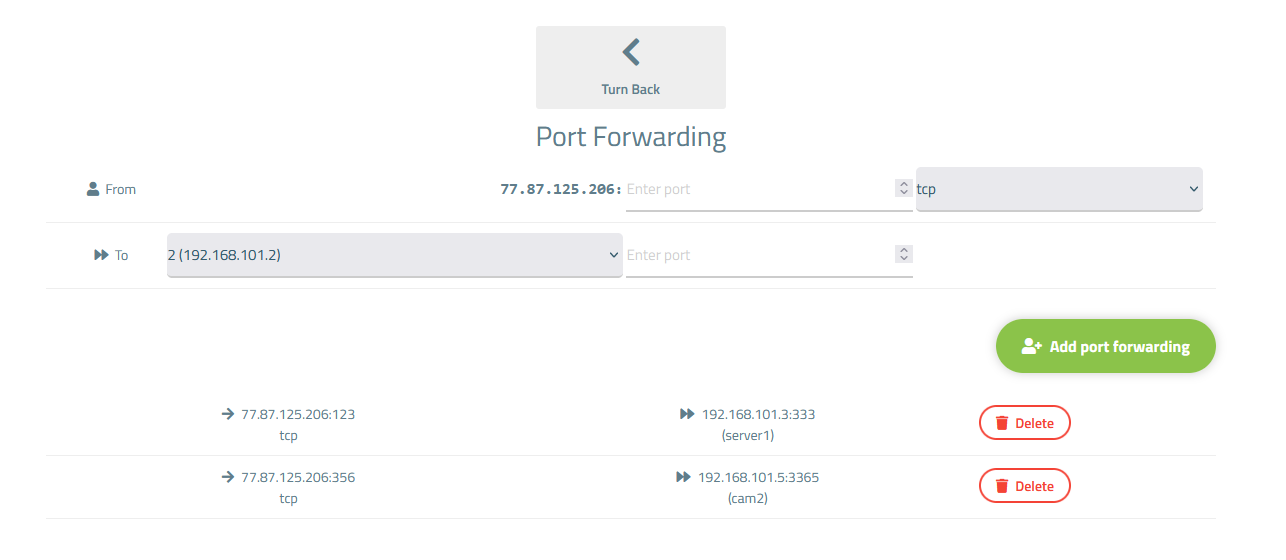
To access the port forwarding settings, you need to click on the **"Port Forwarding"** button on the main screen of the product.
[](https://doc.puq.info/uploads/images/gallery/2023-11/image-1700926797237.png)
To create a new port forwarding rule, enter the port you want to forward, select the protocol, choose the VPN account from the dropdown list to which the port will be forwarded, and enter the port to which the forwarding will occur. After filling in the details, press the **"Add Port Forwarding"** button.
[](https://doc.puq.info/uploads/images/gallery/2023-11/image-1700926871159.png)
To delete an existing rule, you need to click the "**Delete**" button next to the rule you want to remove.