Installation and configuration guide
- Setup (install/update)
- License Activation
- Mikrotik preparation and configuration
- Add server (Mikrotik) in WISECP
- Service/Product configuration
Setup (install/update)
Mikrotik WireGuard VPN module WISECP
Order now | Download | FAQ
To install and update a module, you must perform one and the same action.
1. Download the latest version of the module.
wget https://download.puqcloud.com/WISECP/Product/PUQ_WISECP-Mikrotik-WireGuard-VPN/php81/PUQ_WISECP-Mikrotik-WireGuard-VPN-latest.zipAll versions are available: https://download.puqcloud.com/WISECP/Product/PUQ_WISECP-Mikrotik-WireGuard-VPN/
2. Unzip the archive with the module.
unzip PUQ_WISECP-Mikrotik-WireGuard-VPN-latest.zip3. Copy and Replace "puqMikrotikWireGuardVPN" from "PUQ_WISECP-Mikrotik-WireGuard-VPN" to "WISECP_WEB_DIR/coremio/modules/Product/"
License Activation
Mikrotik WireGuard VPN module WISECP
Order now | Download | FAQ
1. Log in to the administrative area of your WISECP.
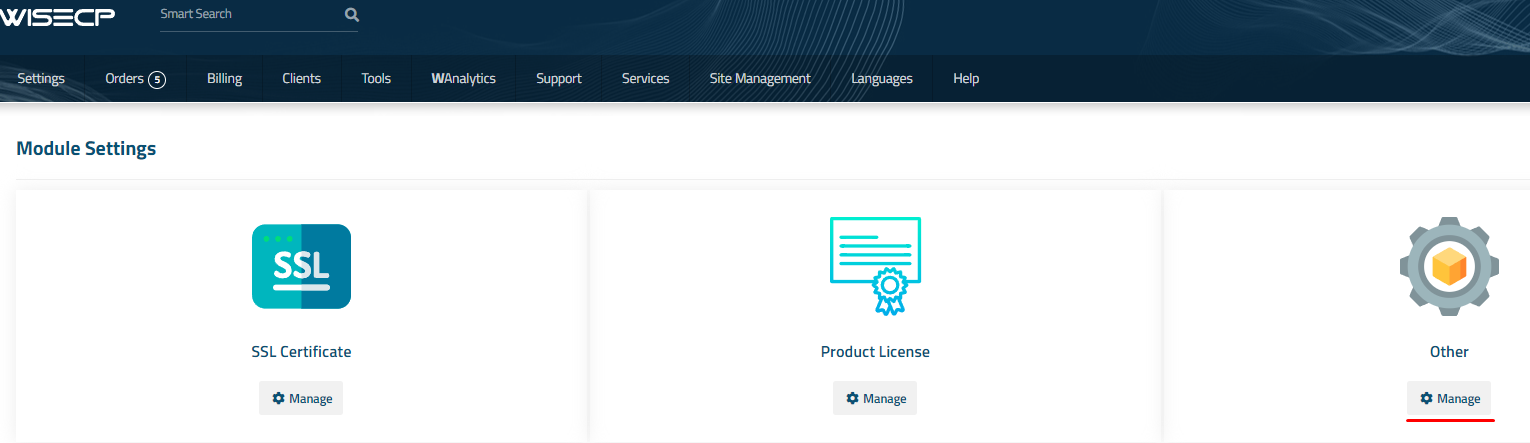
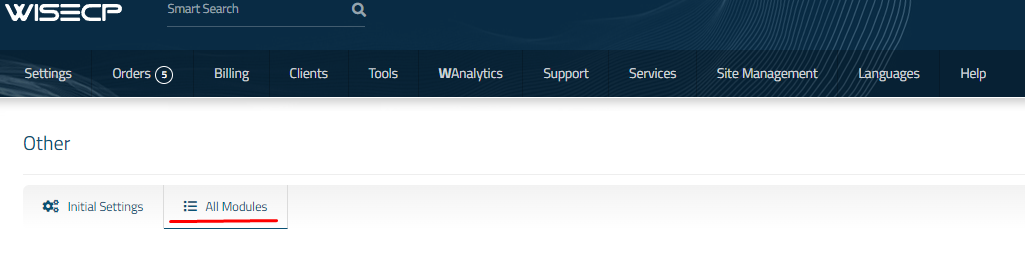
2. Go to module configuration.
Services -> Service Management -> Module Settings -> Other -> All Modules -> PUQ Mikrotik WireGuard VPN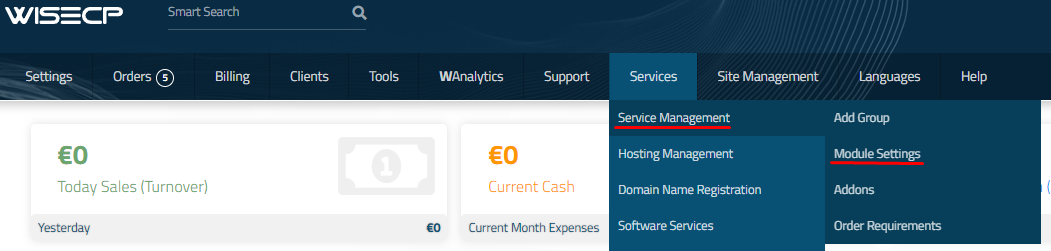
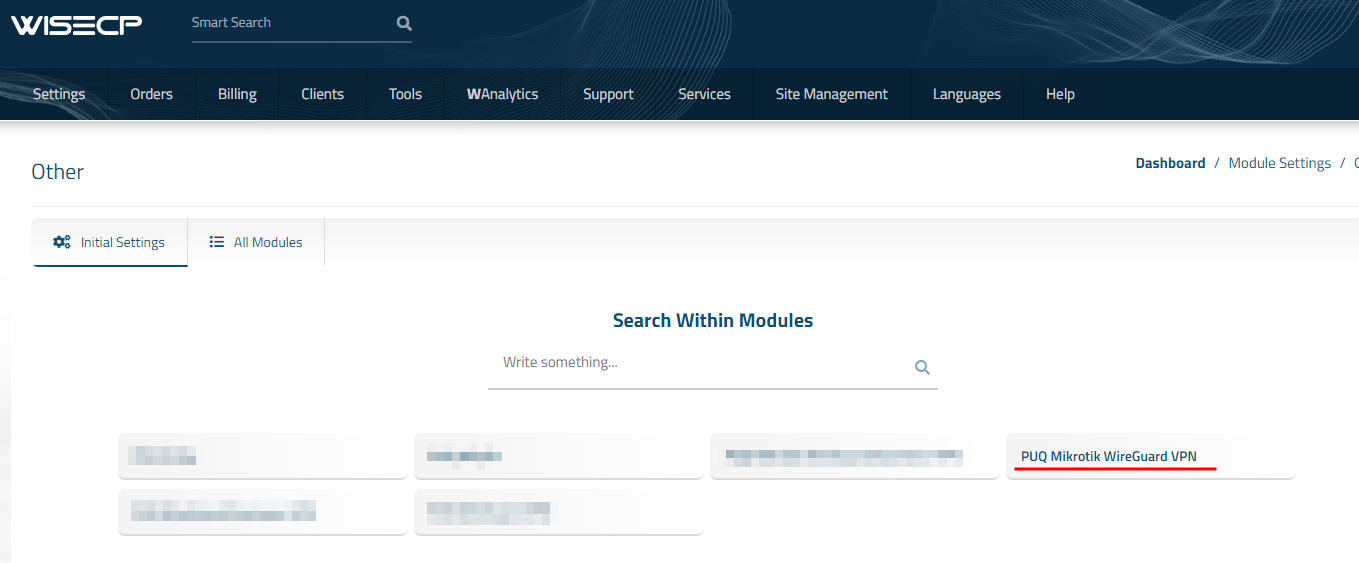
3. On the open page, enter the purchased license key for this product and click the 'Check and Save' button to validate the key and save it.

Mikrotik preparation and configuration
Mikrotik WireGuard VPN module WISECP
Order now | Download | FAQ
Note: Enter the following commands one by one and wait for the command to complete.
Check RouterOS version
Make sure that the version of RouterOS is 7+
system/package/print Enabling HTTPS Create your own root CA on your router
/certificate
add name=LocalCA common-name=LocalCA key-usage=key-cert-sign,crl-sign
Sign the newly created CA certificate
/certificate
sign LocalCA
Create a new certificate for Webfig (non-root certificate)
Note: as common-name=XXX.XXX.XXX.XXX You enter public IP adddress of the router.
/certificate
add name=Webfig common-name=XXX.XXX.XXX.XXX
Sign the newly created certificate for Webfig
/certificate
sign Webfig ca=LocalCA
Enable SSL (www-ssl) and specify to use the newly created certificate for Webfig
/ip service
set www-ssl certificate=Webfig disabled=no
Enable api-ssl and specify to use the newly created certificate for Webfig
 /ip service
 set api-ssl certificate=Webfig disabled=no
Enable WireGuard VPN server

Add IP address on Wireguard interface

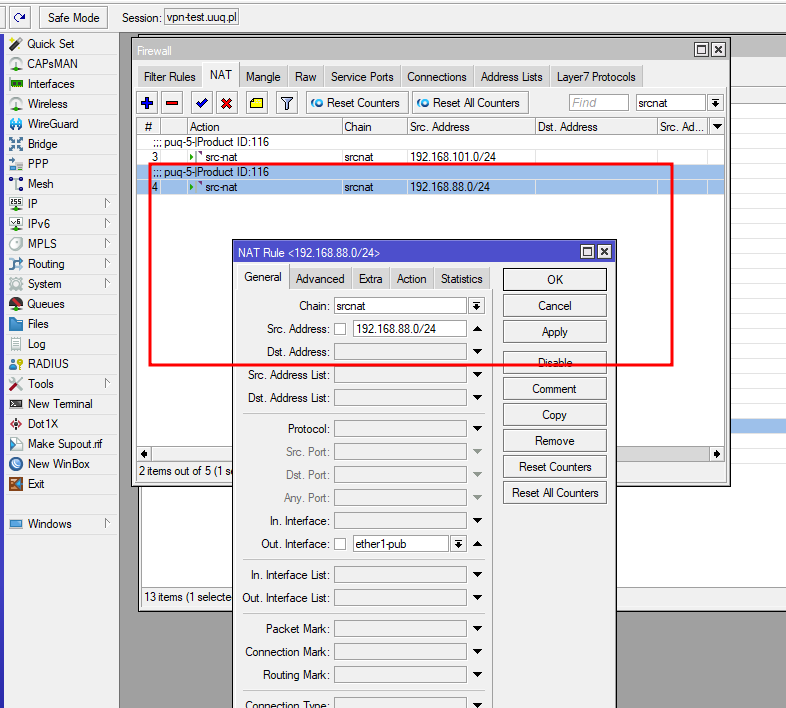
Configuring NAT rules on the firewall
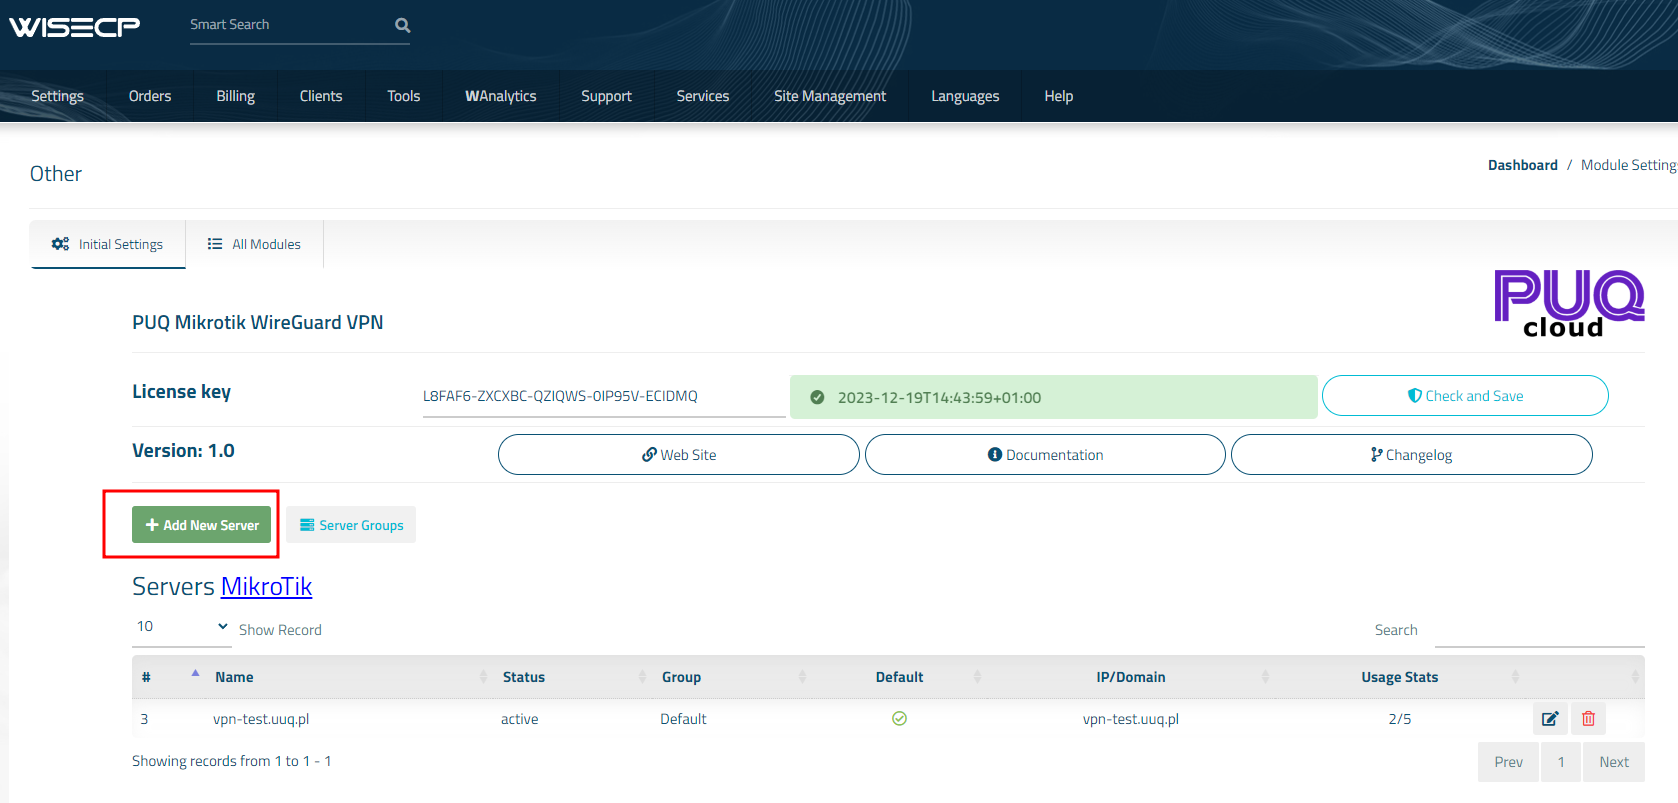
Add server (Mikrotik) in WISECP
Mikrotik WireGuard VPN module WISECP
Order now | Download | FAQ
1. Log in to the administrative area of your WISECP.
2. Go to module configuration.
Services -> Service Management -> Module Settings -> Other -> All Modules -> PUQ Mikrotik WireGuard VPN
3. In the opened page, click the 'Add Server' button.
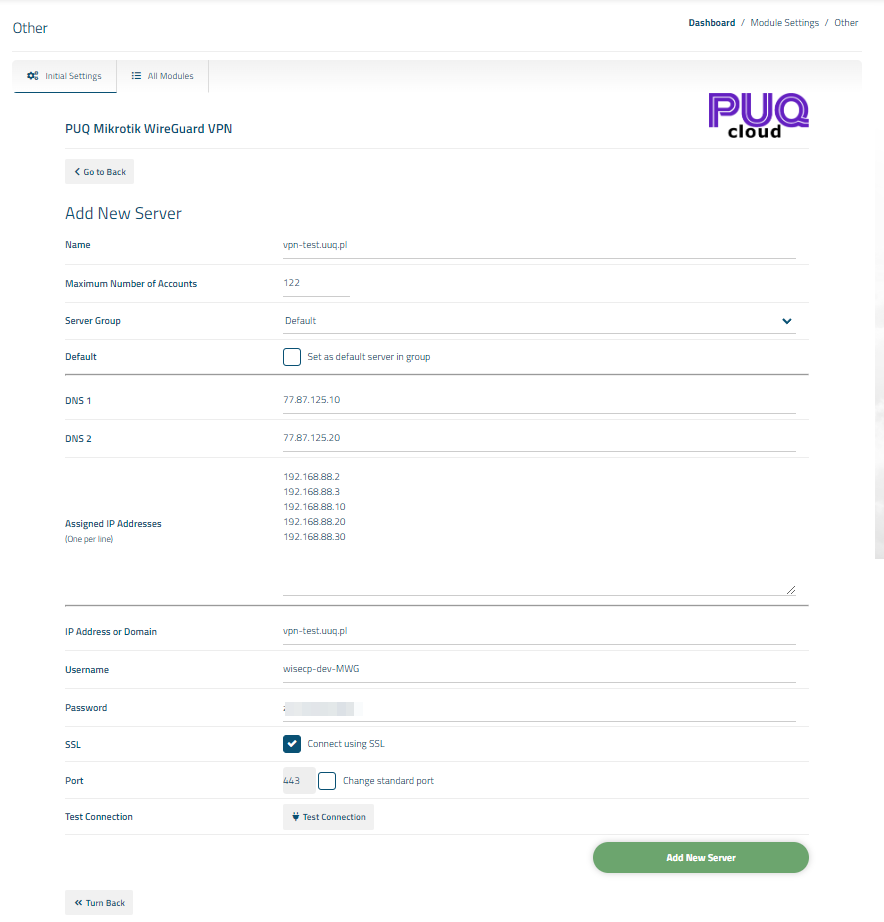
4. On the opened page, enter all the necessary information:
- Name: Displayed name of the server.
- Maximum Number of Accounts: The number of services that can be on this server.
- Server Group: Optionally, choose the server group.
- DNS 1 and DNS 2: are DNS servers that will be specified in the configuration of WireGuard clients.
- Assigned IP Addresses: a list of IP addresses that will be assigned to WireGuard VPN clients, with each address on a new line.
- IP Address or Domain: The address of the MikroTik router you are connecting to.
- Username: is the username for the account on MikroTik.
- Password: is the password for the account on MikroTik.
- Check the SSL box if you want to use SSL-encrypted connection. If necessary, specify the port and perform a connection test.
Service/Product configuration
Mikrotik WireGuard VPN module WISECP
Order now | Download | FAQ
If you do not have a Service Group where you want to place the new service, you need to create a new Service Group
1. Log in to the administrative area of your WISECP.
2. Create New Service Group
Go to
Services -> Service Management -> Add Group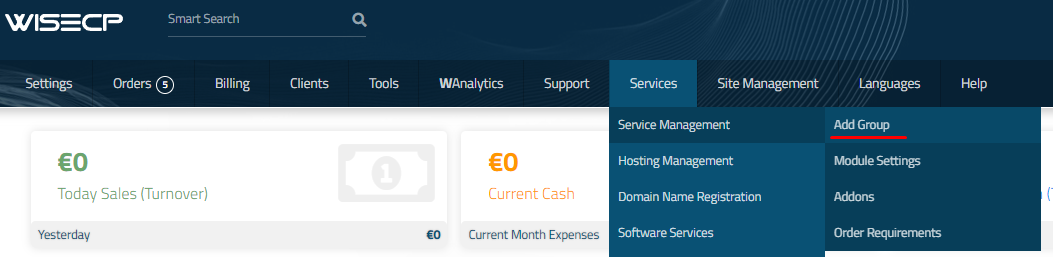
Enter all the necessary data and click the 'Create Group' button.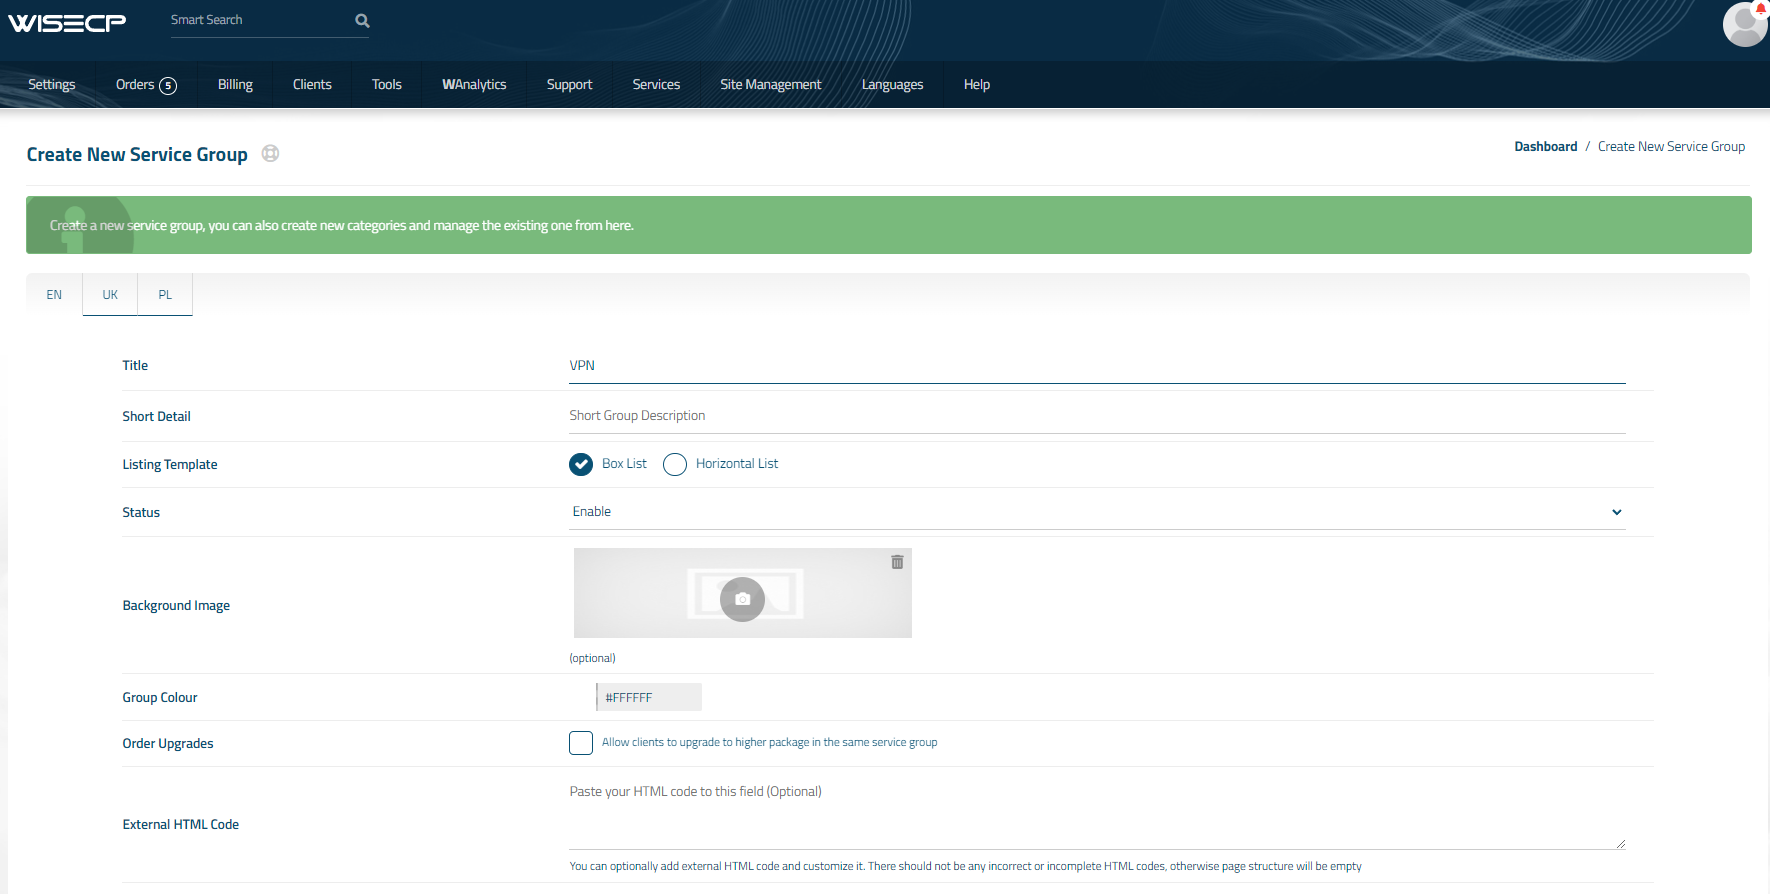
3. Adding a New Service
Go to
Services -> our service group where you need to add the new service.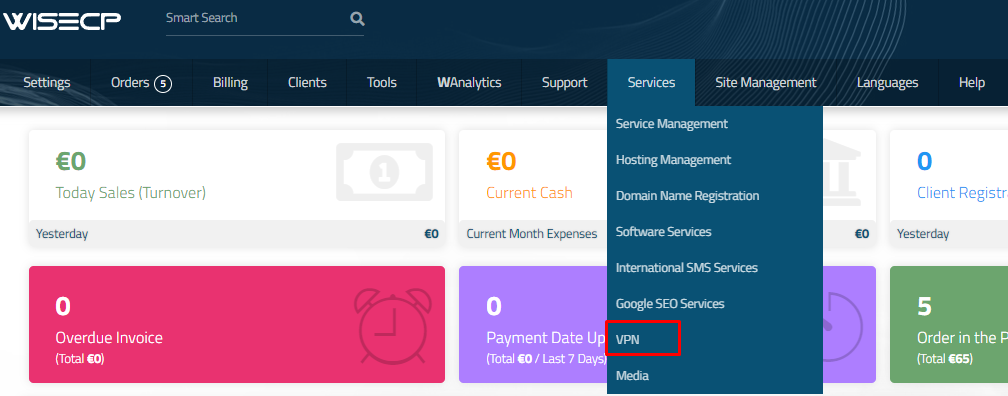
In the opened window, click the 'Create New Service' button.
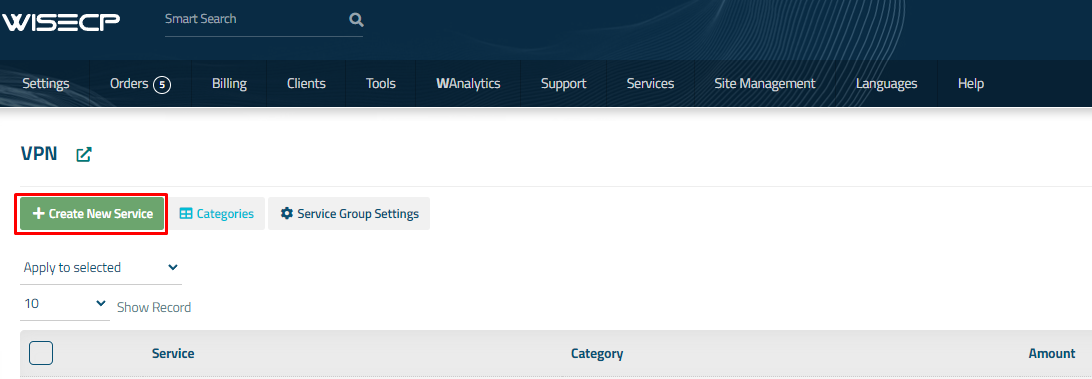
On the opened page, enter all the necessary details for your new service and navigate to the 'Core' tab.
Select the 'PUQ Mikrotik WireGuard VPN' module from the drop-down list of modules.
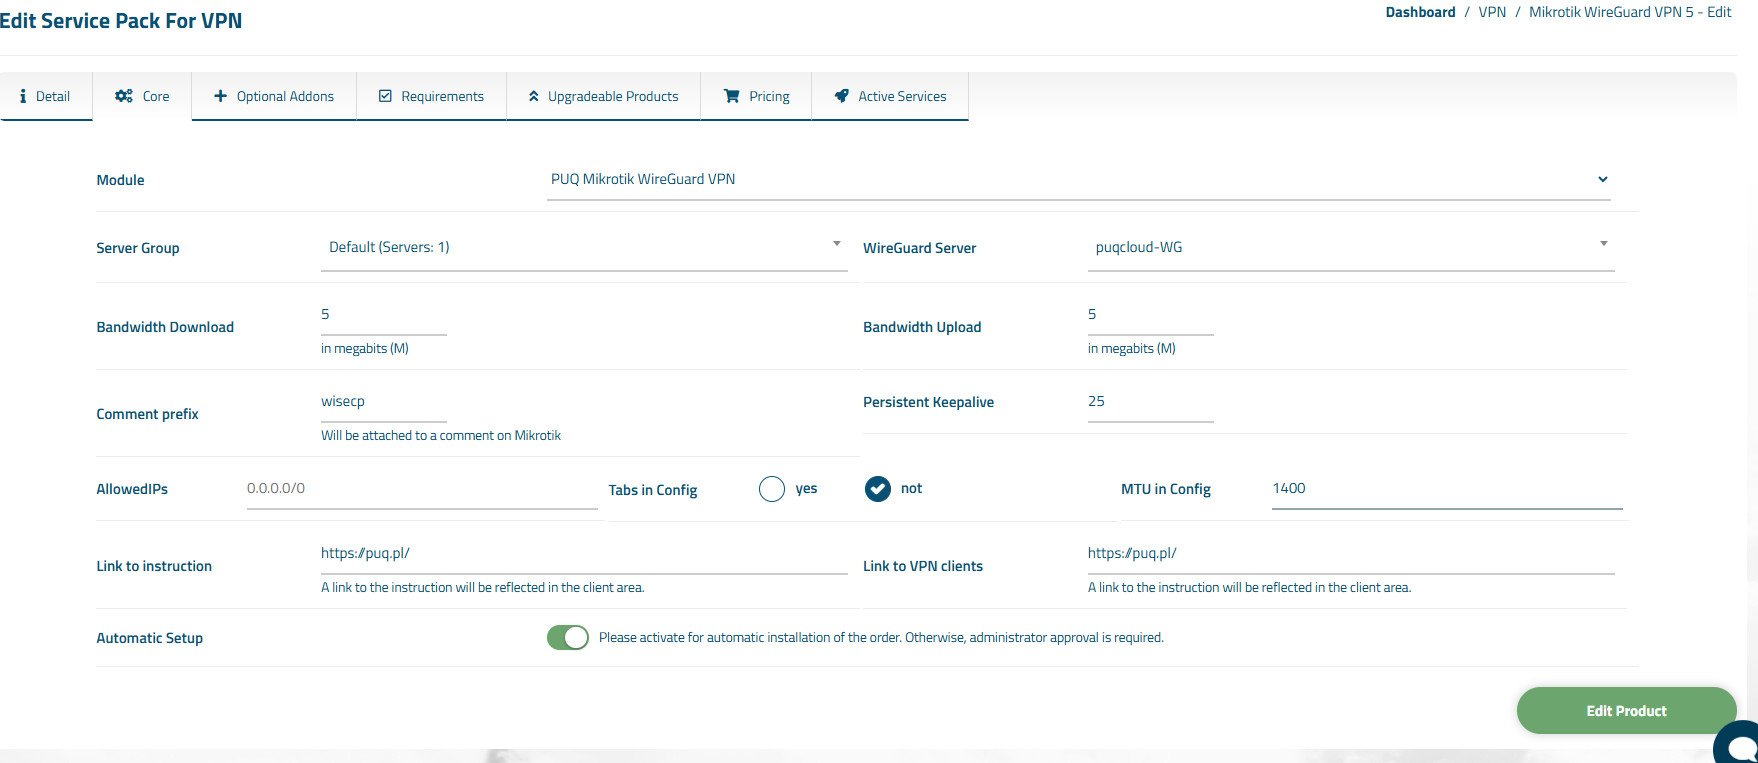
4. Fill in the configuration options according to your preferences.
- Server Group is the group of servers from which a server will be chosen for provisioning the service
- WireGuard Server is the name of the WireGuard server that was created in MikroTik
Attention:
The WireGuard Server field is updated only after saving or adding the service.
You will need to revisit this section to select the WireGuard Server and save the service.
Additionally, the WireGuard Server must be created on all servers within the group.
- Bandwidth Download and Bandwidth Upload represent the connection speed that will be restricted by these parameters, in megabits per second, respectively.
- Comment Prefix will be added at the comment in MikroTik
- Persistent Keepalive and AllowedIPs: parameters of configuration WireGuard clients
- Tabs in Config - Configuration file format with tabs or not
- MTU in Config -Display MTU in config file
- Link to Instruction Provide the link to the instruction for the service, and it will be displayed in the client area as a separate button
-
Link to VPN Clients Provide the link to the page for downloading VPN clients for the service, and it will be displayed in the client area as a separate button
-
Automatic Setup Please activate for automatic installation of the order. Otherwise, administrator approval is required.