# MinIO S3 WHMCS module
# Description
### MinIO S3 module **[WHMCS](https://puqcloud.com/link.php?id=77)**
##### [Order now](https://puqcloud.com/whmcs-module-minio-s3.php) | [Download](https://download.puqcloud.com/WHMCS/servers/PUQ_WHMCS-MinIO-S3/) | [FAQ](https://faq.puqcloud.com/)
## MinIO S3 WHMCS module
The module allows the company to offer its customers the possibility of managing data storage compatible with S3 object storage using the MinIO S3 solution. The module requires a fully configured MinIO server to work. The module does not assist in the creation of such a server in any way.
- - - - - -
## Main features
- **Automatic account provisioning** — auto create and deploy product (User and S3 Buckets) upon order activation
- **API-driven management** — the module uses only the API to manage the accounts on the MinIO server
- **Account lifecycle management** — create, suspend, unsuspend, terminate, change password, and change package for MinIO S3 user accounts
- **Disk usage monitoring** — track and display disk usage statistics with historical data and configurable retention period
- **Email notifications** — automatic notifications when disk usage exceeds configurable thresholds
- **Suspension on disk limit** — automatic suspension when the disk limit is exceeded, with policy switching to restricted mode
- **Multi-language support** — 25 languages including Arabic, Azerbaijani, Catalan, Chinese, Croatian, Czech, Danish, Dutch, English, Estonian, Farsi, French, German, Hebrew, Hungarian, Italian, Macedonian, Norwegian, Polish, Romanian, Russian, Spanish, Swedish, Turkish, and Ukrainian
- **Link to instructions** — configurable link for setting up the service in the client area
- **Policy management** — configurable raw policies for standard and disk-limited access, with admin controls to force policy updates
- **Default bucket creation** — optional automatic creation of a default bucket with configurable suffix
### Admin Panel Options
- Suspend users
- Terminate users
- Unsuspend users
- Change users password
- Change Package
- API connection status
- Disk status
- Update Policy / Set Standard Policy / Set Limited Policy
### Client Panel Options
- Change the MinIO user password
- Disk status
- Using disk space statistics
- Bucket information
- - - - - -
## System requirements
Requirement
Minimum
WHMCS
9.x or higher
PHP
8.2 or higher
MinIO
RELEASE.2025-02-28T09-55-16Z or less
ionCube Loader
v13 or newer (v14, v15)
- - - - - -
## Links
- **Product page:** [https://puqcloud.com/whmcs-module-minio-s3.php](https://puqcloud.com/whmcs-module-minio-s3.php)
- **Documentation:** [https://doc.puq.info/books/minio-s3-whmcs-module](https://doc.puq.info/books/minio-s3-whmcs-module)
- **Support:** [https://puqcloud.com/submitticket.php](https://puqcloud.com/submitticket.php?step=2&deptid=1)
- **Community:** [https://community.puqcloud.com/](https://community.puqcloud.com/)
- - - - - -
## Screenshots
### Client area — Home screen

### Client area — Disk statistics
### Admin area — Product information
# Changelog
### MinIO S3 module **[WHMCS](https://puqcloud.com/link.php?id=77)**
##### [Order now](https://puqcloud.com/whmcs-module-minio-s3.php) | [Download](https://download.puqcloud.com/WHMCS/servers/PUQ_WHMCS-MinIO-S3/) | [FAQ](https://faq.puqcloud.com/)
- - - - - -
## v3.1 (01-03-2026)
- Added null coalescing checks for all array and superglobal accesses to prevent "Undefined array key" warnings
- Added null-safe operators for object property access where object can be null
- Fixed type safety for typed class properties (preventing `TypeError` on null assignment)
- Added boundary checks for empty database query results
- - - - - -
## v3.0 (25-01-2025)
- Support for WHMCS 9+
- Product module settings have been redesigned
- Updated client area interface design
> **Note:** Product reconfiguration is required after update.
- - - - - -
## v2.0 (23-09-2024)
- Module coded with ionCube v13
- Supported PHP versions: 7.4, 8.1, 8.2
- Compatible with WHMCS 8.11.0+
- - - - - -
## v1.9.1 (13-08-2024)
- Fixed bug with password, when "Show password" is "no"
- - - - - -
## v1.9 (26-06-2024)
- Adapted to MinIO version RELEASE.2024-06-26T01-06-18Z
> **Note:** Module will not work with versions lower than this.
- - - - - -
## v1.8 (06-06-2024)
- Client area more adapted for mobile version
- Buttons for copying login and password added to client area
- - - - - -
## v1.7 (16-05-2024)
- User blocking disabled after limit reached
- Policy switches to "Raw policy Disk limit" when exhausted
- Added functional buttons and policy management in admin area
- Added Recalculate Disk Space button for clients
> **Note:** Need to insert "Raw policy Disk limit" in product settings.
- - - - - -
## v1.6 (21-12-2023)
**Fixed Issues:**
- Bug preventing policy deletion when account deleted
- Improved API error logging
**New Features:**
- Disable bucket creation by default
- Set default bucket suffix
- Disable password display by default
- "Show" button for passwords
- Plain text password display options
> **Note:** Save 'Module Setting' in products.
- - - - - -
## v1.5 (18-12-2023)
- Support MinIO RELEASE.2023-12-14T18-51-57Z
- Minor client area changes
- - - - - -
## v1.4 (11-10-2023)
- Support MinIO RELEASE.2023-10-07T15-07-38Z
- 25 language translations added (Arabic, Azerbaijani, Catalan, Chinese, Croatian, Czech, Danish, Dutch, English, Estonian, Farsi, French, German, Hebrew, Hungarian, Italian, Macedonian, Norwegian, Polish, Romanian, Russian, Spanish, Swedish, Turkish, Ukrainian)
- - - - - -
## v1.3 (08-09-2023)
- Support MinIO RELEASE.2023-09-07T02-05-02Z
- - - - - -
## v1.2 (05-03-2023)
- Support PHP 8.1 and PHP 7.4
- Support MinIO RELEASE.2023-02-22T18-23-45Z
- Template changes with icons added
- API timeout set to 30
- - - - - -
## v1.1 (22-02-2023)
- Support WHMCS V8.6
- Support PHP 8.1 (Loader v12) and PHP 7.4
- Template changes
- Service settings email template changed to dropdown
- Translations added: German, Ukrainian
- Updated deletion mechanism for objects, buckets, and users
- - - - - -
## v1.0 (01-08-2022)
- First release# Installation and Configuration Guide
Step-by-step instructions for installing, configuring, and setting up the MinIO S3 WHMCS module, including MinIO server preparation, WHMCS integration, email templates, and product configuration.
# WHMCS setup (install/update)
## System requirements
The module uses ionCube encoding. Your server must meet the following requirements:
| Requirement | Minimum |
|-------------|---------|
| PHP | 8.2 or higher |
| WHMCS | 9.x or higher |
| ionCube Loader | v13 or newer (v14, v15) |
### Older module versions for WHMCS 8
Older versions of the module are available for download, sorted by PHP version:
- PHP 7.4: [https://download.puqcloud.com/WHMCS/servers/PUQ_WHMCS-MinIO-S3/php74/](https://download.puqcloud.com/WHMCS/servers/PUQ_WHMCS-MinIO-S3/php74/)
- PHP 8.1: [https://download.puqcloud.com/WHMCS/servers/PUQ_WHMCS-MinIO-S3/php81/](https://download.puqcloud.com/WHMCS/servers/PUQ_WHMCS-MinIO-S3/php81/)
---
## Step 1 — Download the latest version of the module
```bash
wget http://download.puqcloud.com/WHMCS/servers/PUQ_WHMCS-MinIO-S3/php82/PUQ_WHMCS-MinIO-S3-latest.zip
```
All versions of the module are available via the link: [http://download.puqcloud.com/WHMCS/servers/PUQ_WHMCS-MinIO-S3/](http://download.puqcloud.com/WHMCS/servers/PUQ_WHMCS-MinIO-S3/)
---
## Step 2 — Unzip the archive with the module
```bash
unzip PUQ_WHMCS-MinIO-S3-latest.zip
```
---
## Step 3 — Copy and Replace
Copy the `puqMinIOS3` directory from the extracted `PUQ_WHMCS-MinIO-S3` archive to your WHMCS installation:
```
WHMCS_WEB_DIR/modules/servers/
```
> **Note:** To install and update a module, you must perform one and the same action — download and copy the latest version over the existing files.
# Setup guide: MinIO S3 setup
## Section 1 — Installing and configuring the MinIO server
Update packages and download the MinIO binary:
```bash
sudo apt update
wget https://dl.min.io/server/minio/release/linux-amd64/minio
```
Install the binary and set up the MinIO user:
```bash
sudo chmod +x minio
sudo mv minio /usr/local/bin
sudo useradd -r minio-user -s /sbin/nologin
sudo chown minio-user:minio-user /usr/local/bin/minio
sudo mkdir /usr/local/share/minio
sudo chown minio-user:minio-user /usr/local/share/minio
sudo mkdir /etc/minio
sudo chown minio-user:minio-user /etc/minio
```
Create the environment configuration file `/etc/default/minio`:
```ini
MINIO_ACCESS_KEY="minio"
MINIO_VOLUMES="/usr/local/share/minio/"
MINIO_OPTS="-C /etc/minio --address :9000 --console-address :9001"
MINIO_SECRET_KEY="miniostorage"
```
---
## Section 2 — Installing the Systemd MinIO startup script
Create the service file `/etc/systemd/system/minio.service`:
```ini
[Unit]
Description=MinIO
Documentation=https://docs.min.io
Wants=network-online.target
After=network-online.target
AssertFileIsExecutable=/usr/local/bin/minio
[Service]
WorkingDirectory=/usr/local/
User=minio-user
Group=minio-user
EnvironmentFile=/etc/default/minio
ExecStartPre=/bin/bash -c "if [ -z \"${MINIO_VOLUMES}\" ]; then echo \"Variable MINIO_VOLUMES not set in /etc/default/minio\"; exit 1; fi"
ExecStart=/usr/local/bin/minio server $MINIO_OPTS $MINIO_VOLUMES
Restart=always
LimitNOFILE=65536
TimeoutStopSec=infinity
SendSIGKILL=no
[Install]
WantedBy=multi-user.target
```
---
## Section 3 — Starting the MinIO Server
```bash
sudo systemctl daemon-reload
sudo systemctl enable minio
sudo systemctl start minio
sudo systemctl status minio
```
---
## Section 4 — Securing Access to MinIO Server with Let's Encrypt SSL/TLS Certificate
Install certbot and nginx:
```bash
sudo apt update
sudo apt install certbot nginx python3-certbot-nginx -y
```
Create the nginx configuration file `/etc/nginx/sites-enabled/minio`:
```nginx
server {
listen 80 default_server;
server_name yourdomain.com;
return 301 https://$host$request_uri;
}
server {
listen 443 ssl http2;
server_name yourdomain.com;
ssl_certificate /etc/letsencrypt/live/yourdomain.com/fullchain.pem;
ssl_certificate_key /etc/letsencrypt/live/yourdomain.com/privkey.pem;
ssl_trusted_certificate /etc/letsencrypt/live/yourdomain.com/cert.pem;
ssl_session_timeout 20m;
ssl_ciphers ECDHE-RSA-AES128-GCM-SHA256:ECDHE:ECDH:AES:HIGH:!NULL:!aNULL:!MD5:!ADH:!RC4;
ssl_protocols TLSv1 TLSv1.1 TLSv1.2;
ssl_prefer_server_ciphers on;
ssl_verify_client off;
ignore_invalid_headers off;
client_max_body_size 0;
proxy_buffering off;
location / {
proxy_set_header X-Real-IP $remote_addr;
proxy_set_header X-Forwarded-For $proxy_add_x_forwarded_for;
proxy_set_header X-Forwarded-Proto $scheme;
proxy_set_header Host $http_host;
proxy_connect_timeout 300;
proxy_http_version 1.1;
proxy_set_header Connection "";
chunked_transfer_encoding off;
proxy_pass http://localhost:9001;
}
}
```
Remove the default nginx config and generate SSL certificate:
```bash
rm /etc/nginx/sites-enabled/default
sudo certbot --nginx -d yourdomain.com
sudo service nginx restart
```
Add certificate auto-renewal to crontab:
```
0 12 * * * /usr/bin/certbot renew --quiet
```
---
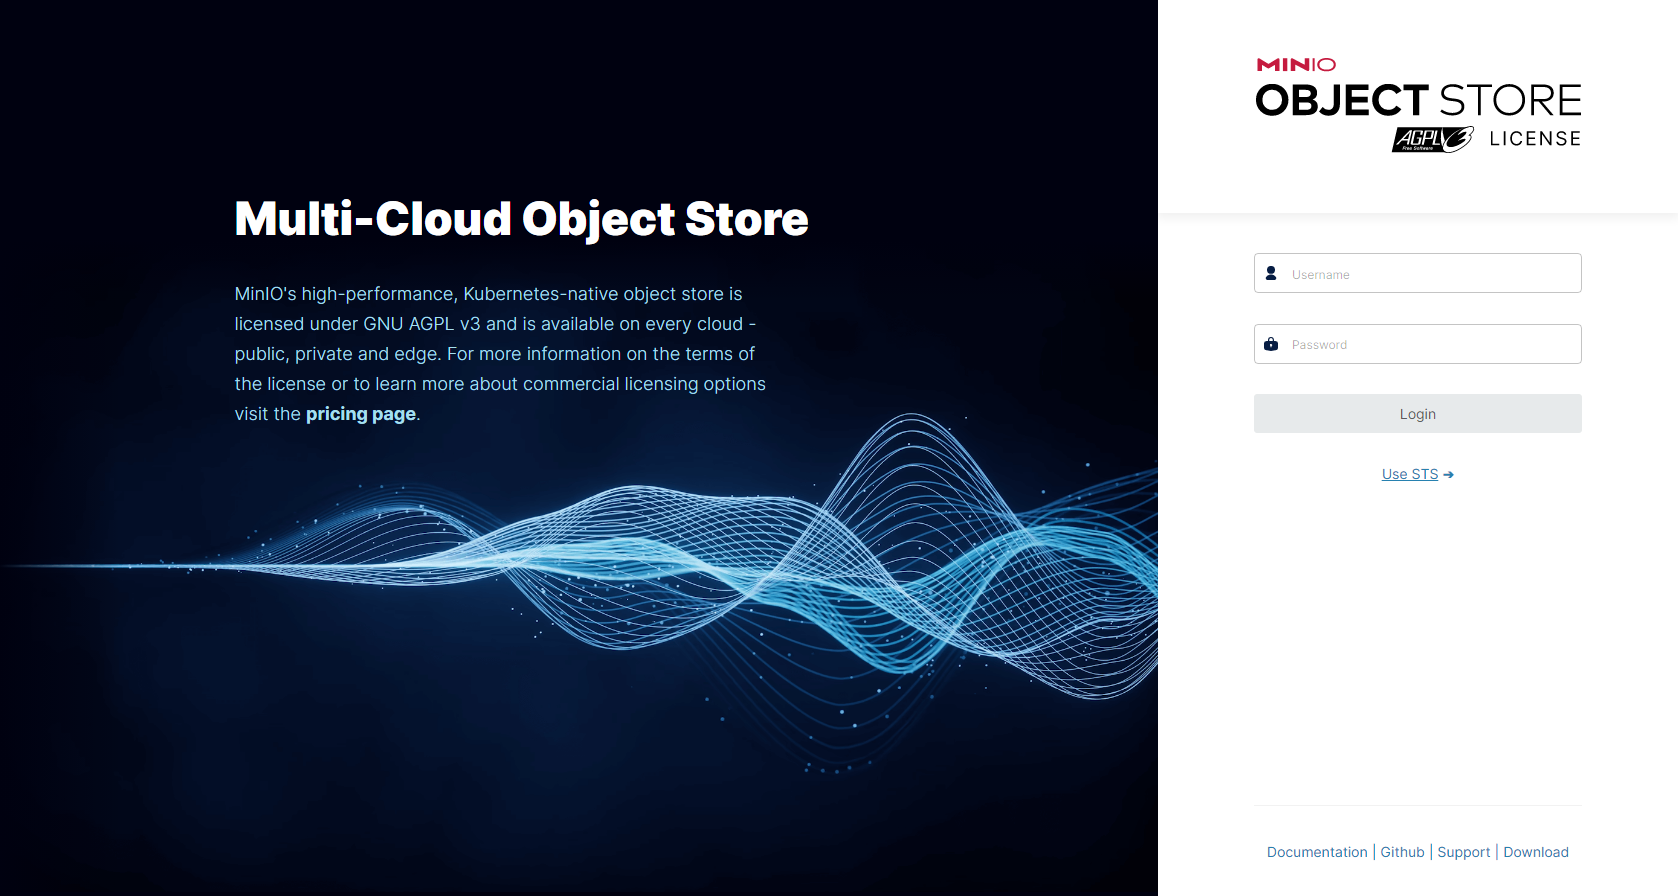
## Default Login Credentials
After installation, you can access the MinIO console at `https://yourdomain.com`:
- **Username:** `minio`
- **Password:** `miniostorage`
# Setup guide: WHMCS setup
## System requirements
The module is encoded with ionCube.
| Requirement | Minimum |
|-------------|---------|
| PHP | 8.2 or higher |
| WHMCS | 9.x or higher |
| ionCube Loader | v13 or newer (v14, v15) |
### Older module versions for WHMCS 8
- PHP 7.4: [https://download.puqcloud.com/WHMCS/servers/PUQ_WHMCS-MinIO-S3/php74/](https://download.puqcloud.com/WHMCS/servers/PUQ_WHMCS-MinIO-S3/php74/)
- PHP 8.1: [https://download.puqcloud.com/WHMCS/servers/PUQ_WHMCS-MinIO-S3/php81/](https://download.puqcloud.com/WHMCS/servers/PUQ_WHMCS-MinIO-S3/php81/)
> To install and update a module, you must perform one and the same action.
---
## Step 1 — Download
```bash
wget http://download.puqcloud.com/WHMCS/servers/PUQ_WHMCS-MinIO-S3/php82/PUQ_WHMCS-MinIO-S3-latest.zip
```
All versions available via: [http://download.puqcloud.com/WHMCS/servers/PUQ_WHMCS-MinIO-S3/](http://download.puqcloud.com/WHMCS/servers/PUQ_WHMCS-MinIO-S3/)
---
## Step 2 — Extract
```bash
unzip PUQ_WHMCS-MinIO-S3-latest.zip
```
---
## Step 3 — Deploy
Copy and replace the `puqMinIOS3` directory from `PUQ_WHMCS-MinIO-S3` to `WHMCS_WEB_DIR/modules/servers/`
---
## Step 4 — Server Configuration
Create a new MinIO S3 server in WHMCS:
Navigate to: **System Settings → Products/Services → Servers**
1. Click **Add New Server**
2. Enter the correct **Name** and **Hostname**
3. In the **Server Details** section, select the **PUQ MinIO S3** module and enter the correct username and password for the MinIO web interface
4. Click the **Test connection** button to verify

---
## Step 5 — Create Product
Navigate to: **System Settings → Products/Services → Create a New Product**
In the **Module Settings** section, select the **PUQ MinIO S3** module and configure the product options.

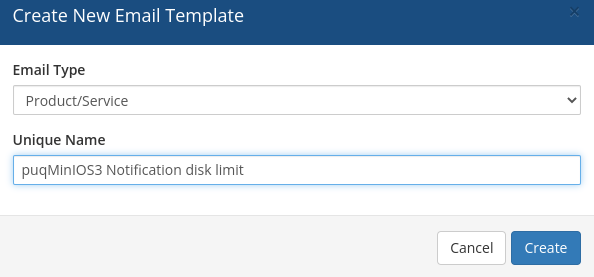
# Email Template (puqMinIOS3 Notification disk limit)
Create an email template for customer notifications when disk usage approaches the limit.
Navigate to: **System Settings → Email Templates → Create New Email Template**
---
## Template configuration
| Parameter | Value |
|-----------|-------|
| **Email Type** | Product/service |
| **Unique Name** | `puqMinIOS3 Notification disk limit` |
---
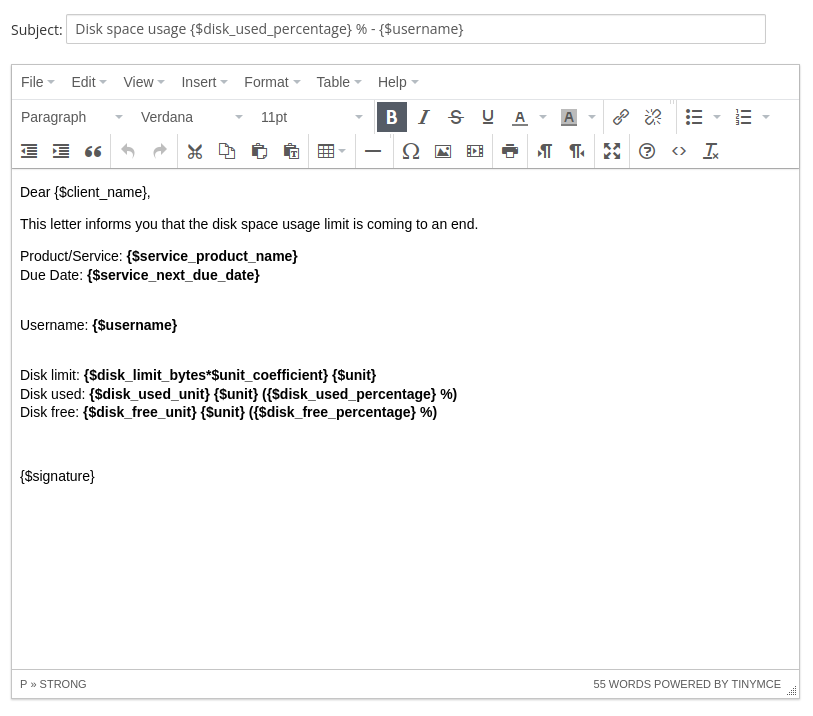
## Email Subject
```
Disk space usage {$disk_used_percentage} % - {$username}
```
---
## Email Body
```html
Dear {$client_name},
This letter informs you that the disk space usage limit is coming to an end.
Product/Service: {$service_product_name}
Due Date: {$service_next_due_date}
Username: {$username}
Disk limit: {$disk_limit_bytes*$unit_coefficient} {$unit}
Disk used: {$disk_used_unit} {$unit} ({$disk_used_percentage} %)
Disk free: {$disk_free_unit} {$unit} ({$disk_free_percentage} %)
{$signature}
```
---
## Available template variables
| Variable | Description |
|----------|-------------|
| `{$username}` | MinIO S3 account username |
| `{$disk_limit_bytes*$unit_coefficient}` | Total disk space limit |
| `{$disk_used_unit}` | Used disk space |
| `{$disk_free_unit}` | Free disk space |
| `{$disk_used_percentage}` | Used disk space percentage |
| `{$disk_free_percentage}` | Free disk space percentage |
| `{$unit}` | Disk space unit (MB, GB, TB, PB) |
> **Note:** Standard WHMCS merge fields are also available in this template.
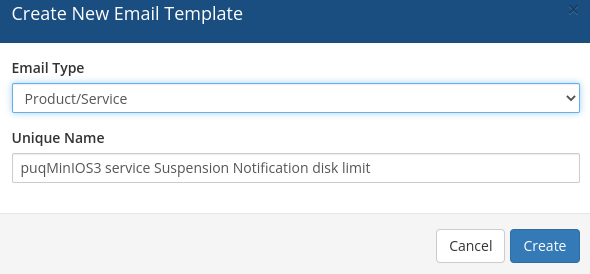
# Email Template (puqMinIOS3 service Suspension Notification disk limit)
Create an email template for customer notifications when the S3 account is suspended due to exceeding the disk limit.
Navigate to: **System Settings → Email Templates → Create New Email Template**
---
## Template configuration
| Parameter | Value |
|-----------|-------|
| **Email Type** | Product/service |
| **Unique Name** | `puqMinIOS3 service Suspension Notification disk limit` |
---
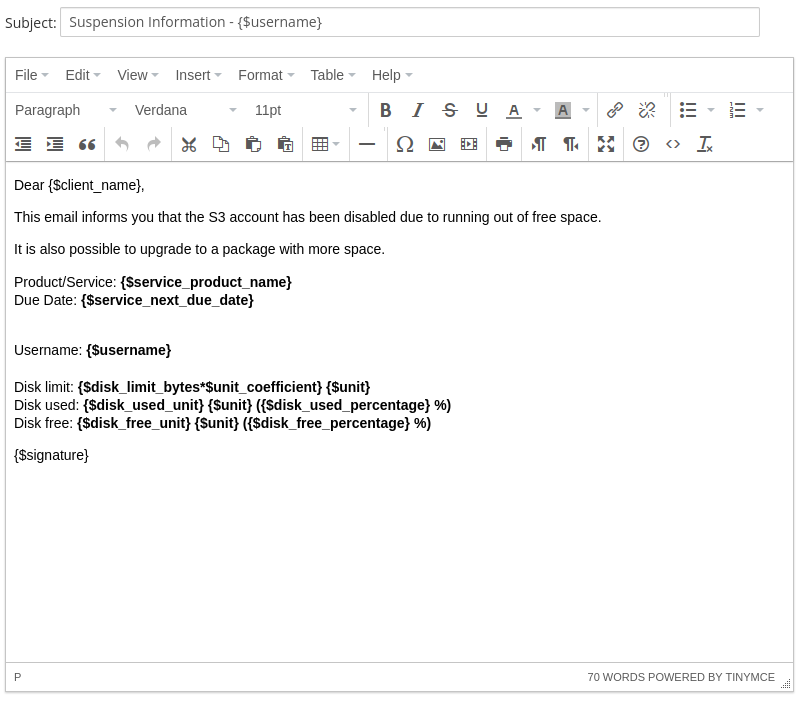
## Email Subject
```
Suspension Information - {$username}
```
---
## Email Body
```html
Dear {$client_name},
This email informs you that the S3 account has been disabled due to running out of free space.
It is also possible to upgrade to a package with more space.
Product/Service: {$service_product_name}
Due Date: {$service_next_due_date}
Username: {$username}
Disk limit: {$disk_limit_bytes*$unit_coefficient} {$unit}
Disk used: {$disk_used_unit} {$unit} ({$disk_used_percentage} %)
Disk free: {$disk_free_unit} {$unit} ({$disk_free_percentage} %)
{$signature}
```
---
## Available template variables
| Variable | Description |
|----------|-------------|
| `{$username}` | MinIO S3 account username |
| `{$disk_limit_bytes*$unit_coefficient}` | Total disk space limit |
| `{$disk_used_unit}` | Used disk space |
| `{$disk_free_unit}` | Free disk space |
| `{$disk_used_percentage}` | Used disk space percentage |
| `{$disk_free_percentage}` | Free disk space percentage |
| `{$unit}` | Disk space unit (MB, GB, TB, PB) |
> **Note:** Standard WHMCS merge fields are also available in this template.
# Add server (MinIO S3)
## Add a new server to the system WHMCS
Navigate to: **System Settings → Servers → Add New Server**
---
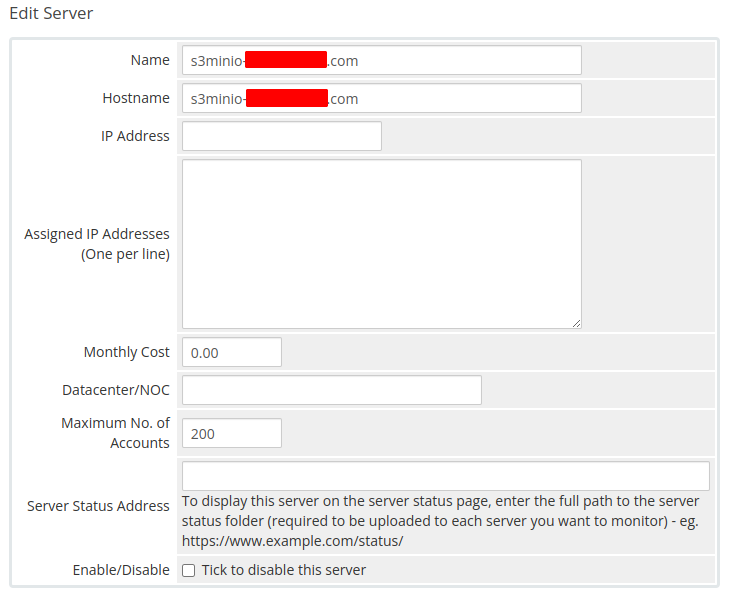
## Step 1 — General settings
Enter the correct **Name** and **Hostname** for your MinIO S3 server.

---
## Step 2 — Module settings
In the **Server Details** section:
1. Select the **PUQ MinIO S3** module
2. Enter the correct **username** and **password** for the MinIO web interface
3. Click the **Test connection** button to verify the connection
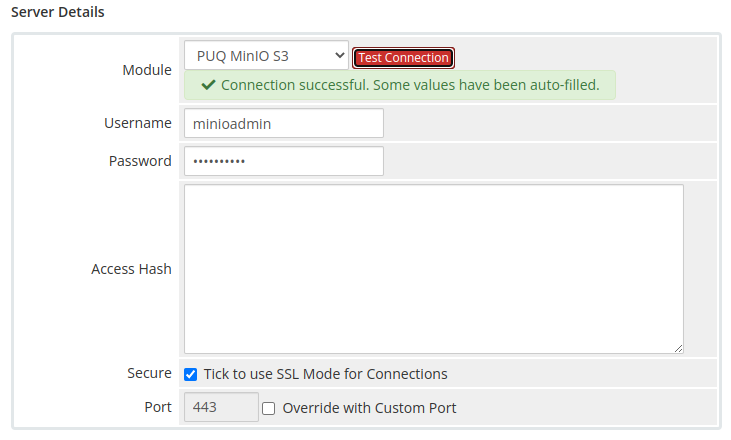
> **Note:** The MinIO user must have administrator privileges to manage users, policies, and buckets via the API.
# Product Configuration
## Add new product to WHMCS
Navigate to: **System Settings → Products/Services → Create a New Product**
In the **Module Settings** section, select the **PUQ MinIO S3** module.
---
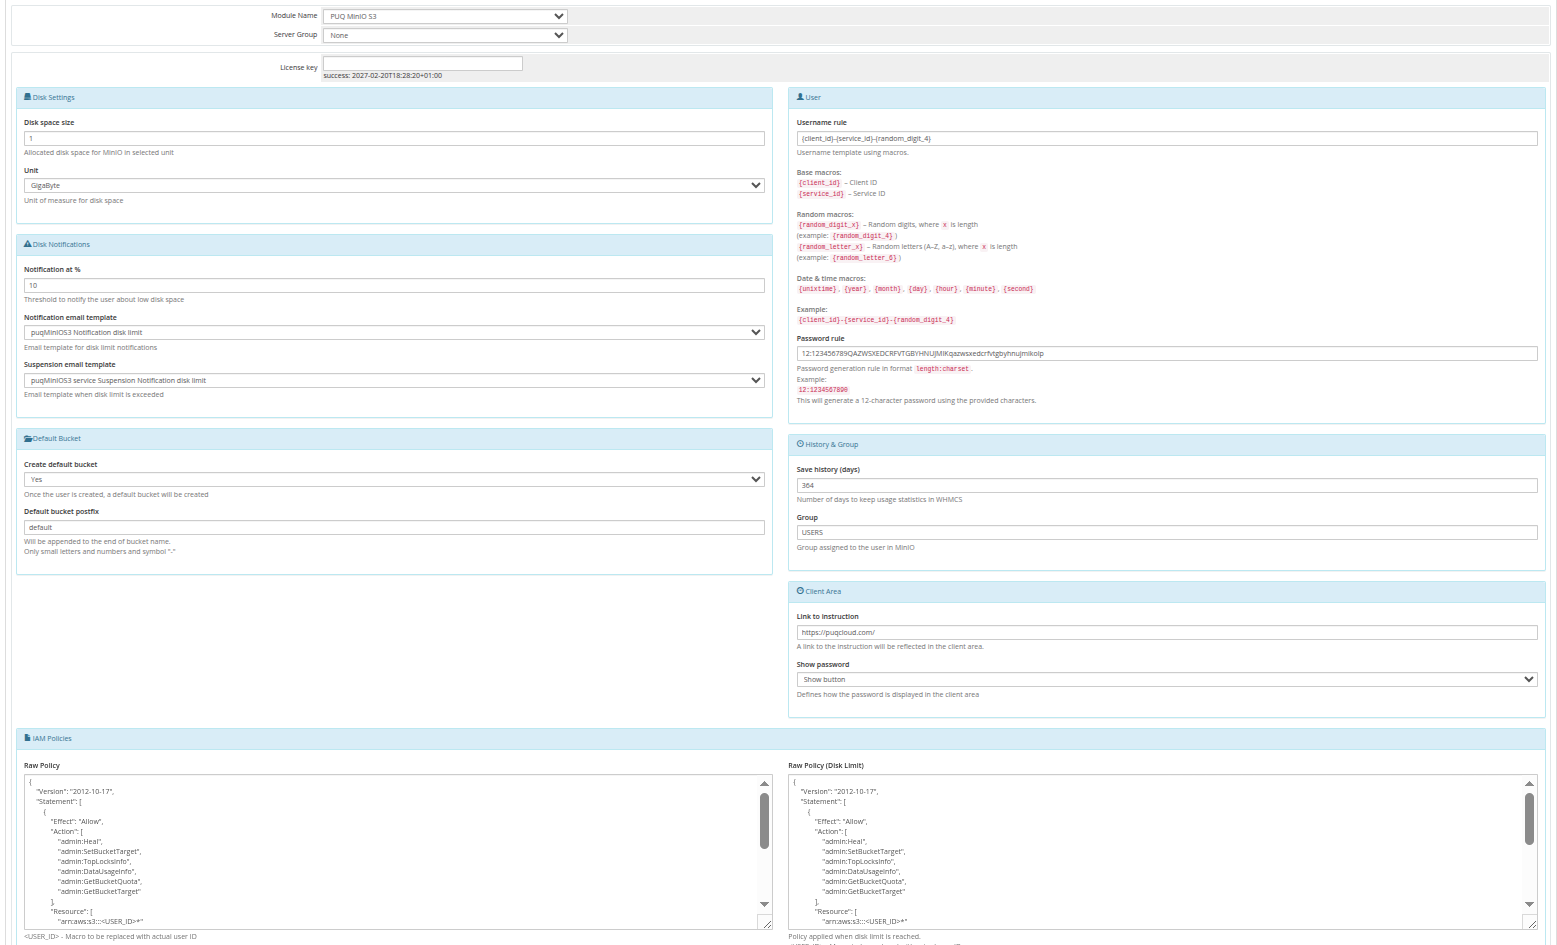
## Configuration parameters
| Parameter | Description |
|-----------|-------------|
| **License key** | A pre-purchased license key for the PUQ MinIO S3 module. For the module to work correctly, the key must be active |
| **Unit** | Packet disk space units (MB, GB, TB, PB) |
| **Disk space size** | Disk size in this product (set to 0 for unlimited) |
| **Notification disk limit email template** | Email template that will be sent when the disk quota is exceeded in % |
| **Notification, used disk space X %** | Sets a percentage parameter (1-100, default 90), after exceeding this parameter a notification will be sent to the user |
| **Group** | The group that will be assigned to the user on the server side of the MinIO S3 |
| **Raw Policy** | The policy that is assigned to the user during creation on the server |
| **Suspend exceeding disk limit email template** | The template of the letter that will be sent to the client if his disk limit is 100% or less 100% |
| **Raw policy Disk limit** | The policy that will be applied to the client when the client runs out of space |
| **Save usage history (days)** | The number of days it takes to save user disk usage statistics |
| **Link to instruction** | Link to the instruction, if filled out, it will be reflected in the client area |
| **Default Bucket** | Options to enable or disable the creation of a default bucket, and also set its prefix |
| **Client Area** | Client zone settings — show or not show the password in the client zone, type how to show the password |
---
## Username rule
Default: `{client_id}-{service_id}`
| Macro | Description |
|-------|-------------|
| `{client_id}` | Client ID |
| `{service_id}` | Service ID |
| `{unixtime}` | Current Unix timestamp |
| `{date}` | Current date (YYYY-MM-DD) |
| `{time}` | Current time (HH-MM-SS) |
| `{random_digit_x}` | Random digit string of length x |
| `{random_letter_x}` | Random letter string of length x |
---
## Password rule
Default: `12:123456789QAZWSXEDCRFVTGBYHNUJMIKqazwsxedcrfvtgbyhnujmikolp`
Format: `length:charset` — where length is the password length and charset is the set of characters to use.
---
## Raw Policy (Standard)
The policy that is assigned to the user during creation on the server:
```json
{
"Version": "2012-10-17",
"Statement": [
{
"Effect": "Allow",
"Action": [
"admin:Heal",
"admin:SetBucketTarget",
"admin:TopLocksInfo",
"admin:DataUsageInfo",
"admin:GetBucketQuota",
"admin:GetBucketTarget"
],
"Resource": [
"arn:aws:s3:::*"
]
},
{
"Effect": "Allow",
"Action": [
"s3:*"
],
"Resource": [
"arn:aws:s3:::*"
]
}
]
}
```
---
## Raw Policy Disk Limit
The policy that will be applied to the client when the client runs out of space:
```json
{
"Version": "2012-10-17",
"Statement": [
{
"Effect": "Allow",
"Action": [
"admin:Heal",
"admin:SetBucketTarget",
"admin:TopLocksInfo",
"admin:DataUsageInfo",
"admin:GetBucketQuota",
"admin:GetBucketTarget"
],
"Resource": [
"arn:aws:s3:::*"
]
},
{
"Effect": "Allow",
"Action": [
"s3:GetObject",
"s3:DeleteObject",
"s3:ListBucket"
],
"Resource": [
"arn:aws:s3:::*"
]
}
]
}
```
> **Important:** Policy recalculation occurs once a day during the collection of server statistics (UpdateServerUsage).
# Client Area
Overview of the client-facing features available in the MinIO S3 WHMCS module, including the home screen, email notifications, and disk usage statistics.
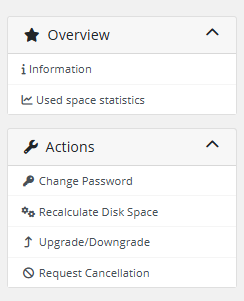
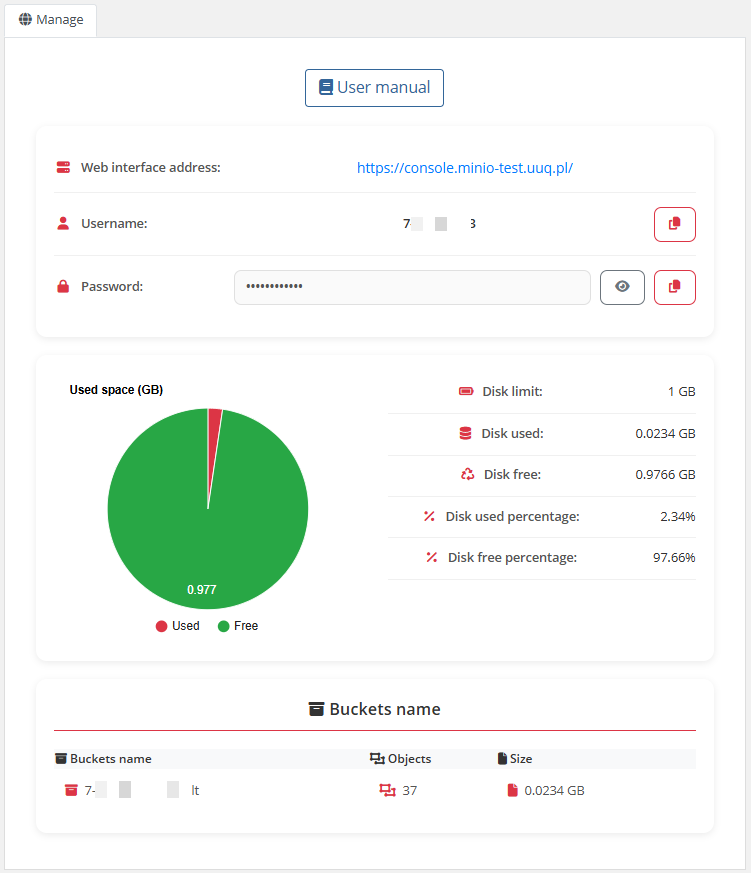
# Home screen
Screenshot when the account is in a normal state.
The end customer, after logging in to his own customer panel, has access to the following information and options:
- Link to the user manual (which was defined by the administrator when setting up the service)
- MinIO server address
- Authorization data (username and password with copy buttons)
- Usage statistics graph
- Table with data on the use of the service
- Bucket Information


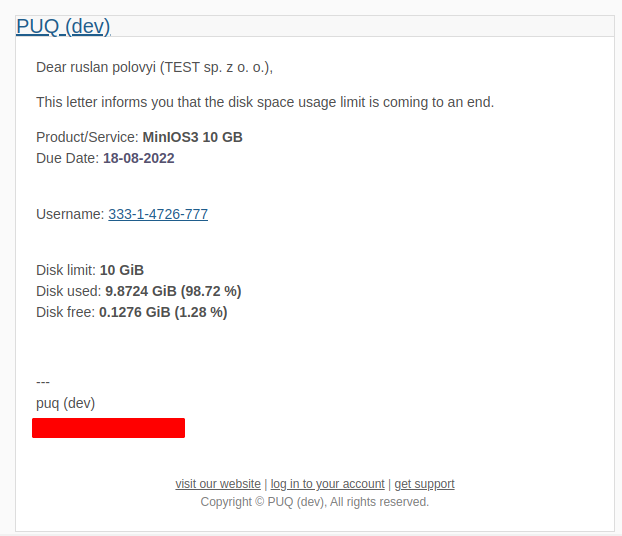
# Email notification
Below you can see an example of an email notification regarding data limit.
When the disk usage exceeds the configured percentage threshold, the system automatically sends an email notification to the customer using the configured email template.
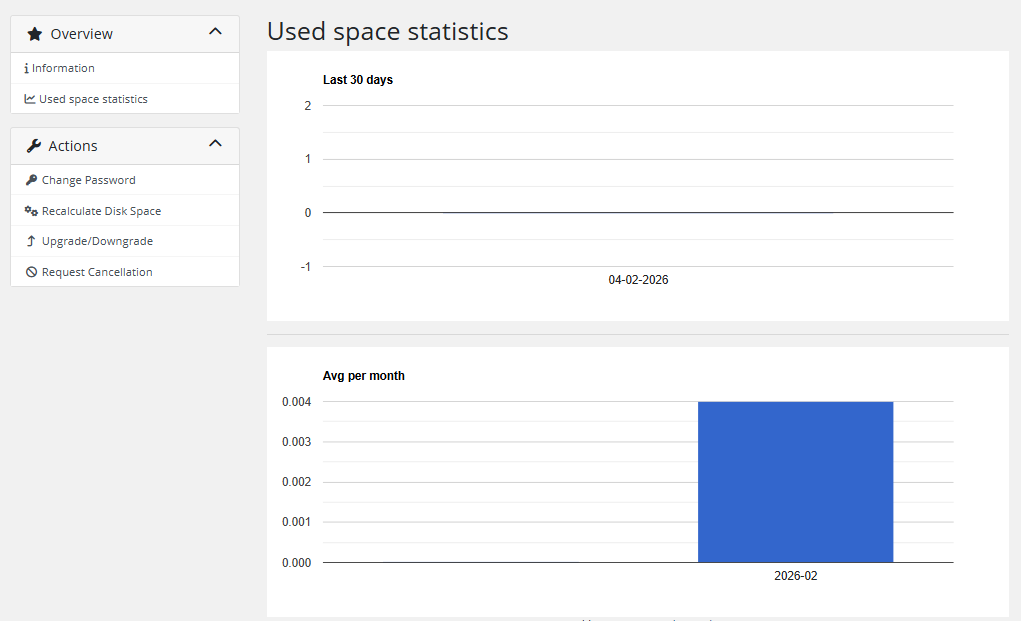
# Disk statistics
Client can check the data usage statistics in the menu item **Used space statistics**.
The statistics page displays disk usage data collected by the WHMCS cron and stored in the database:
- **Last 30 days chart** — daily disk usage displayed as a column chart
- **Average per month chart** — monthly average disk usage
Both charts are rendered using Google Charts.

# Admin Area
Administrative features and tools available in the WHMCS admin panel for managing MinIO S3 services.
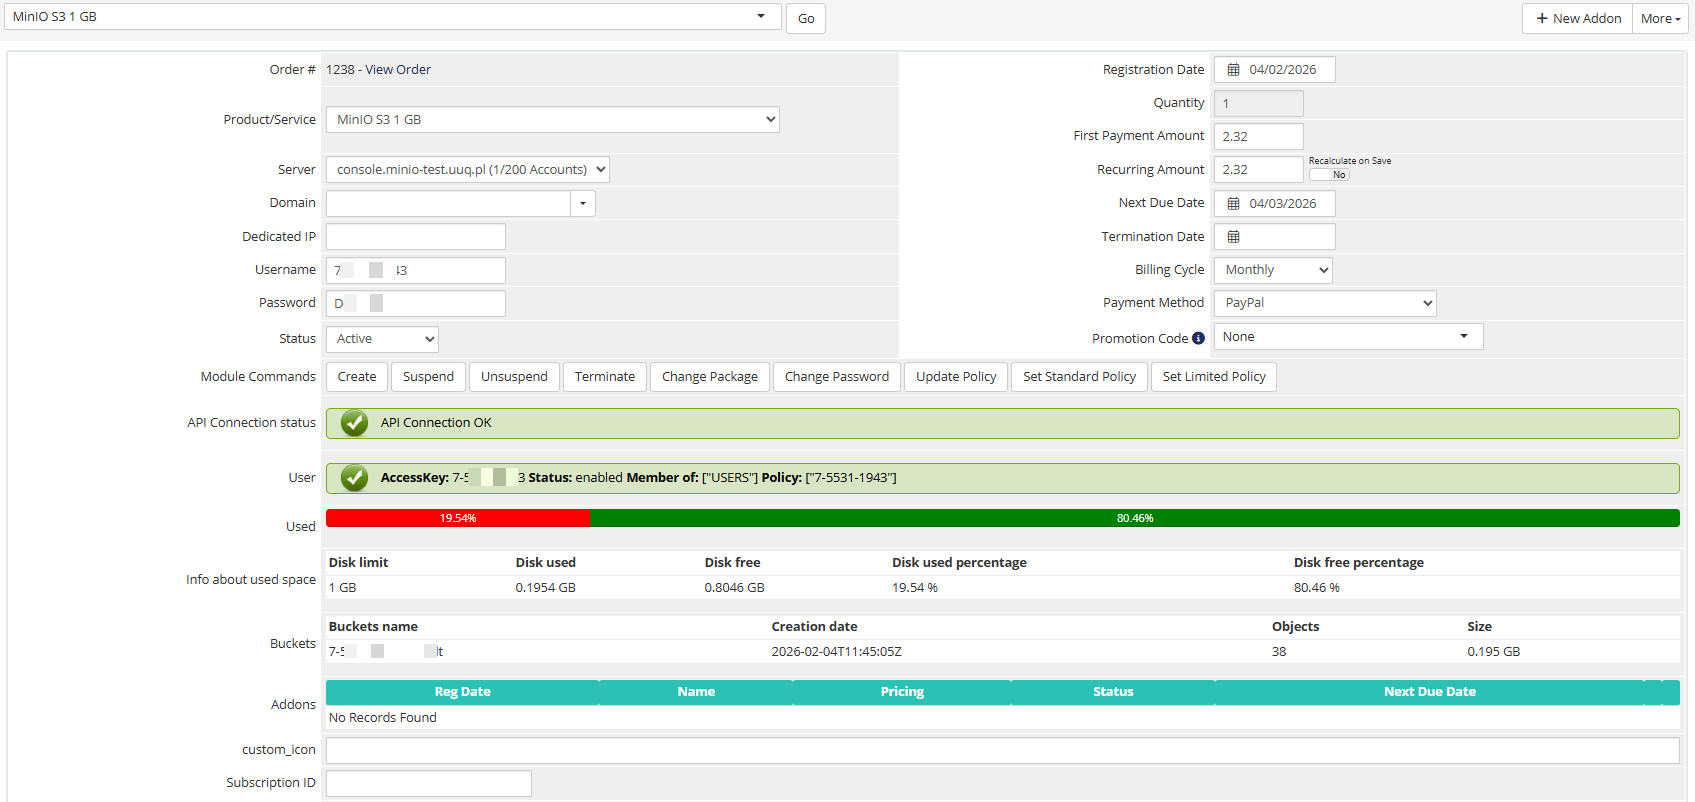
# Product Information
Here is the data presented for the service admin in WHMCS.
The admin area provides the following information and controls:
- **License verification status** — green/red indicator showing license validity
- **API connection status** — real-time test of the MinIO server connection
- **User information** — username, enabled status, group, and email
- **Disk usage** — visual progress bar with detailed usage table
- **Management actions** — Create, Suspend, Unsuspend, Terminate, Change Password, Change Package
## Policy management
- **Update Policy** button — force the system to select and apply the necessary policy. If there is more than 0 free space on the disk, a permissive policy will be applied; if there is 0 free space on the disk, a restrictive policy will be applied.
- **Set Standard Policy** and **Set Limited Policy** buttons — enforce the application of the standard policy and the limited policy respectively.
> **Important:** Policy recalculation occurs once a day during the collection of server statistics (UpdateServerUsage).