other
Grouping Client Products
To use this custom functionality, you must have whmcs installed and configured, with access to the whmcs system and to the whmcs file system with administrator rights.
Install and unzip grouping_client_products.zip
Move the hooks_grouping_client_products.php file to includes>hooks
Move the grouping_client_products.tpl file to templates>twenty-one
Move the grouping_client_products.php file to the root of your code, i.e. to all other php files
To open this page enter https://your.domain/grouping_client_products.php
When you change the name of a .php file, the link https://your.domain/your_file.php also changes

To change the page title,

you need to change in grouping_client_products.php
<?php
//Enter the page title in $title_of_page
$title_of_page = "your title";

Let's move on to the external changes. To add/change an icon to a product group, you need to:
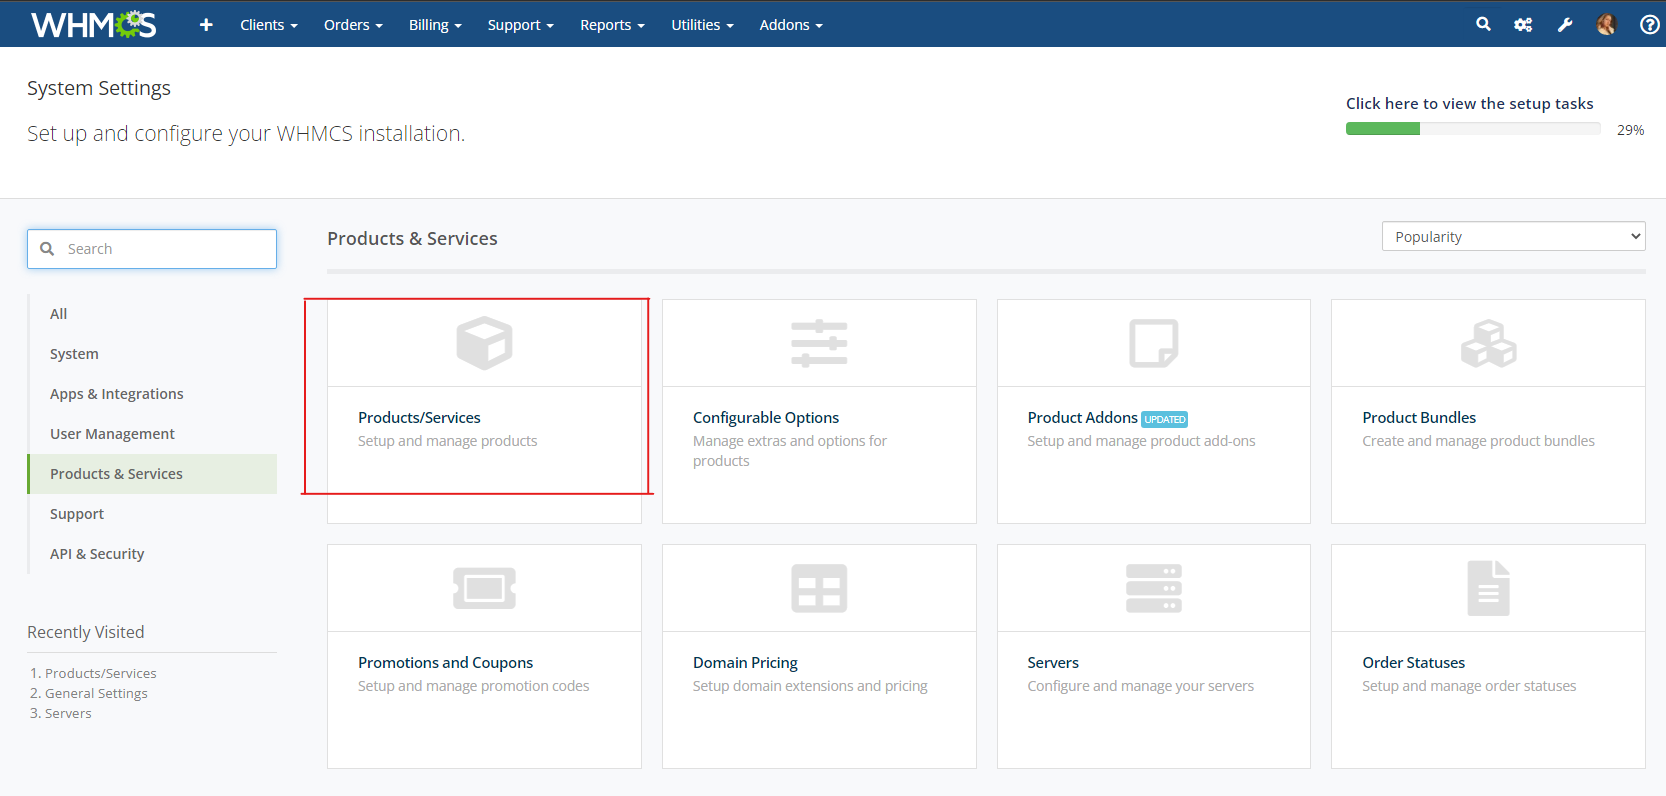
- Log in to WHMCS on the admin panel
- Go to System Settings.

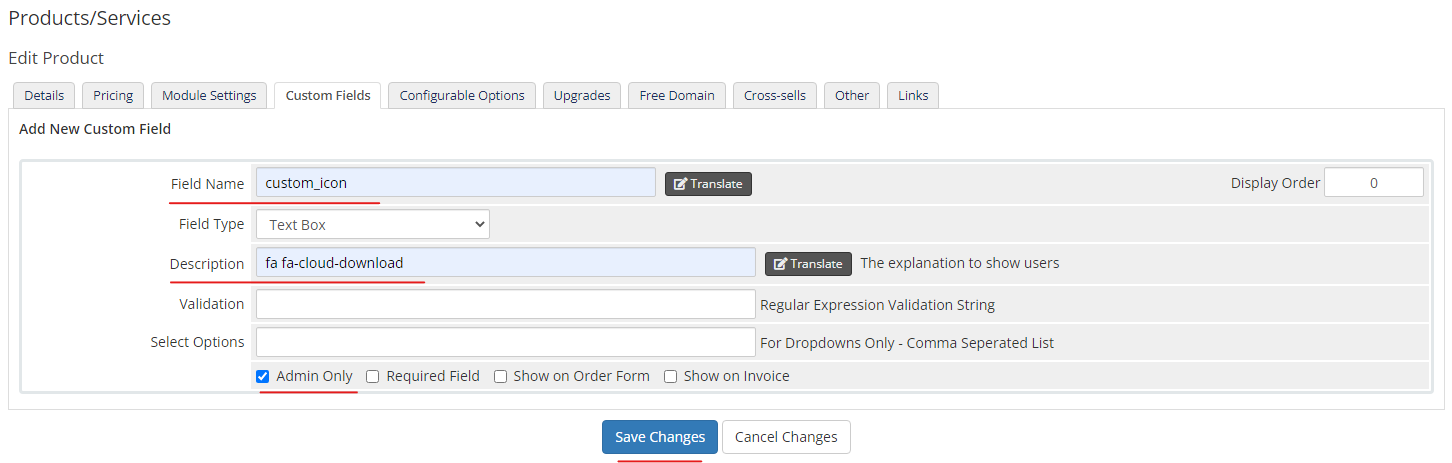
Select the first product from the group and click on Edit

Go to the "Custom Fields" tab and change the icon in the Description field.
The Field Name field should always be named "custom_icon". Without this, the script will not work and your icon will not be displayed.
Check the Admin Only parameter and save the changes
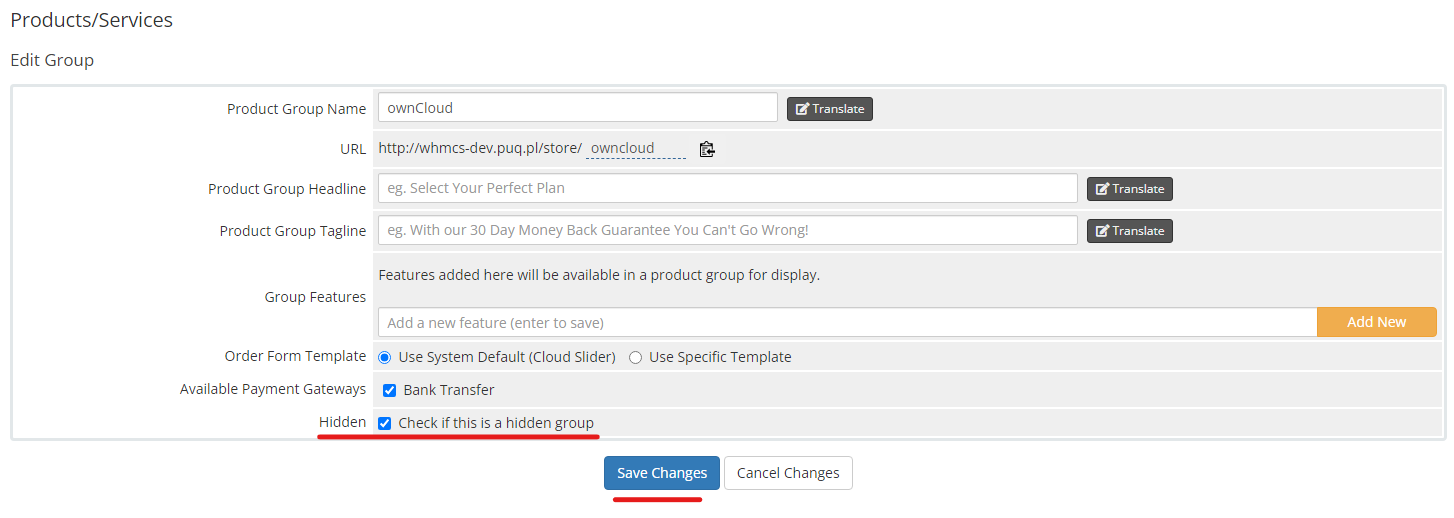
If you want to hide the group, select the group you want to hide and click on Edit.

 To translate the page to the group name, go to Edit of the selected group and click on the Translate button next to the Product Group Name field.
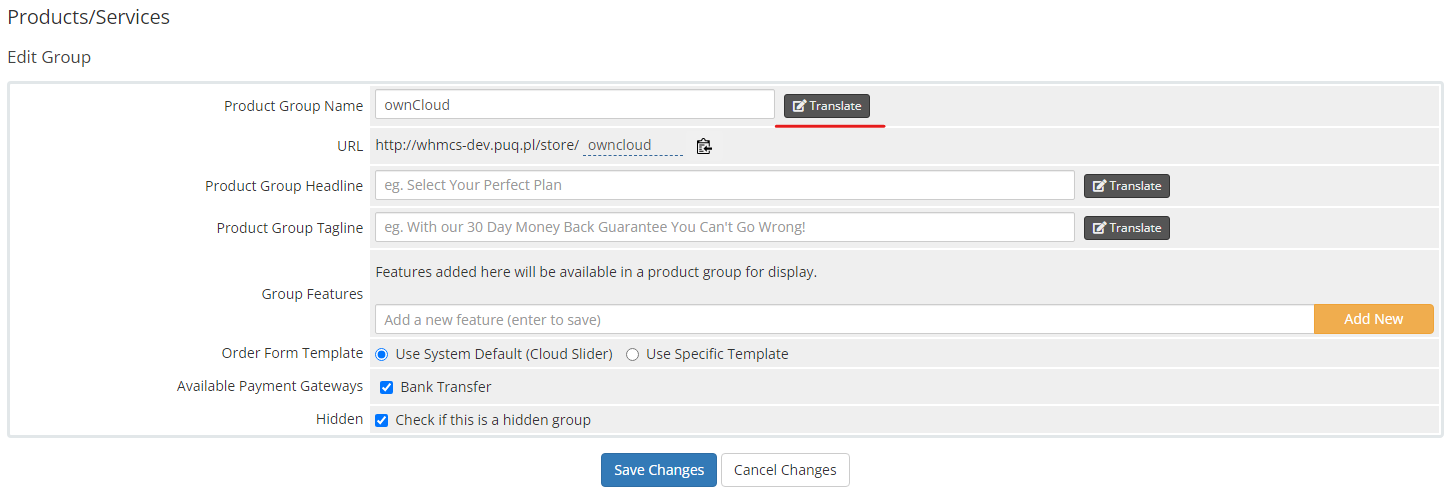
Select the language you want to translate the group to, enter the name in that language, and click on Save Changes.
