4. Create new server for Proxmox in WHMCS
ProxmoxKVM module WHMCS
Order now | Download | FAQ
Preface
For the module to work properly, you must configure the server settings in Your main WHMCS panel. This is the place to set up a proxmox server or proxmox cluster, which will then be used to build KVM machines. Here we define the access data IP ranges and additional settings.
Attention.
If you have one server, or you do not use server groups. Van needs to make this server the default. By clicking on it with the mouse.
Make this server the active default for new signups
Server creation
Login to Your WHMCS panel and create new server Proxmox in WHMCS (System Settings->Products/Services->Servers)

System Settings->Servers->Add New Server- Enter the correct Name and Hostname
- In field Assigned IP Addresses you must enter a list of IP addresses of virtual machines that will be reserved for this server.
Starting with version 1.3, the module started supporting IPv4/IPv6 pools.
In order to manage pools of IPv4 and IPv6 IP addresses, you need to install the PUQ Customization addon module (free)
https://doc.puq.info/books/puq-customization-whmcs-addon/page/ip-pools
https://doc.puq.info/books/puq-customization-whmcs-addon/chapter/module-puqproxmoxkvm
https://doc.puq.info/books/puq-customization-whmcs-addon
https://download.puqcloud.com/WHMCS/addons/PUQ-Customization/
Format to follow in the Assigned IP Addresses field.
To define the available pool of IP addresses, for each available IP number you should enter another line where the data is separated by the "|" separator. Each line with an IP number definition has the following structure:
<bridge>|<vlan_tag>|<IP_address>|<net_mask>|<Gateway>|<DNS1>,<DNS2>
<bridge> - the bridge to which the machine is connected is virtual.
<vlan_tag> - vlan which will be installed on the map of the network machine. In case of not using vlan, you need to set 0
Example:
vmbr0|10|192.168.10.2|24|192.168.10.1|8.8.8.8,1.1.1.1
vmbr0|10|192.168.10.3|24|192.168.10.1|8.8.8.8,1.1.1.1
vmbr0|10|192.168.10.4|24|192.168.10.1|8.8.8.8,1.1.1.1
vmbr0|30|192.168.20.2|24|192.168.20.1|8.8.8.8,1.1.1.1
vmbr0|30|192.168.20.3|24|192.168.20.1|8.8.8.8,1.1.1.1
vmbr0|30|192.168.20.4|24|192.168.20.1|8.8.8.8,1.1.1.1
vmbr1|333|172.16.5.2|24|172.16.5.1|8.8.8.8,1.1.1.1
vmbr1|333|172.16.5.3|24|172.16.5.1|8.8.8.8,1.1.1.1
vmbr1|333|172.16.5.4|24|172.16.5.1|8.8.8.8,1.1.1.1
vmbr3|0|10.0.25.2|24|10.0.25.1|10.0.10.10,10.0.10.20
vmbr3|0|10.0.25.3|24|10.0.25.1|10.0.10.10,10.0.10.20
vmbr3|0|10.0.25.4|24|10.0.25.1|10.0.10.10,10.0.10.20
vmbr3|0|10.0.25.5|24|10.0.25.1|10.0.10.10,10.0.10.20
vmbr3|0|10.0.25.6|24|10.0.25.1|10.0.10.10,10.0.10.20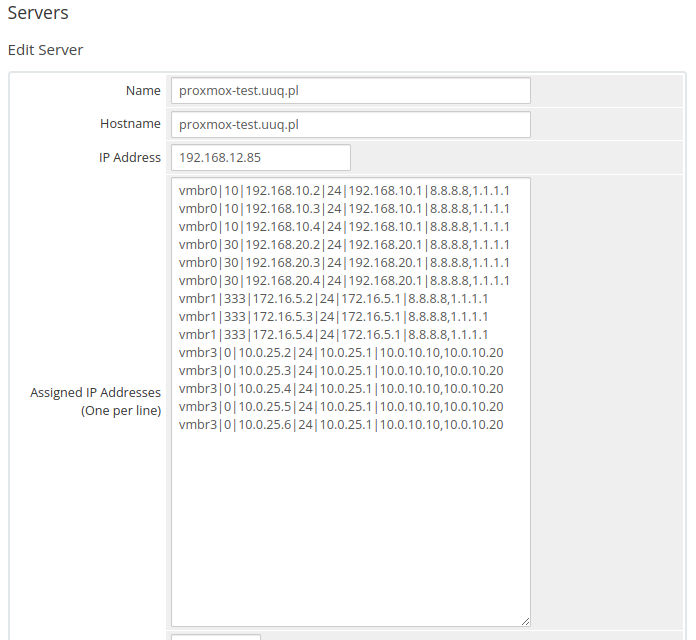
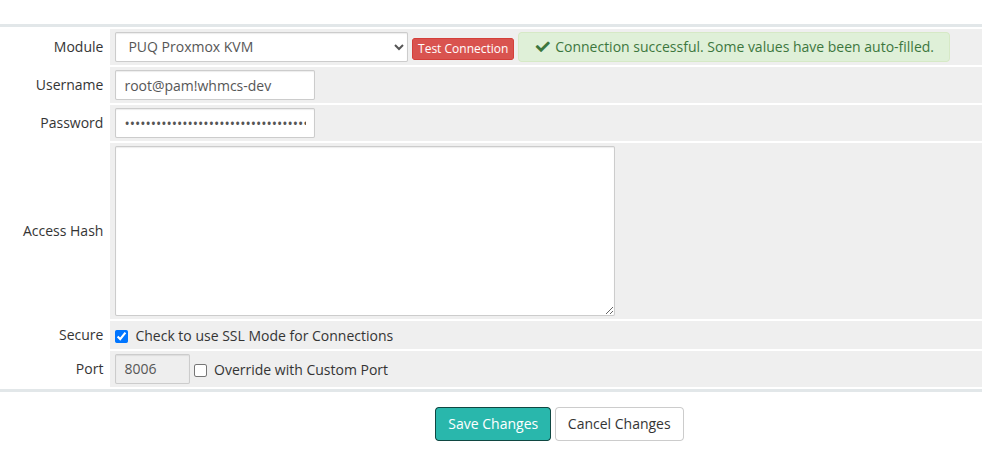
Enter the correct data in the username and password field
- In the Server Details section, select the "PUQ Proxmox KVM" module and enter the correct username and password for the Proxmox web interface.
- To check, click the "Test connection" button
Attention: Starting from module version 2.3, authentication has been changed to token-based.
In the username field, you must enter the Proxmox token ID in the format root@pam!whmcs-dev, and in the password field, enter the token value.
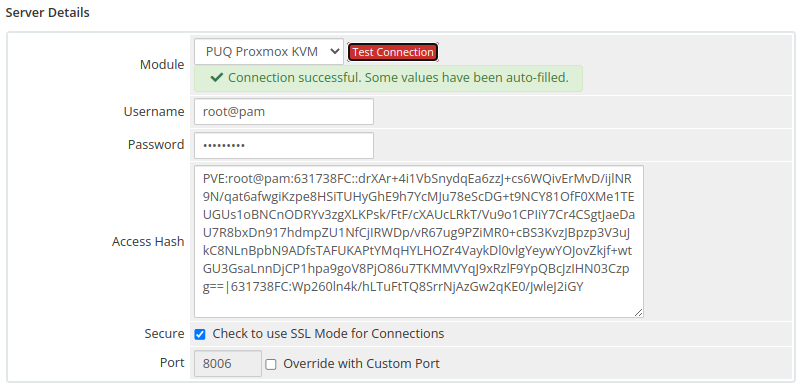
If you are using a version earlier than 2.3, you must enter the Proxmox username in the format root@pam in the username field, and the corresponding password in the password field.
During operation, the module will automatically fill in the Access Hash field. This field does not need to be completed.
VERSION 2.3+
VERSION 2.2-
Attention
If you have one server, or you do not use server groups. Van needs to make this server the default. By clicking on it with the mouse.
Make this server the active default for new signups
