Export Tools
The "ExportTool" extension for WHMCS enables seamless JSON or XML export of data from various WHMCS tables, offering customizable, secure, and efficient data management and integration capabilities.
Description
PUQ Customization module WHMCS
Order now | Download | FAQ
Export Tools
The "ExportTool" extension for WHMCS is a powerful and flexible tool designed to facilitate the export of data in JSON and XML format directly from WHMCS tables. It allows you to create unlimited groups of tables for targeted data management and extraction. With the inclusion of "WHERE" conditions that can be combined using "AND", it offers granular control over the data being exported. Each table group generates a unique URL, providing secure and direct access to the exported data. Additionally, the extension supports data pagination, ensuring efficient data retrieval and handling, even for large datasets. Moreover, the tool enables external applications to connect and access data seamlessly, offering an ideal solution for integrating WHMCS data with third-party software and services. This combination of features makes the ExportTool extension an essential utility for advanced data integration and management within the WHMCS ecosystem.
Configuration
PUQ Customization module WHMCS
Order now | Download | FAQ
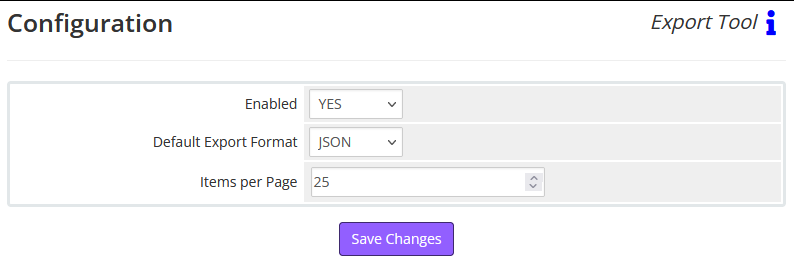
On the "Configuration" page of the Export Tool, you are presented with a straightforward interface to manage the settings for data export functionalities:
1. Enabled: This dropdown allows you to toggle the export feature on (YES) or off (NO). When set to 'YES', the Export Tool is active and can perform data export operations. If set to 'NO', the export capabilities are disabled.
2. Default Export Format: Here you can select the format in which data will be exported. The dropdown menu currently offers 'JSON' and 'XML', which is a common data interchange format that encapsulates data in a structured, key-value pair format. It is widely used because of its text-based nature, making it easy to read and write while also being language-independent.
3. Items per Page: This field lets you specify the number of items you want to display on each page of your exported data. It is pre-set to '25', which means that if you have more than 25 records, they will be paginated accordingly. You can adjust this number based on how much data you want to process or view at once.
At the bottom of the page, the "Save Changes" button allows you to apply any adjustments you've made to the settings. It's crucial to click this after making changes to ensure that your preferences are stored and will be used in future export operations.
These settings provide an initial configuration for how the Export Tool operates, offering a layer of customization to fit your data management needs.
Groups Export
PUQ Customization module WHMCS
Order now | Download | FAQ
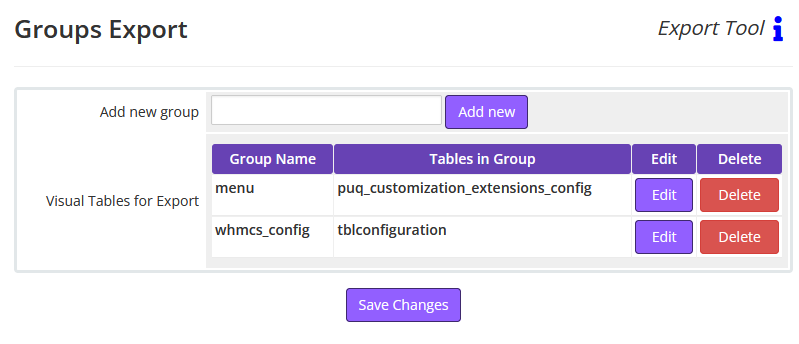
On the "Groups Export" page of the Export Tool, the interface is designed for managing groups of tables that you have set up for exporting data:
1. Add new group: Here, you can create a new group for organizing your tables. Simply type the name of the new group into the text field and click the "Add new" button. This action will create a new group which you can then configure by adding specific tables and setting export conditions.
2. Visual Tables for Export: This section displays the groups that are currently set up for export along with the tables included in each group. For each group listed, there are options to "Edit" or "Delete":
- - Group Name: This column lists the names of the groups you have created, providing an easy reference to manage multiple sets of tables.
- - Tables in Group: Next to each group name, you see the tables that are included in that group. These are the tables whose data you can export using the configurations you have set up for that specific group.
- - Edit: Clicking the "Edit" button next to a group allows you to modify the group's settings. This typically includes changing the tables in the group, adjusting export conditions, or altering access permissions.
- - Delete: If you wish to remove a group entirely, clicking the "Delete" button will remove the group and all associated configurations from the export tool.
Finally, at the bottom of the page, the "Save Changes" button should be clicked after making any changes to commit them to the system.
This page is crucial for organizing your data export activities into manageable groups, which simplifies the process of exporting data from multiple tables and ensures that you can easily access and modify your export settings as needed.
Edit Group
PUQ Customization module WHMCS
Order now | Download | FAQ
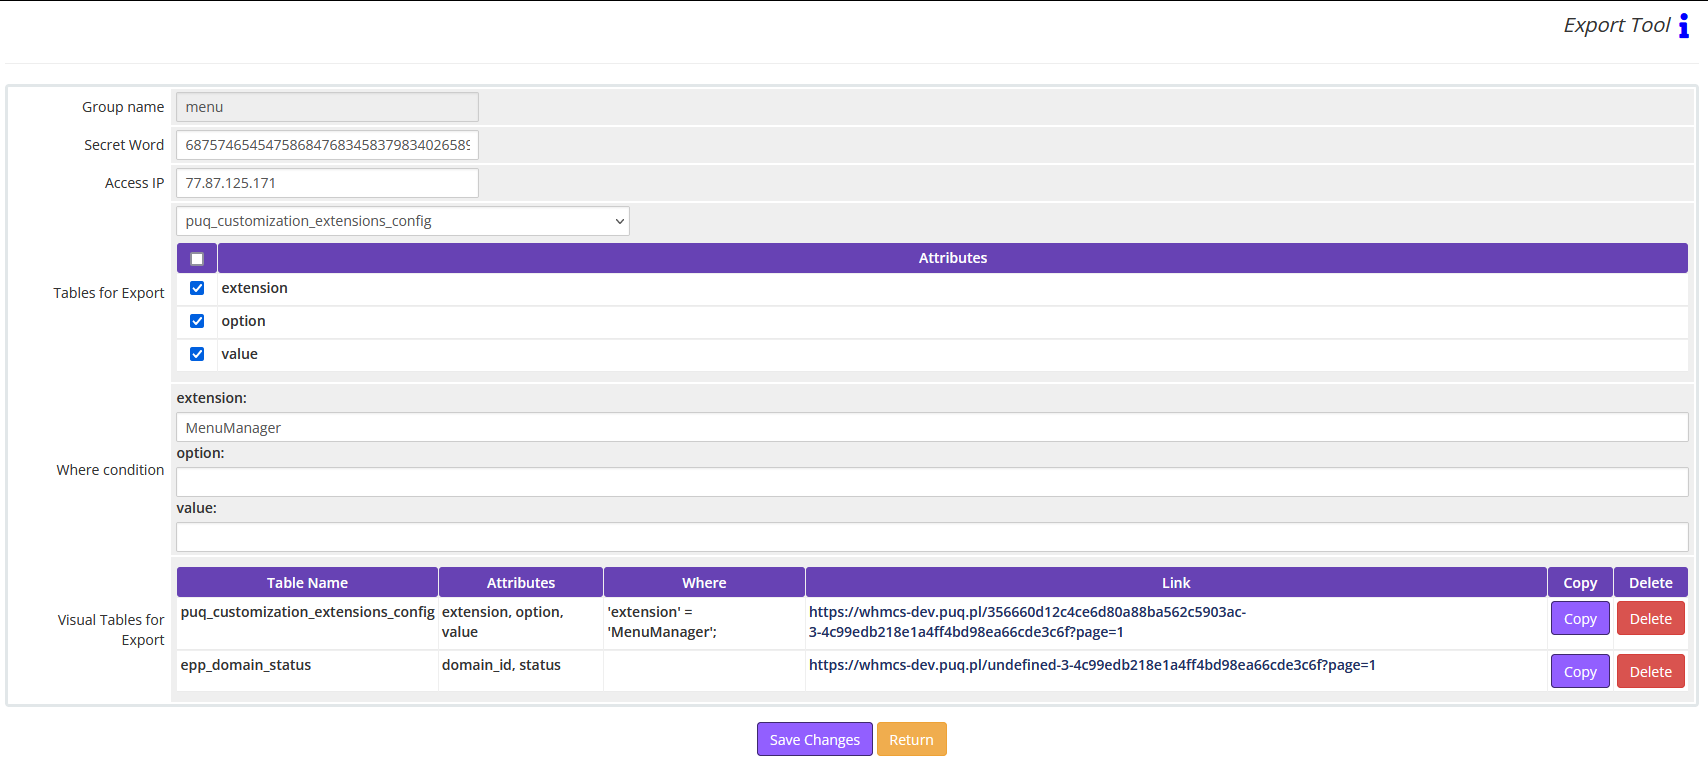
The "Edit Group" page in the ExportTool module is designed to manage and create new groups of data for export. Here's a breakdown of the functionalities available on this page:
- Group Name: This field is where you name your group. It serves as an identifier for the set of data you wish to export.
- Secret Word: Here, you can enter any string which acts as a secret key for generating the hash part of the URL. This is part of the security mechanism to prevent unauthorized access.
- Access IP: This field determines which IP addresses are allowed to access the exported data. You can list multiple IPs separated by commas or use "0.0.0.0" to allow access from any IP. Note that changing this will also change the generated link, as the access IP is factored into the hash generation.
- Tables for Export: A dropdown menu allows you to select from all available tables in your database. Upon selection, all the attributes (columns) available in that table are displayed. You can check the attributes you wish to export, which will then be reflected in the "Visual Tables for Export" section.
- Where Condition: This interactive field allows you to input 'WHERE' conditions that work like 'AND' for each value entered. This feature enables you to refine your data selection based on specific criteria.
- Visual Tables for Export: Displays all the tables you've selected for export along with their attributes and 'WHERE' conditions. In this section, you can see the generated link for data access, copy it, or remove tables from the export group.
To finalize your settings, use the "Save Changes" button. This will update the configurations, including the unique URL generated for data access based on the secret word and access IP you've provided. Remember, each change you make will potentially alter the unique URL, so it's essential to save only after finalizing your settings to ensure consistency and security.