Menu Manager
Allows you to create a custom menus.
Description
PUQ Customization module WHMCS
Order now | Download | FAQ
Menu Manager
Description of the "Menu Manager" extension:
Key features of the extension:
-
Building a two-level menu with easy drag-and-drop of menu items. You can create and customize your own menu according to your needs.
-
Multilingual support for menu items. You can specify different menu item names for different languages, allowing you to adapt the menu to different audiences.
-
Ability to display menu items for logged-in clients, non-logged-in clients, or both. You can configure the visibility of menu items based on the client's authentication status.
-
Each menu item can have a designated link. Users can navigate to different sections and pages by clicking on these links.
-
Option to open links in new browser tabs. This is useful when you want users to be able to view the menu and navigate through links simultaneously.
-
The extension also allows you to add separators in the menu to create a more structured and visually appealing layout.
- You can assign a personalized icon to each menu item, enhancing the visual appeal and helping clients intuitively navigate through the menu. The use of icons improves the overall user experience by providing visual cues and increasing client understanding of the menu structure.
One of the notable features of the extension is the availability of pre-built menu templates that can be installed at any time. This enables you to quickly create menus and adapt them to your needs.


Configuration
PUQ Customization module WHMCS
Order now | Download | FAQ
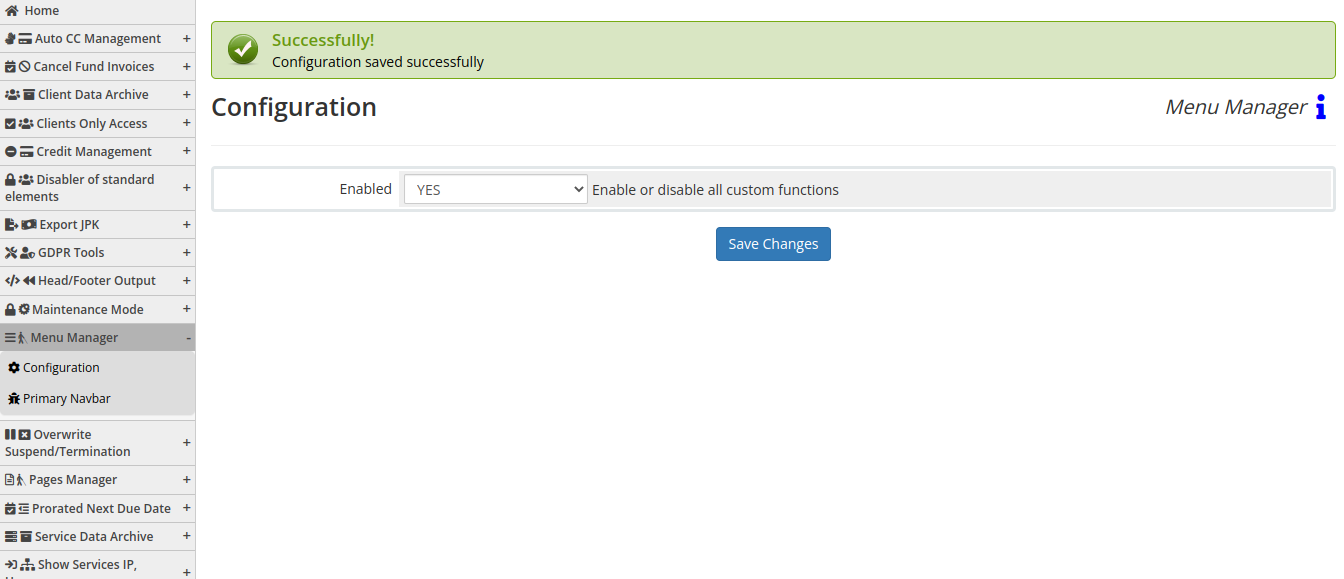
Enabled - Enabling or disabling all custom functions of this extension affects the automation and visibility of its features in the client area. When extension disabled, the automation capabilities and related features provided by the extension will not be active or visible to clients. However, as an administrator, you will still have access to configure and utilize the extension's functionalities through the administration interface. This gives you the flexibility to control the visibility and automation aspects of the extension based on your specific needs and preferences.
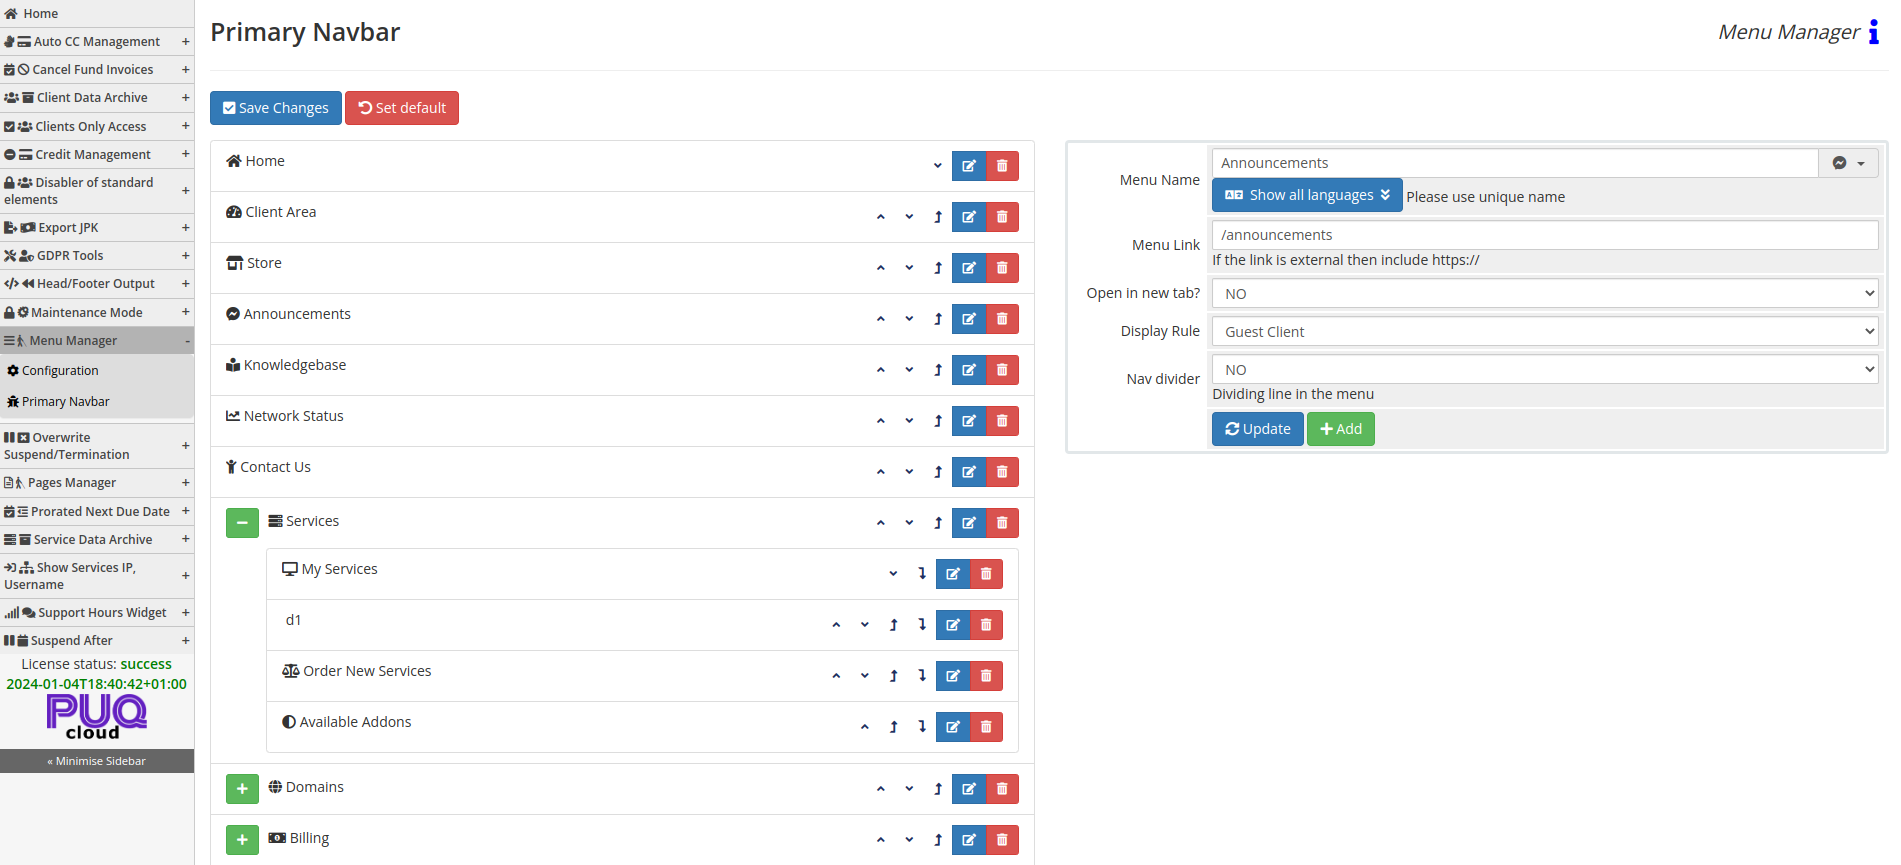
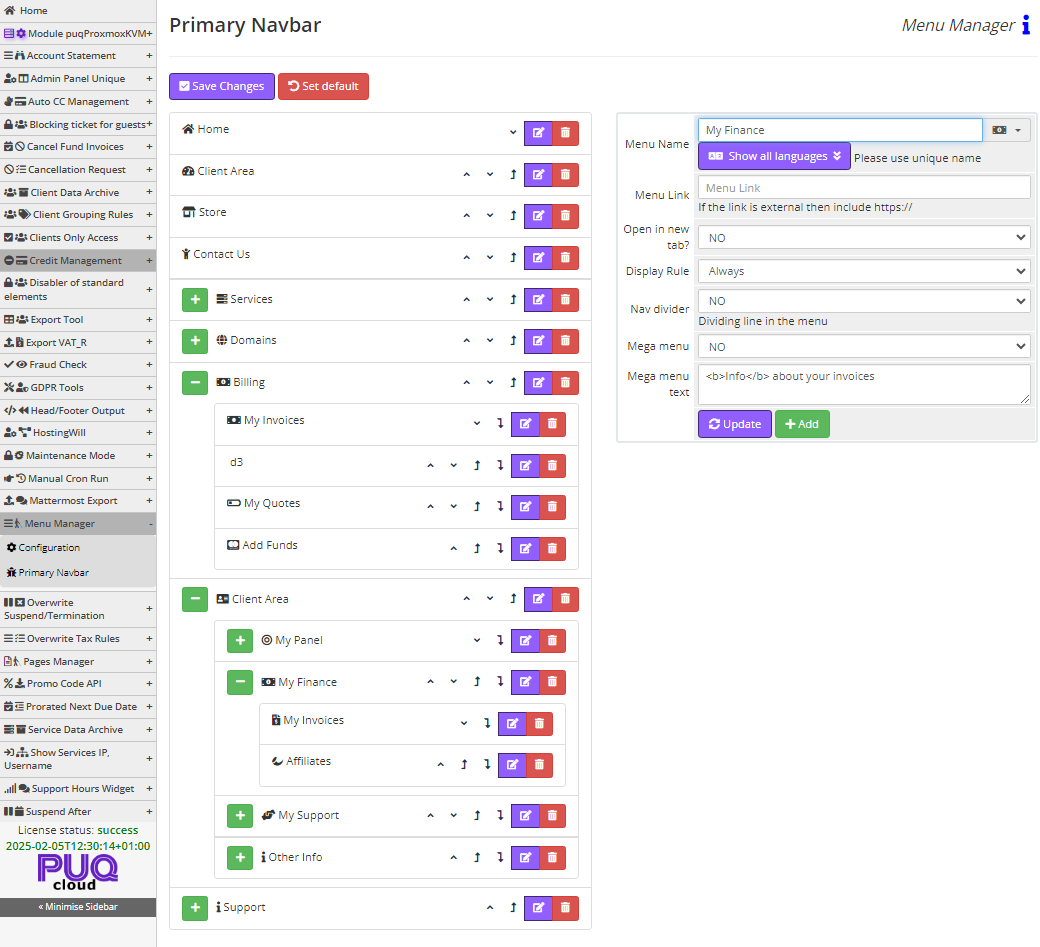
Primary Navbar
PUQ Customization module WHMCS
Order now | Download | FAQ
When configuring the menu for the first time, it will be empty. To populate it with default menu items, click the "Set Default" button.
-
On the right-hand side, you have a panel for adding and editing menu items. In this panel, you will find the following fields:
- Menu Name: Enter the name of the menu item that will be displayed in the client area. You can provide translations for all available languages.
- Icon: Choose an icon for the menu item from the dropdown list.
- Menu Link: Enter the URL to which the client will be redirected when clicking the menu item.
- Open in New Tab: Determine whether the URL should be opened in a new tab or not.
- Display Rule: Set the visibility of the menu item for logged-in clients, non-logged-in clients, or both.
- Nav Divider: This option creates a horizontal separator in the menu instead of a regular menu item.
- There are two buttons, "Update" and "Add," for updating the menu item's data or creating a new menu item, respectively.
-
On the left-hand side, you have the actual menu structure. You can navigate through the menu items using the navigation buttons. Each menu item has "Edit" and "Delete" buttons for performing the corresponding actions. Clicking the "Edit" button will populate the right-hand panel with the menu item's data, which you can edit. Remember to click the "Update" button after making changes.
After you have constructed the menu, don't forget to save your changes by clicking the "Save Changes" button in the top left corner. Next to the "Save Changes" button, there is a "Set Default" button that, when clicked, will set the menu as the default menu.
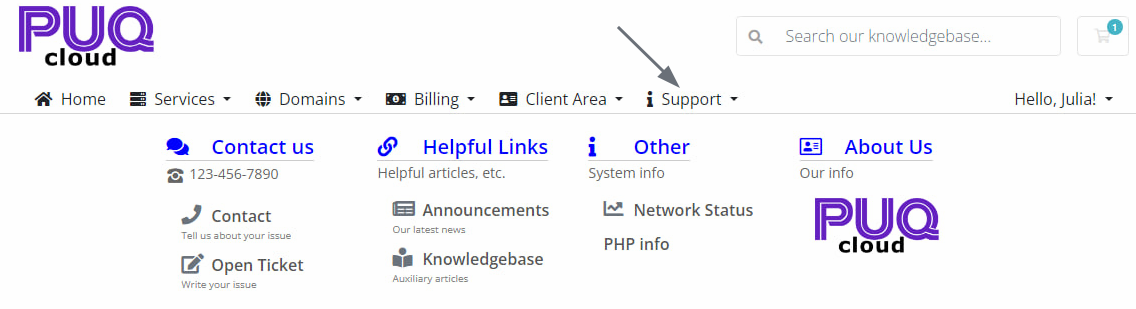
Mega Menu
Client Area
PUQ Customization module WHMCS
Order now | Download | FAQ
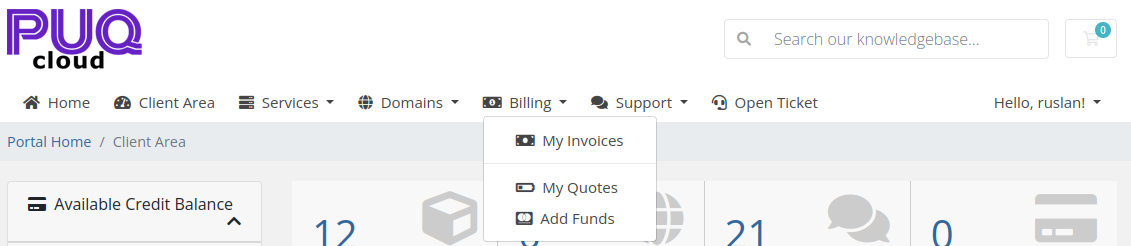
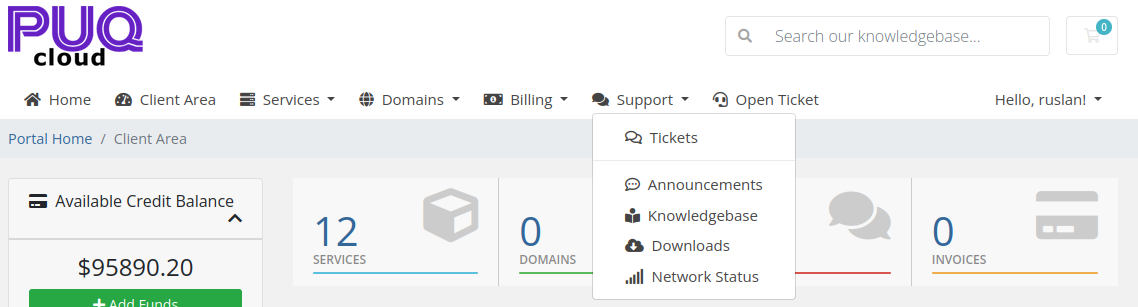
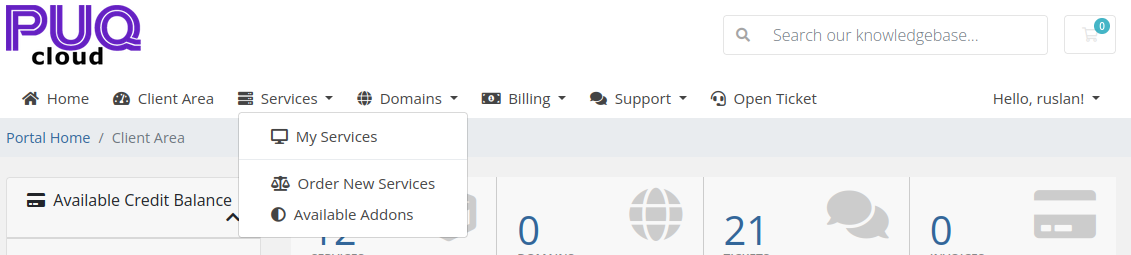
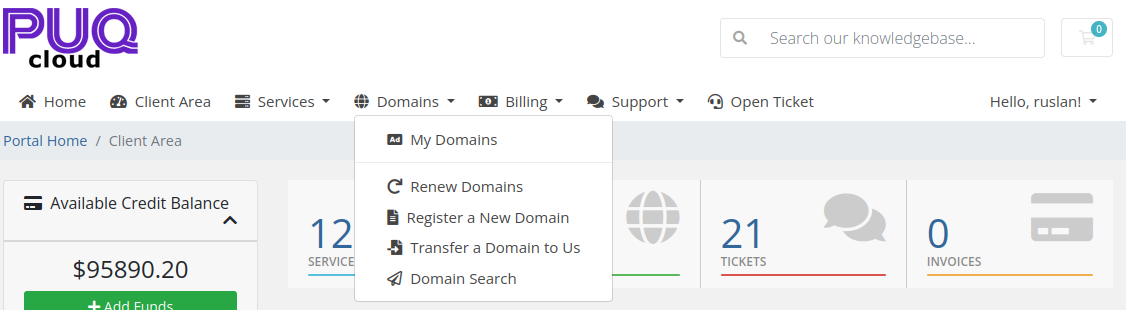
In the client area, the menu looks like this
Not for logged in users

For logged in users