# How to use Admin Area in PUQcloud Panel
# Manage Dashboard
### PUQcloud Panel
##### [Order Now](https://puqcloud.com/puqcloud-panel.php) | [Download](https://github.com/puqcloud/PUQcloud) | [FAQ](https://faq.puqcloud.com/)
[](https://doc.puq.info/uploads/images/gallery/2025-07/image-1753710908068.png)
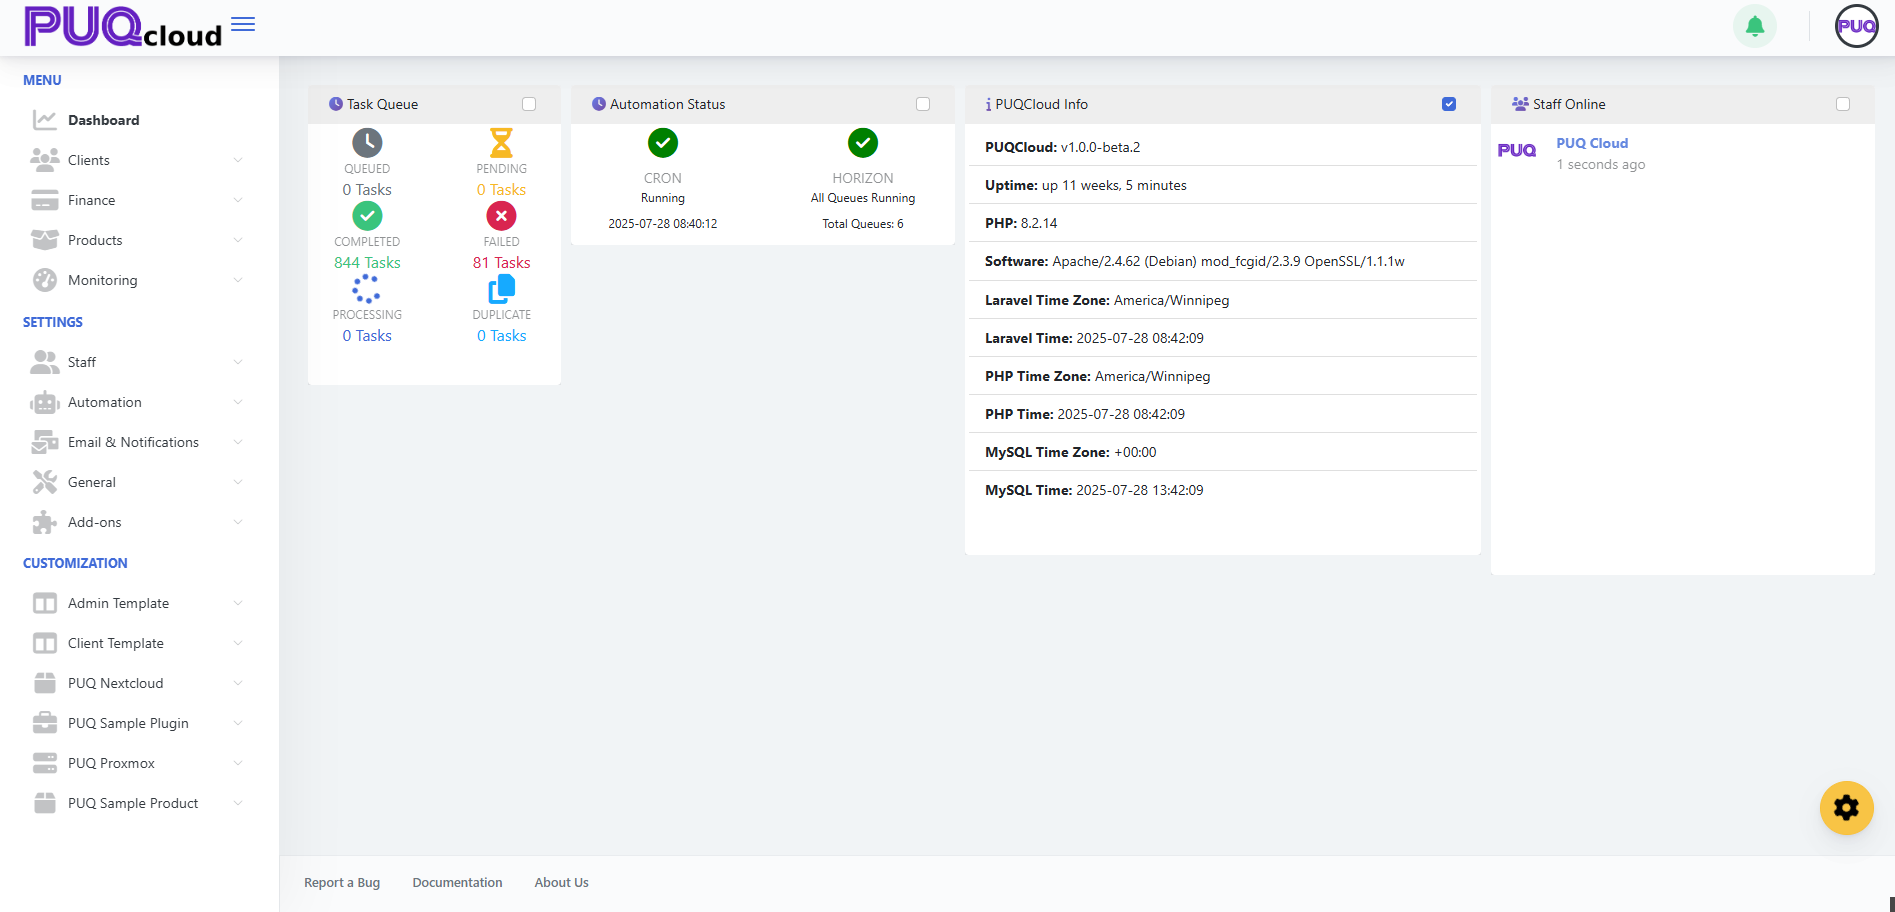
On the PUQcloud dashboard, you can see basic information such as:
- **Task Queue** – Live information about all task statuses, including Queued, Pending, Completed, Failed, Processing, and Duplicate.
- **Automation Status** – Information about Cron and Horizon statuses.
- **PUQcloud Info** – General information about the panel.
- **Staff Online** – A list of currently online staff members.
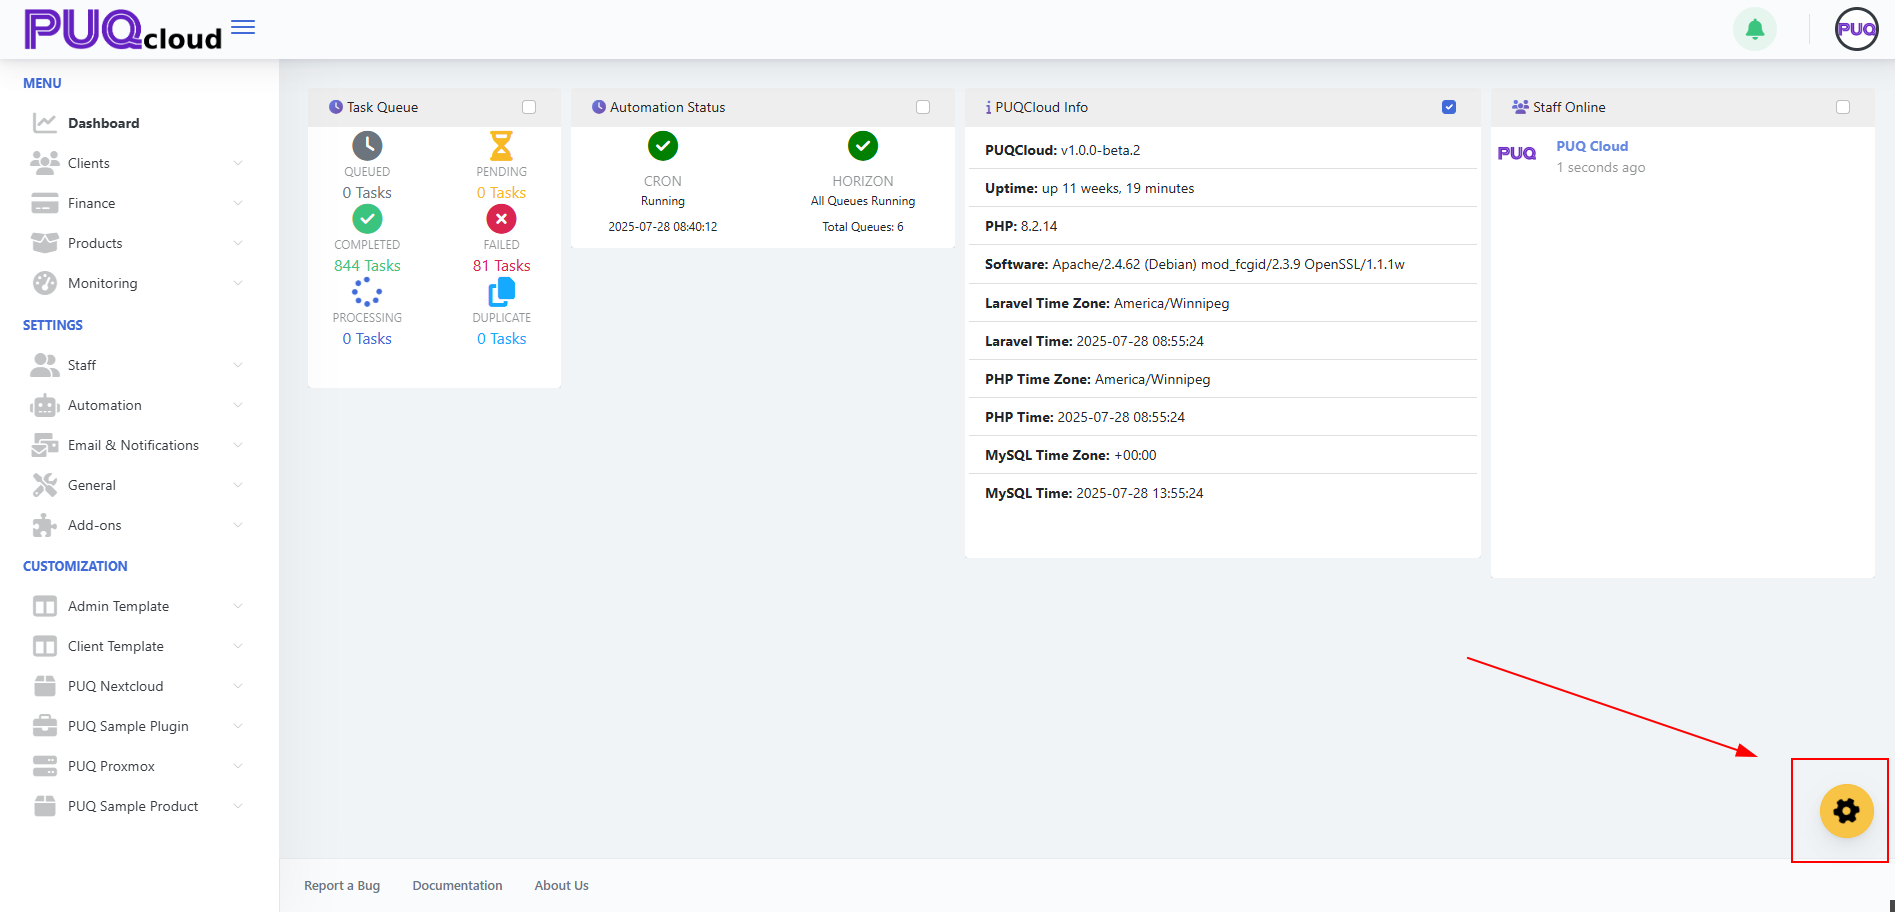
You can also manage the widgets on the dashboard.
Click the **gear icon** in the bottom-left corner.
[](https://doc.puq.info/uploads/images/gallery/2025-07/image-1753710950523.png)
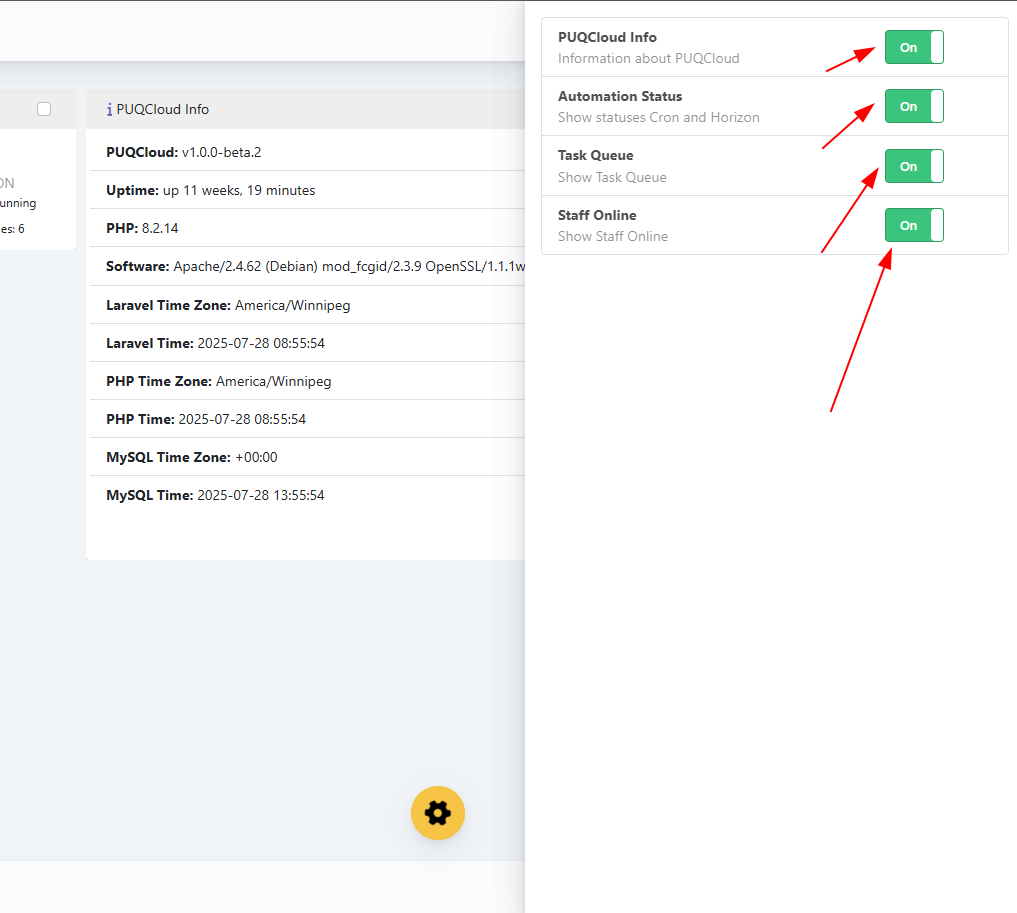
Toggle widgets on or off as needed.
[](https://doc.puq.info/uploads/images/gallery/2025-07/image-1753710972384.png)
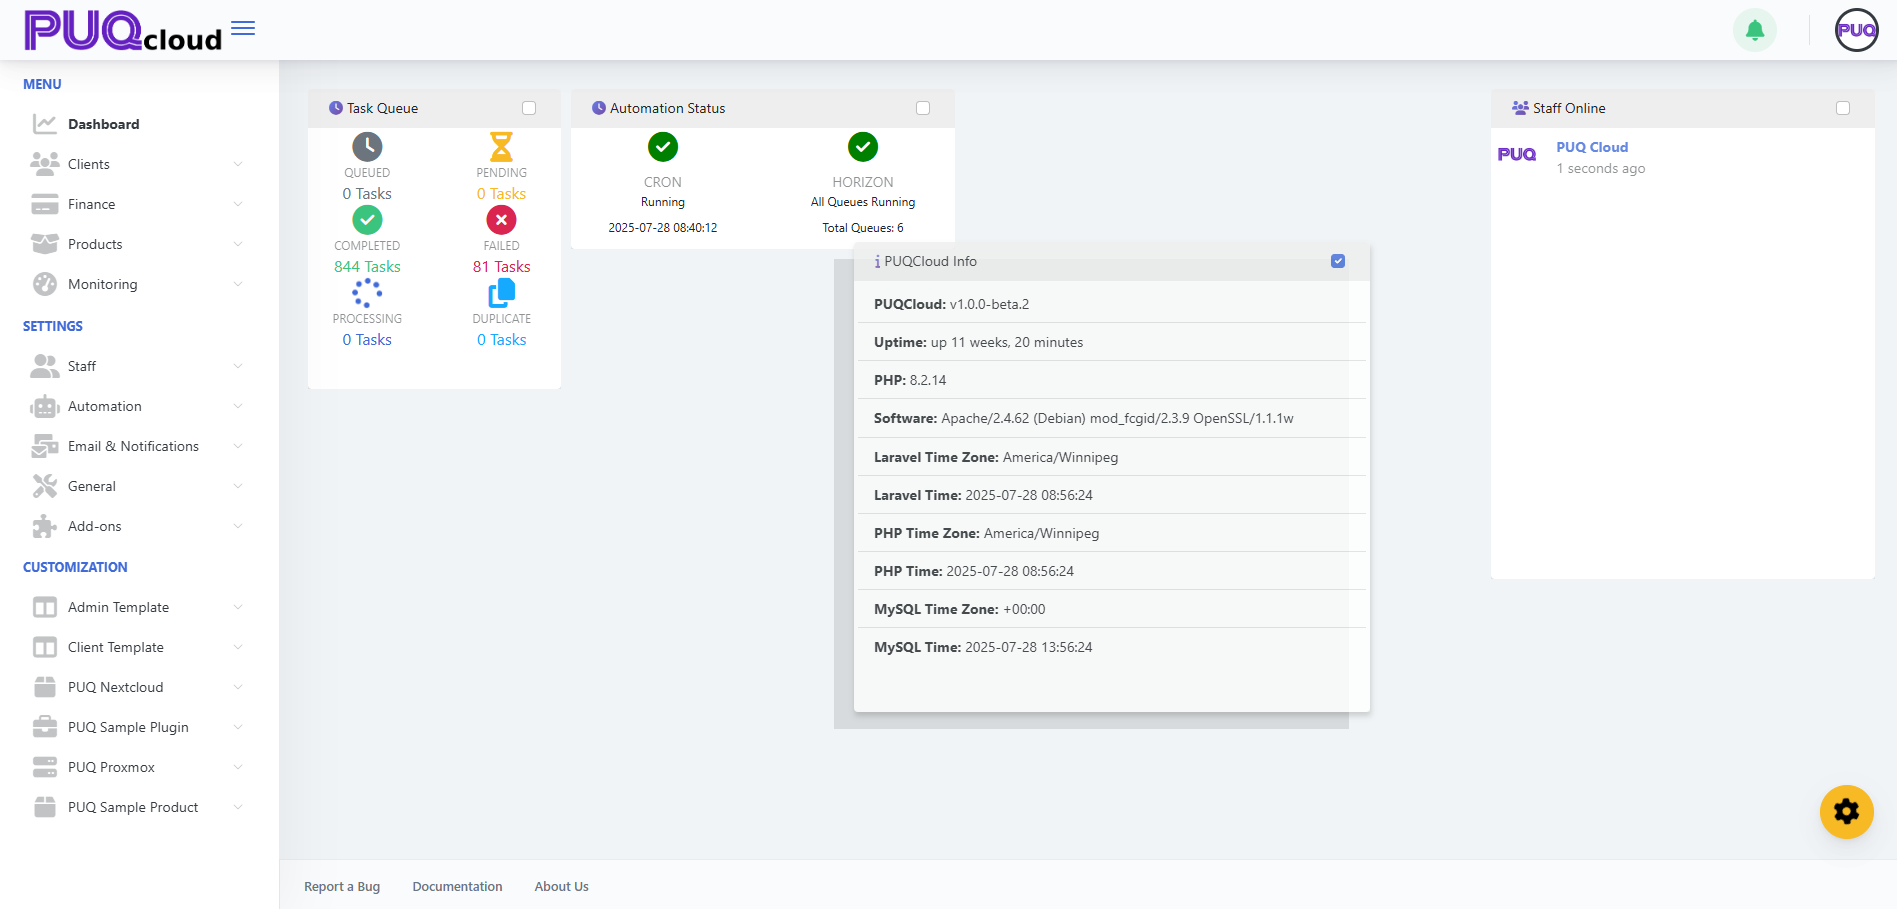
You can also rearrange any widget by simply dragging it to your preferred location.
[](https://doc.puq.info/uploads/images/gallery/2025-07/image-1753710999691.png)
# Create and manage Clients
### PUQcloud Panel
##### [Order Now](https://puqcloud.com/puqcloud-panel.php) | [Download](https://github.com/puqcloud/PUQcloud) | [FAQ](https://faq.puqcloud.com/)
#### Overview
This guide shows administrators how to create new clients and manage existing ones in **PUQcloud Panel**. You’ll learn where to find client records, how to add a client, attach users and addresses, and how to handle services, invoices, and transactions.
- - - - - -
#### Key Features
- Centralized **client directory** with search, sort, and status badges.
- Full **client profile**: personal/company info, language, currency, tax ID, credit limit, admin notes.
- **Addresses management**: billing/shipping, multiple entries, default flags.
- **Users & permissions**: associate users to the client and grant granular rights.
- **Services lifecycle**: add, view status (ACTIVE/COMPLETED/ERROR), open product actions.
- **Finance tools**: create invoices and manual transactions for charges/credits.
- - - - - -
#### Before You Begin
- You must be logged in as an administrator.
- Ensure you know your **home company** tax settings and available **products & prices**.
- - - - - -
#### Navigation
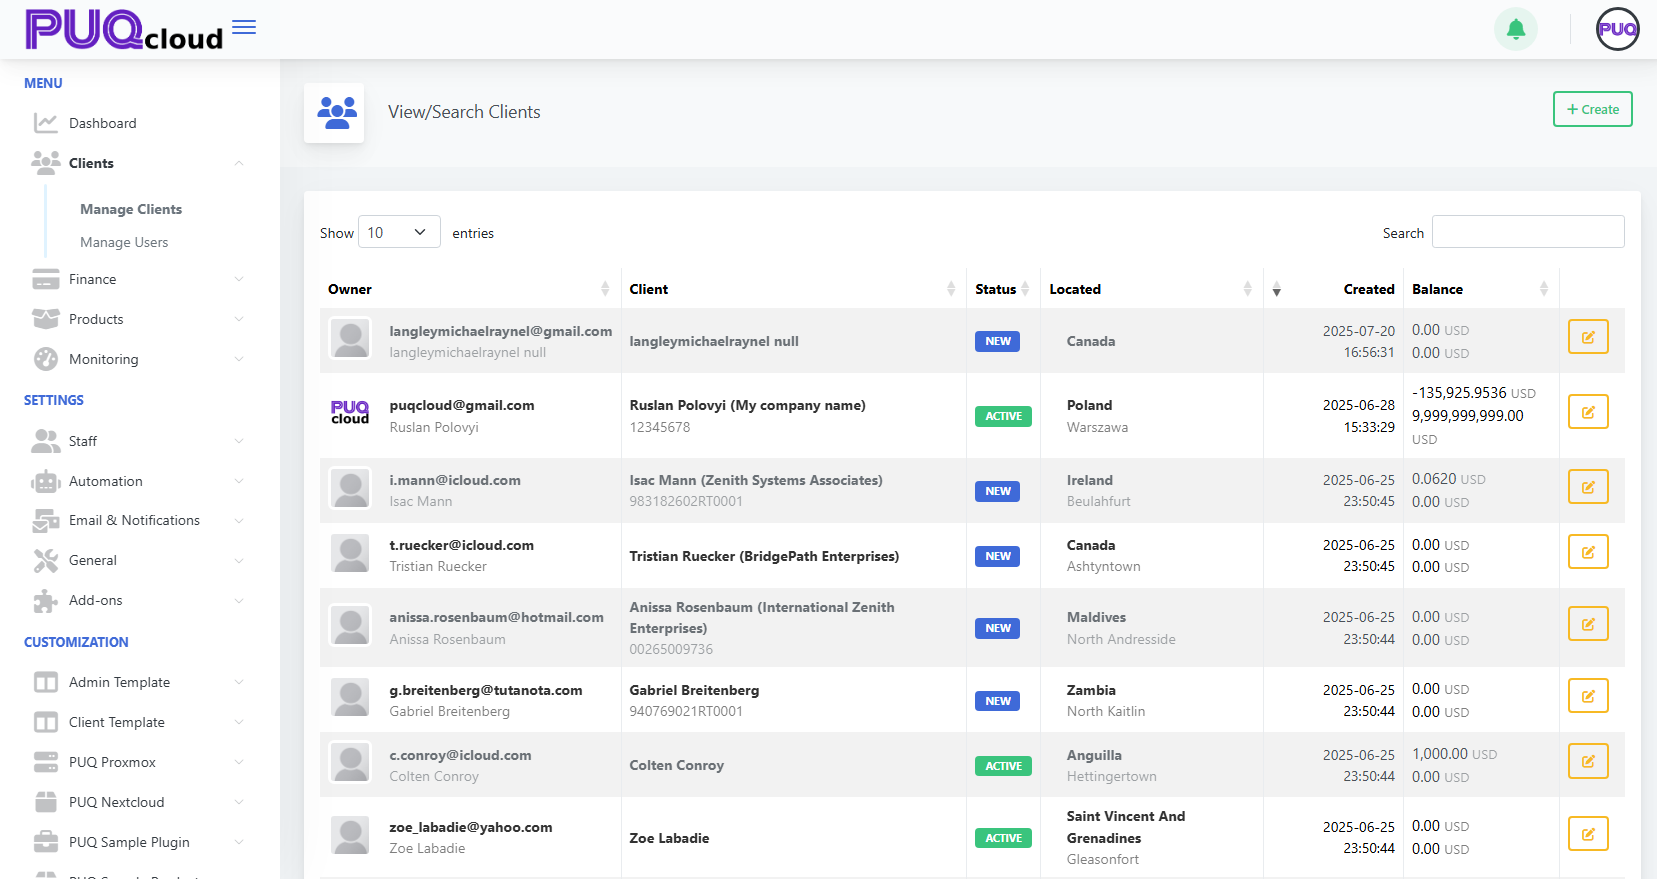
**Menu → Clients → Manage Clients** opens the client directory with columns for Owner, Client, Status, Located, Created, and Balance.
(*screenshot: View/Search Clients list*)
[](https://doc.puq.info/uploads/images/gallery/2025-09/image-1756821414730.png)
- - - - - -
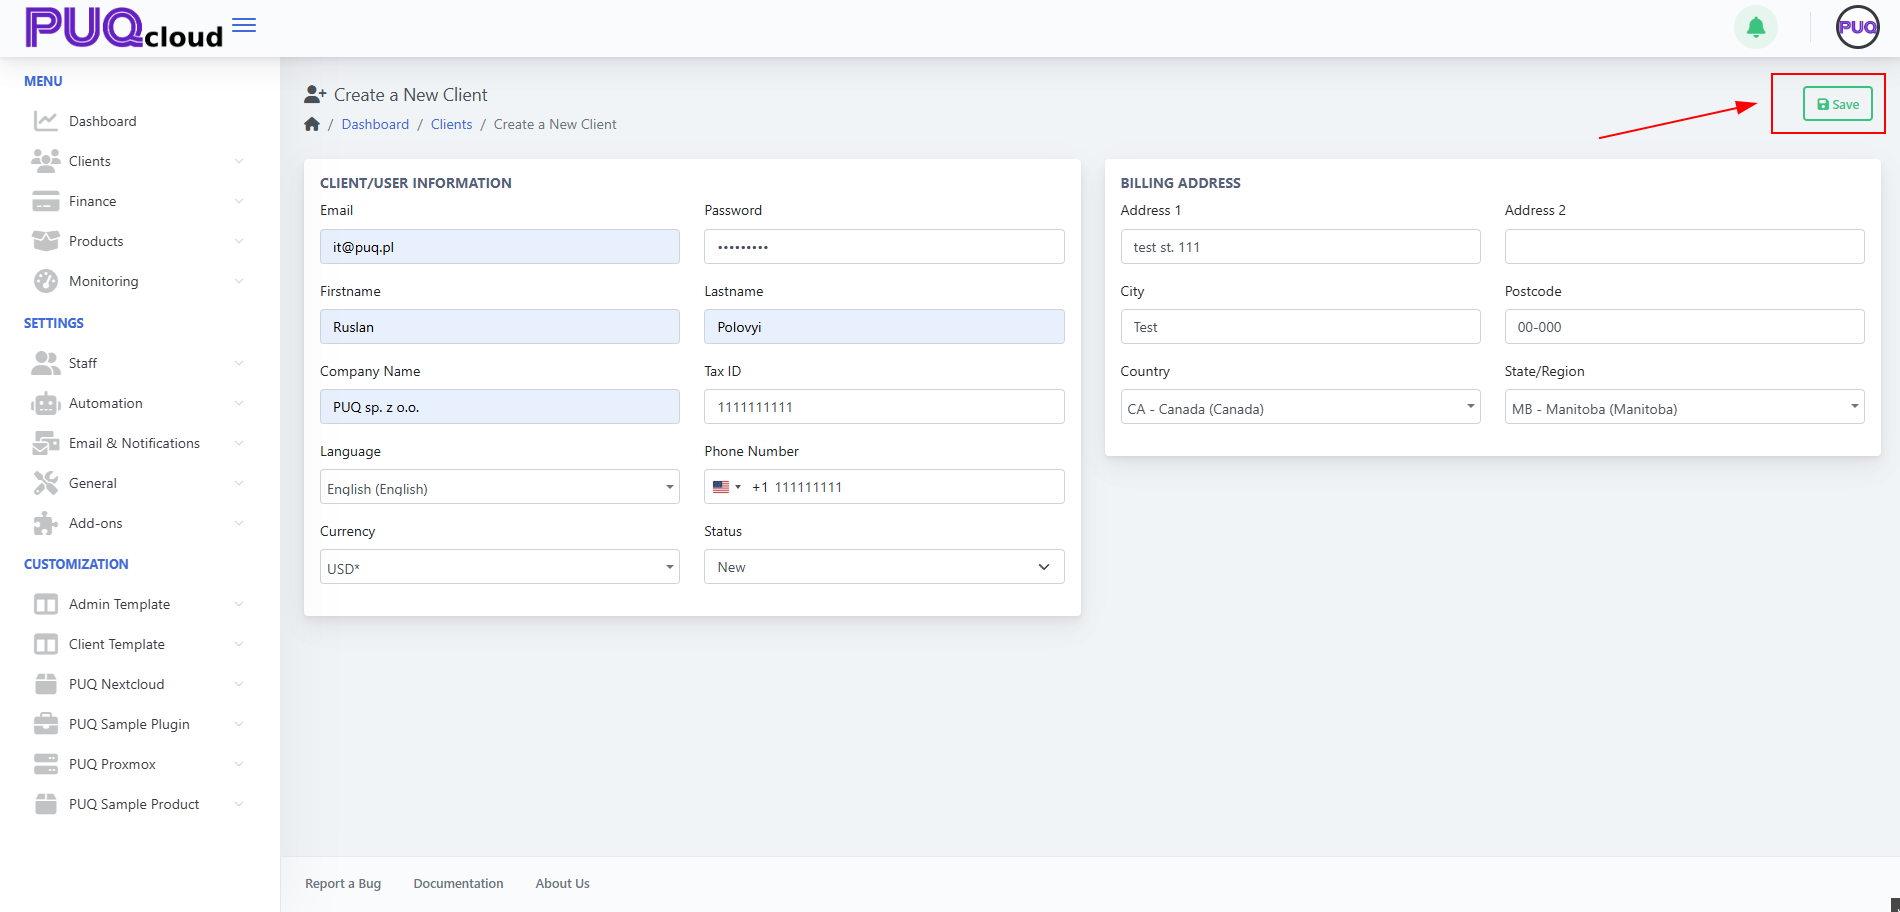
#### Create a New Client
1. Click **+ Create** (top-right on the client list).
2. Fill the **Client/User Information** fields:
- **Email** and **Password**
- **Firstname**, **Lastname**
- **Company Name** (optional for individuals)
- **Tax ID** (if applicable)
- **Phone Number** (with country code)
- **Language**, **Currency**
- **Status** (New/Active/etc.)
3. Fill the **Billing Address**: **Address 1/2**, **City**, **Postcode**, **Country**, **State/Region**.
4. Click **Save**.
*(screenshot: Create a New Client form)*
[](https://doc.puq.info/uploads/images/gallery/2025-09/image-1756821469578.png)
- - - - - -
##### Tips
- **Language** affects the UI for the client’s users.
- **Currency** determines invoice currency defaults.
- Use an accurate **Tax ID** (e.g., GST/HST/QST/VAT formats) for correct tax handling.
- - - - - -
#### Client Record – Tabs & What They Do
After saving, you’ll land on the client’s page with these tabs: **Summary, Profile, Users, Services, Invoices, Transactions**.
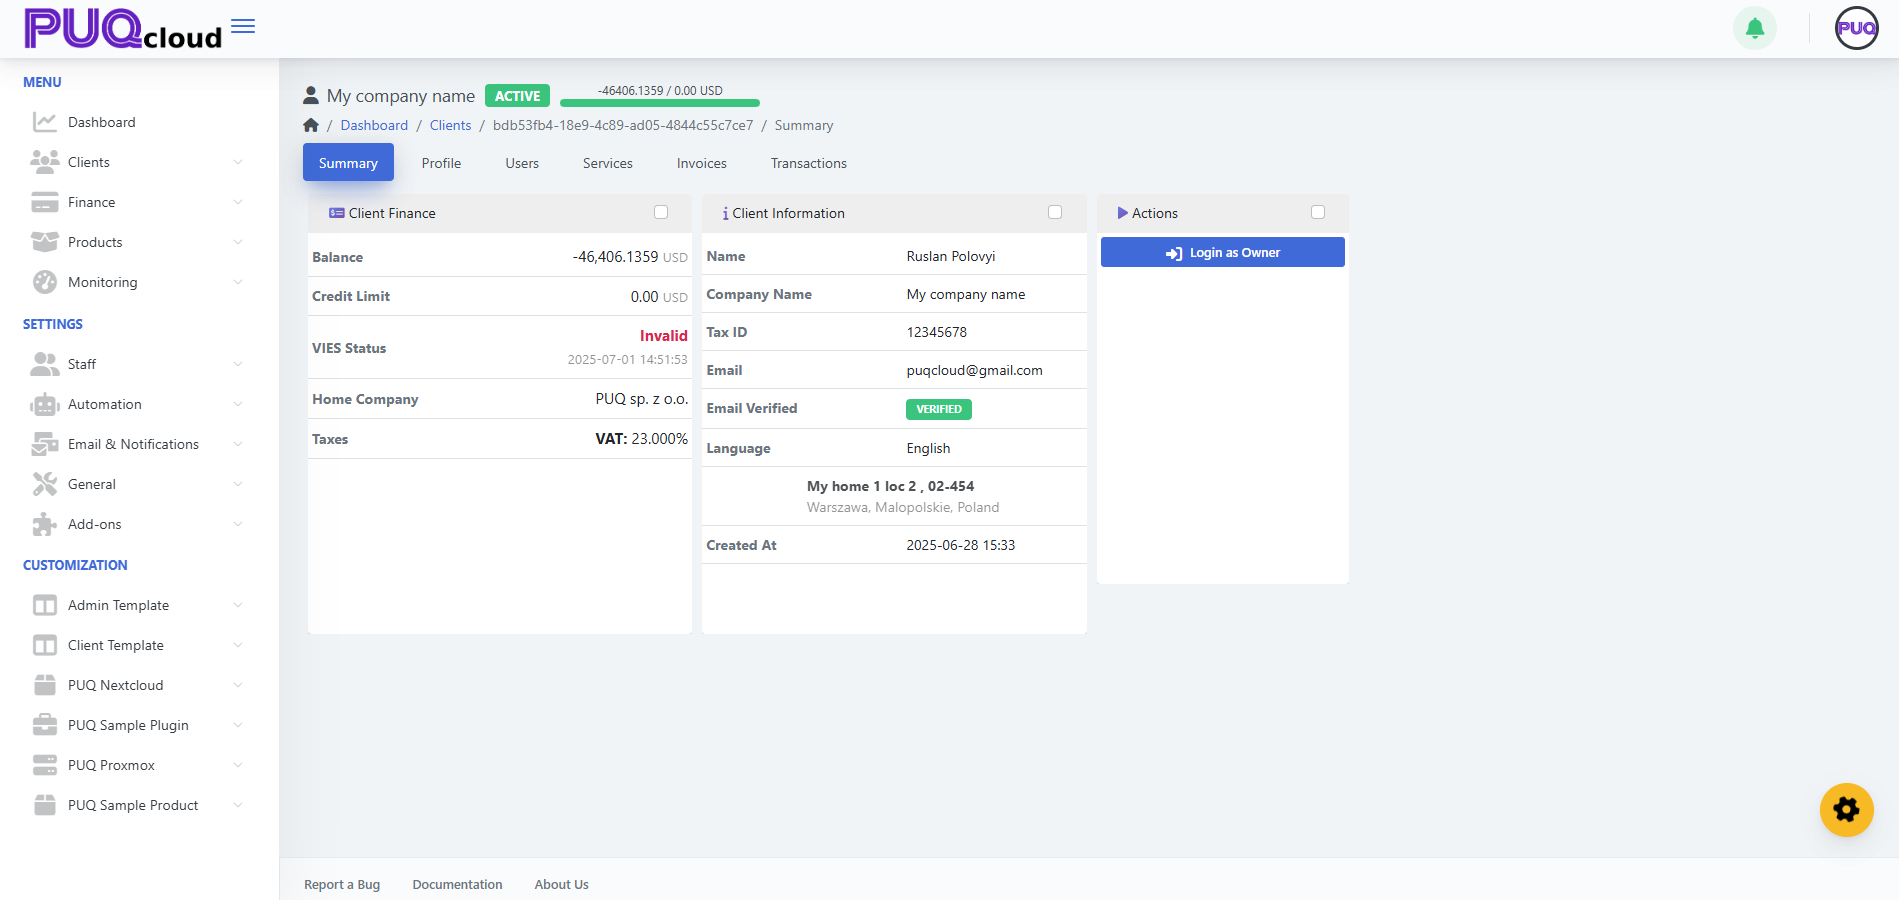
#### Summary
- Quick view of **Client Finance** (Balance, Credit Limit, VIES/Tax status) and **Client Information** (name, company, email, language, main address, created at).
- **Actions** card: **Login as Owner**.
*screenshot: Client → Summary tab*
[](https://doc.puq.info/uploads/images/gallery/2025-09/image-1756821511780.png)
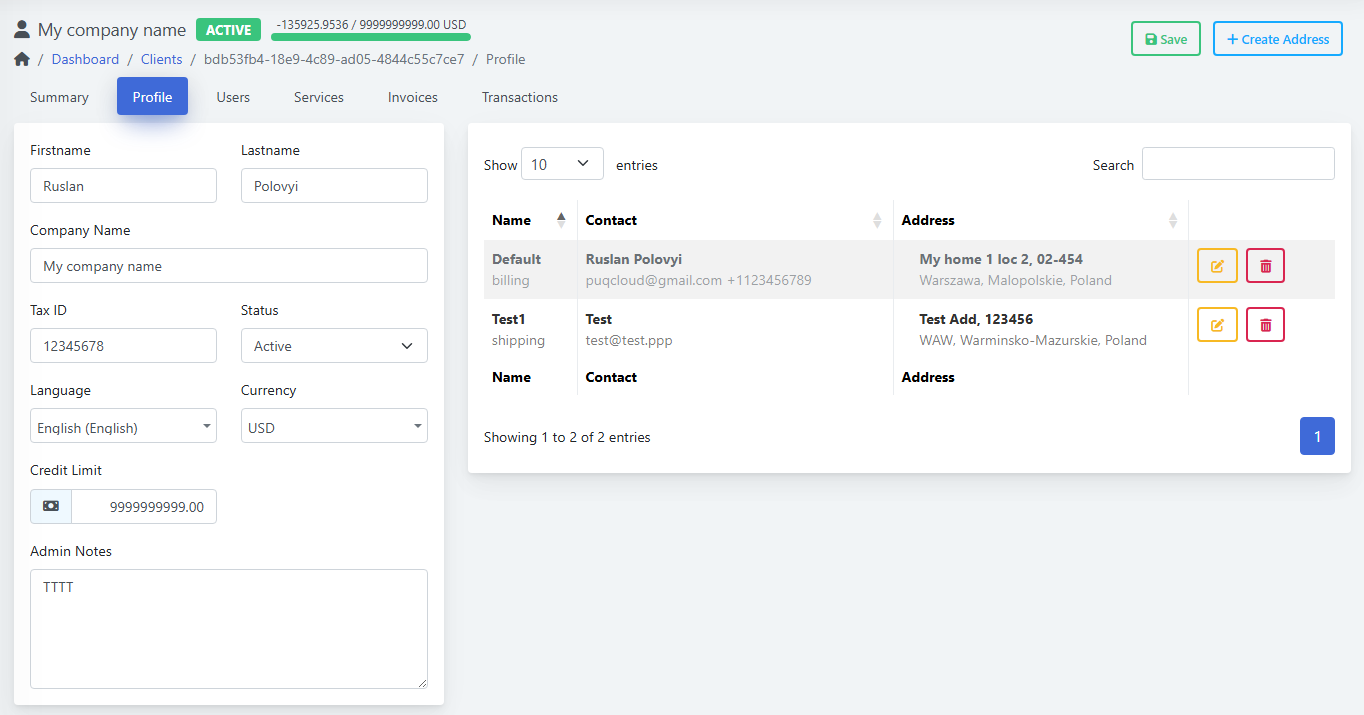
#### Profile
- Update **Firstname/Lastname**, **Company**, **Tax ID**, **Status**, **Language**, **Currency**, **Credit Limit**, **Admin Notes**.
- Right side shows the **Addresses** table with labels like **Default (billing)** or **shipping**; use the yellow **Edit** and red **Delete** buttons.
- Click **+ Create Address** to add a new address.
*(screenshot: Client → Profile tab)*
[](https://doc.puq.info/uploads/images/gallery/2025-09/image-1756821640060.png)
*(screenshot: Create Address modal (Type, Name, Contact, Phone, Email, Address, Country, State/Region))*
[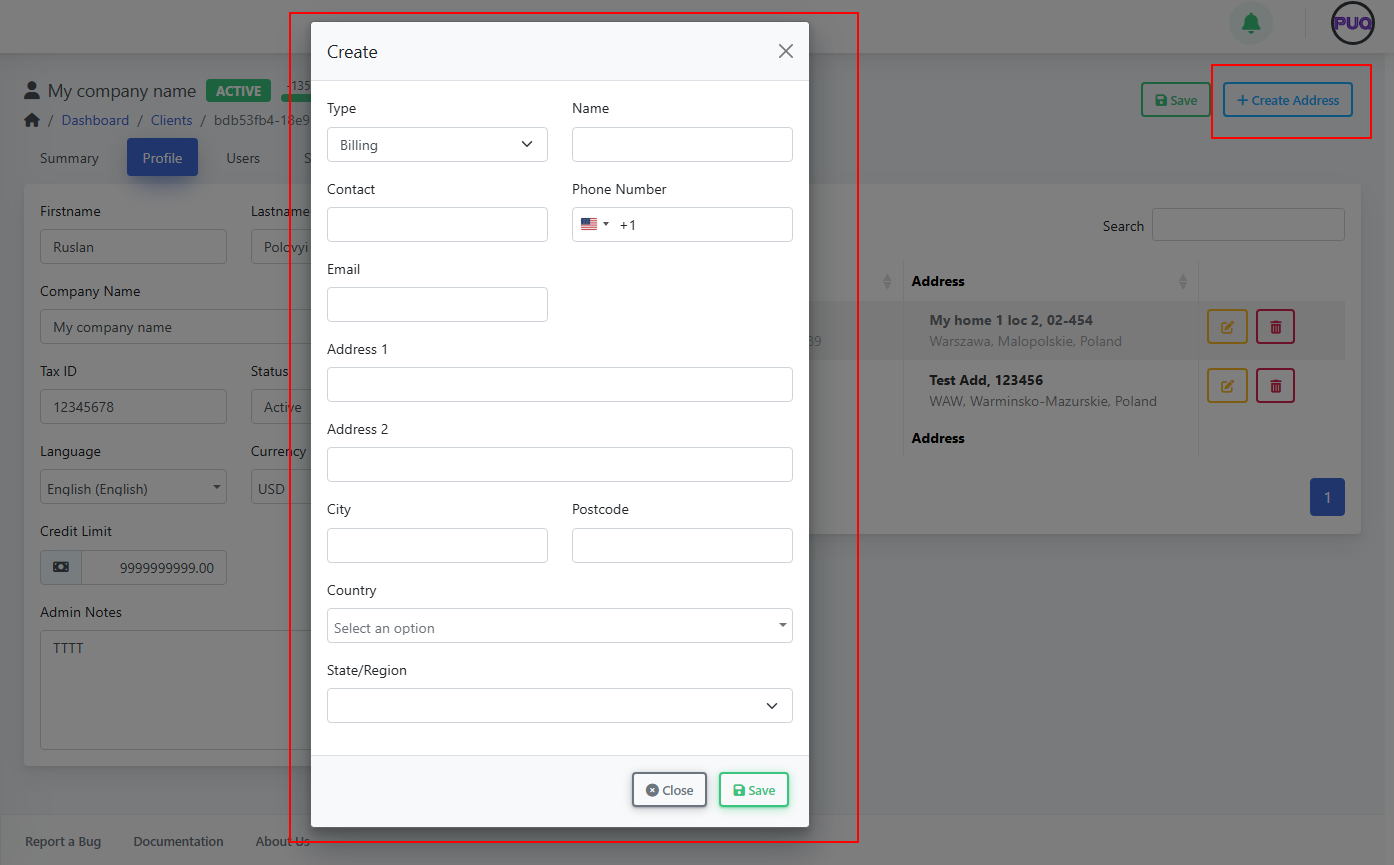](https://doc.puq.info/uploads/images/gallery/2025-09/image-1756821648483-1.png)
**Address Types**
- Billing (used on invoices)
- Shipping (for service deliveries/records)
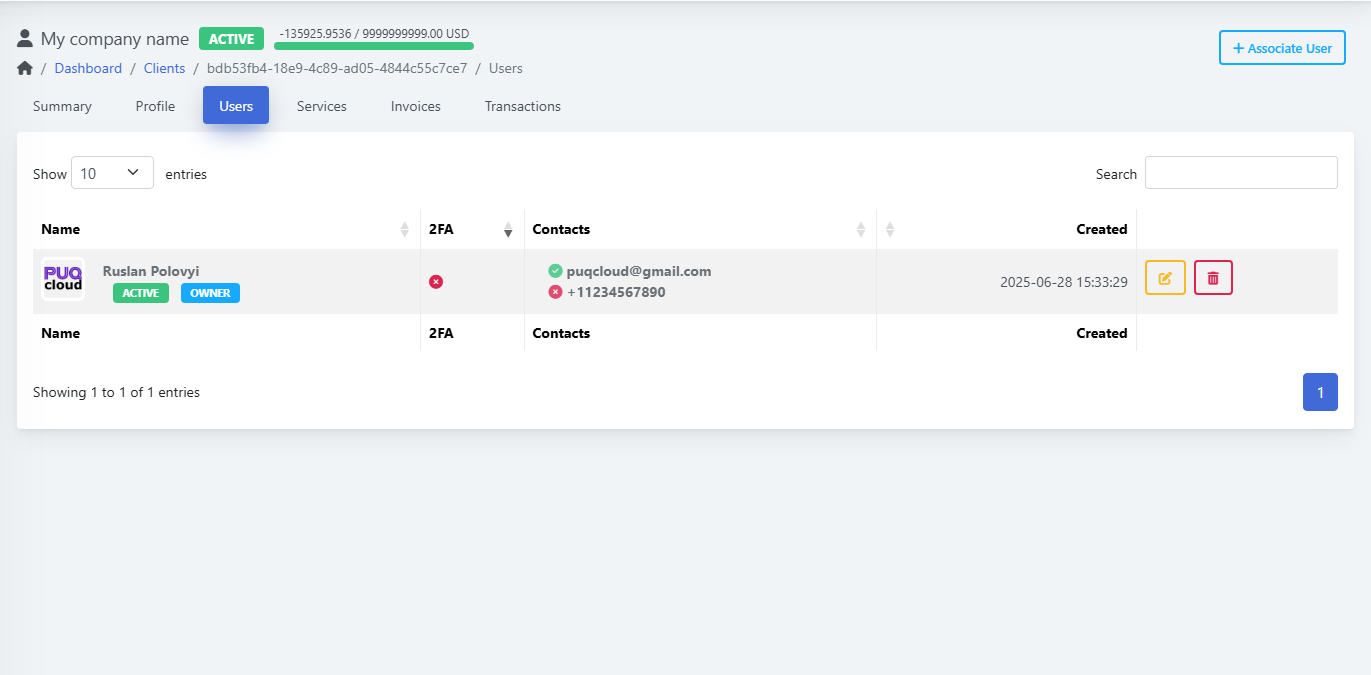
#### Users
- See associated users, 2FA status, contact info, and created date.
- Click **+ Associate User** to link an existing user account.
- Choose **Permissions** such as: *Modify Master Account Profile, Manage Users, Manage Services, Manage Domains,* etc.
- Use **Edit/Delete** to maintain user links.
*(Screenshot: Client → Users tab)*
[](https://doc.puq.info/uploads/images/gallery/2025-09/image-1756821867750.png)
(S*creenshot: Associate User modal with permissions list)*
[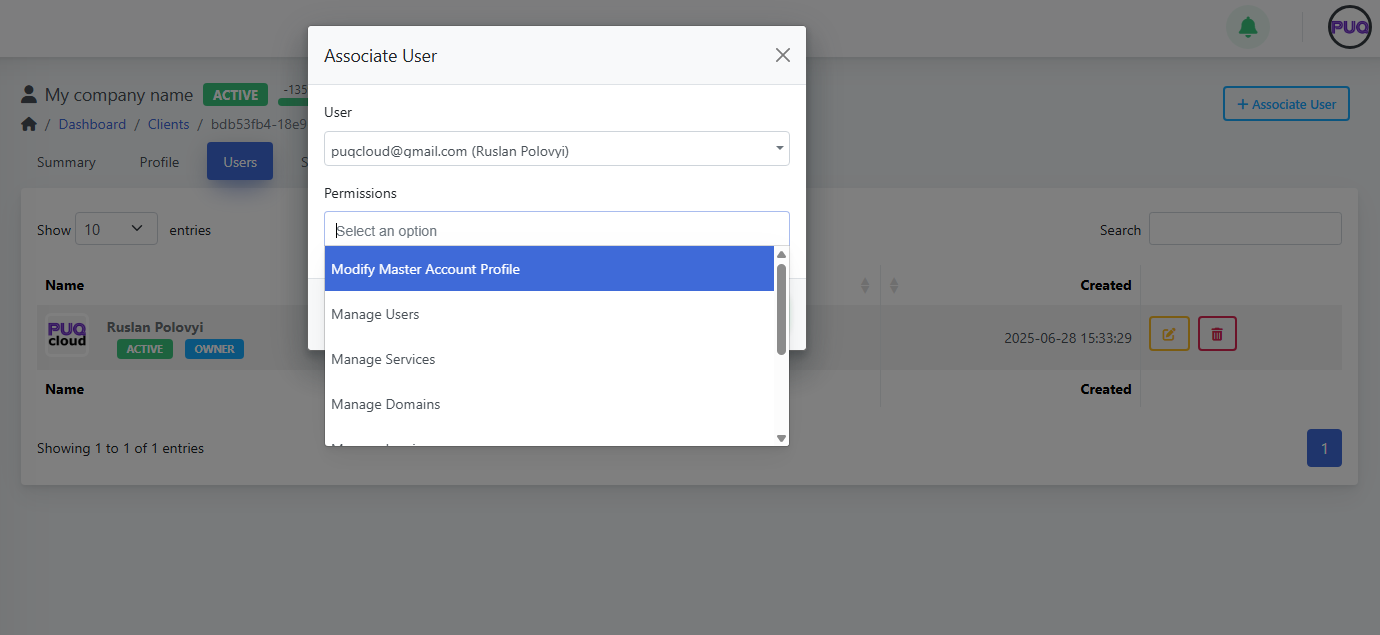](https://doc.puq.info/uploads/images/gallery/2025-09/image-1756821872822.png)
- - - - - -
#### Services
- View all services with **status badges** (e.g., ACTIVE, COMPLETED, ERROR).
- See **Order Date**, **Activation Date**, and **Price**.
- Click **+ Add Service** to provision a product for this client:
1. Select **Product**
2. Choose **Price** (e.g., *Monthly – 20.00 USD*)
3. Click **Save**
*(Screenshot: Services list)*
[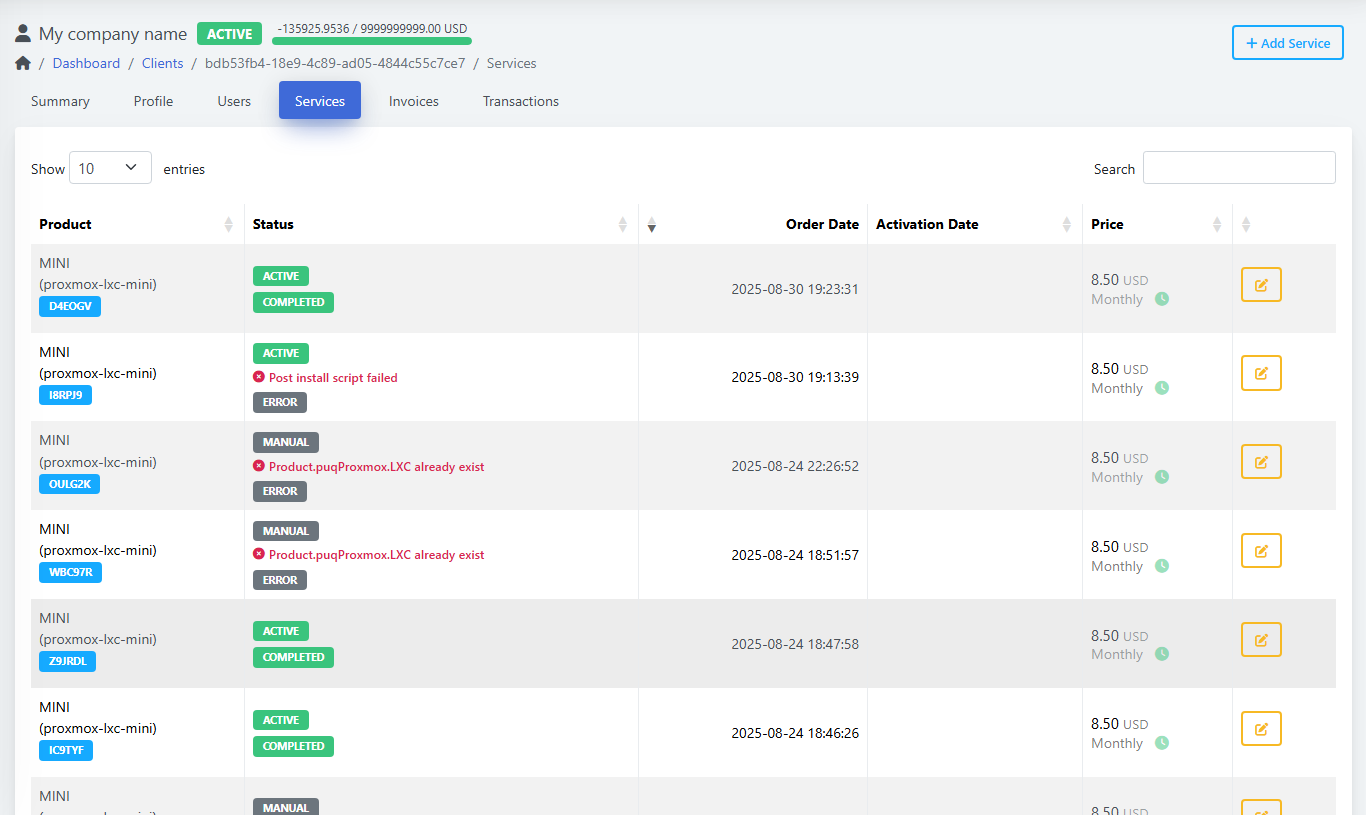](https://doc.puq.info/uploads/images/gallery/2025-09/image-1756821926349.png)
*(Screenshot: Create New Service form)*
[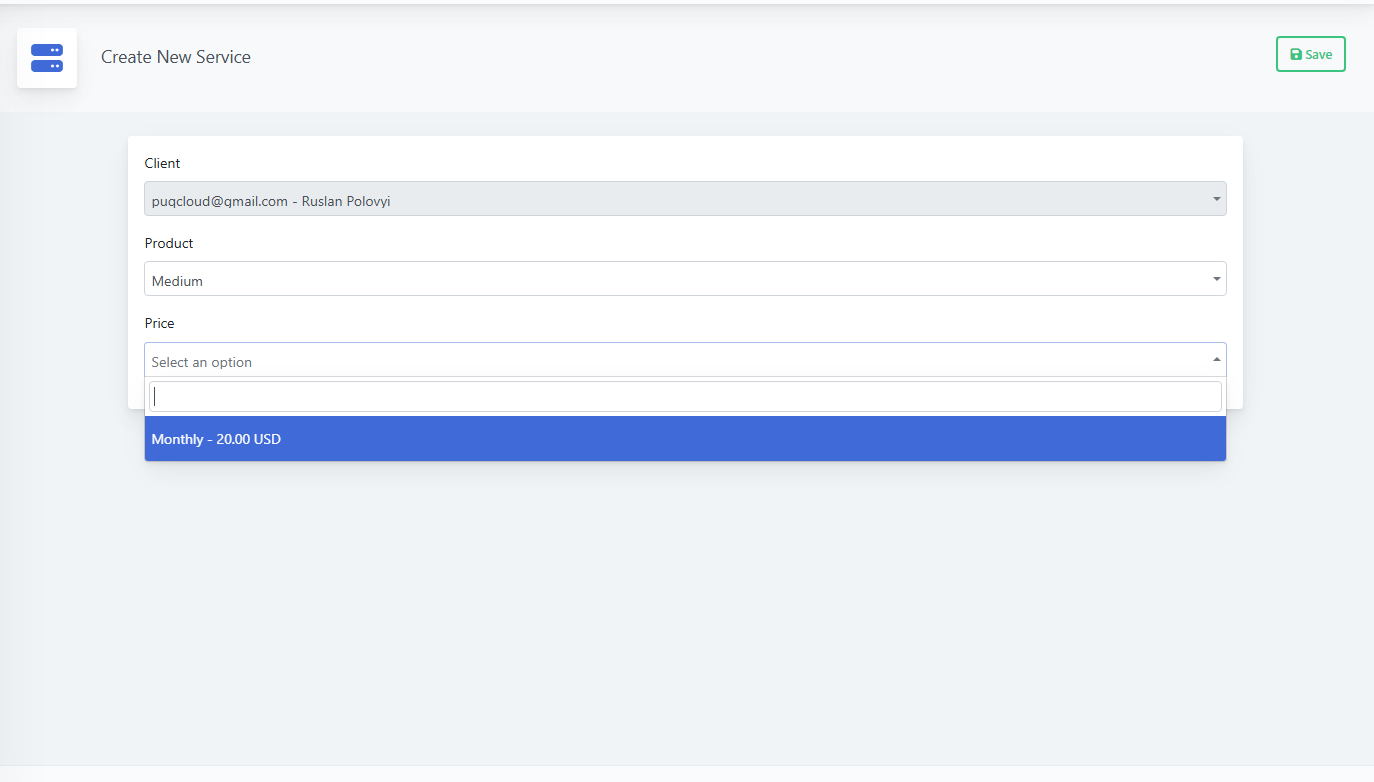](https://doc.puq.info/uploads/images/gallery/2025-09/image-1756821932889.png)
- - - - - -
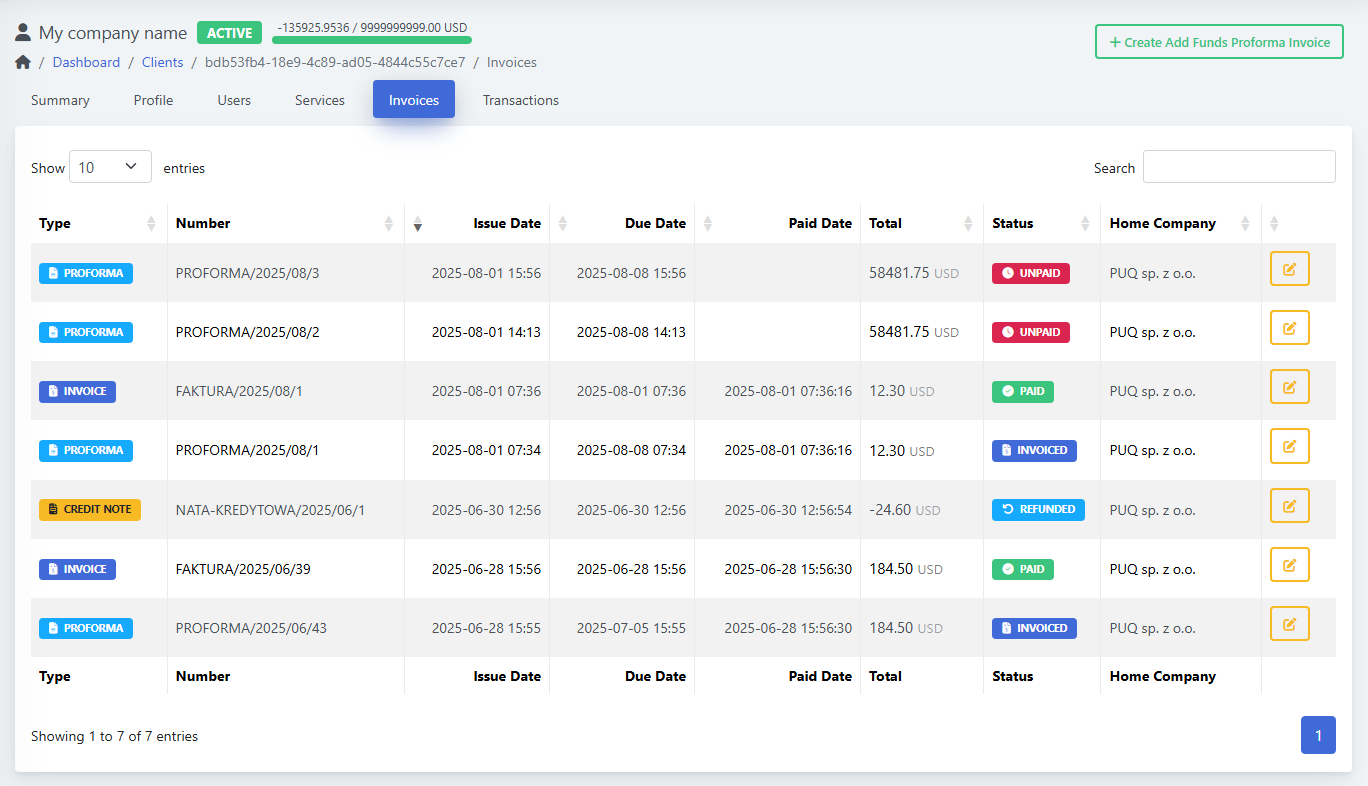
#### Invoices
- List shows **Type** (PROFORMA/INVOICE/CREDIT NOTE), **Number**, **Issue/Due/Paid Dates**, **Total**, **Status** (UNPAID/PAID/INVOICED/REFUNDED), and **Home Company**.
- **Create Add Funds Proforma Invoice**: opens a modal where you set **Net Amount** to top up client funds.
*(Screenshot: Invoices list)*
[](https://doc.puq.info/uploads/images/gallery/2025-09/image-1756821981739.png)
(S*creenshot: Create Add Funds Proforma Invoice modal)*
[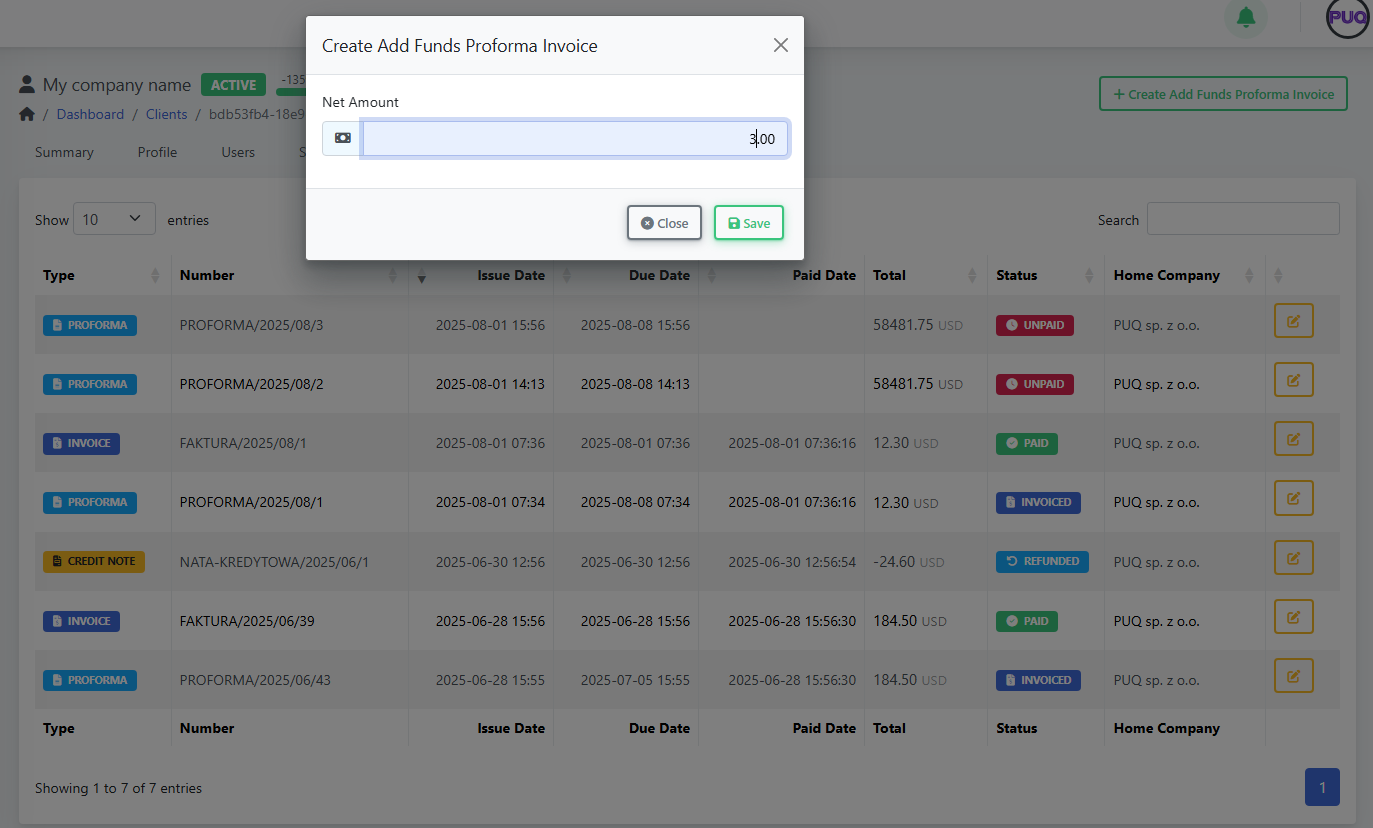](https://doc.puq.info/uploads/images/gallery/2025-09/image-1756821985915.png)
- - - - - -
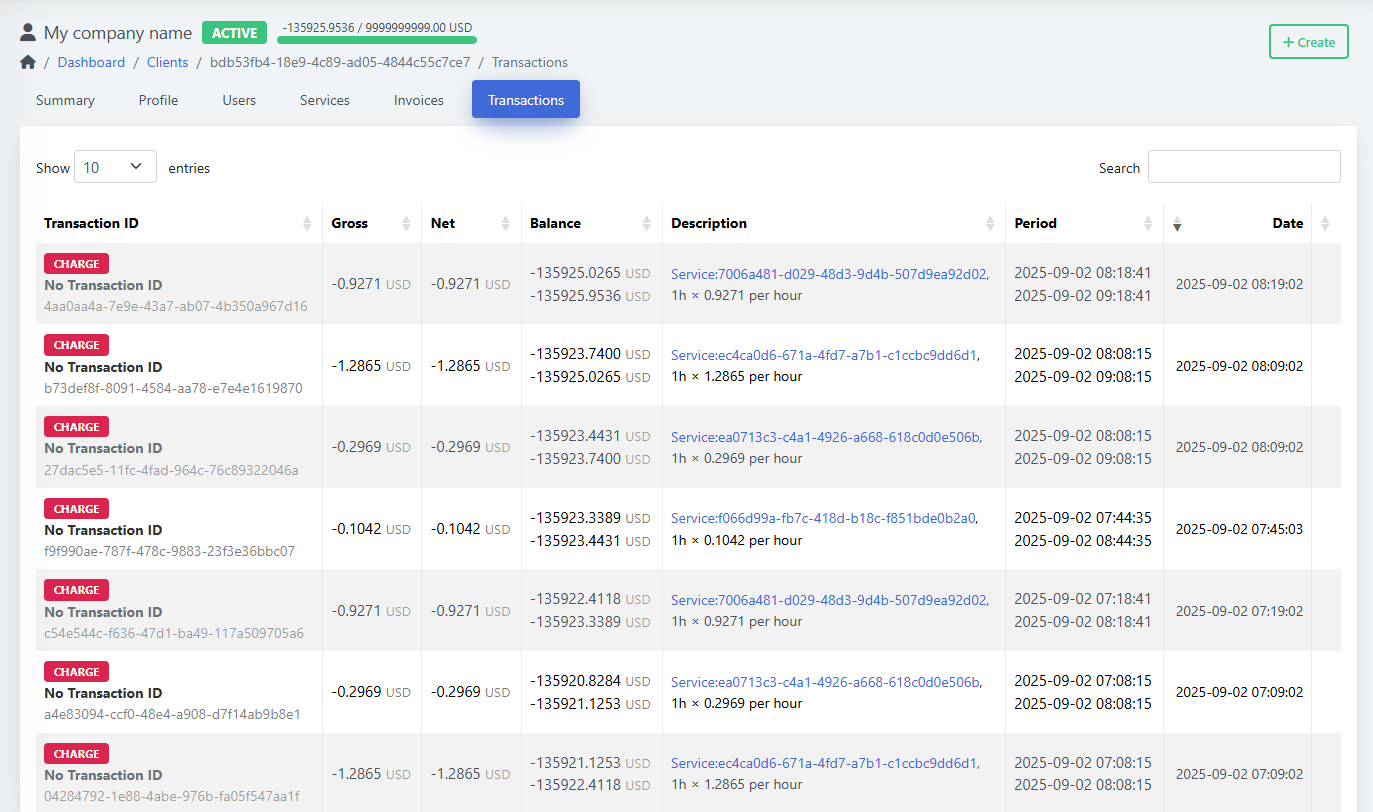
#### Transactions
- Ledger of **Gross**, **Net**, **Balance**, **Description** (usually linked to a service), **Period**, and **Date**.
- Click **Create** to add a manual transaction (charge or credit): set **Amount**, **Transaction ID** (optional), and **Description**, then **Save**.
*(Screenshot: Transactions list)*
[](https://doc.puq.info/uploads/images/gallery/2025-09/image-1756822016682.png)
(S*creenshot: Transactions → Create modal)*
[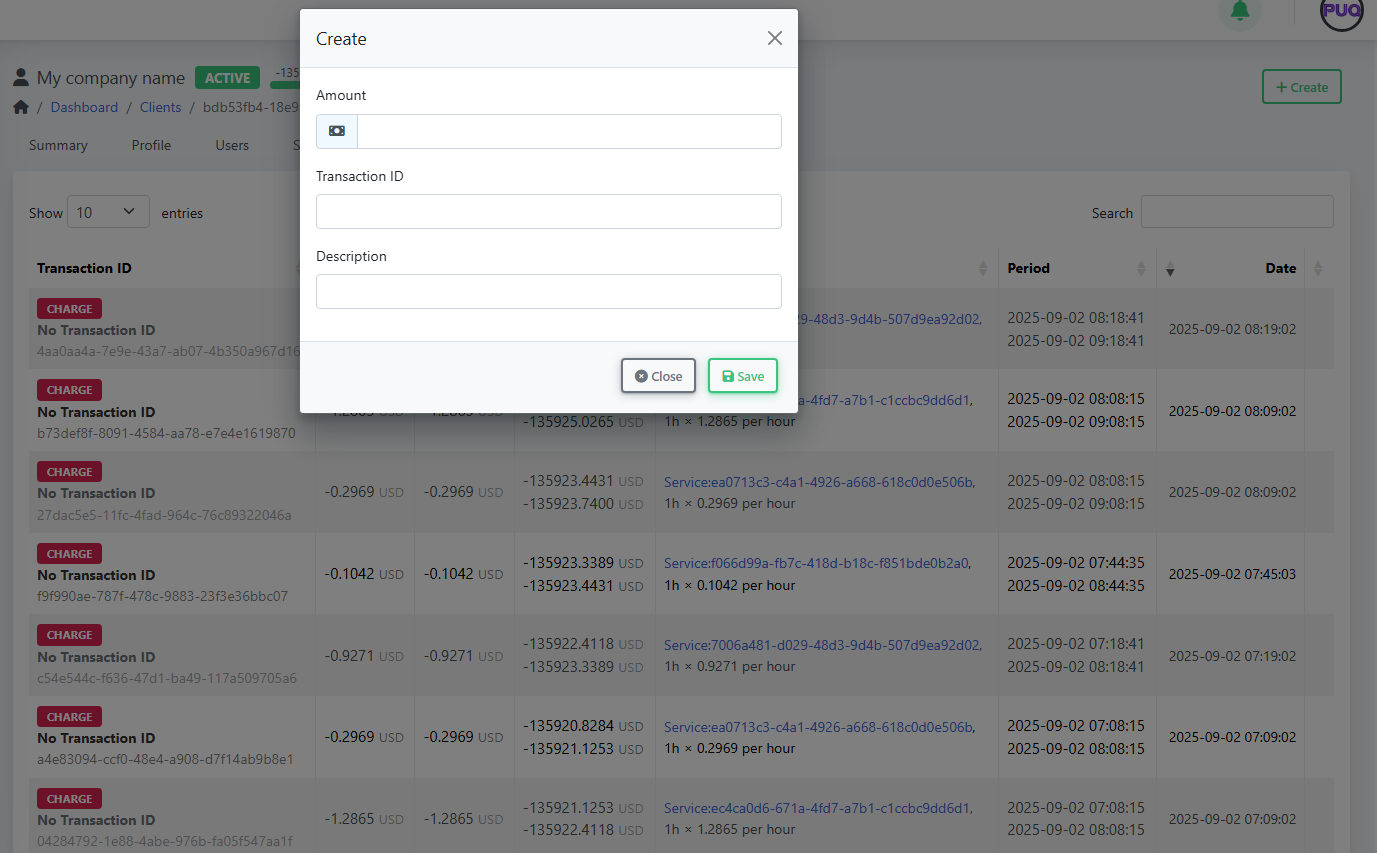](https://doc.puq.info/uploads/images/gallery/2025-09/image-1756822022568.png)
- - - - - -
#### Search, Filter, and Sort Clients
- Use the **Search** box on the client list to filter by name, email, or company.
- Click column headers to **sort** (e.g., by Created date or Balance).
- Status badges (**NEW**, **ACTIVE**) help you visually triage records.
- - - - - -
#### Editing & Lifecycle
- Change **Status** (e.g., New → Active) from the **Profile** tab.
- Update **Tax ID** or **Language/Currency** any time; new settings apply to future invoices.
- Maintain **Credit Limit** to control spending and alerting.
- Keep **Admin Notes** for internal context (billing agreements, support history, etc.).
- - - - - -
#### Best Practices
- Keep **addresses** current—billing address prints on invoices.
- Use **Users & permissions** to grant least-privilege access.
- Prefer **Add Funds Proforma** for prepayments; reconcile via **Transactions**.
- Review **Services** after order to confirm status (look for **ERROR** badges and fix product-side issues).
- - - - - -
#### Troubleshooting
- **Invoice in wrong currency** → Check client **Currency** in Profile before creating invoices.
- **Taxes not applying as expected** → Verify **Home Company** tax rules and client **Tax ID**.
- **User cannot see services** → Revisit **Users** → permissions (grant *Manage Services*).
- **Provisioning error** on service → Open service details and review the last error note; re-run or fix product configuration.
- - - - - -
#### Shortcuts
- **Clients → Manage Clients**: quick search and open profile.
- On **Summary**, use **Login as Owner** to replicate the customer view for support.
- - - - - -
#### You’re done!
You can now add clients, attach their users and addresses, create services, and manage billing—everything from one place in **PUQcloud Panel**.
# Create and manage users
### PUQcloud Panel
##### [Order Now](https://puqcloud.com/puqcloud-panel.php) | [Download](https://github.com/puqcloud/PUQcloud) | [FAQ](https://faq.puqcloud.com/)
This guide explains how administrators can create users, view their client associations, edit details, and remove users in **PUQcloud Panel**.
- - - - - -
#### Overview
- **Path:** **Menu → Clients → Manage Users**
- **You can:**
- Create a new **User** (login identity).
- View a user’s **associated clients** and statuses.
- **Edit** contact info, language, verification flags, and 2FA.
- **Delete** a user account.
- **Who:** Staff with permission to manage users.
**Tip:** A **User** is a person’s login. A **Client** is an account/business they belong to. One user can be associated with multiple clients (e.g., consultant, owner). Permissions are managed from the **Client → Users** tab.
- - - - - -
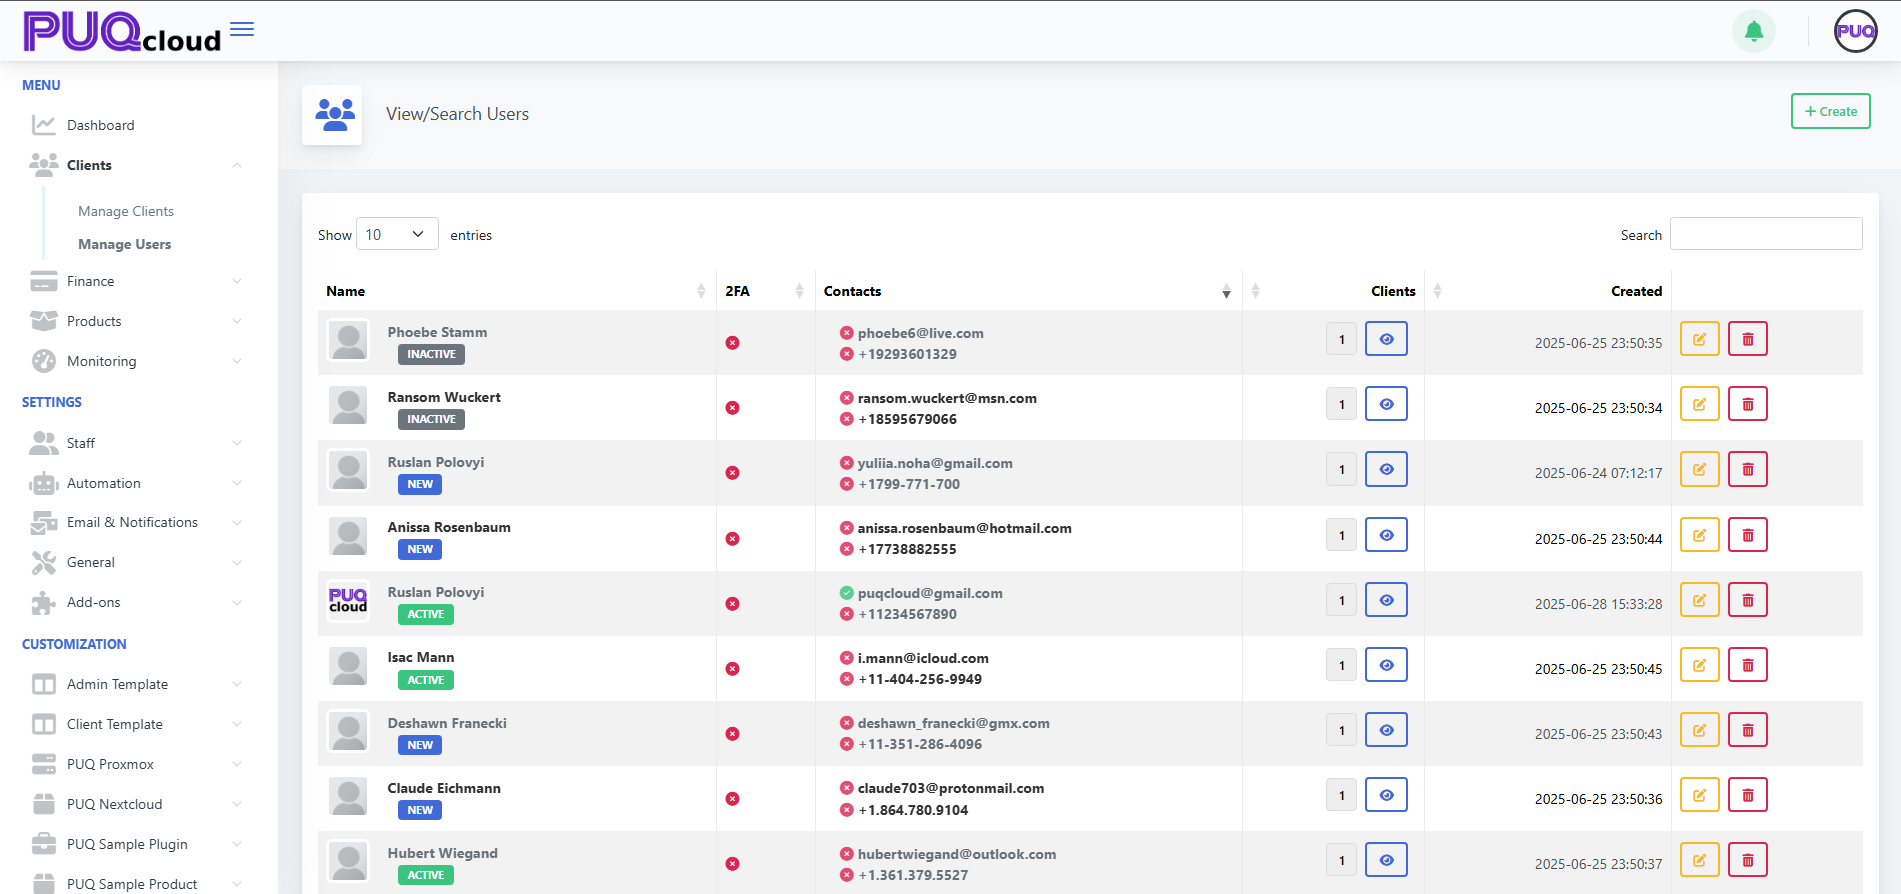
#### List View (Manage Users)
In the table you’ll see: avatar, name, status badges (e.g., **ACTIVE**, **INACTIVE**, **NEW**), **2FA** indicator, contact details (email, phone), **Clients** counter with an **eye** button, **Created** date, and row actions (**Edit**, **Delete**). Use **Search** to filter.
*(Screenshot: View/Search Users list view)*
[](https://doc.puq.info/uploads/images/gallery/2025-09/image-1756900409222.png)
- - - - - -
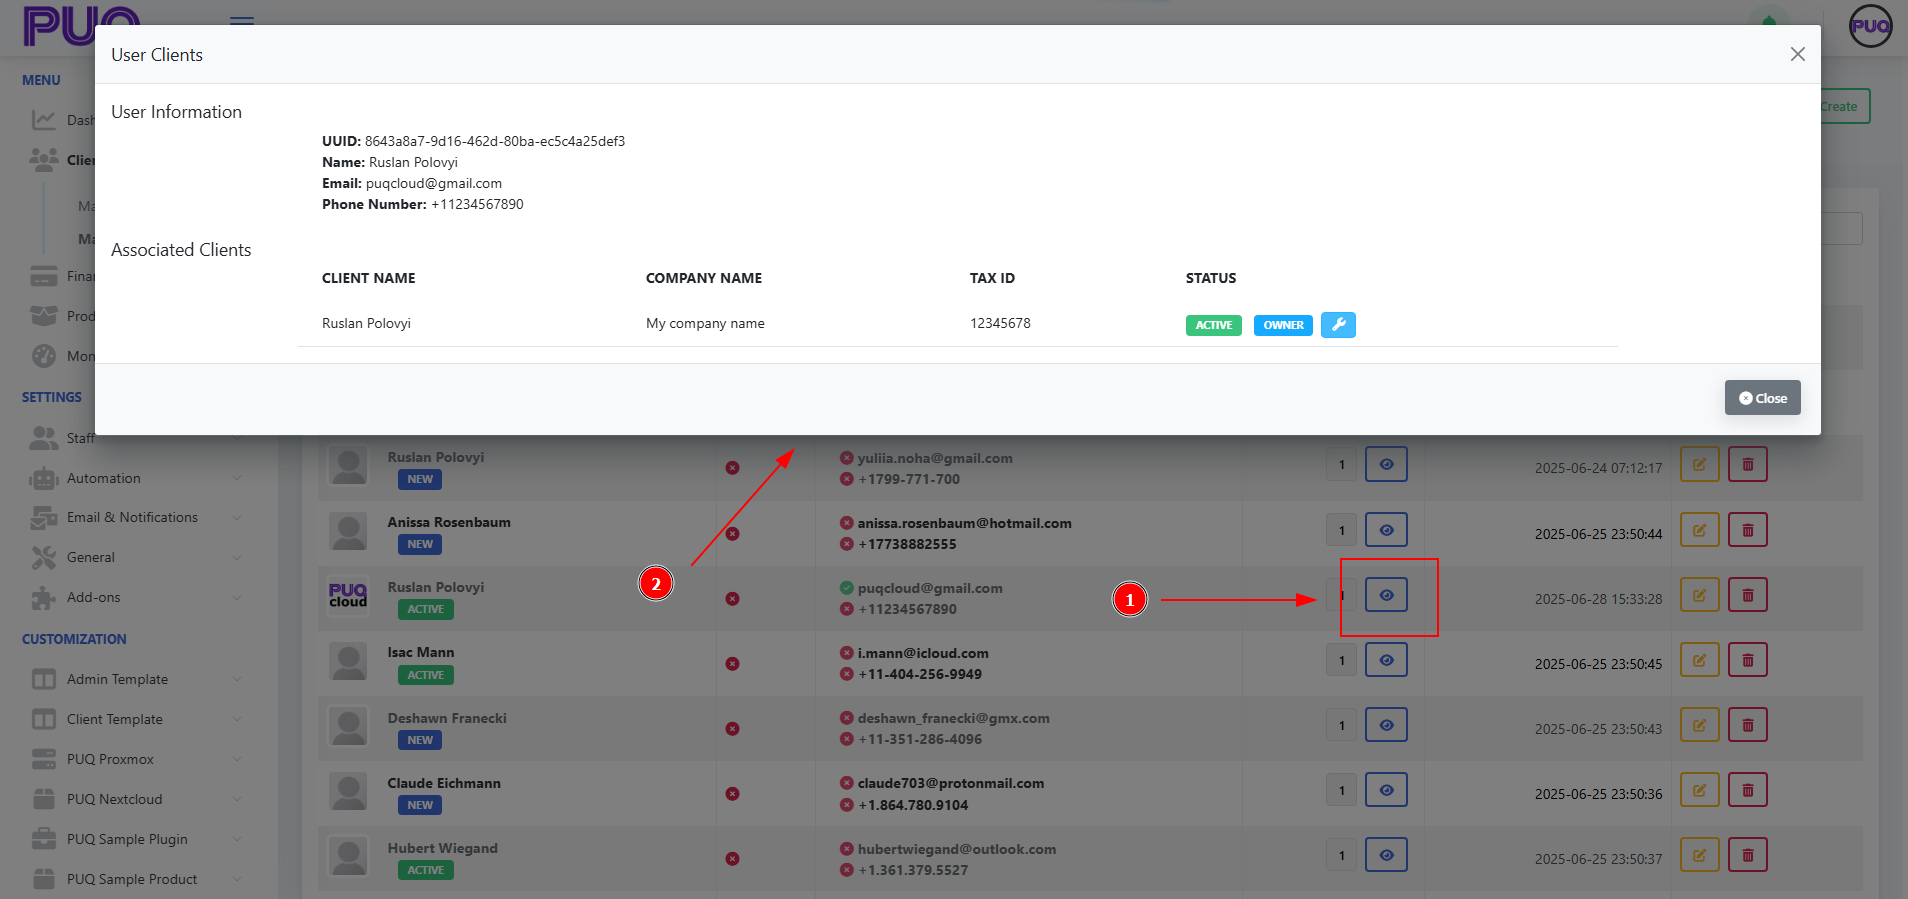
#### Create a User
1. Go to **Clients → Manage Users** and click **+ Create**.
*(Screenshot: Create User modal)*
[](https://doc.puq.info/uploads/images/gallery/2025-09/image-1756900425343.png)
2. Fill the fields:
- **Email** *(required)*
- **Password** *(required)*
- **2FA** *(toggle; optional but recommended)*
- **Firstname**, **Lastname**
- **Phone Number** *(with country code)*
- **Language** *(UI language for the user)*
- **Admin Notes** *(internal only)*
3. Click **Save**. The user appears in the list.
**Next step:** Associate this user with a client from **Clients → Manage Clients → open a client → Users tab → + Associate User** (choose permissions there).
- - - - - -
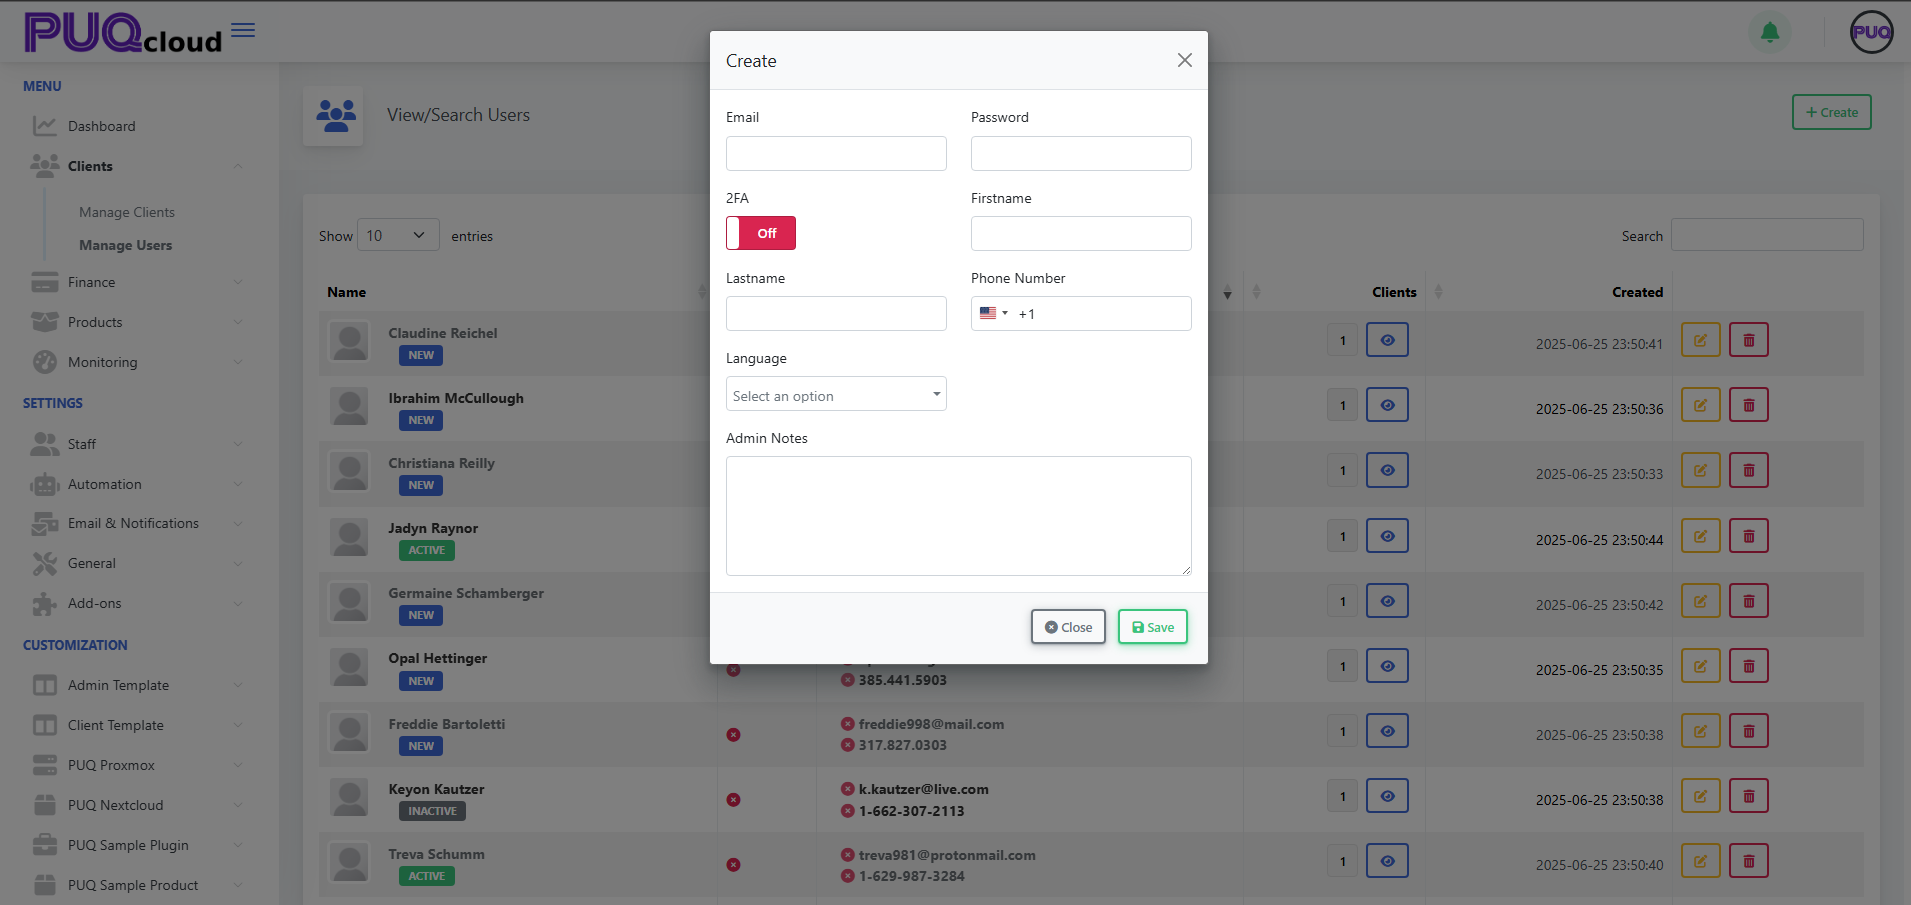
#### View a User’s Clients
1. In **Manage Users**, find the user.
2. Click the **eye** icon in the **Clients** column.
3. In **User Clients** modal, review:
- **User Information:** UUID, Name, Email, Phone.
- **Associated Clients:** Client Name, Company Name, Tax ID, and **Status** badges (e.g., **ACTIVE**, **OWNER**).
4. Close when done.
*(Screenshot: User Clients modal)*
[](https://doc.puq.info/uploads/images/gallery/2025-09/image-1756900477431.png)
- - - - - -
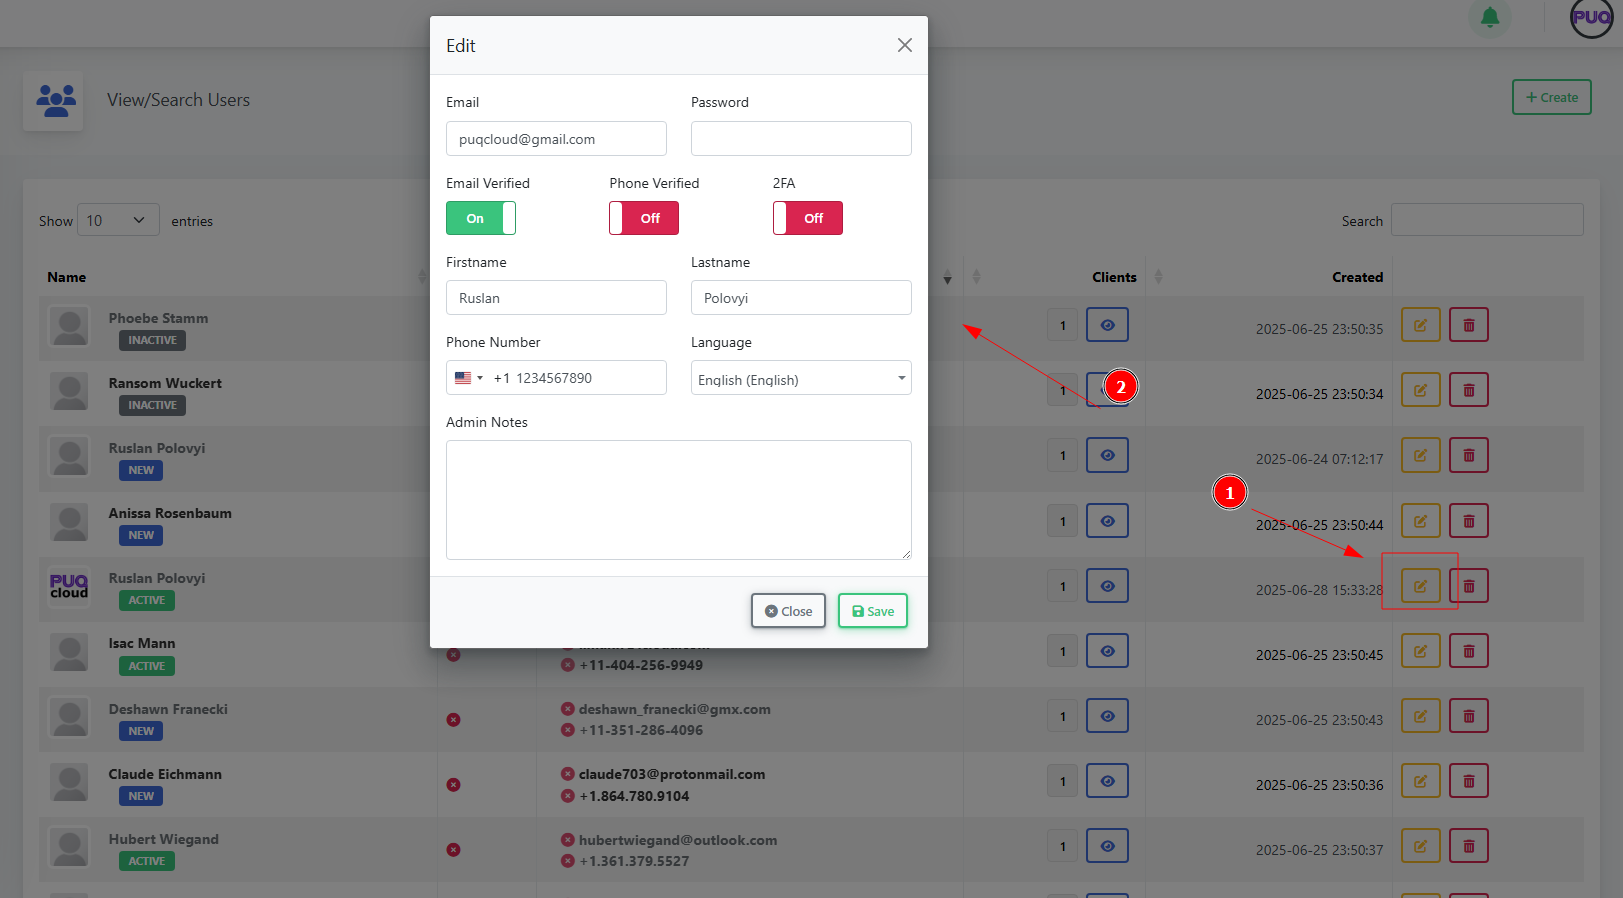
#### Edit a User
1. In **Manage Users**, click the **Edit** (pencil) icon on the desired row.
*(Screenshot: Edit User modal)*
[](https://doc.puq.info/uploads/images/gallery/2025-09/image-1756900500443.png)
2. Update fields:
- **Email**, **Password** (to reset), **Firstname**, **Lastname**
- **Phone Number**, **Language**, **Admin Notes**
- Verification toggles: **Email Verified**, **Phone Verified**
- Security toggle: **2FA** (enable/disable)
3. Click **Save**.
- - - - - -
#### Delete a User
1. In **Manage Users**, click the **Delete** (trash) icon.
2. Confirm the action.
- - - - - -
#### Field Reference
| Field | Where | Description |
|---|
| Email | Create/Edit | User’s login email. Must be unique. |
| Password | Create/Edit | Set/reset the user’s password. |
| 2FA | Create/Edit | Turn on two‑factor authentication for extra security. |
| Firstname / Lastname | Create/Edit | User’s display name. |
| Phone Number | Create/Edit | Stored with international country code. |
| Language | Create/Edit | UI language for this user. |
| Admin Notes | Create/Edit | Internal notes visible to admins only. |
| Email Verified | Edit | Mark whether the email has been verified. |
| Phone Verified | Edit | Mark whether the phone has been verified. |
- - - - - -
#### Good Practices
- Require **strong passwords** and **2FA** for staff.
- Keep **contact info** and **language** up to date.
- Use **Admin Notes** to capture context (e.g., who requested access, ticket link).
- Manage access at **Client → Users** (set granular permissions per client).
- - - - - -
#### Troubleshooting
- **Cannot log in** → Reset **Password**; ensure **Email Verified** is On; check if the user is **ACTIVE**.
- **User can’t see a client** → Associate them in **Client → Users**, verify **status** and **permissions**.
- **2FA lockout** → Temporarily disable **2FA** in **Edit**, then re‑enroll.
- **Duplicate email** → Each user must have a unique email; rename or remove old account.
# Transactions Page
### PUQcloud Panel
##### [Order Now](https://puqcloud.com/puqcloud-panel.php) | [Download](https://github.com/puqcloud/PUQcloud) | [FAQ](https://faq.puqcloud.com/)
[](https://doc.puq.info/uploads/images/gallery/2025-09/image-1756900598141.png)
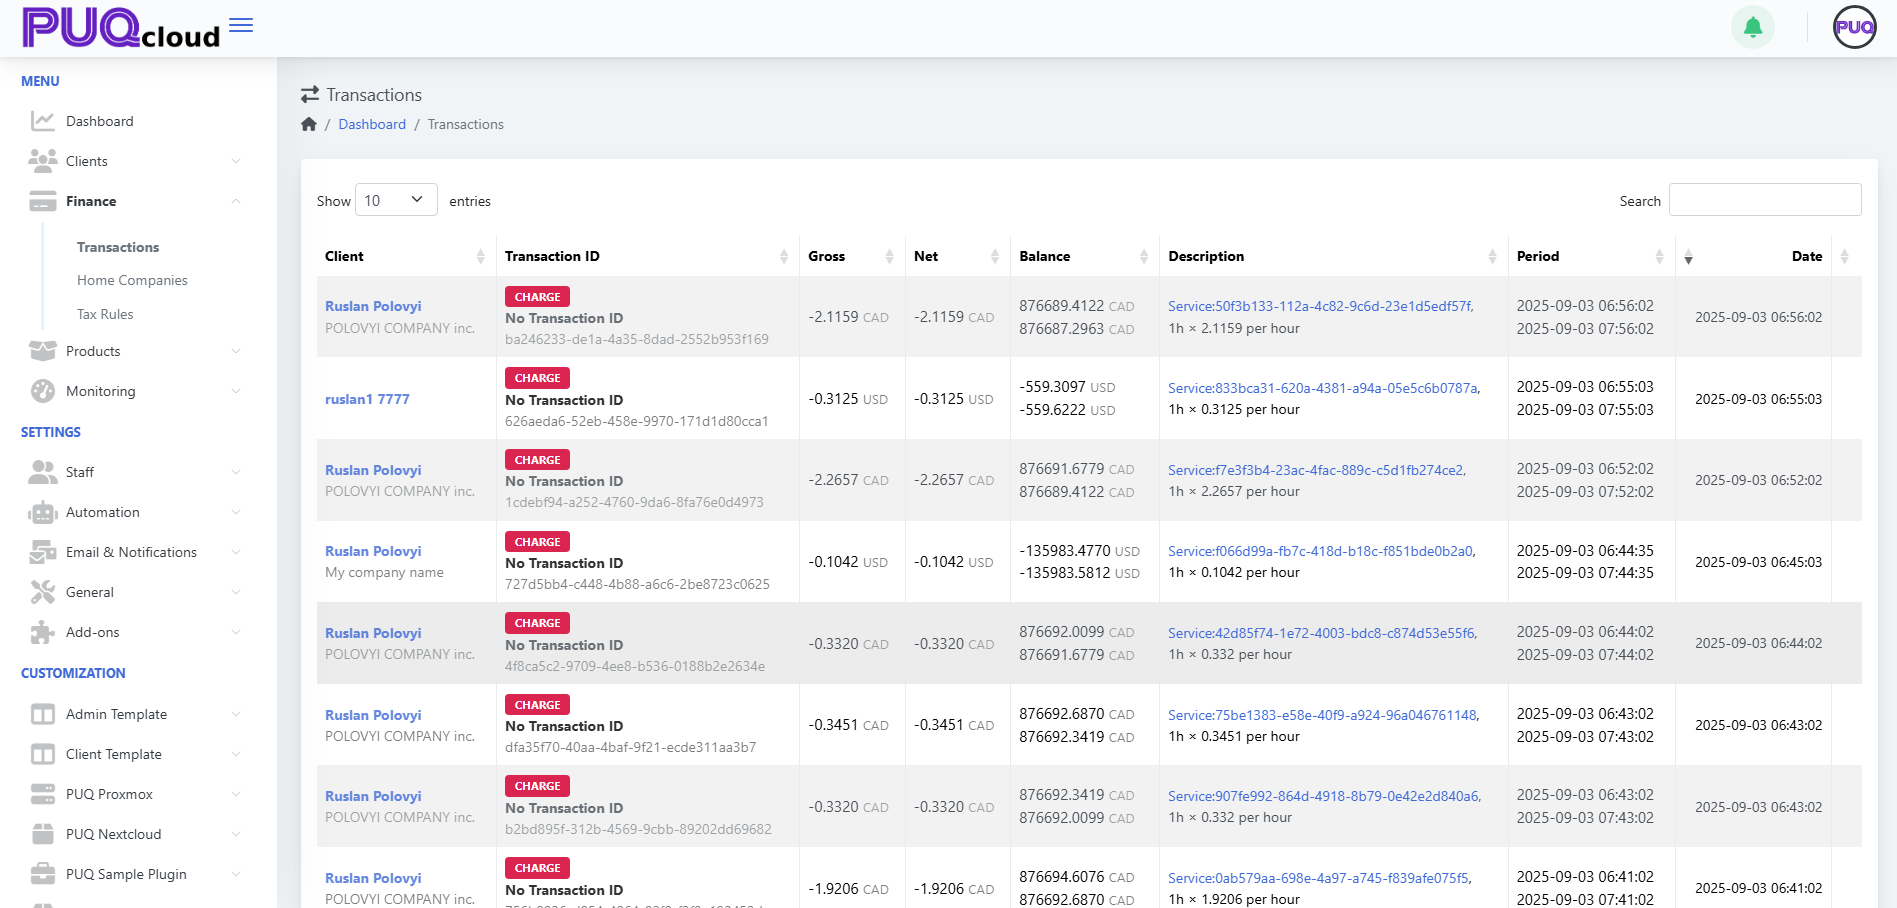
#### 1. Open Transactions View
- From the left-side menu, go to:
**Finance → Transactions**
#### 2. Understand the Columns
Each transaction row includes the following:
| Column | Description |
|---|
| **Client** | The name of the client associated with the transaction. |
| **Transaction ID** | Displays the transaction type (e.g. CHARGE) and a unique ID or "No Transaction ID". |
| **Gross / Net** | Amount before and after fees or discounts. |
| **Balance** | The client’s account balance after the transaction. |
| **Description** | Contains a reference to the service and billing logic. |
| **Period** | Time range for which the charge applies. |
| **Date** | The exact timestamp of when the transaction occurred. |
**How matching works**
The system reads rules **from top to bottom**. The **first matching rule** is applied. Keep your most specific rules (e.g., province/state) **above** more general ones.
- - - - - -
#### Before You Start
1. Make sure you have at least one **Home Company** configured (Settings → Finance → Home Companies).
2. Know your target **tax rates** (GST/HST/PST/VAT, etc.).
3. Decide which **client types** the rule should apply to:
- **Private Client** (individual)
- **Company Without TAX ID**
- **Company With TAX ID**
Always verify rates with your accountant or the official tax authority.
- - - - - -
#### Quick Start: Generate Preset Rules
You can auto-create a starting set of rules and then fine‑tune them.
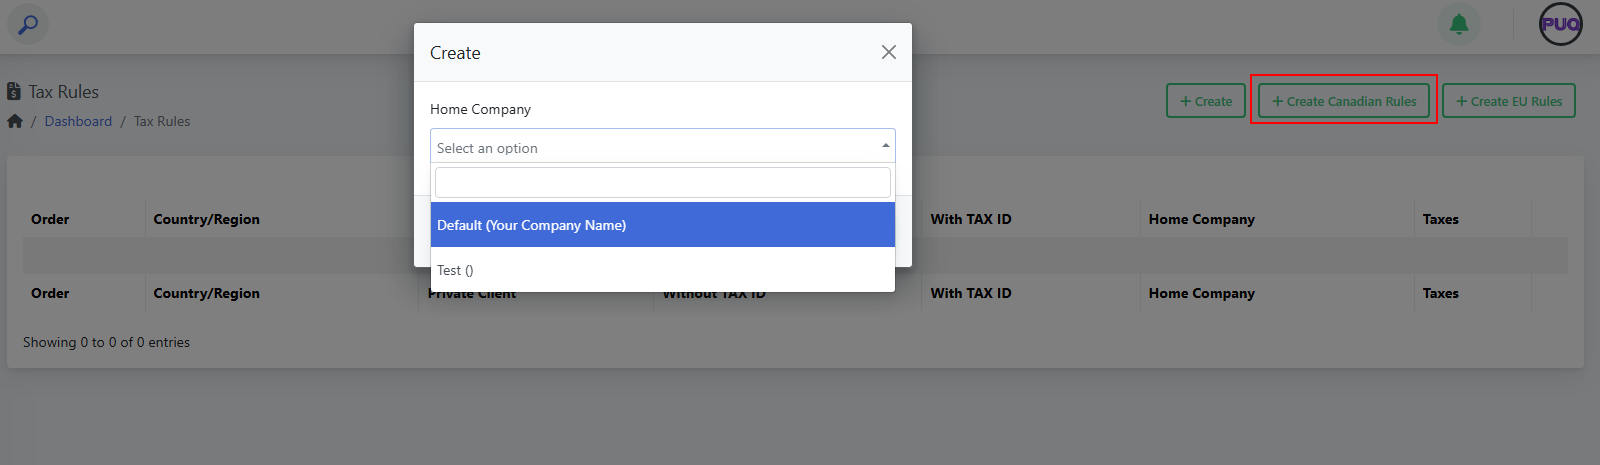
##### Create Canadian Rules
1. Go to **Finance → Tax Rules**.
2. Click **Create Canadian Rules**.
3. Select your **Home Company** and **Save**.
4. Review the generated rules and adjust rates as needed.
*(Screenshot reference: “Create Canadian Rules” modal)*
[](https://doc.puq.info/uploads/images/gallery/2025-09/image-1756819758460.png)
##### Create EU Rules
1. Go to **Finance → Tax Rules**.
2. Click **Create EU Rules**.
3. Select your **Home Company** and **Save**.
4. Review the generated rules and adjust rates as needed.
*(Screenshot reference: “Create EU Rules” modal)*
[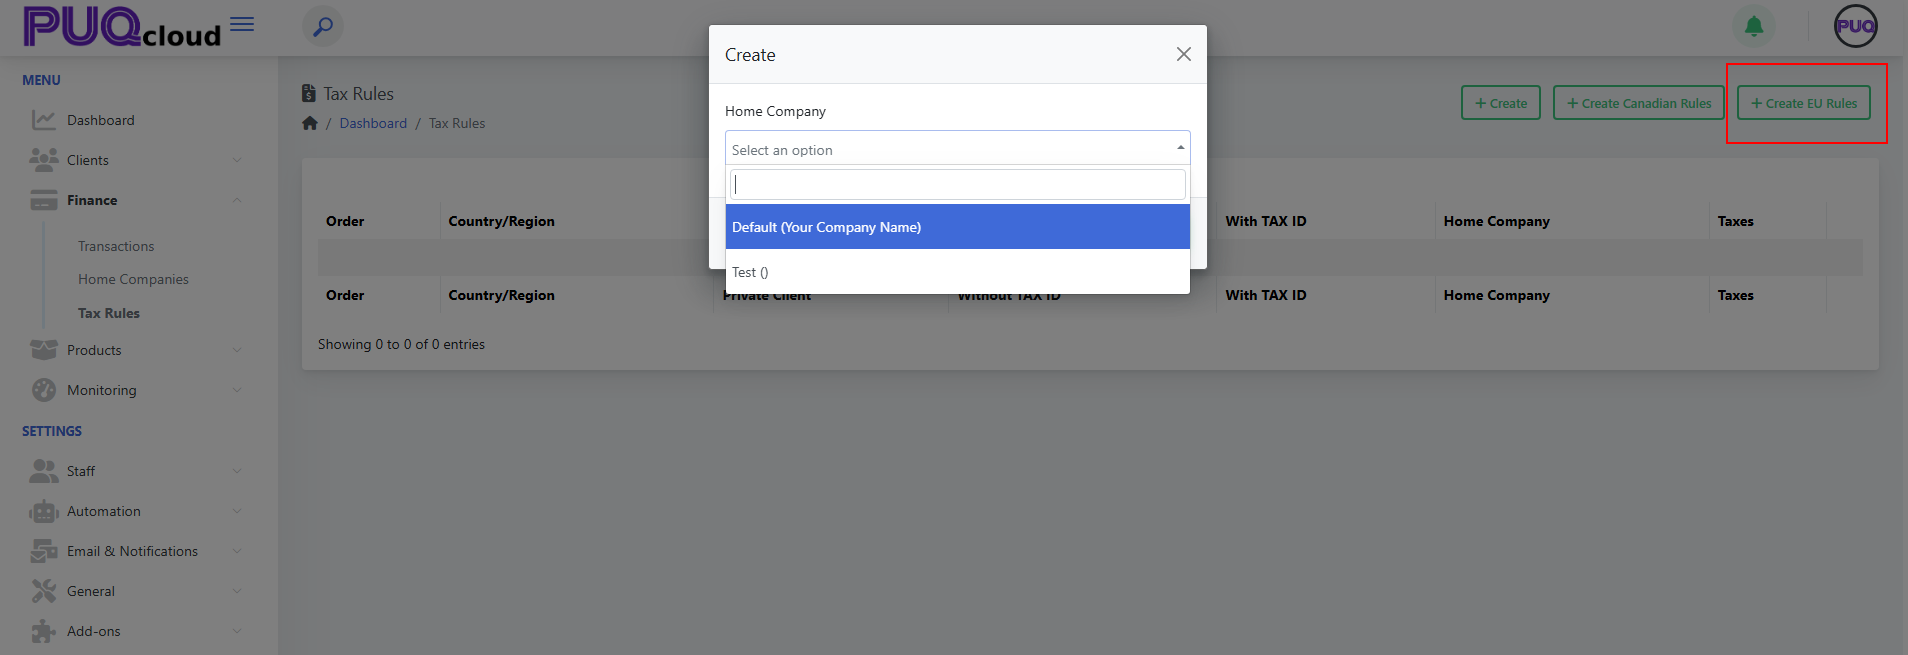](https://doc.puq.info/uploads/images/gallery/2025-09/image-1756819763523.png)
**Note:** Presets are a convenience. You are responsible for validating the final rates.
- - - - - -
#### Create a Tax Rule Manually
1. Open **Finance → Tax Rules**. *(See: List view)*
[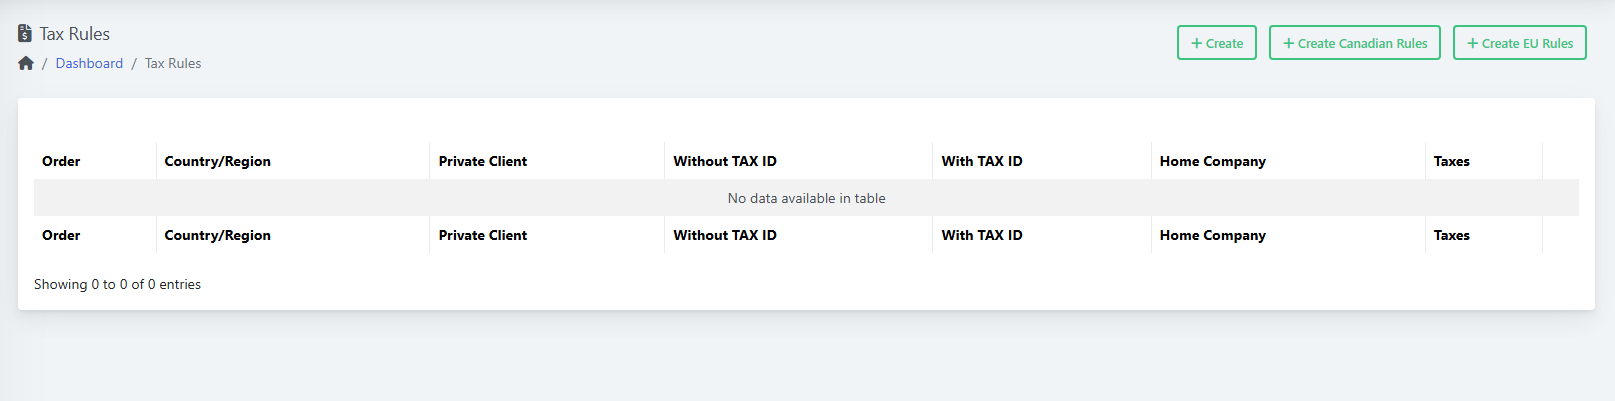](https://doc.puq.info/uploads/images/gallery/2025-09/image-1756819775855.png)
2. Click **Create**. *(See: “Create” modal)*
[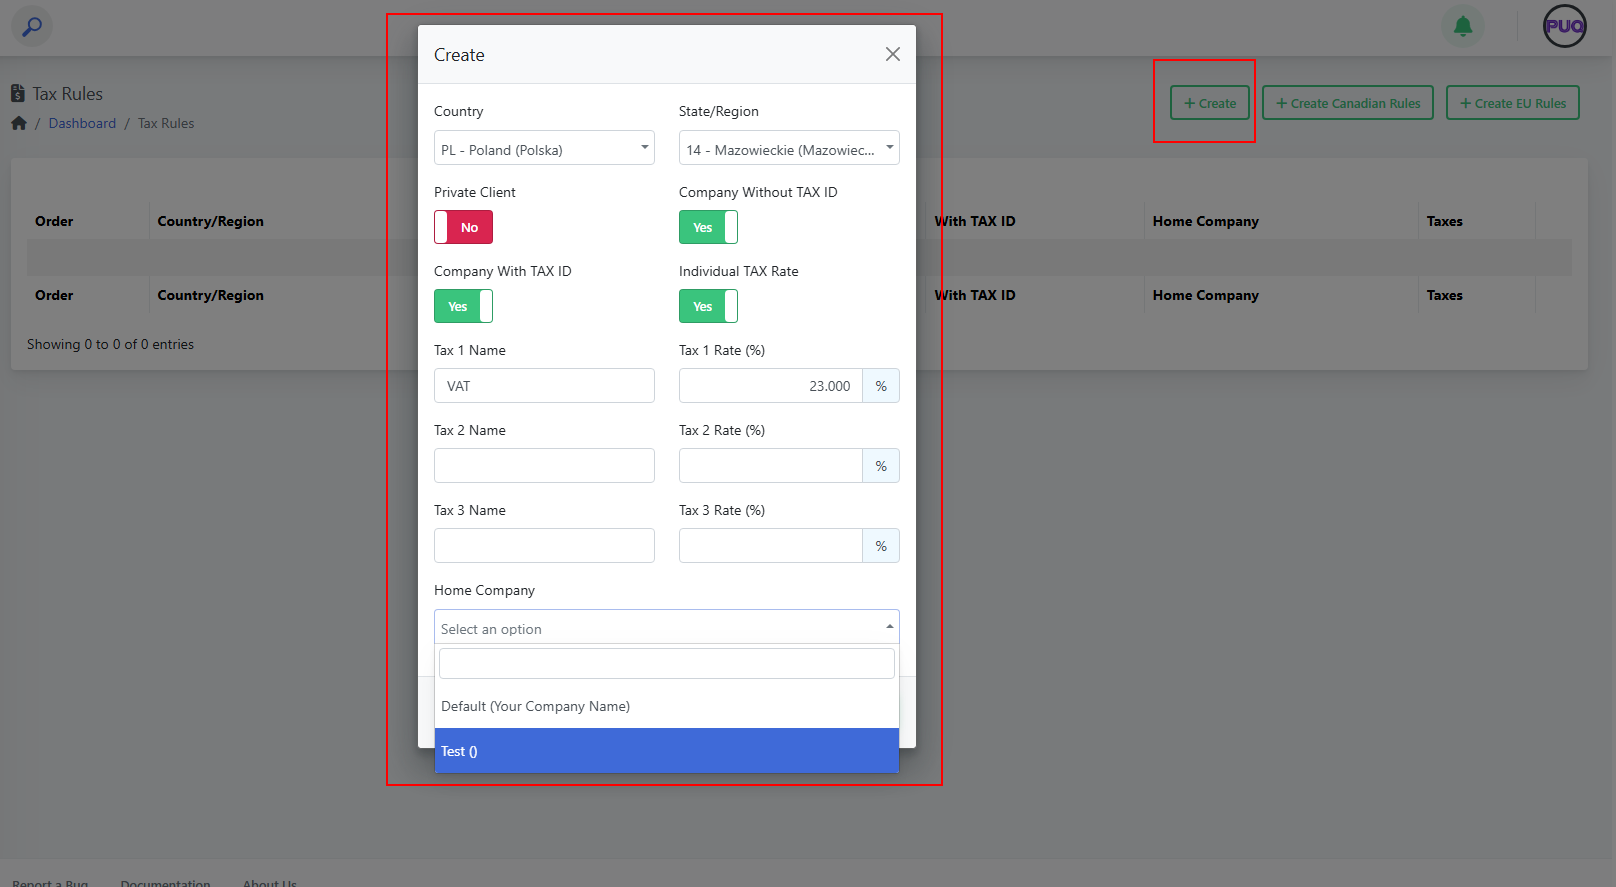](https://doc.puq.info/uploads/images/gallery/2025-09/image-1756819780375.png)
3. Fill the fields:
- **Country** and **State/Region** (optional).
- Turn on the client‑type toggles the rule should apply to:
**Private Client**, **Company Without TAX ID**, **Company With TAX ID**.
(Use **Individual TAX Rate** if the rule should tax individuals.)
- Enter up to **three taxes** (name + percent). Example:
- *Tax 1 Name:* `VAT` — *Tax 1 Rate:* `23.000`
- *Tax 2 Name:* `PST` — *Tax 2 Rate:* `7.000` (if applicable)
- *Tax 3 Name:* `GST` — *Tax 3 Rate:* `5.000` (if applicable)
- Choose **Home Company**.
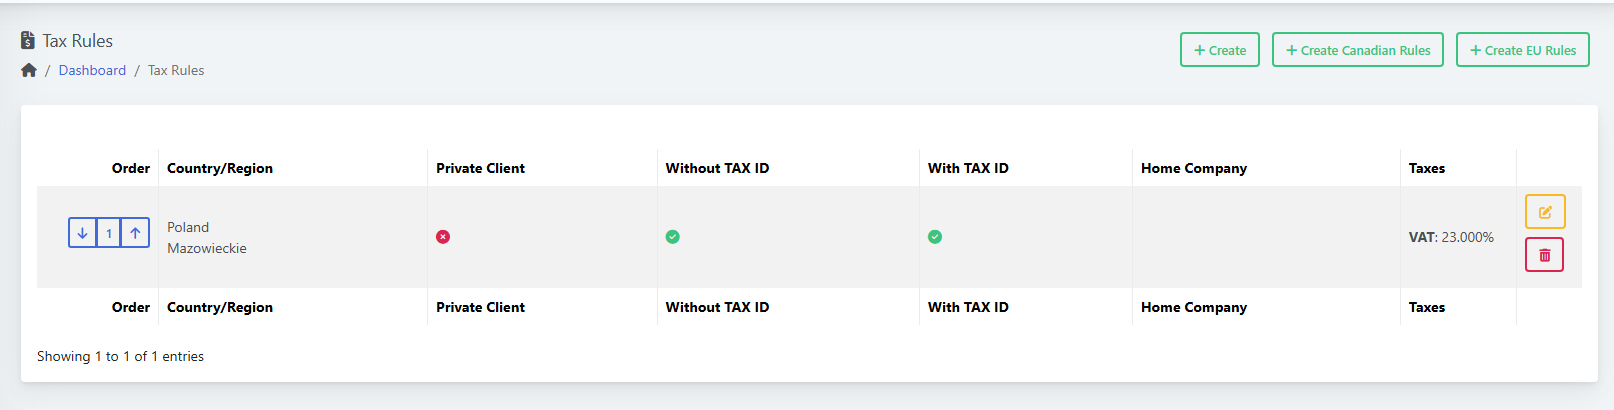
4. Click **Save**. Your rule appears in the list. *(See: List after creating a rule)*
[](https://doc.puq.info/uploads/images/gallery/2025-09/image-1756819804598.png)
- - - - - -
#### Edit a Rule
1. In **Finance → Tax Rules**, click the **Edit** icon on the desired row.
2. Change any fields (country/region, toggles, tax names/rates, home company).
3. Click **Save**.
*(Screenshot reference: “Edit” modal)*
[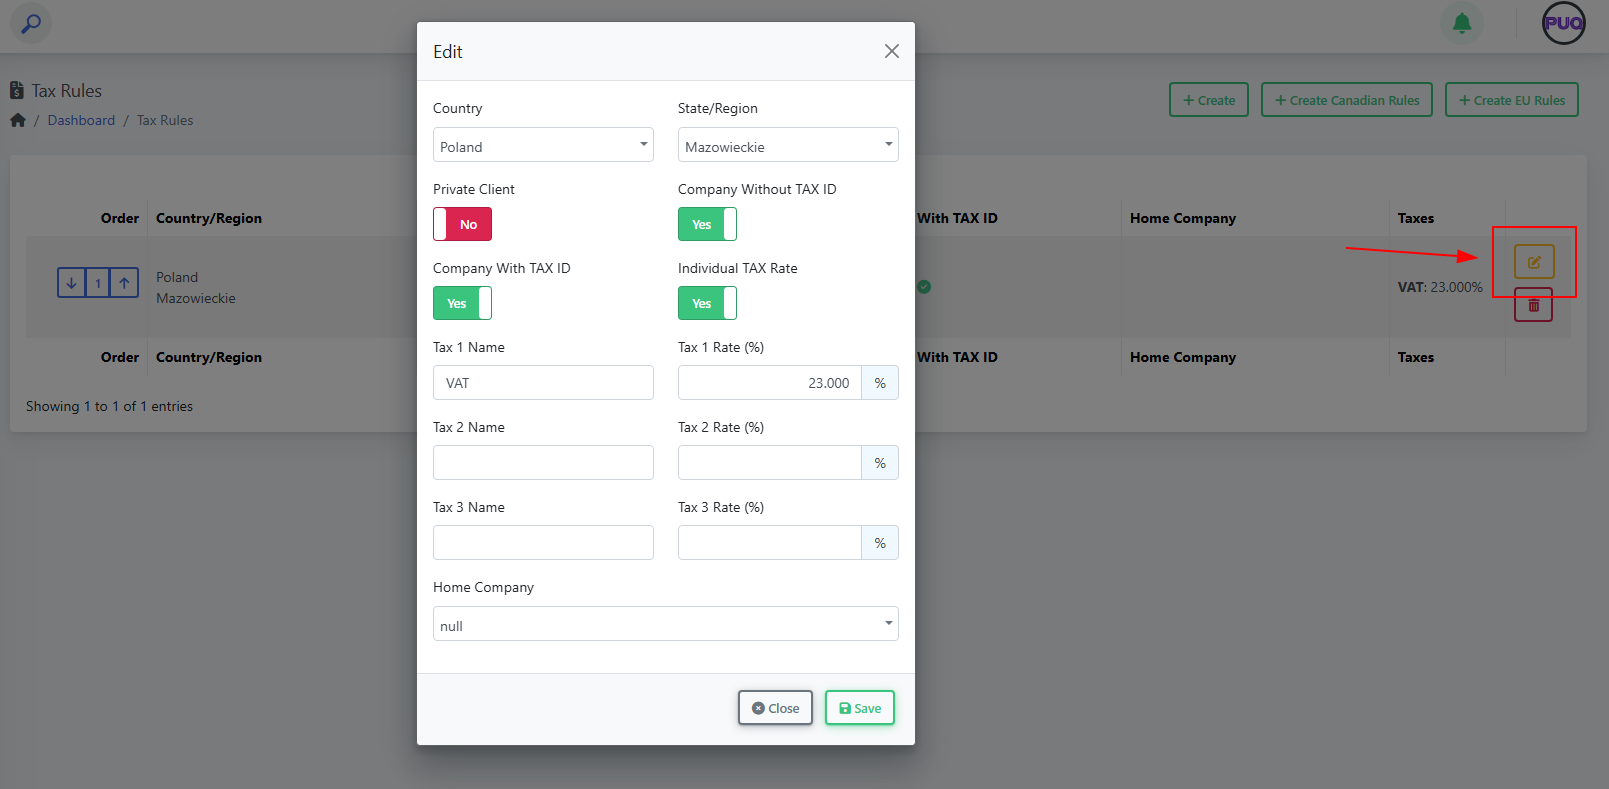](https://doc.puq.info/uploads/images/gallery/2025-09/image-1756819810427.png)
- - - - - -
#### Delete a Rule
1. In **Finance → Tax Rules**, click the **Delete** (trash) icon on the row.
2. Confirm the deletion.
Deleting a rule does not change past invoices; it only affects new invoices going forward.
- - - - - -
#### Change Rule Order (Priority)
1. In **Finance → Tax Rules**, use the **up/down arrows** in the **Order** column.
2. Place **specific** rules (e.g., province/state) **above** general country-wide rules.
- - - - - -
#### Field Reference
| Field | Type | What it controls | Example |
|---|
| Country | Dropdown | The country the rule applies to. | Poland |
| State/Region | Dropdown | Optional region/province/state inside the country. | Mazowieckie |
| Private Client | Toggle | Apply this rule to **individuals**. | On |
| Company Without TAX ID | Toggle | Apply when client is a **company without** a valid tax ID. | On |
| Company With TAX ID | Toggle | Apply when client is a **company with** a valid tax ID. | On |
| Individual TAX Rate | Toggle | Enable taxation for individuals per this rule. | On |
| Tax 1 Name / Rate (%) | Text / Number | First tax component name and percentage. | VAT / 23.000 |
| Tax 2 Name / Rate (%) | Text / Number | Second tax component (if needed). | PST / 7.000 |
| Tax 3 Name / Rate (%) | Text / Number | Third tax component (if needed). | GST / 5.000 |
| Home Company | Dropdown | Which Home Company owns/uses this rule. | Default (Your Company Name) |
- - - - - -
#### Example: Poland → Mazowieckie (VAT 23%)
1. **Create** a rule.
2. Country: **Poland**; State/Region: **Mazowieckie**.
3. Toggles: **Private Client = Off** (if you only tax businesses), **Company Without TAX ID = On**, **Company With TAX ID = On**.
4. Tax 1 Name: **VAT**; Tax 1 Rate: **23.000**.
5. Select **Home Company**.
6. **Save**. *(See: List after creating a rule)*
[](https://doc.puq.info/uploads/images/gallery/2025-09/image-1756819913571.png)
- - - - - -
#### Tips & Good Practices
- Keep a **country-wide** rule at the bottom and **region‑specific** rules above it.
- Use clear tax names: **VAT**, **GST**, **PST**, **HST**.
- Review rules after **tax law changes** or when you expand to new regions.
- For multi‑company setups, double‑check the **Home Company** on each rule.
- - - - - -
#### Troubleshooting
- **My client is taxed incorrectly**
- Check rule **order** (a broader rule may be matched first).
- Verify the **client’s country/region** and **tax ID** status.
- Confirm the **toggles** (Private/With ID/Without ID) match your intent.
- Ensure tax **rates are numeric** (e.g., `23.000`).
- **I don’t see my Home Company**
- Create it in **Home Companies** and then return to Tax Rules.
- - - - - -
#### Screenshot References
- **List view (empty)** — overall layout and action buttons *(Create, Create Canadian Rules, Create EU Rules).*
- **Create modal** — full form with toggles and tax fields.
- **Create Canadian Rules modal** — select Home Company.
- **Create EU Rules modal** — select Home Company.
- **List view (after creating)** — shows Poland/Mazowieckie, indicators and VAT 23.000%.
- **Edit modal** — modify existing rule fields.
# Create and Manage a Product
### PUQcloud Panel
##### [Order Now](https://puqcloud.com/puqcloud-panel.php) | [Download](https://github.com/puqcloud/PUQcloud) | [FAQ](https://faq.puqcloud.com/)
This guide explains how to create, configure, and maintain **Products** in the PUQcloud Panel, including pricing, attributes, options, and module settings.
- - - - - -
#### Overview
- **Path:** **Menu → Products → Products**
- **You can:** Create products, edit details, upload images, add prices, link attributes & option groups, choose a module, and control visibility/availability.
- **Who:** Admins with product management permissions.
A **Product** is what your customers buy. Prices, options, and the provisioning **module** all live under the product.
- - - - - -
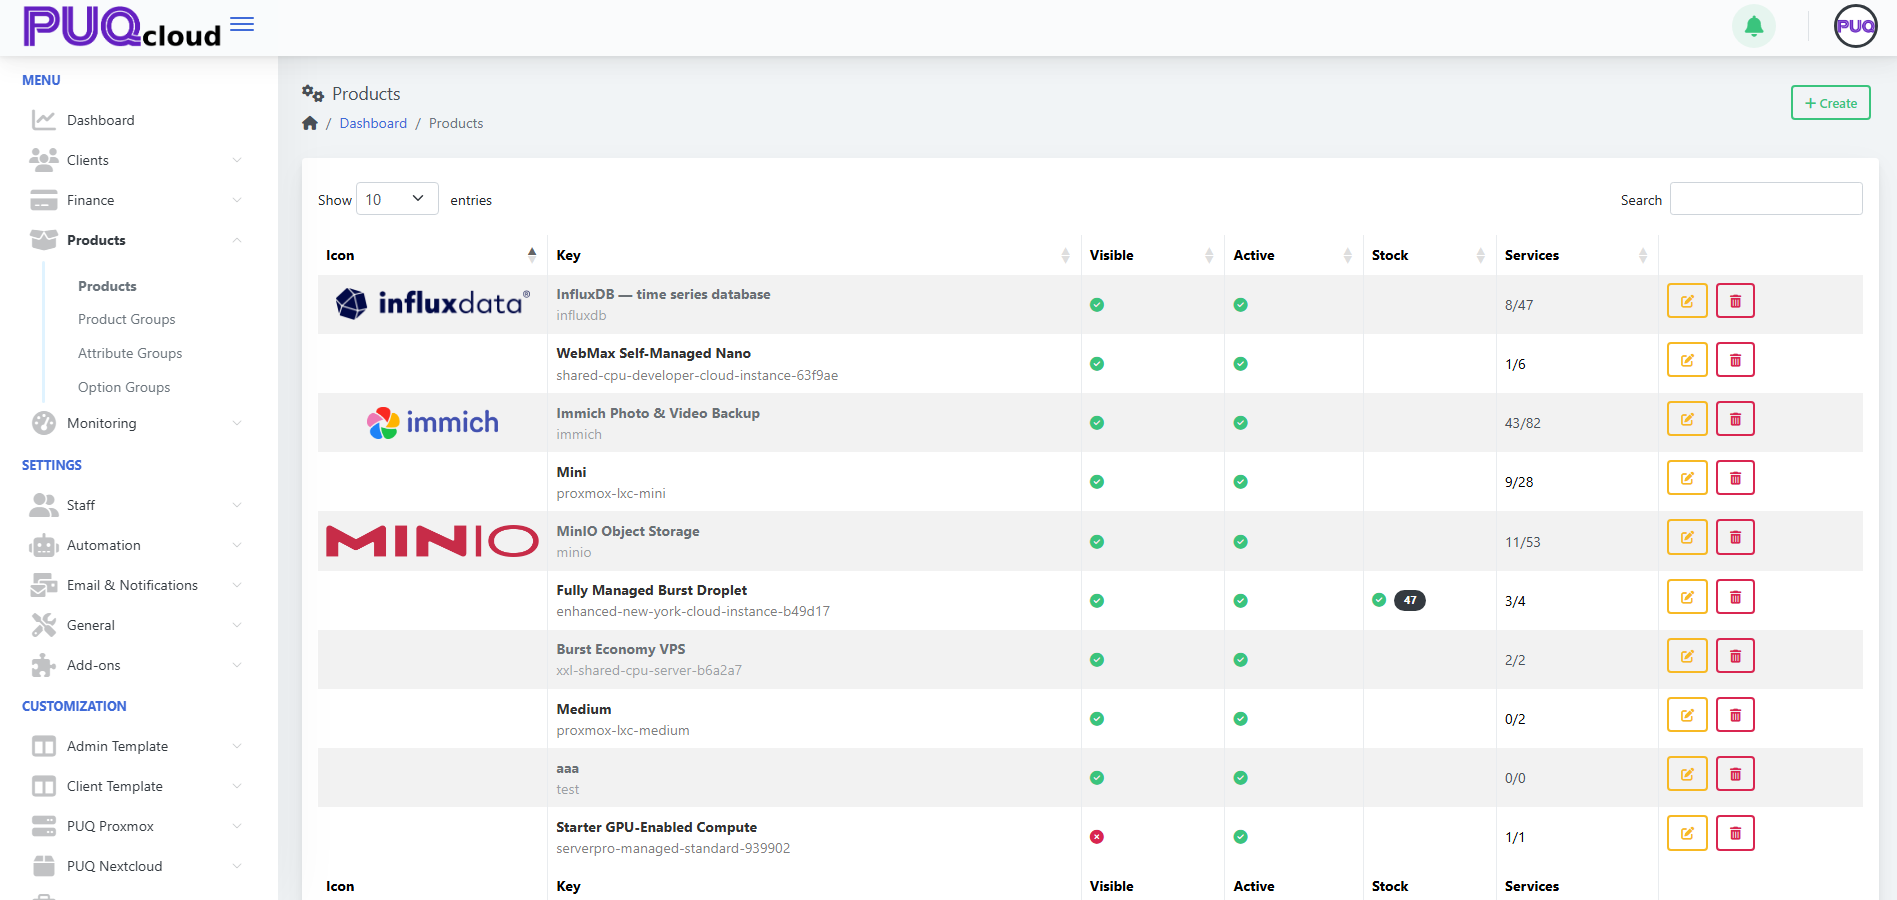
#### Products List
From **Products → Products** you’ll see: Icon, **Key**, **Visible**, **Active**, **Stock**, **Services**, and actions (**Edit**, **Delete**). Use **Search** to filter.
*(Screenshot reference: Products list view)*
[](https://doc.puq.info/uploads/images/gallery/2025-09/image-1756903017354.png)
**Actions**
- **+ Create** — start a new product.
- **Edit** — open the product tabs (General, Images, Pricing, Attributes, Options, Module).
- **Delete** — remove the product (does not remove existing services already provisioned).
- - - - - -
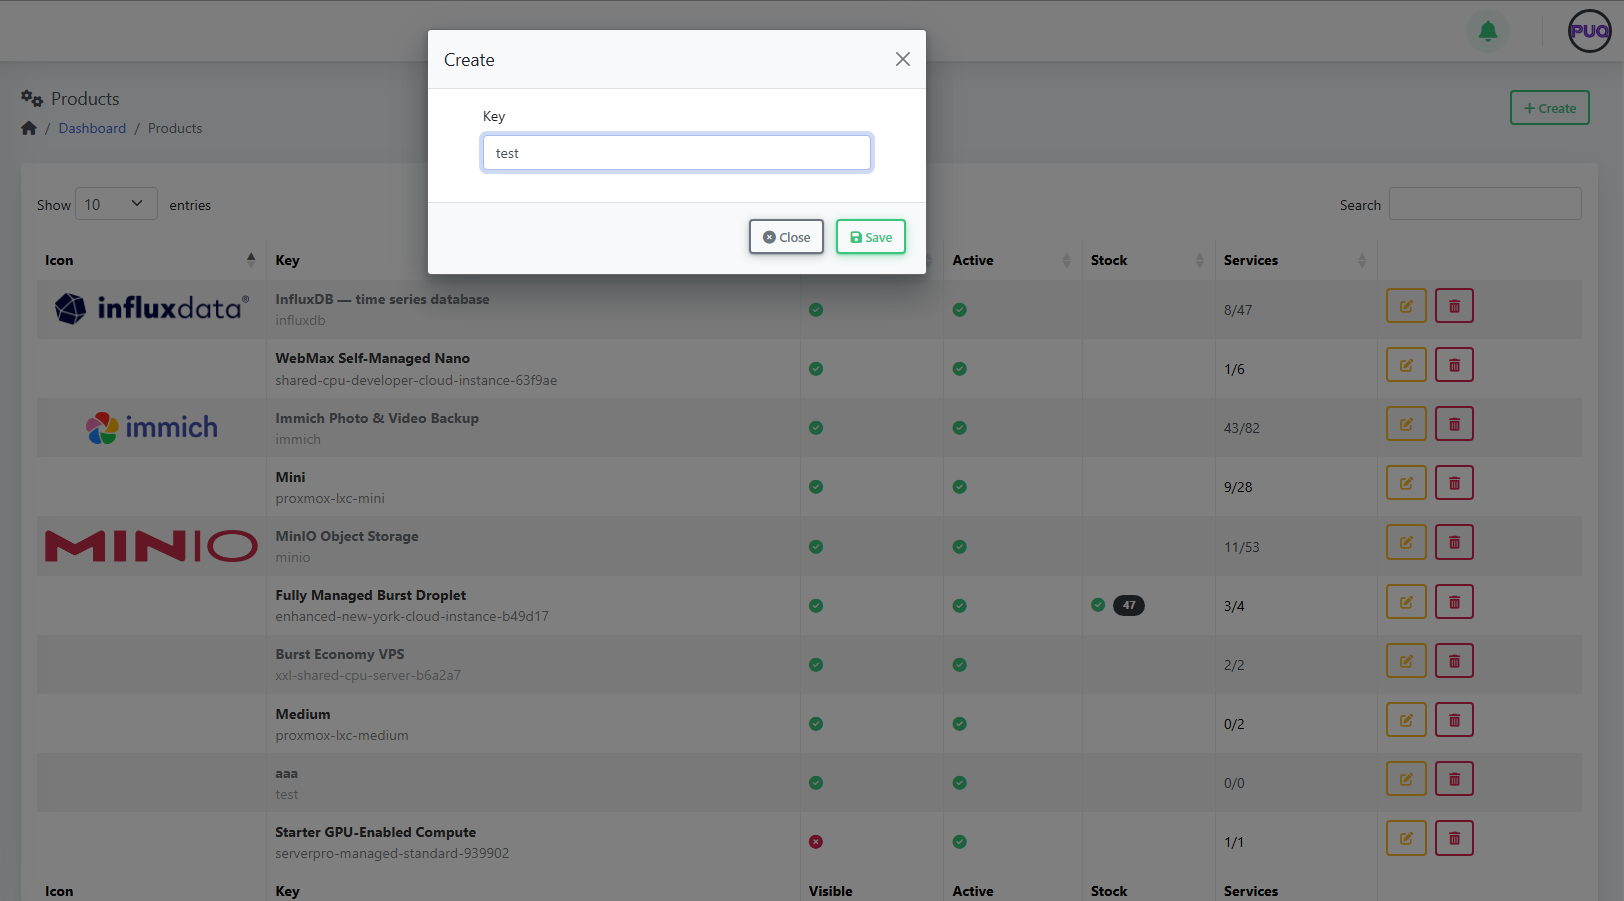
#### Create a Product
1. Click **+ Create**.
2. Enter a unique **Key** (e.g., `influxdb`).
3. Click **Save** — the product opens on the **General** tab for further setup.
*(Screenshots: Create Product modal → Product General tab)*
[](https://doc.puq.info/uploads/images/gallery/2025-09/image-1756903047710.png)
- - - - - -
#### Configure the Product
Use the tabs across the top to complete setup.
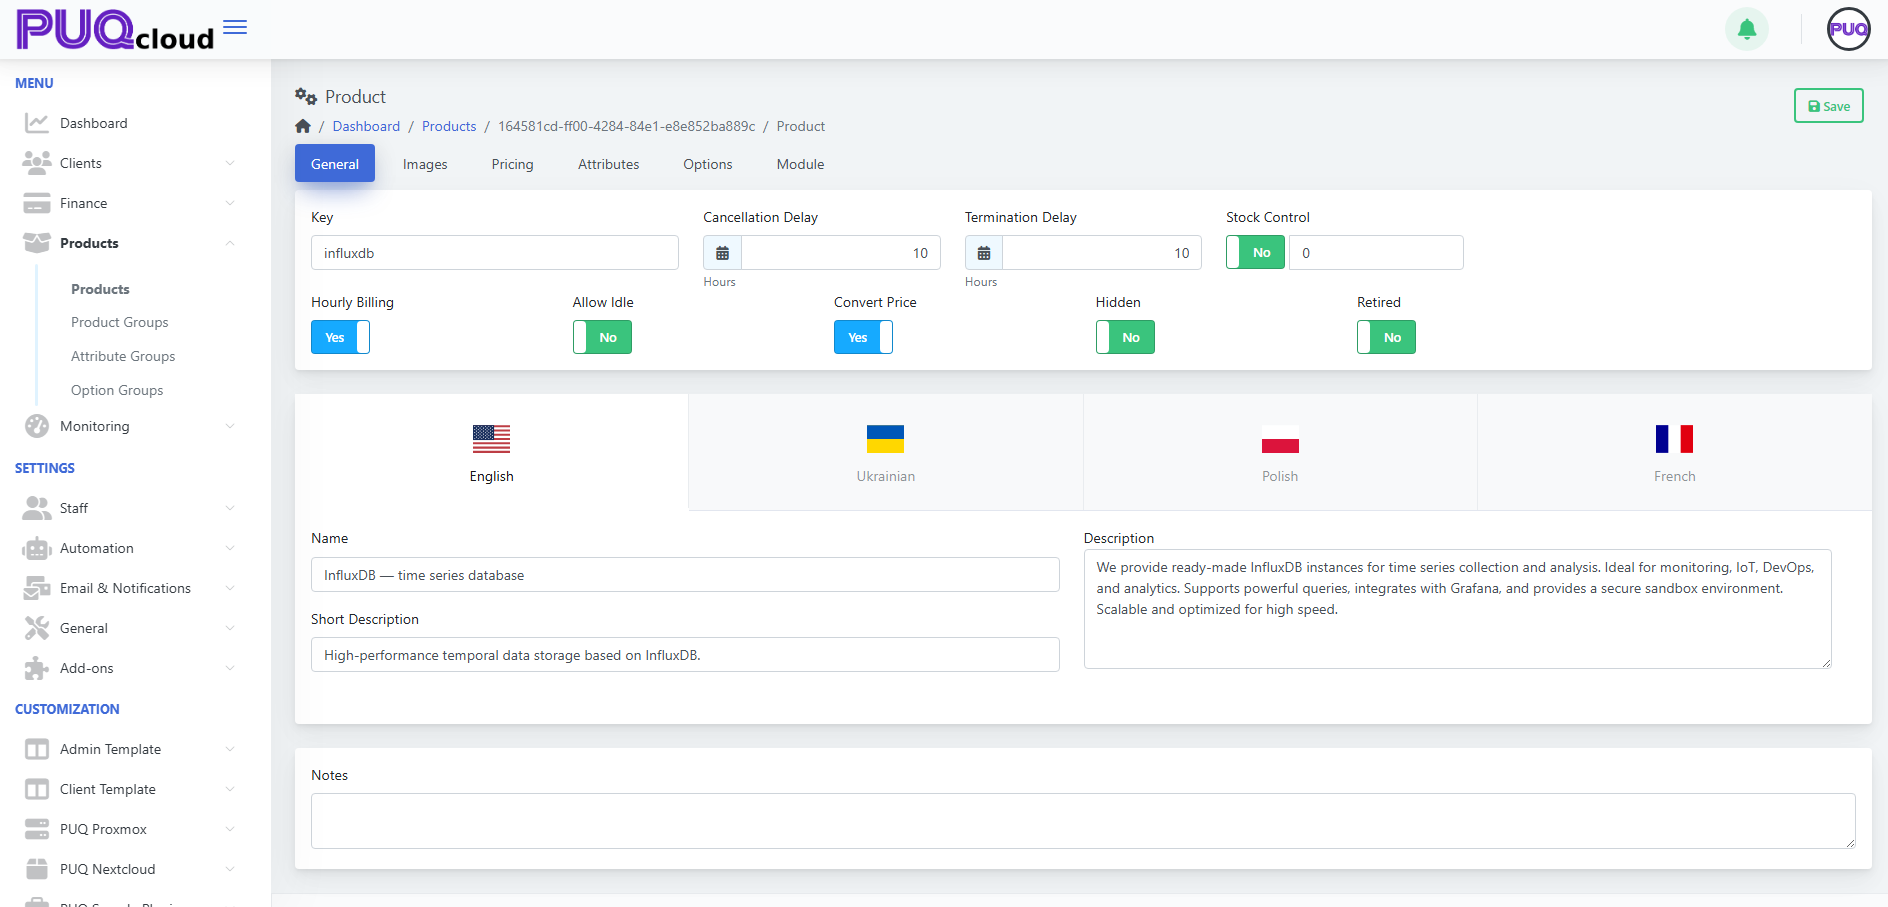
##### 1) General
Fields you’ll see:
- **Key** — internal identifier (read-only after creation).
- **Hourly Billing** — enable if the product can be charged hourly.
- **Allow Idle** — allow an "idle" price tier.
- **Convert Price** — auto-convert base currency rates to other currencies.
- **Cancellation Delay** / **Termination Delay (Hours)** — grace windows before cancel/terminate executes.
- **Stock Control** — enable and set quantity to track stock.
- **Hidden** — hide from storefront/catalog.
- **Retired** — prevent new purchases while keeping existing services.
- **Localized content** — **Name**, **Short Description**, **Description** per language.
- **Notes** — internal notes for admins.
Click **Save**.
*(Screenshot reference: Product → General tab)*
[](https://doc.puq.info/uploads/images/gallery/2025-09/image-1756903073473.png)
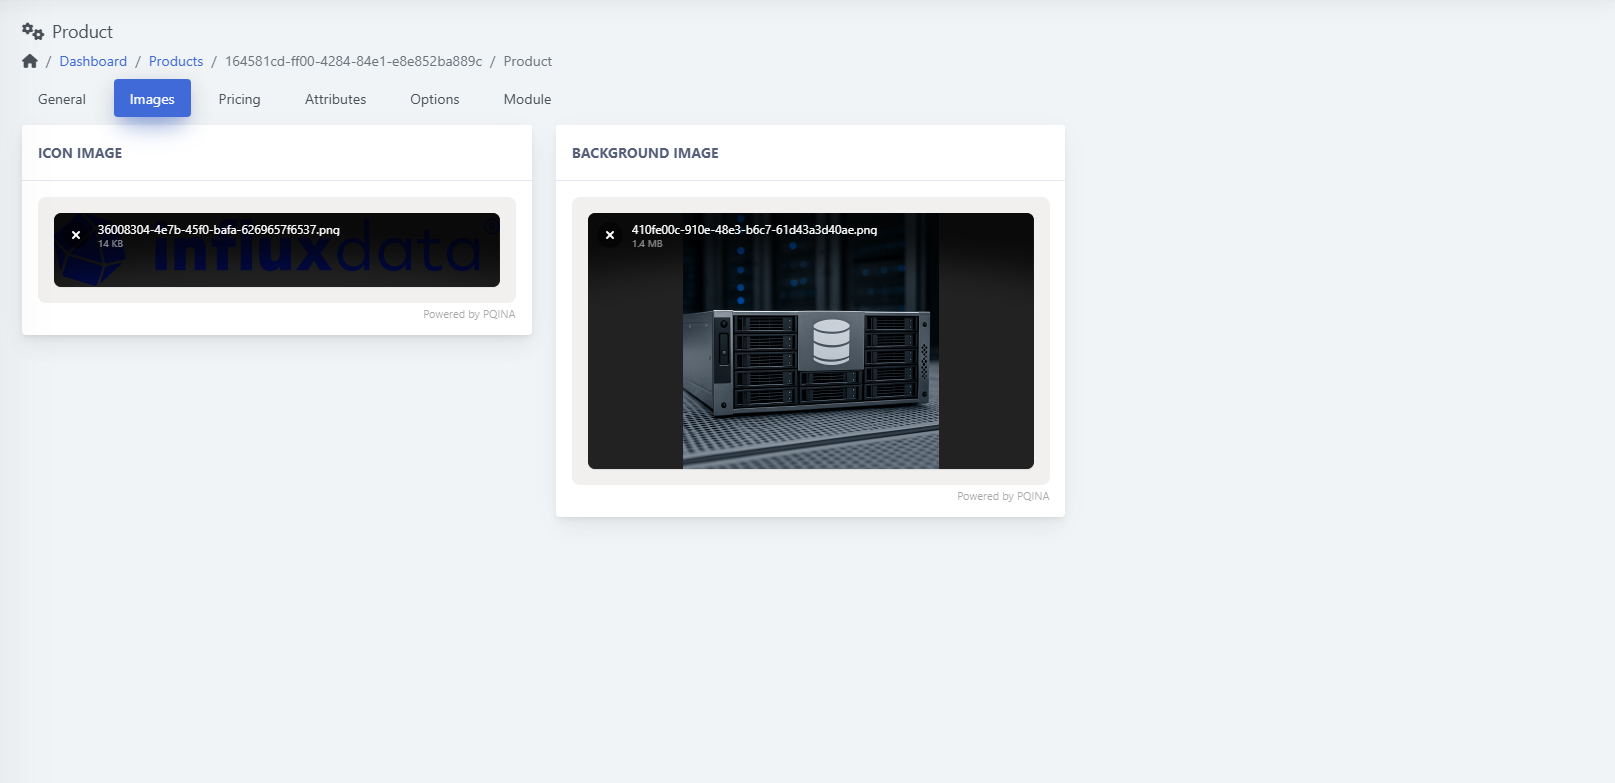
##### 2) Images
- **Icon image** — small logo shown in listings.
- **Background image** — larger visual used on product pages/cards.
Drag & drop or click to upload, then **Save**.
*(Screenshot reference: Product → Images tab)*
[](https://doc.puq.info/uploads/images/gallery/2025-09/image-1756903090331.png)
##### 3) Pricing
The table shows **Period**, **Currency**, **Setup**, **Base**, **Idle**, **Switch down**, **Switch up**, **Uninstall** with **Edit/Delete** actions.[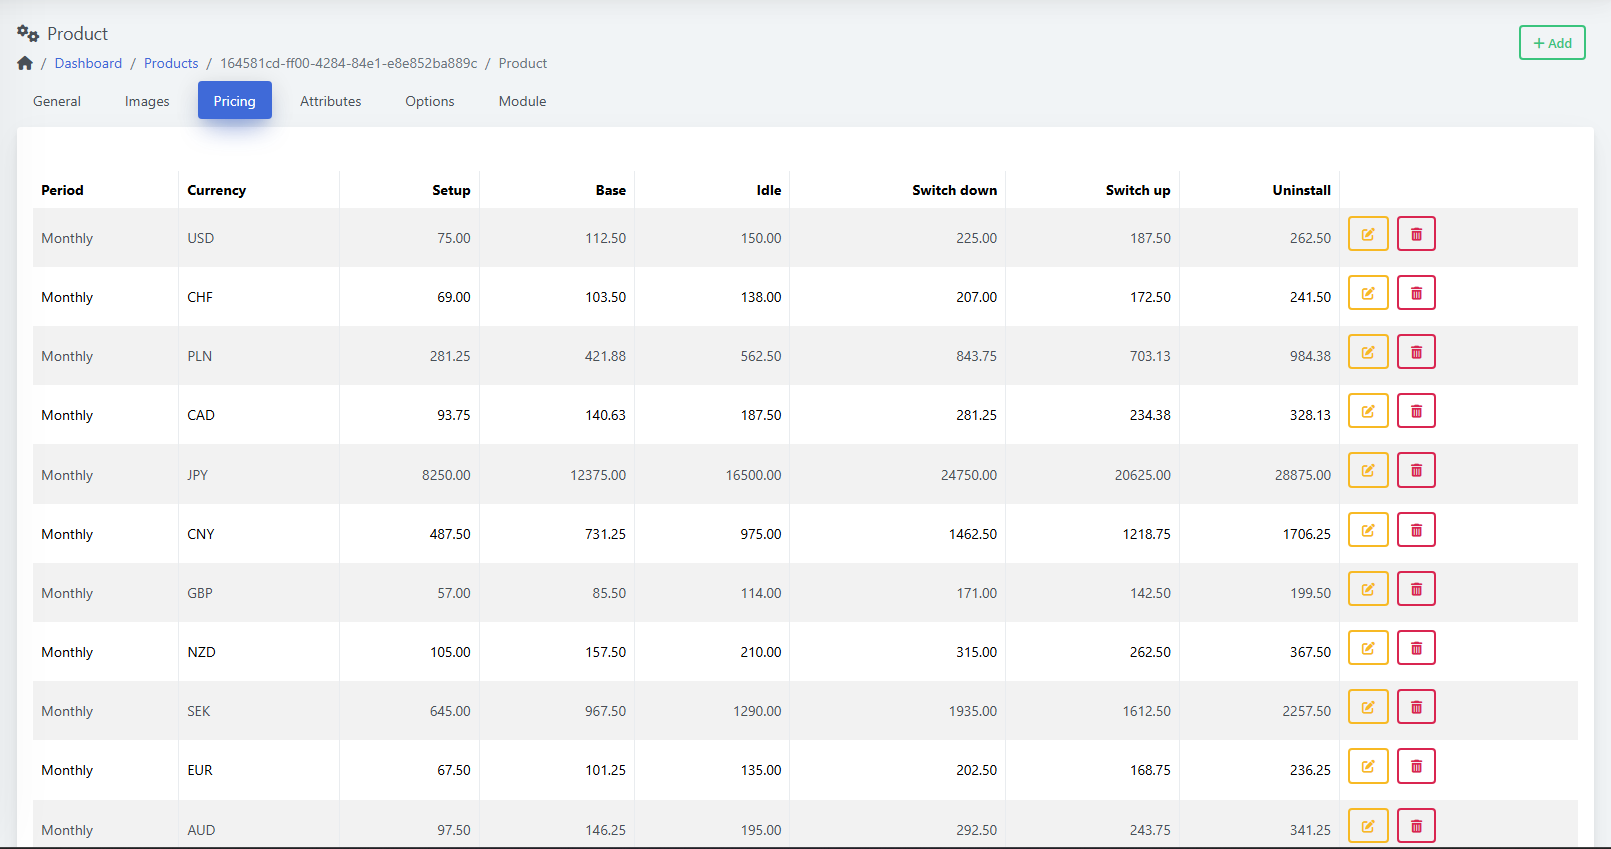](https://doc.puq.info/uploads/images/gallery/2025-09/image-1756903104284.png)
**Add a price**
1. Click **+ Add**.
2. Choose **Currency** and **Period** (One‑Time, Daily, Weekly, Bi‑weekly, Monthly, etc.).
3. Enter amounts as needed (Setup, Base, Idle, Switch up/down, Uninstall).
4. **Save**.[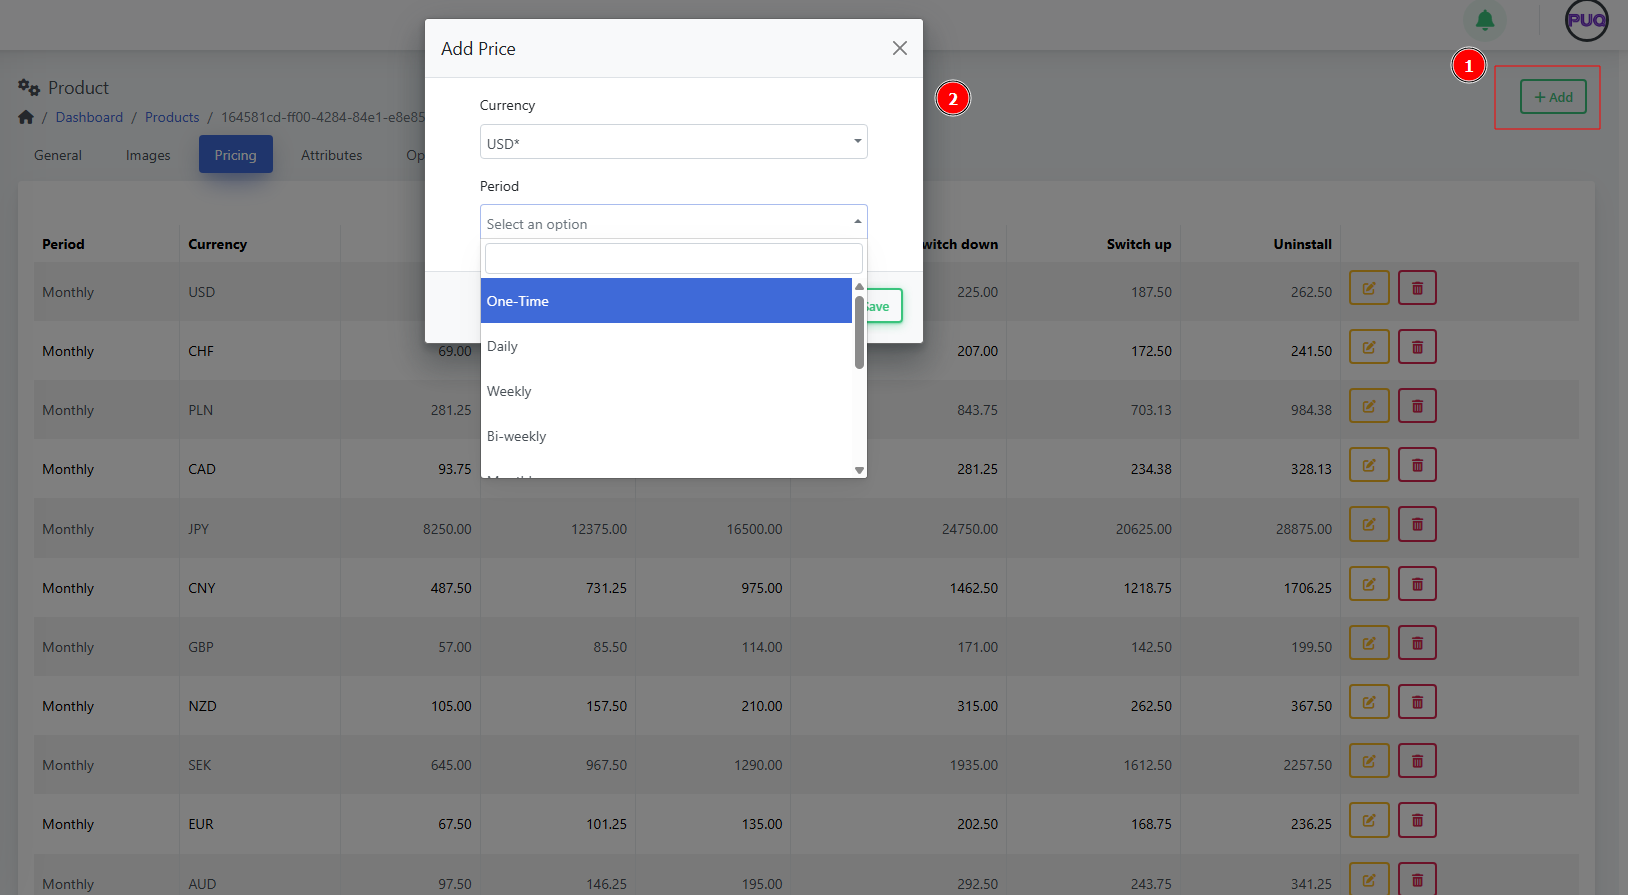](https://doc.puq.info/uploads/images/gallery/2025-09/image-1756903111741.png)
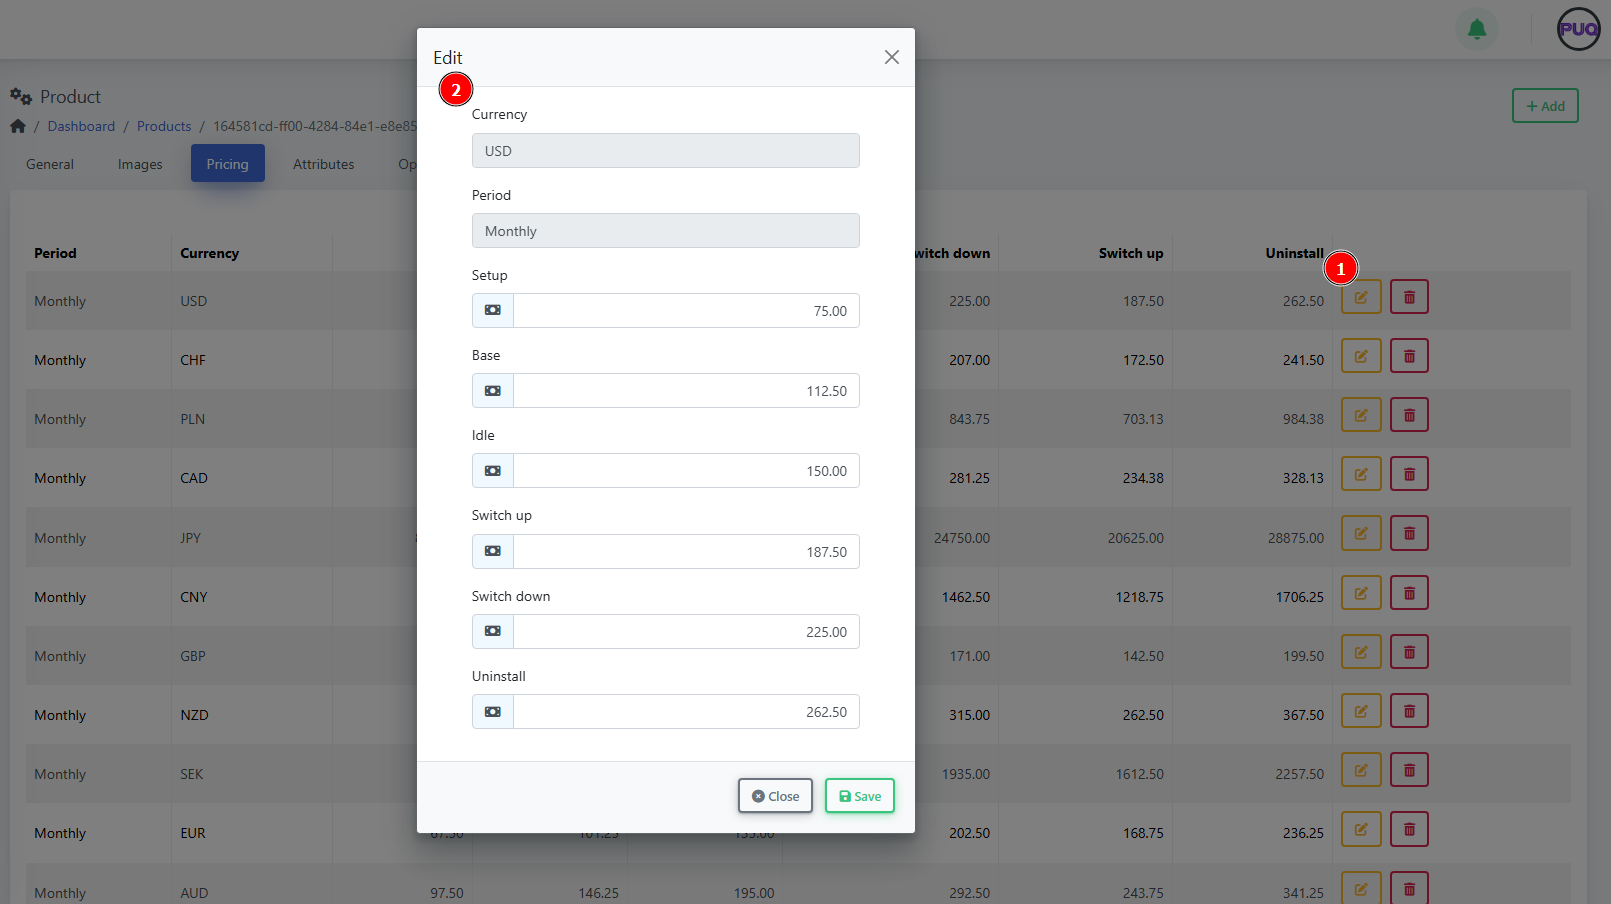
**Edit a price**
- Click the **Edit** icon on a row, adjust amounts, **Save**.
[](https://doc.puq.info/uploads/images/gallery/2025-09/image-1756903119210.png)
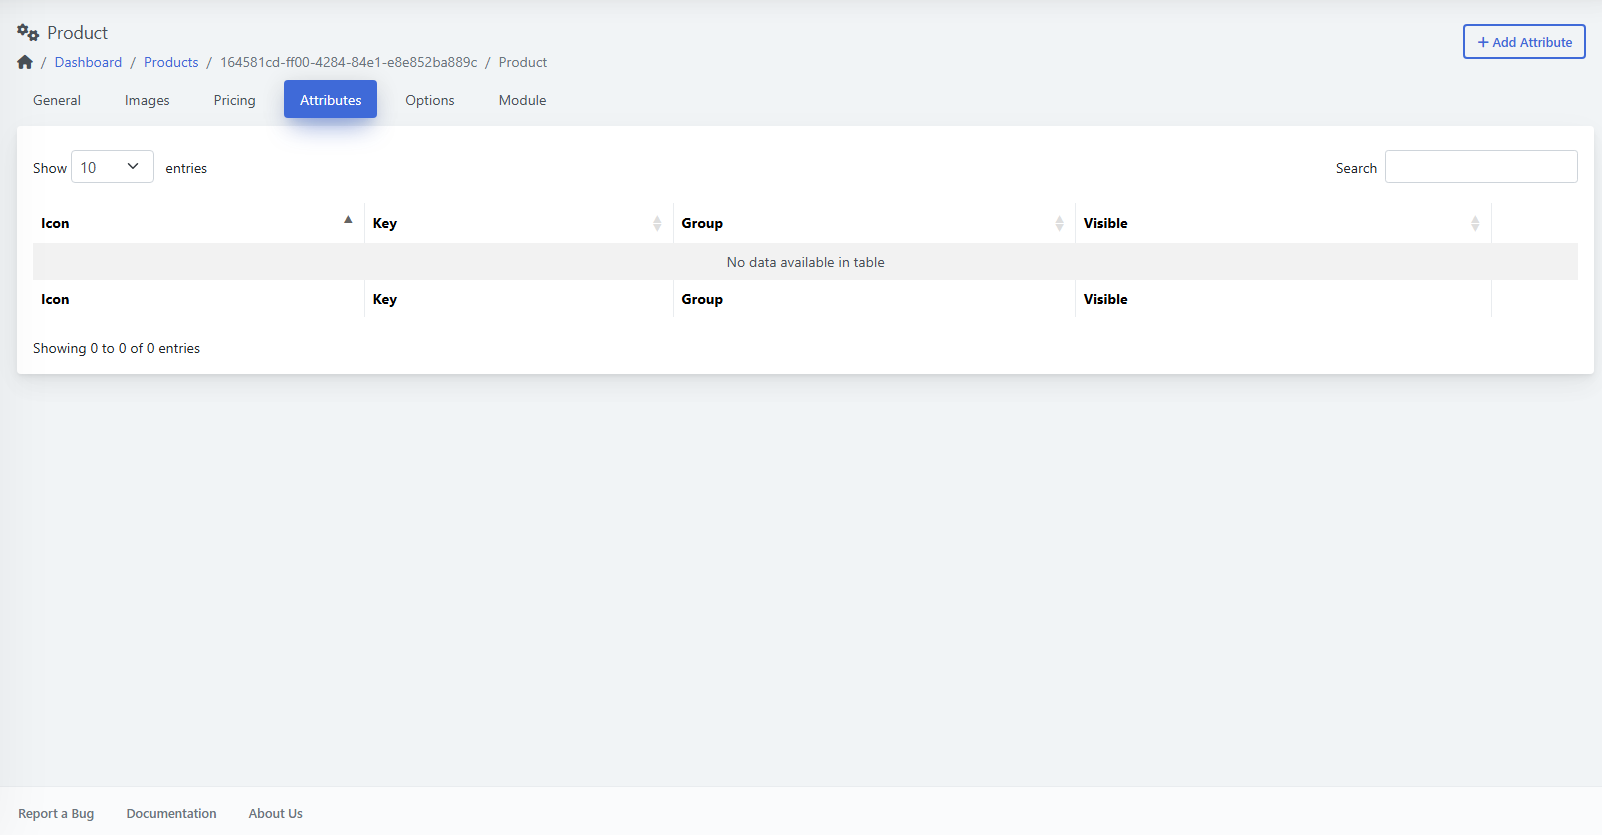
##### 4) Attributes
Attach predefined **attributes** that describe or parameterize the product (often used by modules or displayed to customers).
[](https://doc.puq.info/uploads/images/gallery/2025-09/image-1756903212627.png)
**Add an attribute**
1. Open **Attributes** and click **+ Add Attribute**.
2. Pick an item from the dropdown list (e.g., `proxmox-lxc-rootfs-raid10`).
3. **Save**.
[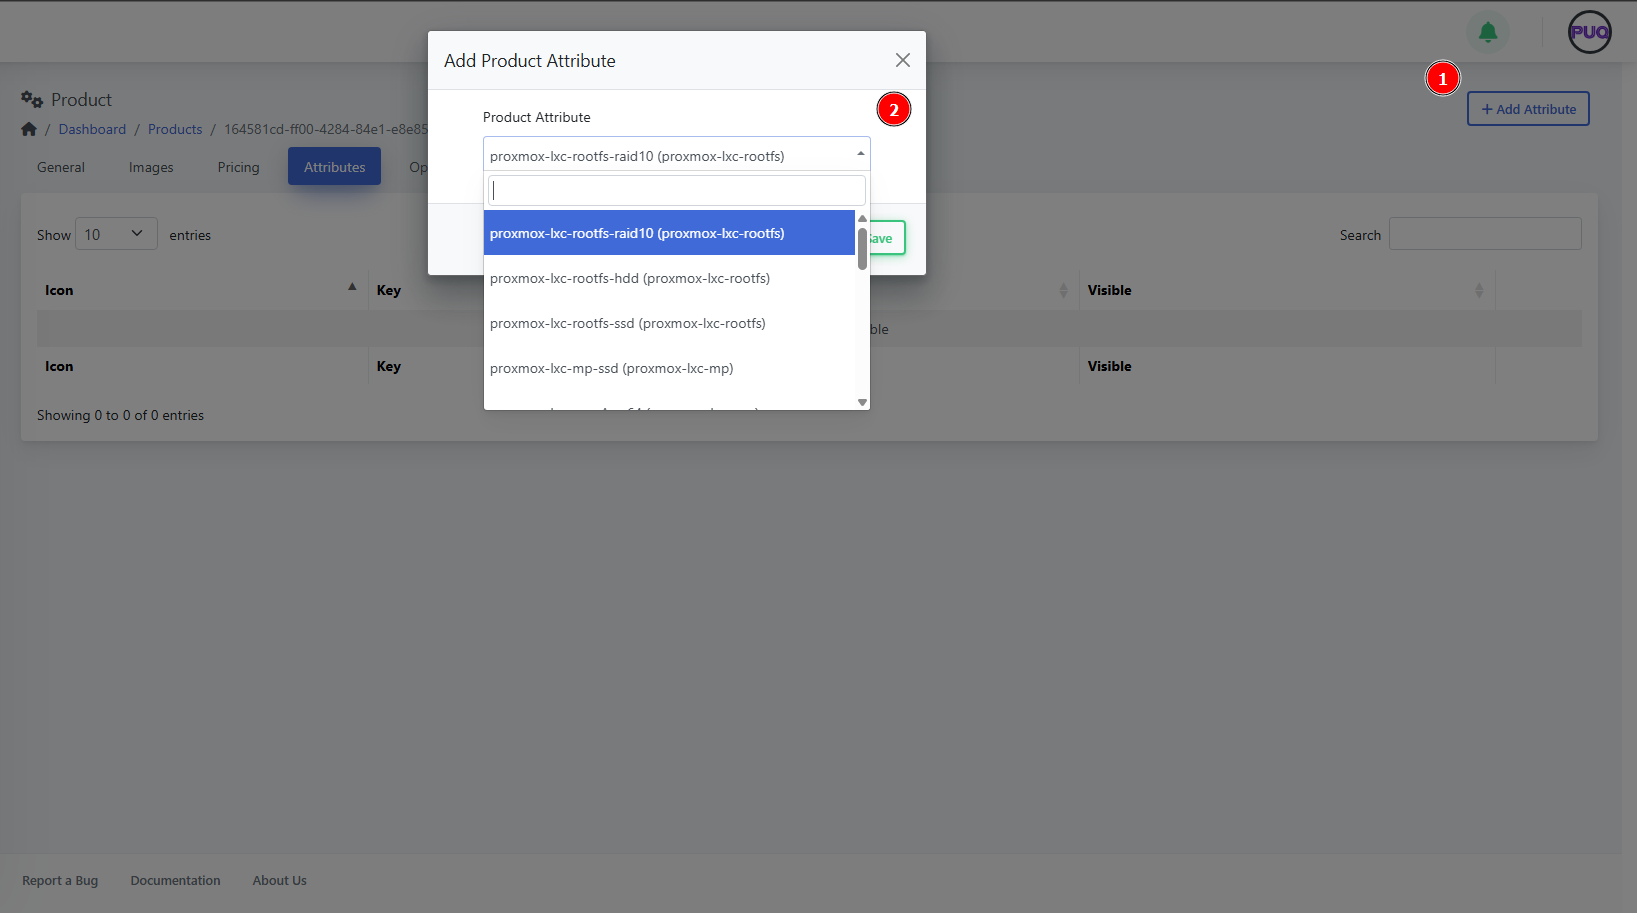](https://doc.puq.info/uploads/images/gallery/2025-09/image-1756903218589.png)
##### 5) Options
Link **option groups** like CPU, RAM, Disk to let customers configure variants during order.
[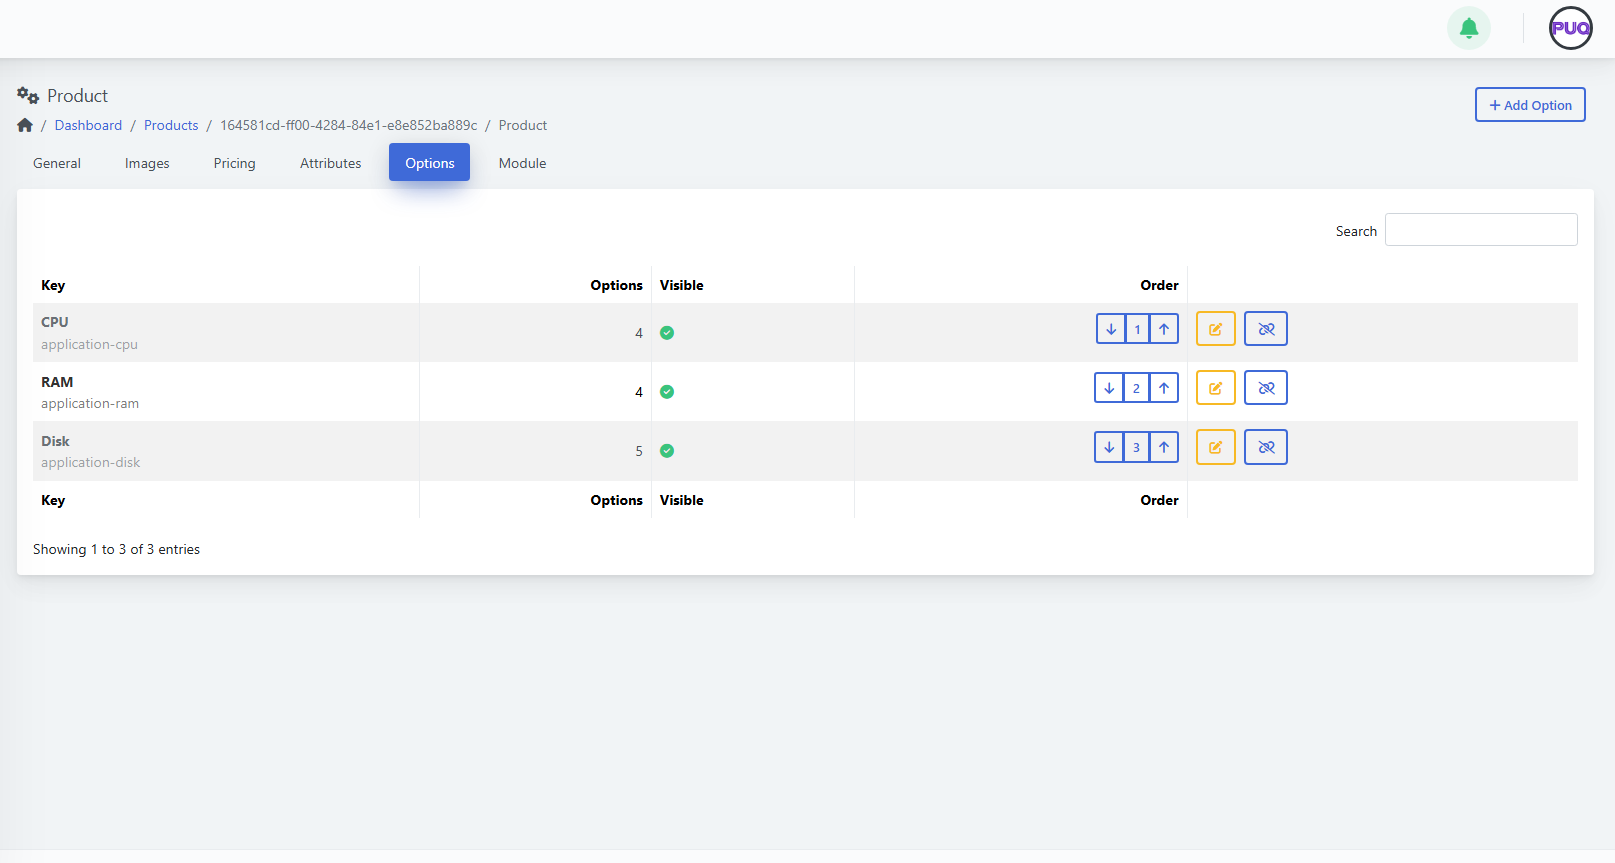](https://doc.puq.info/uploads/images/gallery/2025-09/image-1756903301898.png)
**Add an option group**
1. Open **Options** and click **+ Add Option**.
2. Select a group (e.g., **Firewall**, **Location**, **Additional Disk**) and **Save**.
[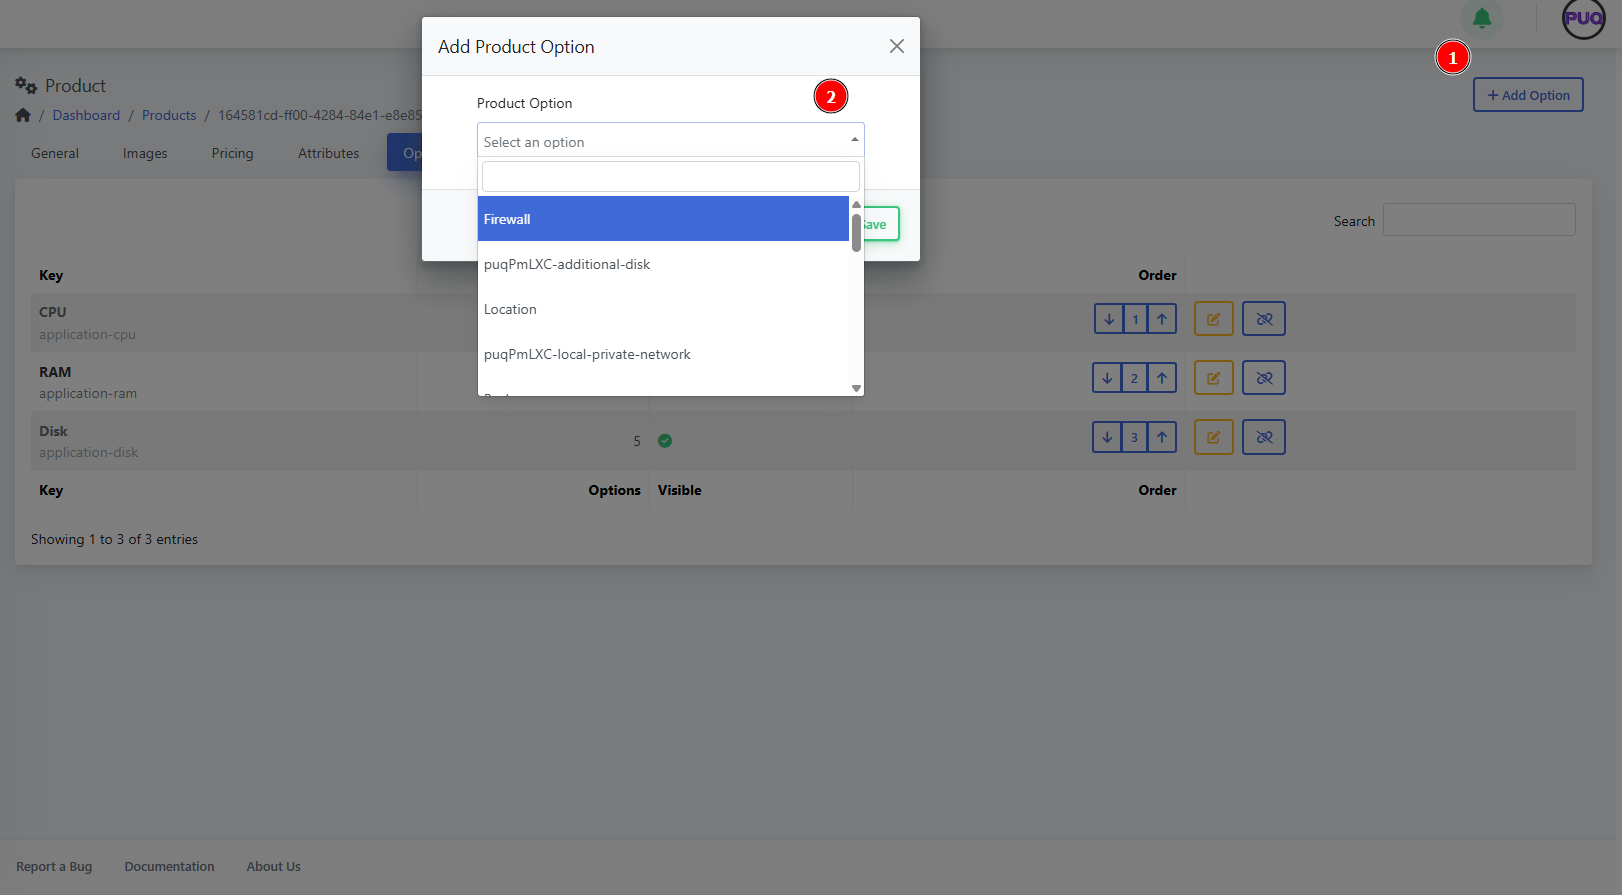](https://doc.puq.info/uploads/images/gallery/2025-09/image-1756903308668.png)
**Manage option groups**
- **Order** — use the up/down arrows to change display order.
- **Edit** — open the option group editor.
- **Hide/Show** — toggle visibility for this product.
- **Unlink** — detach the group from this product (confirm in the dialog).
[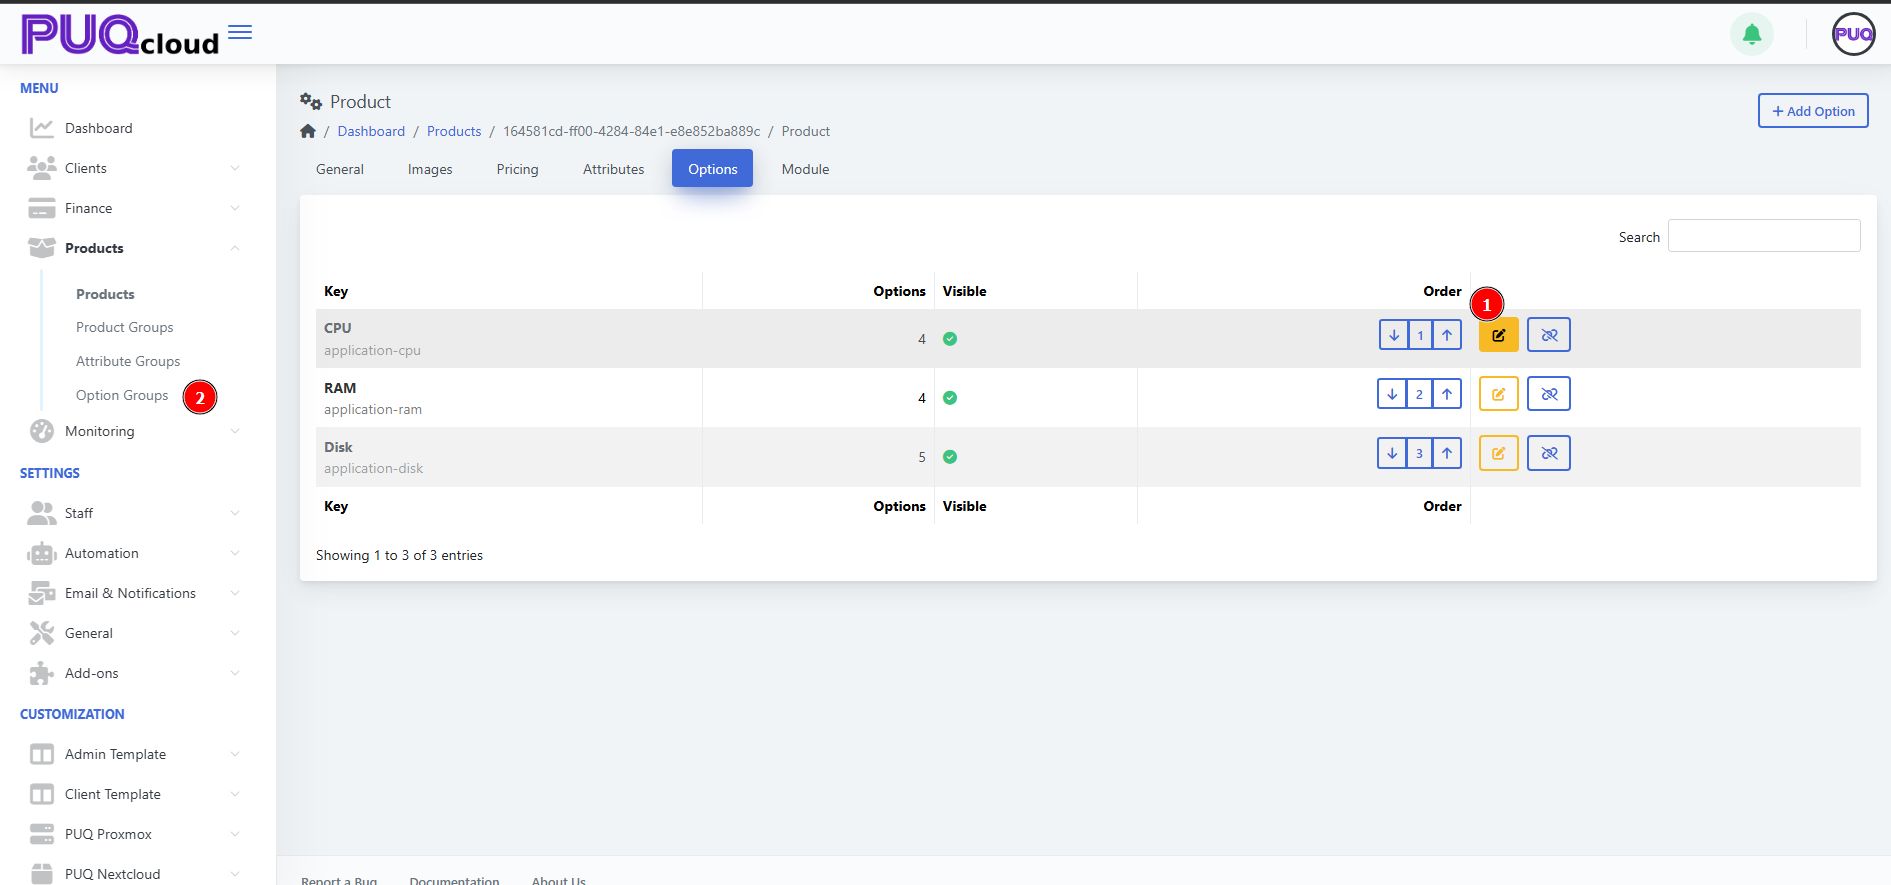](https://doc.puq.info/uploads/images/gallery/2025-09/image-1756903317194.png)
[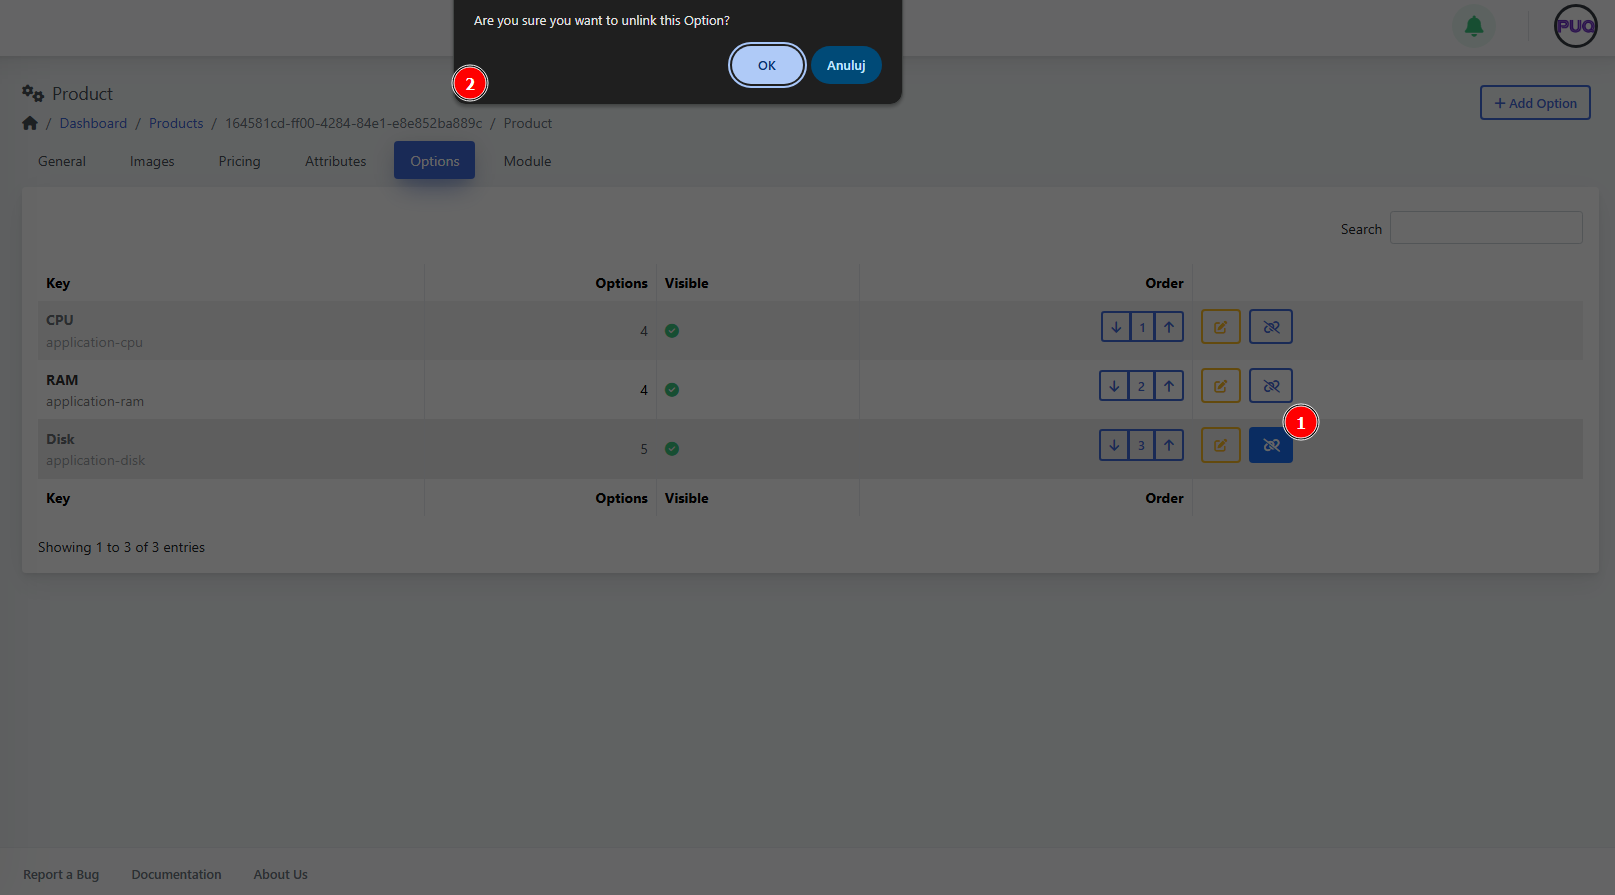](https://doc.puq.info/uploads/images/gallery/2025-09/image-1756903362963.png)
##### 6) Module
Choose the **provisioning module** and fill in any required fields. Each module exposes its own parameters.
1. Go to **Module**.
2. Pick the **Module** from the dropdown (e.g., *PUQ Sample Product (active)*).
3. Complete the module fields.
4. Click **Save**.
*(Screenshot reference: Module tab)*
[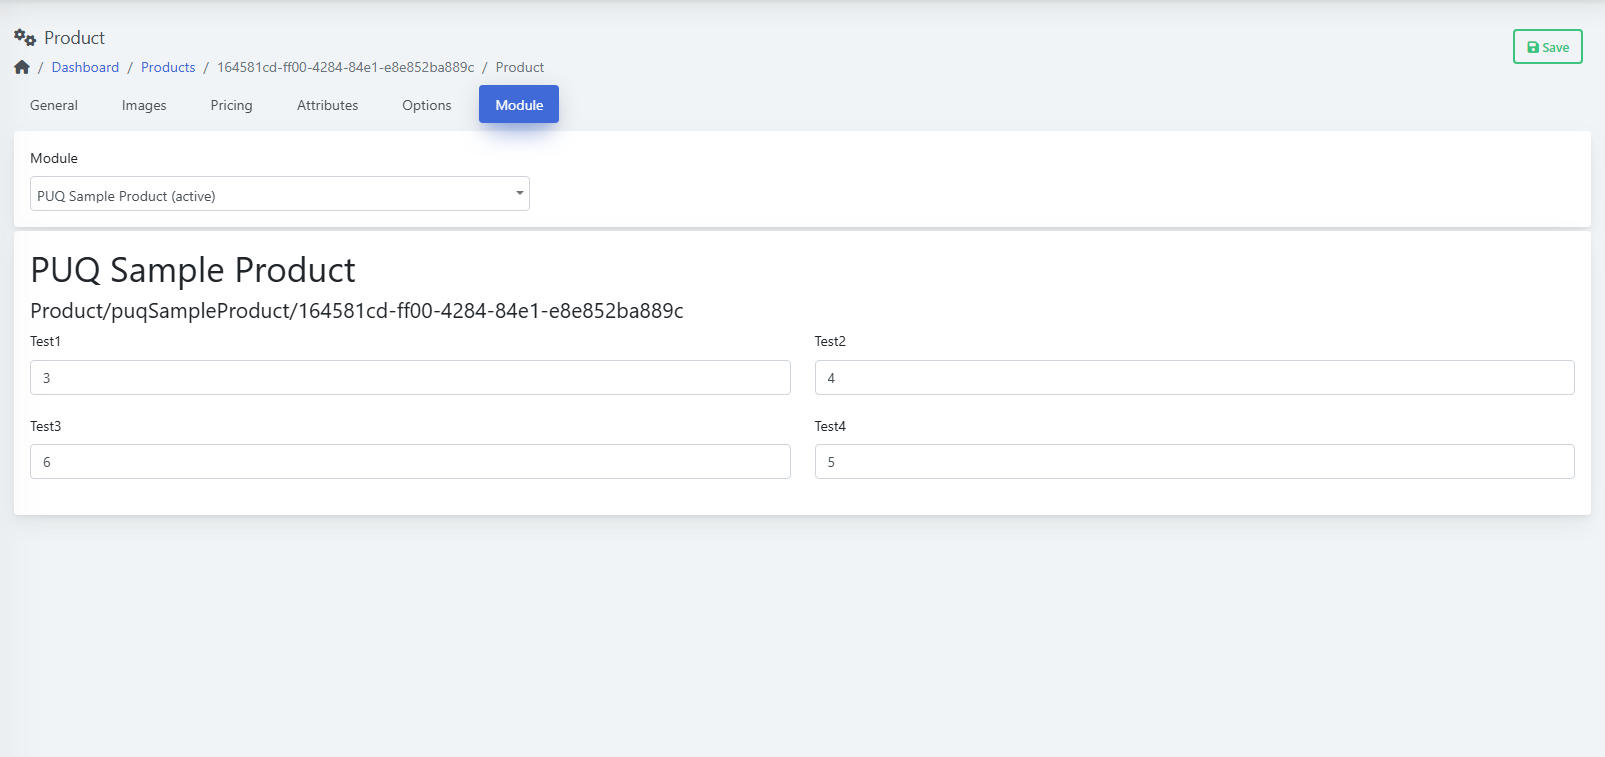](https://doc.puq.info/uploads/images/gallery/2025-09/image-1756903370916.png)
- - - - - -
#### Manage Visibility & Lifecycle
- Set **Hidden = On** to keep the product out of public listings while you work.
- Use **Retired = On** to stop new sales but keep existing services intact.
- Control **Stock** to cap new orders when capacity is limited.
- - - - - -
#### Best Practices
- Start with **Hidden** while configuring; unhide only after pricing and module are ready.
- Use clear, multilingual **Name/Descriptions** for customer understanding.
- Keep **Pricing** consistent across currencies (use **Convert Price** if appropriate).
- Keep option groups organized; put common groups (CPU/RAM/Disk) at the top.
- Test a full order path with a sandbox client before going live.
- - - - - -
#### Troubleshooting
- **Product not visible on site** → Check **Hidden** and **Retired** toggles; ensure at least one **Price** exists.
- **Options missing at checkout** → Verify the groups are **linked** and **visible** for this product.
- **Provisioning fails** → Confirm **Module** is selected and all required fields are filled; review module logs.
- **Wrong currency shown** → Check the **Pricing** table and **Convert Price** setting.
# Create and Manage Product Groups
### PUQcloud Panel
##### [Order Now](https://puqcloud.com/puqcloud-panel.php) | [Download](https://github.com/puqcloud/PUQcloud) | [FAQ](https://faq.puqcloud.com/)
**Product Groups** let you organize related products (e.g., Mini/Medium/Advanced plans) into a single category with shared visuals and templates.
- - - - - -
#### Overview
- **Path:** **Menu → Products → Product Groups**
- **You can:** Create groups, set icons/images, localize copy, assign templates, add/remove products, change order and visibility.
- **Who:** Admins with product management permissions.
Groups control how products are displayed on the storefront (list/order/manage templates) and provide a place to order items and manage visibility.
- - - - - -
#### Product Groups List
You’ll see: **Icon**, **Key**, **Visible**, **Products** (count), **Order** controls (down / index / up), and actions (**Edit**, **Delete**). Use **Search** to filter.
*(Screenshot reference: Product Groups list)*
[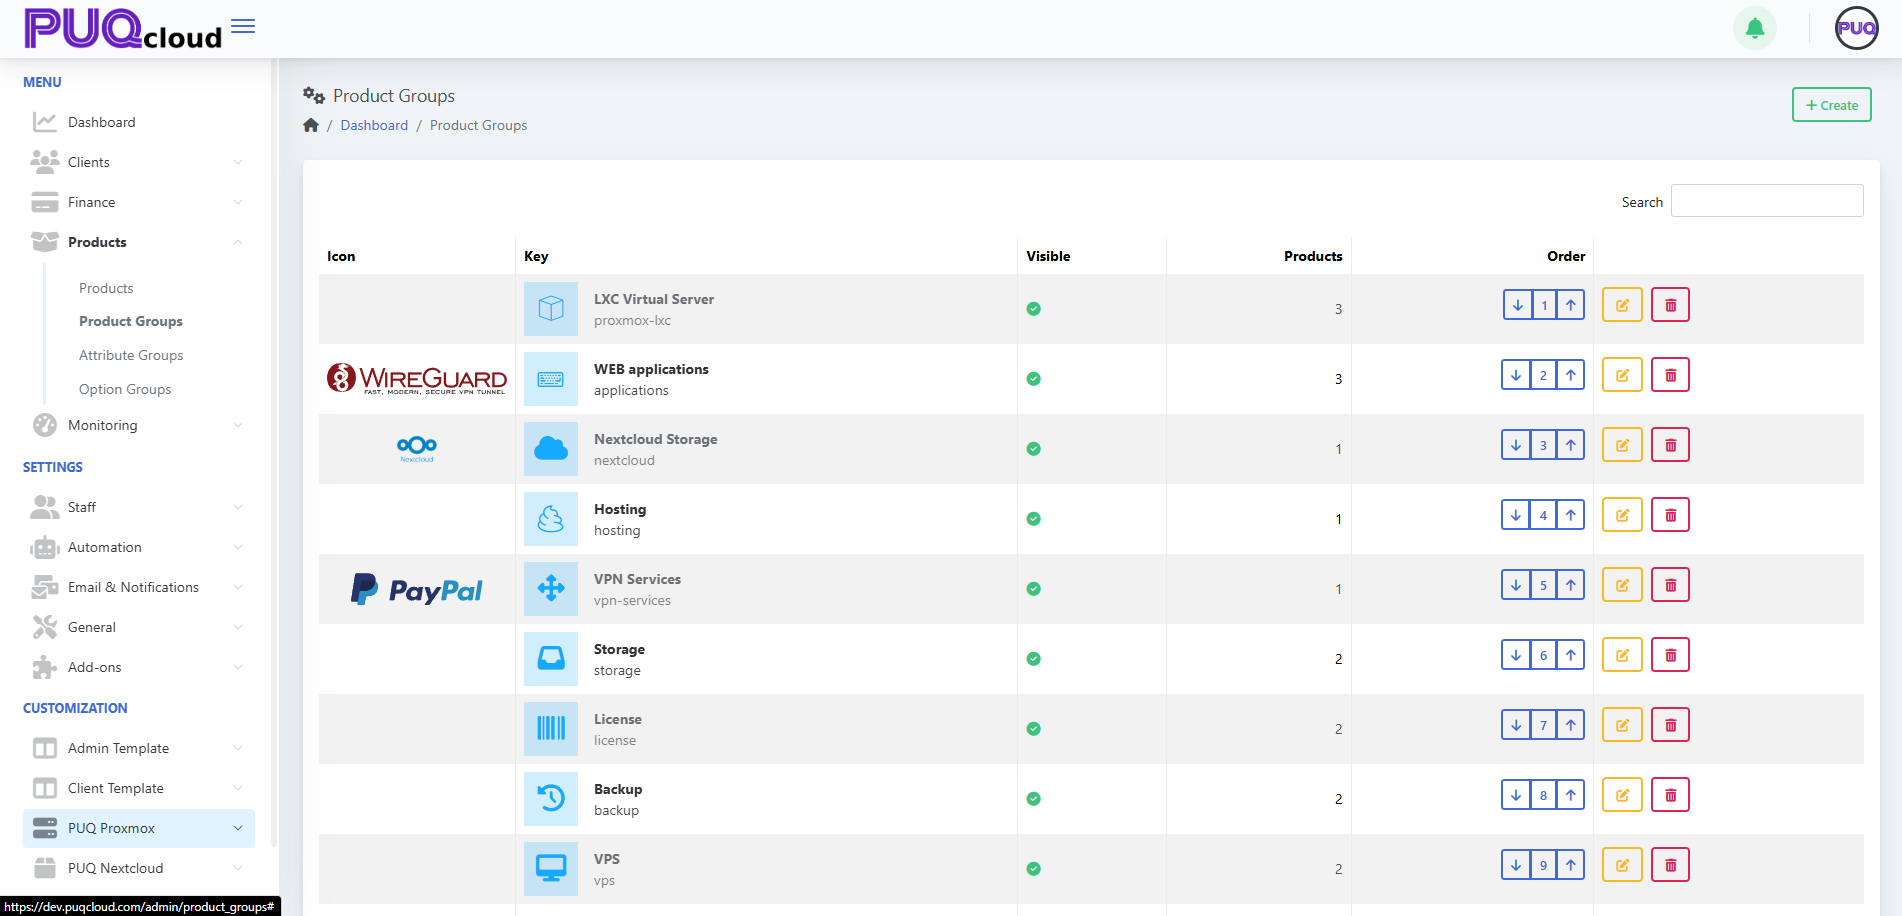](https://doc.puq.info/uploads/images/gallery/2025-09/image-1757599011970.png)
**Actions**
- **+ Create** — add a new group. *(Screenshot: Create Group modal)*
[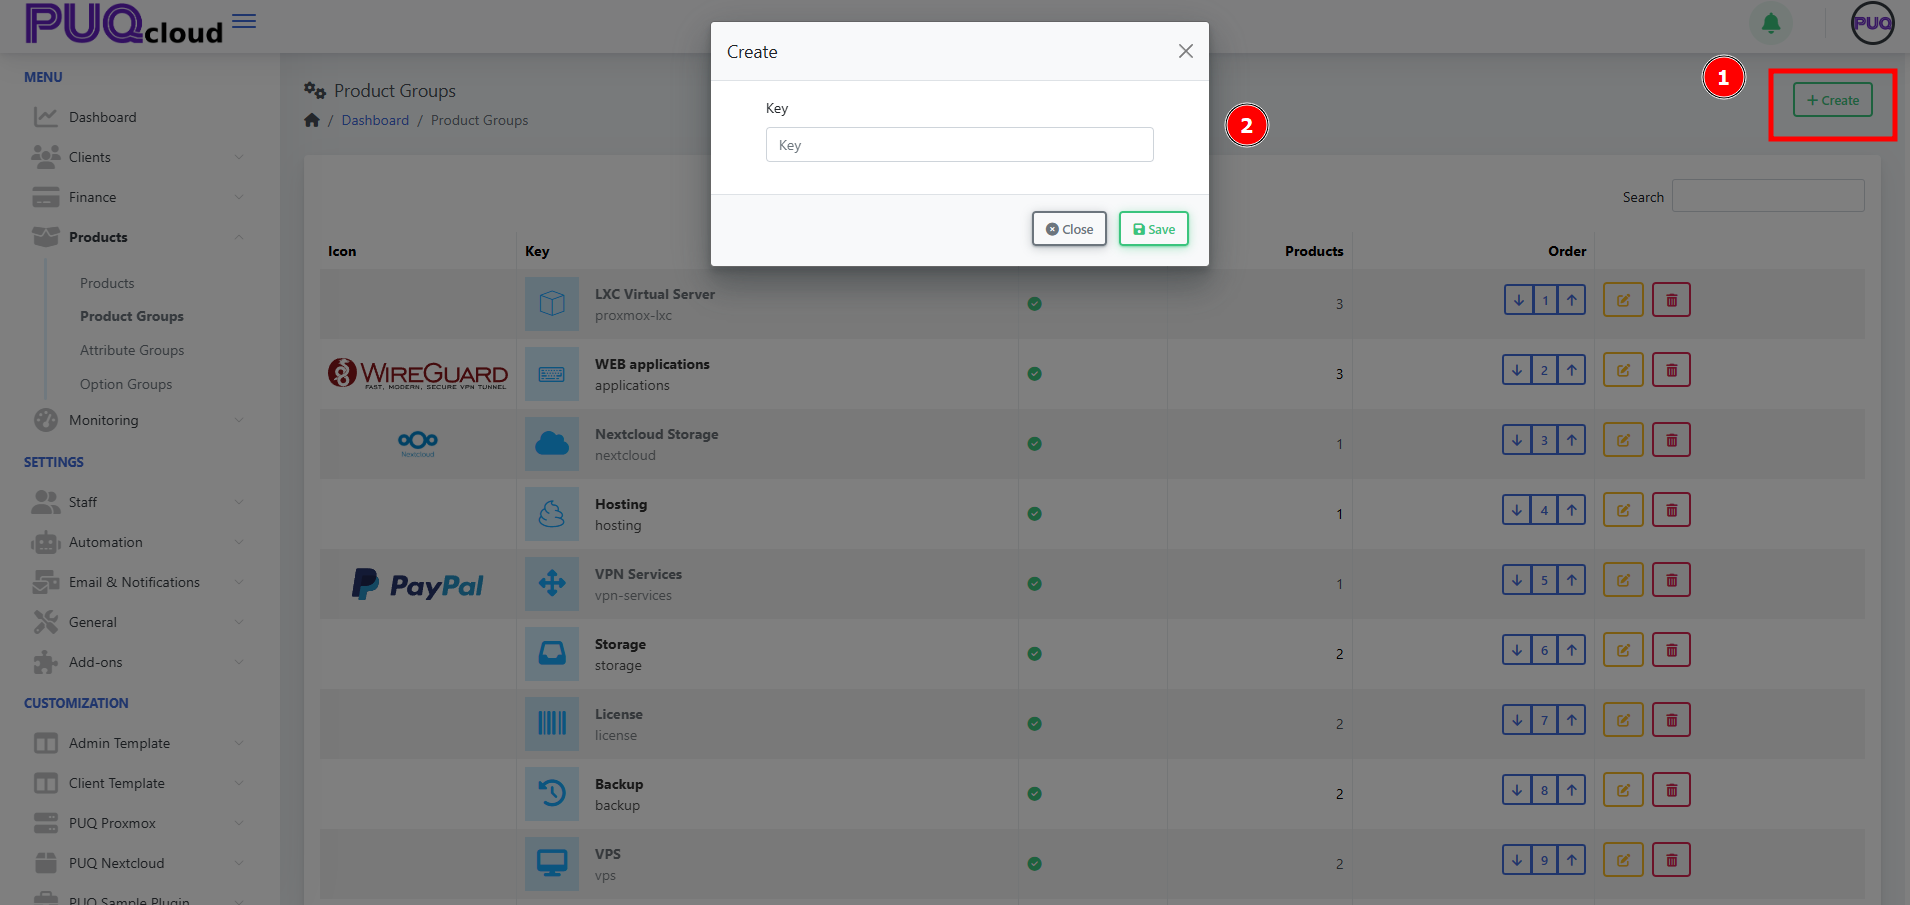](https://doc.puq.info/uploads/images/gallery/2025-09/image-1757599028793.png)
- **Order** — use arrows to arrange groups on the storefront.
- **Edit** — open tabs **General / Images / Products**.
- **Delete** — remove the group (does not delete products).
- - - - - -
#### Create a Product Group
1. Click **+ Create**.
2. Enter a unique **Key** (e.g., `proxmox-lxc`).
3. Click **Save**. The group opens on the **General** tab.
*(Screenshots: Create modal → General tab)*
[](https://doc.puq.info/uploads/images/gallery/2025-09/image-1757599035155.png)
- - - - - -
#### Configure the Group
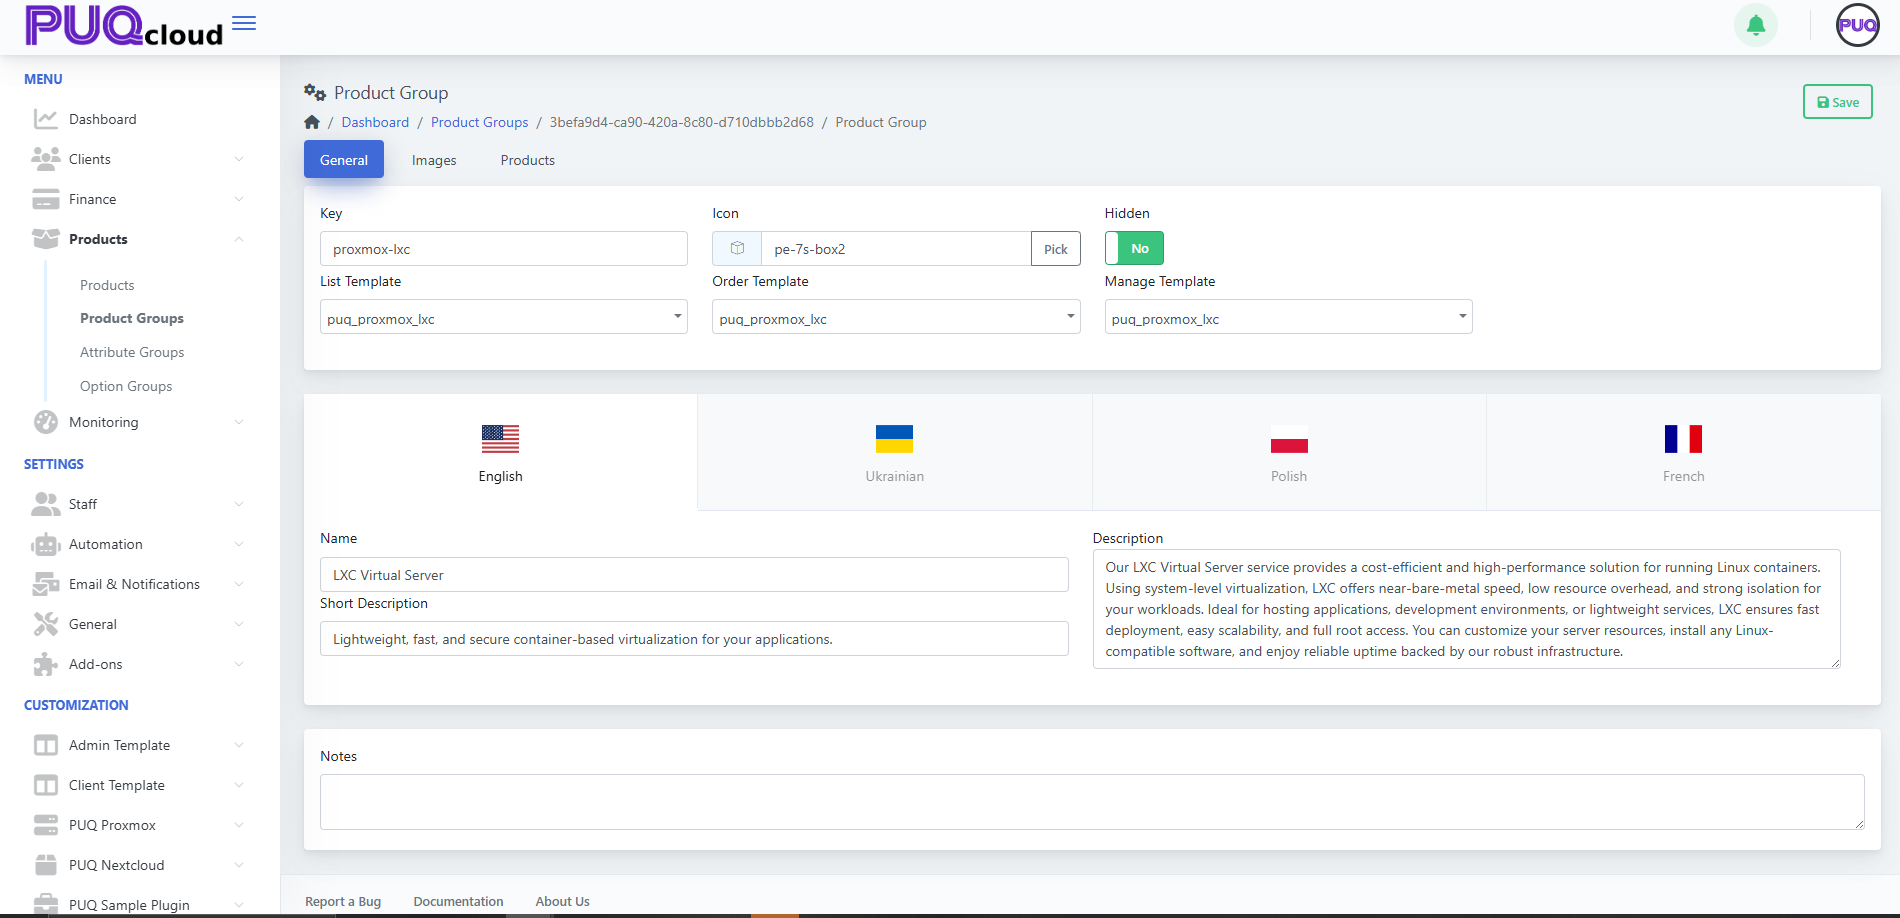
##### General tab
- **Key** — internal identifier (read‑only after creation).
- **Icon** — choose an icon from your set (**Pick**).
- **Hidden** — hide/show the group from storefront.
- **Templates**
- **List Template** — how the group appears on the catalog page.
- **Order Template** — layout for the order page of products in this group.
- **Manage Template** — layout for the client’s service management page.
- **Localized content** — **Name**, **Short Description**, **Description** per language.
- **Notes** — internal, visible to admins only.
Click **Save**.
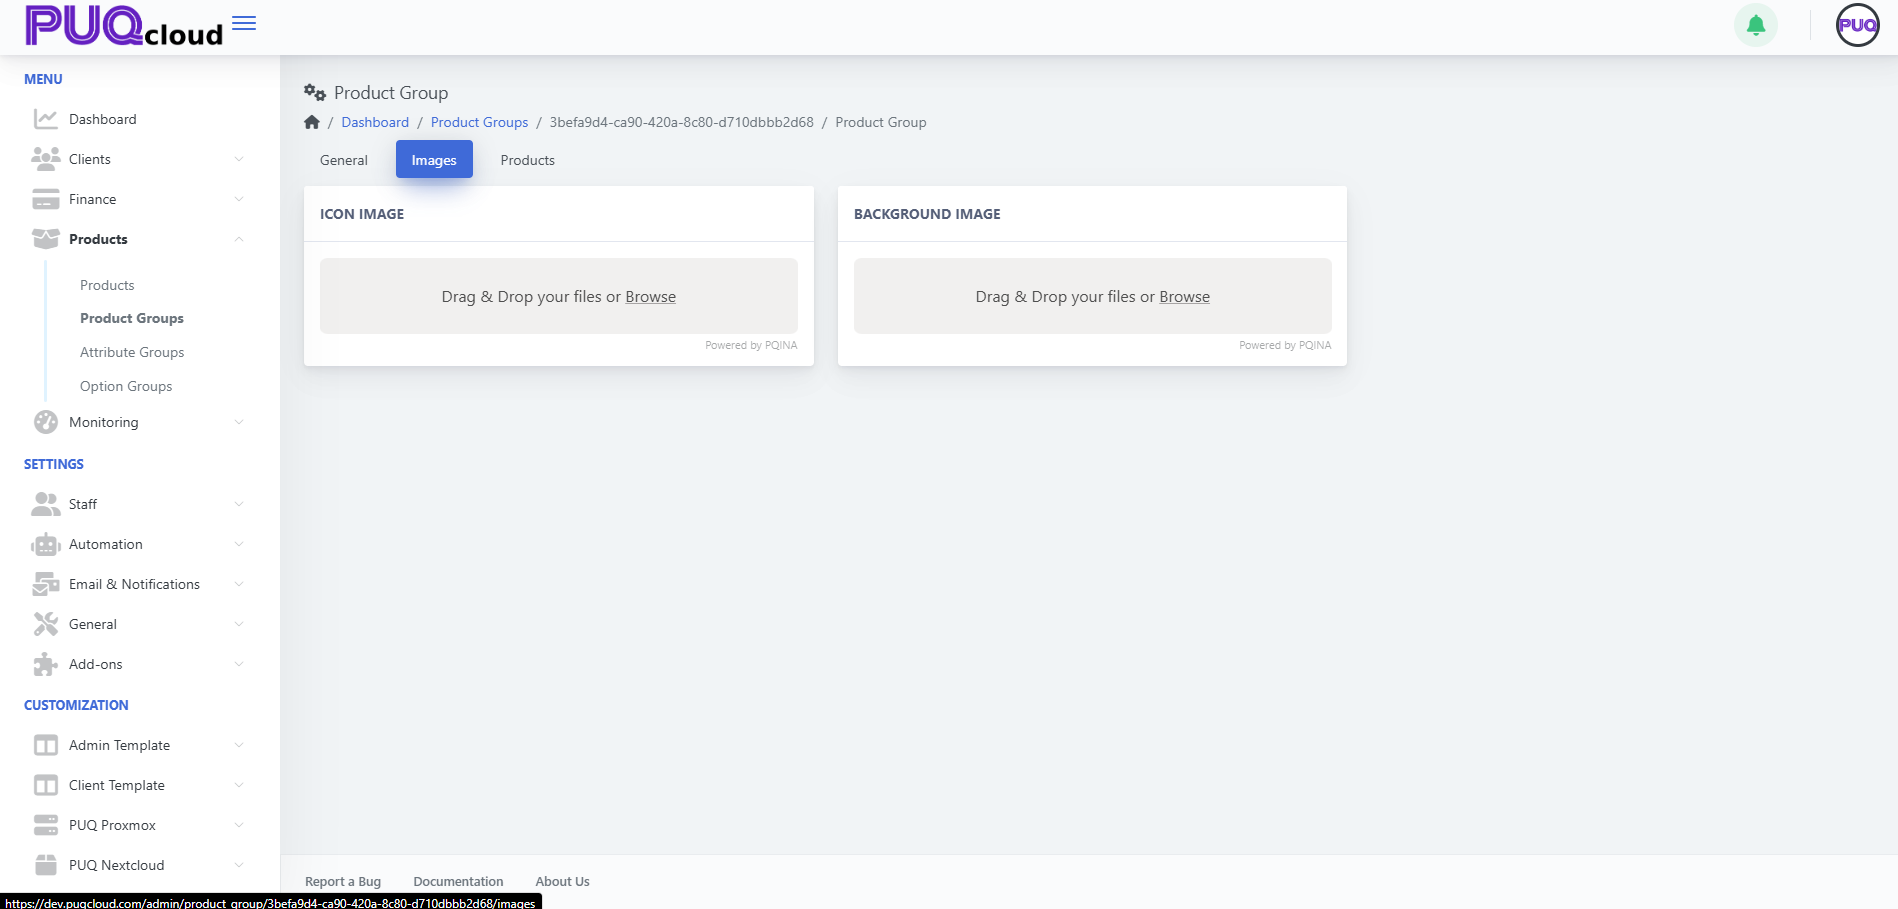
##### Images tab
Upload visuals that represent the group:
- **Icon Image** — small logo used in lists/cards.
- **Background Image** — large banner-style image.
Drag & drop or **Browse**, then **Save**.
*(Screenshot: Images tab)*
[](https://doc.puq.info/uploads/images/gallery/2025-09/image-1757599044206.png)
- - - - - -
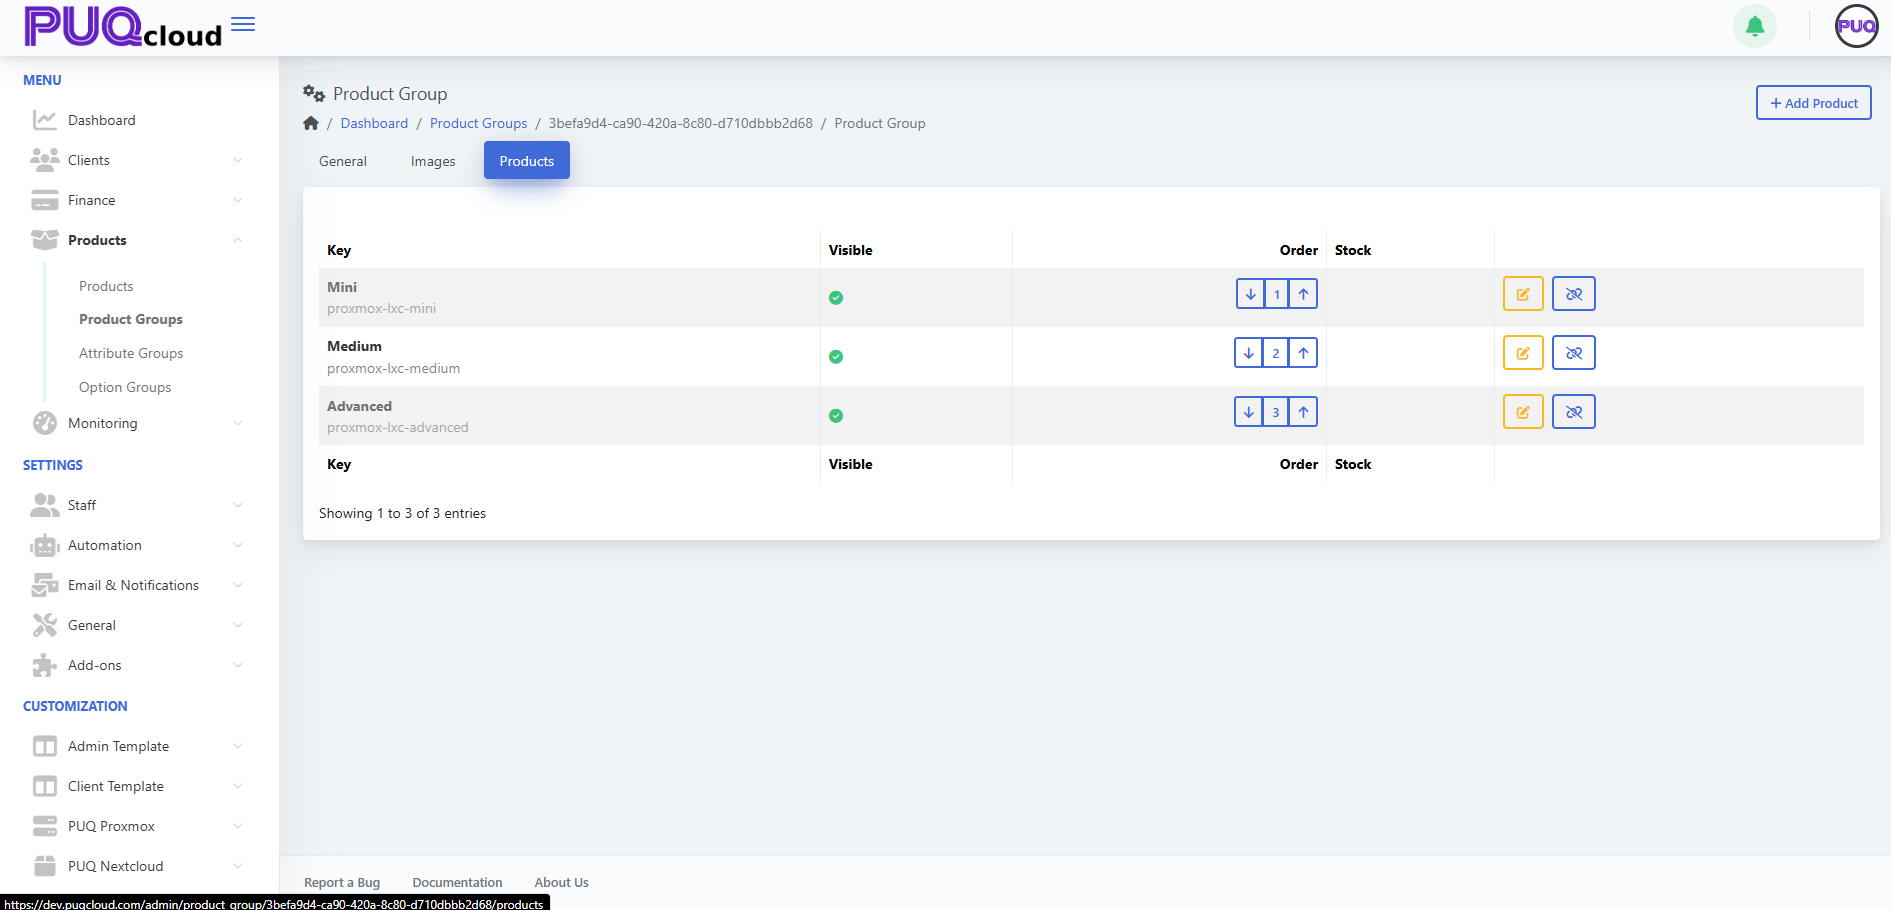
#### Add & Manage Products in the Group
Open the **Products** tab. *(Screenshot: Products tab)*
[](https://doc.puq.info/uploads/images/gallery/2025-09/image-1757599050153.png)
##### Add products
1. Click **+ Add Product**.
2. Select one or more **existing products** to link to this group.
3. **Save**.
##### Manage items
- **Visible** — the green check indicates the product is visible inside this group.
- **Order** — use arrows to set the display order (e.g., Mini = 1, Medium = 2, Advanced = 3).
- **Edit** — open the product for editing in a new view.
- **Hide/Show** — toggle product visibility in this group (without altering the product’s global status).
- **Unlink** — detach the product from the group (confirmation dialog).
Tip: Keep a clear progression (e.g., Mini → Medium → Advanced) and ensure at least one **visible** product exists per group.
- - - - - -
#### Best Practices
- Keep groups **Hidden** while drafting, then unhide when ready.
- Use consistent naming/visuals across **Name**, **Icon**, and **Images**.
- Choose templates that match the **product type** for a seamless order flow.
- Reuse groups for families of products (e.g., CPU/RAM tiers for the same service).
- Review the **Products** count in the list to quickly spot empty groups.
- - - - - -
#### Troubleshooting
- **Group doesn’t appear in catalog** → Turn **Hidden = Off**; verify that the group contains at least **one visible product**.
- **Product not showing under the group** → Ensure it’s **linked** and **visible** in the **Products** tab; also check the product’s own **Hidden/Active** flags.
- **Wrong page layout** → Confirm **List/Order/Manage Templates** are correct for this group.
- **Unexpected order** → Use the arrow controls in both **Group list** (for groups) and **Products tab** (for items) to correct ordering.
- - - - - -
#### Screenshot References
- **Product Groups list** — overview of groups with counts, visibility and order.
- **Create Group modal** — single Key field.
- **General tab** — Key, Icon, Hidden, Templates, localized fields.
- **Images tab** — Icon Image and Background Image uploaders.
- **Products tab** — list with Visible, Order, Edit, Hide/Show, Unlink.
# Create and Manage an Attribute Group
### PUQcloud Panel
##### [Order Now](https://puqcloud.com/puqcloud-panel.php) | [Download](https://github.com/puqcloud/PUQcloud) | [FAQ](https://faq.puqcloud.com/)
**Product Attribute Groups** are collections of attributes (e.g., IPv4, IPv6, 10 Gbps) you can later attach to products. They help standardize feature flags and technical capabilities across multiple products.
- - - - - -
#### Overview
- **Path:** **Menu → Products → Attribute Groups**
- **You can:** Create groups, localize names/descriptions, upload images, add/edit/delete attributes in a group, and control group visibility.
- **Who:** Admins with product management permissions.
A **Product Attribute** is a single capability/flag (e.g., `IPv6`). An **Attribute Group** is a labeled collection of such attributes.
- - - - - -
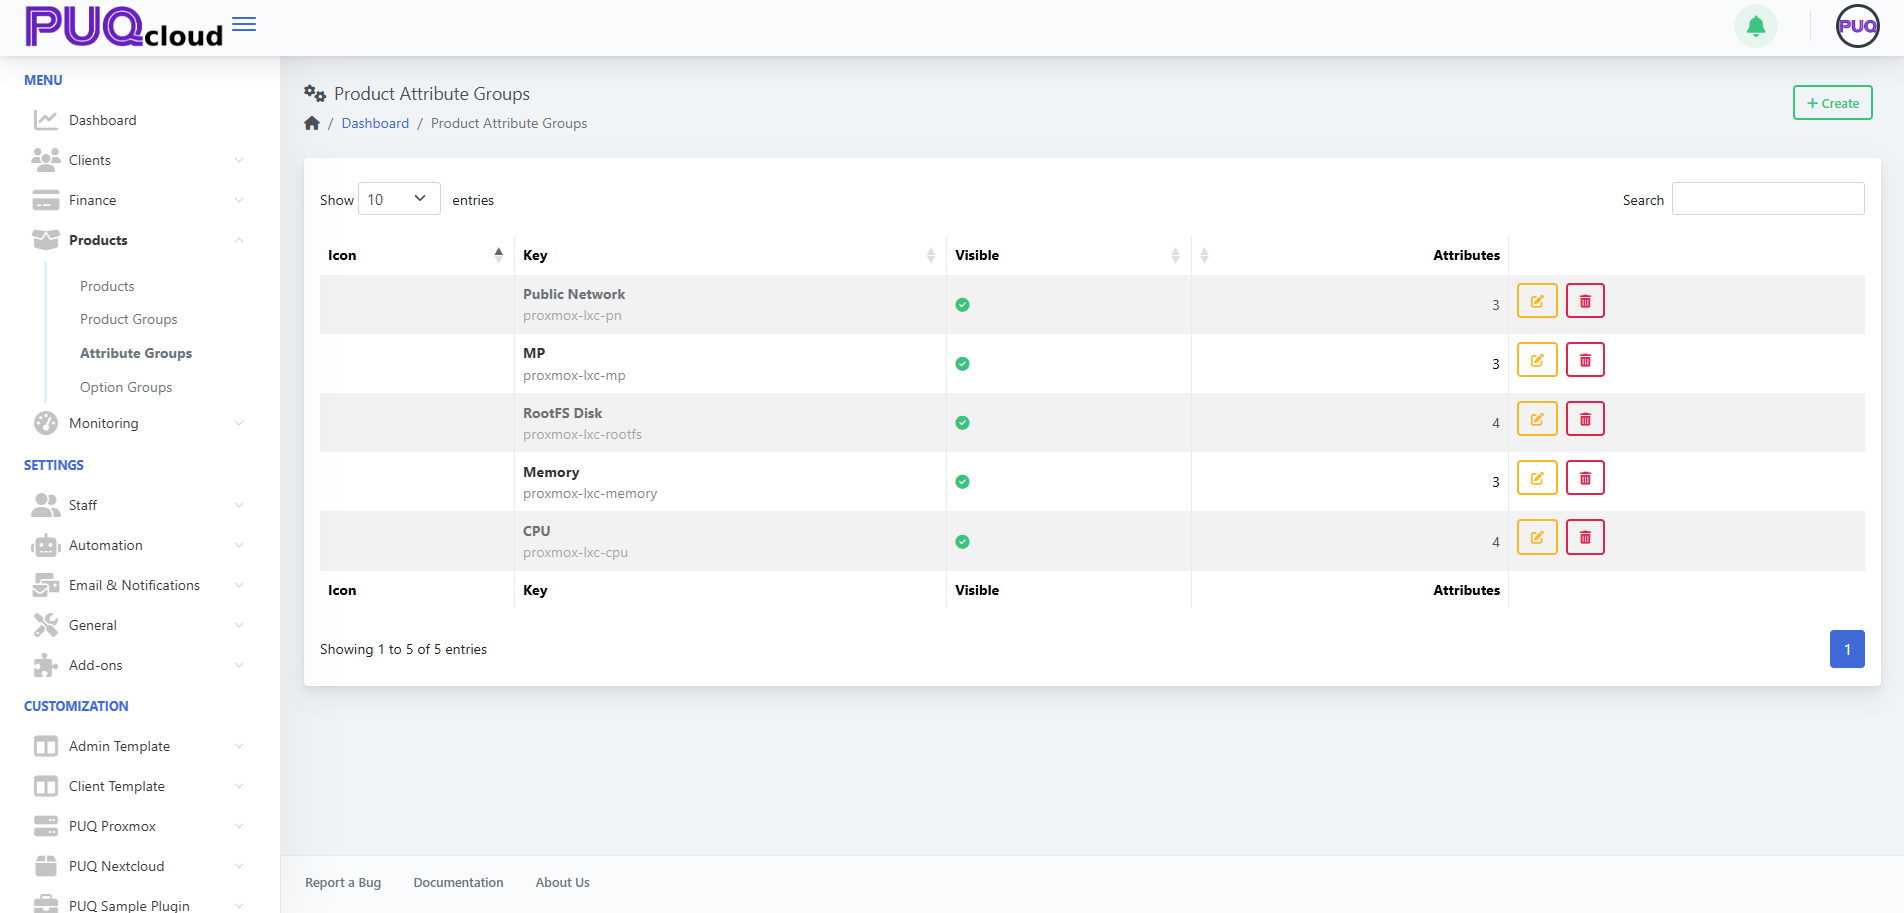
#### Attribute Groups List
The list shows **Icon**, **Key**, **Visible**, and **Attributes** (count) with actions **Edit** and **Delete**. Use **Search** to filter.
*(Screenshot reference: Attribute Groups list)*
[](https://doc.puq.info/uploads/images/gallery/2025-09/image-1757599579030.png)
**Actions**
- **+ Create** — add a new attribute group. *(Screenshot: Create Group modal)*
[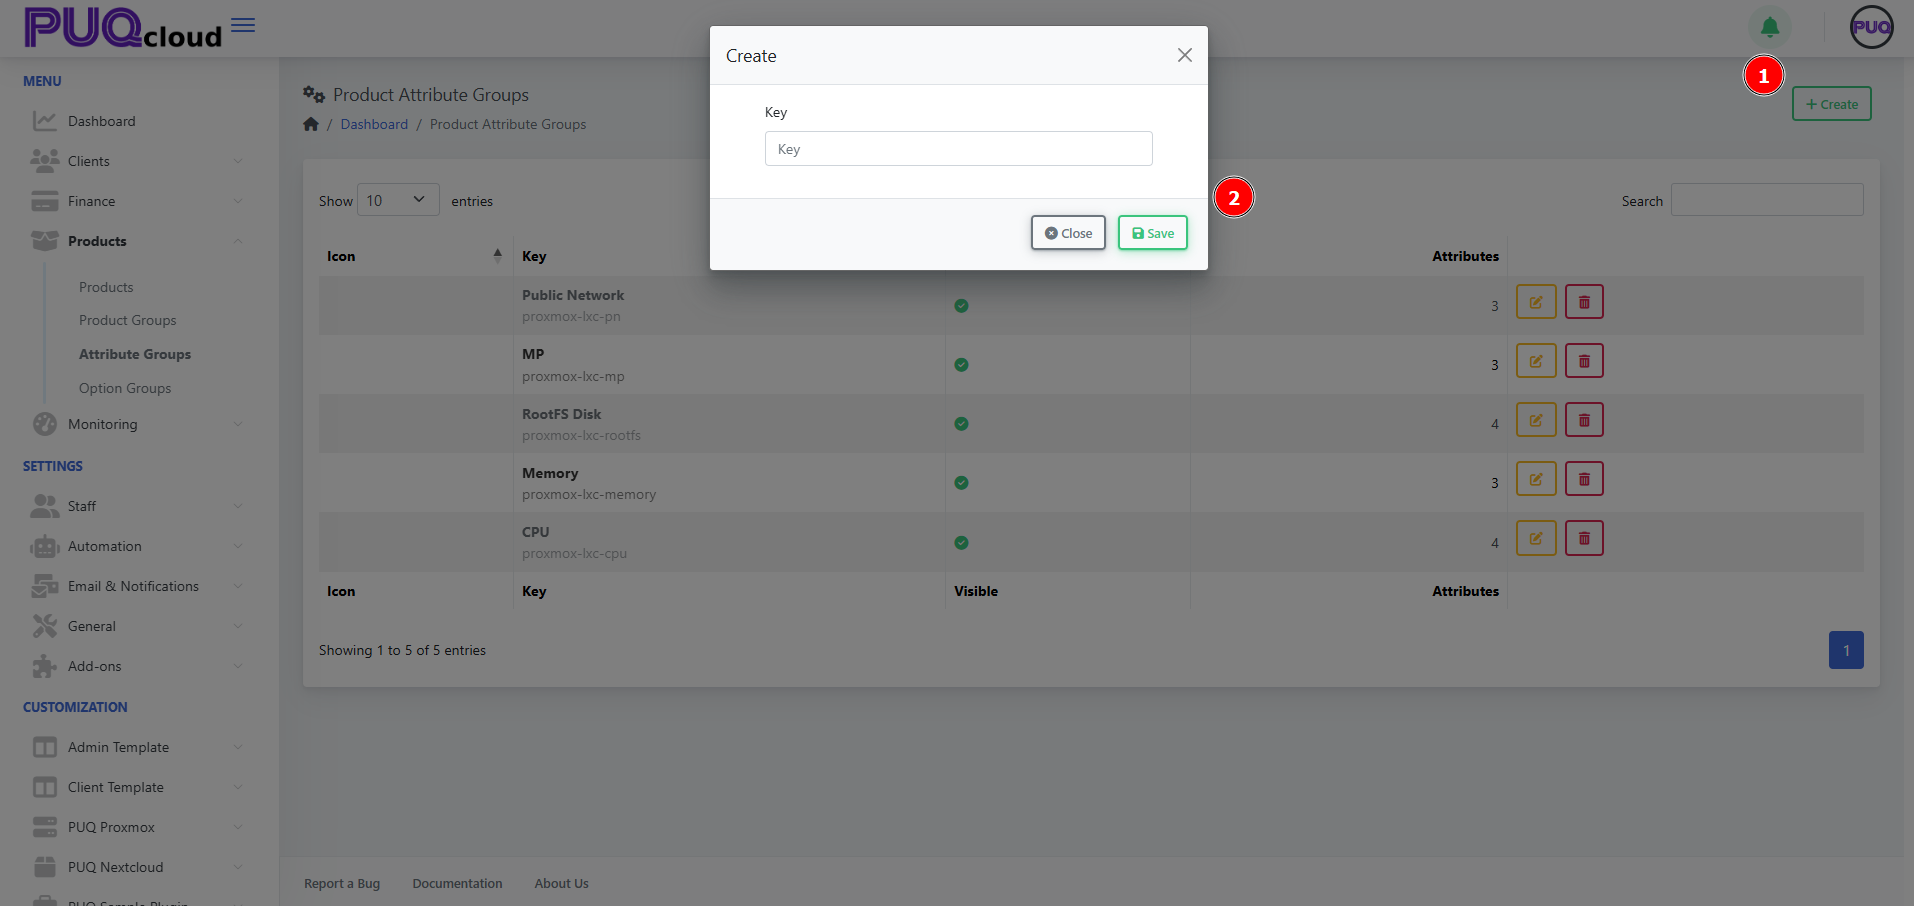](https://doc.puq.info/uploads/images/gallery/2025-09/image-1757599585569.png)
- **Edit** — open tabs **General / Images / Attributes**.
- **Delete** — remove the group (does **not** remove attributes already linked to products).
- - - - - -
#### Create an Attribute Group
1. Click **+ Create**.
2. Enter a unique **Key** (e.g., `proxmox-lxc-pn`) and **Save**.
- - - - - -
#### Configure the Group
Use the tabs across the top.
##### General tab
- **Key** — internal identifier (read‑only after creation).
- **Hidden** — hide/show the entire group from selection lists.
- **Localized content** — **Name**, **Short Description**, and **Description** per language.
- **Notes** — internal notes for admins.
Click **Save**.
*(Screenshot: Attribute Group → General tab)*
[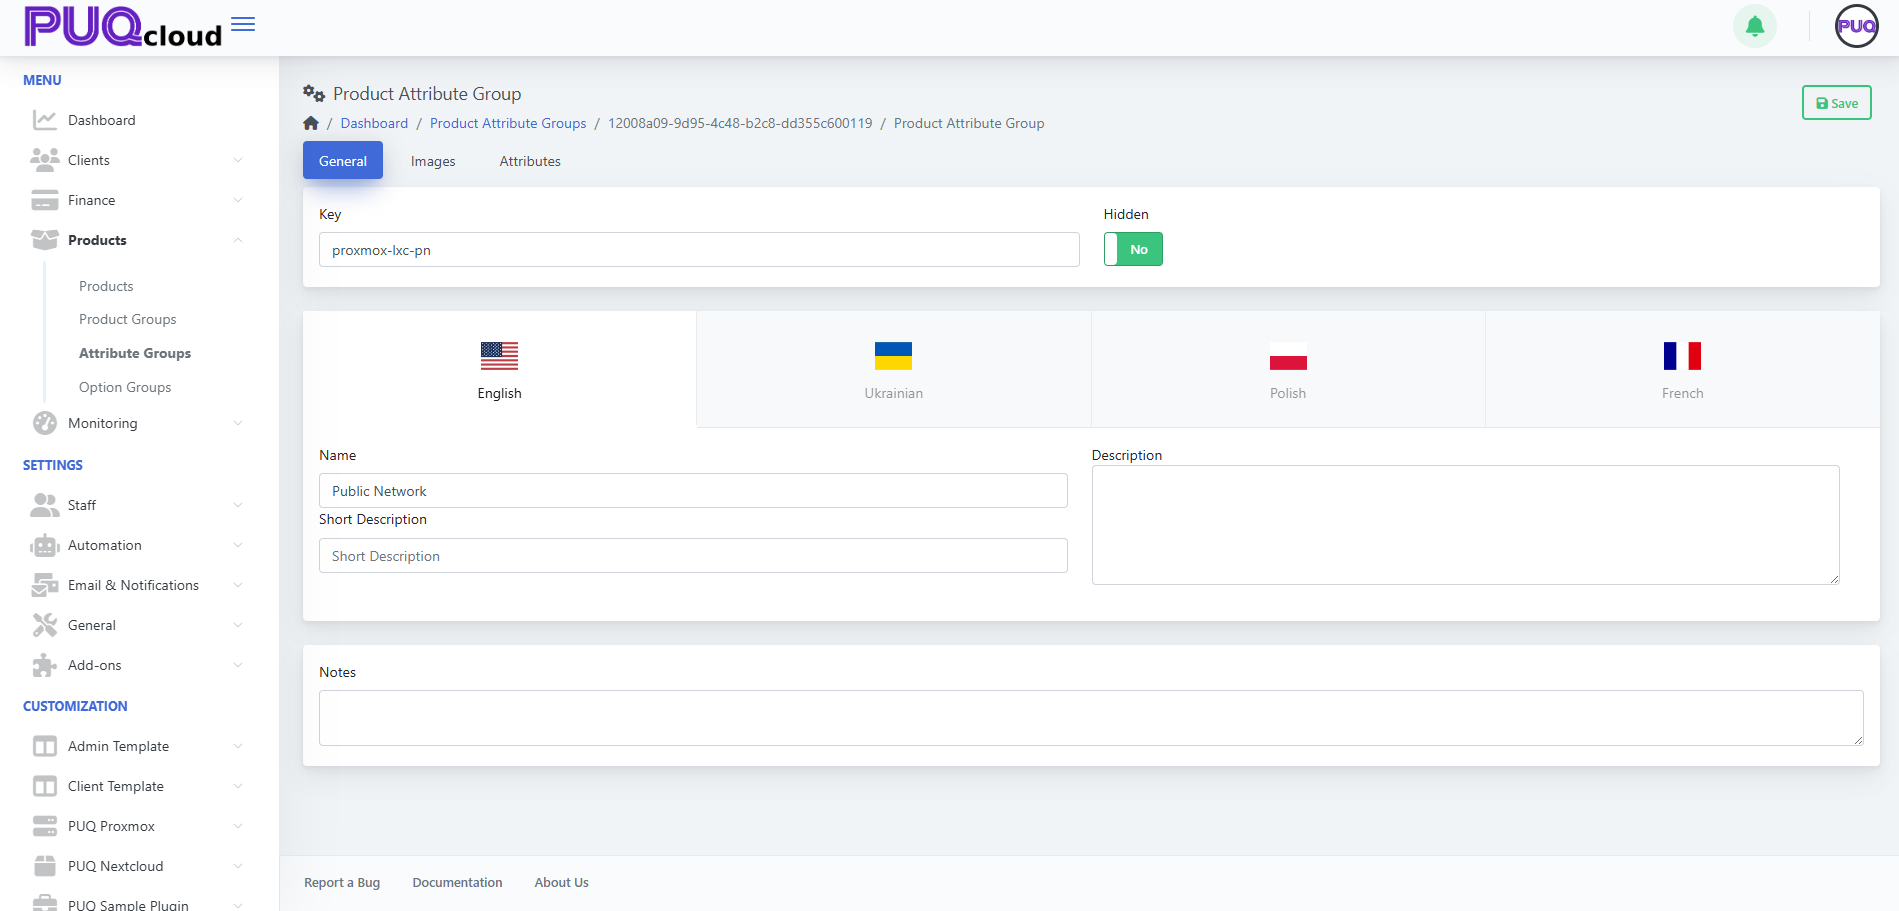](https://doc.puq.info/uploads/images/gallery/2025-09/image-1757599606940.png)
##### Images tab
Upload visuals representing the group:
- **Icon Image** — small logo used in lists/cards.
- **Background Image** — larger banner image.
Drag & drop files or **Browse**, then **Save**.
*(Screenshot: Attribute Group → Images tab)*
[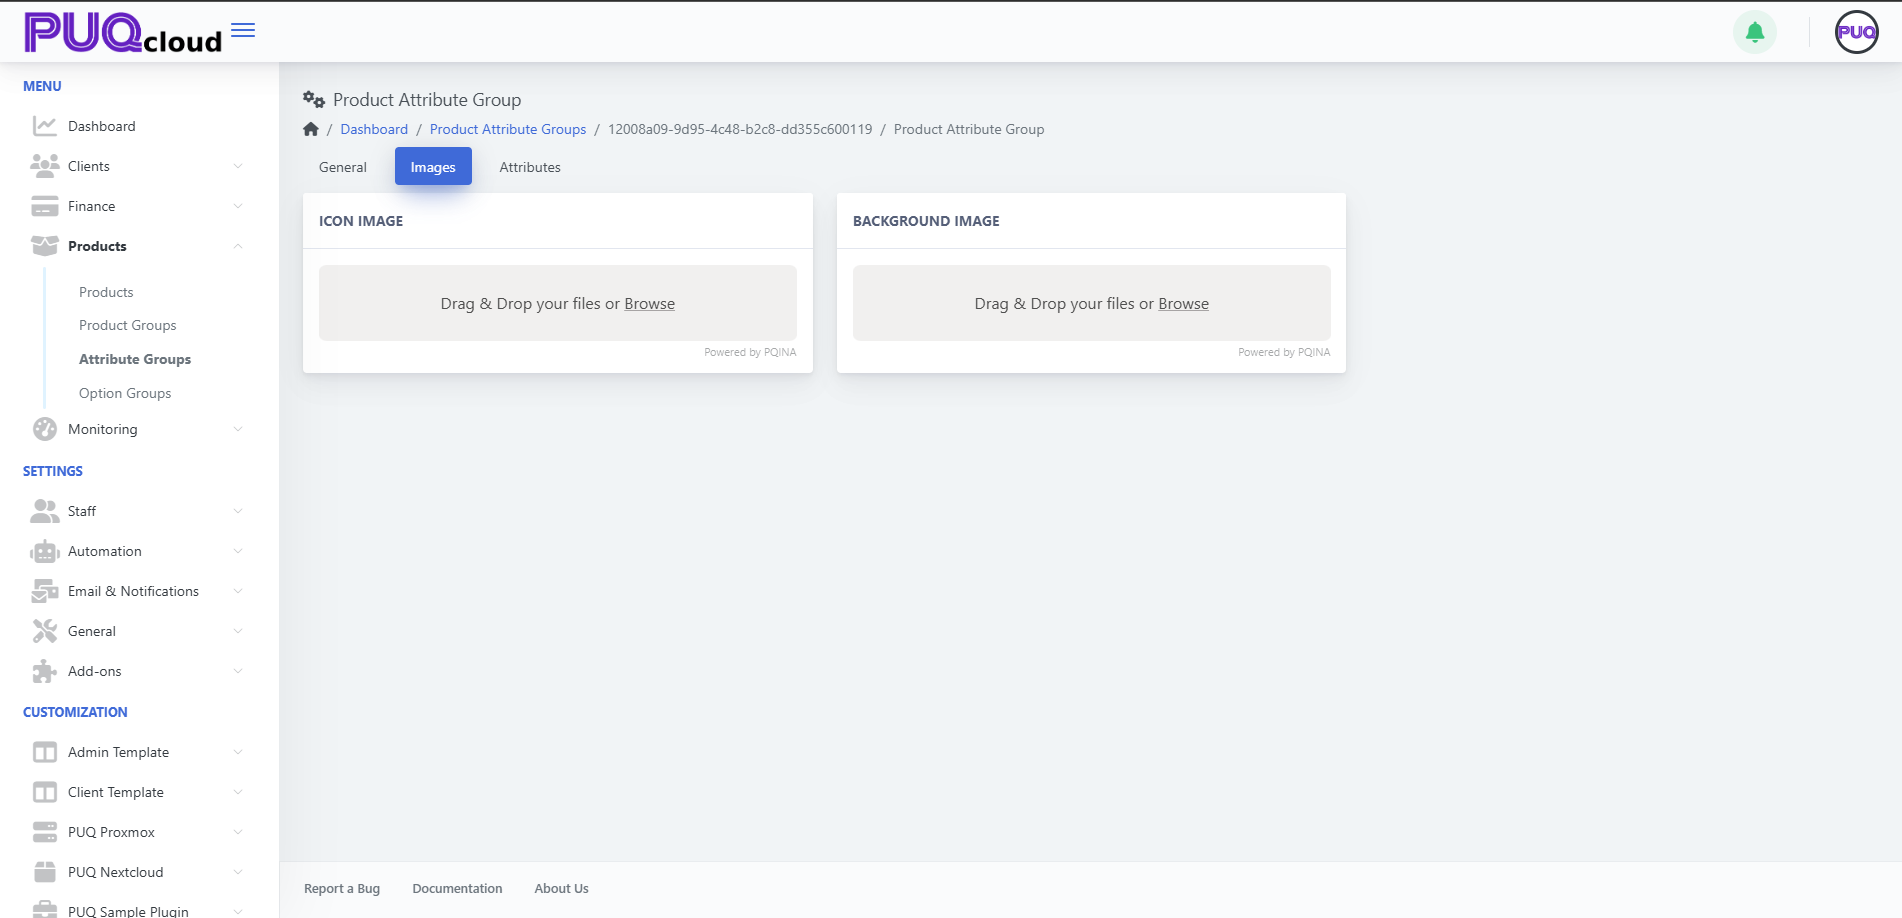](https://doc.puq.info/uploads/images/gallery/2025-09/image-1757599613048.png)
##### Attributes tab (inside the group)
Add and manage the individual attributes that belong to this group.
You’ll see columns **Key** and **Visible** with actions **Edit** and **Delete** for each attribute.
**Add an attribute**
1. Click **+ Create** (top‑right while on the group).
2. Fill out the attribute details (e.g., **Key** `proxmox-lxc-pn-ipv6`, Name `IPv6`).
3. Set **Visible** as needed and **Save**.
**Edit / Delete**
- Use the **Edit** (pencil) or **Delete** (trash) on a row.
*(Screenshot: Attribute Group → Attributes tab showing IPv4, IPv6, 10 Gbps)*
[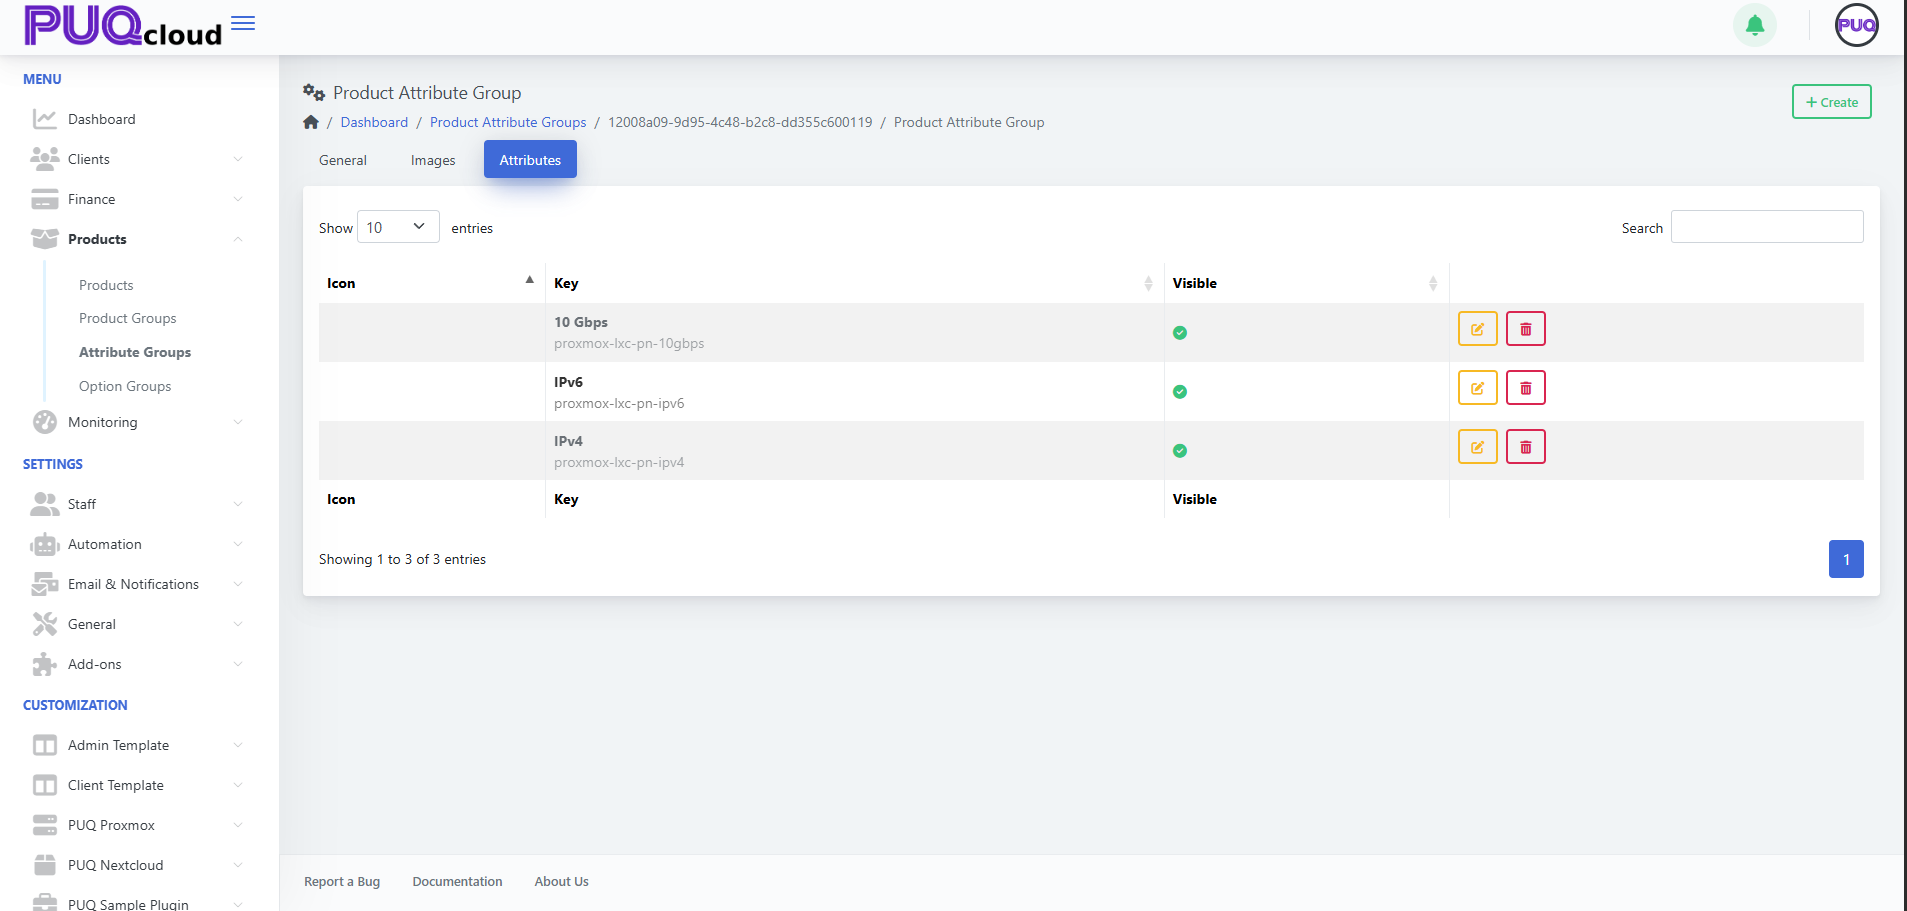](https://doc.puq.info/uploads/images/gallery/2025-09/image-1757599621969.png)
- - - - - -
#### Using Attributes in Products
Once your attributes exist, attach them to products.
1. Open **Products → Products**, select a product.
2. Go to the product’s **Attributes** tab.
3. Click **+ Add Attribute** and pick from available attributes (they are organized by their groups).
4. **Save** the product.
Tip: Consistent keys (e.g., `proxmox-lxc-pn-ipv4`) make it easier for modules/automation to reference attributes programmatically.
- - - - - -
#### Best Practices
- **Plan the taxonomy**: create groups by domain (e.g., Networking, Storage, CPU features).
- **Keep keys stable**: avoid renaming keys after products reference them.
- **Localize** names/descriptions so storefronts are consistent across languages.
- **Use visibility** to stage new attributes before making them selectable.
- - - - - -
#### Troubleshooting
- **Attribute not selectable on a product** → Ensure the attribute **exists**, is **Visible**, and you’re on the product’s **Attributes** tab.
- **Old attribute still appears** → It may be linked on products; unlink from those products before deletion.
- **Module fails expecting a flag** → Verify the attribute **Key** matches what the module/integration expects (case‑sensitive).
- - - - - -
#### Screenshot References
- Attribute Groups list page.
- **Create** Attribute Group modal.
- Attribute Group → **General** tab.
- Attribute Group → **Images** tab.
- Attribute Group → **Attributes** tab with items (IPv4, IPv6, 10 Gbps).
# Create and Manage Product Option Groups
### PUQcloud Panel
##### [Order Now](https://puqcloud.com/puqcloud-panel.php) | [Download](https://github.com/puqcloud/PUQcloud) | [FAQ](https://faq.puqcloud.com/)
#### Why Option Groups?
Option Groups let you package reusable choices (like **Firewall levels**, **CPU tiers**, **RAM sizes**) and attach them to many products at once. You get consistent naming, pricing, and ordering — and one place to update them.
- - - - - -
#### Step-by-step, with pro tips
##### 1) Create the Group
- Go to **Products → Option Groups** → **+ Create**.
Screenshot list view.
[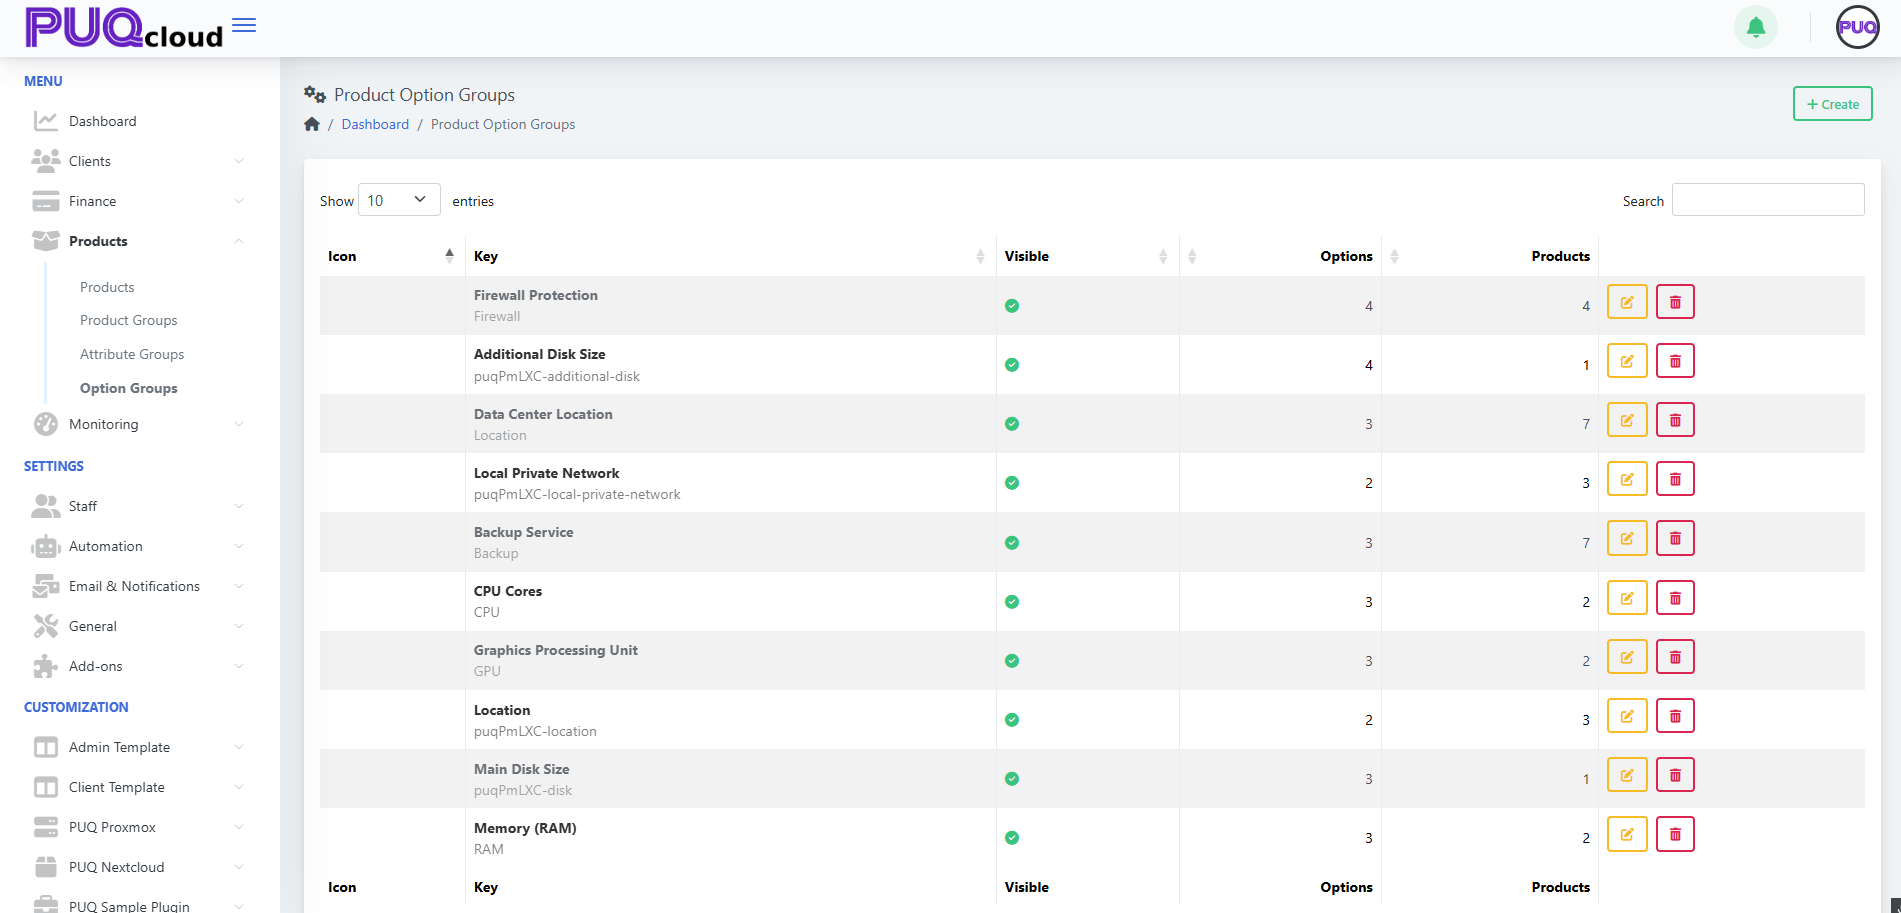](https://doc.puq.info/uploads/images/gallery/2025-09/image-1758024679732.png)
Screenshot “Create Option Group” modal[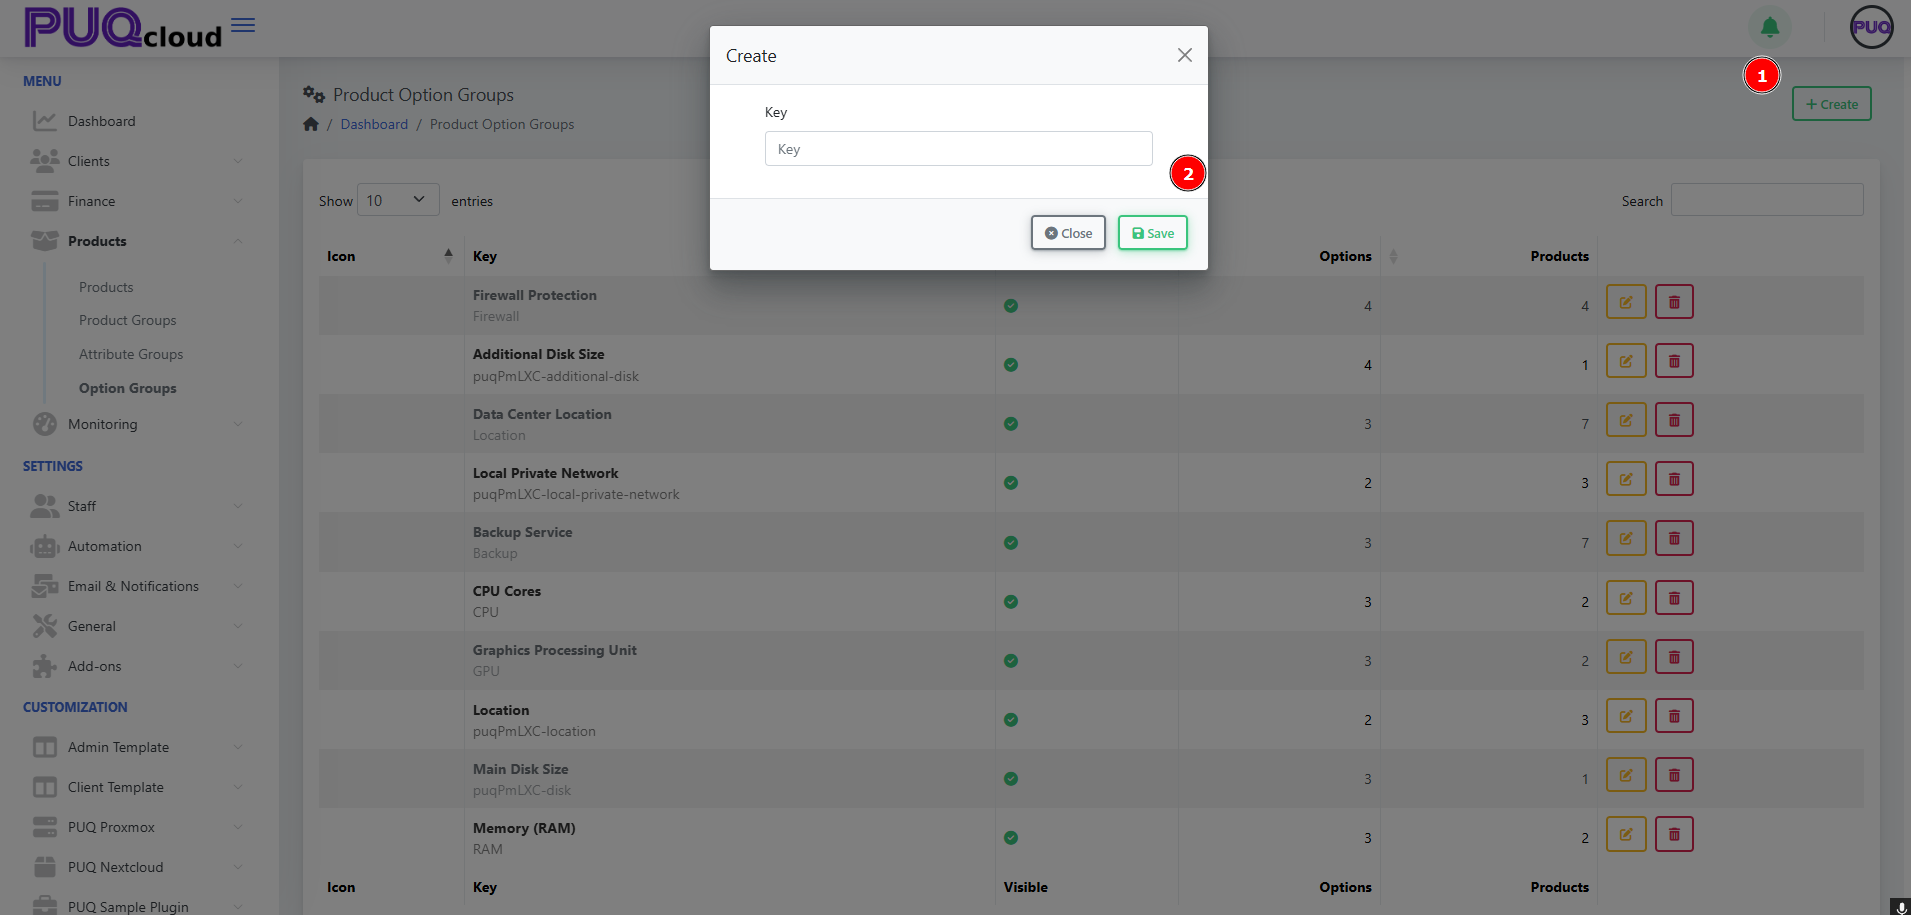](https://doc.puq.info/uploads/images/gallery/2025-09/image-1758024679765.png)
**Naming rule of thumb**
- **Key**: machine-friendly & permanent (e.g., `Firewall`, `CPU`, `puqPmLXC-disk`).
- **Name**: client-facing & translatable (e.g., “Firewall Protection”).
- Avoid spaces in **Key**; use hyphens or camelCase for consistency.
- - - - - -
##### 2) Set General Properties
Open the group and configure:
- **Hidden**: set to **No** to display to clients.
- **Convert Price**: **Yes** if pricing should auto-convert across currencies.
- **Multilingual content**: fill **Name**, **Short Description**, **Description**, plus **Notes** for internal admins.
Screenshot General tab
[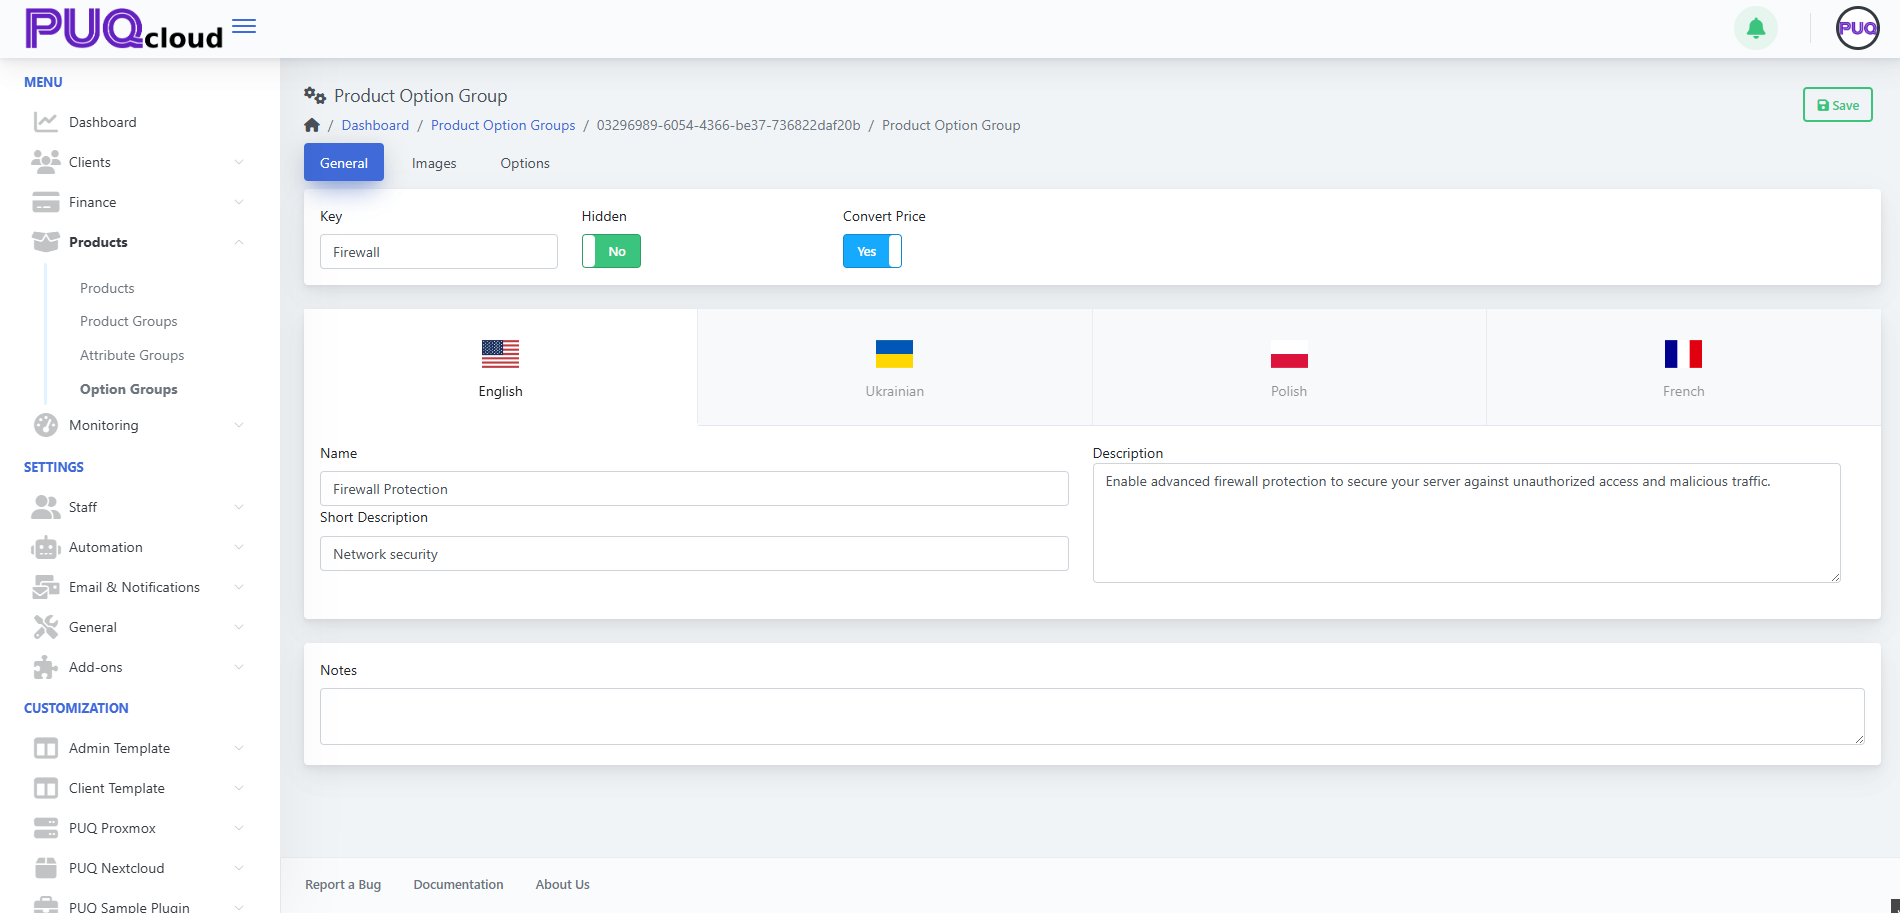](https://doc.puq.info/uploads/images/gallery/2025-09/image-1758024727339.png)
**Pro tip:** Put upgrade logic in the **Description** (“Level 2 adds IP reputation filter”), so clients know what changes between levels.
- - - - - -
##### 3) Add Visuals (optional, but nice)
Add an **Icon** for quick recognition and a **Background** for storefront cards.
Screenshot Images tab
[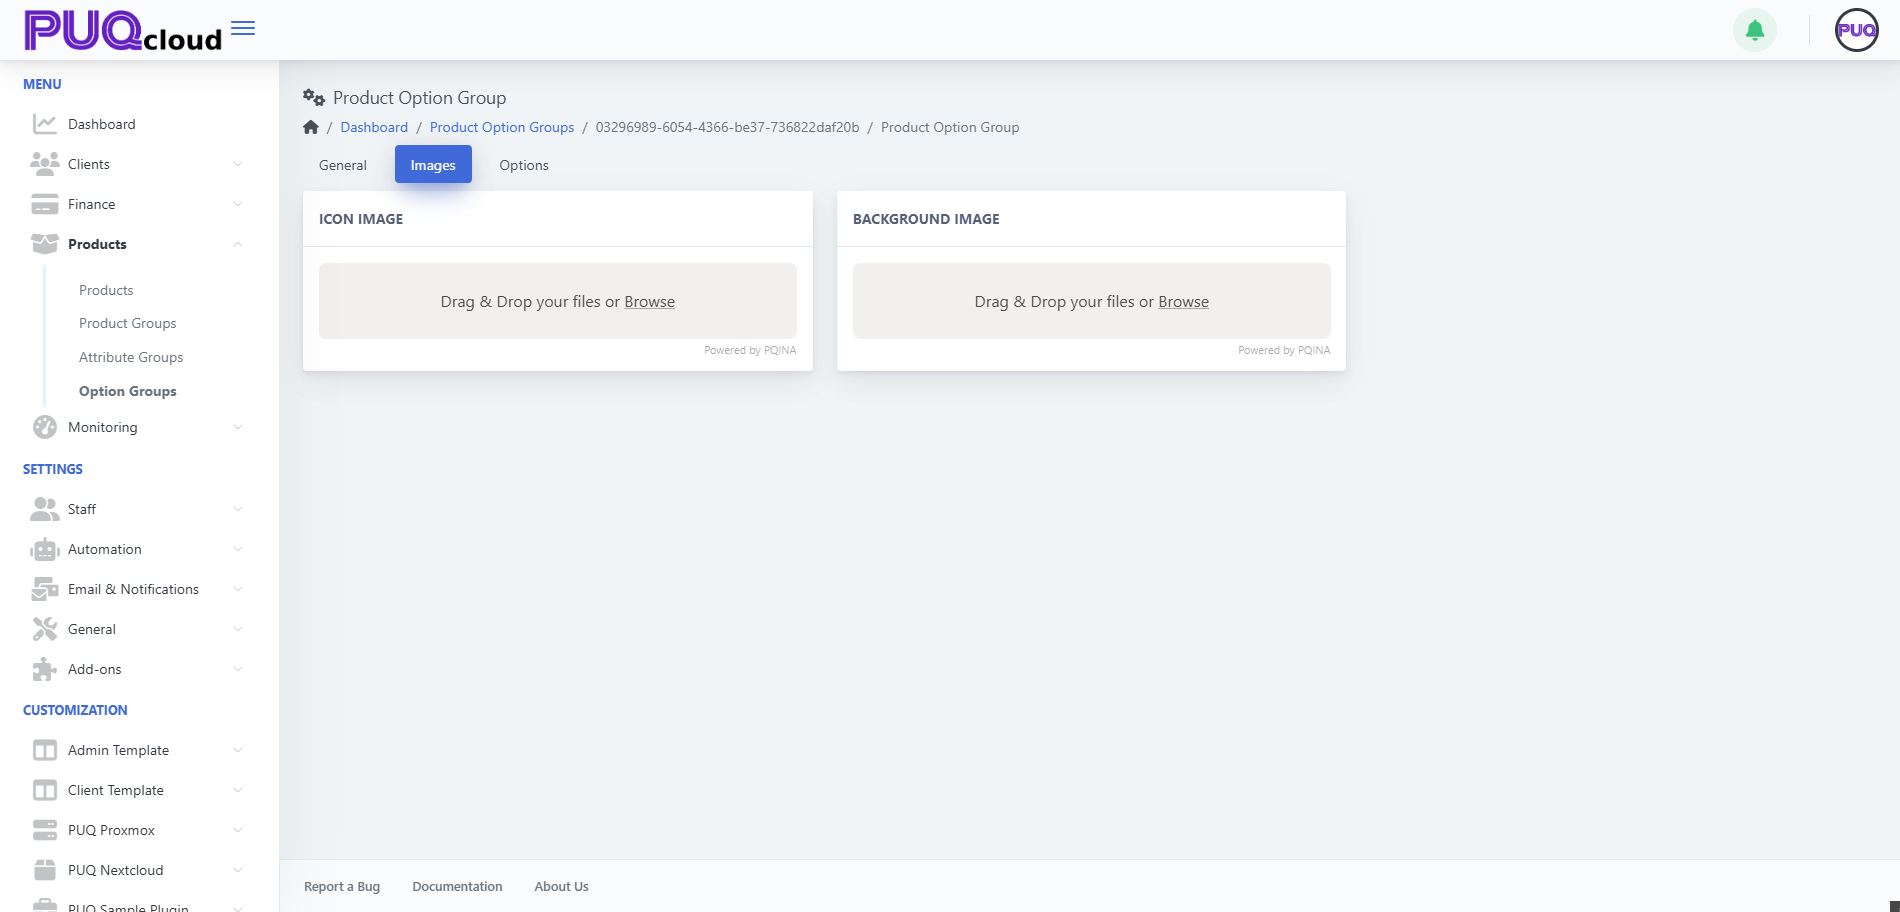](https://doc.puq.info/uploads/images/gallery/2025-09/image-1758024839999.png)
**Branding tip:** Use neutral, product-agnostic icons so this group can be reused across offerings.
- - - - - -
##### 4) Add Options (the items clients actually choose)
Go to **Options** → **+ Create** and add each selectable item (e.g., *Firewall level 0/1/2/3*).
Screenshot Options list with order controls[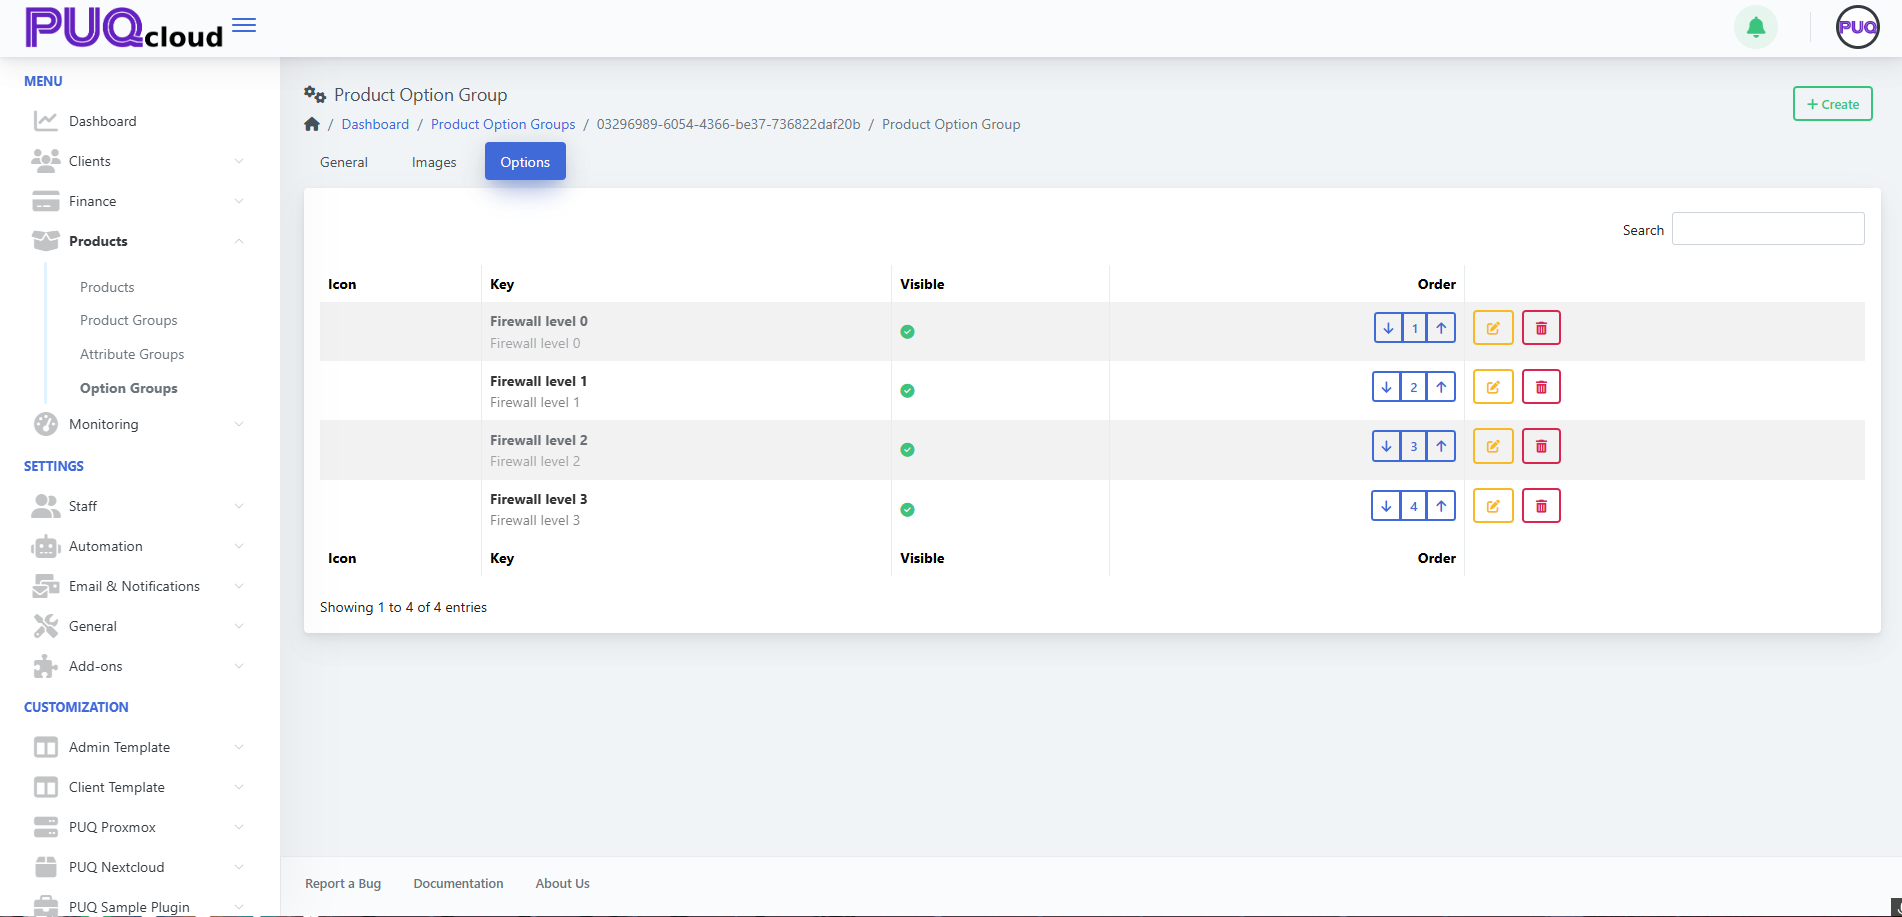](https://doc.puq.info/uploads/images/gallery/2025-09/image-1758024854462.png)
Screenshot “Create Option” modal
[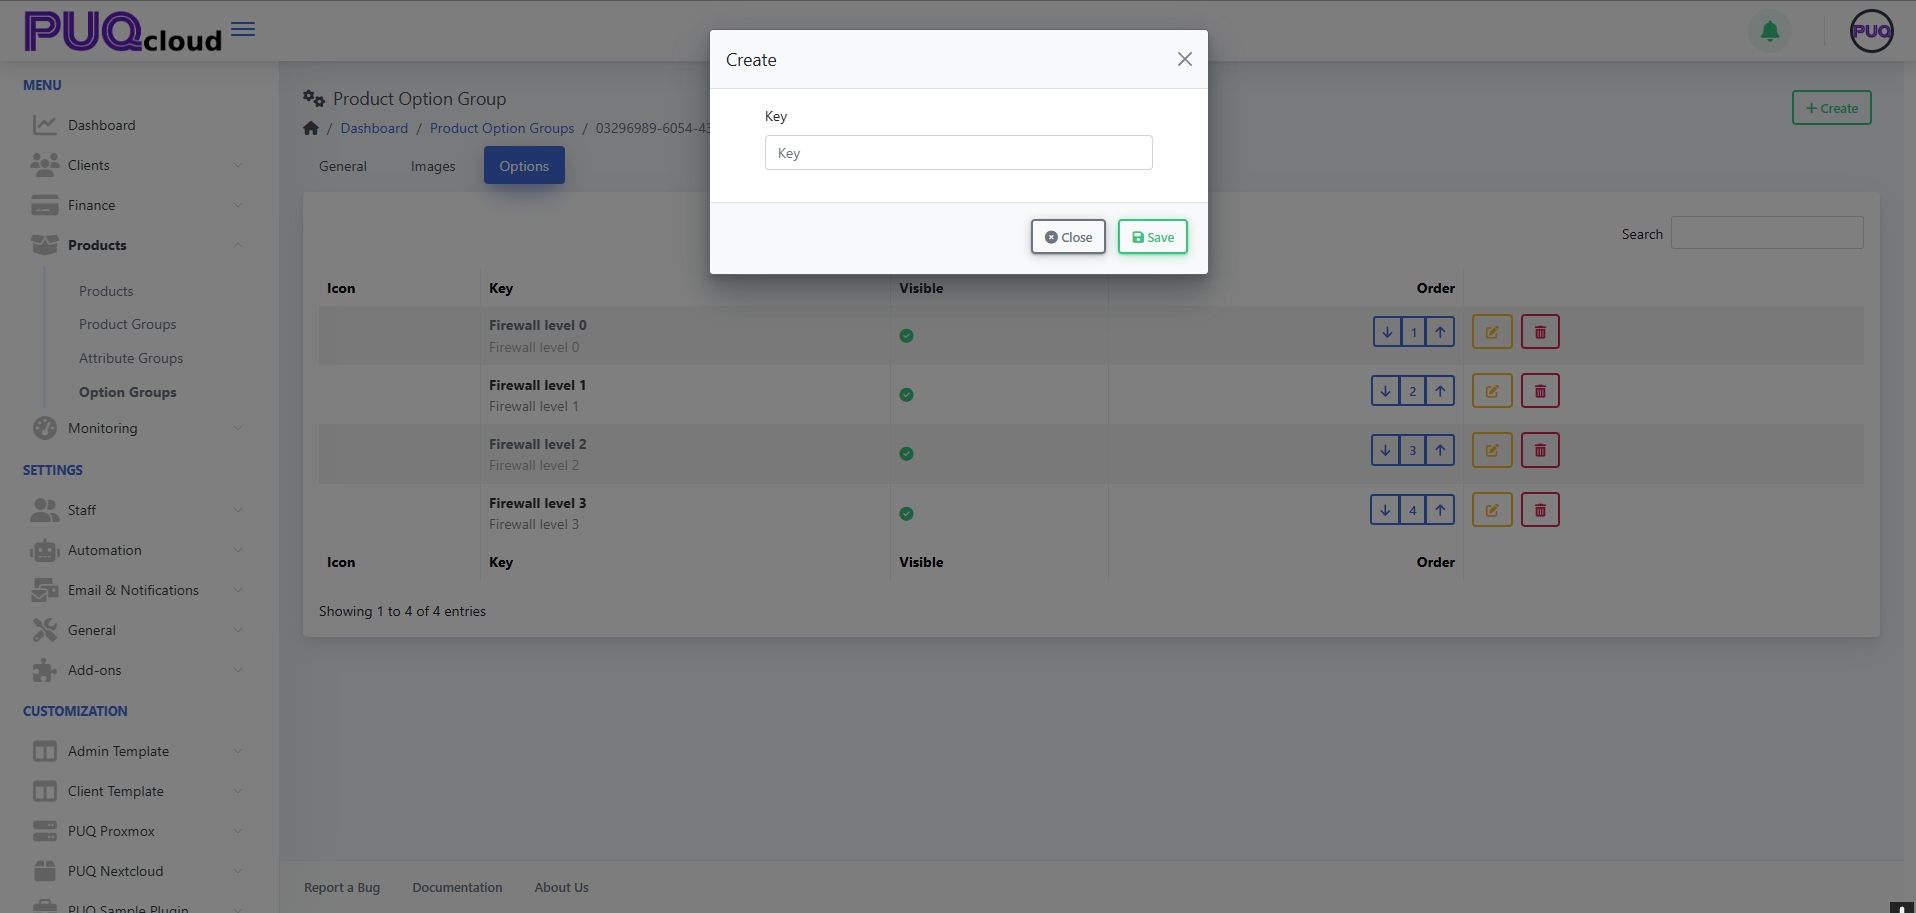](https://doc.puq.info/uploads/images/gallery/2025-09/image-1758024854491.png)
- Keep **Key** short (e.g., `firewall-level-1`).
- Use the **order arrows** to arrange from lowest → highest tier.
- Toggle **Visible** to quickly remove an option from the storefront without deleting it.
**UX tip:** List from “basic → advanced”. Clients upgrade more confidently when progression is obvious.
- - - - - -
##### 5) Edit an Option & Add Prices
Click **Edit** on an option:
- Fill **Key**, optional **Value** (if your module reads a value), **Hidden**, **Notes**.
- Upload **Icon/Background** for this option (optional).
- Localize **Name**, **Short Description**, **Description**.
Screenshot Edit Option page
[](https://doc.puq.info/uploads/images/gallery/2025-09/image-1758024902746.png)
Now add a price row:
- Click **+ Add Price** → choose **Currency** & **Period** (One-time, Daily, Monthly, etc.).
- Fill **Setup**, **Base** (recurring), **Idle** (if billed when idle), **Switch up/down** (upgrade/downgrade delta), **Uninstall** (one-time removal fee).
Screenshot “Add Price” modal
[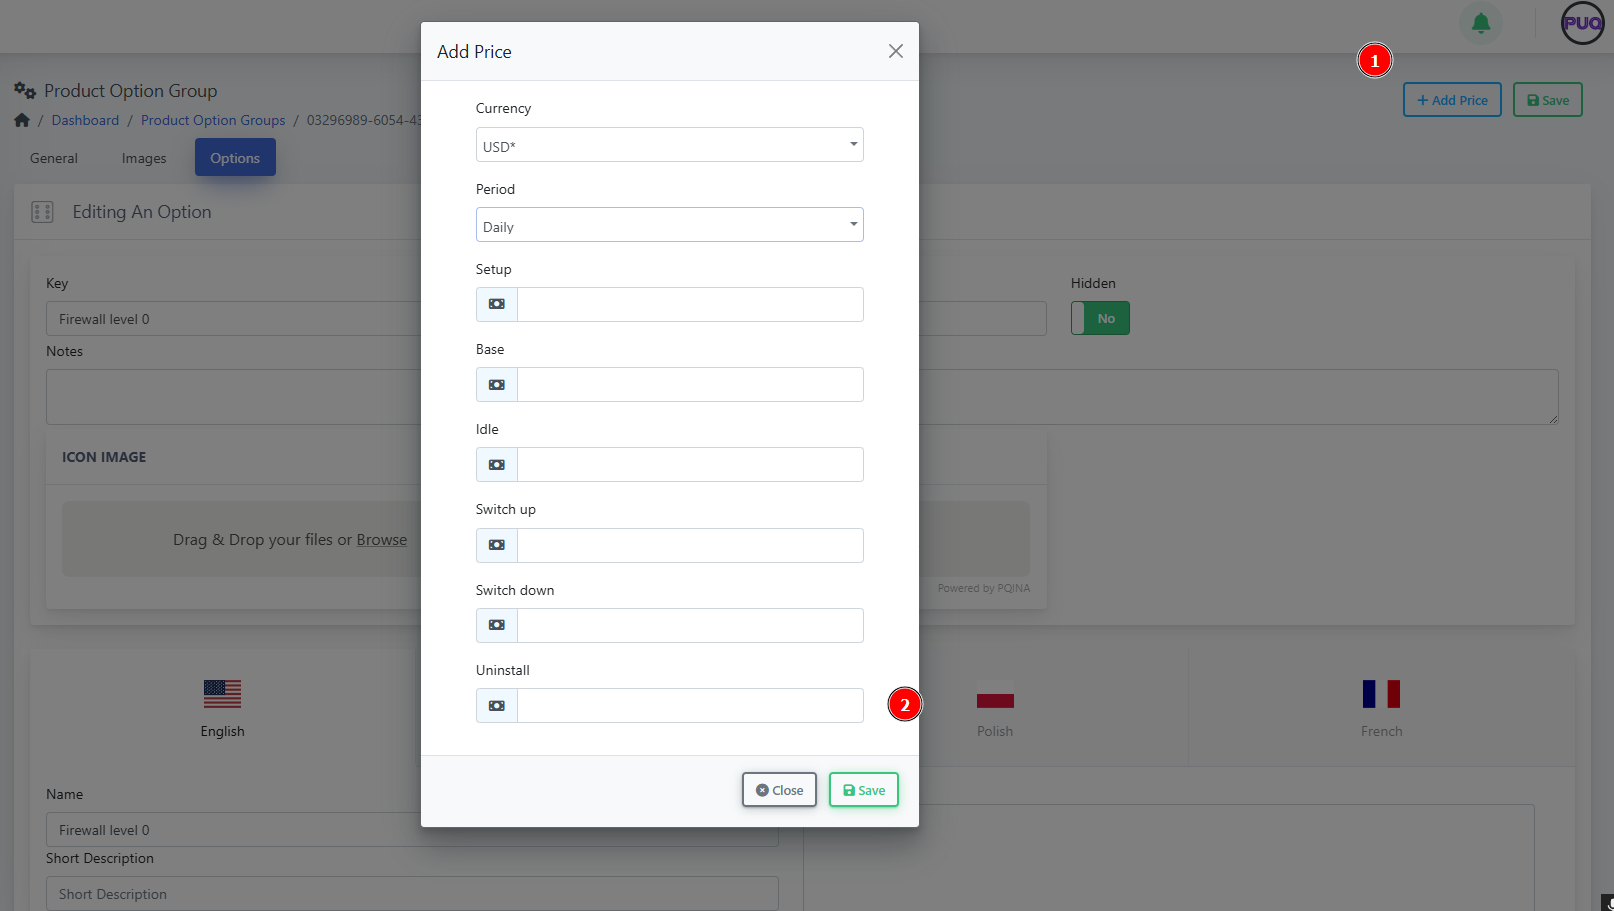](https://doc.puq.info/uploads/images/gallery/2025-09/image-1758024914898.png)
**Pricing tip:** Only add price rows you actually need. If an option is informational, leave pricing blank.
- - - - - -
#### Example: “Firewall Protection” (ready-to-copy model)
**Group Key:** `Firewall`
**Options (ordered):**
1. Firewall level 0 — baseline filtering
2. Firewall level 1 — adds IP reputation lists
3. Firewall level 2 — + geo-blocking
4. Firewall level 3 — + L7 rules & rate limiting
**Minimal price matrix idea**
- Level 0: Base 0.00 (included)
- Level 1: Base 3.00 (Monthly)
- Level 2: Base 6.00 (Monthly)
- Level 3: Base 9.00 (Monthly)
(Use **Convert Price = Yes** for multi-currency catalogs.)
- - - - - -
#### Attaching the Group to Products
1. Open a **Product** → **Options** tab → link your **Option Group**.
2. Save and preview the product order page to verify order, visibility, and prices.
**Governance tip:** Reuse one **Firewall** group across multiple products; update once, benefit everywhere.
- - - - - -
#### Quality checks (2-minute audit)
- ✅ Group is **Visible** and option order makes sense.
- ✅ Each option has localized **Name** (and descriptions where needed).
- ✅ Price rows exist **only** where you charge.
- ✅ Group is attached to every relevant product.
- ✅ Upgrade paths are clear (level numbers or size increments).
- - - - - -
#### Troubleshooting & gotchas
- **Group doesn’t show on the product:** It isn’t attached on the product’s **Options** tab.
- **Wrong currency on price:** Add a row per currency or enable **Convert Price**.
- **Client can’t see an option:** The option is **Hidden** or priced for a period the product doesn’t use.
- **Reordering doesn’t reflect on storefront:** Refresh cache and verify product still points to the same group.
- - - - - -
#### Maintenance playbook
- Use **Notes** to record internal logic (e.g., “Level 2 requires WAF module v2.1+”).
- When deprecating, switch an option to **Hidden** first, then remove after migrations.
- Version your groups with a suffix only when schema changes (e.g., `Firewall-v2`).
# Check and manage Task Queue
### PUQcloud Panel
##### [Order Now](https://puqcloud.com/puqcloud-panel.php) | [Download](https://github.com/puqcloud/PUQcloud) | [FAQ](https://faq.puqcloud.com/)
#### Overview
In **PUQcloud Panel**, many system operations are processed **in the background**, allowing multiple tasks to run simultaneously **without affecting overall performance**.
This background job system ensures that resource-intensive operations — such as permission checks, automated provisioning, or notifications — are executed efficiently and asynchronously.
The **Task Queue** section gives administrators full visibility and control over these background jobs.
It allows monitoring, filtering, and inspection of all automated system tasks.
- - - - - -
#### Navigation Path
**Dashboard → Monitoring → Task Queue**
- - - - - -
#### Key Features
| Feature | Description |
|---|
| **Background Execution** | Multiple jobs run in parallel without slowing down the panel or user sessions. |
| **Job List** | Displays all queued, running, or completed background tasks. |
| **Status Indicators** | Each job shows a colored label: *Pending*, *Processing*, or *Completed*. |
| **Queue Info** | Indicates which queue the job belongs to (e.g., System, Default, etc.). |
| **Dates** | Displays job creation, start, and completion timestamps. |
| **Filter Range** | Allows selection of specific date/time intervals to refine results. |
| **Task Detail View** | Shows raw input and output data for each job. |
- - - - - -
#### Using the Task Queue
##### 1. Access the Task Queue
Navigate to
**Dashboard → Monitoring → Task Queue**
You will see a list of recent system jobs.
Each entry contains:
- **Job Name**
- **Queue**
- **Dates**
- **Status**
[](https://doc.puq.info/uploads/images/gallery/2025-10/1.png)
- - - - - -
##### 2. Filter by Date and Time
Use the **Filter** field to narrow down results.
Click the date range bar and select a start and end date/time using the popup calendar.
After choosing the range, click **Apply**.
[](https://doc.puq.info/uploads/images/gallery/2025-10/emM2.png)
- - - - - -
##### 3. View Task Details
To inspect a specific job:
1. Click the **eye icon** next to the job.
2. A popup window will display **Input Data** and **Output Data**.
This information helps identify job parameters and verify successful completion.
[](https://doc.puq.info/uploads/images/gallery/2025-10/3.png)
- - - - - -
#### Status Colors
| Color | Meaning |
|---|
| 🟡 **Processing** | Task is currently being executed. |
| ⚫ **Queued** | Task is waiting to start. |
| 🟢 **Completed** | Task has finished successfully. |
| 🔴 **Failed** | Task encountered an error during execution. |
- - - - - -
#### Queue Controls
| Control | Description |
|---|
| **Auto Refresh Interval** | Located in the top right corner. Choose how often the list updates (e.g., every 2 seconds). |
| **Switch (Off/On)** | Enables or disables automatic refreshing. |
| **Search Field** | Quickly locate jobs by name or ID. |
- - - - - -
#### Example Use Case
A system job such as
**`App\Jobs\CheckingAdminPermissionsJob`**
verifies admin permission configurations.
When completed, the **Task Detail** window shows output data like:
```json
{
"jobId": "3de9043e-dfbb-4335-9796-48e137c1b5b9"
}
```
- - - - - -
#### Tips
- PUQcloud automatically manages queues, ensuring high performance even when many jobs are running simultaneously.
- Use **short intervals (2–5 seconds)** when debugging background tasks.
- To reduce load, disable auto-refresh when not actively monitoring.
- If a task fails, use the job ID from the output data to locate logs or related errors.
# Check and manage Admin Sessions
### PUQcloud Panel
##### [Order Now](https://puqcloud.com/puqcloud-panel.php) | [Download](https://github.com/puqcloud/PUQcloud) | [FAQ](https://faq.puqcloud.com/)
#### Overview
The **Admin Sessions** section in **PUQcloud Panel** allows system administrators to monitor all admin activities and requests executed through both **web** and **API interfaces**.
Each session is logged automatically, showing the **admin user**, **IP address**, **accessed URL**, and **method type**.
This monitoring tool helps maintain transparency, detect unusual activity, and ensure security compliance within your PUQcloud environment.
Just like the Task Queue, these operations run **in the background**, ensuring **no performance impact** on the system while recording all admin actions.
- - - - - -
#### Navigation Path
**Dashboard → Monitoring → Admin Sessions**
- - - - - -
#### Key Features
| Feature | Description |
|---|
| **Complete Admin Logs** | Tracks all admin operations across the web panel and API requests. |
| **Background Tracking** | Logs are recorded automatically without slowing down system performance. |
| **Filter by Date Range** | Focus on specific time periods for auditing or troubleshooting. |
| **Auto Refresh Control** | Choose how often session logs update automatically. |
| **Search and Sorting** | Quickly find specific admins, URLs, or IP addresses. |
| **“Hide Me” Option** | Exclude your own sessions from the view for cleaner analysis. |
- - - - - -
#### Using the Admin Sessions Page
##### 1. Access the Page
Go to
**Dashboard → Monitoring → Admin Sessions**
You will see a list of session entries, each containing:
- **Date and Time**
- **Admin Name and Email**
- **IP Address**
- **Request Type (WEB/API, GET/POST)**
- **Accessed URL**
[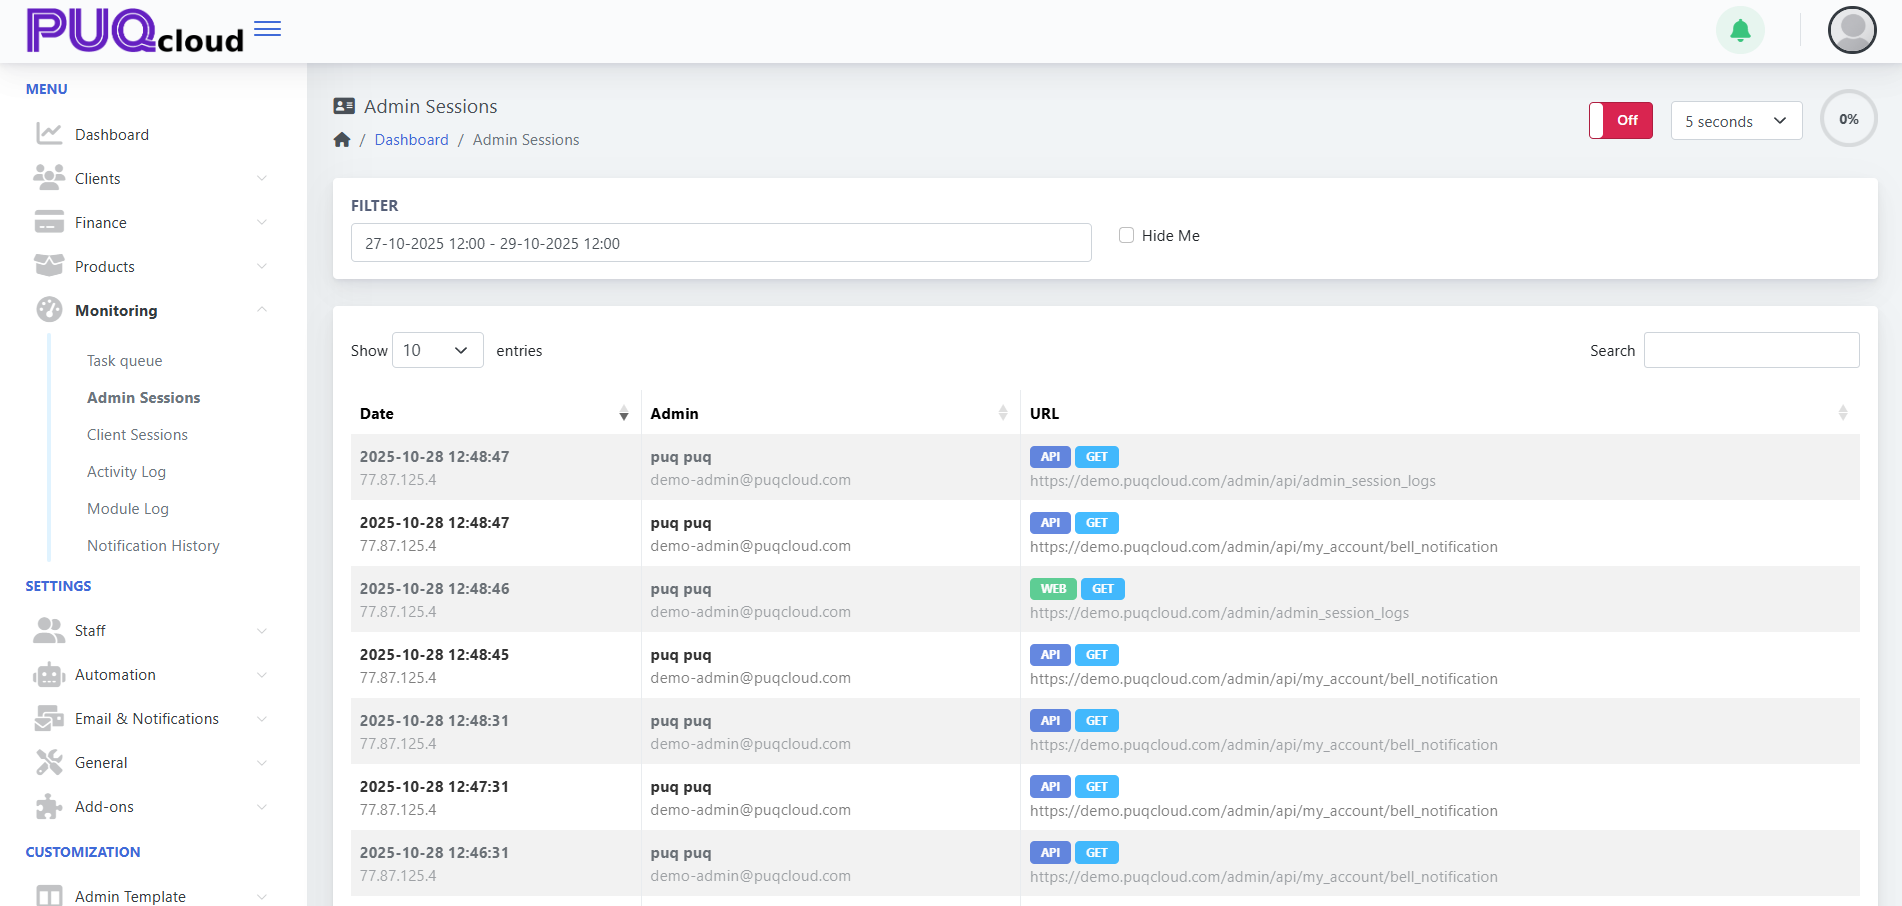](https://doc.puq.info/uploads/images/gallery/2025-10/vxA1.png)
- - - - - -
##### 2. Filtering Sessions
Use the **Filter** field to select a time range.
Click inside the date field to open the calendar, choose a start and end date, and confirm with **Apply**.
This helps narrow the view to a specific investigation period.
[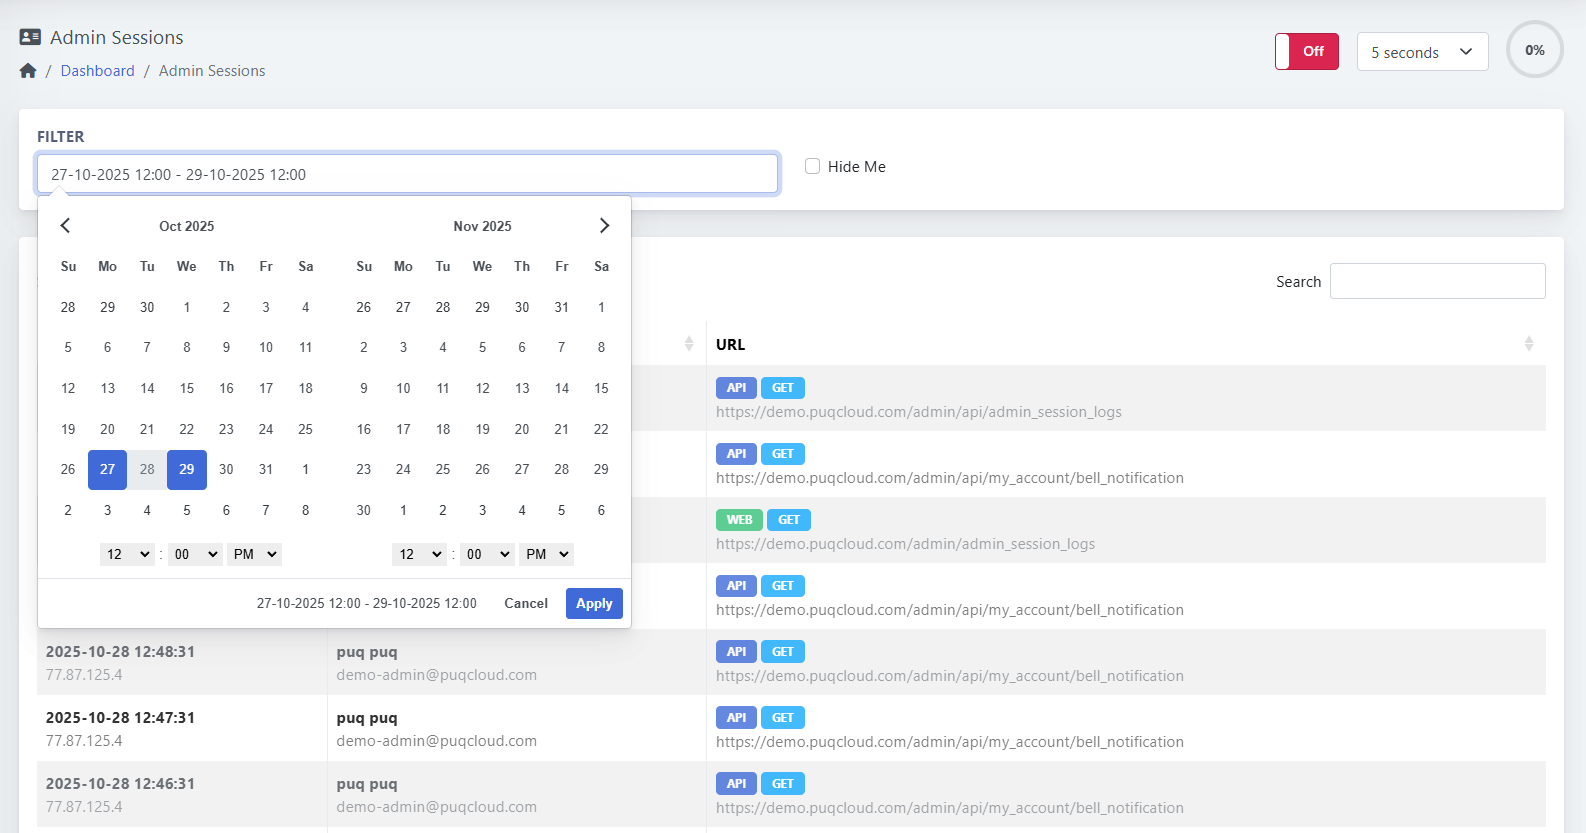](https://doc.puq.info/uploads/images/gallery/2025-10/3BH2.png)
- - - - - -
#### Columns Explained
| Column | Description |
|---|
| **Date** | Timestamp of when the admin made a request. |
| **Admin** | Name and email of the administrator. |
| **IP Address** | Logged IP address from which the request was made. |
| **URL** | Full path of the accessed page or API endpoint. |
| **Type (WEB/API)** | Indicates the source of the request. |
| **Method (GET/POST)** | Shows the HTTP method used. |
- - - - - -
#### Status Labels
| Label | Meaning |
|---|
| 🟦 **API** | Request came through the system API. |
| 🟩 **WEB** | Request made through the web interface. |
| 🟢 **GET** | Data was fetched from the system. |
| 🟠 **POST** | Data was sent or modified. |
- - - - - -
#### Queue Controls
| Control | Description |
|---|
| **Auto Refresh Interval** | Located in the top right. You can set refresh time (e.g., every 5 seconds). |
| **Off/On Switch** | Enables or disables automatic refreshing. |
| **Search Box** | Filter results by keyword (admin name, URL, IP). |
- - - - - -
#### Example Use Case
An administrator wants to verify recent API requests:
By opening **Monitoring → Admin Sessions**, they can view every endpoint accessed, including timestamps, IP addresses, and request types.
Example entry:
```
2025-10-28 12:48:47 | puq puq | demo-admin@puqcloud.com
API GET → https://demo.puqcloud.com/admin/api/admin_session_logs
IP: 77.87.125.4
```
- - - - - -
#### Tips
- Enable short auto-refresh intervals (2–5 seconds) for real-time monitoring.
- Use the **Hide Me** checkbox to exclude your own requests while observing other admins.
- Combine **date filtering** with **keyword search** for precise audits.
- API and web sessions are logged in one unified view for maximum traceability.
# Check and manage Client Sessions
### PUQcloud Panel
##### [Order Now](https://puqcloud.com/puqcloud-panel.php) | [Download](https://github.com/puqcloud/PUQcloud) | [FAQ](https://faq.puqcloud.com/)
#### Overview
The **Client Sessions** section in **PUQcloud Panel** provides full visibility into all user and client activities occurring in the system.
Each client’s interaction — whether via the **web panel** or **API requests** — is automatically logged in real time.
All session tracking runs **in the background**, so even with thousands of simultaneous connections, the system performance remains unaffected.
This feature is essential for **security auditing**, **support troubleshooting**, and **usage monitoring**.
- - - - - -
#### Navigation Path
**Dashboard → Monitoring → Client Sessions**
- - - - - -
#### Key Features
| Feature | Description |
|---|
| **Complete Client Logs** | Monitors every user’s actions through the Client Area and API. |
| **Background Execution** | Sessions are recorded asynchronously, ensuring no system slowdown. |
| **Real-Time Tracking** | Displays ongoing requests with instant refresh intervals. |
| **Filter by Date Range** | Analyze session activity for a specific period. |
| **Auto Refresh Option** | Set automatic updates every few seconds. |
| **Detailed Metadata** | Includes timestamp, IP, client name, user name, and accessed URL. |
- - - - - -
#### Using the Client Sessions Page
##### 1. Access the Page
Navigate to
**Dashboard → Monitoring → Client Sessions**
You’ll see a list of recorded client activities including:
- **Date and Time**
- **Client and User**
- **IP Address**
- **Request Source (WEB/API)**
- **HTTP Method (GET/POST)**
- **Full URL Accessed**
[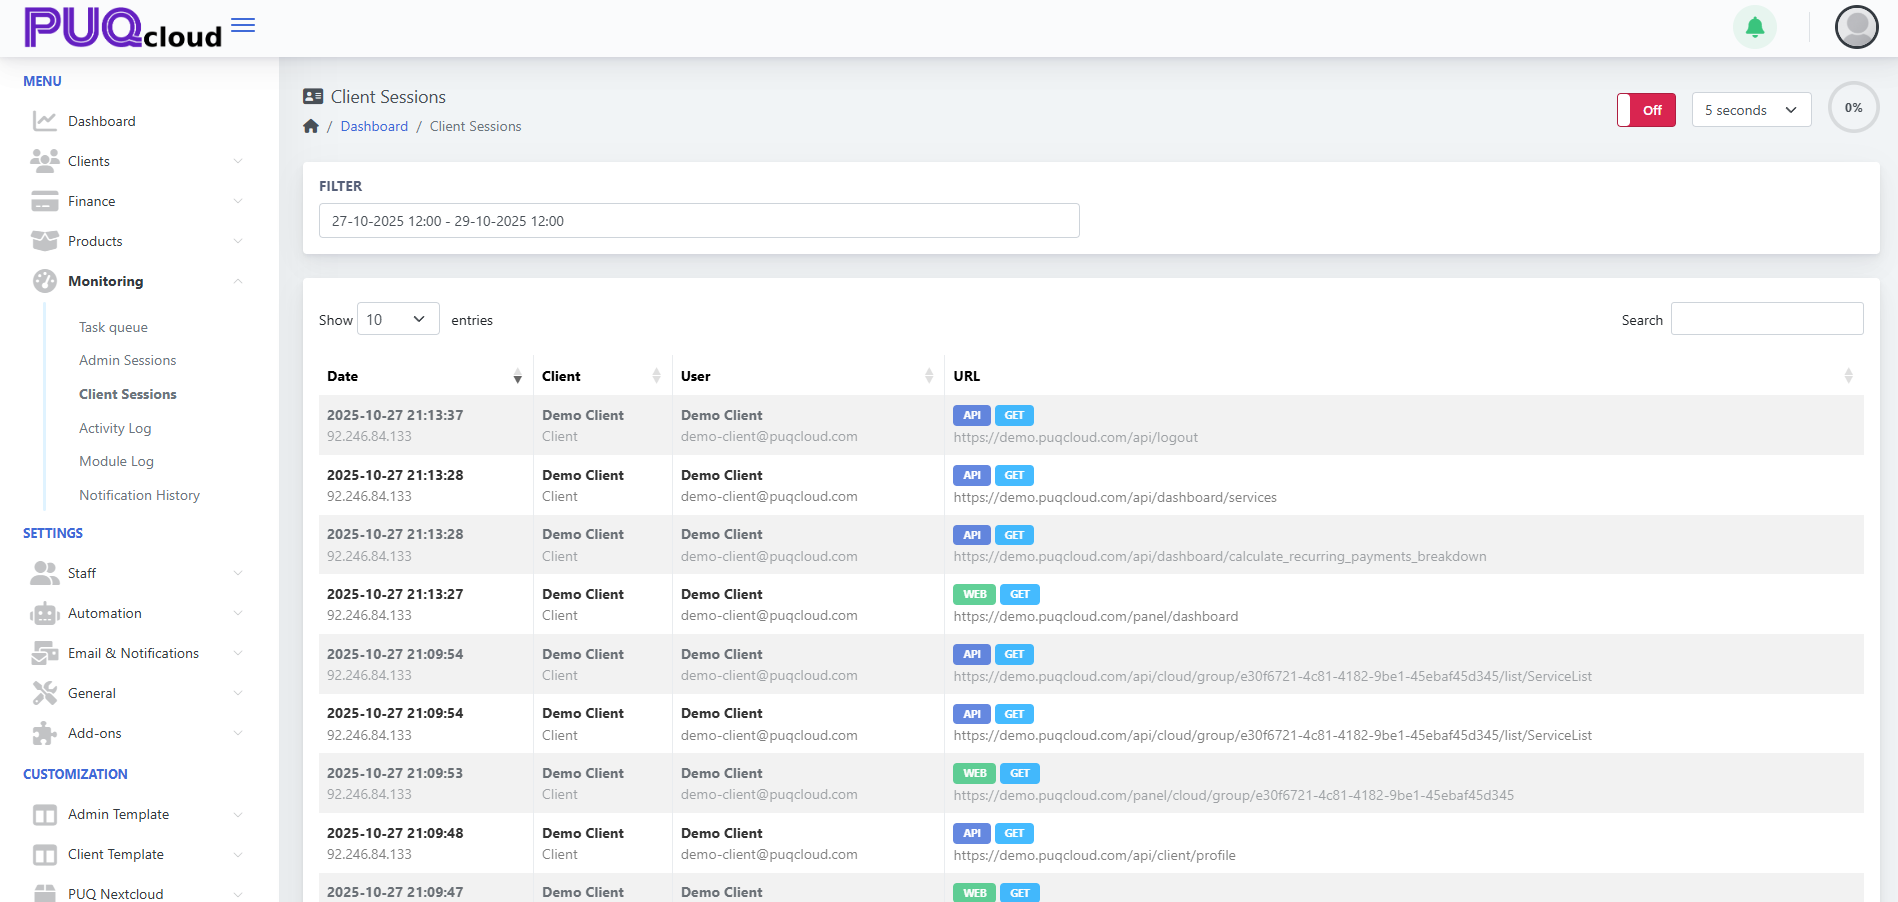](https://doc.puq.info/uploads/images/gallery/2025-10/axp1.png)
- - - - - -
##### 2. Filter by Date and Time
To narrow results, use the **Filter** field at the top.
Click the date range selector, choose your **start** and **end** times, then click **Apply** to confirm.
[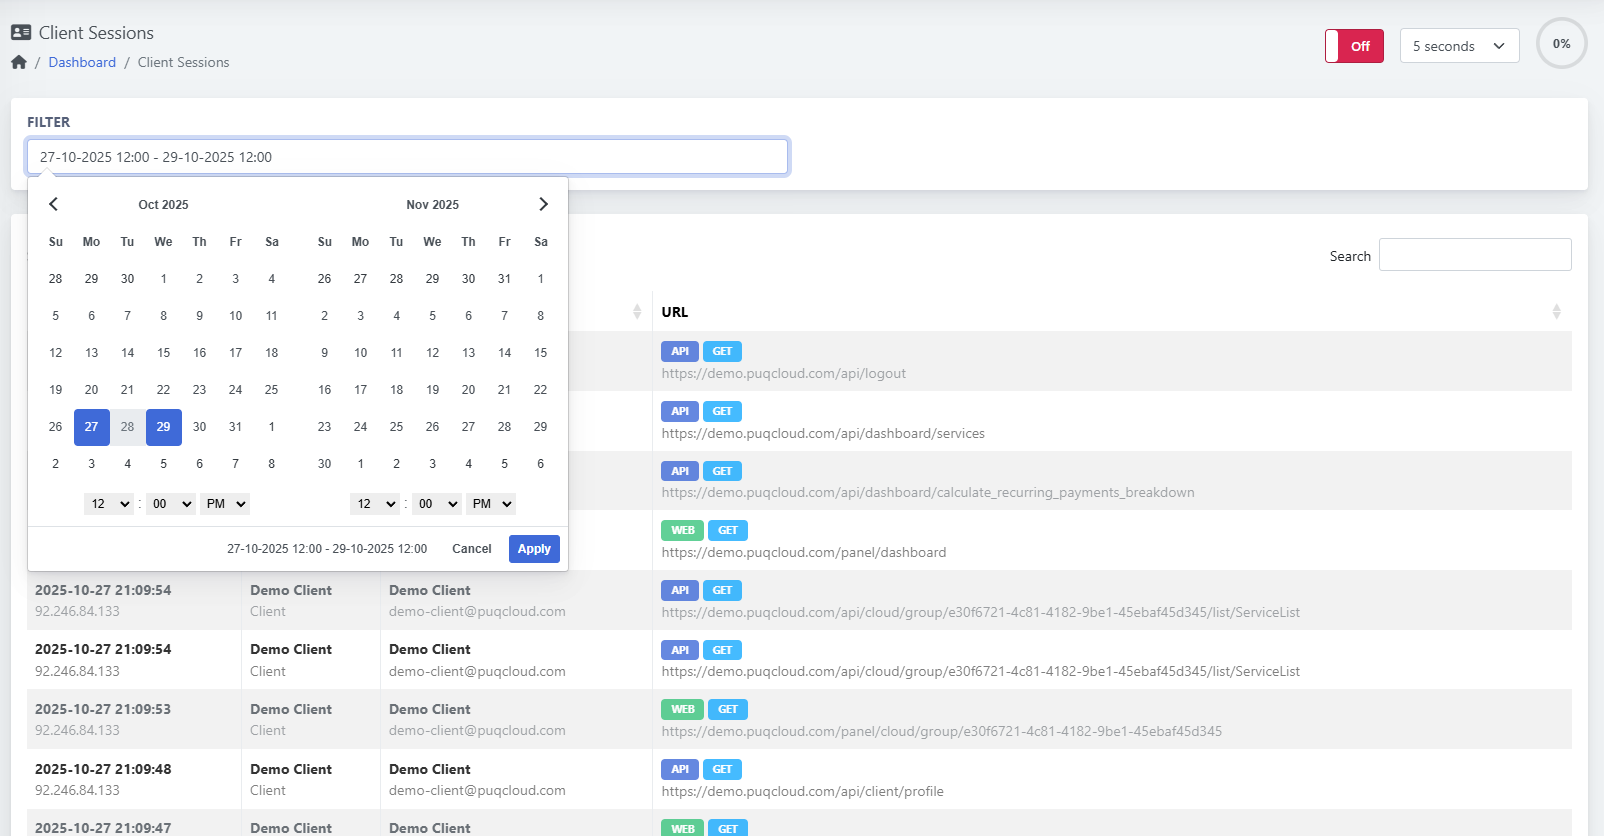](https://doc.puq.info/uploads/images/gallery/2025-10/3WP2.png)
- - - - - -
#### Columns Explained
| Column | Description |
|---|
| **Date** | When the request was made. |
| **Client** | Name of the organization or customer account. |
| **User** | Name and email of the user under that client. |
| **IP Address** | Source IP used during the session. |
| **URL** | Exact web or API endpoint accessed. |
| **Type (WEB/API)** | Indicates the request source. |
| **Method (GET/POST)** | HTTP action type (data retrieval or update). |
- - - - - -
#### Status Labels
| Label | Meaning |
|---|
| 🟦 **API** | Request executed through system API. |
| 🟩 **WEB** | Request sent via client web interface. |
| 🟢 **GET** | Data retrieved from the system. |
| 🟠 **POST** | Data submitted or changed. |
- - - - - -
#### Queue Controls
| Control | Description |
|---|
| **Auto Refresh Interval** | Located in the top-right corner. Select update frequency (e.g., every 5 seconds). |
| **Off/On Switch** | Turns automatic refreshing on or off. |
| **Search Box** | Quickly find sessions by client name, user, IP, or URL. |
- - - - - -
#### Example Use Case
Support staff can use this section to trace a client’s recent activity.
For instance, you can identify when a client accessed their service list or triggered an API call.
Example entry:
```
2025-10-27 21:13:37 | Demo Client | demo-client@puqcloud.com
API GET → https://demo.puqcloud.com/api/logout
IP: 92.246.84.133
```
- - - - - -
#### Tips
- Use **short refresh intervals (3–5 seconds)** to watch active client activity in real time.
- Combine **date filters** with **keyword searches** to quickly find suspicious or failed API calls.
- Logs include both **web panel navigation** and **API usage**, providing full operational transparency.
- Background tracking ensures **stable system performance** even with heavy usage.
# Check and manage Activity Log
### PUQcloud Panel
##### [Order Now](https://puqcloud.com/puqcloud-panel.php) | [Download](https://github.com/puqcloud/PUQcloud) | [FAQ](https://faq.puqcloud.com/)
#### Overview
The **Activity Log** section in **PUQcloud Panel** provides a centralized record of all important system and user actions.
Every event — whether triggered by an administrator, client, or automated background job — is logged here to ensure full transparency and accountability.
Activity tracking runs **entirely in the background**, meaning multiple operations can be recorded simultaneously **without affecting system performance**.
This allows administrators to trace actions, monitor transactions, and quickly investigate unusual activity.
- - - - - -
#### Navigation Path
**Dashboard → Monitoring → Activity Log**
- - - - - -
#### Key Features
| Feature | Description |
|---|
| **Full Action History** | Tracks all actions performed by users and system processes. |
| **Performance-Safe Logging** | Background operation ensures stable performance during heavy load. |
| **Detailed Event Data** | Each record includes time, initiator, action type, and description. |
| **Filter by Date Range** | Focus on specific periods to analyze system behavior. |
| **Search Function** | Quickly find specific actions or users. |
| **Auto Refresh Option** | Keep the log updated in real time for live monitoring. |
- - - - - -
#### Using the Activity Log
##### 1. Access the Activity Log
Navigate to
**Dashboard → Monitoring → Activity Log**
You’ll see a structured table displaying all recent system activities with columns for:
- **Date**
- **Initializer** (User or System)
- **Action**
- **Description**
[](https://doc.puq.info/uploads/images/gallery/2025-10/HiT1.png)
- - - - - -
##### 2. Filter by Date and Time
To focus on a specific time range, use the **Filter** field.
Click the input box to open the date/time selector, choose your preferred period, and click **Apply**.
[](https://doc.puq.info/uploads/images/gallery/2025-10/1xN2.png)
- - - - - -
#### Columns Explained
| Column | Description |
|---|
| **Date** | Timestamp of when the action occurred. |
| **Initializer** | The actor who performed the action (e.g., system, admin, or client). |
| **Action** | The operation type (e.g., charge, login, create, update). |
| **Description** | Detailed log entry including affected model, transaction link, and related data. |
- - - - - -
#### Action Types
| Label | Meaning |
|---|
| 🟦 **INFO** | Informational log (e.g., successful login, transaction created). |
| 🟧 **WARNING** | Indicates potential issue or unusual operation. |
| 🔴 **ERROR** | Operation failed or triggered an exception. |
- - - - - -
#### Queue Controls
| Control | Description |
|---|
| **Auto Refresh Interval** | Located at the top right. Define how often logs refresh (e.g., every 5 seconds). |
| **Off/On Switch** | Enables or disables automatic refresh. |
| **Search Box** | Find actions by keyword, ID, or user. |
- - - - - -
#### Example Use Case
An administrator wants to verify all automated billing actions executed by the system.
By filtering the **Activity Log**, they can view entries such as:
```
2025-10-28 12:37:07 | System | charge | Transaction:9e0077dd-aad4-400a-8437-01bf61b41de6 created.
Amount Net: -0.0645 USD Amount Gross: -0.0645 USD Fees: 0.0000 USD
```
This helps confirm that automated transactions ran correctly and without errors.
- - - - - -
#### Tips
- Use **Activity Log** as your primary audit trail for all background and user operations.
- Combine it with **Admin Sessions** and **Client Sessions** for full transparency.
- Use **search filters** to isolate suspicious events quickly.
- Since logging runs asynchronously, you can safely enable **real-time refresh** during monitoring.
# Check and manage Module Log
### PUQcloud Panel
##### [Order Now](https://puqcloud.com/puqcloud-panel.php) | [Download](https://github.com/puqcloud/PUQcloud) | [FAQ](https://faq.puqcloud.com/)
#### Overview
The **Module Log** in **PUQcloud Panel** provides detailed records of all operations executed by modules — including API requests, SSH commands, and service actions.
It helps administrators **debug**, **monitor**, and **audit** communication between PUQcloud and external systems such as **Proxmox**, **Nextcloud**, and others.
All logging processes run **in the background**, allowing multiple modules to record events simultaneously **without impacting performance**.
This ensures that even heavy automation tasks remain fast and efficient.
- - - - - -
#### Navigation Path
**Dashboard → Monitoring → Module Log**
- - - - - -
#### Key Features
| Feature | Description |
|---|
| **Detailed Module-Level Tracking** | Records every request and response for each module. |
| **Safe Background Execution** | All logs are generated asynchronously to avoid slowing down the system. |
| **Live Monitoring** | Real-time updates every few seconds for active debugging. |
| **Filter by Date and Time** | Review specific activity ranges. |
| **Search and Filter** | Quickly locate logs by module name, action, or keyword. |
| **Log Viewer** | Inspect full request and response content for debugging. |
| **Delete All Logs** | Instantly clear old logs when troubleshooting is complete. |
- - - - - -
#### Using the Module Log
##### 1. Access the Page
Navigate to
**Dashboard → Monitoring → Module Log**
You’ll see all module-related activity displayed in a structured table with columns for:
- **Date**
- **Name** (module name)
- **Action**
- **Level**
[](https://doc.puq.info/uploads/images/gallery/2025-10/Kxn1.png)
- - - - - -
##### 2. Filter by Date and Time
To focus on a specific period, use the **Filter** control at the top.
Select the desired start and end dates and times, then click **Apply** to reload the results.
[](https://doc.puq.info/uploads/images/gallery/2025-10/ogC2.png)
- - - - - -
##### 3. View Log Details
Each record includes a “View” (👁️) icon on the right.
Click it to open the detailed log window showing:
- **Type and Module Name**
- **Action Type**
- **Log Level**
- **Request Payload**
- **Response Data**
This view is essential for debugging API and SSH communication.
[](https://doc.puq.info/uploads/images/gallery/2025-10/mAb3.png)
- - - - - -
#### Columns Explained
| Column | Description |
|---|
| **Date** | Timestamp of the log entry. |
| **Name** | The name of the module (e.g., puqProxmox, puqNextcloud). |
| **Action** | Describes what operation was executed (API Request, SSH Command, etc.). |
| **Level** | Indicates the log type (Debug, Info, Warning, Error). |
- - - - - -
#### Log Levels
| Level | Description |
|---|
| 🟣 **DEBUG** | Detailed technical data for developers and administrators. |
| 🟦 **INFO** | Informational events indicating normal operation. |
| 🟧 **WARNING** | Non-critical issue or irregular response. |
| 🔴 **ERROR** | Operation failed or received invalid data. |
- - - - - -
#### Controls and Options
| Control | Description |
|---|
| **Auto Refresh** | Refresh interval (top-right) allows you to monitor logs in real time. |
| **Off/On Switch** | Enable or disable live updates. |
| **Search Box** | Quickly find logs by action or module name. |
| **Delete All** | Clears all logs at once — useful after debugging sessions. |
- - - - - -
#### Example Use Case
While testing the **puqProxmox** module, the administrator can open **Module Log** to check the API and SSH calls executed during a provisioning process.
Example entry:
```
2025-10-28 08:25:23 | puqProxmox | API Request - Sending Request | DEBUG
```
By clicking the 👁️ icon, the admin can inspect both the request JSON and the response received from the external system.
- - - - - -
#### Tips
- Use **DEBUG** level logs for troubleshooting module integrations.
- Regularly clear old logs to keep your workspace clean.
- Combine with the **Task Queue** section to trace background automation steps.
- Since logs are recorded asynchronously, there’s **no performance degradation**, even during heavy module execution.
# Check and manage Notification History
### PUQcloud Panel
##### [Order Now](https://puqcloud.com/puqcloud-panel.php) | [Download](https://github.com/puqcloud/PUQcloud) | [FAQ](https://faq.puqcloud.com/)
# Create & Manage Administrators
### PUQcloud Panel
##### [Order Now](https://puqcloud.com/puqcloud-panel.php) | [Download](https://github.com/puqcloud/PUQcloud) | [FAQ](https://faq.puqcloud.com/)
Use this quick, practical guide to add new admins, edit access, reset passwords, and keep your panel secure. Each step tells you exactly where to place your screenshots.
- - - - - -
#### Open the Administrators page
**Path:** **Settings → Staff → Admins**
Here you’ll see the current admins list with **Edit** ✏️ and **Delete** 🗑️ actions.
Administrators list (with Edit/Delete).
[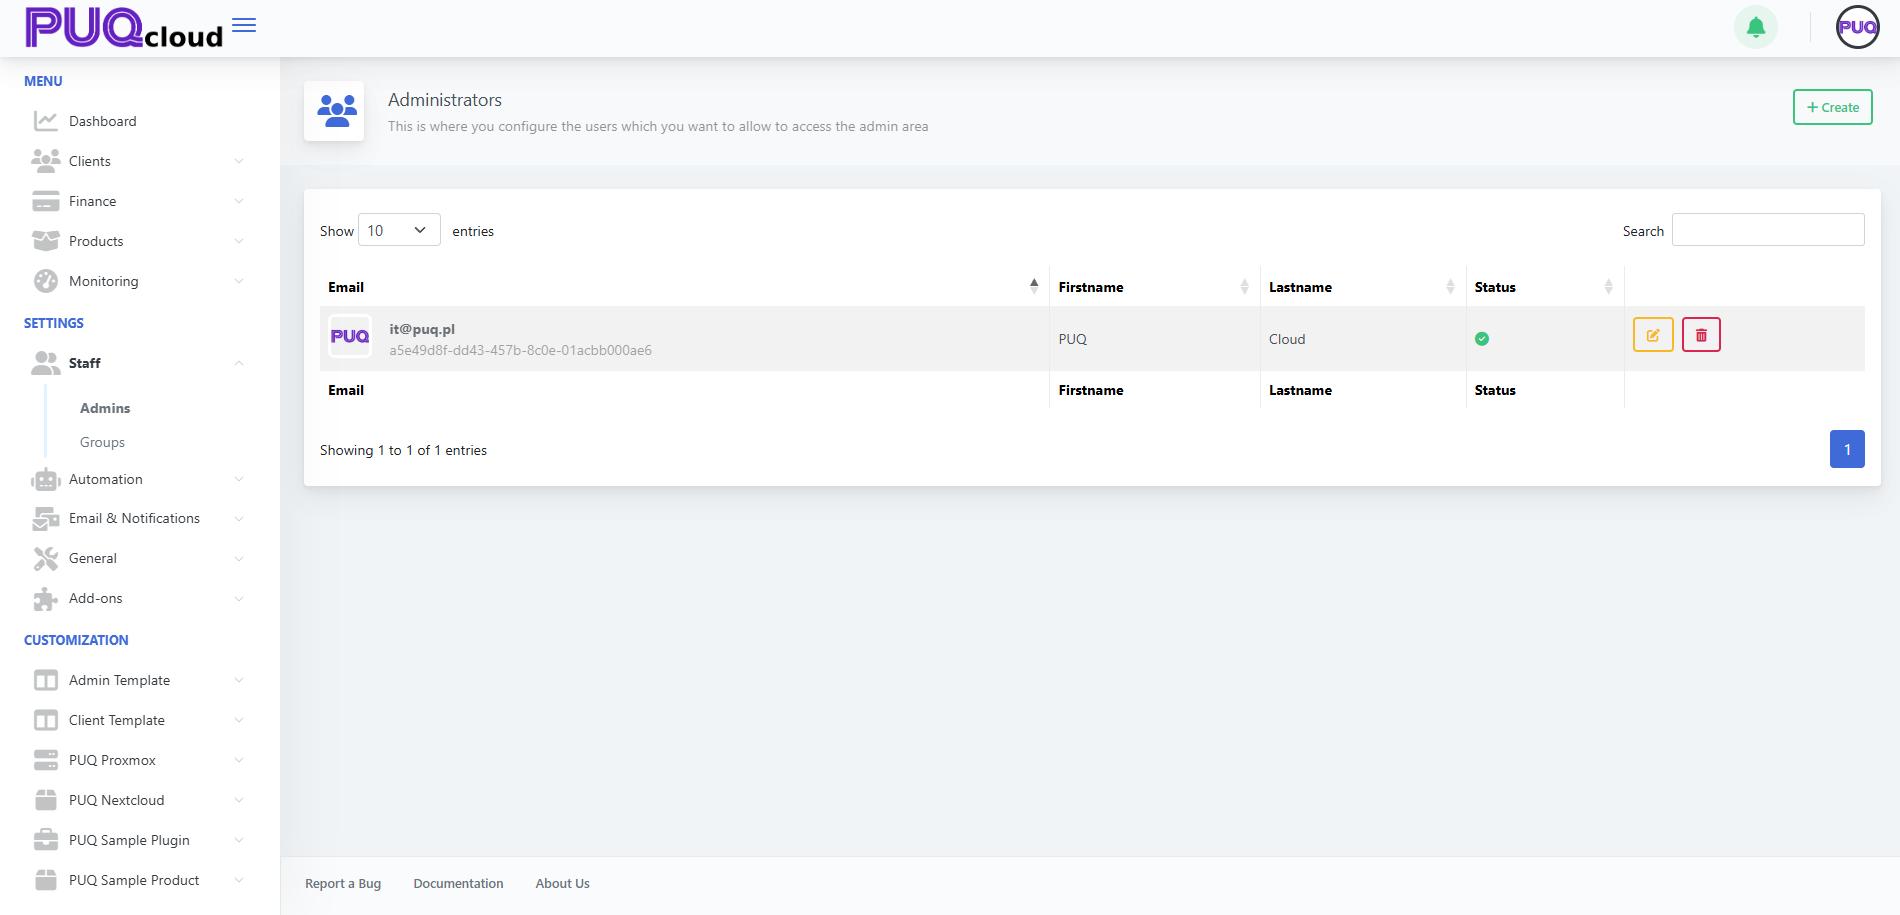](https://doc.puq.info/uploads/images/gallery/2025-09/image-1758113045196.png)
- - - - - -
#### Create a new Administrator
1. Click **+ Create** (top-right).
2. Fill in:
- **Email**, **Firstname**, **Lastname**
- **Language** (UI language for this admin)
- **Groups** (permission set; e.g., *Super Admin* or your custom groups)
- **Password** and **Confirm password**
3. Click **Save**.
“Create Administrator” modal (all fields)
[](https://doc.puq.info/uploads/images/gallery/2025-09/image-1758113062417.png)
**Notes**
- Use a **unique, work email** per person (no shared logins).
- Assign the **minimum necessary group** (least privilege).
- - - - - -
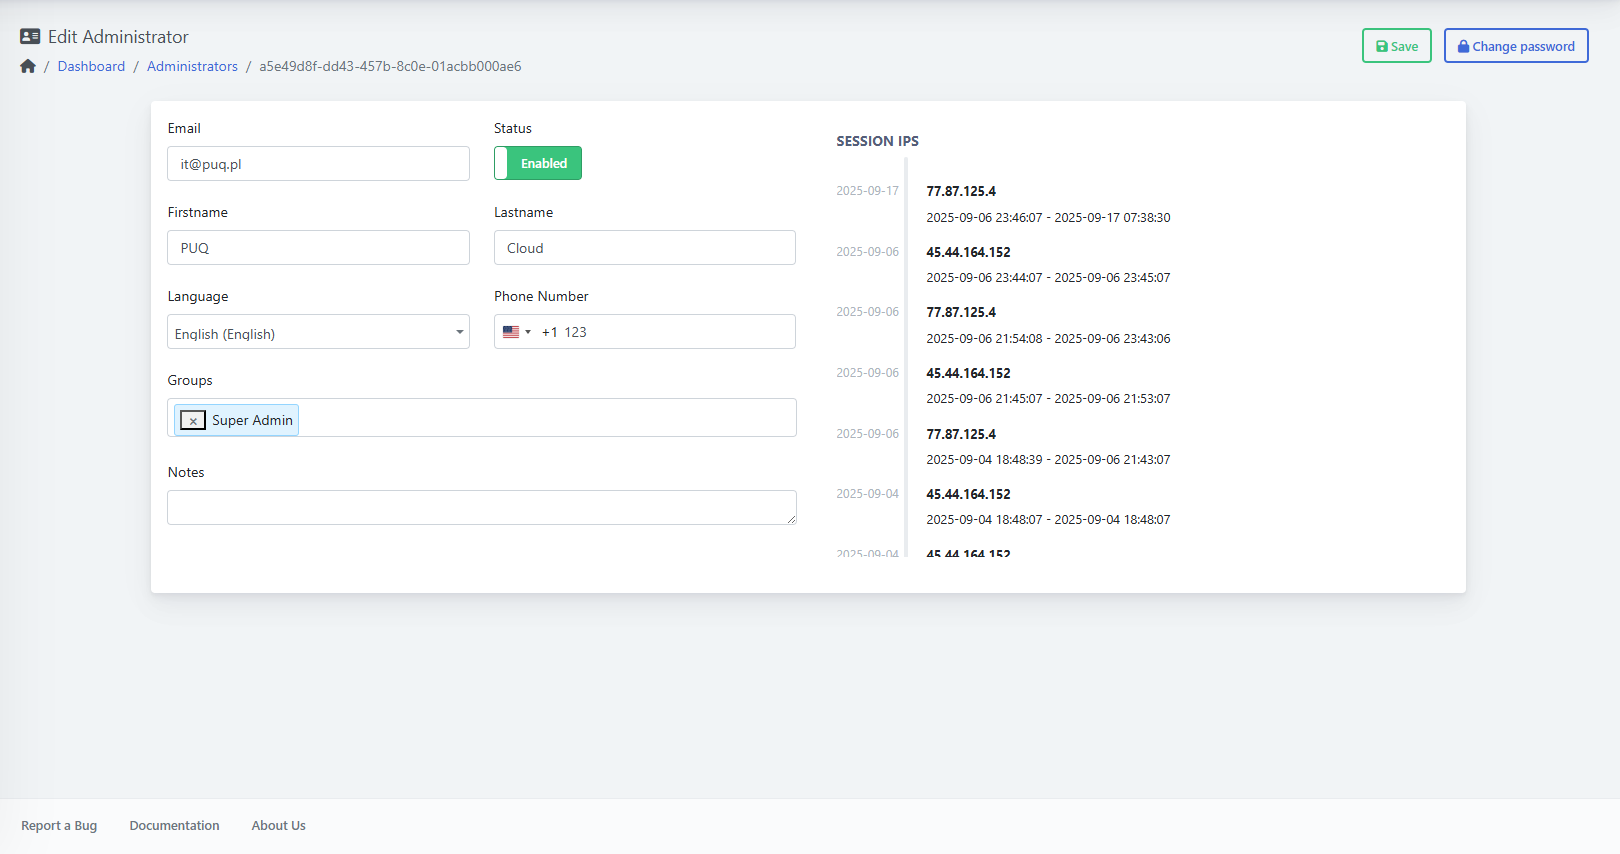
#### Edit an Administrator (status, groups, details)
From the list, click **Edit**:
- **Status:** toggle **Enabled/Disabled** to grant or block access.
- **Groups:** add/remove roles to change permissions.
- **Language**, **Phone Number**, and **Notes** as needed.
- **Session IPs** (right side): quick audit of recent logins.
Click **Save** when done.
Edit Administrator page (Status, Groups, Session IPs, Save)
[](https://doc.puq.info/uploads/images/gallery/2025-09/image-1758113074934.png)
- - - - - -
#### Change an Administrator’s Password
On the **Edit** page, click **Change password** (top-right), enter **Password** and **Confirm**, then **Save**.
“Change password” modal
[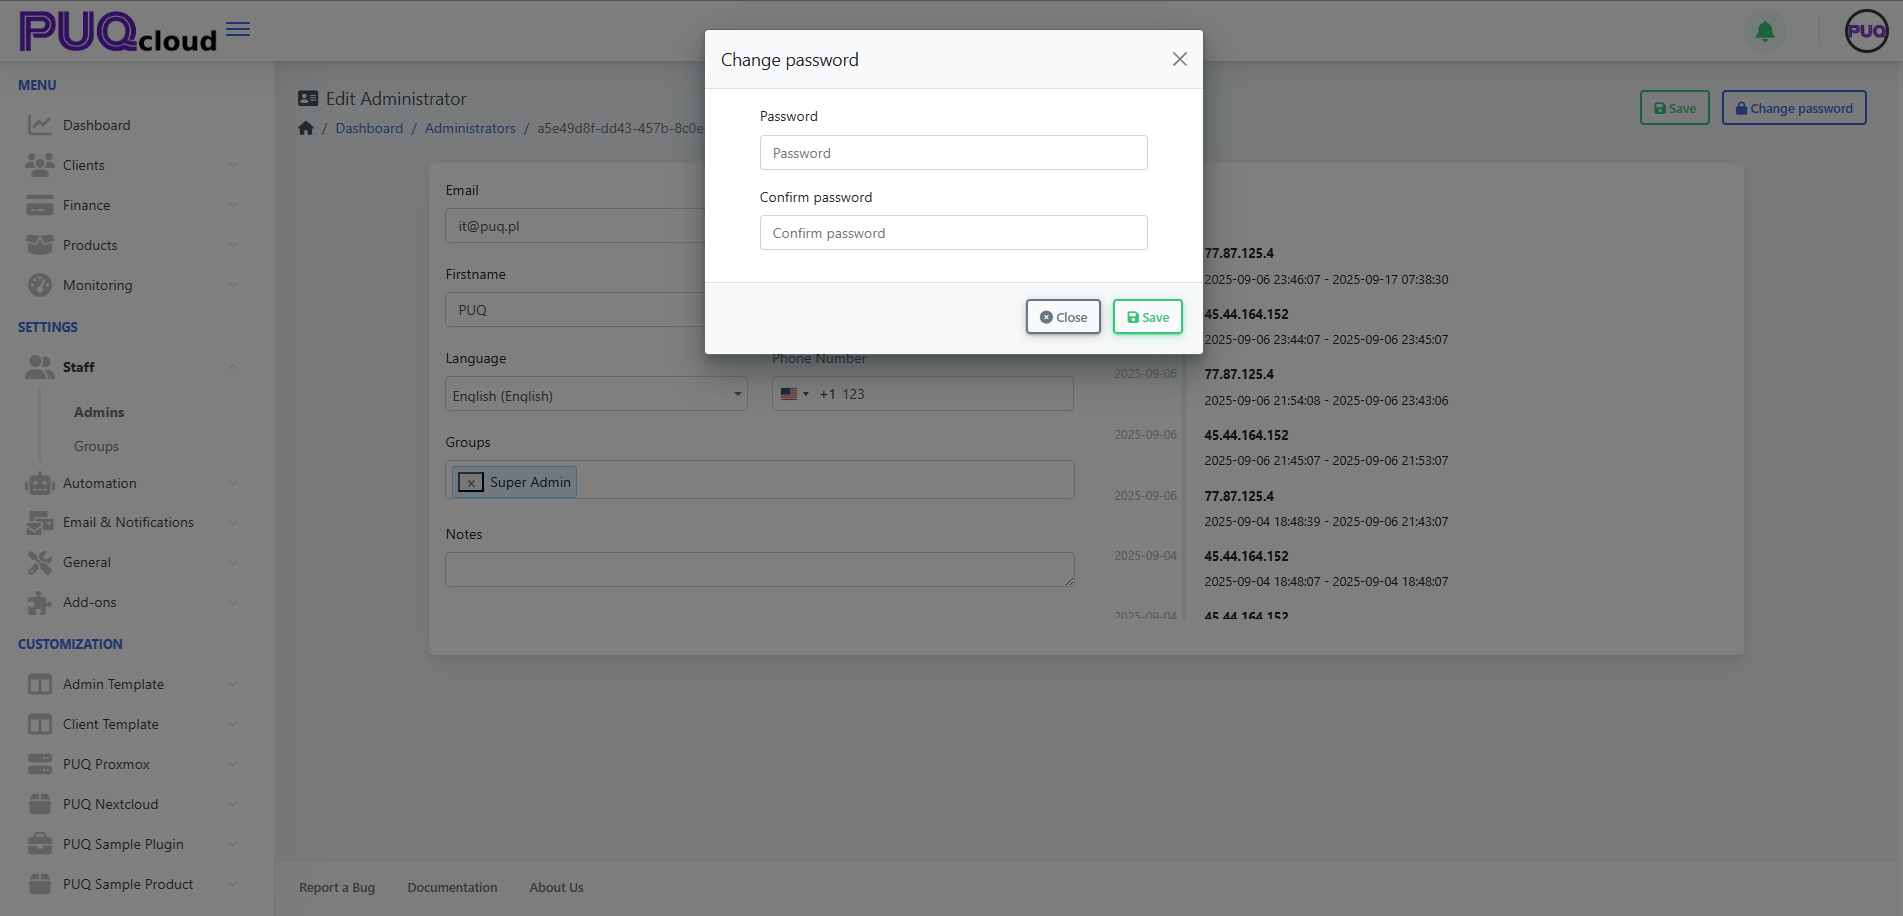](https://doc.puq.info/uploads/images/gallery/2025-09/image-1758113088563.png)
Tip: enforce strong passwords and ask the user to enable 2FA in their Client Area.
- - - - - -
#### Delete an Administrator
On the **Admins** list, click the **🗑️ Delete** button next to the user and confirm.
**Best practice:** never delete your **last Super Admin**. Create/assign another Super Admin first.
- - - - - -
#### Groups & permissions (quick tips)
- Define groups in **Settings → Staff → Groups** (e.g., *Support*, *Finance*, *Ops*).
- Follow **least privilege**: grant only what the role needs.
- Separate **Finance** vs **Technical** access when possible.
- Review group membership regularly (monthly/quarterly).
- - - - - -
#### Security checklist
- One person = one account (no shared logins).
- Require **2FA** for all admins (set in the user’s Client Area).
- Rotate passwords for high-privilege accounts.
- Watch the **Session IPs** for unusual activity.
- Immediately **Disable** or **Delete** ex-staff accounts.
- - - - - -
#### Troubleshooting
- **“Save” is greyed out / error:** check required fields, unique email, password match.
- **Can’t log in:** ensure **Status = Enabled**; verify correct email.
- **Missing features:** user likely lacks the right **Group**.
- **Password change fails:** confirm both fields match and meet policy.
# Create & Manage Administrator Groups
### PUQcloud Panel
##### [Order Now](https://puqcloud.com/puqcloud-panel.php) | [Download](https://github.com/puqcloud/PUQcloud) | [FAQ](https://faq.puqcloud.com/)
Use this to build role-based access for your staff. I’ll also show where to place each screenshot.
- - - - - -
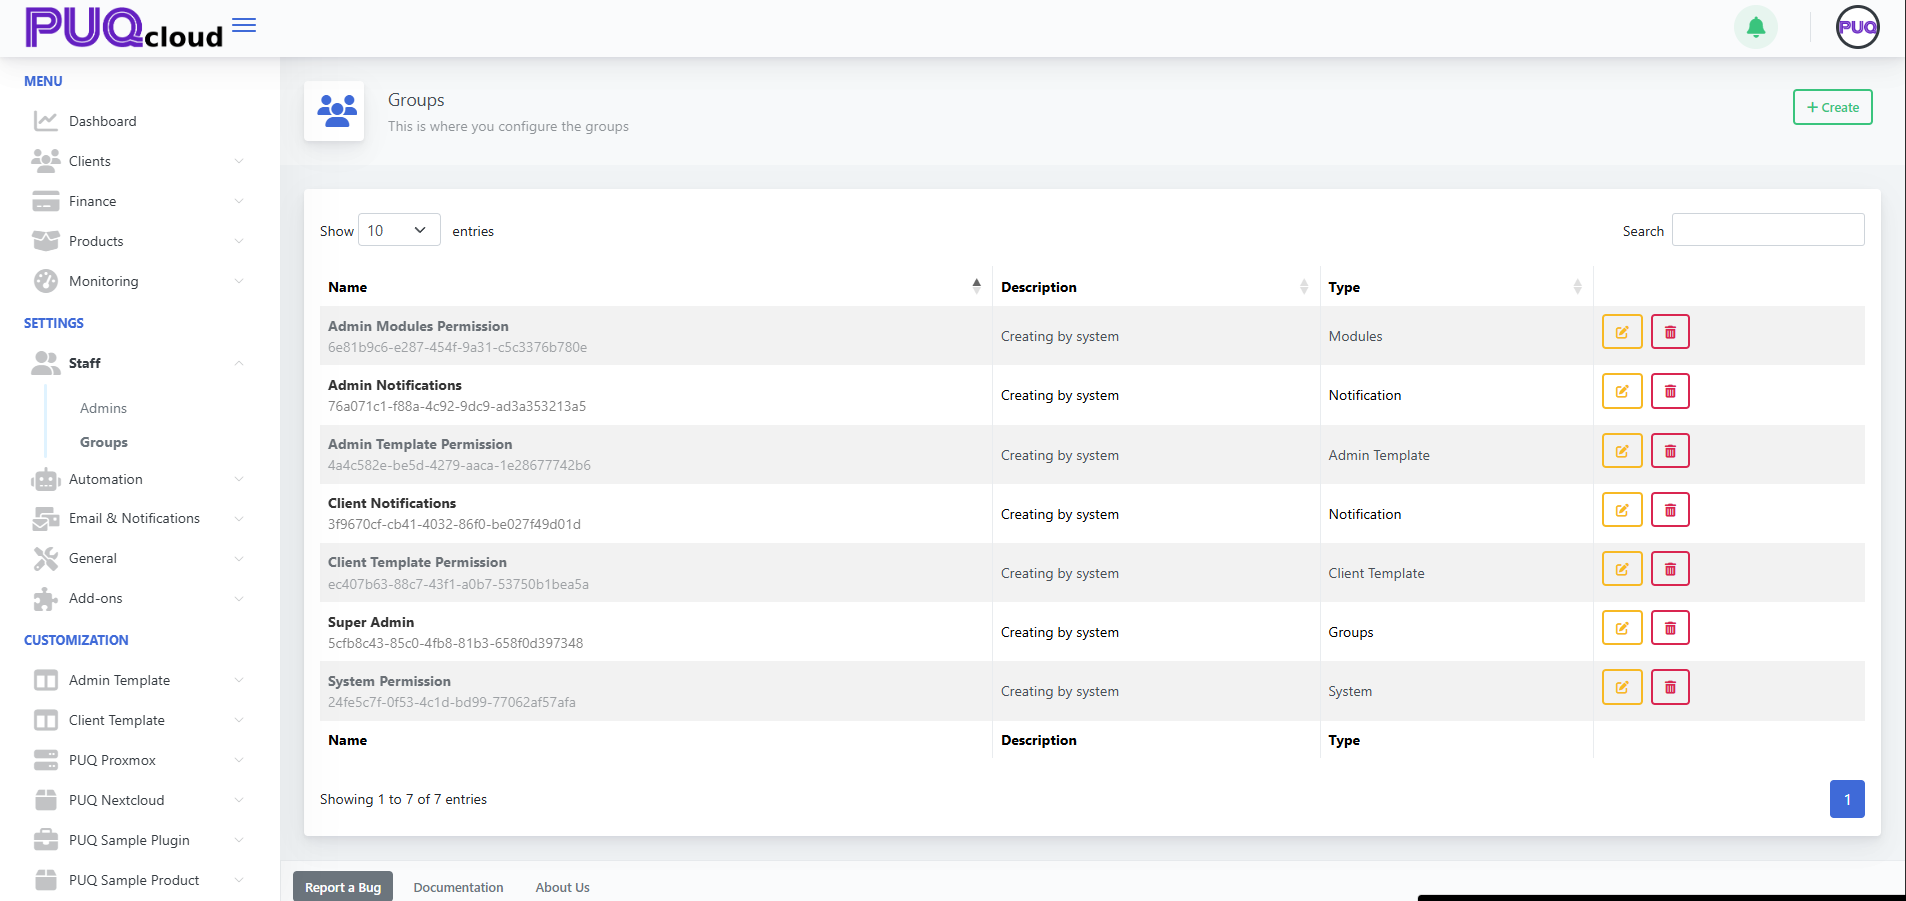
#### Open Groups
**Path:** **Settings → Staff → Groups**
Here you can see all groups plus **Edit** ✏️ / **Delete** 🗑️.
Groups list (with action buttons).
[](https://doc.puq.info/uploads/images/gallery/2025-09/image-1758114573798.png)
- - - - - -
#### Create a Group (for Admins)
1. Click **+ Create** (top-right).
2. Fill in:
- **Name** — e.g., *Support*, *Finance*, *Ops*
- **Type** — choose **Groups** (this is the correct type for administrator roles)
3. **Save**.
“Create Group” modal (Type dropdown visible).
[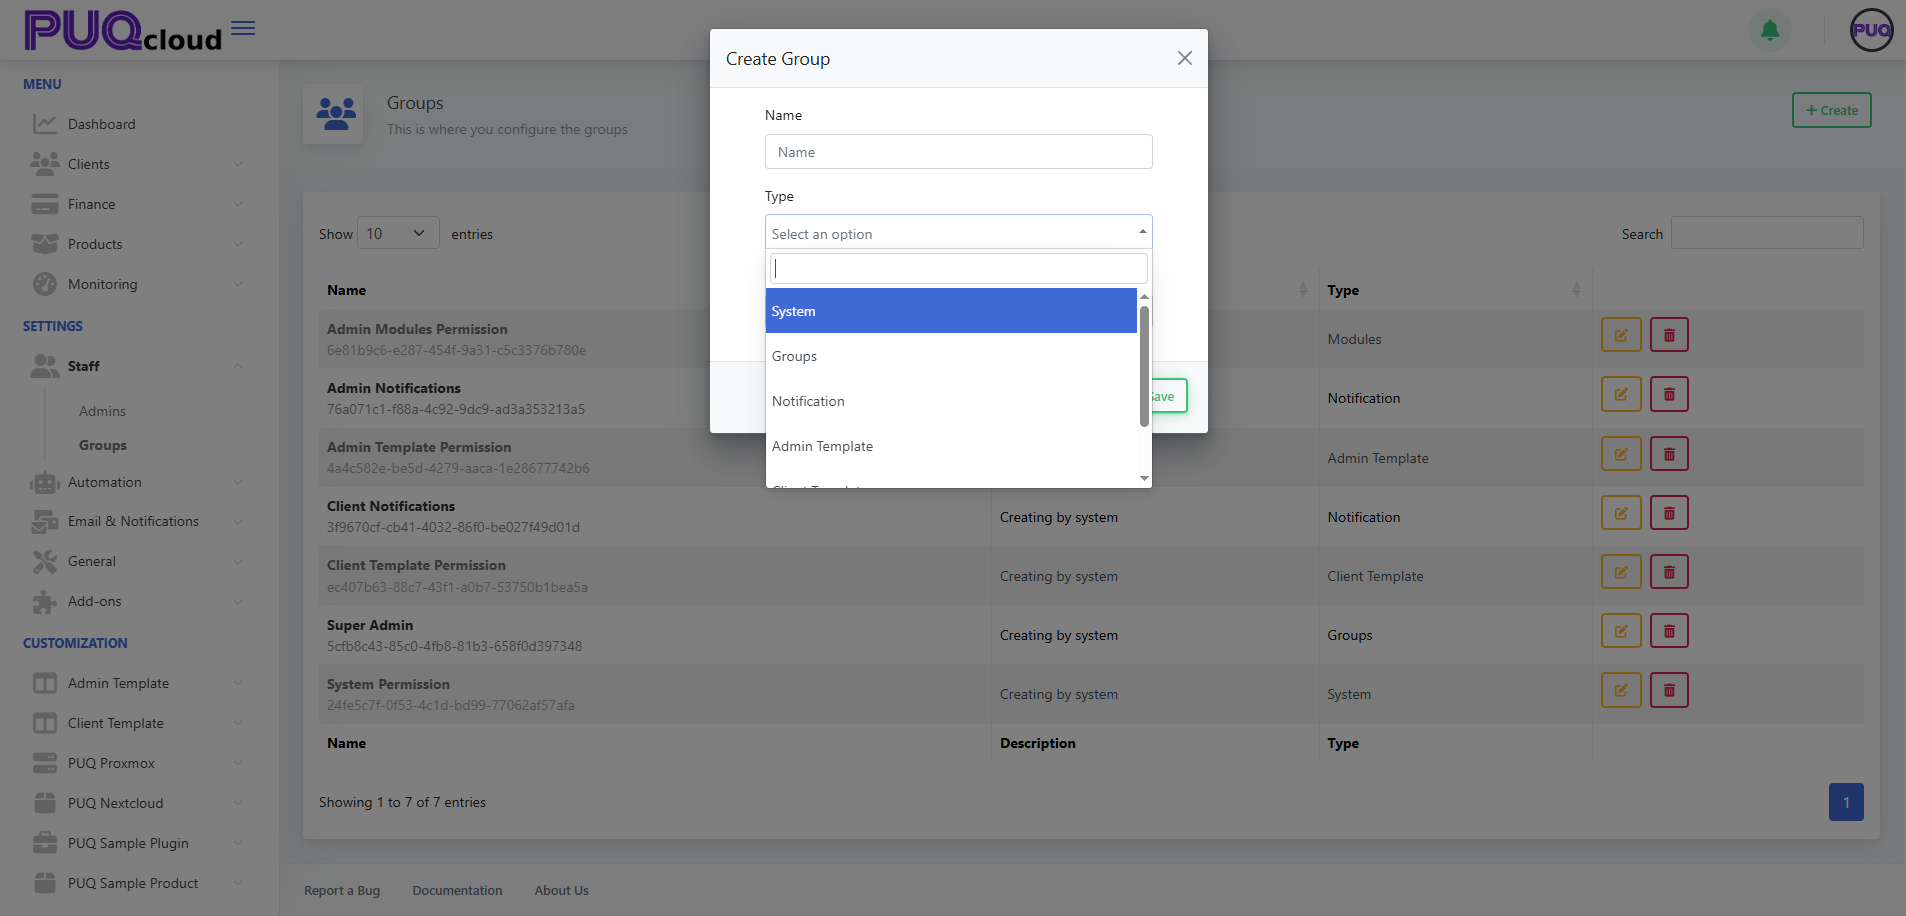](https://doc.puq.info/uploads/images/gallery/2025-09/image-1758114580687.png)
Other types (System, Notification, Admin/Client Template) are system/helper sets. For admin roles, use **Groups**.
- - - - - -
#### Configure Permissions
After saving, you’re on the **Edit Group** page. Toggle capabilities the group should have, e.g.:
- **System Permission** — system-level operations.
- **Admin Modules Permission** — access to admin modules/features.
- **Admin Notifications** — receive back-office alerts.
- **Client Notifications** — receive client-side alerts (usually off for admins unless needed).
- **Admin Template Permission** / **Client Template Permission** — manage templates.
Add a **Description**, then **Save**.
Edit Group with toggles (On/Off).
[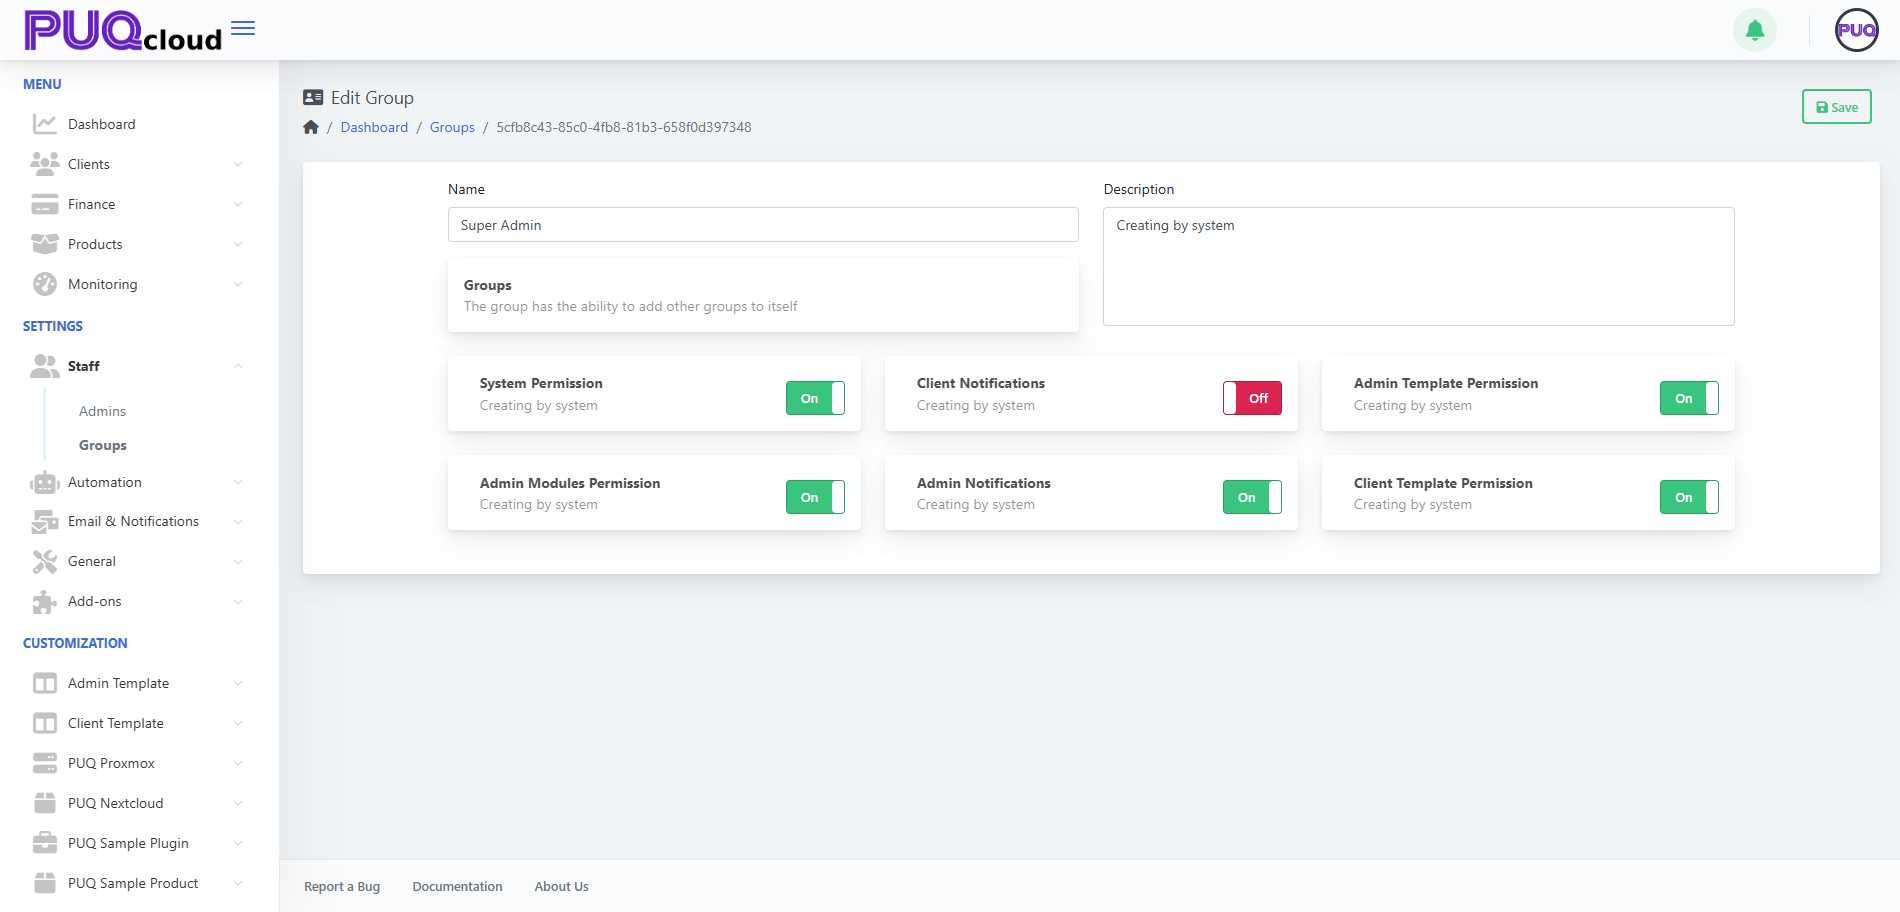](https://doc.puq.info/uploads/images/gallery/2025-09/image-1758114588329.png)
- - - - - -
#### Assign the Group to Administrators
**Path:** **Settings → Staff → Admins → Edit** an admin → **Groups** field → add your group → **Save**.
(Use least-privilege: only the access they need.)
- - - - - -
#### Edit / Delete a Group
- From the **Groups** list, click **✏️ Edit** to change toggles or rename/describe.
- Click **🗑️ Delete** to remove a group (only if no critical users rely on it).
- - - - - -
#### Tips & Good Practice
- Start with broad roles (*Support*, *Finance*, *Ops*), then refine toggles.
- Keep **Super Admin** for a few trusted people only.
- Review memberships monthly; remove access for ex-staff immediately.
- Test new roles with a non-super-admin account before rollout.
# Manage scheduler in the Admin Area
### PUQcloud Panel
##### [Order Now](https://puqcloud.com/puqcloud-panel.php) | [Download](https://github.com/puqcloud/PUQcloud) | [FAQ](https://faq.puqcloud.com/)
**Why Scheduler?** So billing, cleanups, lifecycle actions, and Proxmox jobs run *on time*, *automatically*, and *predictably*.
#### Where is it?
**Automation → Scheduler**
[](https://doc.puq.info/uploads/images/gallery/2025-09/image-1758198466372.png)Scheduler overview (System tab) with task card UI (Last/Next Run, cron, On/Off, Save, Reset).
- - - - - -
#### 60-second UI tour
Every task card has 6 key parts:
1. **Title** + short description.
2. **Last Run** — when it last executed (great to spot stalls).
3. **Next Run** — when it will run next.
4. **Cron expression** — schedule in `* * * * *` format.
5. **On/Off** toggle — enable/disable instantly.
6. **Save** (disk) / **Reset** (↺) — apply or discard changes.
**Rule #1:** change cron → **Save** → confirm **Next Run** updates. If it didn’t, your change isn’t applied.
- - - - - -
#### Tabs & what they’re for
##### 1. System
Service/test tasks.
- Keep **Off** in production unless you use them intentionally.
[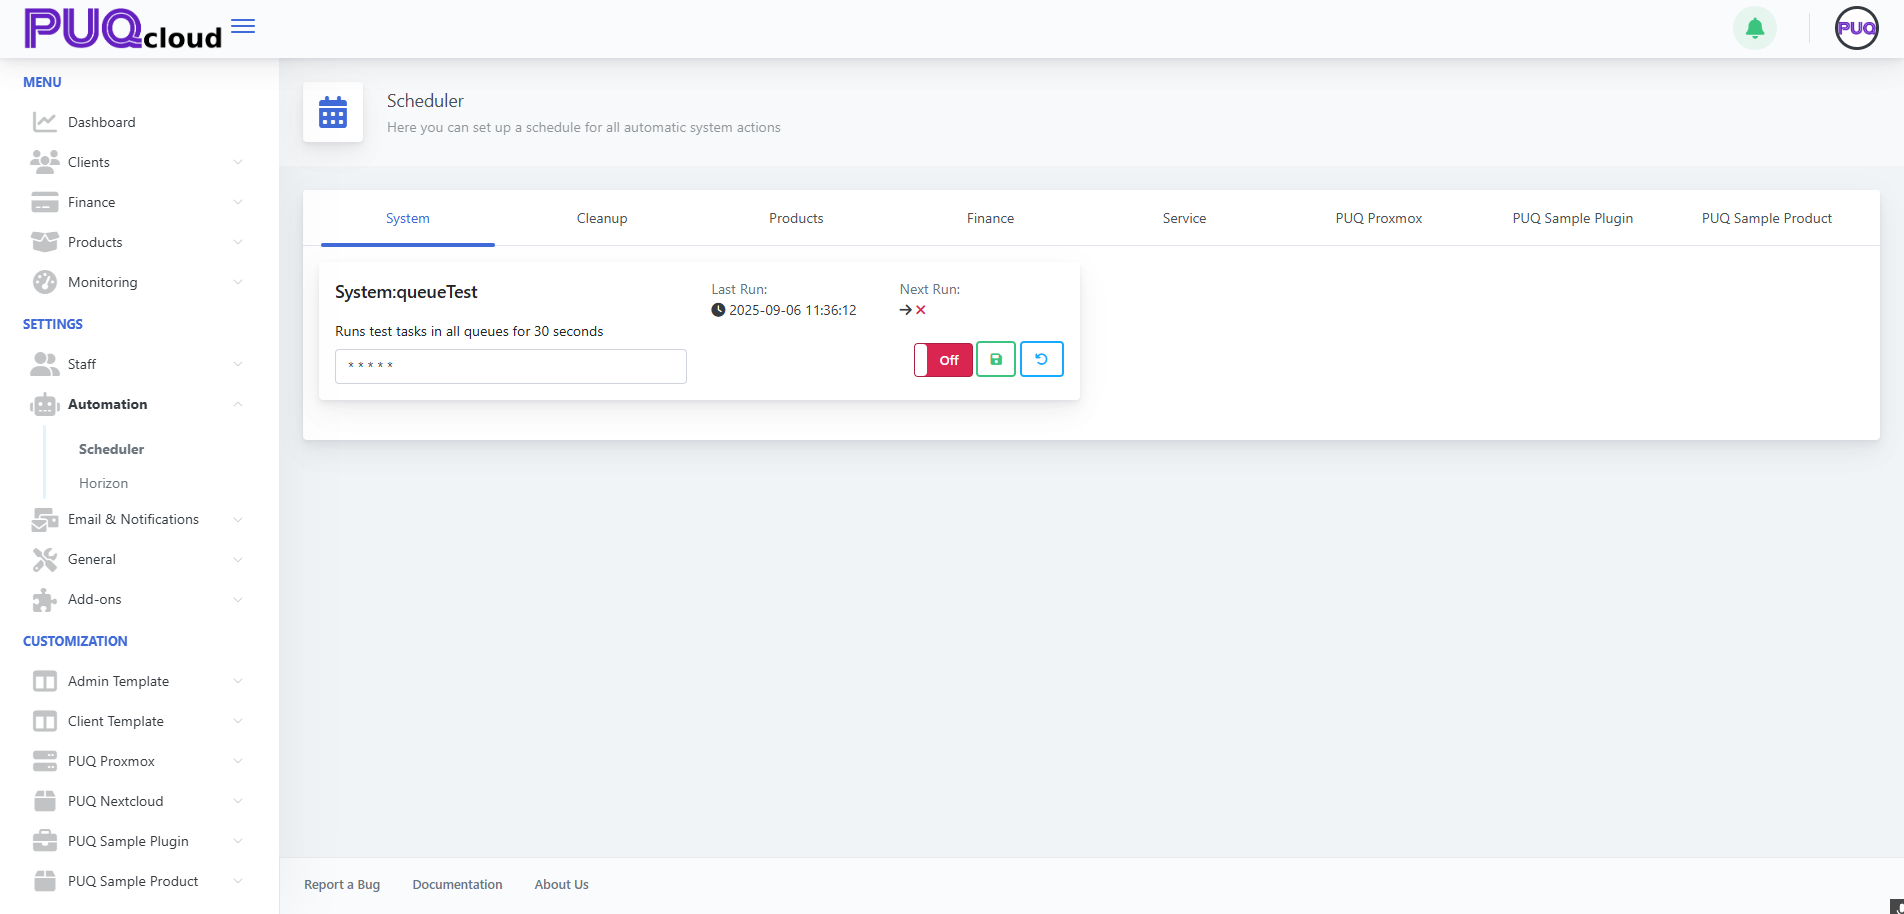](https://doc.puq.info/uploads/images/gallery/2025-09/image-1758198498265.png)
Scheduler overview (System tab) with task card UI (Last/Next Run, cron, On/Off, Save, Reset).
- - - - - -
##### 2. Cleanup
Housekeeping for logs, sessions, and “lost” queue jobs.
- **System:clearingLostTasks** — converts `pending/processing` to `failed/duplicate`.
- **System:Cleanup** — clears logs/history by retention.
Suggested schedule:
- LostTasks: `*/30 * * * *`
- Cleanup: `0 3 * * *` (daily at 03:00)
[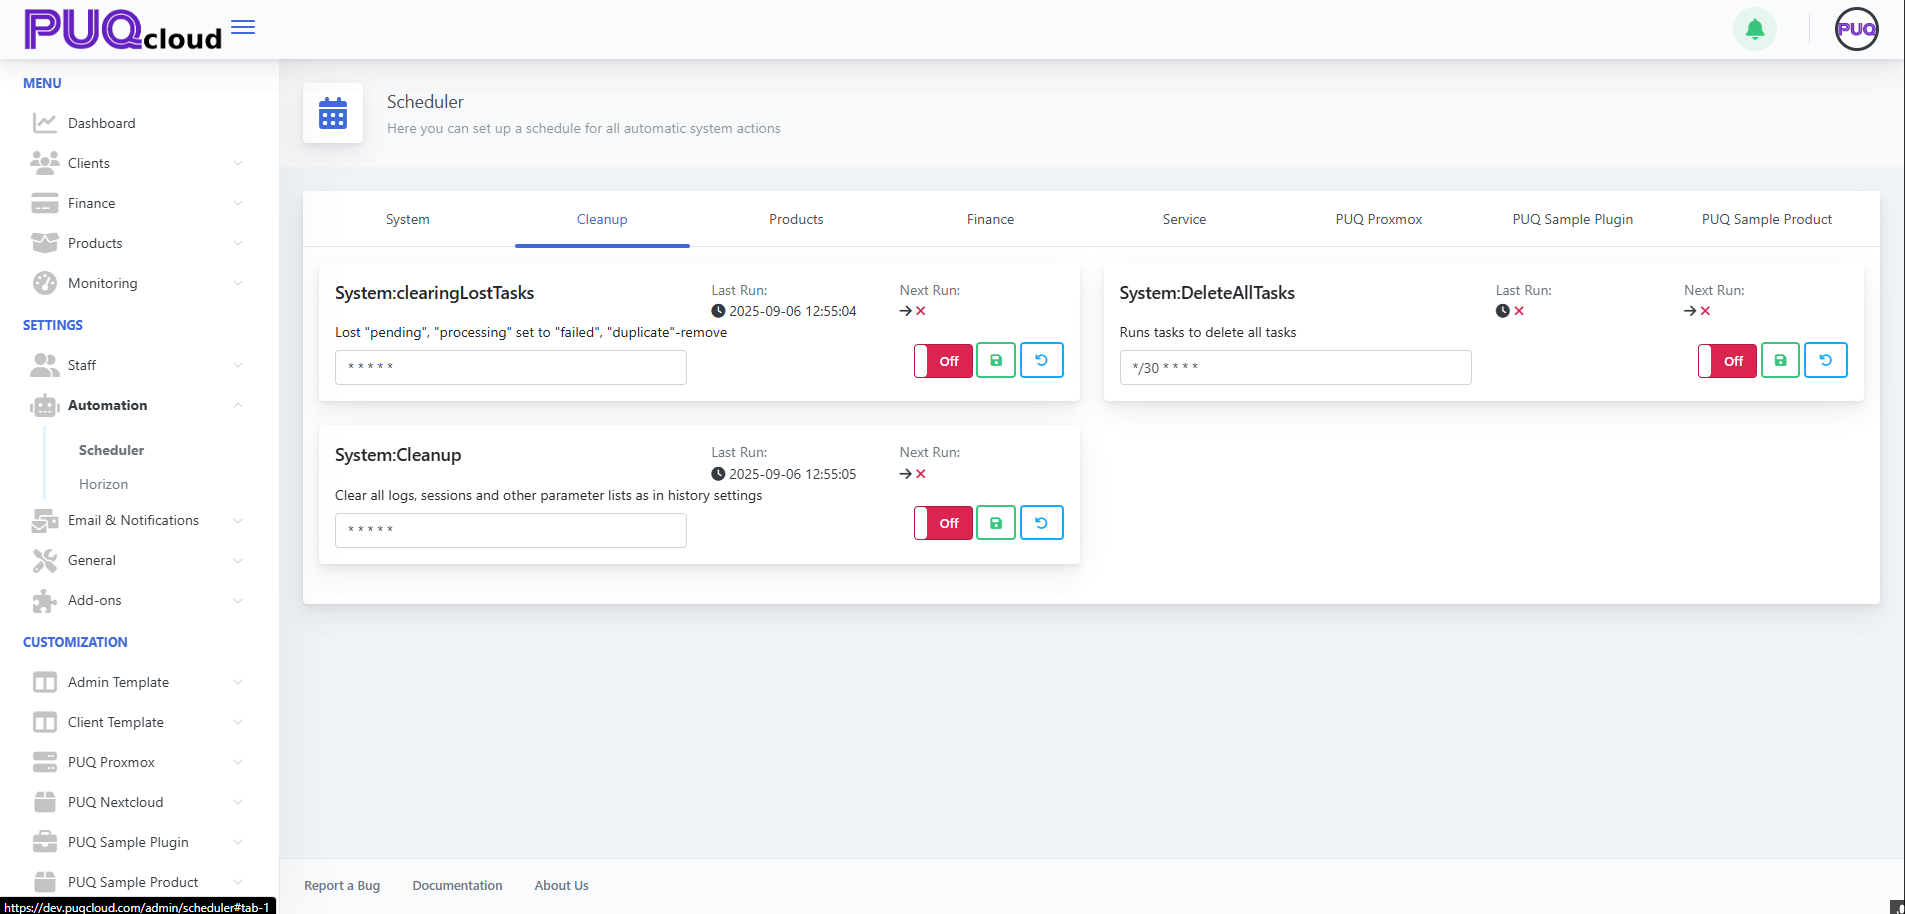](https://doc.puq.info/uploads/images/gallery/2025-09/image-1758198722637.png)Cleanup tab showing “System:clearingLostTasks” and “System:Cleanup” with example cron values.
**Tip:** while debugging you can run them more often; switch back to the nightly window later.
- - - - - -
##### 3. Products
Bulk price conversions/recalculation.
- **Products:ConvertPrice** — keeps prices aligned with currency rates.
Schedules that work:
- `0 * * * *` (hourly) or `*/15 * * * *` in volatile markets.
[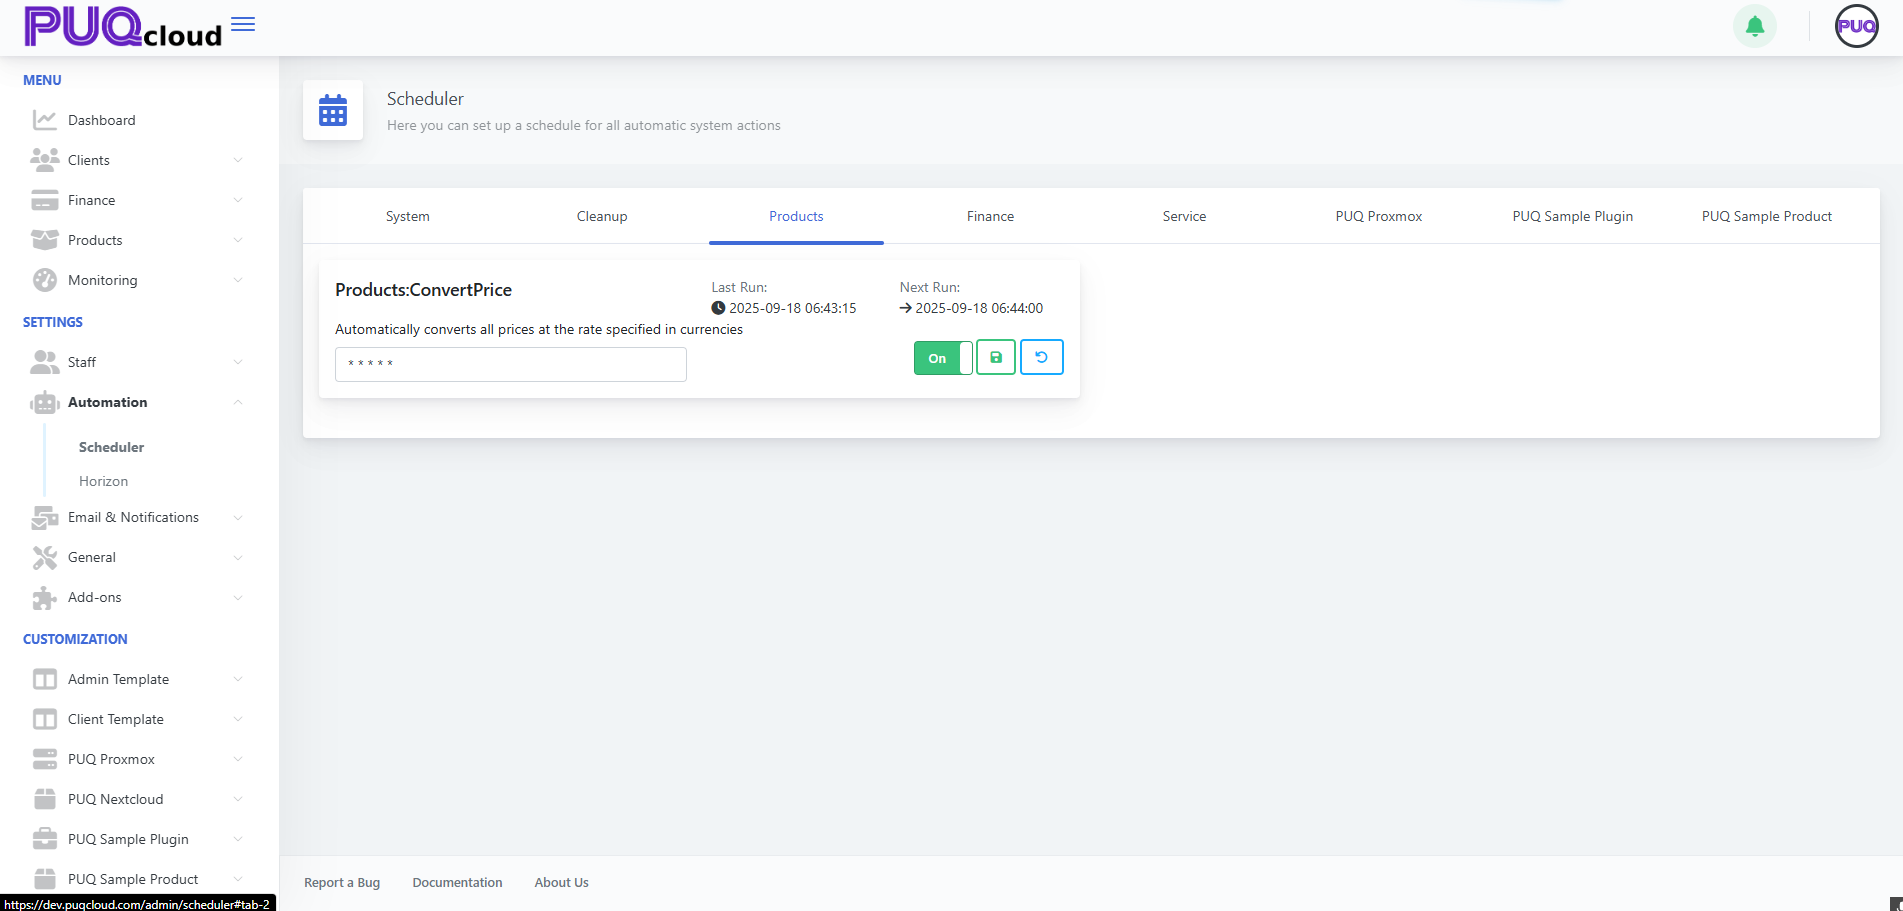](https://doc.puq.info/uploads/images/gallery/2025-09/image-1758198746129.png)
Products tab showing “Products:ConvertPrice” enabled with sample cron.
- - - - - -
##### 4. Finance
The billing heart: charges and transactions.
- **Finance:ChargeServices** — charges active services and creates transactions.
Balanced options:
- `*/10 * * * *` — near-real-time customer experience.
- `0 * * * *` — lighter load, OK for hourly charging.
[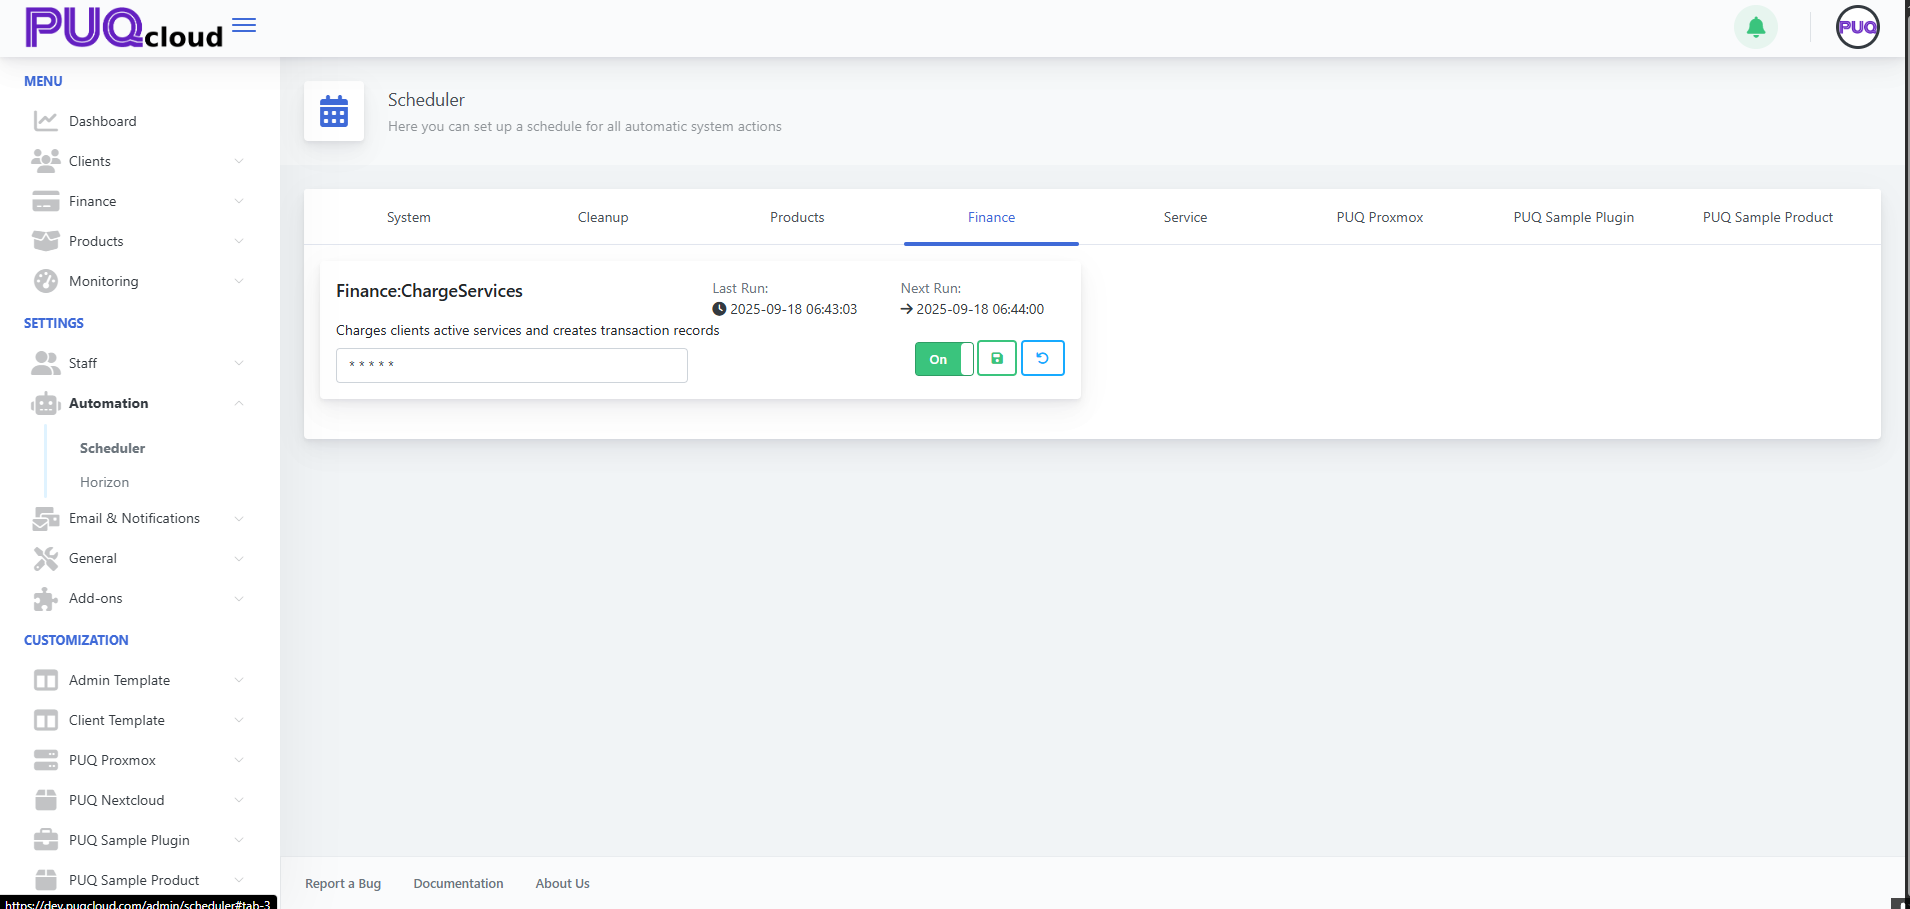](https://doc.puq.info/uploads/images/gallery/2025-09/image-1758198833647.png)Finance tab showing “Finance:ChargeServices” enabled with sample cron.
**Pro tip:** do faster cycles by day (`*/10`), slower at night if you manage cron externally with “day/night” profiles.
- - - - - -
##### 5. Service
Service lifecycle automation:
- **Service:CreateServices** — create on sufficient funds.
- **Service:SuspendServices** — suspend on debt.
- **Service:TerminationServices** — terminate after grace.
- **Service:UnsuspendServices** — restore after top-up.
- **Service:CancellationServices** — process cancellations.
Recommended starter profile:
- Create/Suspend/Unsuspend: `*/10 * * * *`
- Cancellation: `*/30 * * * *`
- Termination: `0 4 * * *` (nightly)
**[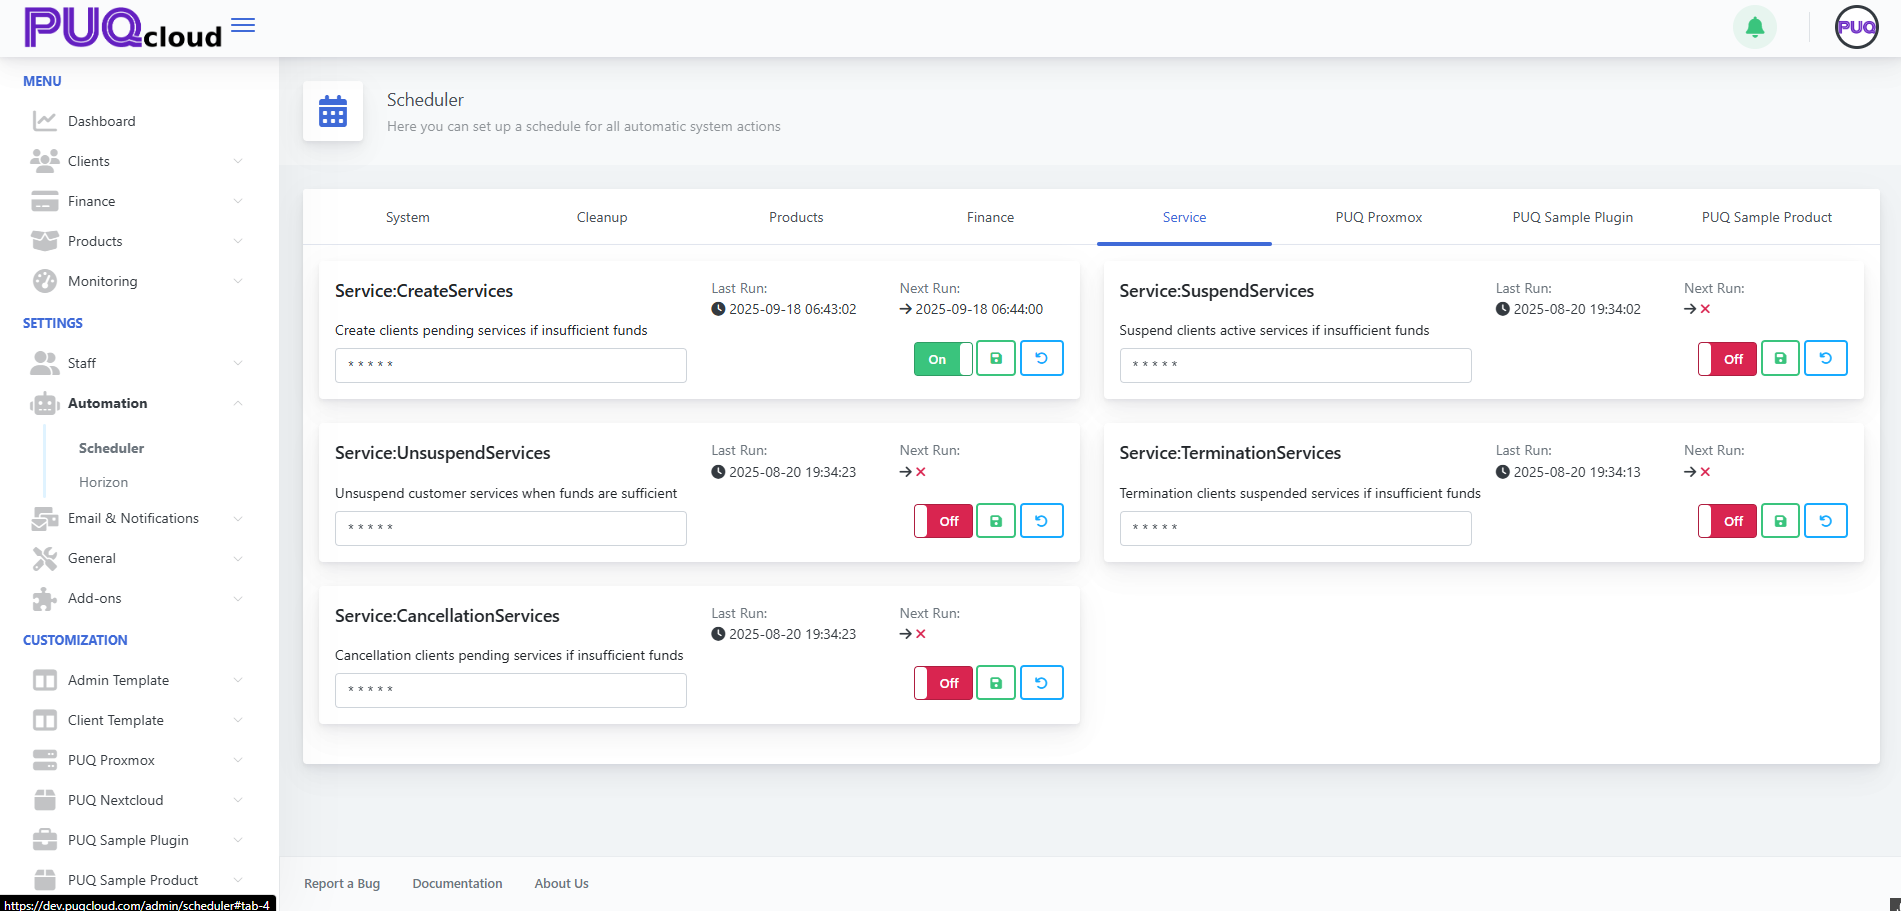](https://doc.puq.info/uploads/images/gallery/2025-09/image-1758198856071.png)**Service tab with lifecycle tasks (Create, Suspend, Unsuspend, Termination, Cancellation) and their toggles.
**Safety:** run terminations once per night to avoid heavy daytime I/O.
- - - - - -
##### 6. PUQ Proxmox
Cluster sync and backups.
- **puqProxmox:SyncClusters** — `*/5 * * * *`.
- **puqProxmox:MakeBackups** — `0 2 * * *` (02:00 daily).
[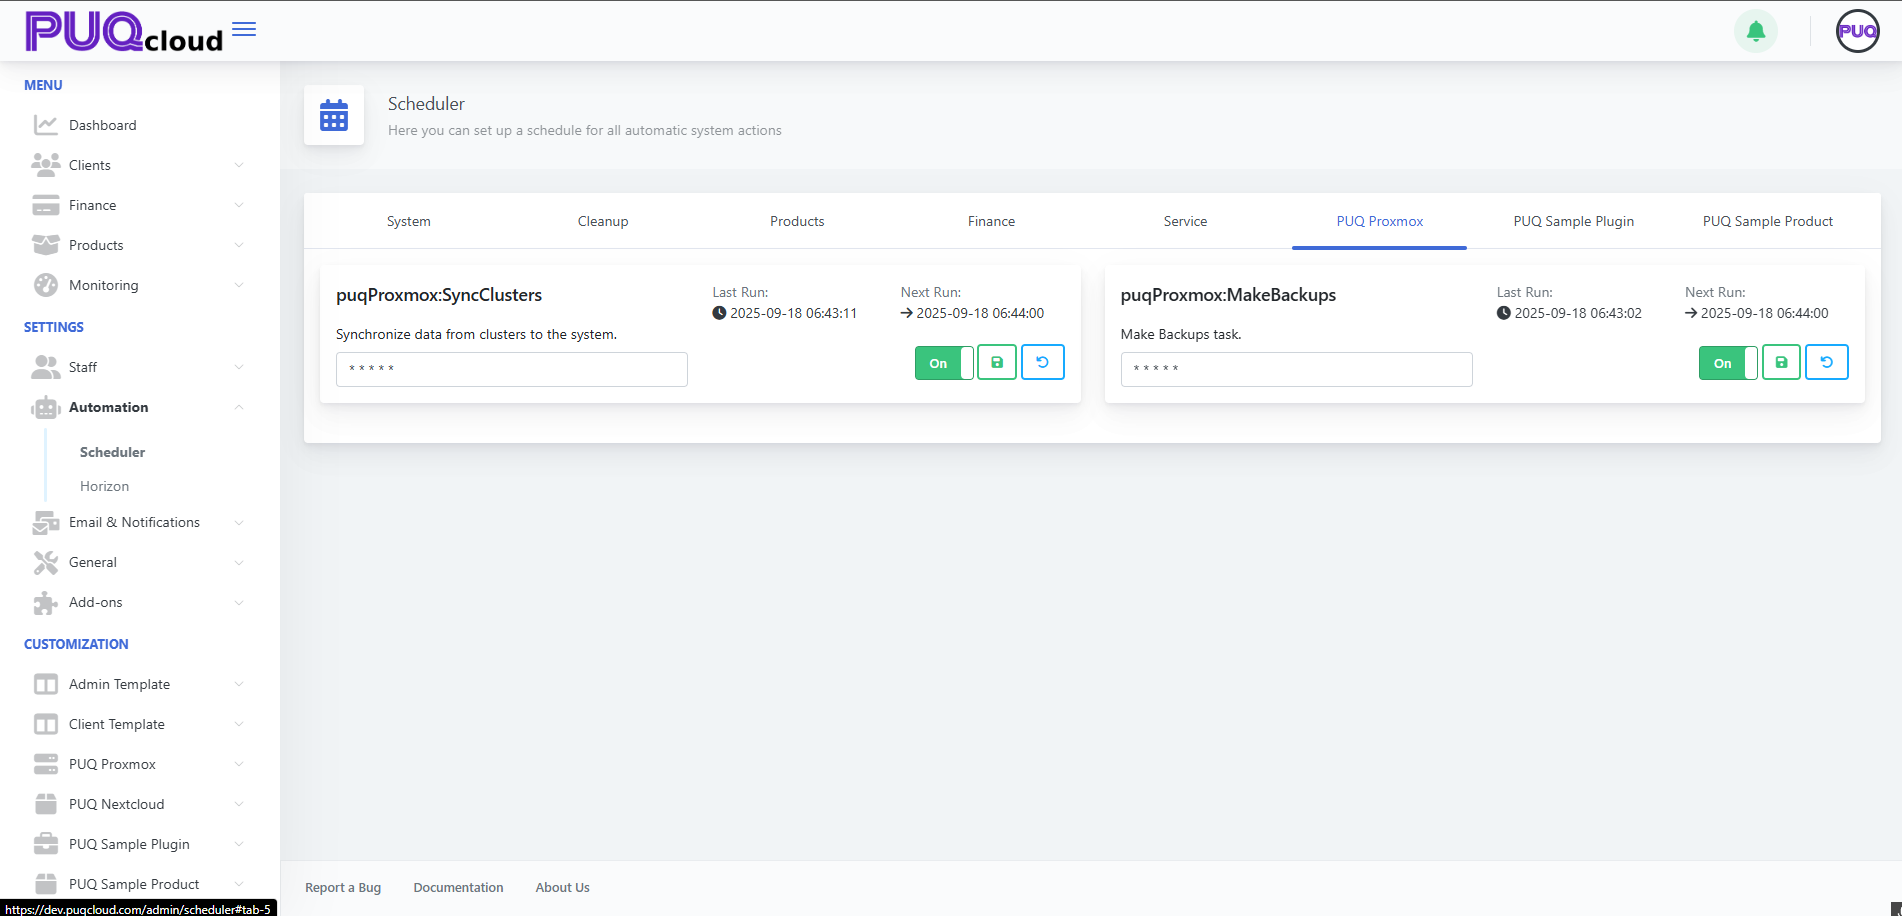](https://doc.puq.info/uploads/images/gallery/2025-09/image-1758198884128.png)PUQ Proxmox tab showing “puqProxmox:SyncClusters” and “puqProxmox:MakeBackups” with recommended schedules.
**Practice:** give backups a dedicated quiet window; watch storage I/O.
- - - - - -
##### 7. PUQ Sample Plugin / PUQ Sample Product
Demo tasks — keep **Off** in production.
[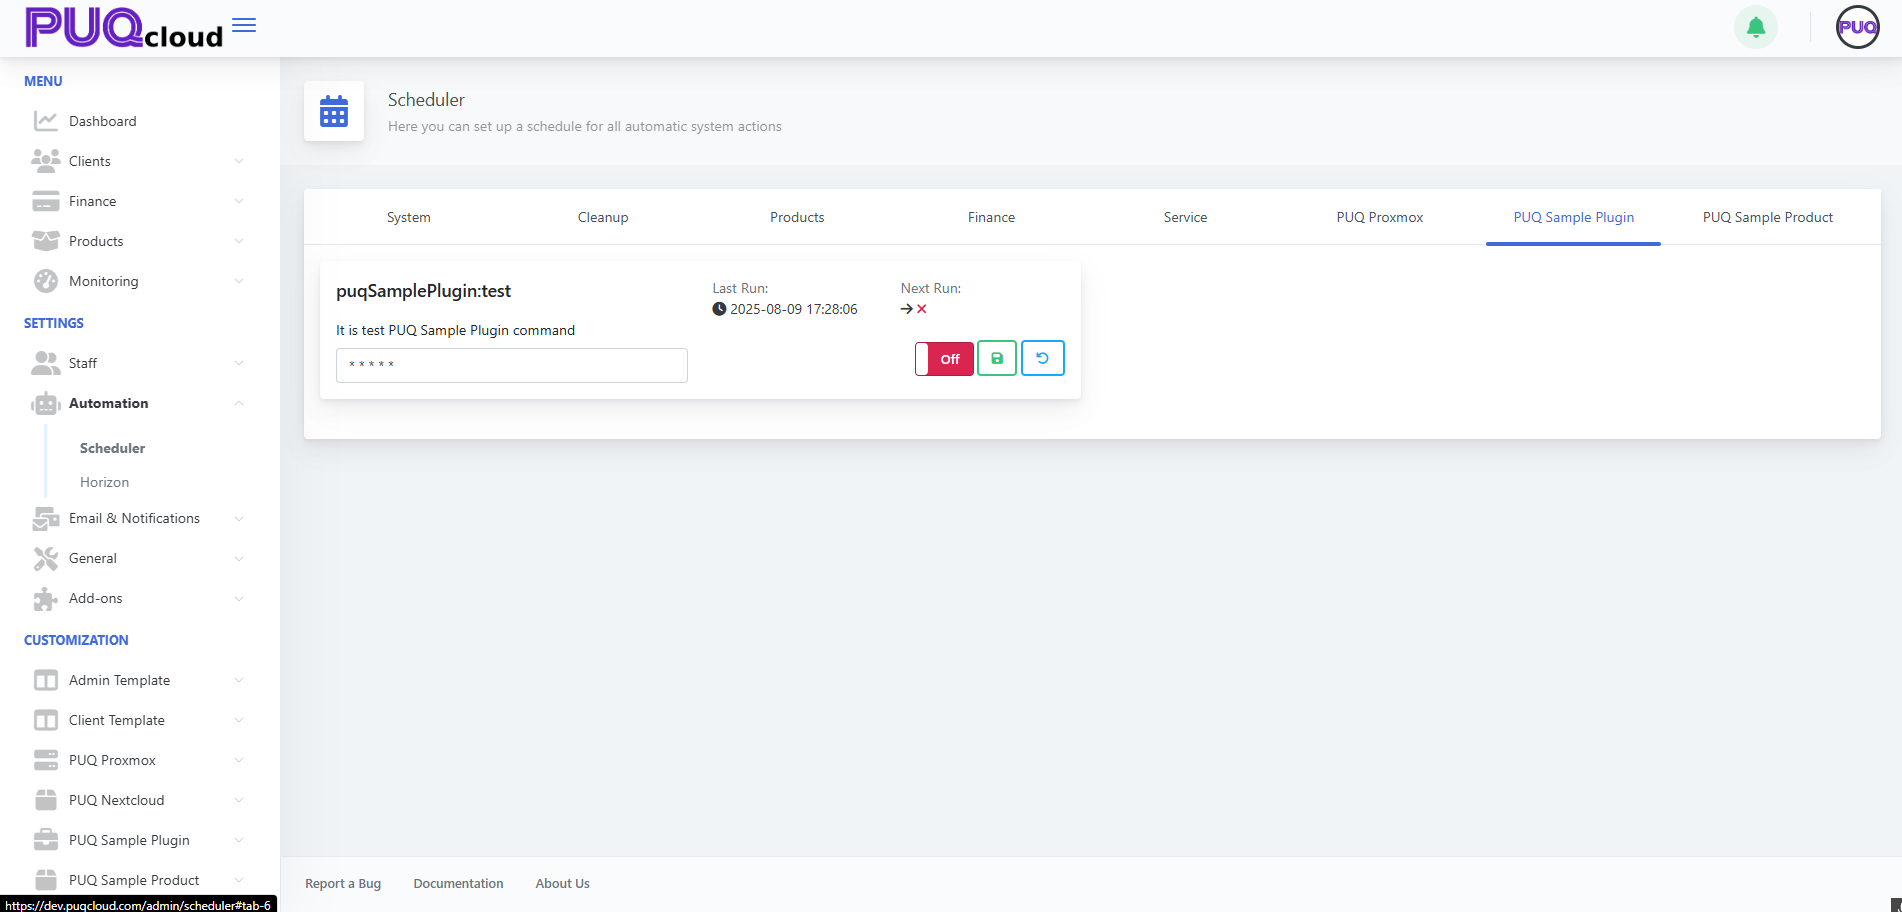](https://doc.puq.info/uploads/images/gallery/2025-09/image-1758198911958.png)PUQ Sample Plugin tab showing “puqSamplePlugin:test” (demo task) in Off state.
[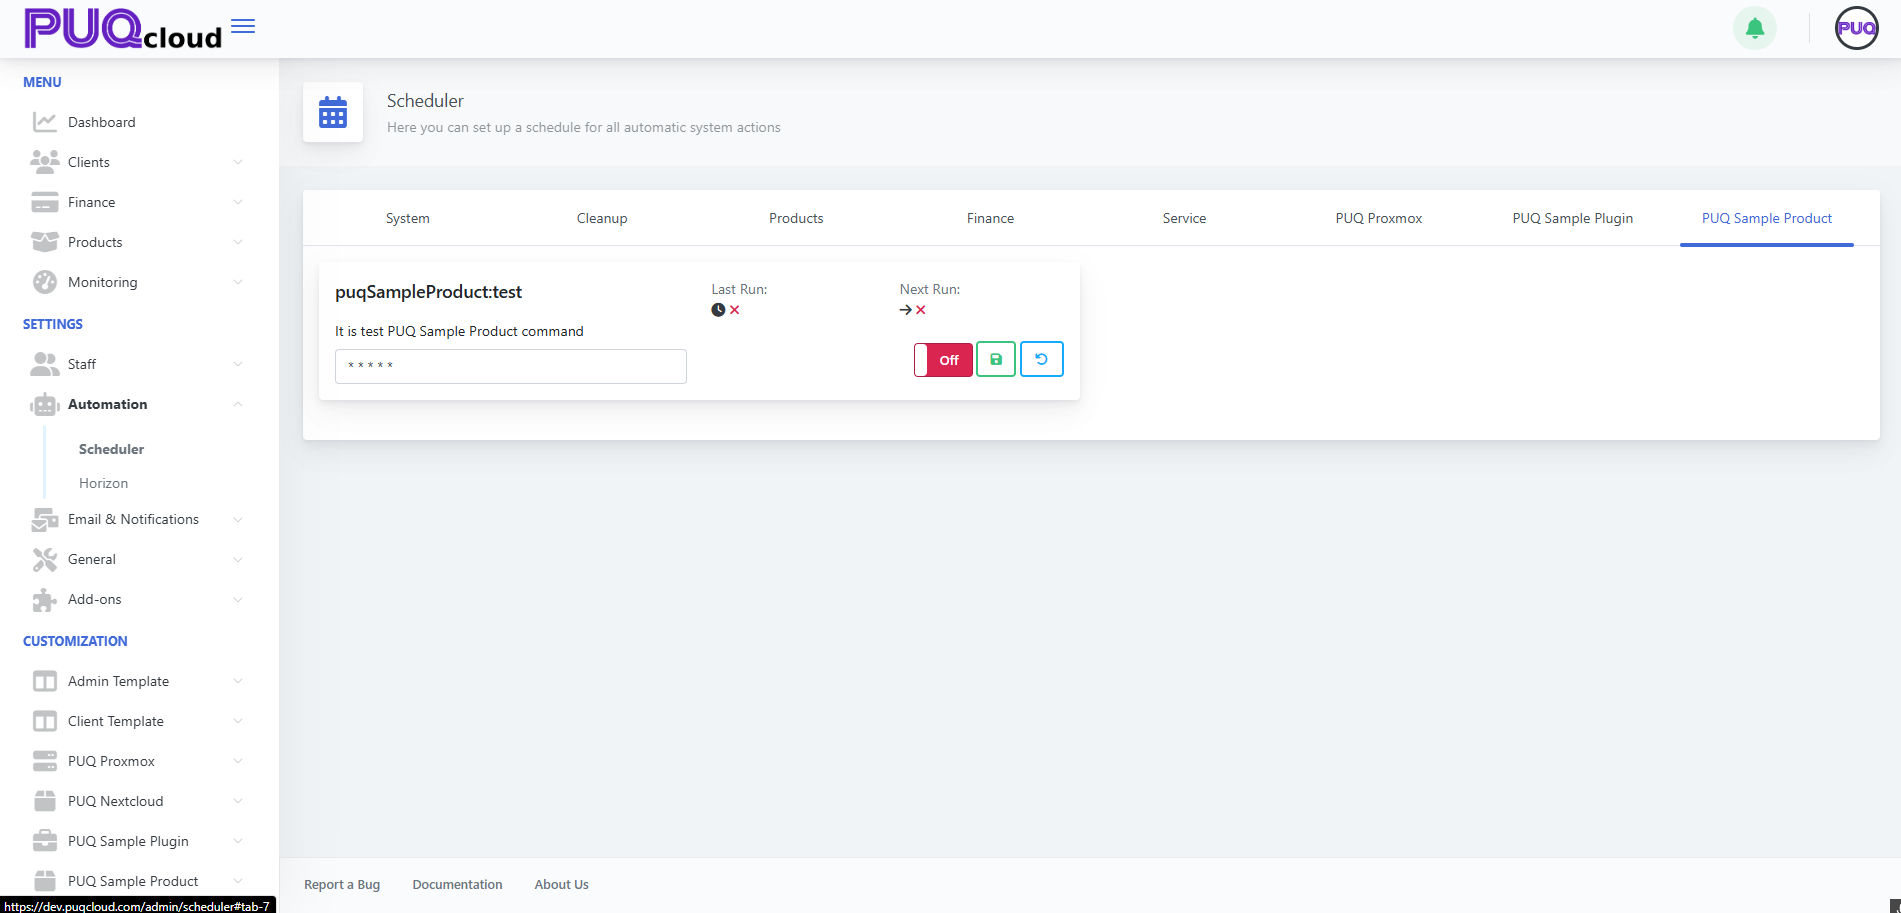](https://doc.puq.info/uploads/images/gallery/2025-09/image-1758198911975.png)PUQ Sample Product tab showing “puqSampleProduct:test” (demo task) in Off state.
- - - - - -
#### Cron cheat sheet (no pain)
| Expression | Meaning |
|---|
| `* * * * *` | Every minute |
| `*/5 * * * *` | Every 5 minutes |
| `*/10 * * * *` | Every 10 minutes |
| `0 * * * *` | At the start of every hour |
| `0 2 * * *` | Daily at 02:00 |
| `0 3 * * 1` | Mondays at 03:00 |
| `*/30 8-20 * * 1-5` | Every 30 min 08:00–20:00 on weekdays |
**Note:** Times follow the server’s timezone. If times look odd, verify the host TZ.
- - - - - -
#### Ready-made profiles (copy/paste)
##### “Starter” (safe and effective)
- Finance: `*/10 * * * *`
- Service Create/Suspend/Unsuspend: `*/10 * * * *`
- Service Cancellation: `*/30 * * * *`
- Service Termination: `0 4 * * *`
- Cleanup Lost: `*/30 * * * *`
- Cleanup: `0 3 * * *`
- Convert Price: `0 * * * *`
- SyncClusters: `*/5 * * * *`
- MakeBackups: `0 2 * * *`
##### “Nightly heavy-lifting”
- All heavy tasks (Termination/Cleanup/Backups) between **02:00–04:00**.
- Frequent light tasks during the day (Charge/Status/Sync).
- - - - - -
#### Safe-change checklist
1. **Environment** — test on **staging** first.
2. **Snapshot current crons** — copy or take a screenshot for rollback.
3. Change cron → **Save** → confirm **Next Run** updated.
4. Monitor 24–48h: **Last Run**, billing effects, backups, system load.
5. If issues appear — **Reset** on the card (or revert cron) and **Save**.
- - - - - -
#### Troubleshooting quick tree
**A. Task doesn’t run**
- Toggle is **Off**? → turn **On**.
- **Next Run** missing? → fix cron syntax and **Save**.
- Workers/cron down? → restart your queue workers/system cron.
**B. System load too high**
- Move heavy jobs to night (02:00–04:00).
- Reduce frequency (`*/10` → `*/30`, `*/30` → `0 * * * *`).
**C. Data gets stale (prices/sync/status)**
- Increase frequency (hourly → every 15 or 10 minutes).
- Check worker logs for task errors.
- - - - - -
#### Micro-FAQ
- **Why is “Next Run” showing an X?**
Task is **Off** or cron is invalid. Enable and/or fix cron, then **Save**.
- **Can I trigger a task now?**
UI focuses on schedules. For ad-hoc runs, temporarily set the cron to the nearest minute, **Save**, then revert.
- **How do I know it’s healthy?**
Watch **Last Run**, see that service lifecycle events occur on time, finance entries are up-to-date, and backups are fresh.
- - - - - -
##### Wrap-up
1. Define “day/night” profiles.
2. Heavy jobs at night; routine jobs every 5–15 minutes.
3. After any change: **Save** → check **Next Run**.
4. Use **Last Run** + worker logs as your health sensors.
# Manage Notification Senders in the Admin Area
### PUQcloud Panel
##### [Order Now](https://puqcloud.com/puqcloud-panel.php) | [Download](https://github.com/puqcloud/PUQcloud) | [FAQ](https://faq.puqcloud.com/)
Use this guide to add, edit, and configure the channels your system uses to send emails/alerts (PHP mailer, SMTP, Bell, etc.).
- - - - - -
#### Open the Notification Senders page
1. In the Admin Area, go to **Email & Notifications → Notification Senders**.
2. You’ll see all existing senders with their **Module** (delivery method) and quick actions.
*Notification Senders list with Edit/Delete actions.*
[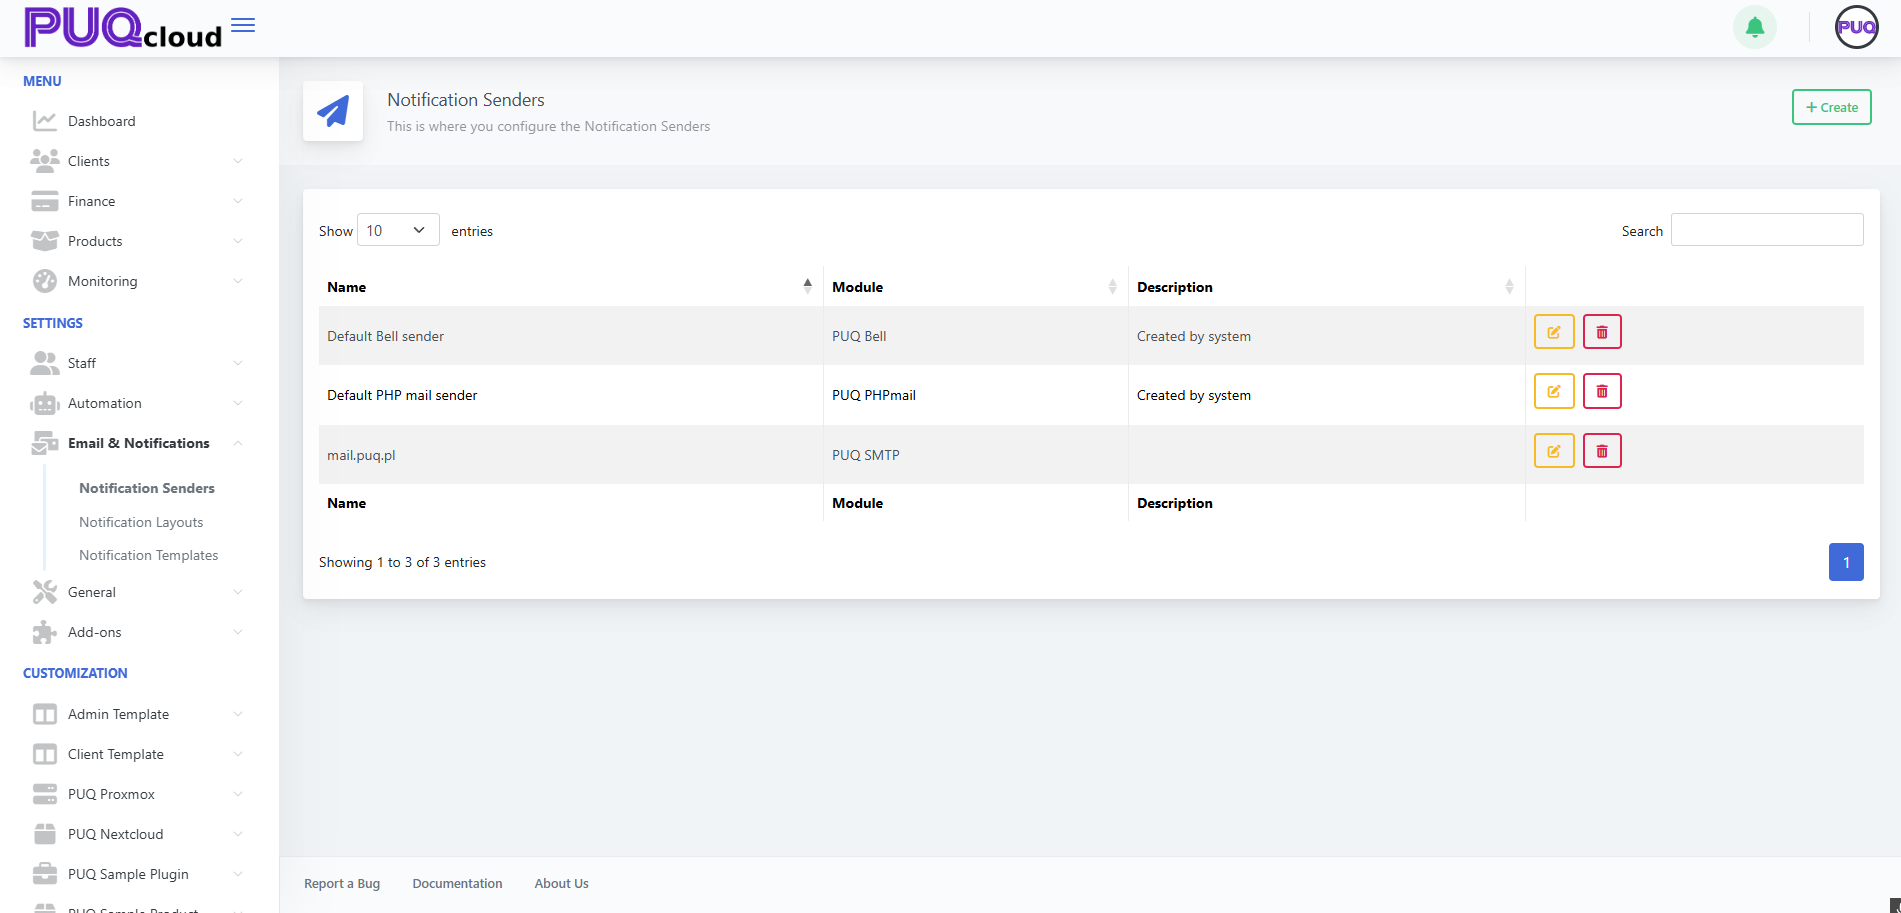](https://doc.puq.info/uploads/images/gallery/2025-09/image-1758199850390.png)
- - - - - -
#### Understand sender types (Modules)
When creating a sender you’ll choose a **Module**:
- **PUQ PHPMailer** — uses PHP mail; simple to set up, limited deliverability controls.
- **PUQ SMTP** — sends through your mail server (recommended for deliverability).
- **PUQ Bell** — internal “bell”/in-app notifications (no email).
- - - - - -
#### Create a new sender
1. Click **+ Create** (top-right).
2. In the modal, fill **Name** (e.g., “Support SMTP”) and choose a **Module**.
*“Create Notification Sender” modal with Module dropdown.*
[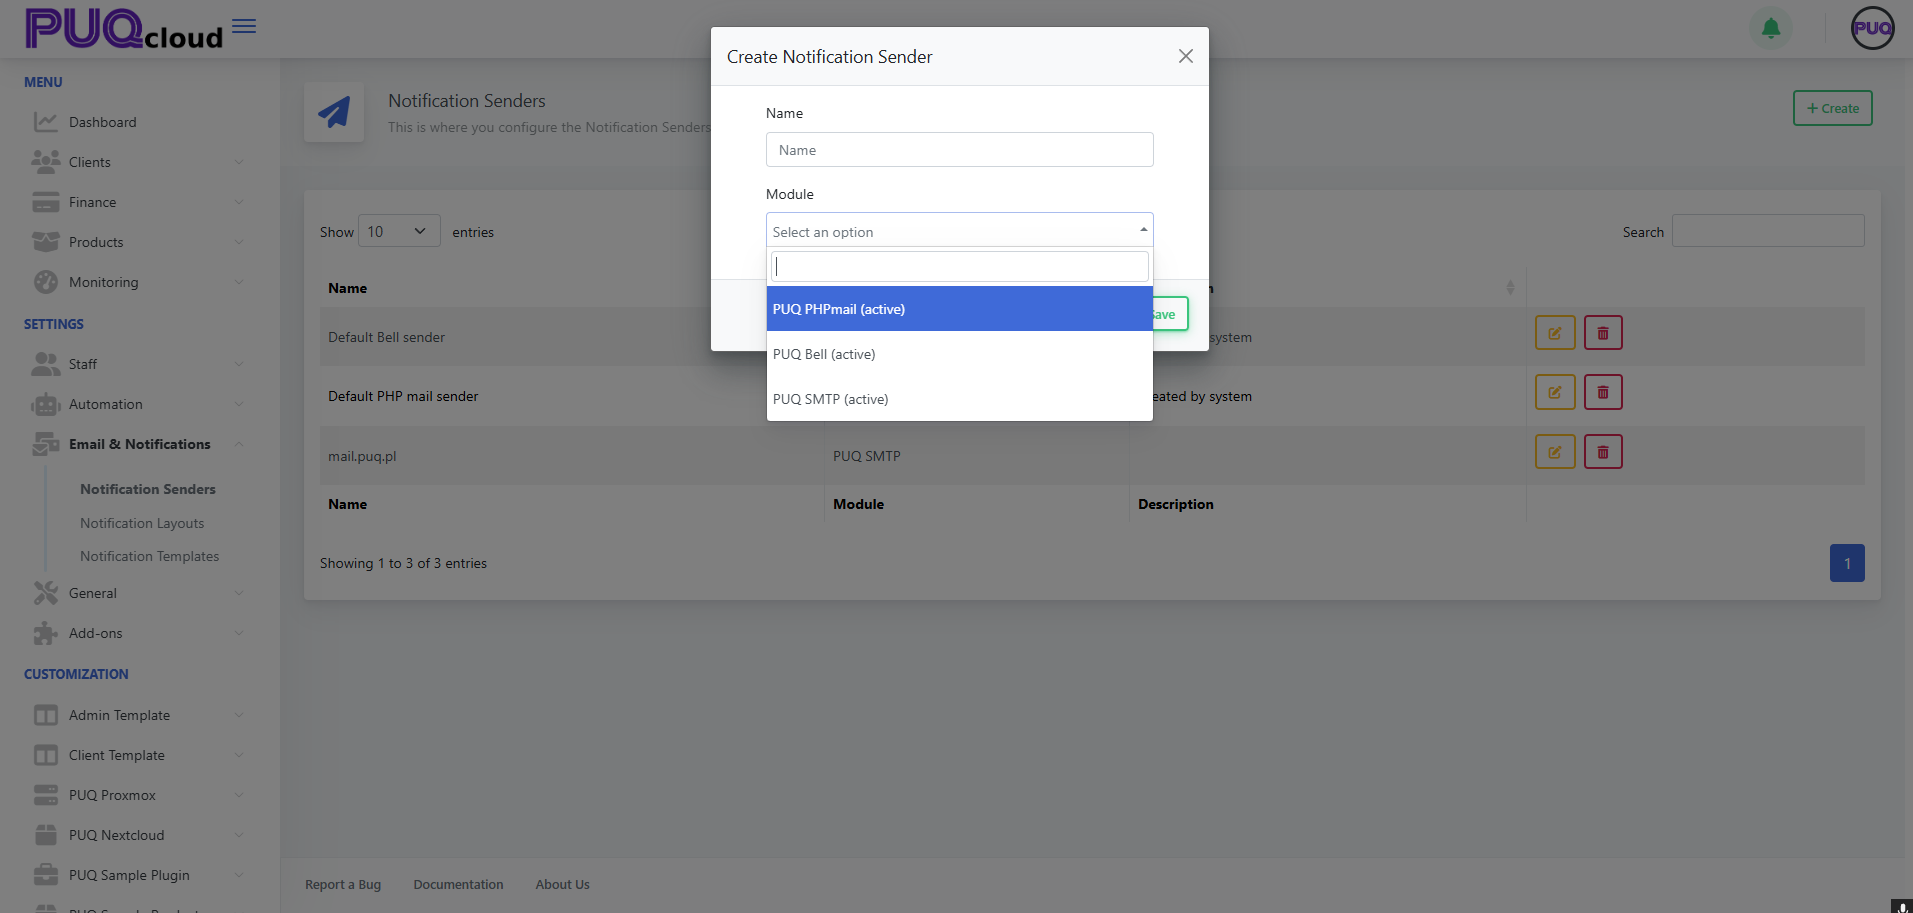](https://doc.puq.info/uploads/images/gallery/2025-09/image-1758199862367.png)
Tip: Create one sender per use case (e.g., “System Alerts (SMTP)”, “Marketing (SMTP)”, “In-app Bell”).
- - - - - -
#### Configure SMTP details (if you chose **PUQ SMTP**)
After saving the modal, you’ll land on the sender’s settings page. Fill the fields:
- **Name / Description** — friendly label for admins.
- **Email** — the “From” address (often must be a verified mailbox/domain).
- **Sender Name** — the “From name” (e.g., “PUQ Cloud”).
- **Server** — SMTP host (e.g., `mail.example.com`).
- **Port** — usually **465** (SSL) or **587** (TLS).
- **Encryption** — **SSL**/**TLS**/**None** per your provider.
- **Username / Password** — mailbox credentials.
Click **Test Connection** to verify, then **Save**.
*SMTP sender edit form with Test Connection button.*
[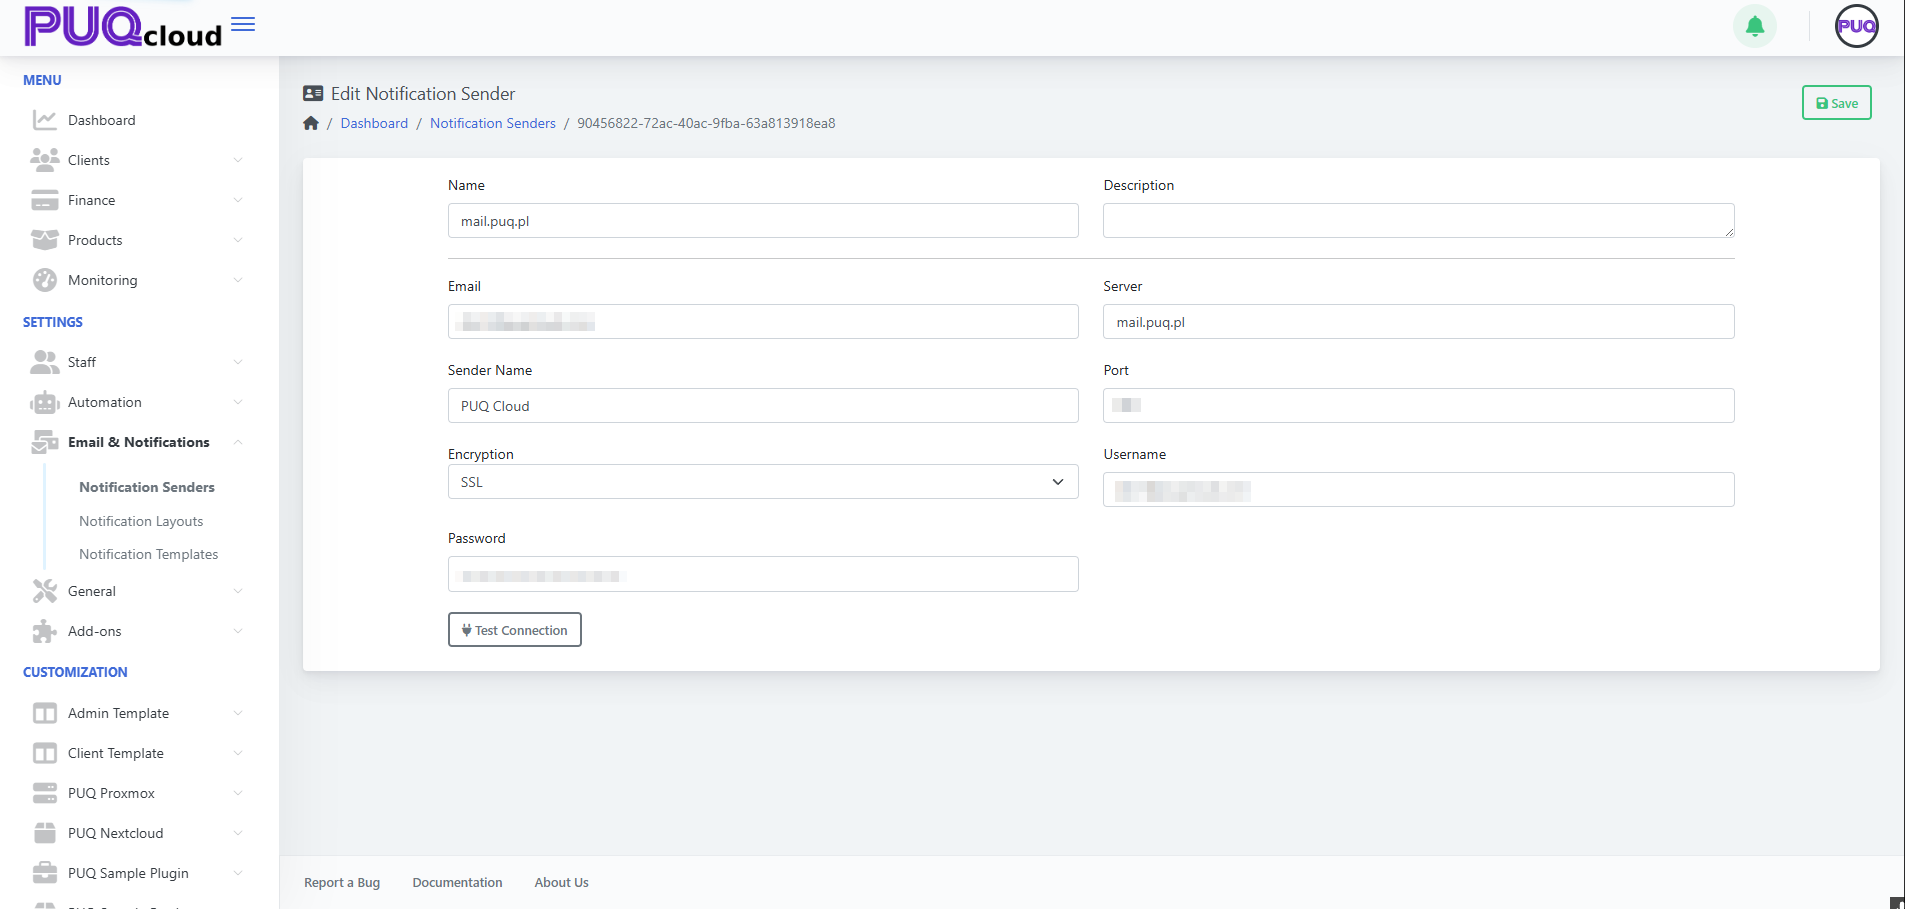](https://doc.puq.info/uploads/images/gallery/2025-09/image-1758199886166.png)
Deliverability tips
• Use a dedicated subdomain (e.g., `mail.example.com`).
• Set up SPF, DKIM, and DMARC where you host DNS.
• Match the **Email** domain with the authenticated SMTP domain.
- - - - - -
#### Edit or remove a sender
- From the list, click **✏️ Edit** to update any field and **Save**.
- Click **🗑️ Delete** to remove a sender (you’ll be asked to confirm).
Heads-up: If a sender is referenced by a **Notification Template** or workflow, update those to the new sender before deleting.
- - - - - -
#### Best practices
- Maintain at least **one SMTP sender** for production.
- Keep separate senders for **transactional** vs **marketing** mail.
- Periodically **Test Connection** after password/host changes.
- Restrict who can edit senders via **Admin Groups/Roles**.
- - - - - -
#### Troubleshooting checklist
- ❌ **Test Connection fails** → verify host/port/encryption; check firewall blocks.
- 📬 **Emails land in spam** → fix SPF/DKIM/DMARC; use consistent “From” domain; warm up IP if applicable.
- 🔐 **Auth errors** → re-enter username/password; confirm app-passwords if using Google/Microsoft; ensure 2FA policies allow SMTP.
- - - - - -
That’s it! Your Notification Senders are now set up and ready to power templates and automated notifications.
# Manage Notification Layouts in the Admin Area
### PUQcloud Panel
##### [Order Now](https://puqcloud.com/puqcloud-panel.php) | [Download](https://github.com/puqcloud/PUQcloud) | [FAQ](https://faq.puqcloud.com/)
Below is a compact, step-by-step guide to creating and customizing the HTML wrappers (“layouts”) that your notification templates use. You’ll: find the section, add a layout, and tailor the HTML/CSS with live preview and multi-language tabs.
- - - - - -
#### Open Notification Layouts
- Go to **Email & Notifications → Notification Layouts**.
- You’ll see the built-in **Admin Default Layout** and **Client Default Layout**.
**What you can do here**
- **✏️ Edit** an existing layout.
- **🗑️ Delete** a custom layout (system layouts are protected).
- **+ Create** a new layout.
*Notification Layouts list with built-in Admin/Client entries.*
[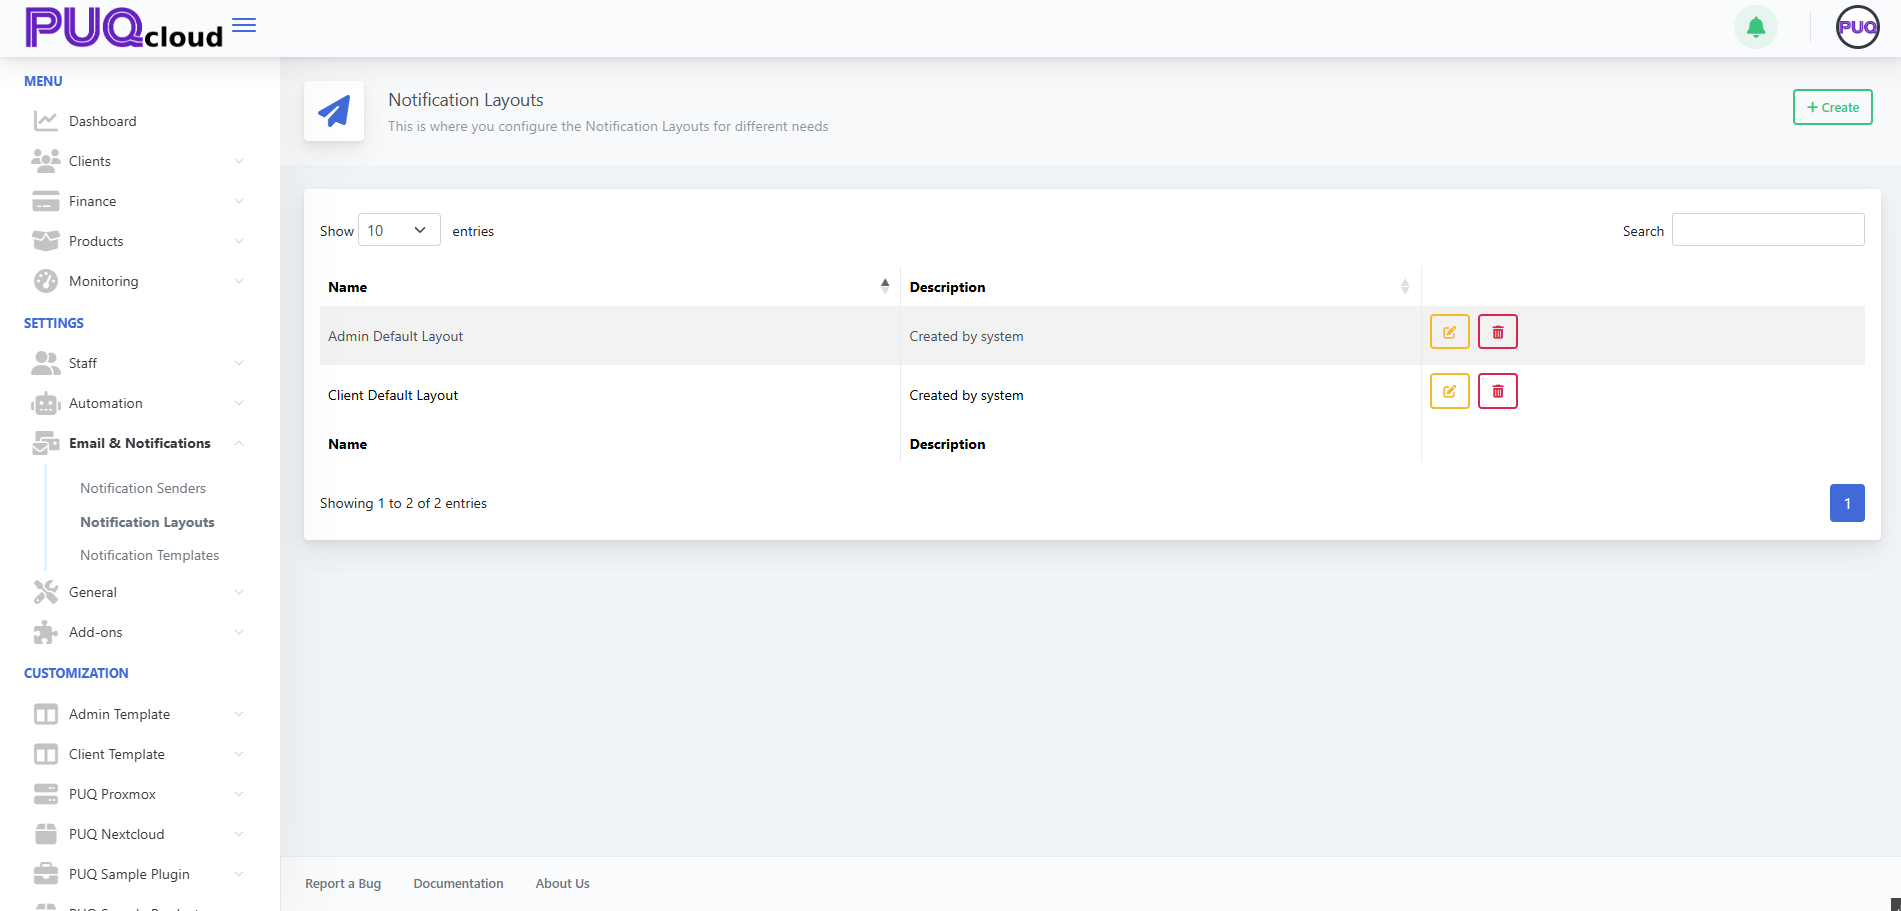](https://doc.puq.info/uploads/images/gallery/2025-09/image-1758200468585.png)
- - - - - -
#### Create a new layout
1. Click **➕ Create** (top-right).
2. Give the layout a **Name** (e.g., “Marketing Layout”).
3. Click **Save**.
*“Create Notification Layout” modal (Name).*
[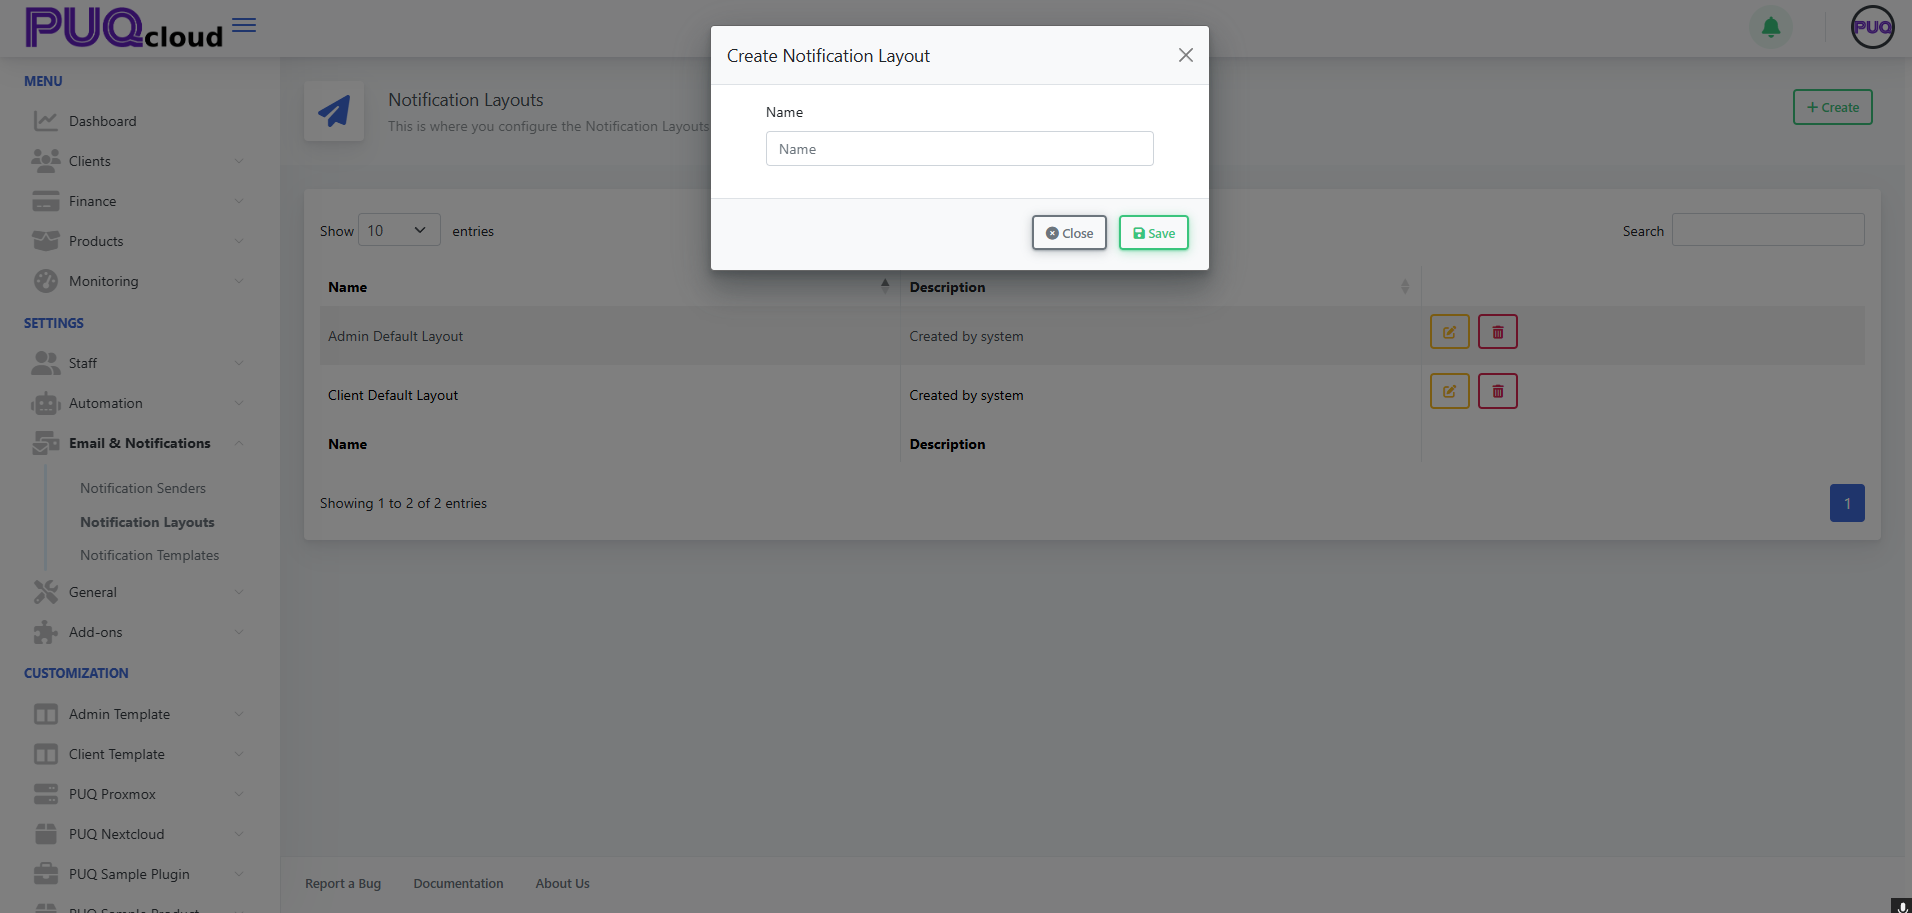](https://doc.puq.info/uploads/images/gallery/2025-09/image-1758200473815.png)
- - - - - -
#### Edit a layout (HTML/CSS + preview)
Open a layout (e.g., **Admin Default Layout**). The editor provides:
- **Multi-language tabs** across the top (🇺🇸 English, 🇺🇦 Ukrainian, 🇵🇱 Polish, 🇫🇷 French).
- A **code editor** (left) for your HTML/CSS wrapper.
- A **live HTML preview** (right) showing how variables render.
##### Key variables/partials you’ll use
- `{{ $title }}` – Notification/title string.
- `{!! $content !!}` – The body that each specific notification template injects.
- `{{ $locale }}` – Current language code (often used on the `` tag).
- Optional: `{{ $signature }}` or `{!! $signature !!}` if your layout includes a signature partial (depends on your installation).
Tip: Your layout is the *frame*. Individual notification templates only inject their own content into `{!! $content !!}`. Keep shared branding, header, footer, fonts, and styling in the layout.
*“Edit Notification Layout” (Admin Default) with code editor and live preview.*
[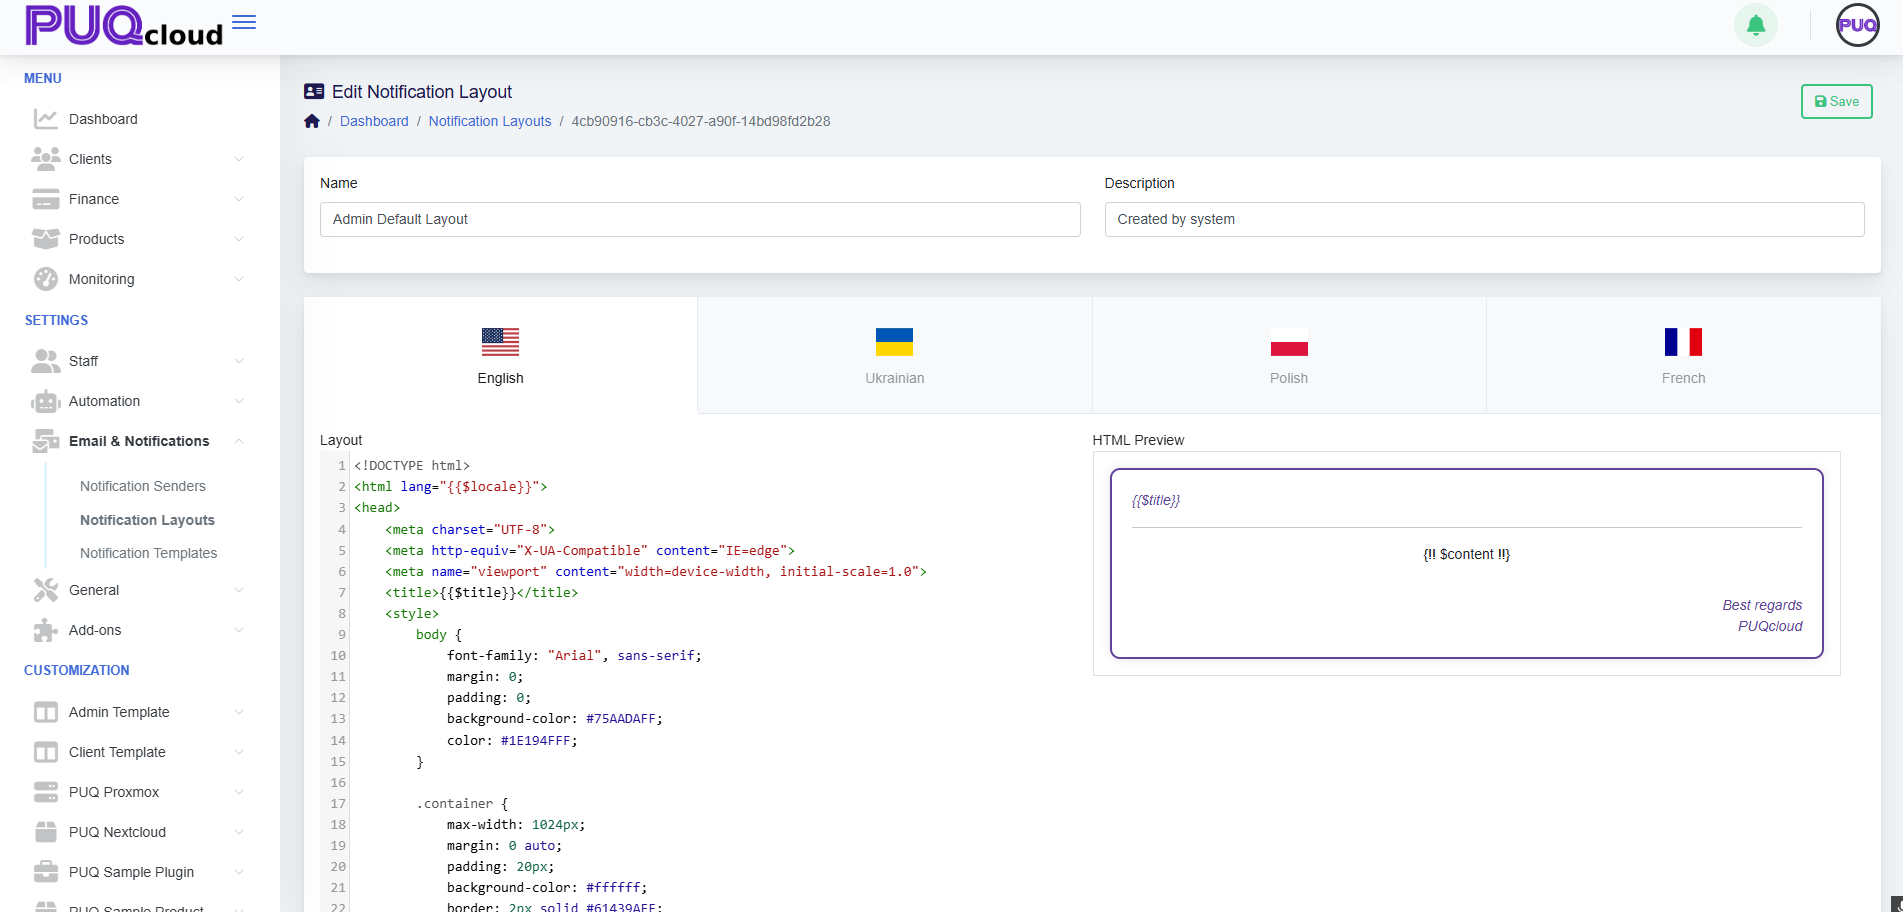](https://doc.puq.info/uploads/images/gallery/2025-09/image-1758200496592.png)
- - - - - -
#### Style a client-facing layout
For the **Client Default Layout**, you might include:
- A branded header with gradient background.
- A **CTA button** (e.g., “Visit Client Area”).
- A footer with company signature.
Best practice: Keep fonts, spacing, and colors consistent with your website, and ensure the CTA is visible in both light/dark email clients.
*“Edit Notification Layout” (Client Default) with branded CTA preview.*
[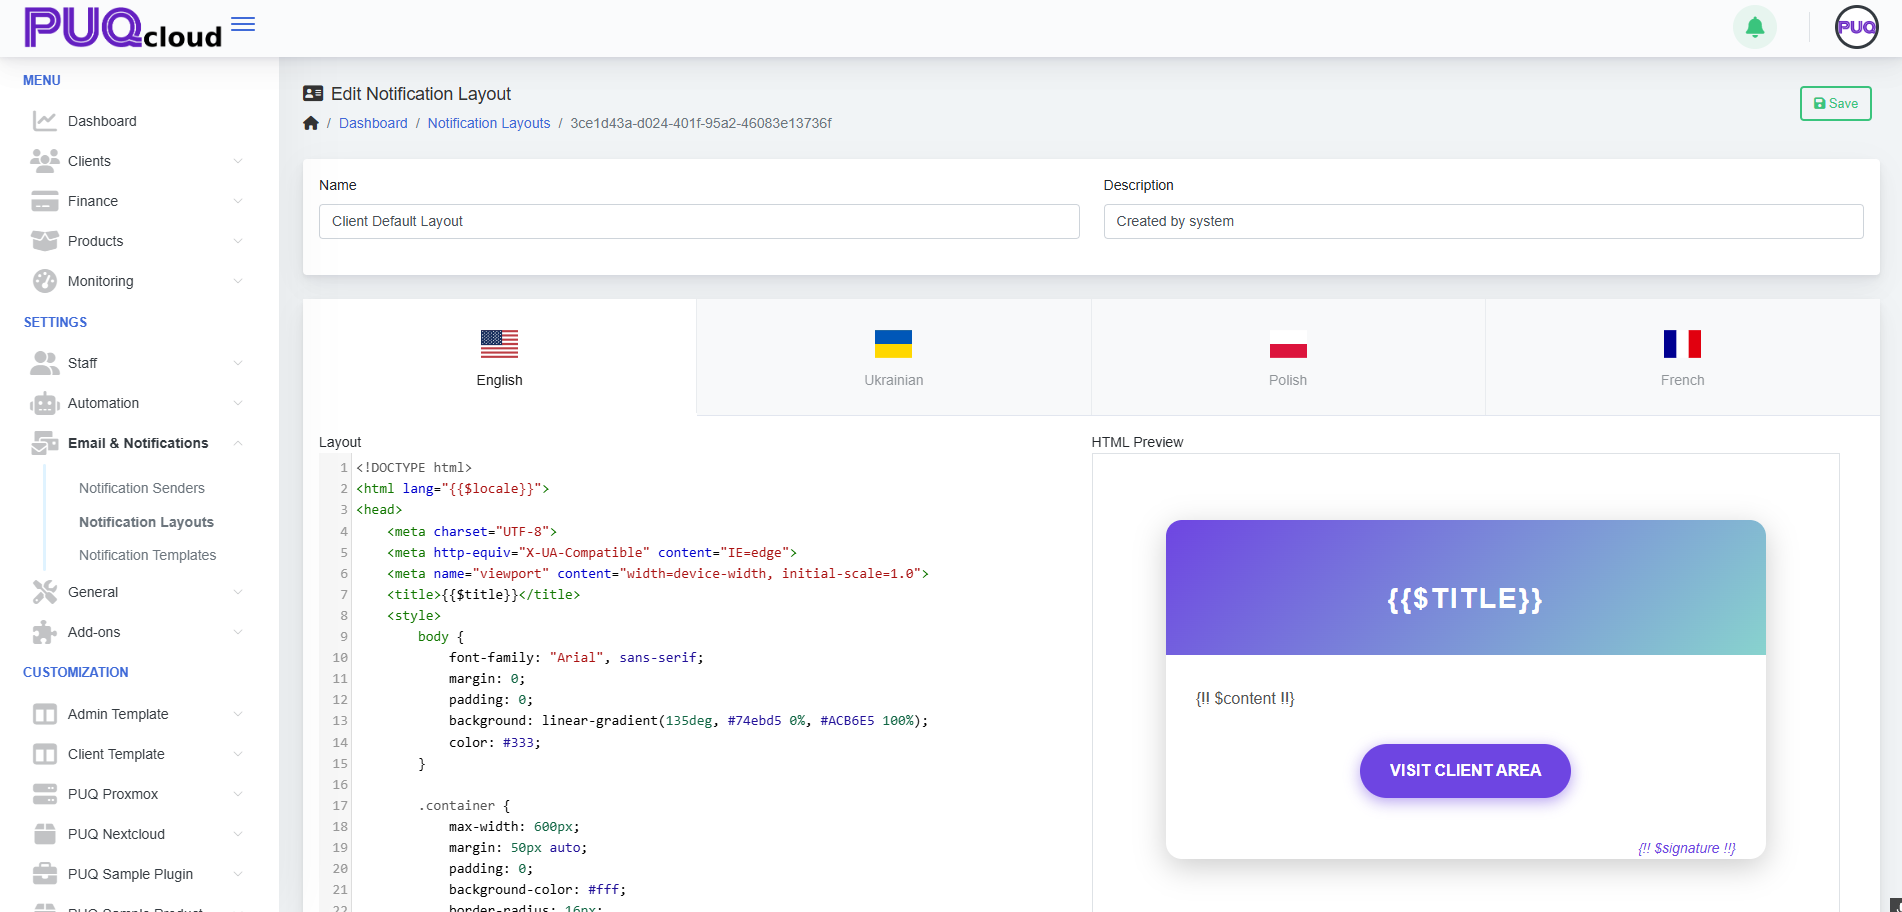](https://doc.puq.info/uploads/images/gallery/2025-09/image-1758200514588.png)
- - - - - -
#### Apply layouts to your notification templates
- Each **notification template** (e.g., “Invoice Paid”, “Password Reset”) can reference one of your layouts.
- Use the **Client Default Layout** for customer-facing emails and **Admin Default Layout** for staff/internal alerts.
If your system allows choosing the layout inside each template: open **Email & Notifications → Notification Templates**, pick the template, and select the layout from the dropdown. (If not present, your installation may assign layouts automatically by scope—Client vs Admin.)
- - - - - -
#### Test before you go live
- Use **Notification Senders** (SMTP/PHPMail/Bell) to ensure delivery works.
- Send a **real test** for each language tab you changed.
- Check the email in a few clients (Gmail, Outlook, Apple Mail) and on mobile.
- - - - - -
#### Tips & safeguards
- **Do not remove** `{!! $content !!}` — your template body inserts here.
- **Keep inline styles** where possible; many email clients strip external CSS.
- **Avoid heavy JS** (email clients ignore it).
- **Dark mode**: test contrast (buttons and text).
- **Language tabs**: update all languages to avoid fallback mismatches.
- **Versioning**: copy your HTML to a snippet file or Git before big edits.
- - - - - -
#### Quick Troubleshooting
- **Broken layout?** Revert to the default layout or restore your last working HTML.
- **Variables not rendering?** Ensure you used the correct blade/templating syntax (`{{ }}` for escaped, `{!! !!}` for raw HTML).
- **Images blocked?** Host images over HTTPS and add `alt` text; consider base64 for critical icons.
- - - - - -
That’s it! Your notifications are now consistent, branded, and ready to ship.
# Manage Notification Templates (Admin Area)
### PUQcloud Panel
##### [Order Now](https://puqcloud.com/puqcloud-panel.php) | [Download](https://github.com/puqcloud/PUQcloud) | [FAQ](https://faq.puqcloud.com/)
Here’s a clear, step-by-step guide to managing **Notification Templates** in the Admin Area.
- - - - - -
#### Open the Templates list
- Go to **Email & Notifications → Notification Templates**.
- This page lists all built-in (“**SYSTEM**”) and any custom templates, grouped by category (Staff/Client – Operational/Administrative).
- Use the **Search** box to filter by name and the **✏️ Edit** button to customize a template.
Notification Templates list with categories and edit actions.
[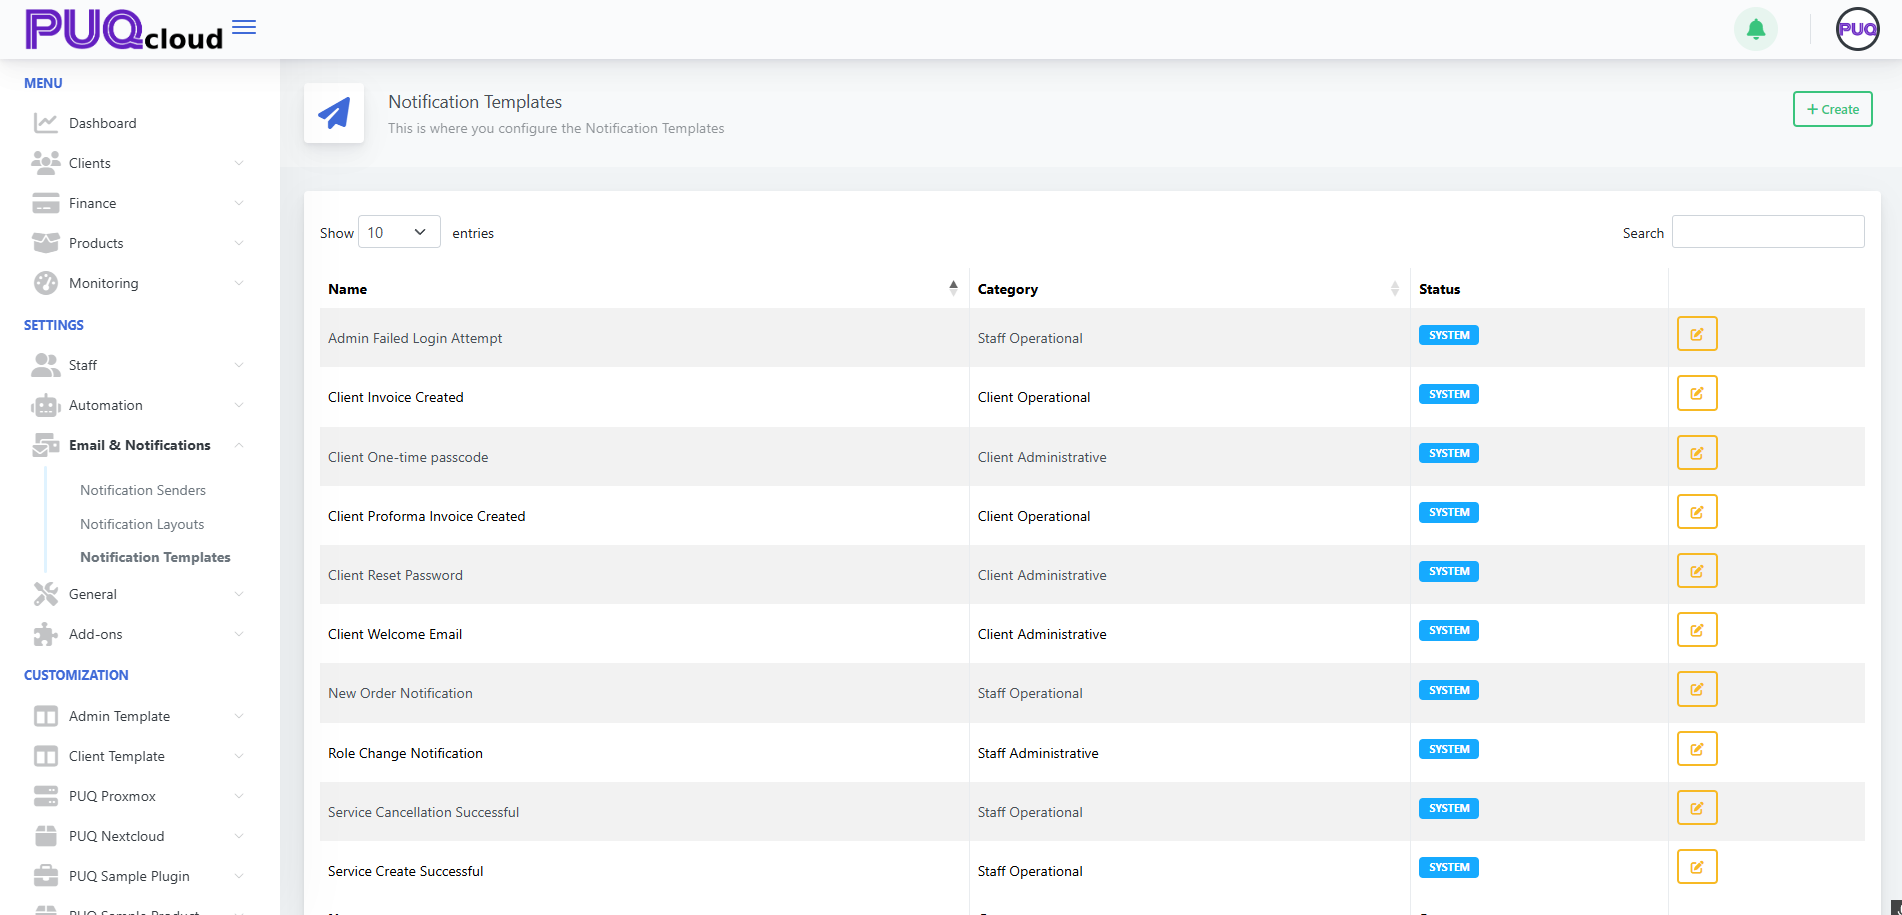](https://doc.puq.info/uploads/images/gallery/2025-09/image-1758200948928.png)
- - - - - -
#### Create a new template
1. Click **+ Create** (top-right).
2. Enter a **Name**.
3. Pick a **Category**:
- **Staff Administrative**
- **Staff Operational**
- **Client Administrative**
- **Client Operational**
4. Click **Save**.
Tip: Categories help route who receives the message and where it shows up in the UI.
“Create Notification Template” modal (Category).
[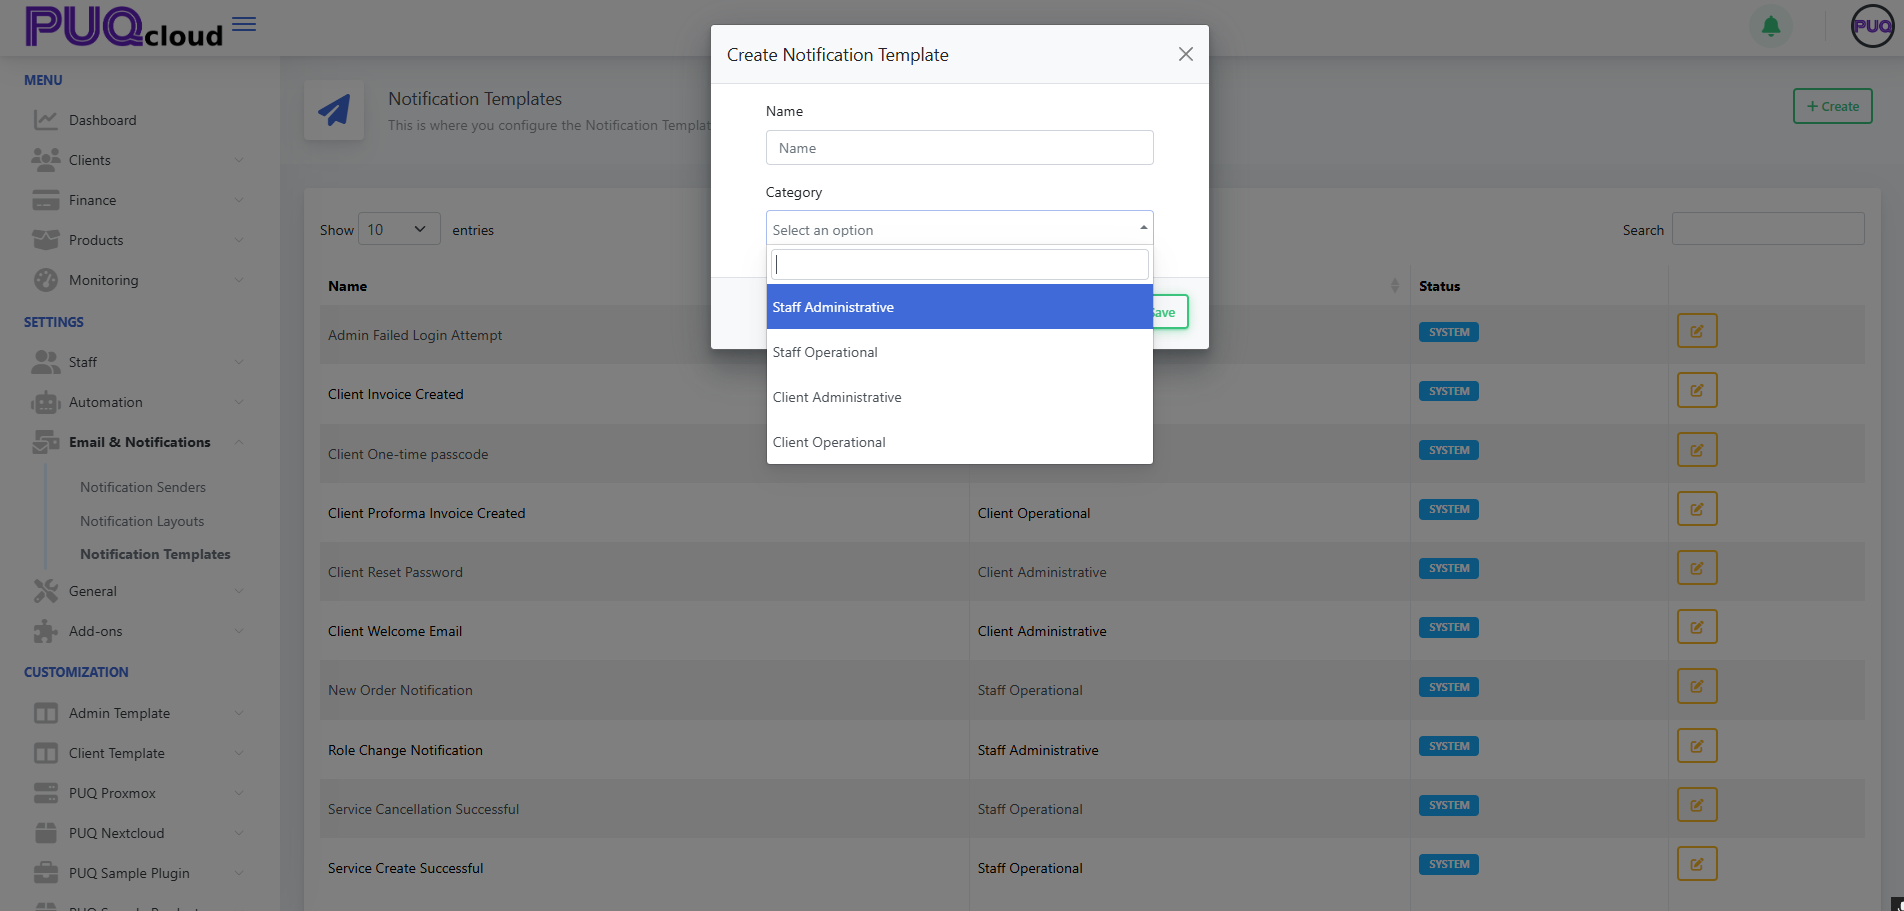](https://doc.puq.info/uploads/images/gallery/2025-09/image-1758200953032.png)
- - - - - -
#### Edit a template (content & languages)
When you edit a template you’ll see:
- **Language tabs** (EN/UA/PL/FR): maintain localized versions for each language you support.
- **Subject**: the email subject line for that language.
- **Text Mini**: a short/plain snippet (great for SMS/push or the top of text-only emails).
- **HTML Preview**: a live preview of the HTML you’re composing on the left.
Changes are independent per language; remember to save after editing each language if you switch tabs.
Edit Notification Template: language tabs, Subject, Text Mini, live preview.
[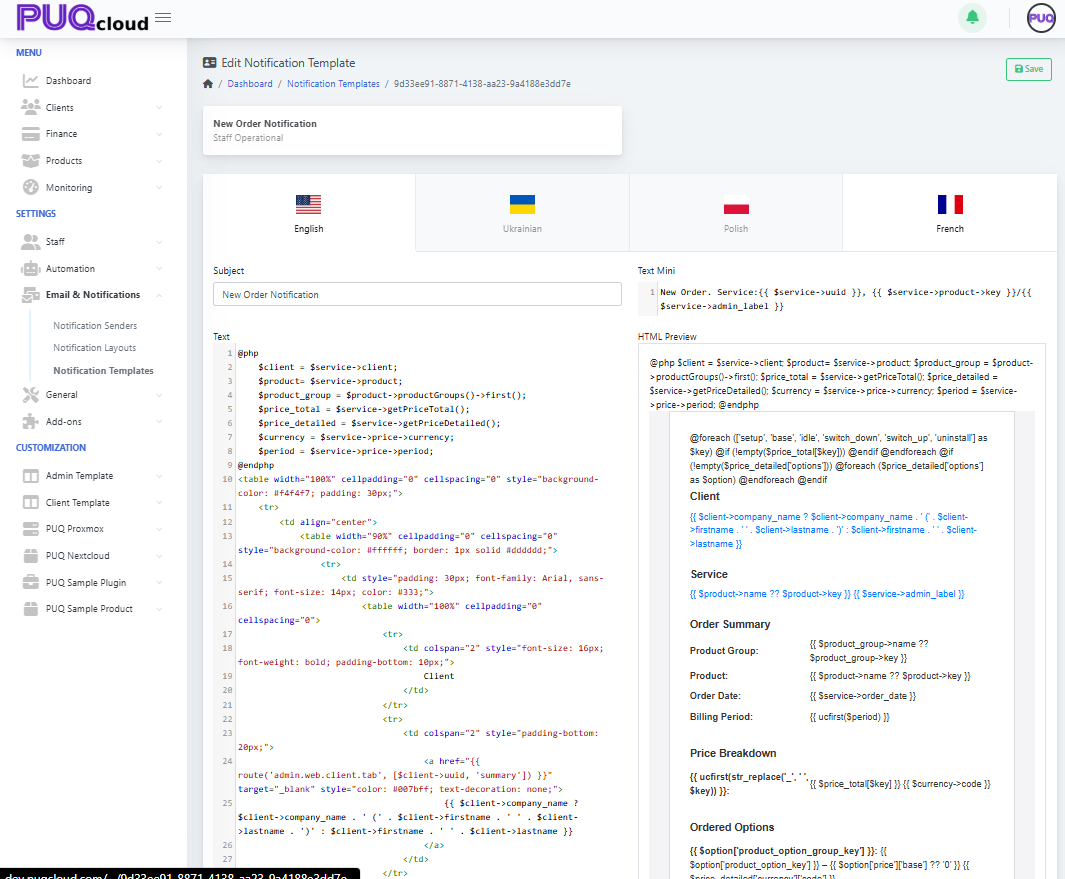](https://doc.puq.info/uploads/images/gallery/2025-09/image-1758200965950.png)
- - - - - -
#### Write the message (variables & logic)
- The editor supports template variables and light blade-style syntax. Common objects include:
- `$client` (e.g., `$client->company_name`, `$client->firstname`)
- `$service` (e.g., `$service->uuid`, `$service->price`, `$service->product`)
- `$product`, `$price_detail`, `$currency`, `$period`, etc., depending on the event
- Use control structures (`@if`, `@foreach`) to conditionally render parts of the email.
Examples you’ll often see:
```blade
{{ $service->uuid }}
{{ $client->firstname }} {{ $client->lastname }}
@foreach($price_detailed['options'] ?? [] as $option)
{{ $option['name'] }} — {{ $option['price'] }}
@endforeach
```
- Keep **Text Mini** short and human-readable; reserve full markup for the HTML body.
- Watch the **HTML Preview** on the right to validate your structure and data placeholders.
- - - - - -
#### Best practices
- **Clone behavior:** Editing a SYSTEM template effectively overrides it (your changes become the active version); you can always re-apply defaults later by copying from a fresh environment.
- **Keep it accessible:** Use semantic HTML and inline styles; avoid images for critical info.
- **Localization parity:** Ensure every language tab has at least a basic subject/body.
- **Personalization:** Prefer `$client->firstname` over generic “Dear Customer”.
- **Links & safety:** Use absolute URLs and include a clear **call to action** (e.g., “Visit Client Area”).
- **Testing:** Trigger the real event (e.g., create a proforma invoice) in a sandbox account to see the final message flowing through your selected **Notification Sender** (SMTP/PHPMail/Bell).
- - - - - -
#### Troubleshooting
- **Variables show blank:** That variable isn’t available for the event. Inspect other defaults for that event to see which fields are used.
- **Rendering issues:** Check unclosed tags and preview; simplify nested tables if needed.
- **Wrong language sent:** Confirm the client’s preferred language and that the localized version exists.
- - - - - -
##### Related setup (optional but recommended)
- Configure **Email & Notifications → Notification Senders** (SMTP, PHPMail, Bell) so mail actually goes out.
- Adjust **Notification Layouts** if you want a shared header/footer or branding that wraps your templates.
That’s it—you’re ready to create polished, localized notifications that fit your brand and workflows.
# DNS Manager — Server Groups
### PUQcloud Panel
##### [Order Now](https://puqcloud.com/puqcloud-panel.php) | [Download](https://github.com/puqcloud/PUQcloud) | [FAQ](https://faq.puqcloud.com/)
#### 1) What Server Groups are for
A **Server Group** is a logical pool of one or more DNS servers that act together as the authoritative nameservers for the zones you assign to the group.
You define the public **NS hostnames** for the group (what registrars and resolvers will see), and you attach real DNS servers to the group (PowerDNS or HestiaCP via PUQcloud modules). Any **Zone** linked to this group will be created/updated on **all** servers in the group.
**Path:** **Settings → DNS Manager → Server Groups**
[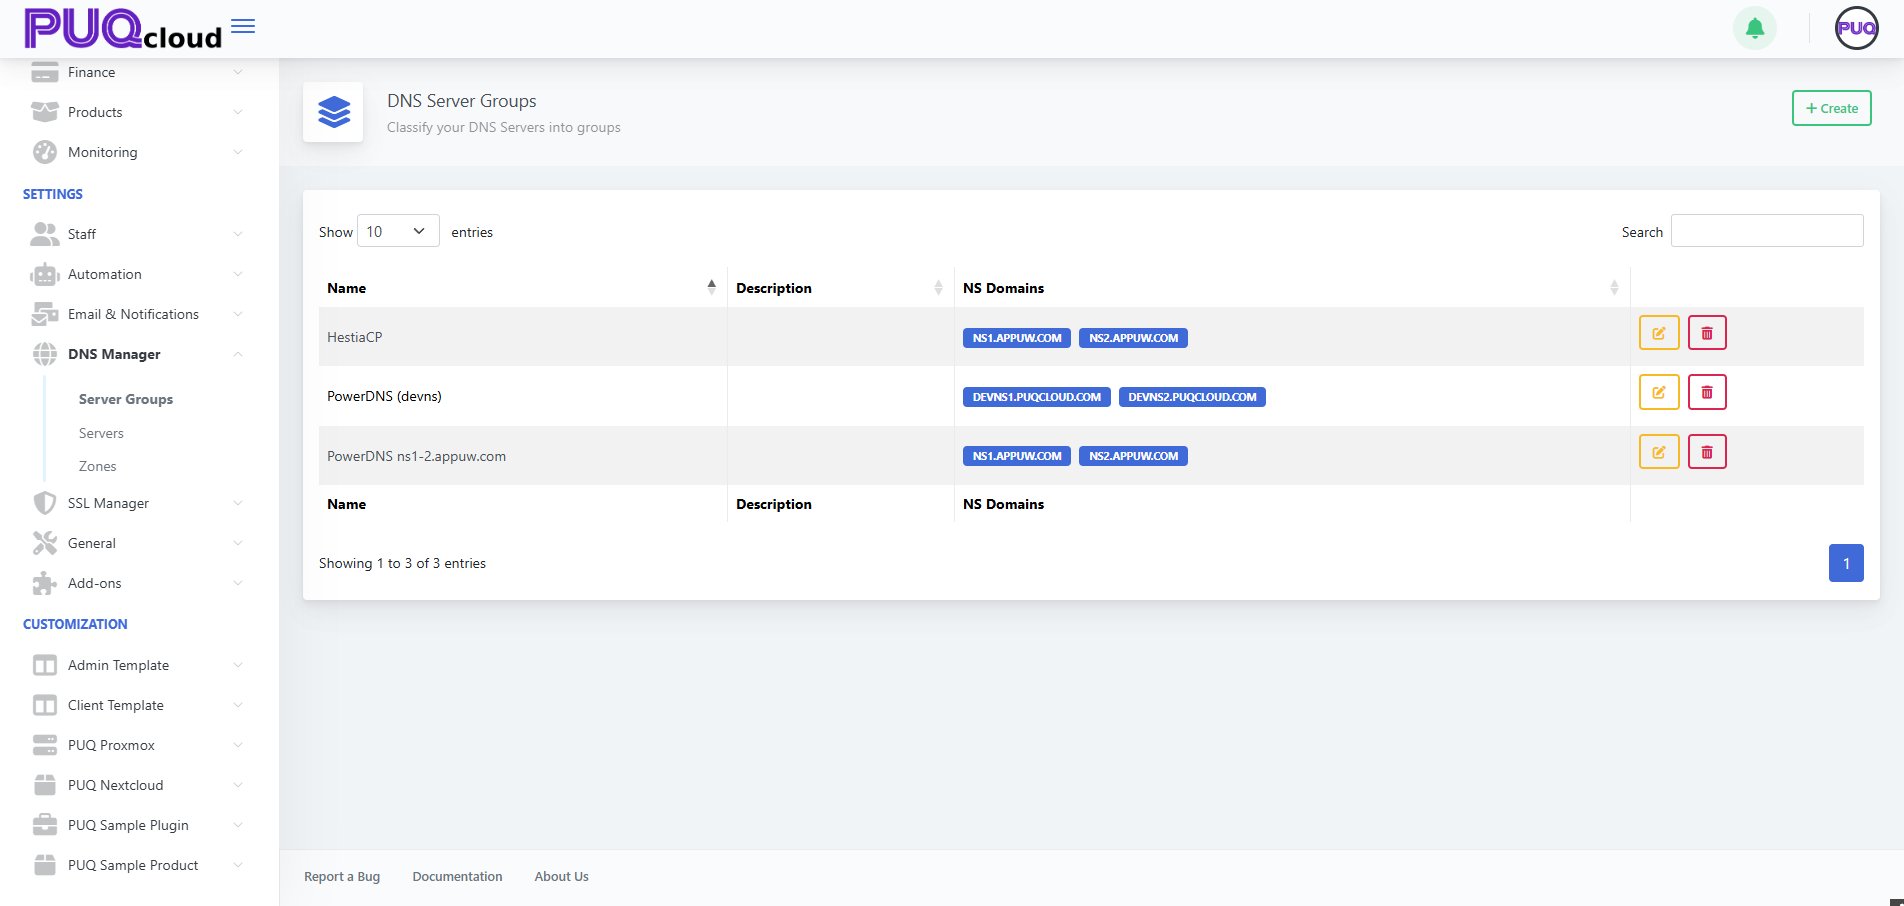](https://doc.puq.info/uploads/images/gallery/2025-11/1.png)
- - - - - -
#### 2) When you need groups
- You operate **two or more** DNS servers for redundancy.
- You separate **production** vs **staging/tech** DNS (e.g., ACME DNS-01 challenge zone).
- You roll out **multi-region** authoritative DNS and want a single switch to move zones between clusters.
- You’re **migrating** from one platform to another and need both pools side by side.
- - - - - -
#### 3) Supported modules (for servers you’ll attach)
- **PUQ PowerDNS** — talks directly to PowerDNS HTTP API (typically port `8081`).
- **PUQ HestiaCP DNS** — manages zones/records through HestiaCP API.
> You can mix group types: one group may contain only PowerDNS nodes, another only HestiaCP, etc.
- - - - - -
#### 4) Before you start (prereqs)
- Prepare your **NS hostnames** (e.g., `ns1.example.com`, `ns2.example.com`) and make sure they will resolve to the public IPs of your real DNS servers.
- Add your physical DNS servers in **DNS Manager → Servers** and verify them with **Save and Test**.
- If these hostnames are used for **domain delegation**, update them at the registrar after you finish (or set glue records if needed).
- - - - - -
#### 5) Creating a Server Group — step by step
1. Go to **Server Groups** and click **+ Create**.
2. Fill in **Name** and (optional) **Description**.
3. In **NS Domains**, enter the authoritative NS hostnames — **one per line** (e.g., `ns1.appuw.com`, `ns2.appuw.com`).
4. Click **Save**.
[](https://doc.puq.info/uploads/images/gallery/2025-11/2.png)
- - - - - -
#### 6) Editing a Server Group (fields explained)
Open the group you just created.
[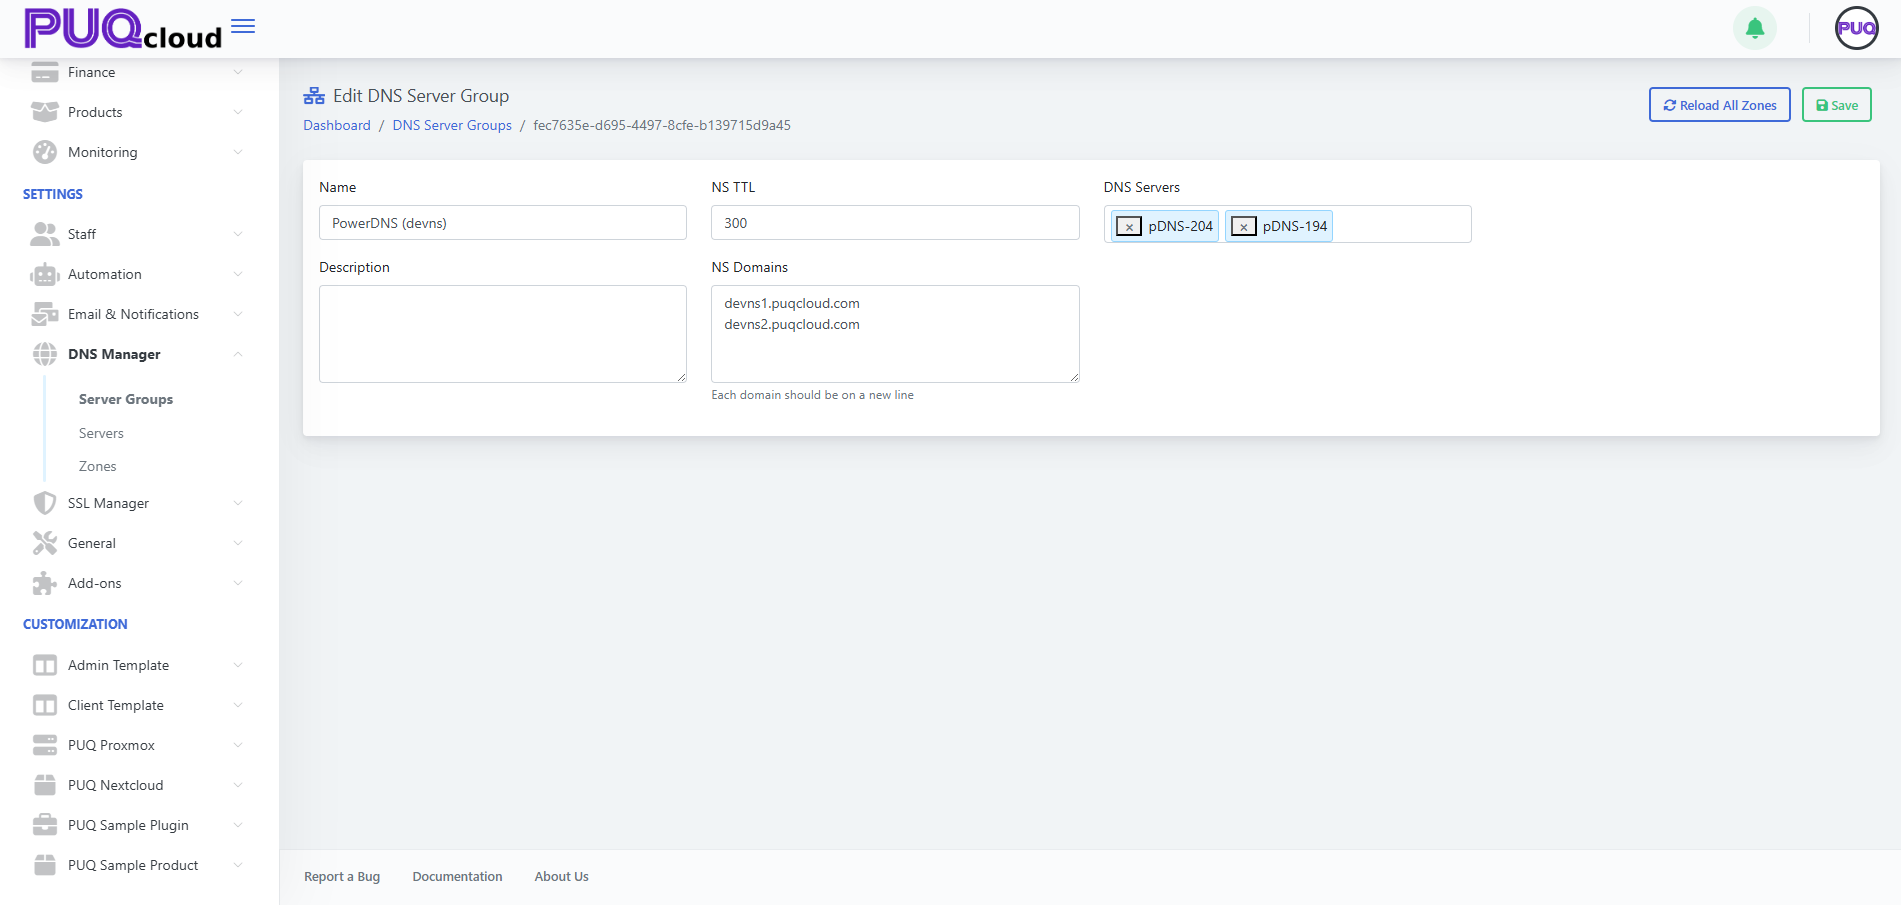](https://doc.puq.info/uploads/images/gallery/2025-11/image-1763040701669.png)
##### Fields
| Field | Purpose | Notes / Examples |
|---|
| **Name** | Friendly title of the group | e.g., `PowerDNS (devns)` |
| **NS TTL** | TTL for NS records this group advertises | 300–900 is typical; use 300 during migrations |
| **NS Domains** | The public authoritative NS hostnames for the group | `ns1.appuw.com` and `ns2.appuw.com`, each on a new line |
| **DNS Servers** | The real servers (from **DNS Manager → Servers**) to run this group | Select 2+ for redundancy; can be PowerDNS or HestiaCP nodes |
##### Actions
- **Reload All Zones** — push/refresh **every zone** assigned to this group across all attached servers (useful after adding/removing a server).
- **Save** — persist changes.
- - - - - -
#### 7) How groups, servers, and zones interact
- A **Zone** belongs to exactly **one Server Group**.
- A **Server Group** can contain **multiple servers** (recommended: at least two).
- When you create/edit a zone, PUQcloud writes changes to **all servers** in the selected group.
- Changing the group for a zone (via **Zones → Move To**) moves its management to the new server pool.
- - - - - -
#### 8) Typical patterns
##### A. ACME “Tech Zone” group (DNS-01 for SSL)
Create a group like **PowerDNS (devns)** with NS hostnames such as `devns1.yourdomain.com` and `devns2.yourdomain.com`, attach 2+ PowerDNS servers, and delegate these NS in the registry.
Use this group to host a technical zone (e.g., `acme.yourdomain.com`) where SSL Manager will place TXT records during issuance. In target zones you only set CNAME for `_acme-challenge` pointing into the tech zone; Let’s Encrypt follows the CNAME and validates TXT there.
##### B. Production authoritative DNS
Create a group **PowerDNS ns1-2** with `ns1.example.com` and `ns2.example.com`, attach your production servers, and assign all public zones to this group.
##### C. Migration between platforms
Keep **Group A (HestiaCP)** and **Group B (PowerDNS)** simultaneously.
Import zones to Group B, test, then in **Zones** use **Move To** to switch each zone from A to B. Lower **NS TTL** before switching to reduce propagation delays.
- - - - - -
#### 9) Best practices
- Always have **≥2 servers** per group, ideally in different networks/regions.
- Choose **clear names**: `PowerDNS ns1-2`, `PowerDNS (devns)`, `HestiaCP-EU`.
- Keep **NS TTL** low (300) during migrations or frequent changes.
- After adding a server to a group, run **Reload All Zones**.
- Ensure **NS Domains** here match the **actual delegation** at your registrar.
- Secure server APIs (IP allowlist, HTTPS where applicable) and use distinct API keys.
- - - - - -
#### 10) Troubleshooting
| Symptom | Likely cause | Fix |
|---|
| Zones don’t appear on a new server | Server not attached to the group or not reloaded | Add it under **DNS Servers**, click **Reload All Zones** |
| Public NS answers are inconsistent | One node out of sync or offline | Check server health, run **Reload All Zones**, review logs |
| Registrar warns about NS mismatch | NS hostnames in group don’t match registry delegation | Align **NS Domains** here with registrar NS; wait for TTL |
| SSL DNS-01 fails | Tech group/zone mis-delegated or CNAME wrong | Verify tech zone delegation and `_acme-challenge` CNAME chain |
# DNS Manager — Servers
### PUQcloud Panel
##### [Order Now](https://puqcloud.com/puqcloud-panel.php) | [Download](https://github.com/puqcloud/PUQcloud) | [FAQ](https://faq.puqcloud.com/)
#### 1) Purpose of this section
In **Servers** you connect your **real DNS servers** to PUQcloud. Then you attach these servers to **Server Groups**, and groups power your **Zones** (create/update records, reload zones, import/export).
**Path:** **Settings → DNS Manager → Servers**
[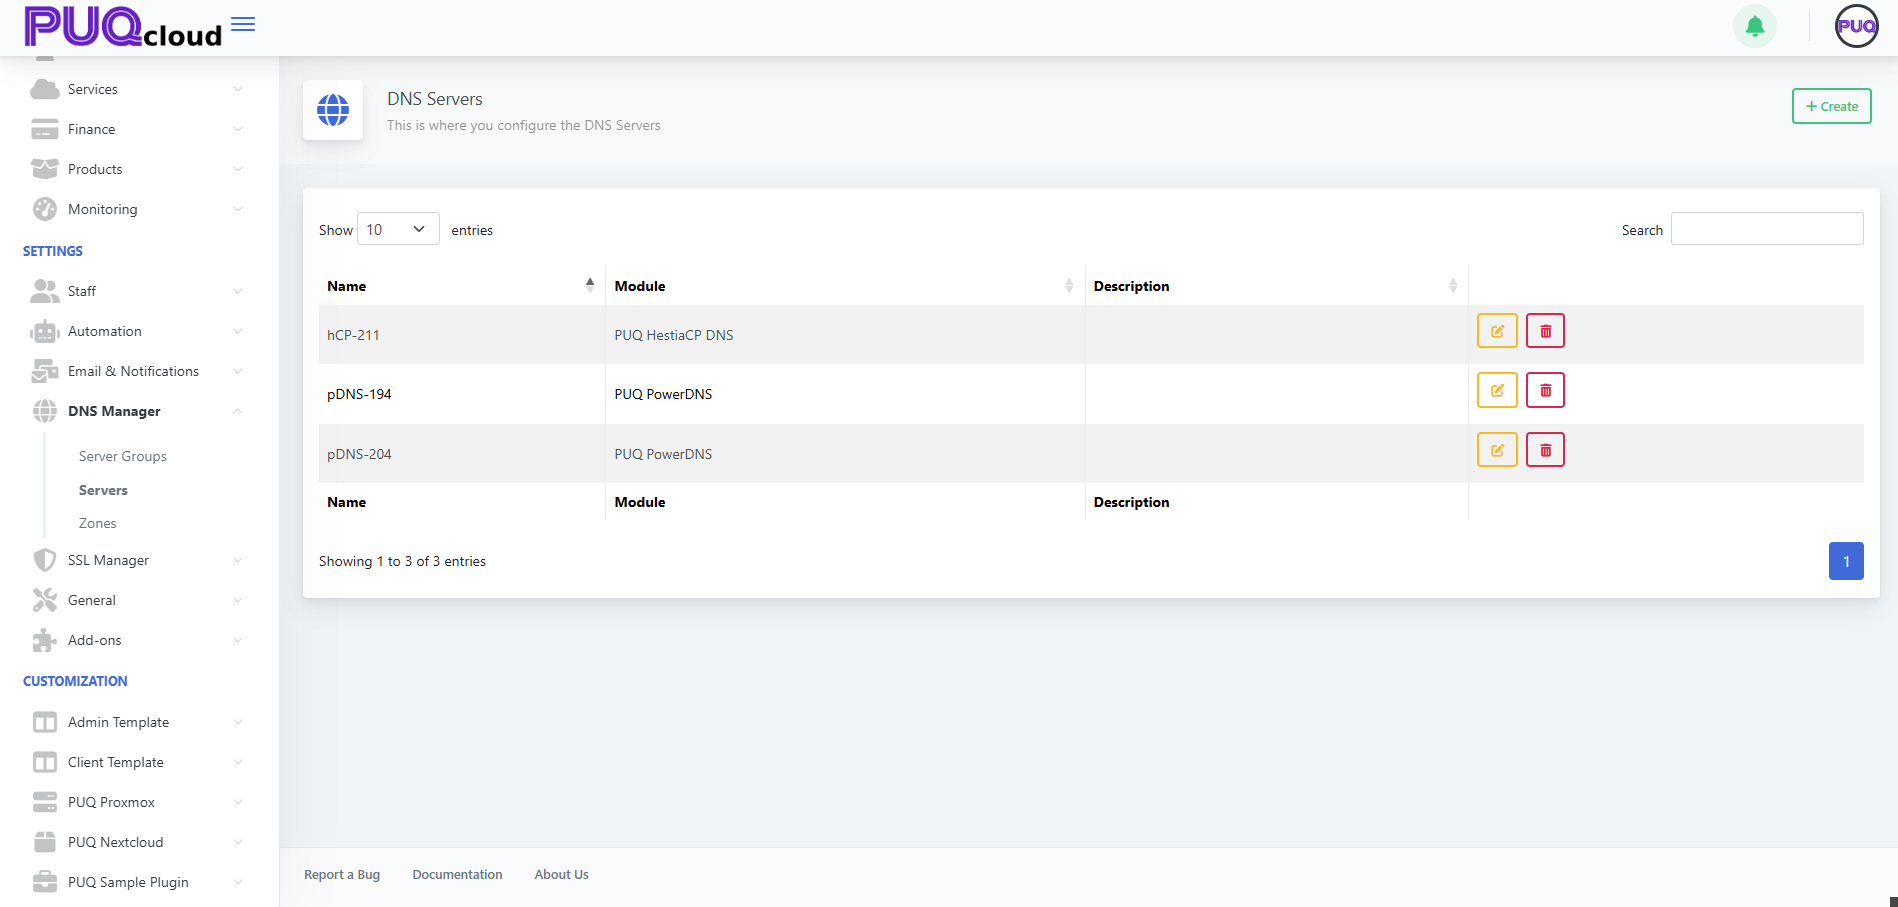](https://doc.puq.info/uploads/images/gallery/2025-11/3.png)
- - - - - -
#### 2) Supported modules
PUQcloud integrates via pluggable modules:
##### • PUQ PowerDNS
Direct integration with the **PowerDNS HTTP API** (typically port `8081`). The panel creates/updates zones and records through the REST API and provides **Save and Test** to confirm connectivity and show the PowerDNS version.
**Use when:** you run your own PowerDNS authoritative servers and want fast, transparent automation (including ACME/SSL “tech zone” workflows).
##### • PUQ HestiaCP DNS
Manages zones/records via the **HestiaCP API**. Operations are performed under a HestiaCP user/API key you supply.
**Use when:** your DNS lives inside HestiaCP and you want to centralize control via PUQcloud.
> You can run both modules side-by-side in different **Server Groups** (handy for migrations or prod/staging separation).
- - - - - -
#### 3) Create a server — step by step
1. Open **Servers** and click **+ Create**.
2. Enter a **Name** (a friendly label).
3. Choose **Module**: **PUQ PowerDNS** or **PUQ HestiaCP DNS**.
4. Click **Save** — you’ll land on the edit page with connection fields.
[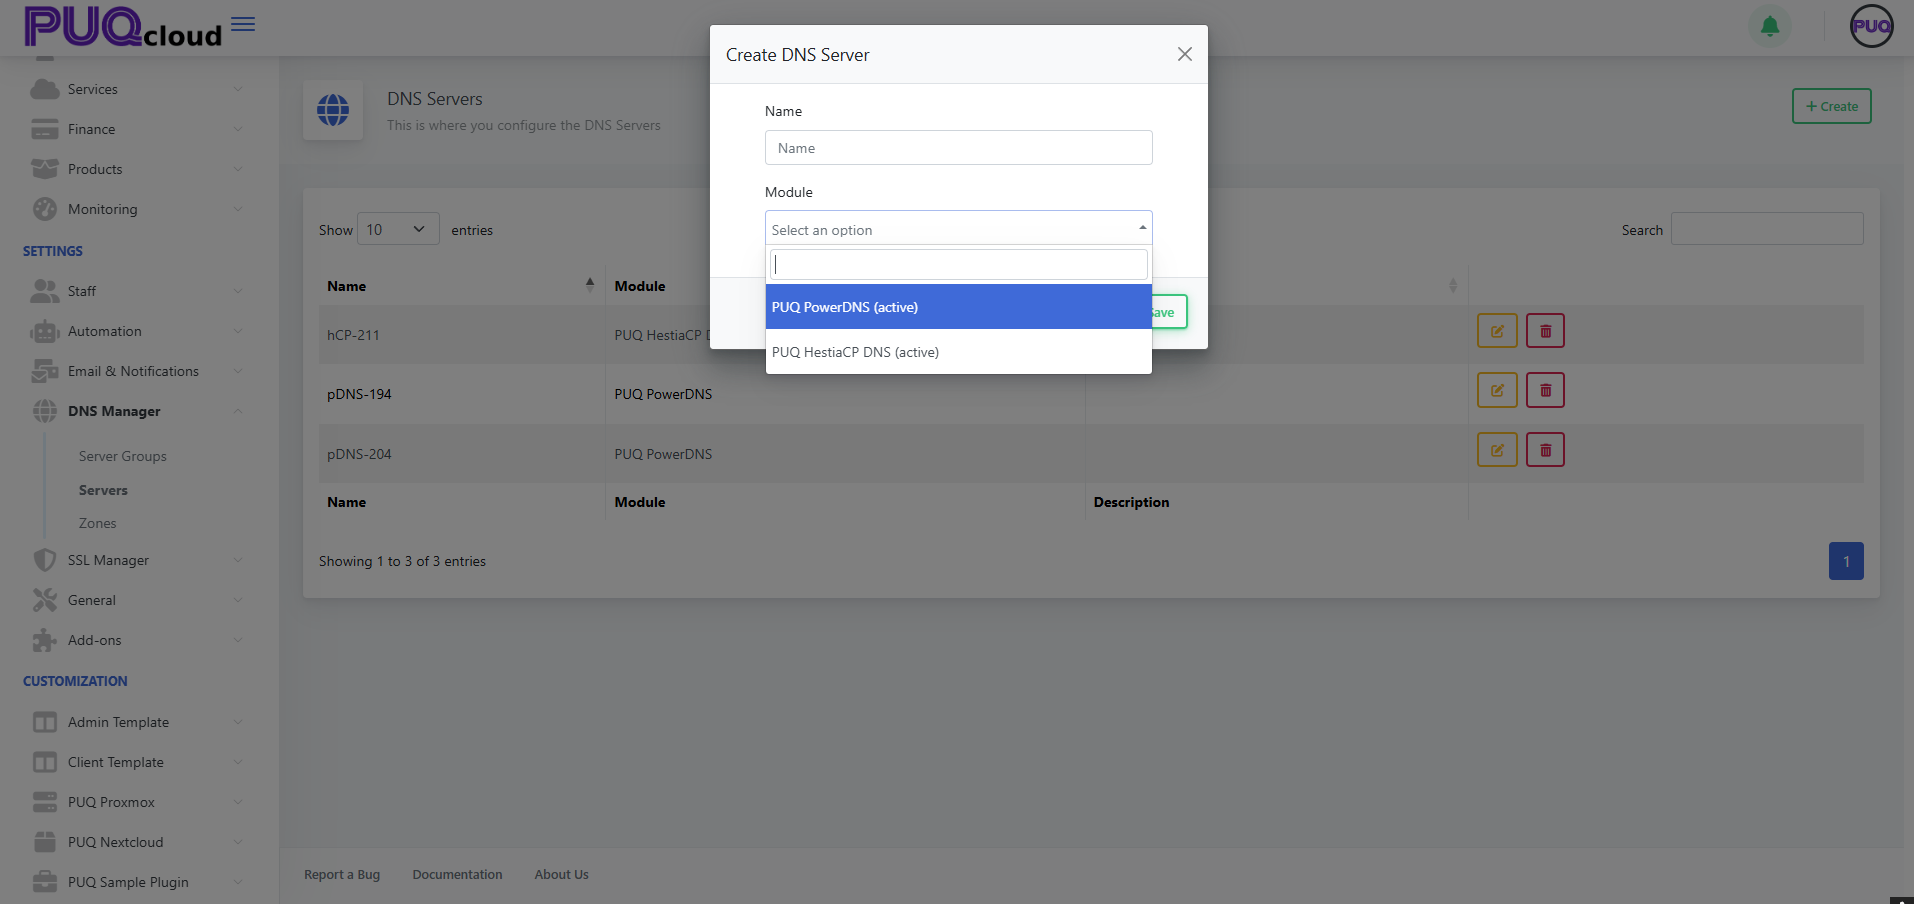](https://doc.puq.info/uploads/images/gallery/2025-11/4.png)
- - - - - -
#### 4) Configure PowerDNS (PUQ PowerDNS)
**[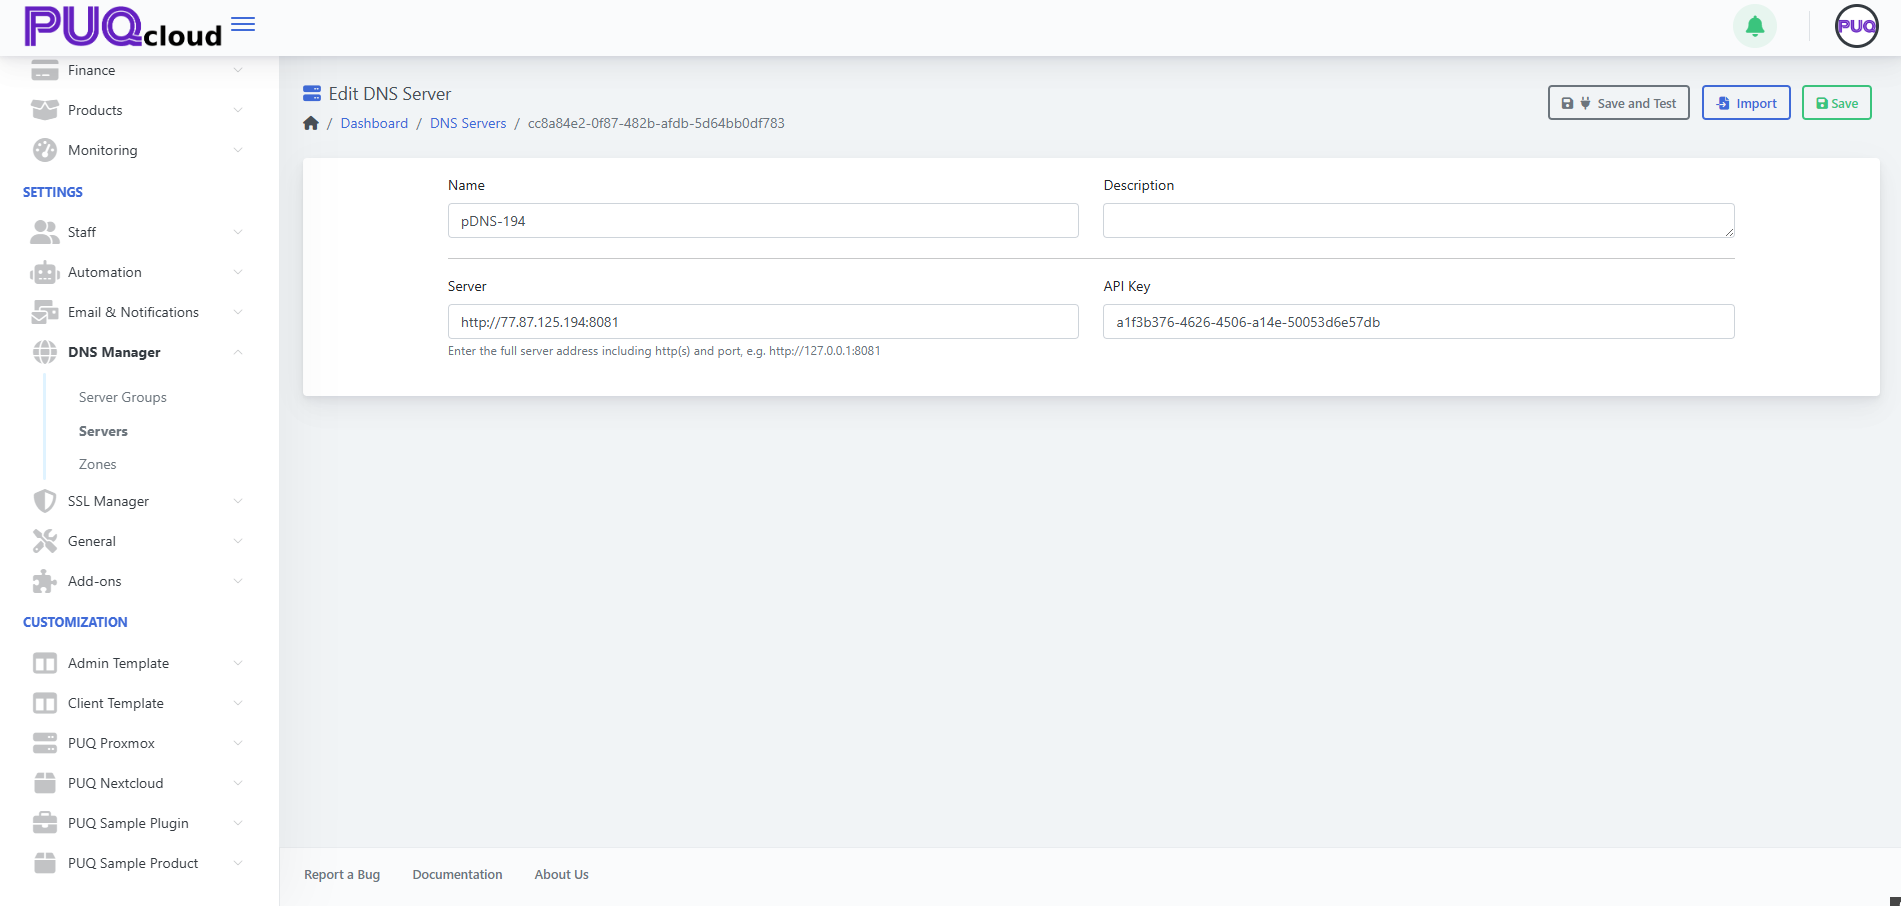](https://doc.puq.info/uploads/images/gallery/2025-11/5.png)**
[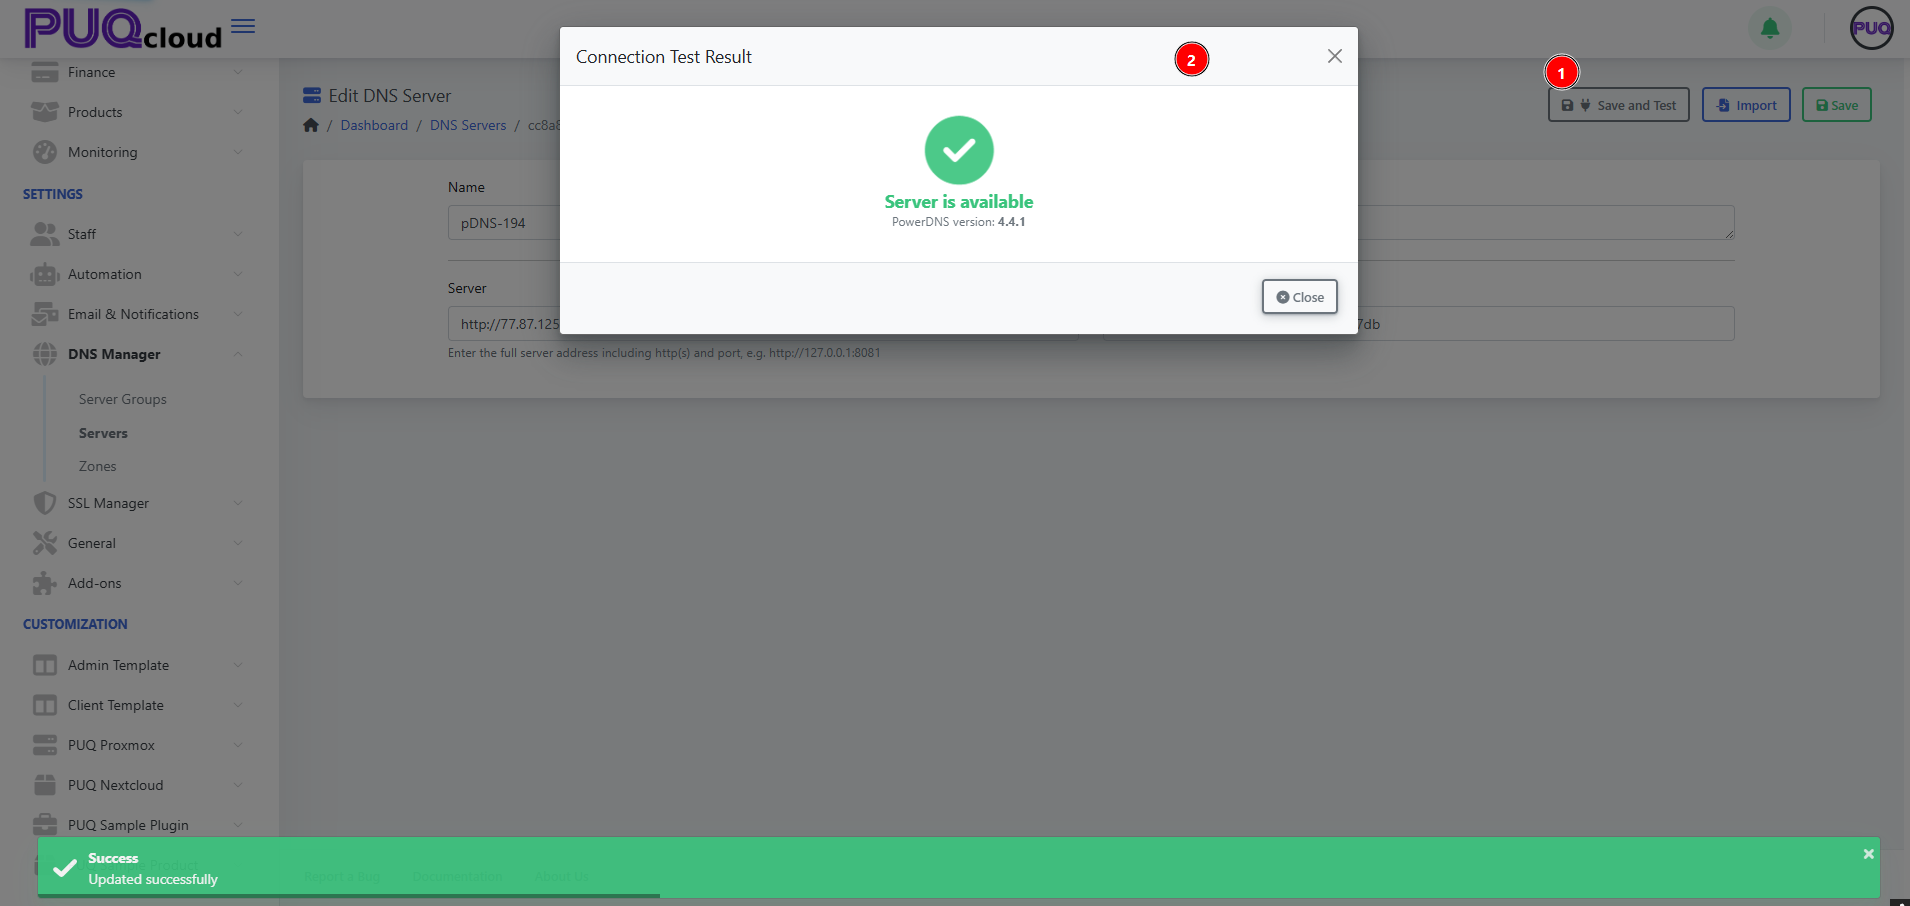](https://doc.puq.info/uploads/images/gallery/2025-11/6.png)
##### Fields
| Field | What to enter | Example / Tip |
|---|
| **Name** | Any friendly name | `pDNS-194` |
| **Description** | Optional note | `PowerDNS on dev node` |
| **Server** | Full API URL incl. protocol & port | `http://203.0.113.194:8081` or `https://dns.example.com:8081` |
| **API Key** | PowerDNS API token (`api-key=` in config) | Create a **dedicated key** for PUQcloud only |
##### Buttons
- **Save and Test** — checks connectivity and displays the **PowerDNS version**.
- **Import** — pulls existing zones from this server (useful on first attach).
- **Save** — persists the settings.
##### Security tips
- **IP-restrict** the PowerDNS API to your PUQcloud host.
- Prefer **HTTPS** to the API, use a separate **API Key** with least privilege.
- Watch PowerDNS logs during imports or bulk changes.
- - - - - -
#### 5) Configure HestiaCP (PUQ HestiaCP DNS)
After selecting **PUQ HestiaCP DNS**, the edit form shows the HestiaCP API connection fields (API URL + authentication parameters according to your HestiaCP setup — token or user/password).
**Recommendations:**
- Create a **dedicated HestiaCP user/API key** for PUQcloud.
- Confirm the API is **enabled and reachable** from the PUQcloud host.
- After **Save and Test**, verify by creating a test zone under **Zones**.
- - - - - -
#### 6) Add the server to a group
Once the server tests OK, go to **Settings → DNS Manager → Server Groups → Edit** and add it under **DNS Servers** for the target group.
Then click **Reload All Zones** to deploy **all group zones** onto this newly attached node.
- - - - - -
#### 7) Typical scenarios
##### A. PowerDNS cluster for the ACME tech zone
1. Add **2+ PowerDNS servers** (in **Servers**), test each with **Save and Test**.
2. Create a group **PowerDNS (devns)**, set **NS Domains** (e.g., `devns1.example.com`, `devns2.example.com`), and attach both servers.
3. Delegate those NS at your registrar.
4. Create the **tech zone** `acme.example.com` in this group.
5. In **SSL Manager → Certificate Authorities**, select this tech zone as **DNS Zone**. Done.
##### B. Migrating from HestiaCP to PowerDNS
1. Connect your PowerDNS servers.
2. Import zones from HestiaCP (use the **Import** button on PowerDNS or **Zones → Export / Import**).
3. Create a new **Server Group** for PowerDNS and **Move To** switch zones into it.
4. After validation, change domain **delegation** at the registrar to the new NS.
- - - - - -
#### 8) Best practices
- **Redundancy:** attach **at least two** servers to each group (ideally different regions/ASNs).
- **Naming:** keep labels clear — `pDNS-194`, `pDNS-204`, `hCP-211`.
- Always run **Save and Test** after changing connection params.
- Keep zone **TTL 300–600s** during active changes/migrations.
- Lock down APIs by **IP allowlists** and use **HTTPS** where possible.
- Export zones as backups before **bulk operations**.
- - - - - -
#### 9) Troubleshooting
| Symptom | Likely cause | Fix |
|---|
| **Save and Test** fails | Wrong URL/port/key or firewall blocks access | Verify `http(s)://host:port`, API key, and allow the PUQcloud IP |
| Zone import incomplete | API/user lacks permissions | Grant appropriate rights or use **Zones → Import** |
| Group zones don’t deploy to the new server | Server not added to **Server Group** | Add it, then **Reload All Zones** |
| Different answers from NS nodes | One node out of sync or offline | Check health/logs, **Reload All Zones**, restore connectivity |
# DNS Manager — Zones
### PUQcloud Panel
##### [Order Now](https://puqcloud.com/puqcloud-panel.php) | [Download](https://github.com/puqcloud/PUQcloud) | [FAQ](https://faq.puqcloud.com/)
#### 1) What a Zone is and how it works
A **DNS Zone** is the set of DNS records for a domain (e.g., `example.com`) or a **reverse** domain (`in-addr.arpa`, `ip6.arpa`).
In PUQcloud, every zone is assigned to exactly one **Server Group**, and that group has one or more real DNS servers attached. As a result:
- When you create or change records in **Zones**, PUQcloud writes those changes to **all servers in the selected group**.
- Zone-level meta (e.g., **Primary NS**, **NS Domains**, **SOA fields**) is stored with the zone and deployed to the group’s servers.
**Path:** **Settings → DNS Manager → Zones**
[](https://doc.puq.info/uploads/images/gallery/2025-11/7.png)
- - - - - -
#### 2) The Zones list & actions
The list shows all zones, how many records each has, which **Server Group** it belongs to, the **Primary NS** (SOA MNAME), and the **Admin Email** (SOA RNAME).
Per-row actions:
- **Edit** — open the zone editor
- **Delete** — remove the zone
Top-right: **+ Create** to add a new zone.
- - - - - -
#### 3) Create a zone
Click **+ Create** and fill the form.
[](https://doc.puq.info/uploads/images/gallery/2025-11/8.png)
##### Field reference
| Field | Description | Tip |
|---|
| **Name** | Zone name. For forward zones use `example.com`. For reverse: IPv4 uses `x.y.z.in-addr.arpa`, IPv6 uses the `…ip6.arpa` nibble format. | Use correct reverse notation. |
| **DNS Server Group** | Which group of servers will host this zone | Choose the group you prepared (e.g., *PowerDNS ns1-2* or *PowerDNS (devns)* for the ACME tech zone). |
| **SOA Admin Email** | Email in SOA (RNAME, with a dot instead of `@`) | Commonly `hostmaster@domain.tld`. |
| **SOA TTL (seconds)** | TTL for the SOA record | `3600` is a safe default. |
| **SOA Refresh** | Slave refresh interval | `86400` (24h) typical. |
| **SOA Retry** | Retry interval if refresh fails | `7200` (2h). |
| **SOA Expire** | When slaves consider zone expired | `1209600` (14 days). |
| **SOA Minimum TTL** | Negative caching (minimum TTL) | `3600`. |
Click **Save** to create the zone.
- - - - - -
#### 4) Edit a zone
Opening a zone leads to **Edit DNS Zone**.
[](https://doc.puq.info/uploads/images/gallery/2025-11/9.png)
##### What you see
- **Name** — zone name (read-only for some reverse templates).
- **DNS Server Group** — which group serves this zone.
- **Primary NS** — SOA MNAME (main NS).
- **NS Domains** — authoritative nameserver hostnames shown as badges. These should match your actual registrar delegation.
- **SOA** fields — TTL, Refresh, Retry, Expire, Minimum TTL.
- **Records table** — the list of all records in this zone.
##### Top actions
- **+ Create Record** — add A/AAAA/CNAME/TXT/MX/SRV/NS/PTR etc.
- **Reload Zone** — force-sync this zone across all servers in the group.
- **Move To** — move the zone to another **Server Group** (useful for migrations).
- **Export / Import** — export to/import from a standard zone format (PowerDNS/BIND-compatible).
- **Save** — save changes to the zone **properties** (record edits have their own save flow in the record modal).
- - - - - -
#### 5) Add records
Click **+ Create Record**.
[](https://doc.puq.info/uploads/images/gallery/2025-11/10.png)
##### Common record types
- **A / AAAA** — IPv4/IPv6 address mappings (e.g., `www → 203.0.113.10`).
- **CNAME** — alias (e.g., `www → @` or `example.com`).
- **TXT** — free-form text (SPF, DKIM, ACME challenges).
- **MX** — mail exchangers with priority.
- **SRV** — service records (VoIP, LDAP, etc.).
- **NS** — delegate sub-zones to other nameservers.
- **PTR** — reverse mapping (IP to hostname) for reverse zones.
##### Examples (forward)
- `@` → A → `203.0.113.10`
- `www` → CNAME → `@`
##### Example (mail)
- `@` → MX (10) → `mx1.example.com.`
- `@` → TXT → `v=spf1 include:spf.example.net -all`
##### Reverse example (PTR)
In `0.168.192.in-addr.arpa`:
- `130` → PTR → `host130.example.com.`
- - - - - -
#### 6) ACME / SSL with a technical zone
For DNS-01 challenges, SSL Manager commonly uses a **technical zone** (e.g., `acme.yourdomain.tld`) hosted by a dedicated **Server Group** (e.g., *PowerDNS (devns)*). The workflow:
1. In the **target** zone (the zone for which you want a cert), create a **CNAME**:
`_acme-challenge.yourdomain.tld → _acme-challenge.yourdomain.tld.acme.yourdomain.tld.`
2. During issuance, SSL Manager automatically creates/updates the **TXT** in the **tech zone** (via PowerDNS/Hestia modules).
3. The CA queries `_acme-challenge` on the target zone, **follows the CNAME** into the tech zone, and reads the TXT.
4. Once validated, the certificate becomes **ACTIVE** (see **SSL Certificates** guide).
> Ensure the tech group’s **NS Domains** are really authoritative and are properly delegated at the registrar.
- - - - - -
#### 7) Export / Import
- **Export** — download the zone in a PowerDNS/BIND-compatible format (great for backups and migrations).
- **Import** — upload a zone file to quickly populate records. After import, verify records and click **Reload Zone**.
- - - - - -
#### 8) Best practices
- Use **TTL 300–600s** while actively changing/migrating; raise later for stability.
- Keep **≥2 NS** in the serving group (prefer distinct regions/ASNs).
- For **ACME**, keep a **separate tech zone** and **separate group**.
- Always **Export** before bulk edits.
- After changing a zone’s **Server Group**, use **Move To** and then **Reload Zone**.
- Regularly verify delegation (`dig NS yourdomain.tld`) and key records resolution from multiple locations.
- - - - - -
#### 9) Troubleshooting
| Symptom | Likely cause | Fix |
|---|
| Public resolvers can’t see your changes | Registrar delegation wrong or **NS Domains** don’t match real NS | Correct delegation, align **NS Domains**, wait for TTL |
| Different answers on NS1 vs NS2 | One node out of sync or offline | **Reload Zone**, check server health, review logs |
| ACME DNS-01 fails | Missing/wrong CNAME to tech zone; caching | Validate with `dig`, fix CNAME/TXT, wait for TTL |
| Zone import errors | Incompatible format or invalid entries | Fix offending lines, re-import |
# SSL Manager - Certificate Authorities
### PUQcloud Panel
##### [Order Now](https://puqcloud.com/puqcloud-panel.php) | [Download](https://github.com/puqcloud/PUQcloud) | [FAQ](https://faq.puqcloud.com/)
#### Overview
**Certificate Authorities (CA)** are provider profiles the panel uses to issue and renew SSL/TLS certificates via ACME. PUQcloud follows a simple rule: **one module per CA**.
Currently supported modules:
- **Let’s Encrypt** (plus **Let’s Encrypt Staging** for safe testing)
- **ZeroSSL**
- Create and configure CA profiles (ACME account, technical DNS zone, timeouts).
- Test connectivity to the CA (**Save and Test**) and see the CA directory endpoints.
- Keep multiple profiles (e.g., Production vs Staging) and select them per-certificate.
- - - - - -
1. Go to **Settings → SSL Manager → Certificate Authorities** and click **+ Create**.
2. Enter **Name** and choose **Module = PUQ ACME (active)** → **Save**.
3. Click **Edit** on the new CA profile and fill in the fields (see the Field Reference below).
4. Click **Save and Test**. A modal should show **API is available** plus a dump of **ACME directory endpoints**.
5. Click **Save**.
- - - - - -
| Field | What it is | When / Why |
|---|
| **Name** | Internal display name | Use meaningful names like `LE PROD`, `LE STAGING`, `ZeroSSL`. |
| **Description** | Short profile note | Note target usage: “production issuance”, “sandbox”, or project scope. |
| **Certificate Authority** | Selected CA directory | Use **Let’s Encrypt Staging** for tests, **Let’s Encrypt** or **ZeroSSL** for production. |
| **Email address for the ACME account** | Email used to register/manage the ACME account | Required. Prefer a shared ops mailbox (e.g., `it@company.tld`) for continuity. |
| **EAB Key ID / EAB HMAC Key** | External Account Binding | Needed by some providers/plans (e.g., ZeroSSL). Leave empty if not required. |
| **DNS Zone** | **Technical zone** where TXT records are actually created | Example: `acme.puqcloud.com`. The target domain’s `_acme-challenge` will **CNAME** to this zone. |
| **Allow wildcard certificates** | Allows `*.domain` | Enable if you plan wildcard issuance (DNS-01 only). |
| **DNS Record TTL (seconds)** | TTL for created DNS records | 30–60 speeds up DCV; raise slightly if your DNS is slow to propagate. |
| **API Timeout (seconds)** | Max wait for ACME API responses | Increase (e.g., 20–30) on flaky networks/CI bursts. |
| **Save and Test** (button) | Connectivity check | Opens a modal with **API is available** and the list of ACME endpoints. Investigate if it fails. |
- - - - - -
- Uses **DNS-01 via a technical zone**:
1. On the **target domain** you create a **CNAME** for `_acme-challenge.domain` pointing into your technical zone (e.g., `_acme-challenge.domain CNAME .acme.puqcloud.com`).
2. Let’s Encrypt queries `_acme-challenge` on the target domain, **follows the CNAME** into the tech zone, and reads the TXT value there.
- **Let’s Encrypt Staging** is ideal for testing without spending production rate limits.
- Wildcards (`*.domain`) require DNS-01 and the **Allow wildcard** flag.
- Supports **account API keys** so that **issued certificates appear in your ZeroSSL account**.
- If you **don’t** provide keys, the system will create **temporary keys per certificate** automatically.
- With a paid ZeroSSL plan (~$12/month), generate API keys and add them to PUQcloud so all certs are visible/manageable in your ZeroSSL panel.
- - - - - -
- Start with **Let’s Encrypt Staging** to validate your flow, then enable **Let’s Encrypt** (production).
- Keep **DNS TTL** low (30–60s) in the CA profile to speed up challenges.
- For ZeroSSL at scale, use **account keys** for visibility and auditing.
- - - - - -
1. **Create** a new CA profile (add EAB/API keys if required by your ZeroSSL plan).
2. **Save and Test** to confirm directory endpoints.
3. Check/update your **technical DNS zone** if it differs from previous setup.
4. **Issue a test cert** on a non-critical domain to validate DCV.
5. For **new** certs, select the new CA in the creation form. For **existing** certs, you cannot “switch issuer”; **issue a new** certificate under the new CA and deploy it.
6. Verify **Days Remaining / Auto Renew** behavior on new certs (and, with ZeroSSL keys, that issues appear in the ZeroSSL account).
- - - - - -
- **“Save and Test” doesn’t show “API is available”**
- Check selected CA, network access, EAB keys (if required), and **API Timeout**.
- **LE DNS validation fails**
- Confirm the **CNAME** is correct and already resolves to the tech zone; wait for **TTL**.
- **Wildcard fails**
- Ensure **Allow wildcard** is enabled and you are using **DNS-01**.
- **ZeroSSL certificates don’t show in the ZeroSSL dashboard**
- Add **account API keys** to the CA profile (temporary per-certificate keys don’t link certs to your account).
- **SSL Certificates** — issuance workflow (Draft → CSR → Pending (CNAME) → Active), auto-renew, metadata.
- **DNS Manager** — managing your technical zone and verifying `_acme-challenge` records.
- **Email & Notifications** — reminders for expiry and operational alerts.
| Symptom | Likely cause | Fix |
|---|
| Stuck in **Pending** | CNAME not resolving / wrong target | Verify `_acme-challenge.` name and target in tech zone; wait for **TTL**. |
| Issuance doesn’t start | CSR not generated | Click **Generate CSR**, then follow CNAME steps. |
| No **“Certificate is active!”** after CNAME | DCV incomplete / CA error | Check logs; ensure the tech zone is publicly resolvable. |
| Auto-renew doesn’t trigger | Bad **Auto Renew Days** or broken CNAME | Use a sensible threshold (e.g., 7) and verify CNAME/tech zone. |
| PEM mismatch on import | Key/cert pair doesn’t match | Import the correct pair or reissue. |
All tabs share a **Save** button (top-right). Changes apply system-wide.
- - - - - -
#### Time Based (log retention)
Use this tab to control how long different histories are kept before cleanup jobs remove them.
- **Admin Session Log History** – days to keep admin login/session logs.
- **Client Session Log History** – days to keep client session logs.
- **Activity Log History** – days to keep system activity logs (actions, events).
- **Module Log History** – days to keep module-specific logs.
- **Notification History** – days to keep notification entries.
- **Completed Task Queue History** – days to keep completed queue items.
- **Task Queue History** – days to keep all queue task records.
- **User Verification Code Lifetime** – minutes a verification code remains valid.
**Tips**
- Shorter values reduce storage usage and improve log queries.
- Keep compliance needs in mind (audit requirements) before trimming aggressively.
General › Time Based tab with retention fields.
[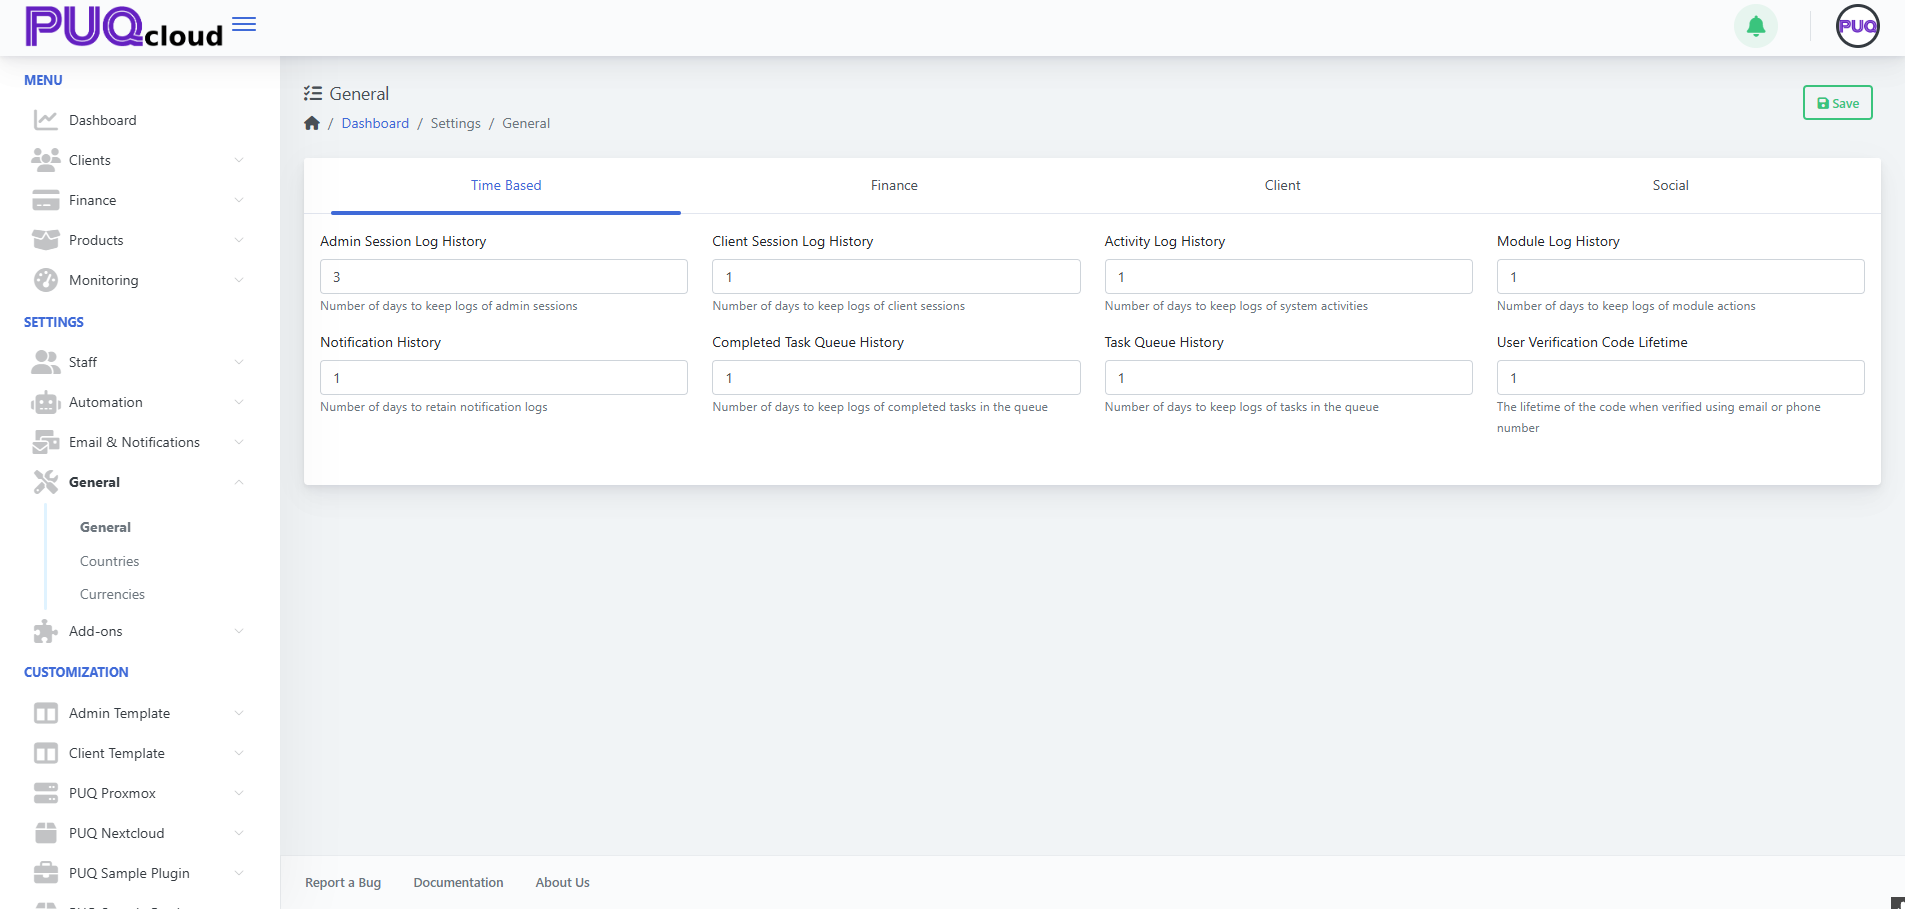](https://doc.puq.info/uploads/images/gallery/2025-09/image-1758202056756.png)
- - - - - -
#### Finance (billing defaults & limits)
Define monetary guardrails and invoice behavior.
- **Default Invoice Due Days** – number of days after issue date when invoices are due.
- **Minimum Add Funds Amount** – smallest wallet/top-up amount allowed.
- **Maximum Add Funds Amount** – largest single top-up amount allowed.
- **Maximum Client Balance** – hard ceiling for a client’s total wallet balance.
**Best practices**
- Align *Default Invoice Due Days* with your dunning/collections process.
- Set realistic *Min/Max Add Funds* to reduce micro-payments and risk.
- Use *Max Client Balance* to avoid accounting or AML headaches.
General › Finance tab with invoice and balance limits.
[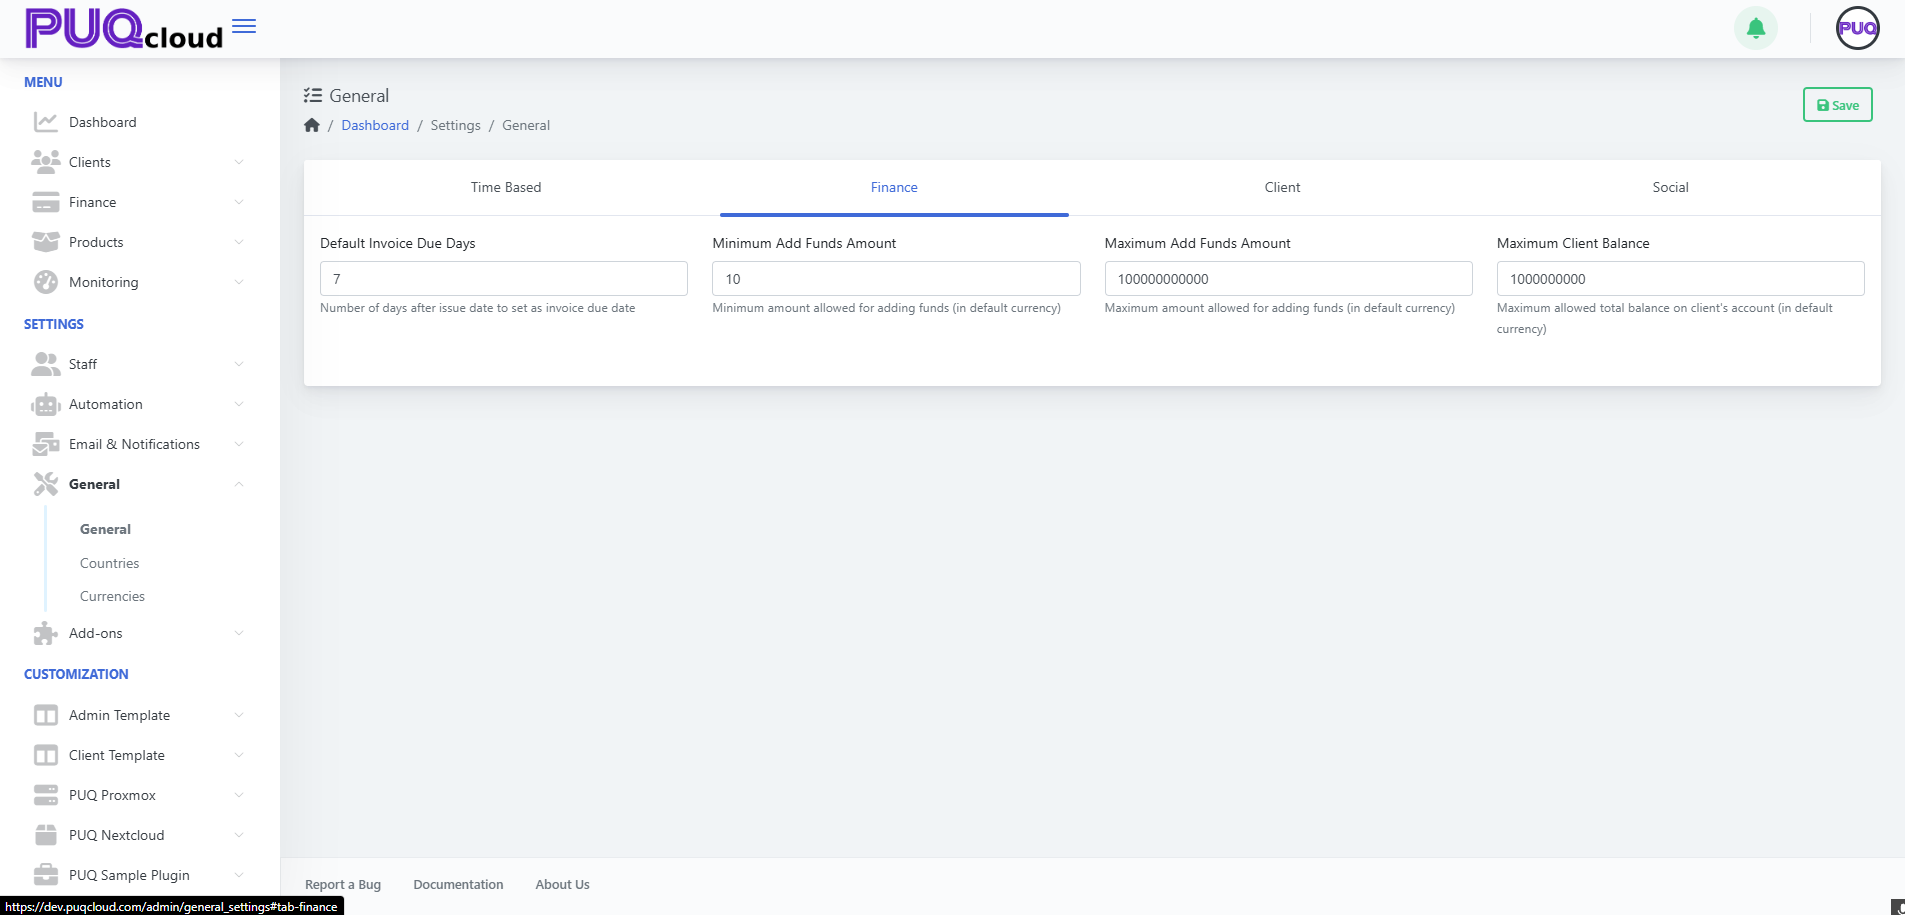](https://doc.puq.info/uploads/images/gallery/2025-09/image-1758202070700.png)
- - - - - -
#### Client (customer timeouts)
A small but important setting for customer security & UX.
- **Reset Password URL Expire (minutes)** – how long a password-reset link remains valid after it’s issued.
**Guidance**
- 30–120 minutes is common; lower values are more secure, higher values are more forgiving.
General › Client tab with reset link expiry.
[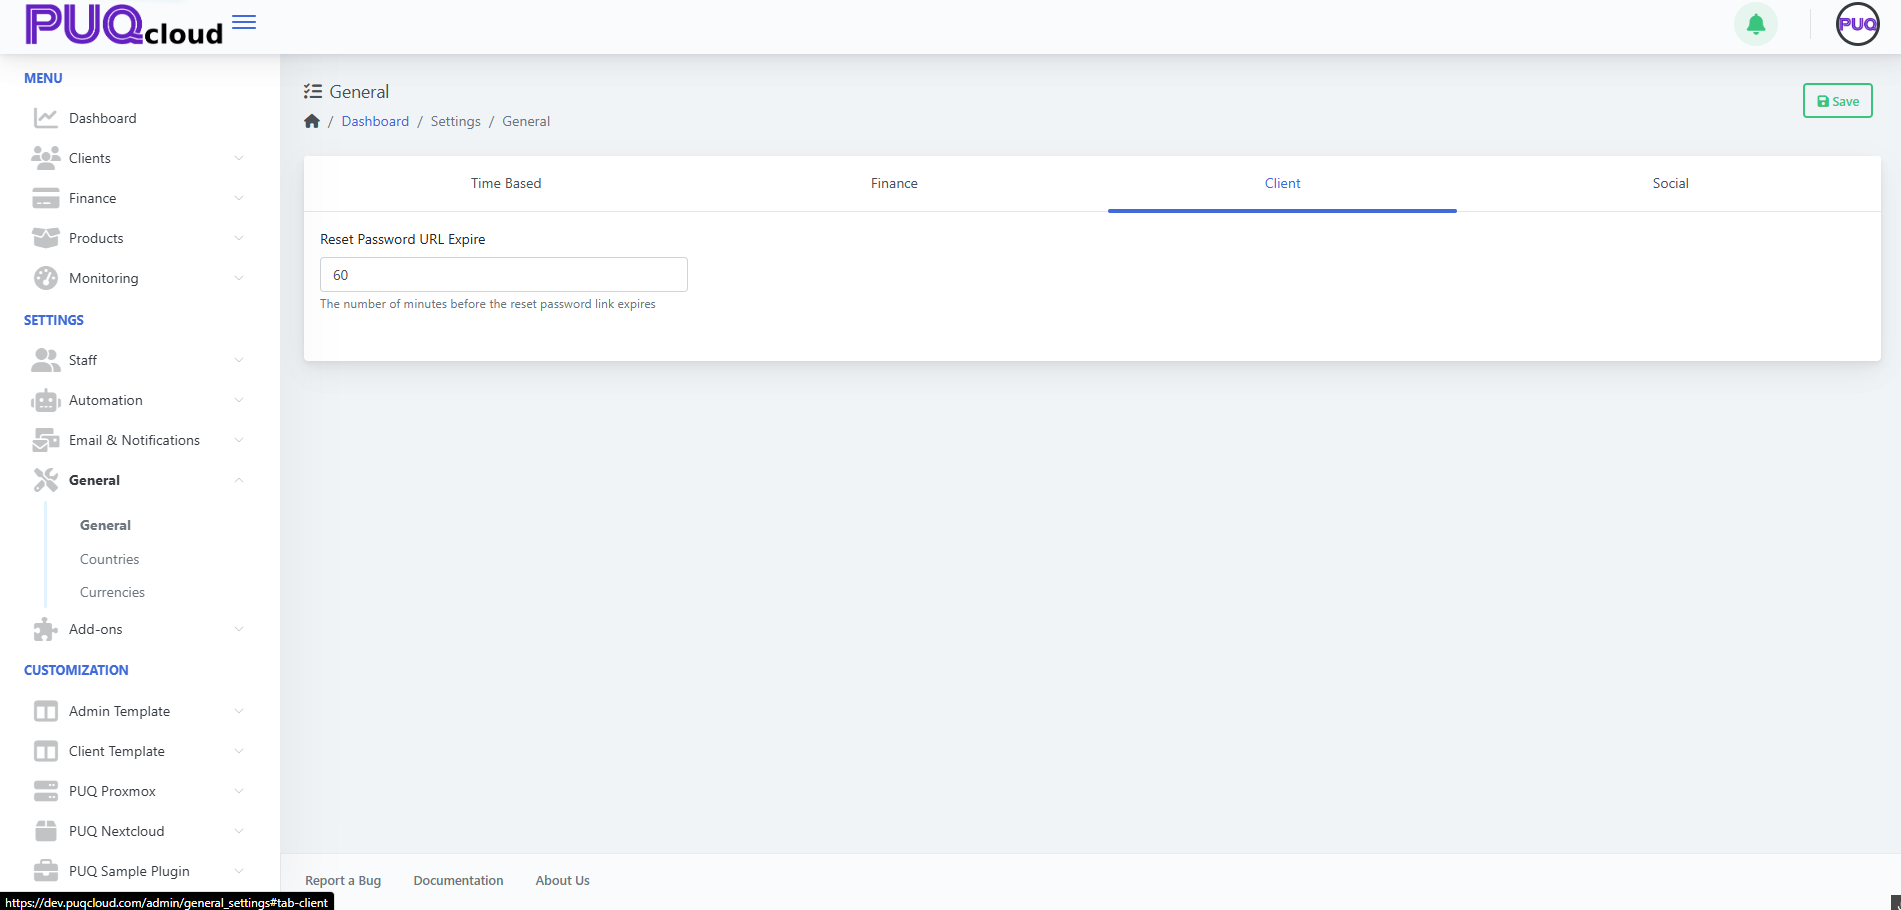](https://doc.puq.info/uploads/images/gallery/2025-09/image-1758202083150.png)
- - - - - -
#### Social (brand & contact presence)
Store the official social/profile identifiers used across notifications and the client portal. Fields include:
- **Facebook, YouTube, LinkedIn, WhatsApp, Telegram, Twitter (X), Viber, Discord, Reddit, Vimeo, GitHub, Flickr, Skype, Bitbucket, Gitter, Slack**.
**Usage**
- Enter full URLs where applicable; for chat apps, follow the placeholder notes (e.g., WhatsApp in full international format, Discord invite URL path).
- These can be pulled into notification templates or shown in the client area footer/headers, depending on your theme.
General › Social tab with profile/link fields.
[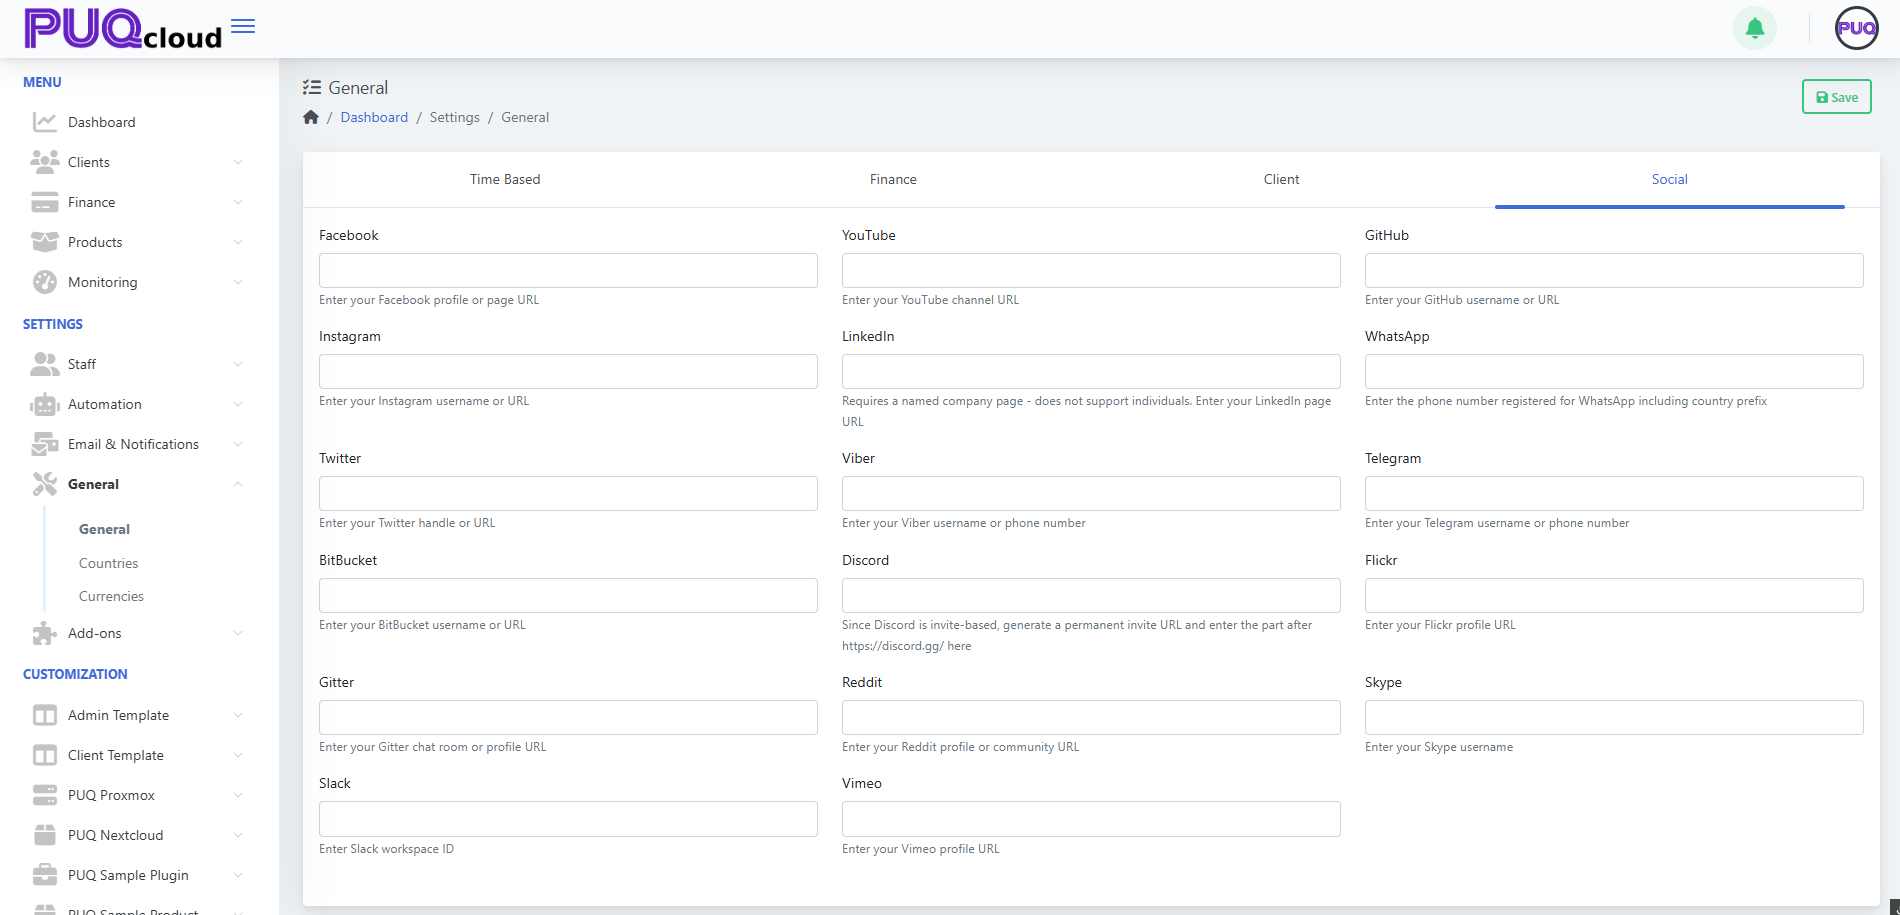](https://doc.puq.info/uploads/images/gallery/2025-09/image-1758202093382.png)
- - - - - -
#### Workflow summary
1. Go to **Dashboard → Settings → General**.
2. Work through each tab (**Time Based → Finance → Client → Social**).
3. Click **Save** (top-right).
4. If you reduced retention periods, confirm your **Scheduler/Cleanup** tasks are enabled (so old data is actually purged).
5. Review notification templates/layouts if you plan to surface your social links there.
- - - - - -
#### Quick defaults (safe starting points)
- **Admin/Activity/Module logs:** 7–30 days
- **Client/Task queues:** 7–14 days
- **Verification code lifetime:** 10–30 minutes
- **Invoice due days:** 7–14 days
- **Min/Max add funds:** set to your business model (e.g., 10 / 10,000)
- **Max client balance:** large enough for typical prepayments, but not unlimited
# Сheck Countries in the Admin Area
### PUQcloud Panel
##### [Order Now](https://puqcloud.com/puqcloud-panel.php) | [Download](https://github.com/puqcloud/PUQcloud) | [FAQ](https://faq.puqcloud.com/)
Follow these steps to review country records and their regions.
- - - - - -
#### Go to Countries
- In the left menu, open **Settings → General → Countries**.
You’ll see a paginated table with columns **Flag**, **Code**, **Name**, **Calling Code**, and **Regions**.
Use the **Search** box (top-right) and the **Show entries** dropdown to filter and page through results.
Countries list with search, pagination, and “Regions (eye)” action.
[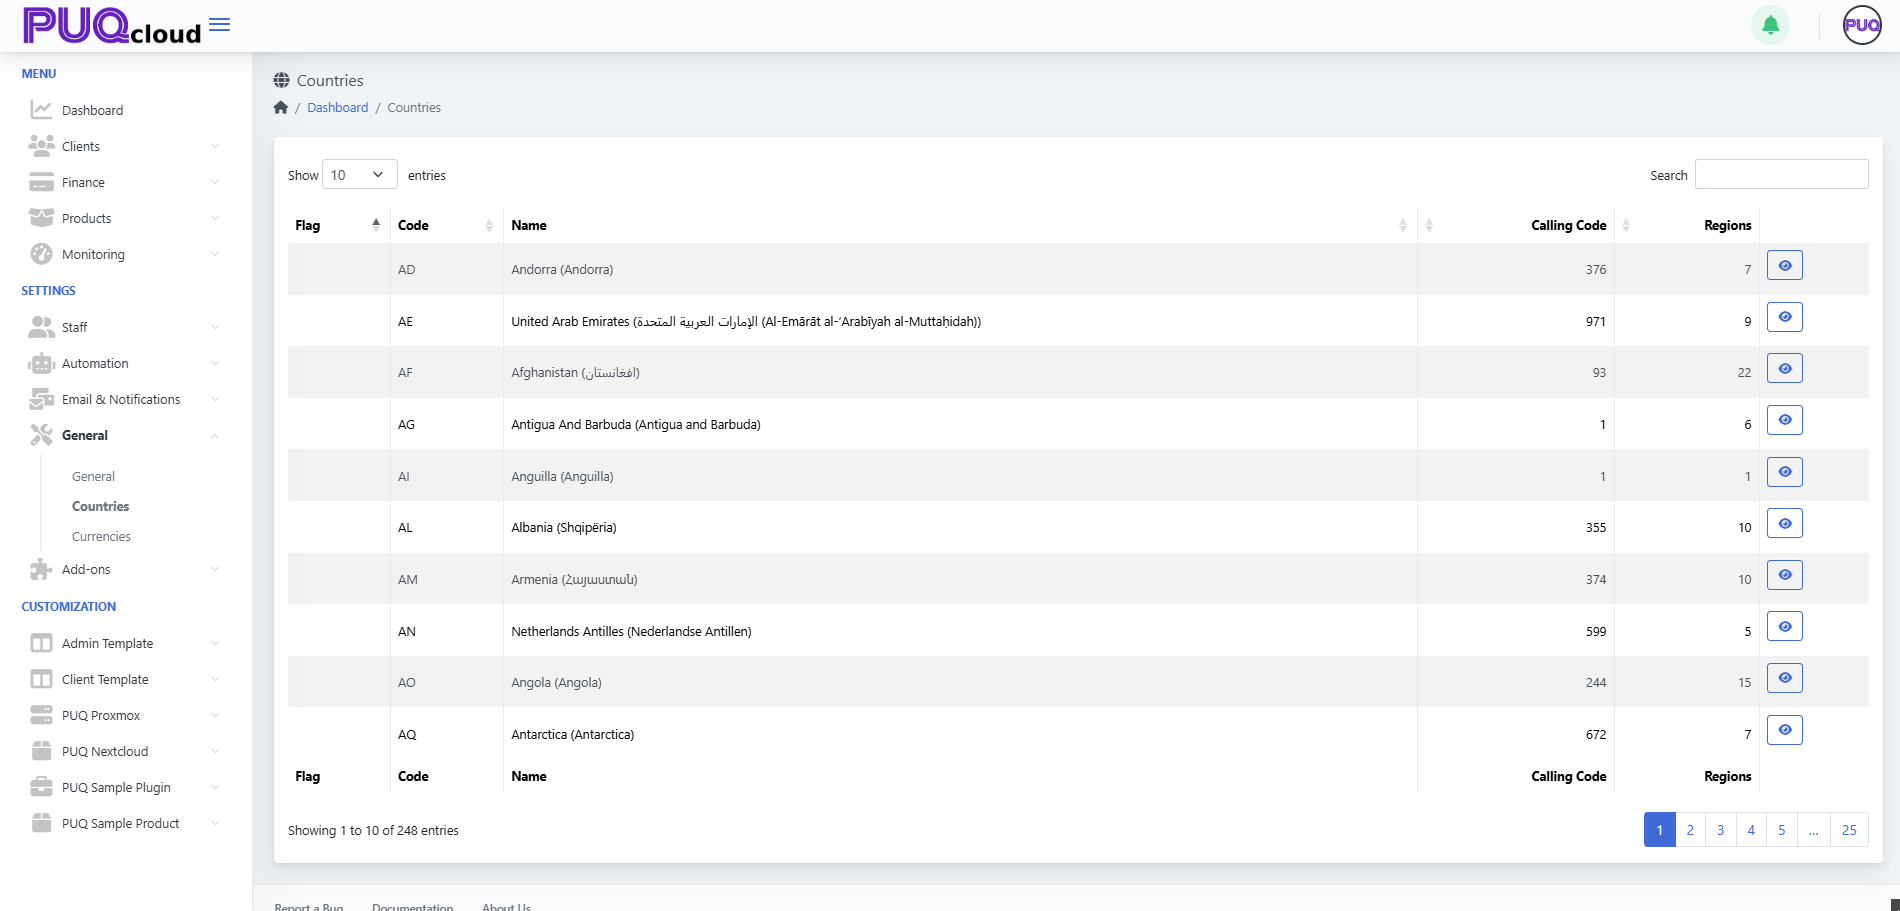](https://doc.puq.info/uploads/images/gallery/2025-09/image-1758202738977.png)
#### View a country’s regions
- In the **Regions** column, click the **eye** button for the country you want to inspect.
Regions modal listing Region Name, Native Name, and Code (with Close button).
[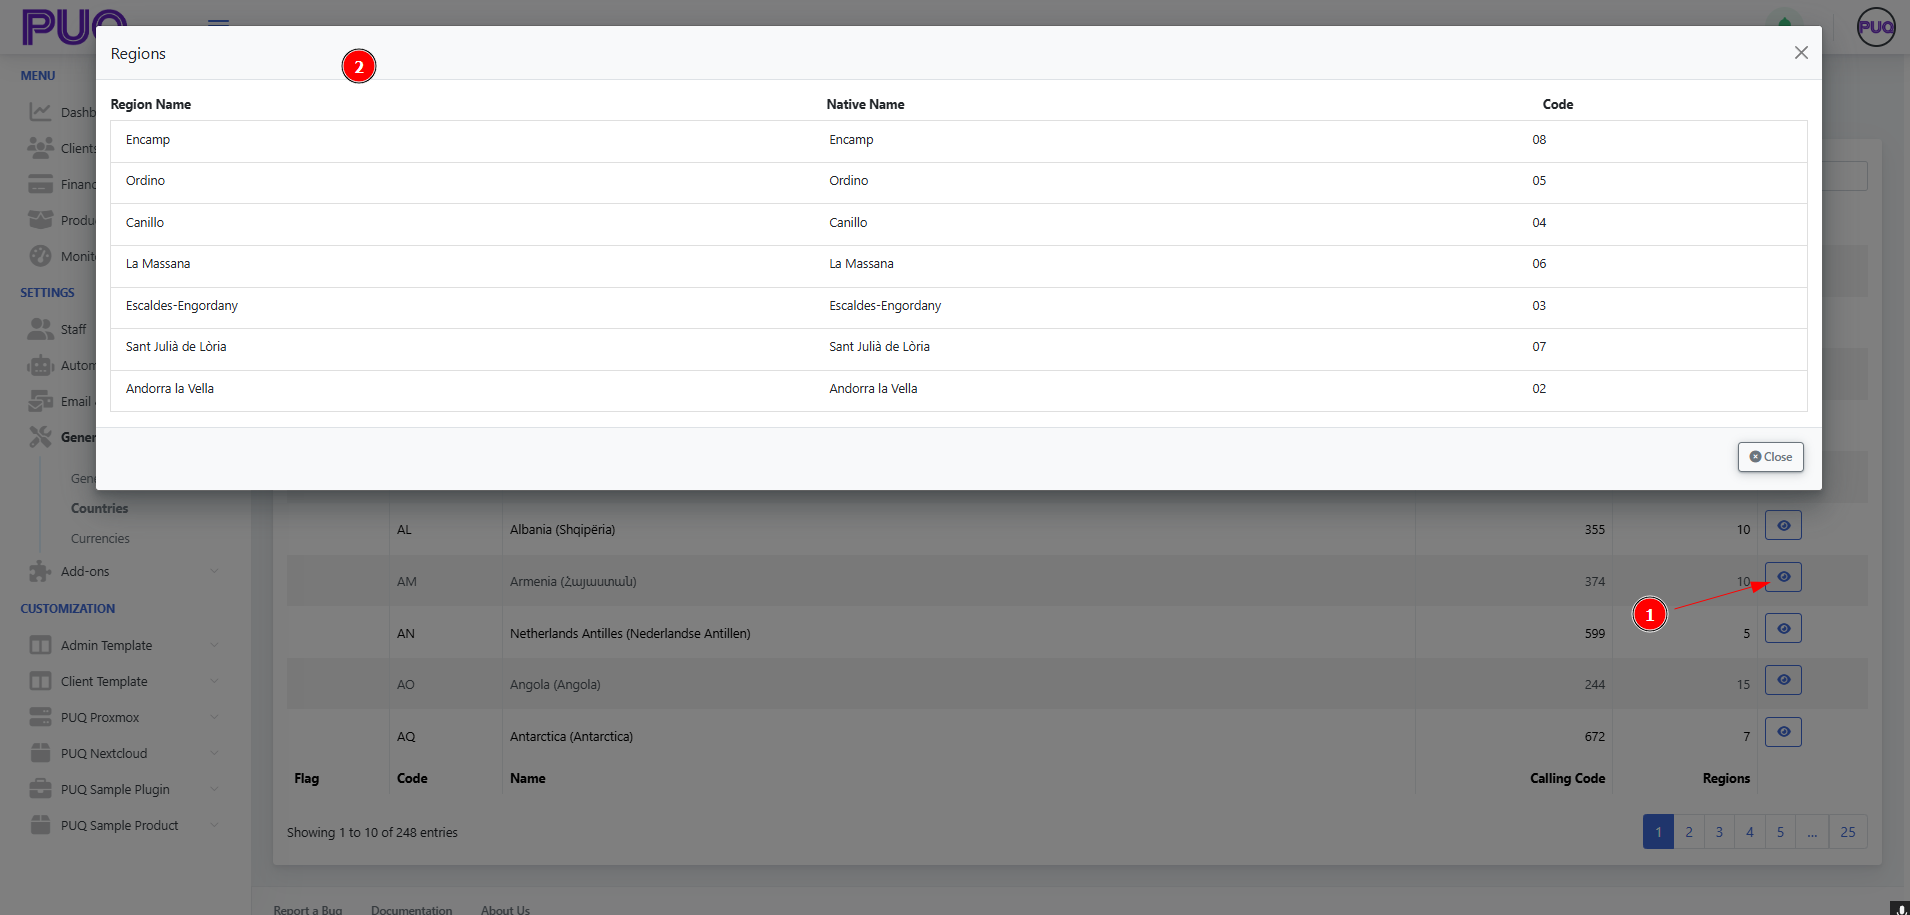](https://doc.puq.info/uploads/images/gallery/2025-09/image-1758202748215.png)
#### Tips
- Click column headers to sort (e.g., by **Code** or **Calling Code**).
- The Regions modal is read-only; use the **Close** button to return to the list.
# Create and manage Currencies in the Admin Area
### PUQcloud Panel
##### [Order Now](https://puqcloud.com/puqcloud-panel.php) | [Download](https://github.com/puqcloud/PUQcloud) | [FAQ](https://faq.puqcloud.com/)
#### Where to find it
1. In the left menu go to **Settings → General → Currencies**.
*Currencies list with search, paging, and row actions (Edit/Delete).*
[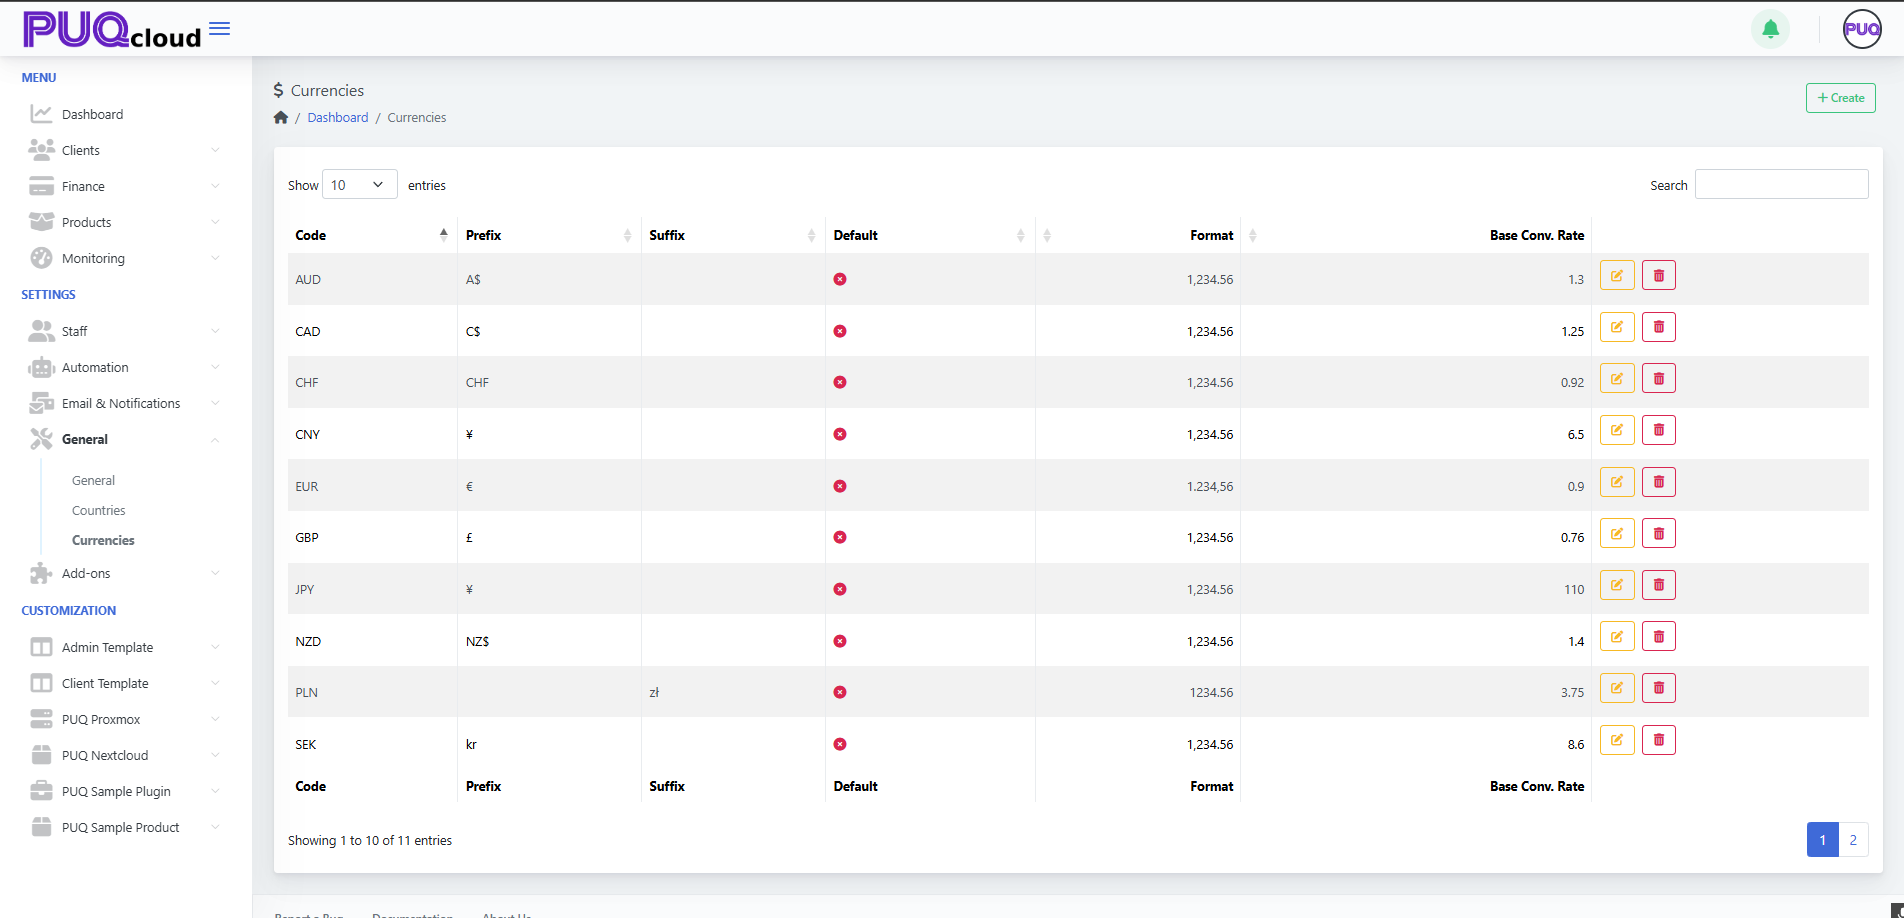](https://doc.puq.info/uploads/images/gallery/2025-09/image-1758204026462.png)
- - - - - -
#### Create a new currency
1. Click **+ Create** (top-right of the page).
2. In the **Create** modal, fill in:
- **Code** – the ISO currency code (e.g., `USD`, `EUR`, `JPY`).
- **Prefix** – symbol shown **before** the amount (e.g., `$`, `CHF`).
- **Suffix** – symbol shown **after** the amount (e.g., `zł` for PLN).
- **Exchange Rate** – base conversion rate against your system’s base currency.
- **Format** – choose the number formatting style (thousand/decimal separators).
- **Default** – tick if this should become the **system default** currency.
3. Click **Save**.
*Notes*
- You can use either a sign (e.g., `€`) or a short text (e.g., `NZ$`) for prefix/suffix.
- The **Exchange Rate** is relative to your base currency (the one you treat as “1.00”).
*“Create Currency” modal with all fields (Code, Prefix, Suffix, Exchange Rate, Format, Default).*
[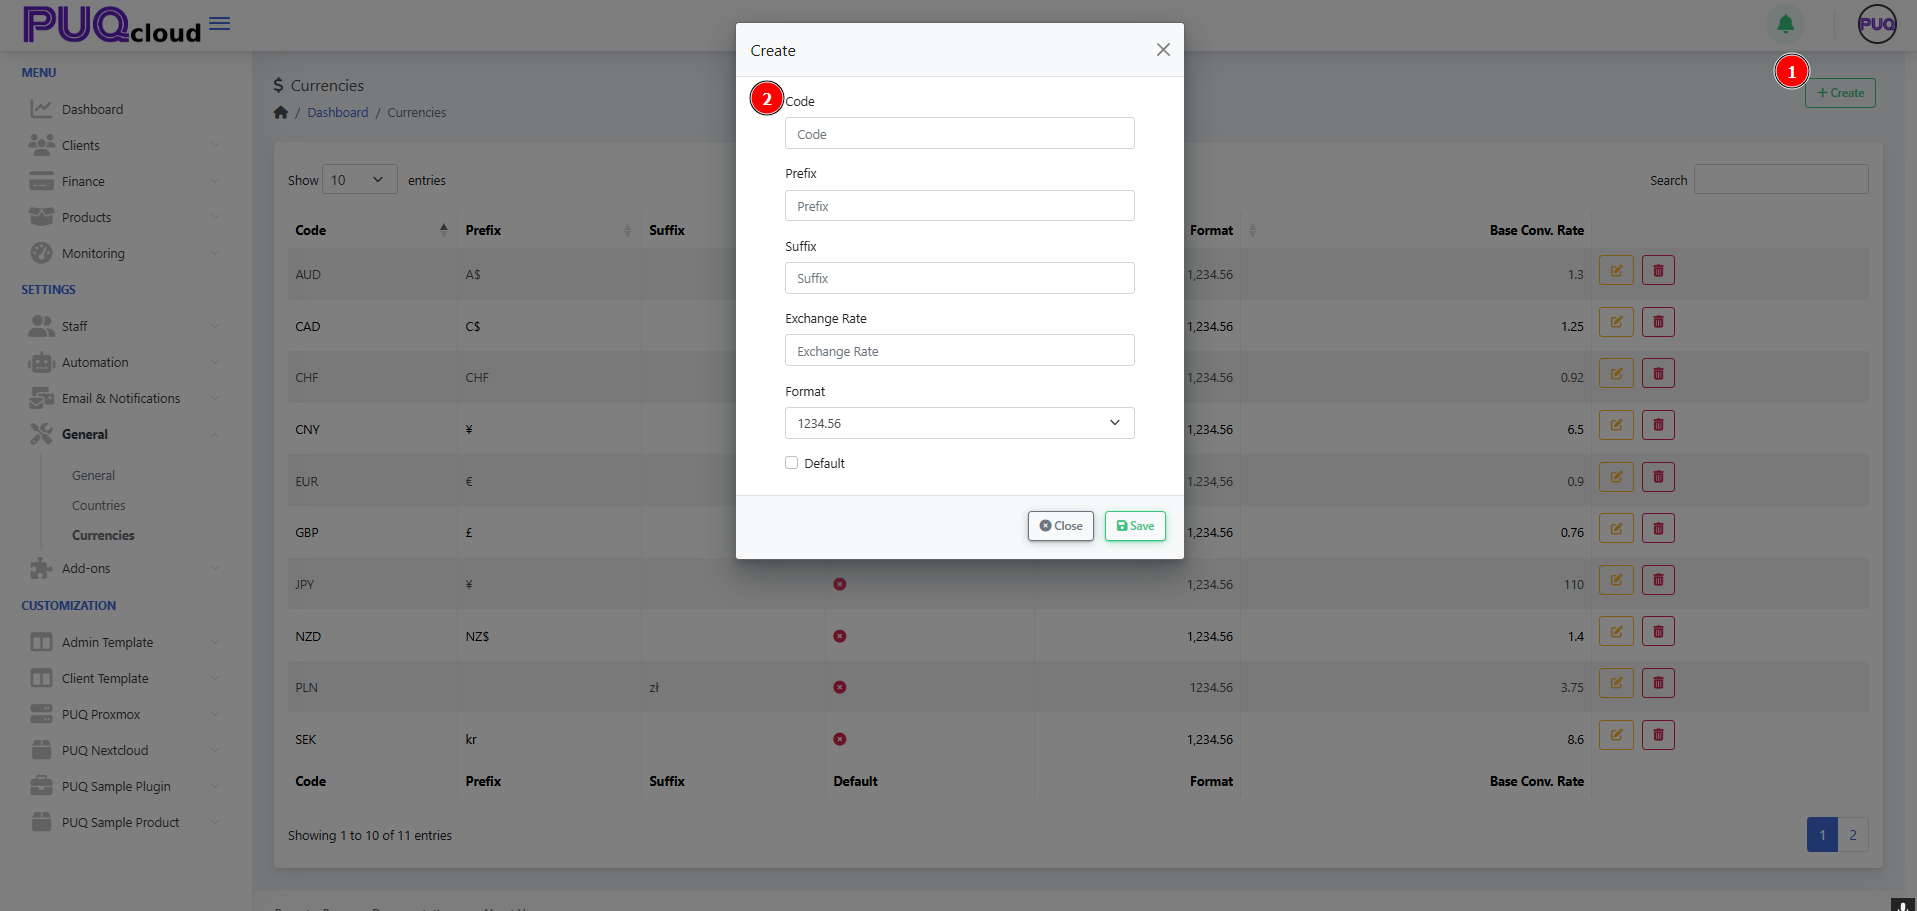](https://doc.puq.info/uploads/images/gallery/2025-09/image-1758204035047.png)
- - - - - -
#### Edit an existing currency
1. In the list, click the **pencil** icon for the currency you want to change.
2. Update **Code**, **Prefix**, **Suffix**, **Exchange Rate**, **Format**, or toggle **Default**.
3. Click **Save** to apply changes.
*Tips*
- Use Format to enforce consistent display (e.g., `1,234.56` vs `1.234,56`).
- When you change **Exchange Rate**, all derived conversions will use the new rate going forward.
*“Edit Currency” modal opened from the row (rate/format/default shown).*
[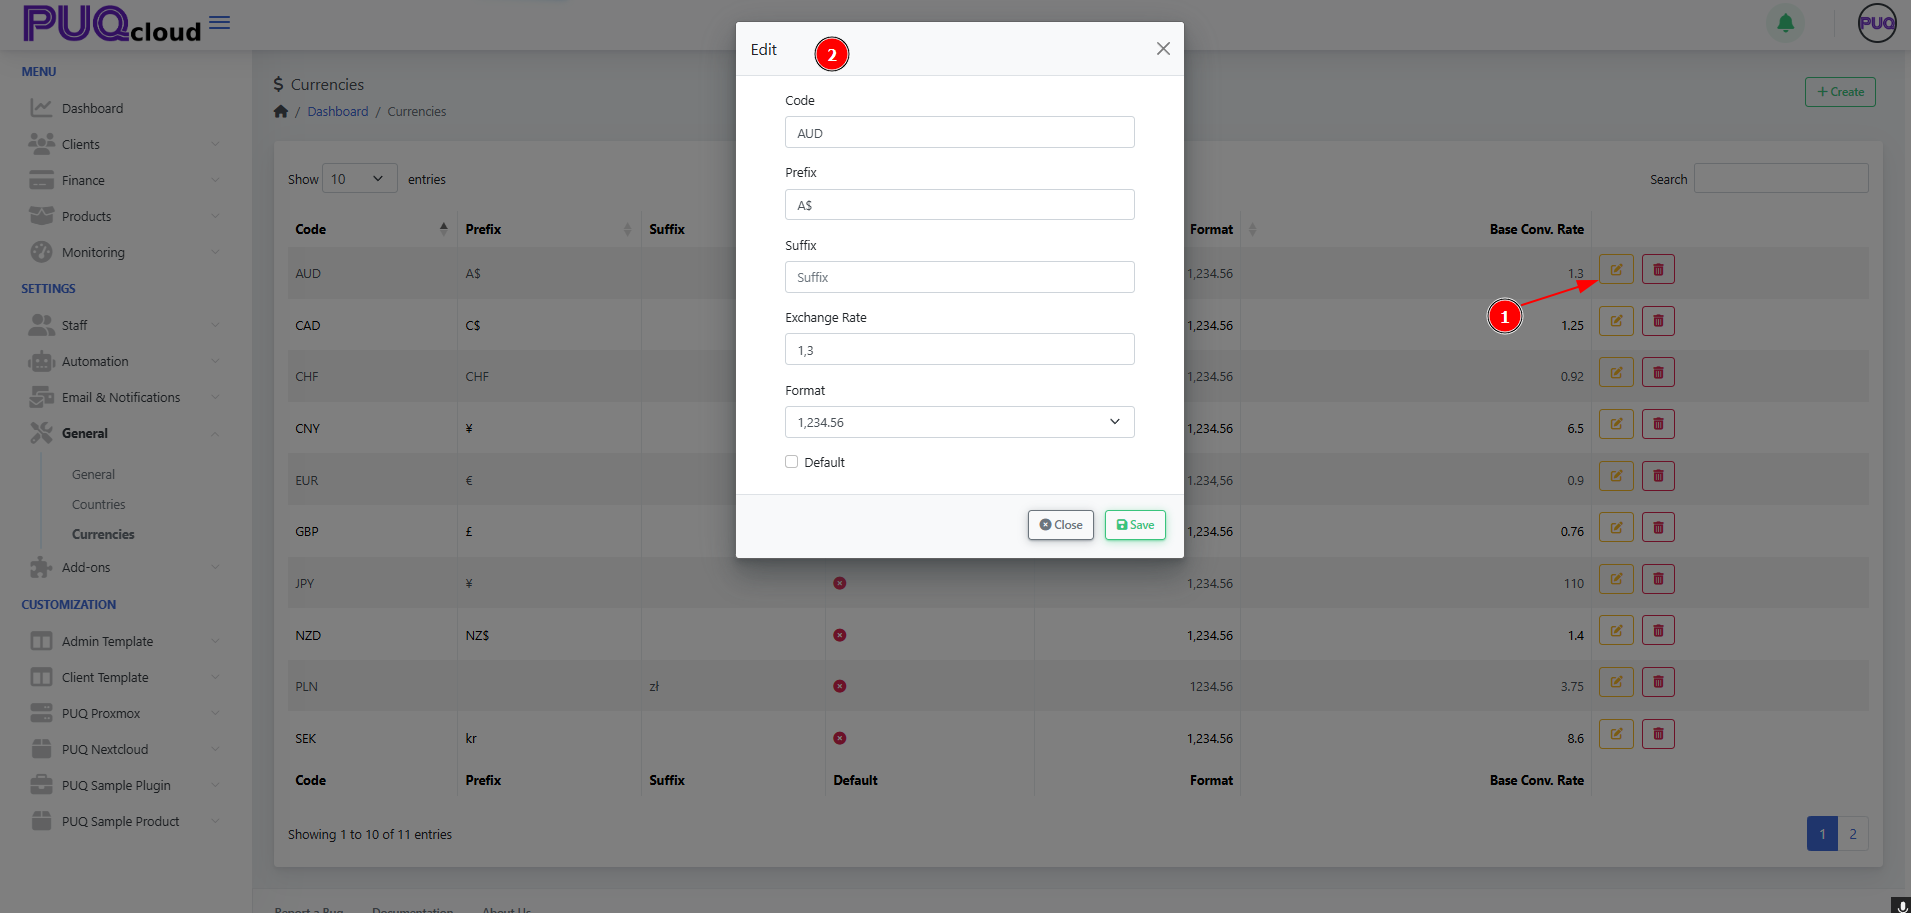](https://doc.puq.info/uploads/images/gallery/2025-09/image-1758204072477.png)
- - - - - -
#### Delete a currency
- Click the **trash** icon on the currency row you wish to remove, then confirm.
(You cannot delete a currency that is currently set as **Default**; switch default first.)
- - - - - -
#### Search, sort, and paginate
- **Search** (top-right) filters by code or symbols.
- Click column headers to **sort** (e.g., by **Code**).
- Use page controls at the bottom to navigate through the list.
- - - - - -
#### Best practices
- Keep **one** clear **Default** currency at all times.
- Review **Exchange Rates** regularly or automate updates if available elsewhere.
- Prefer **ISO codes** for clarity (`USD`, `EUR`, `GBP`, etc.).
- Use **Prefix/Suffix** consistently across your currencies (e.g., `$` as prefix, `zł` as suffix).
That’s it—you can now add, edit, remove, and format currencies in the Admin Area with confidence.