Manage Notification Templates (Admin Area)
PUQcloud Panel
Order Now | Download | FAQ
Here’s a clear, step-by-step guide to managing Notification Templates in the Admin Area.
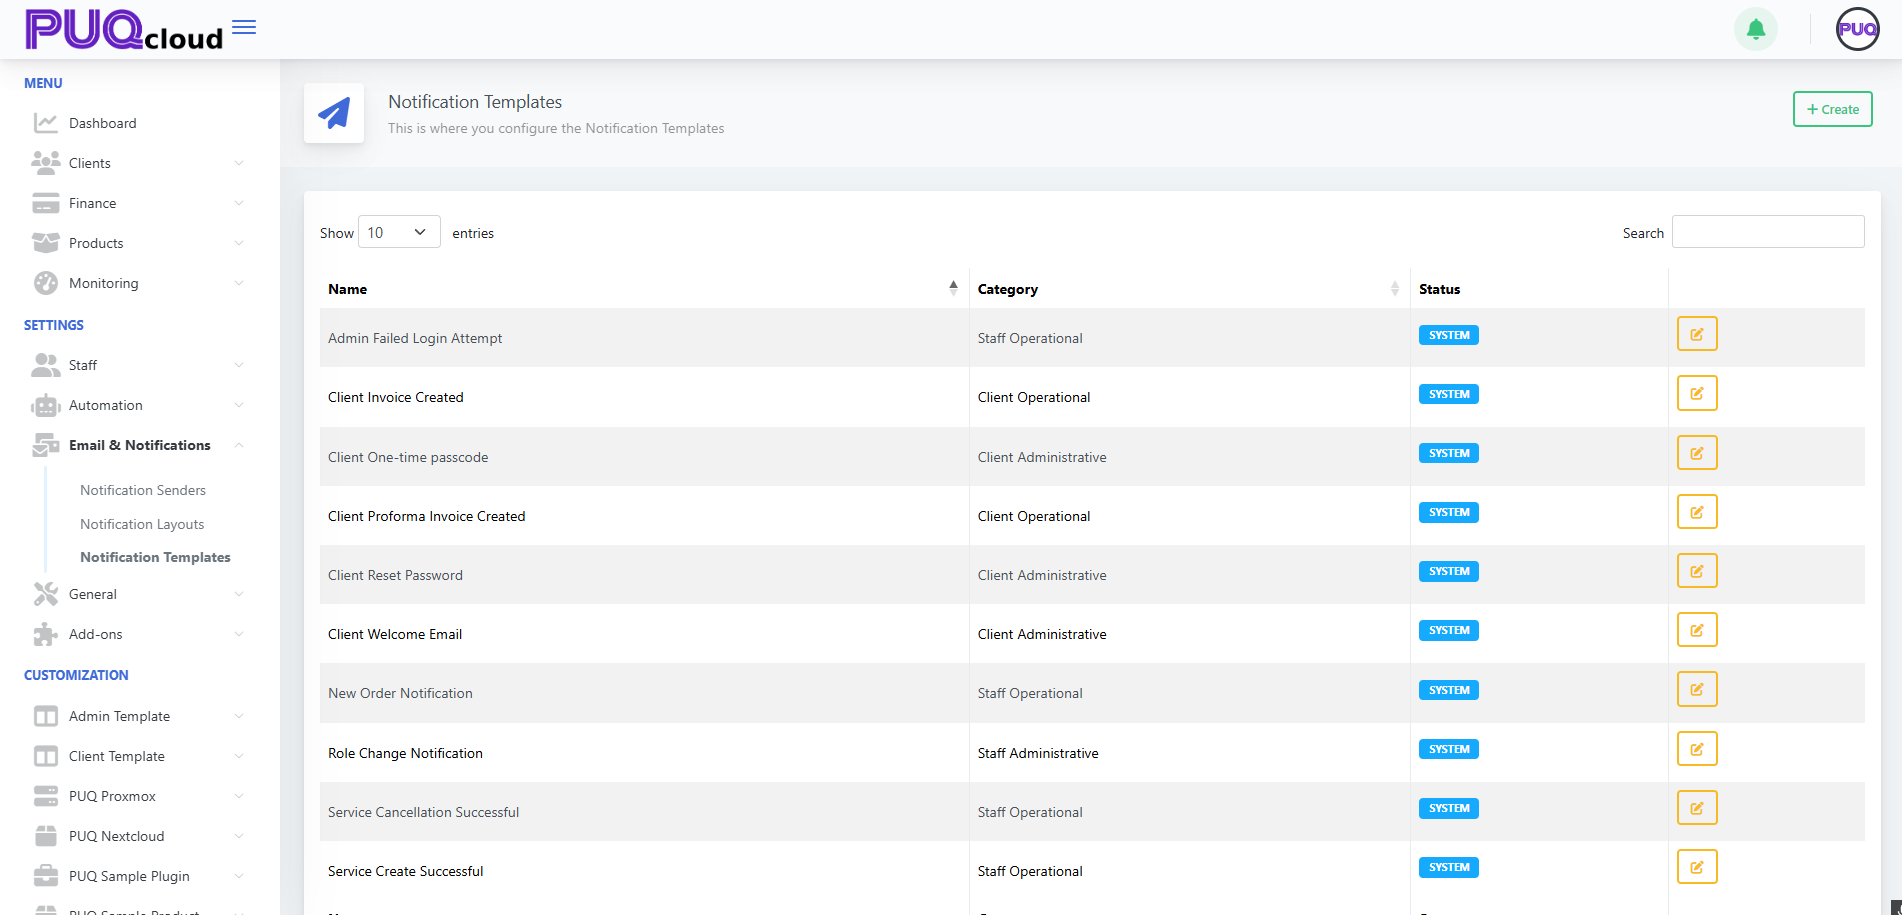
Open the Templates list
-
Go to Email & Notifications → Notification Templates.
-
This page lists all built-in (“SYSTEM”) and any custom templates, grouped by category (Staff/Client – Operational/Administrative).
-
Use the Search box to filter by name and the ✏️ Edit button to customize a template.
Notification Templates list with categories and edit actions.
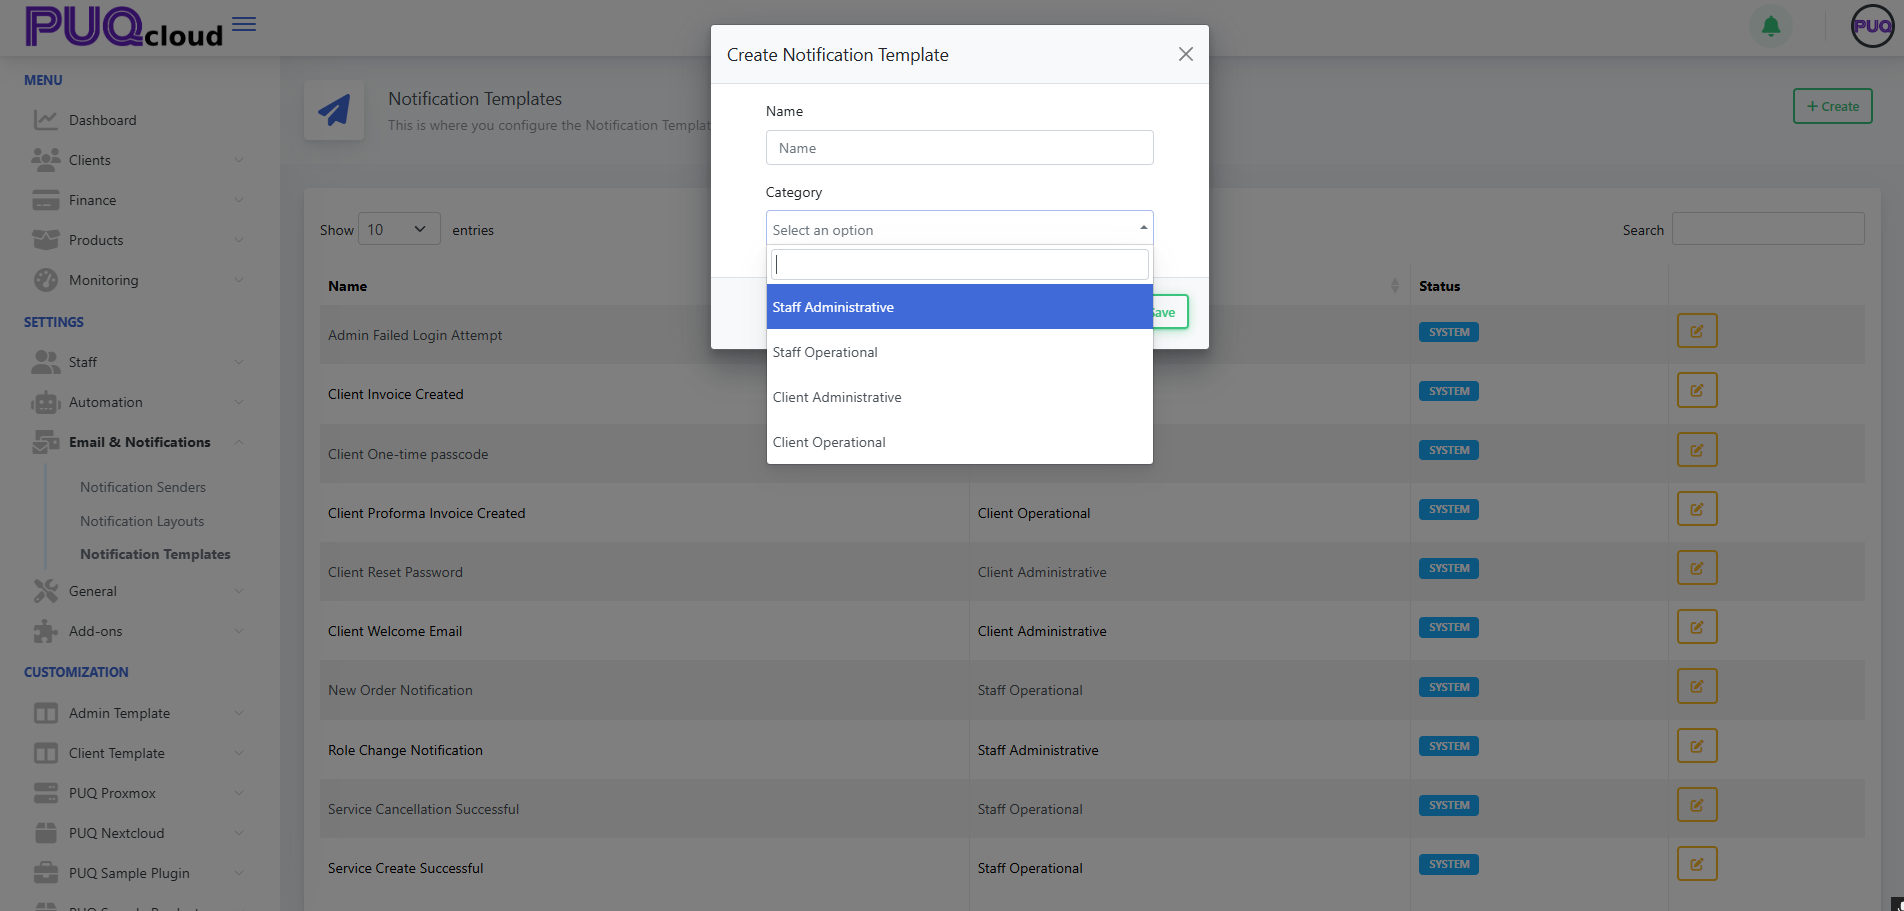
Create a new template
-
Click + Create (top-right).
-
Enter a Name.
-
Pick a Category:
-
Staff Administrative
-
Staff Operational
-
Client Administrative
-
Client Operational
-
-
Click Save.
Tip: Categories help route who receives the message and where it shows up in the UI.
“Create Notification Template” modal (Category).
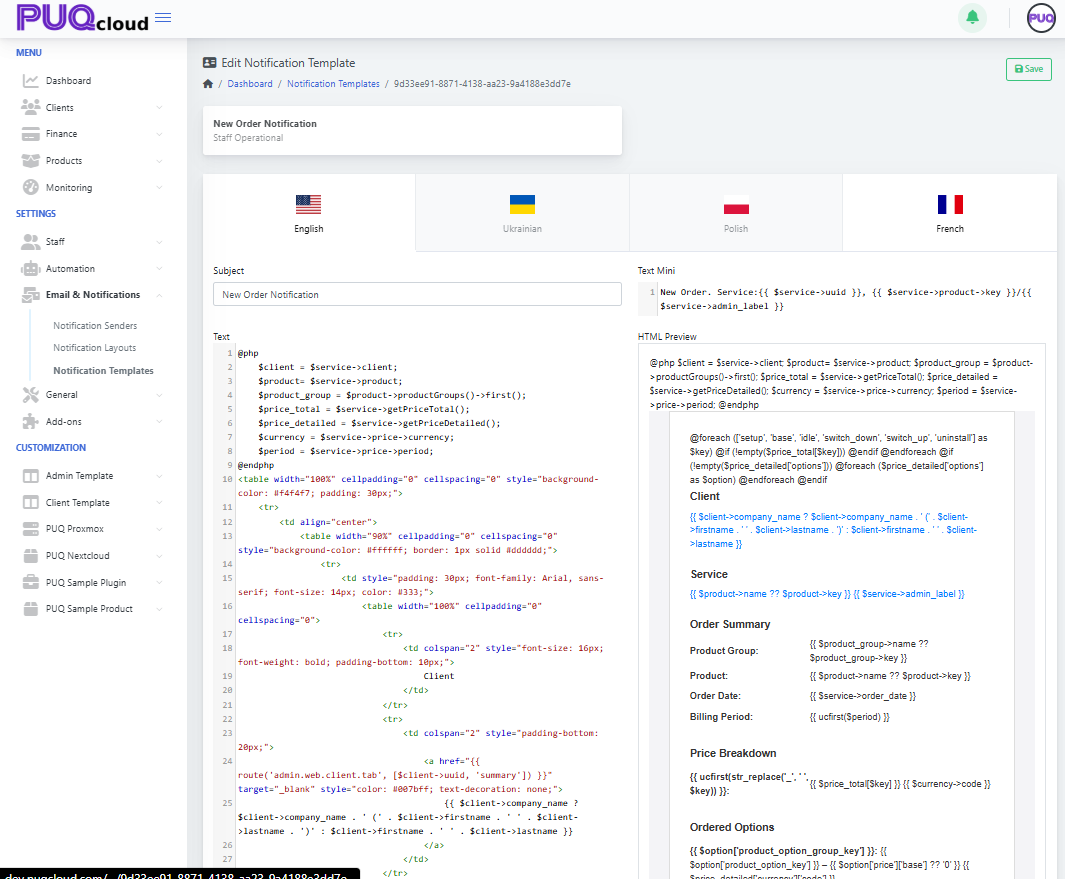
Edit a template (content & languages)
When you edit a template you’ll see:
-
Language tabs (EN/UA/PL/FR): maintain localized versions for each language you support.
-
Subject: the email subject line for that language.
-
Text Mini: a short/plain snippet (great for SMS/push or the top of text-only emails).
-
HTML Preview: a live preview of the HTML you’re composing on the left.
Changes are independent per language; remember to save after editing each language if you switch tabs.
Edit Notification Template: language tabs, Subject, Text Mini, live preview.
Write the message (variables & logic)
-
The editor supports template variables and light blade-style syntax. Common objects include:
-
$client(e.g.,$client->company_name,$client->firstname) -
$service(e.g.,$service->uuid,$service->price,$service->product) -
$product,$price_detail,$currency,$period, etc., depending on the event
-
-
Use control structures (
@if,@foreach) to conditionally render parts of the email.
Examples you’ll often see:
{{ $service->uuid }}
{{ $client->firstname }} {{ $client->lastname }}
@foreach($price_detailed['options'] ?? [] as $option)
  {{ $option['name'] }} — {{ $option['price'] }}
@endforeach
-
Keep Text Mini short and human-readable; reserve full markup for the HTML body.
-
Watch the HTML Preview on the right to validate your structure and data placeholders.
Best practices
-
Clone behavior: Editing a SYSTEM template effectively overrides it (your changes become the active version); you can always re-apply defaults later by copying from a fresh environment.
-
Keep it accessible: Use semantic HTML and inline styles; avoid images for critical info.
-
Localization parity: Ensure every language tab has at least a basic subject/body.
-
Personalization: Prefer
$client->firstnameover generic “Dear Customer”. -
Links & safety: Use absolute URLs and include a clear call to action (e.g., “Visit Client Area”).
-
Testing: Trigger the real event (e.g., create a proforma invoice) in a sandbox account to see the final message flowing through your selected Notification Sender (SMTP/PHPMail/Bell).
Troubleshooting
-
Variables show blank: That variable isn’t available for the event. Inspect other defaults for that event to see which fields are used.
-
Rendering issues: Check unclosed tags and preview; simplify nested tables if needed.
-
Wrong language sent: Confirm the client’s preferred language and that the localized version exists.
Related setup (optional but recommended)
-
Configure Email & Notifications → Notification Senders (SMTP, PHPMail, Bell) so mail actually goes out.
-
Adjust Notification Layouts if you want a shared header/footer or branding that wraps your templates.
That’s it—you’re ready to create polished, localized notifications that fit your brand and workflows.