IKEv2 clients configuring
- IKEv2 Official clients
- Android IKEv2 client configuration
- macOS IKEv2 client configuration
- Windows IKEv2 client configuration
- Linux IKEv2 client configuration
- Mikrotik IKEv2 client configuration
- iOS IKEv2 client configuration
IKEv2 Official clients
Order now | Download | FAQ
Our solution works great with official client programs. We strongly invite you to use them.
You can download from the https://www.strongswan.org/download.html
Please always download latest versions. The following list is intended as a general direction only.
strongSwan Downloads
NetworkManager Plugin
strongSwan's NetworkManager plugin is available as binary package for several distributions (e.g. network-manager-strongswan on Debian/Ubuntu).
Current Release
Version: 1.6.0
- NetworkManager-strongswan-1.6.0.tar.bz2
-
This version supports GTK 4 (in addition to GTK 3), but doesn't support compiling against libnm-glib anymore.
Android App
The strongSwan Android app can be installed from App stores, or manually by downloading the APK from our download server.
Current Release
Version: 2.3.3
https://play.google.com/store/apps/details?id=org.strongswan.android
https://f-droid.org/en/packages/org.strongswan.android/
Android IKEv2 client configuration
Order now | Download | FAQ
In order to connect to a VPN, follow these steps:
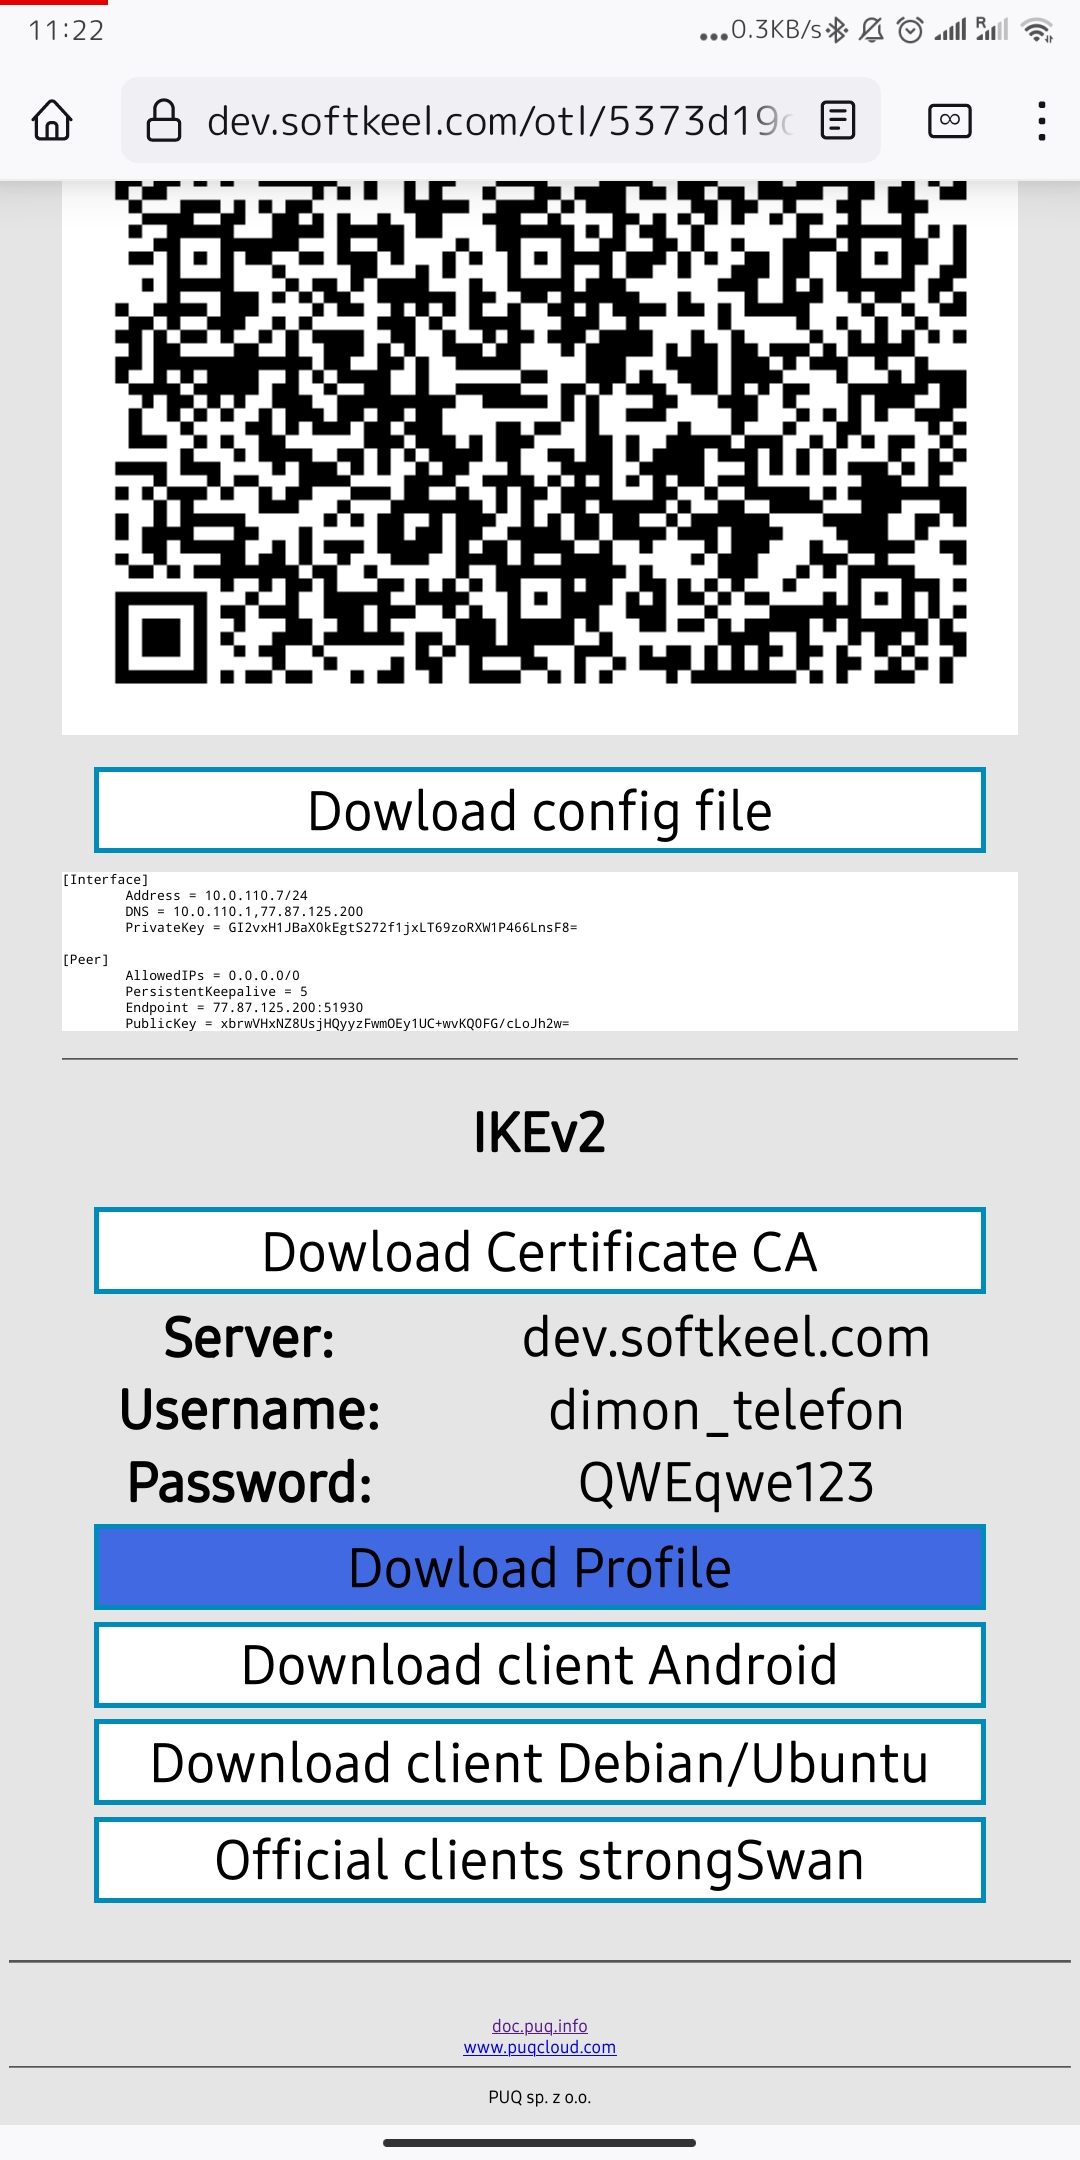
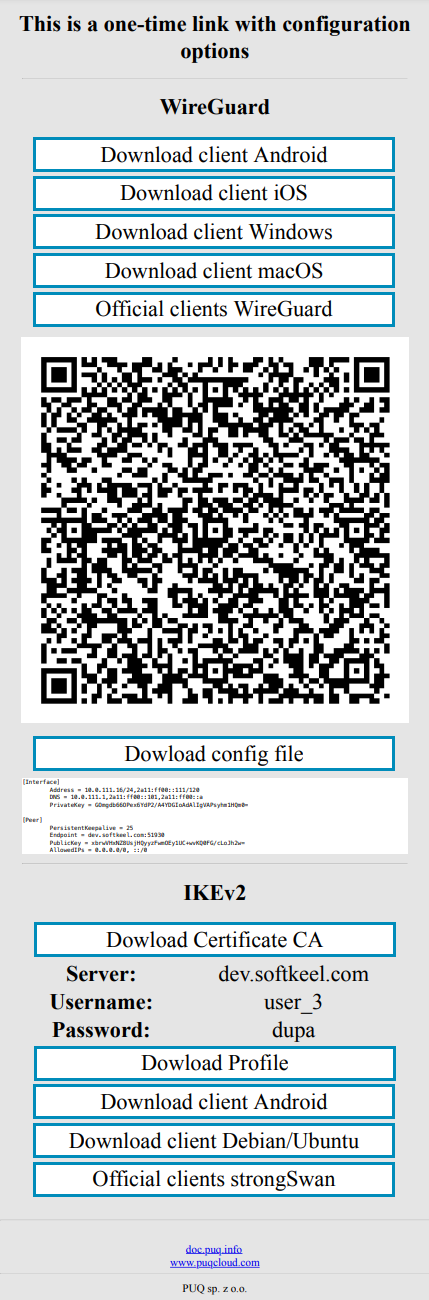
- Open the link you received in a browser to get instructions and configuration for your new VPN connection. And you will see the following page in the browser window

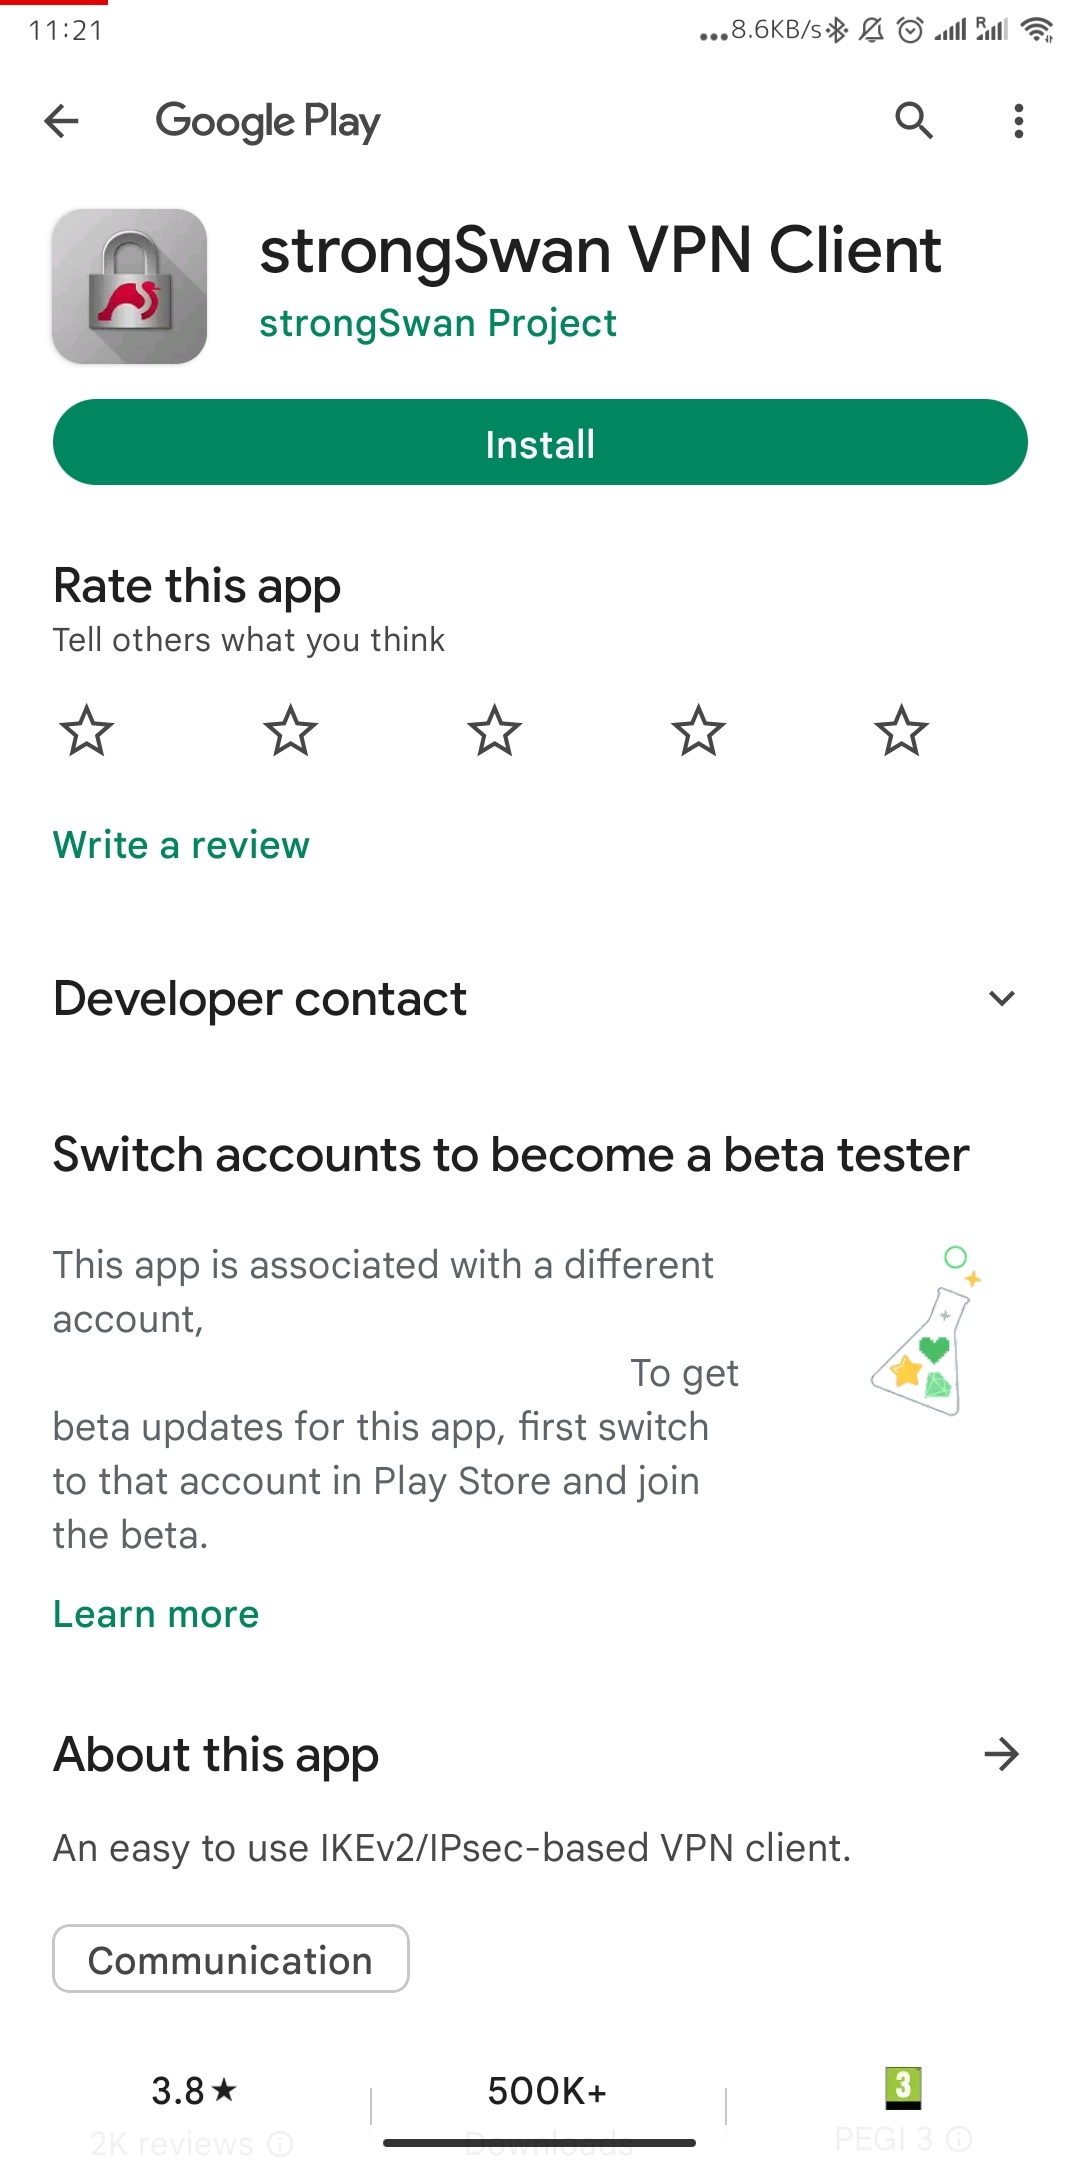
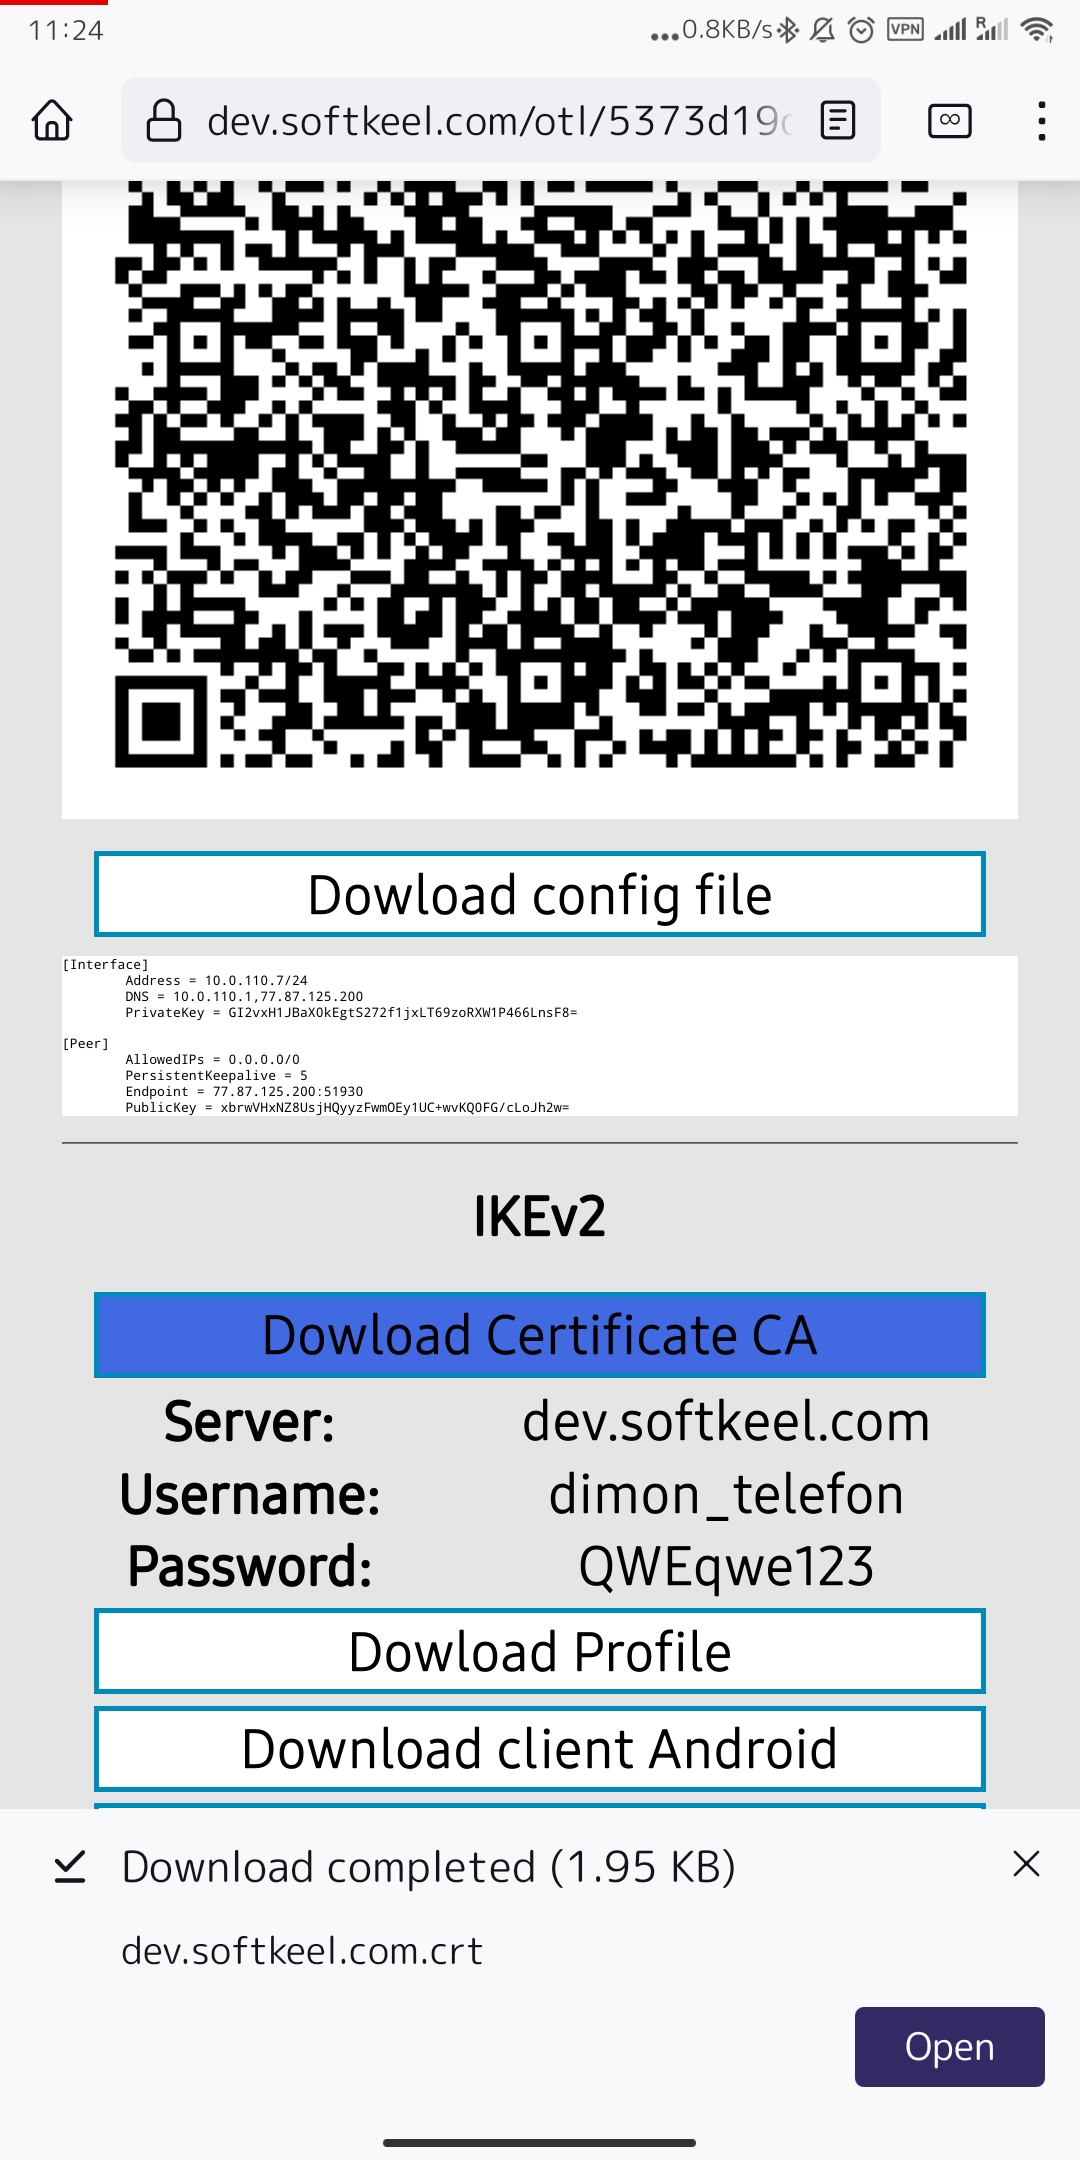
- To continue, you need to install a connection client for your Android device. To download and install your IKEv2 connection client, go to the IKEv2 section and click on the "Download client Android" button.

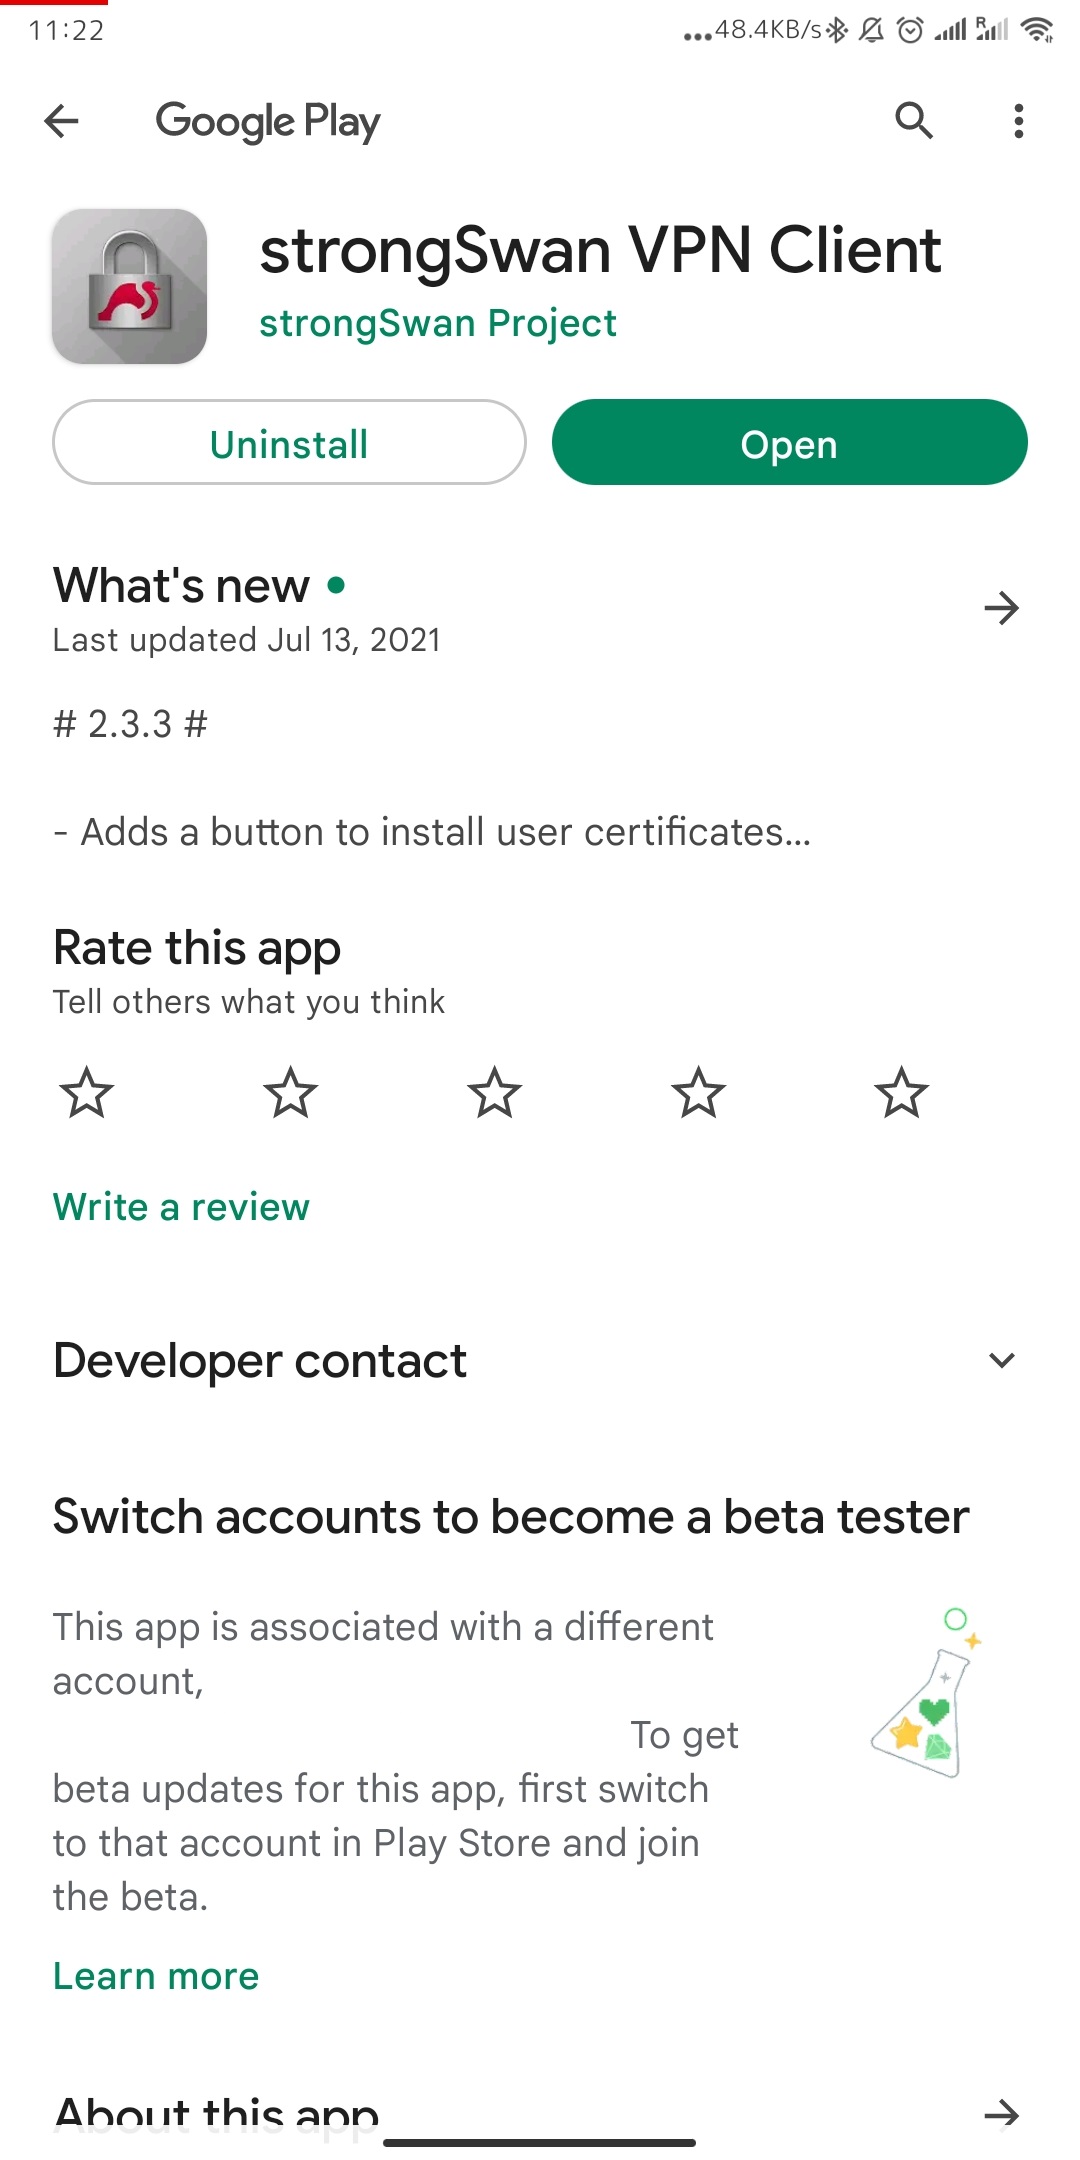
- Install the app from your app store.


-
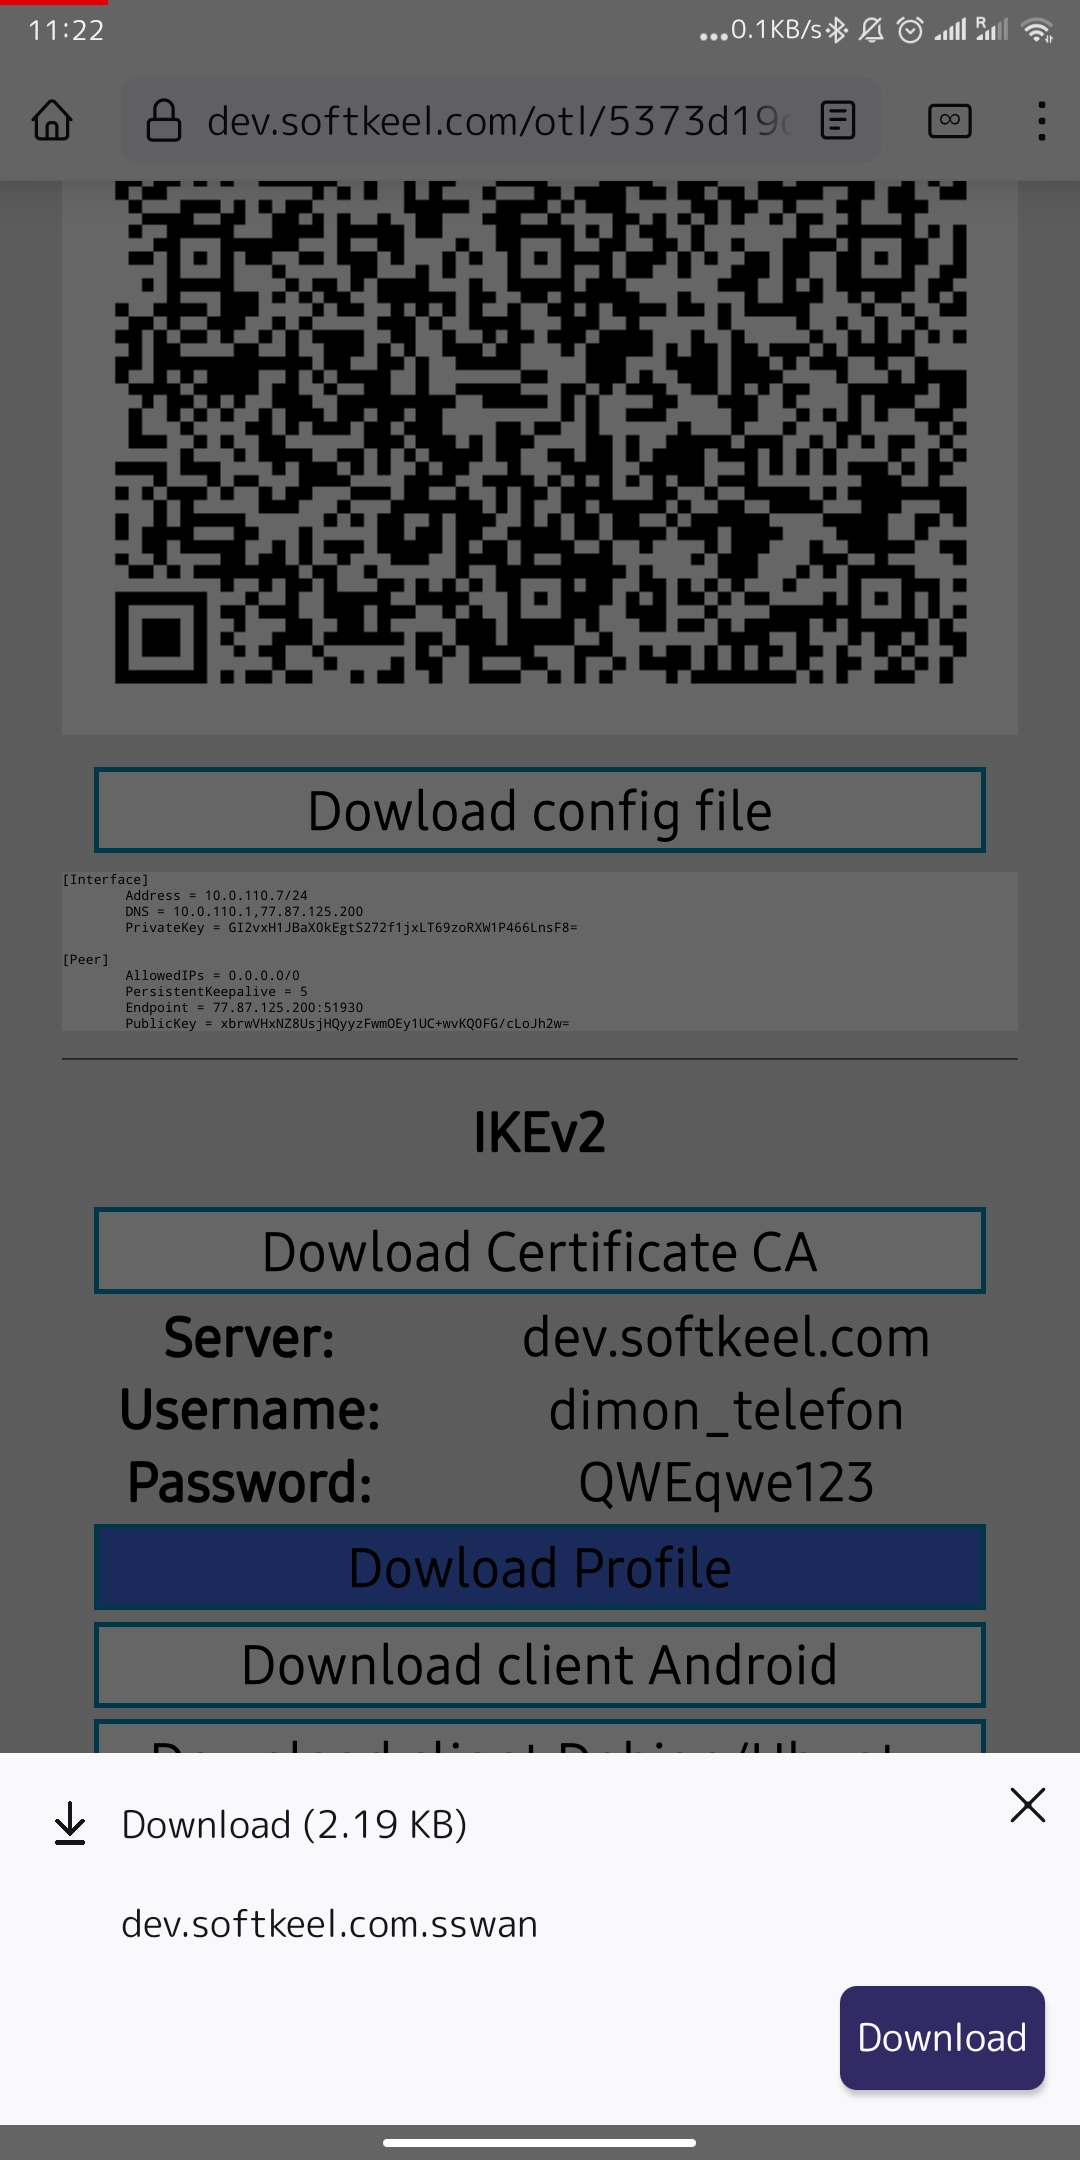
After the app is installed. Download your connection profile in the IKEv2 section. To download the connection profile, click "Dowload Profile"


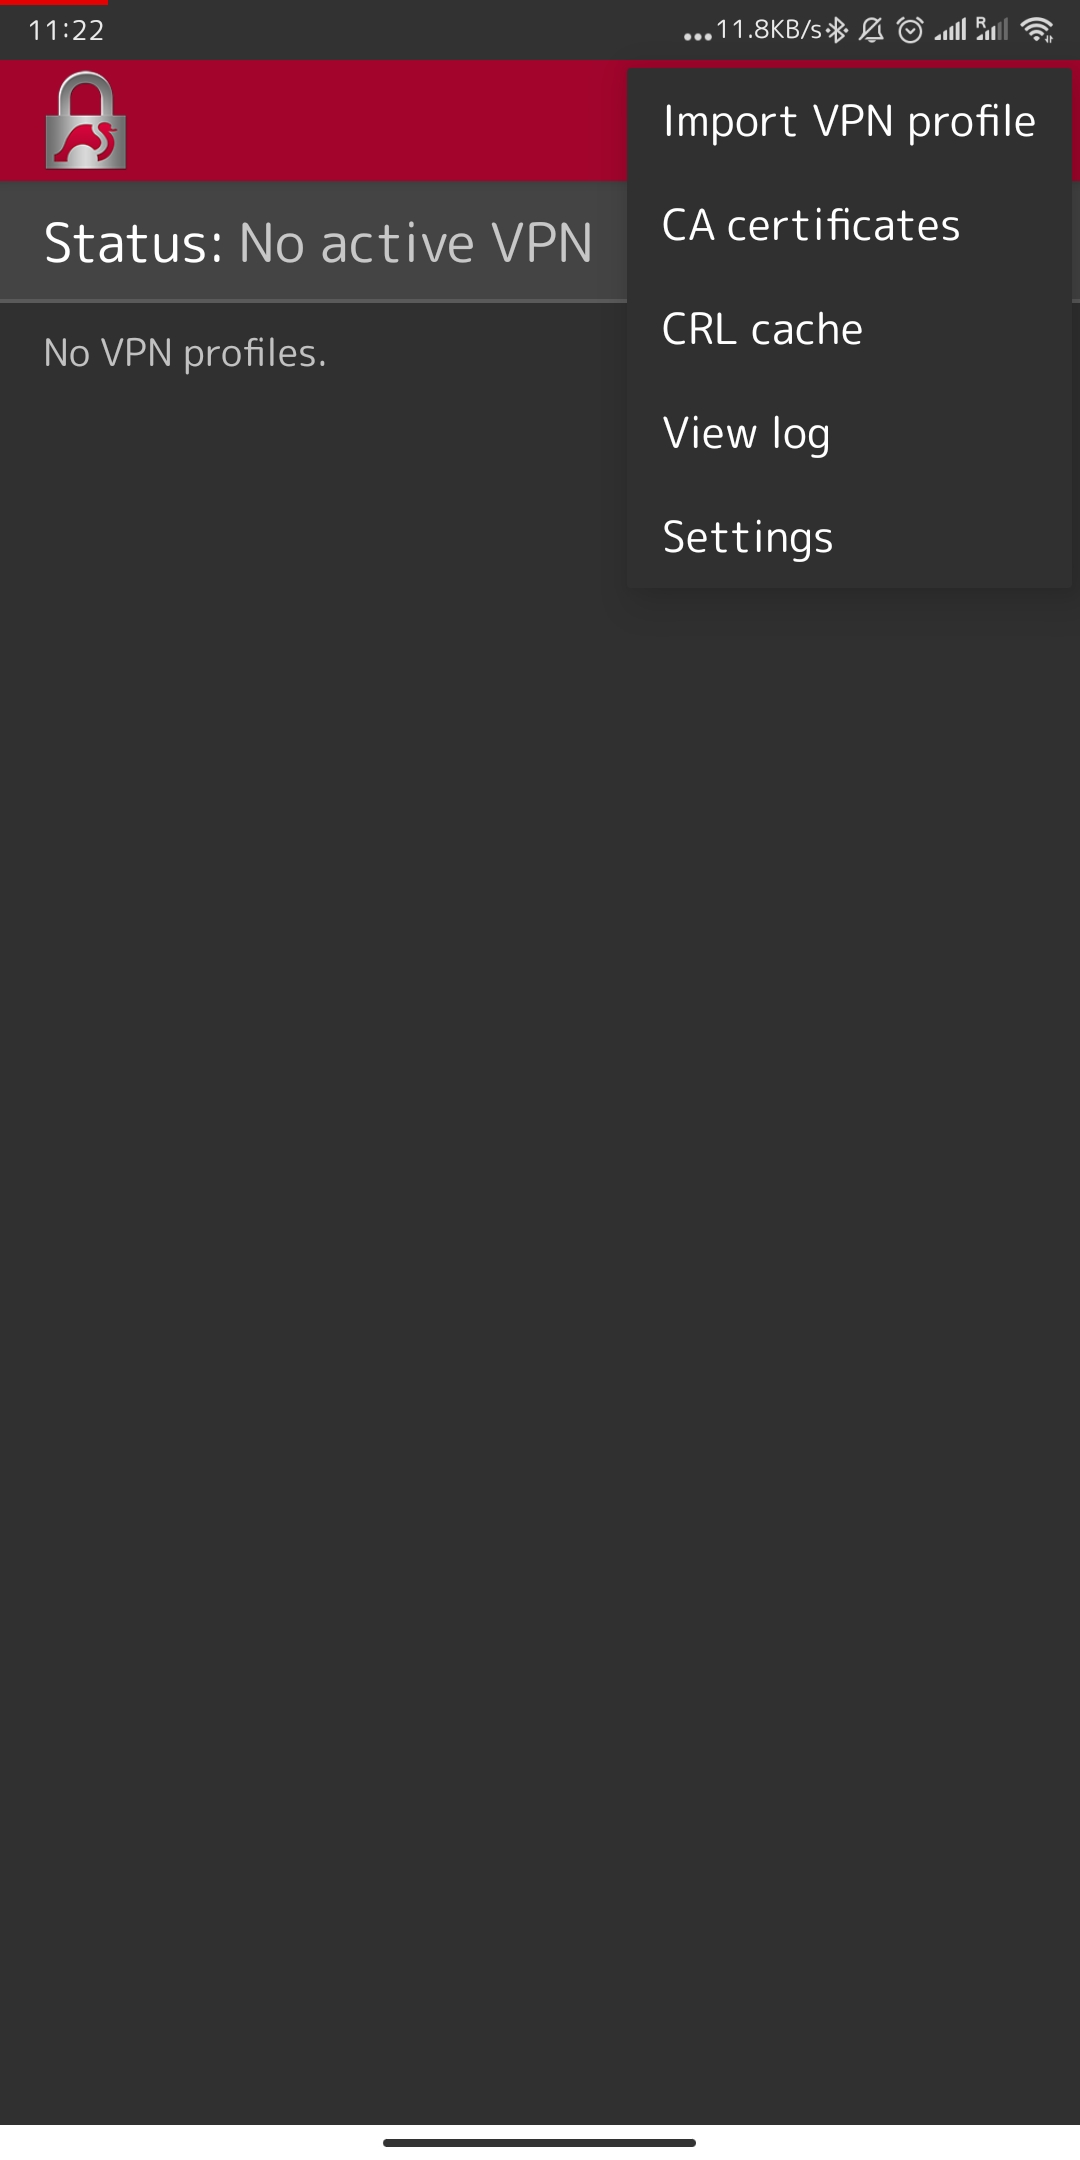
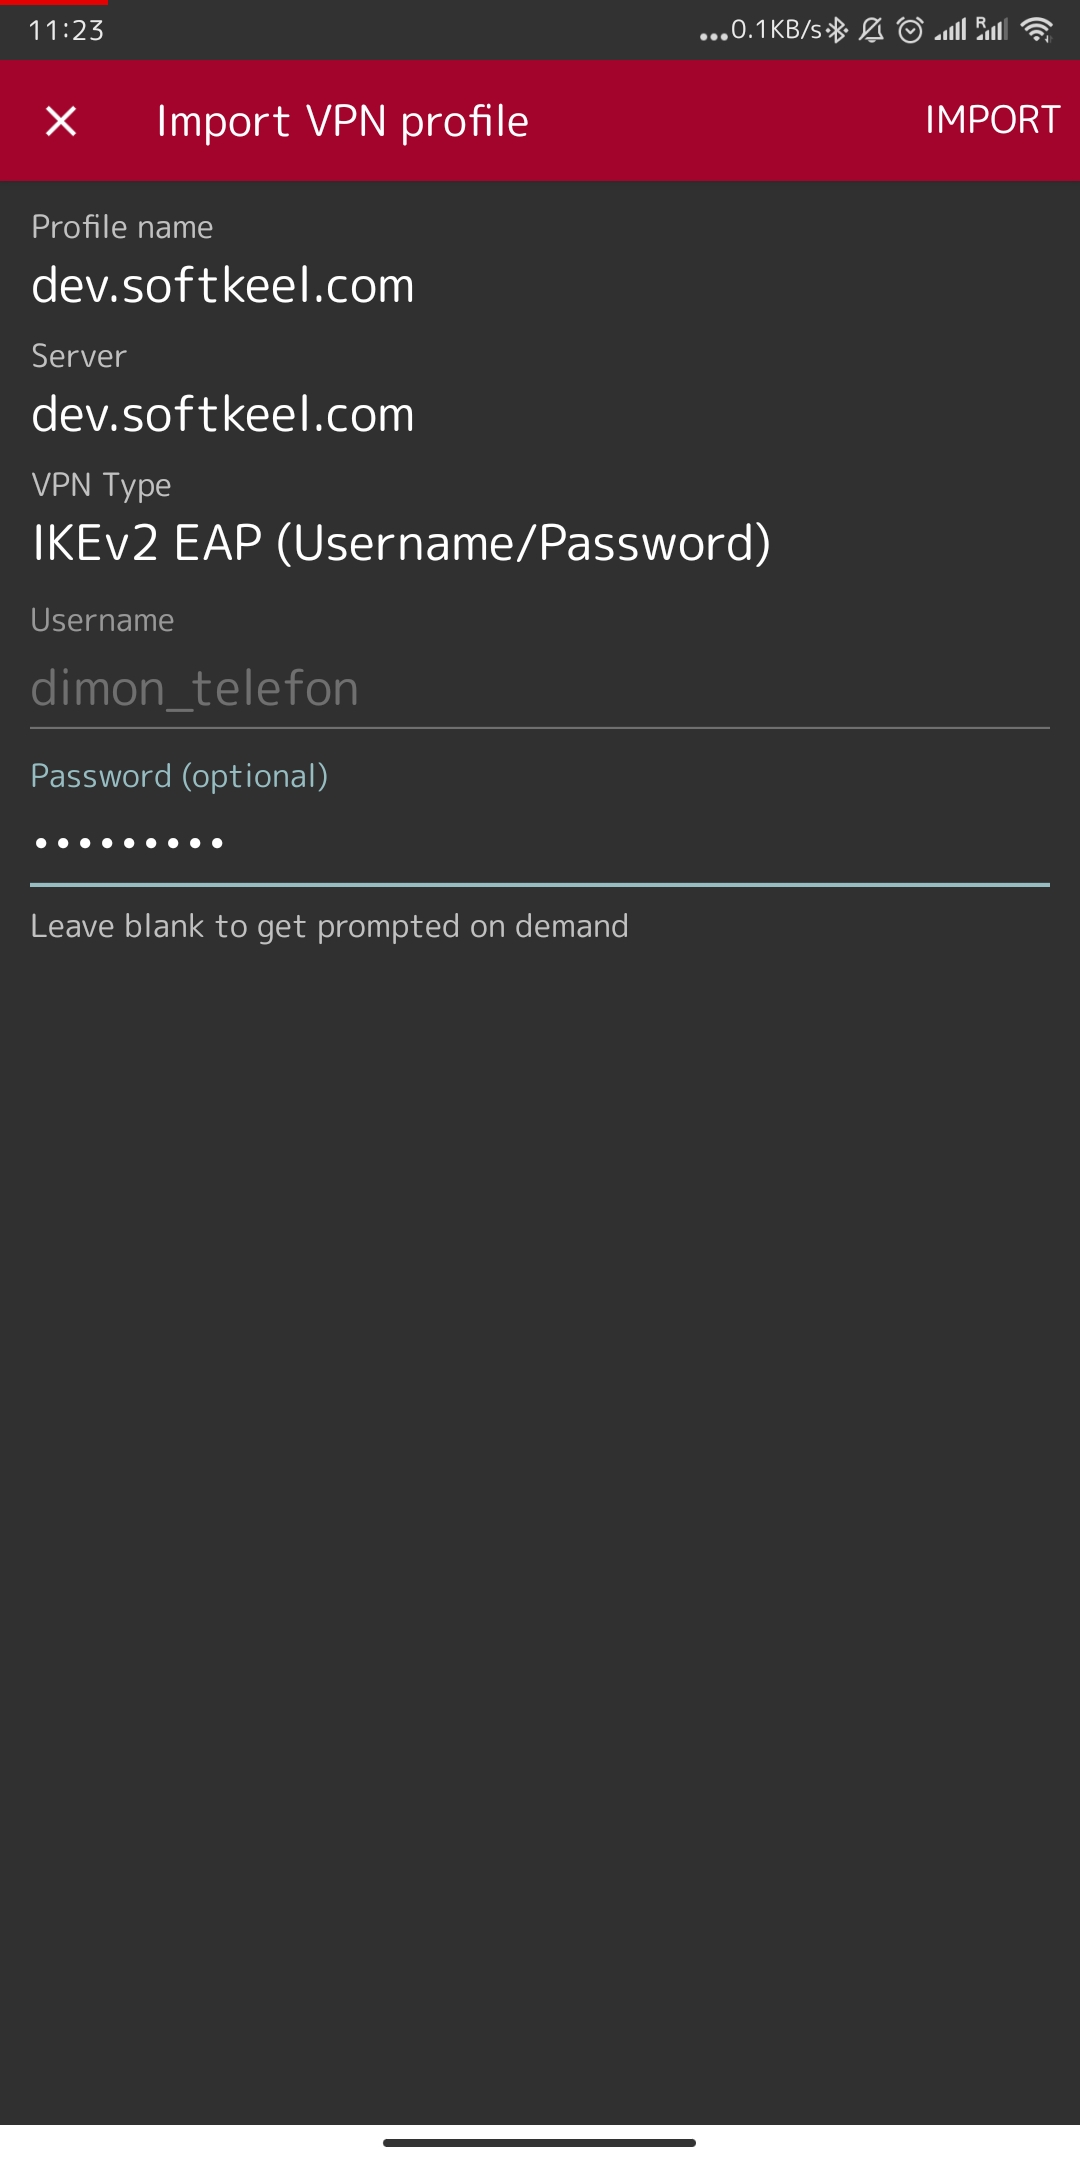
- After you have downloaded the connection profile, you need to import this profile into your application. Open the app and click "Import VPN Profile" on the menu.

- You need to enter your password, which will be available to you in the information provided to you. We cannot pass the password as it is not secure in terms of the IKEv2 protocol.

-
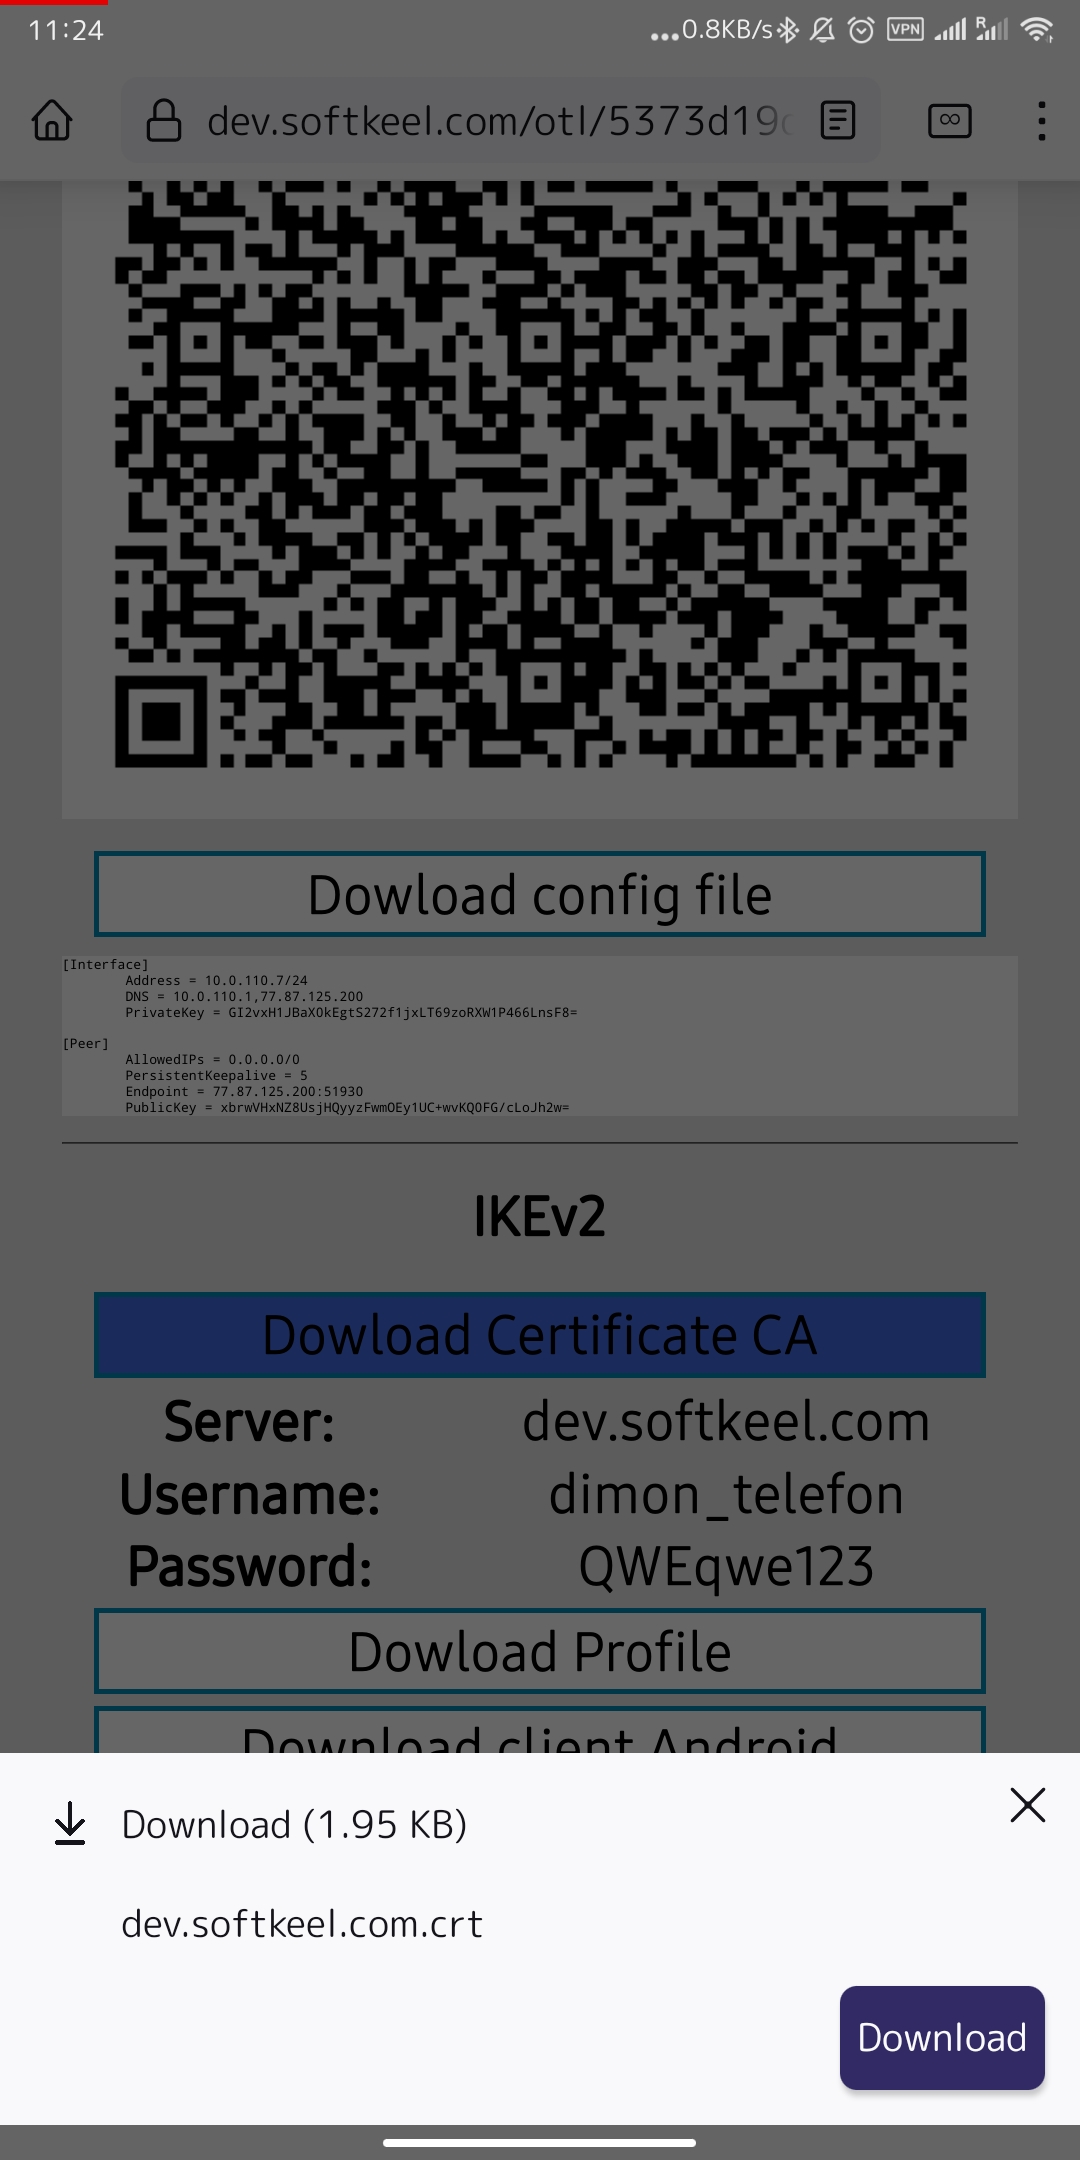
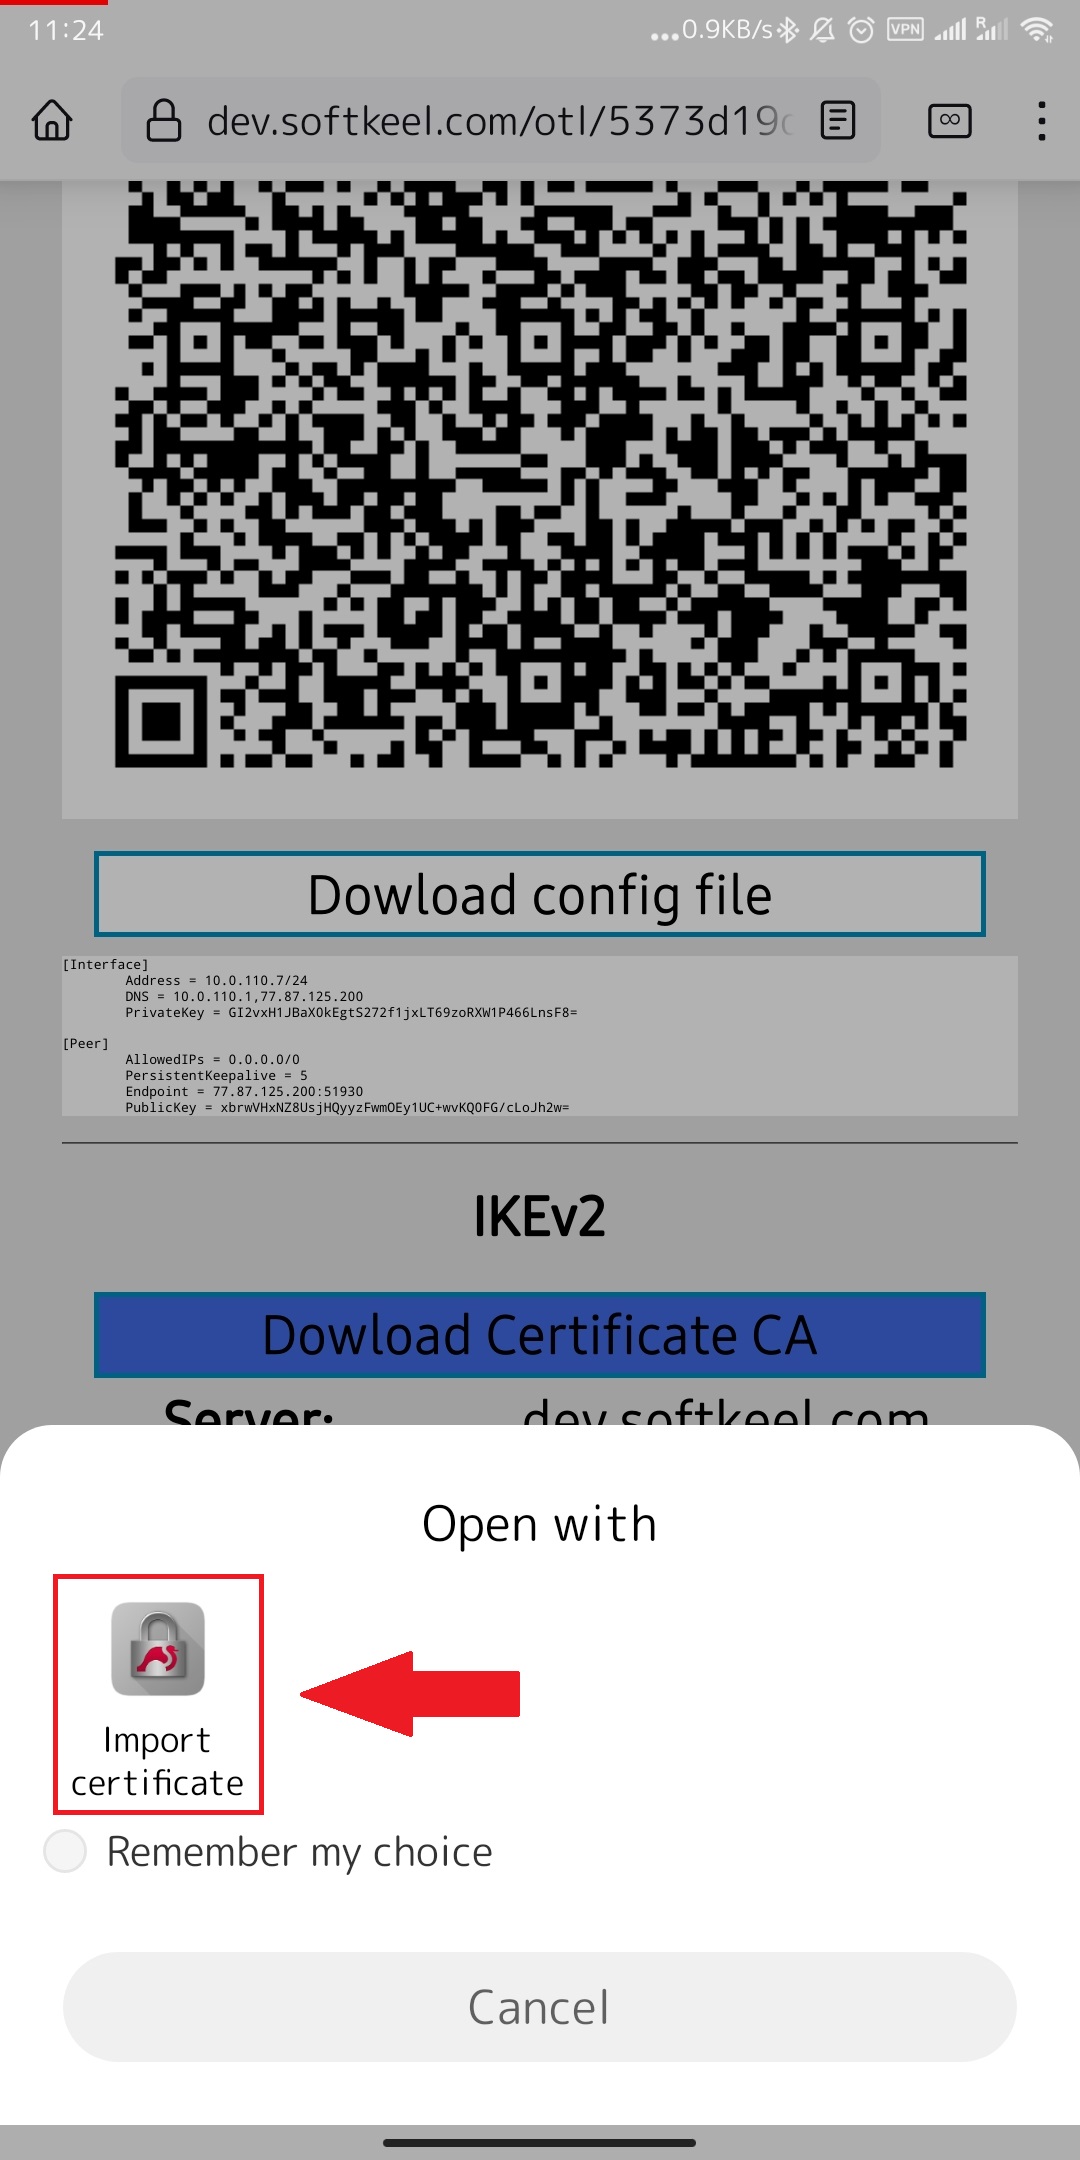
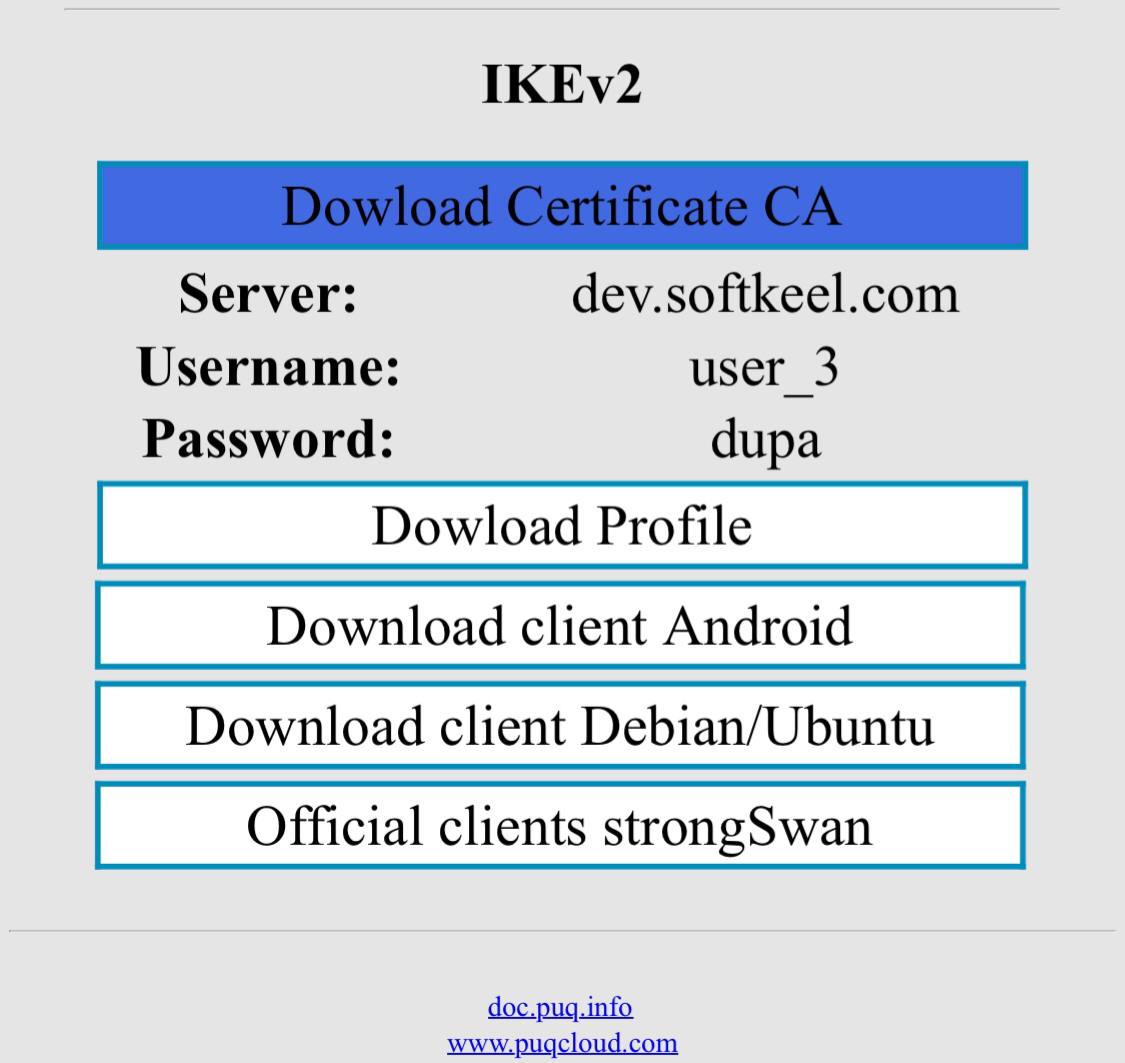
Almost done. But that's not all. We need to import keys for our connection. This is necessary to ensure that the connection is encrypted. To download the key, you need to click on the "Dowload Certificate CA" button. And save the certificate for further integration. To start importing a certificate, simply open it and select an application to open the file.

-
Next click open.

-
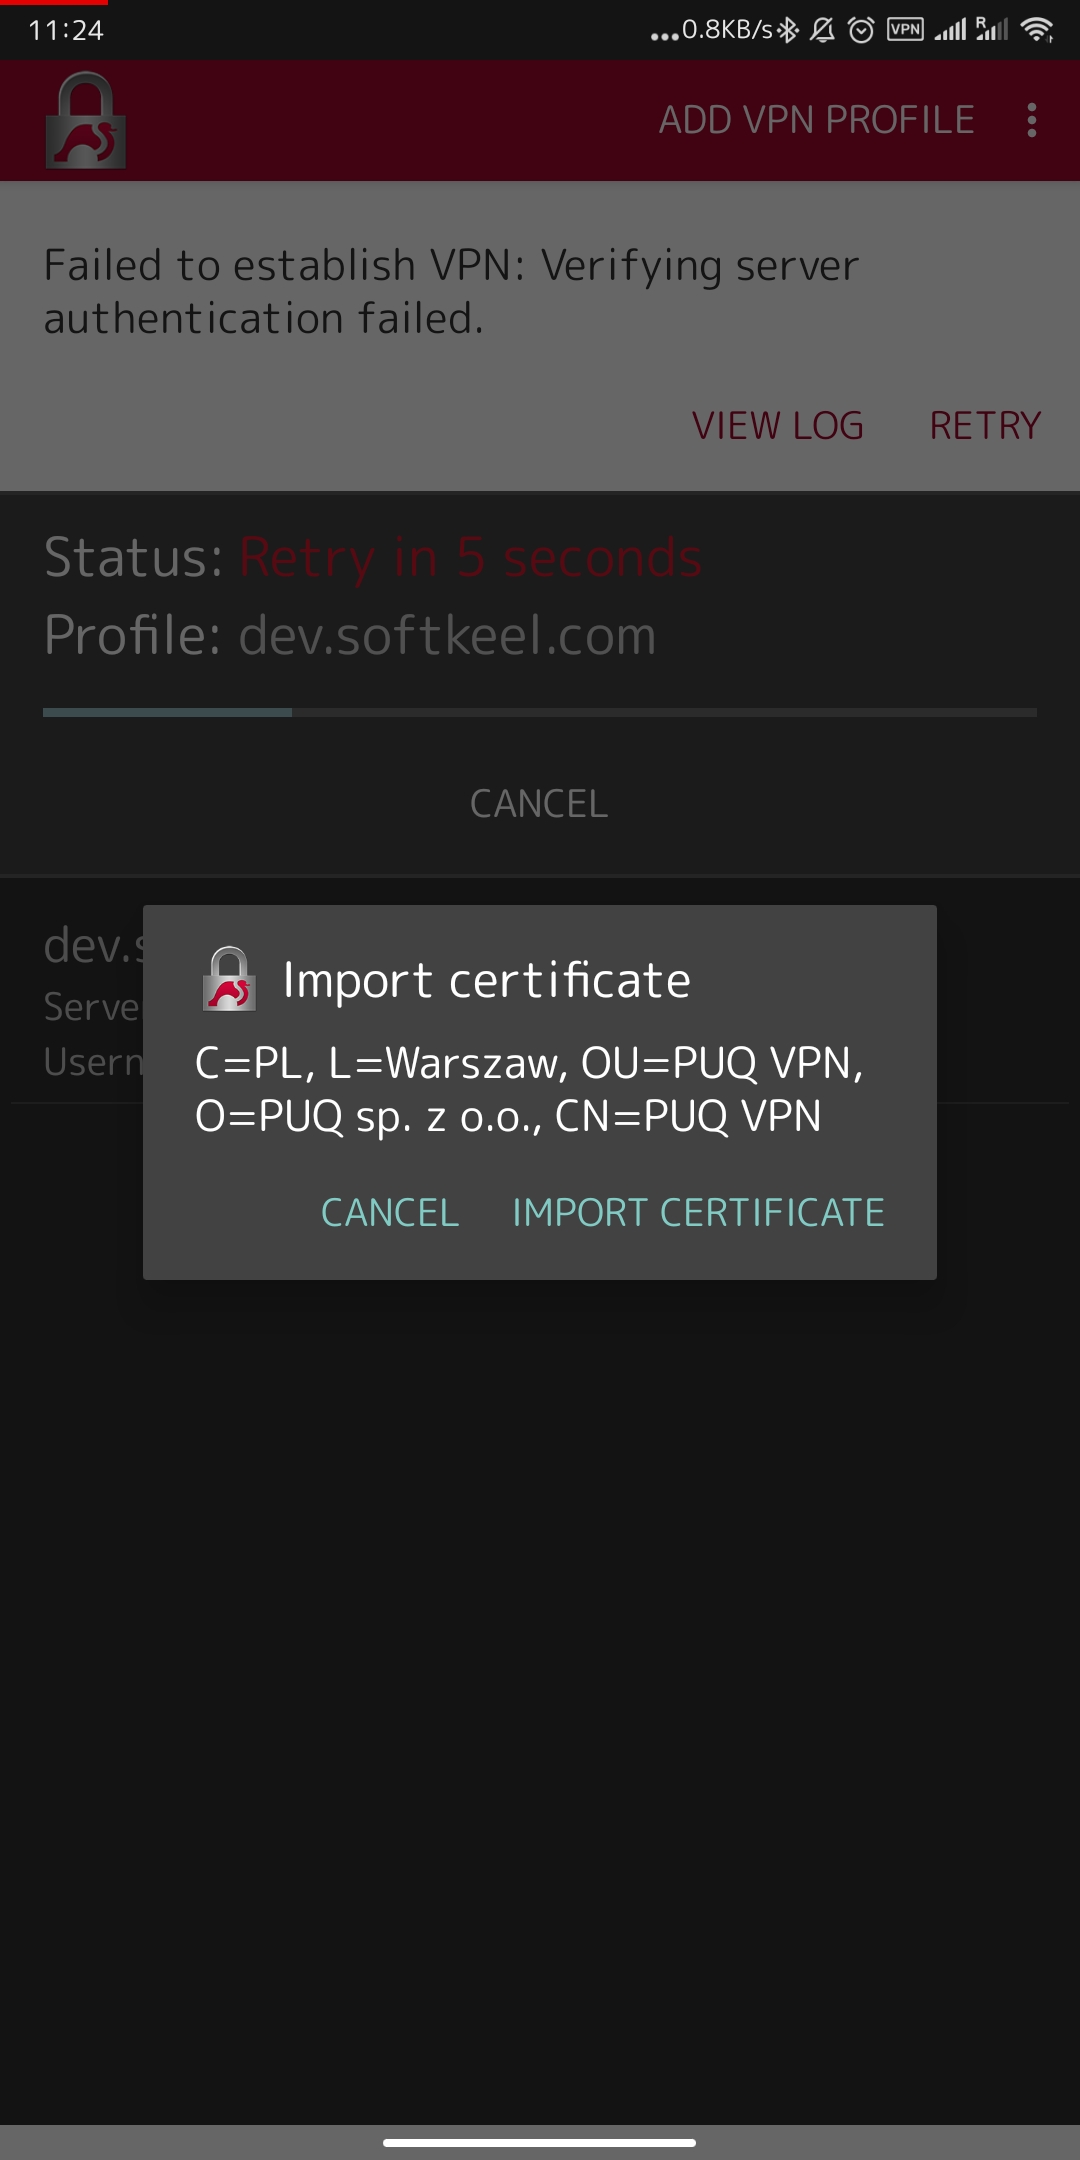
After you click open, select an application from those offered. And click on the "Import Certificate" button.


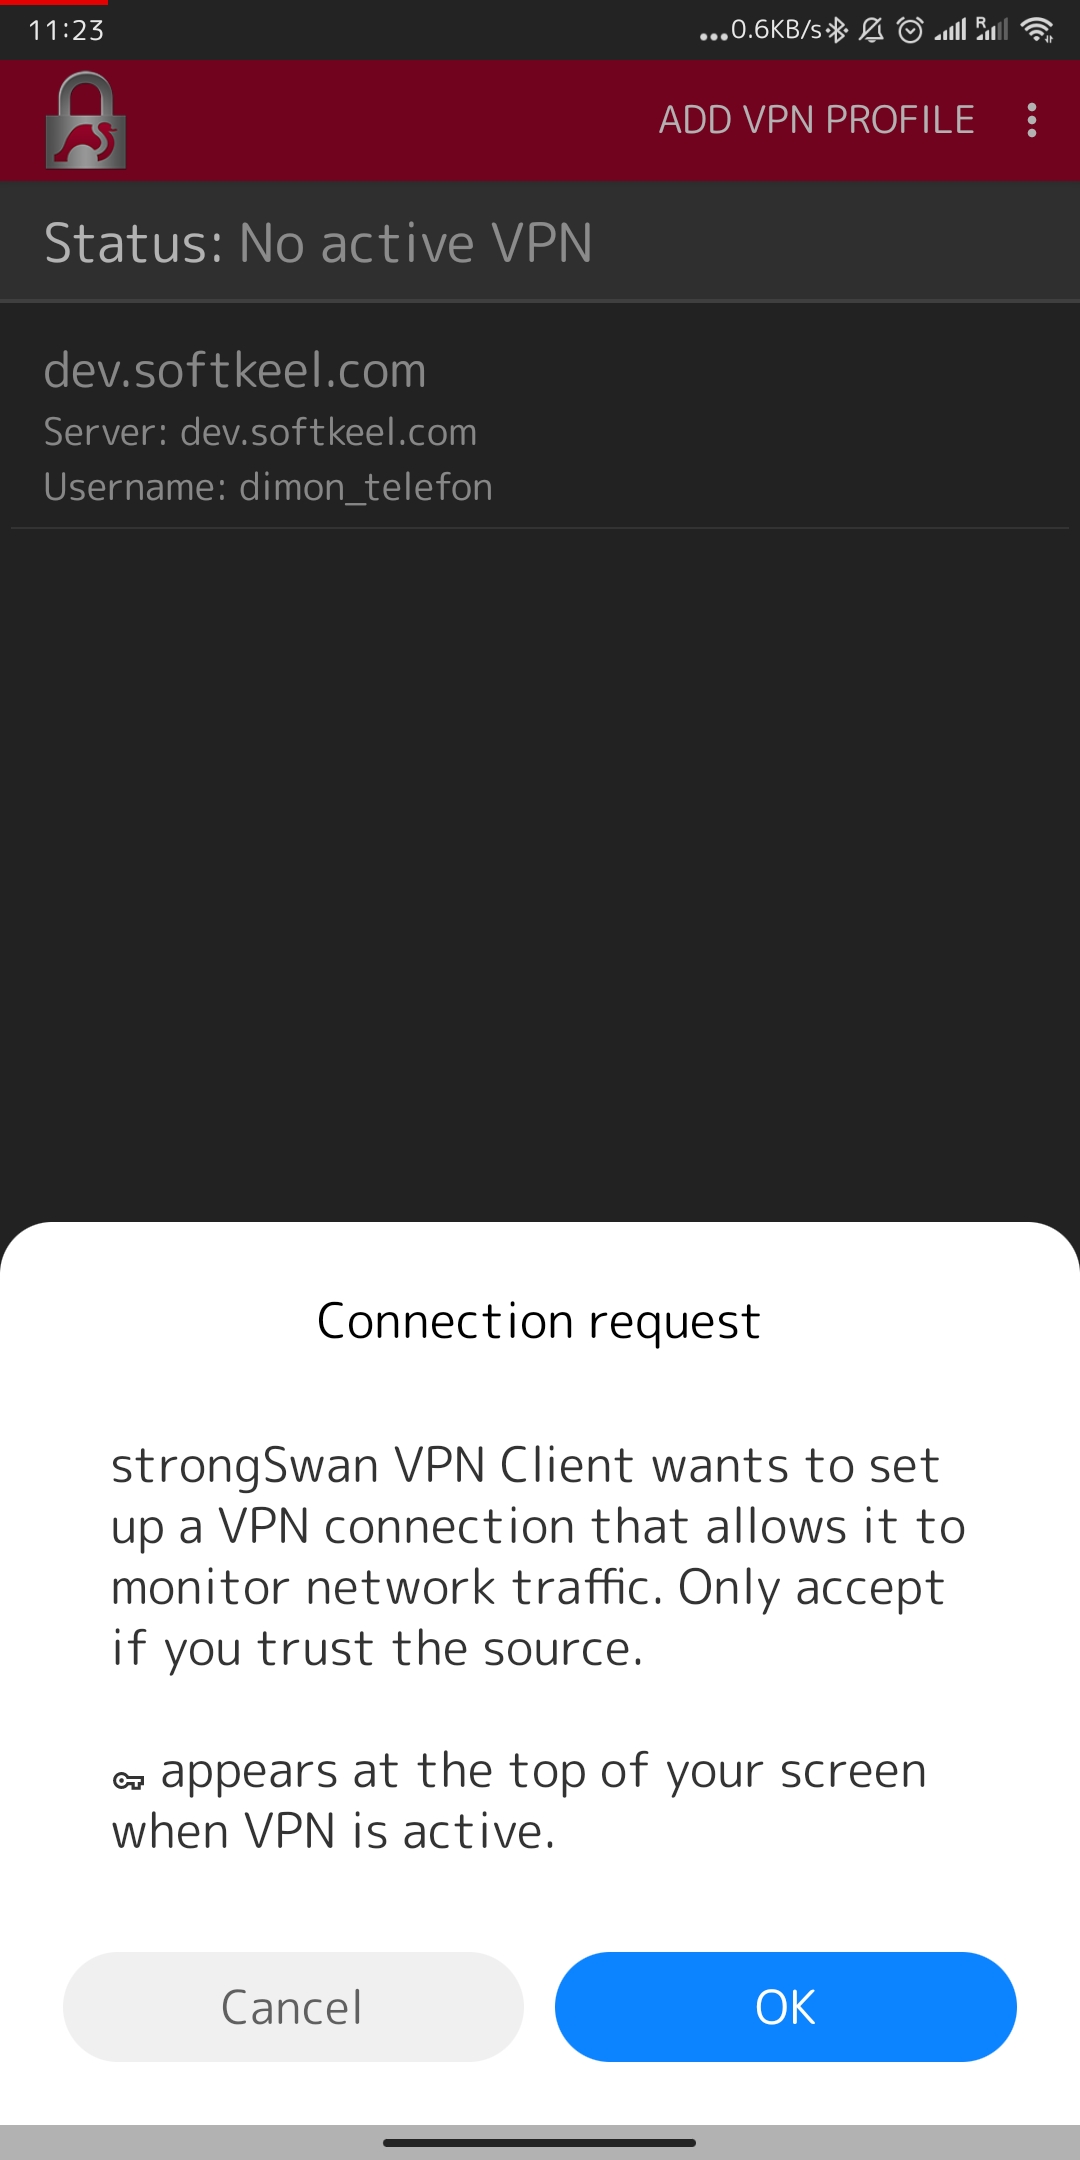
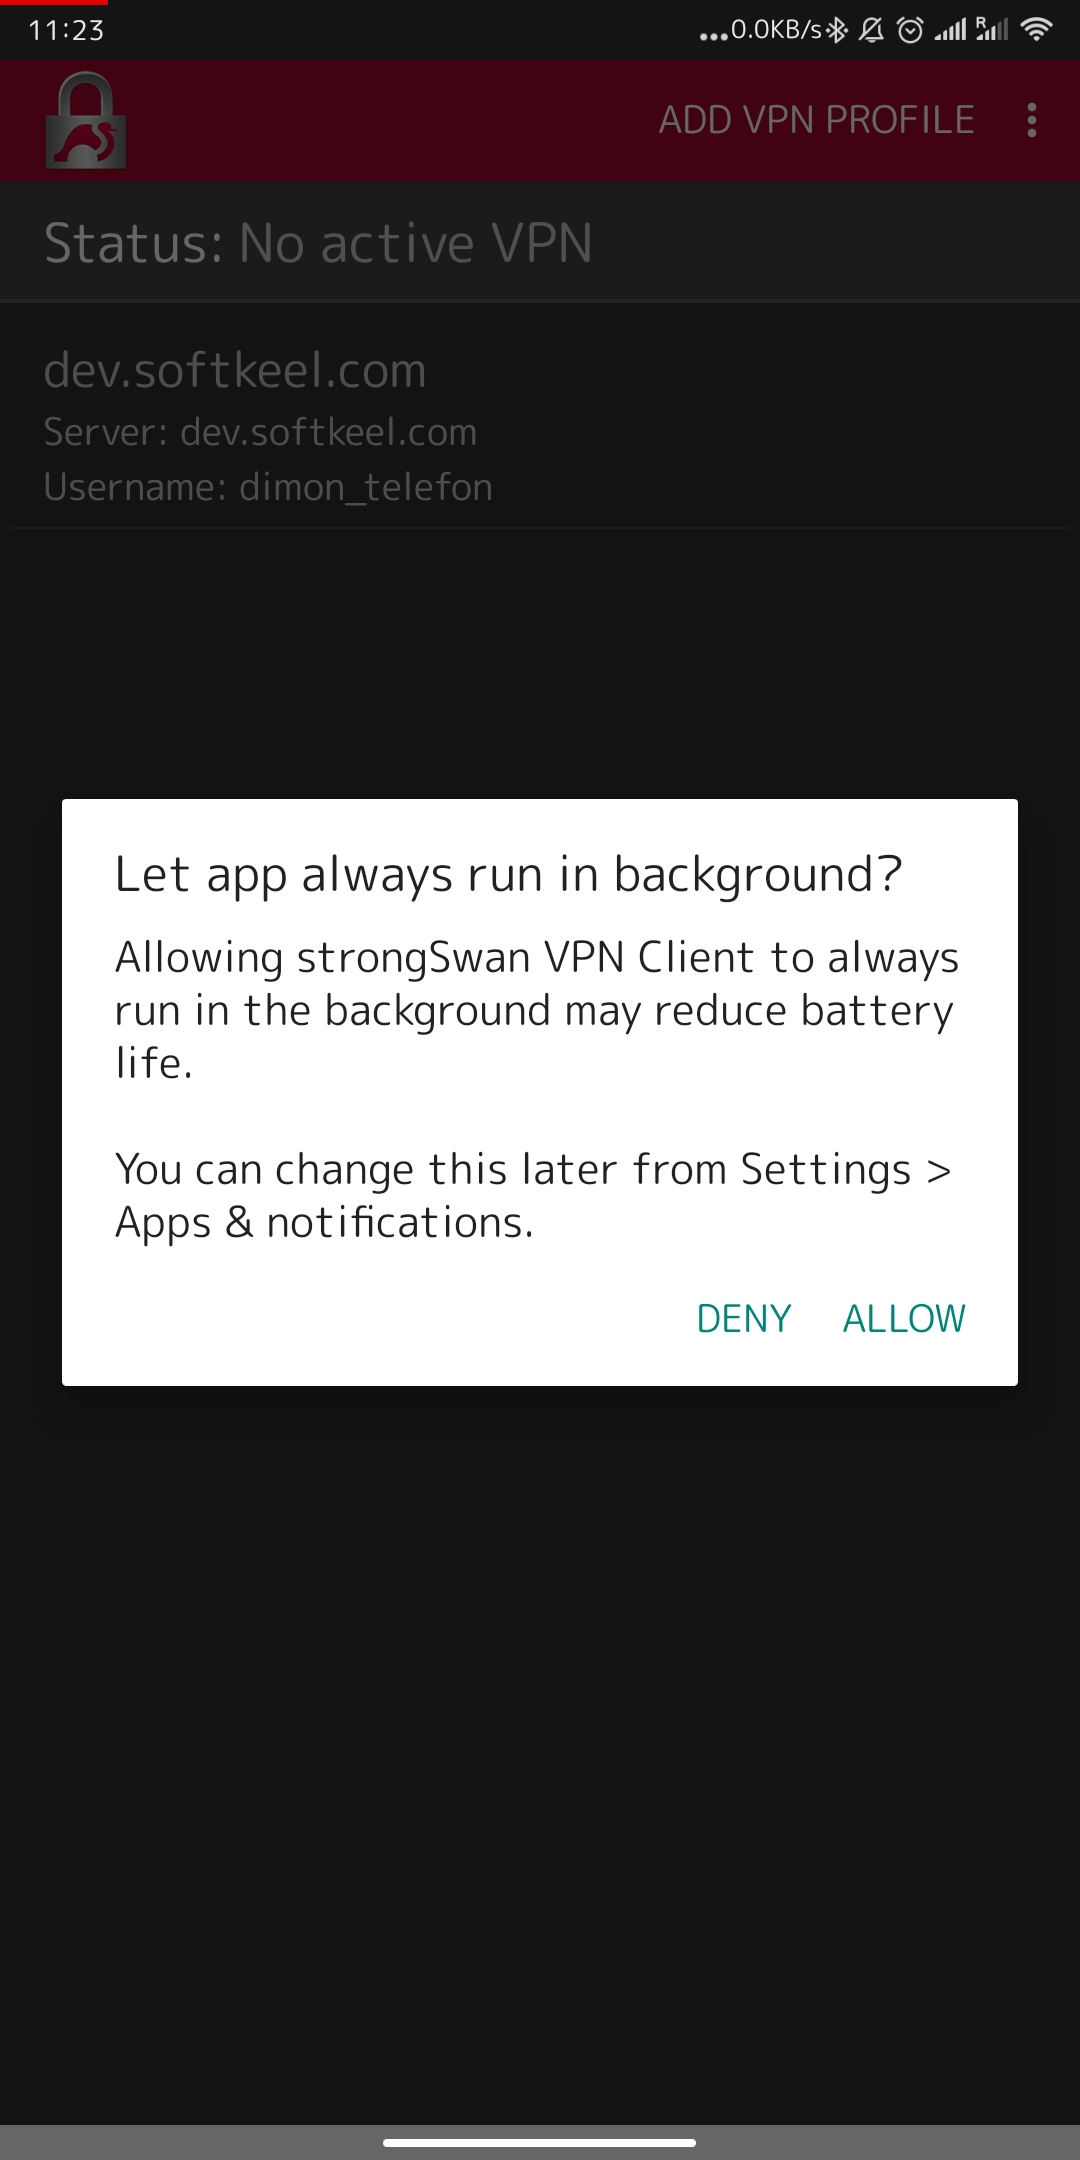
- After importing the certificate, you can share it with a secure VPN network. Agree to the system warnings if you want to activate the connection.


- Congratulations, your connection is set up!


macOS IKEv2 client configuration
Order now | Download | FAQ
In order to connect to a VPN, follow these steps:
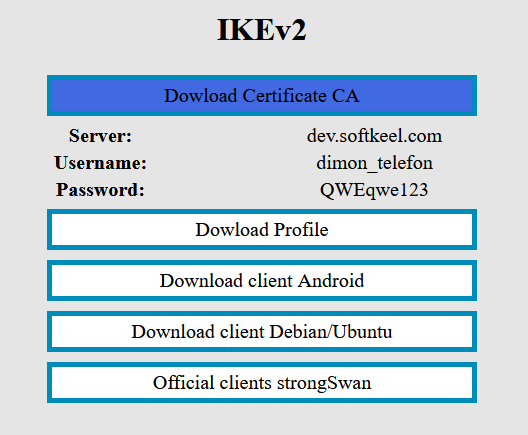
- Open the link you received in a browser to get instructions and configuration for your new VPN connection. And you will see the following page in the browser window
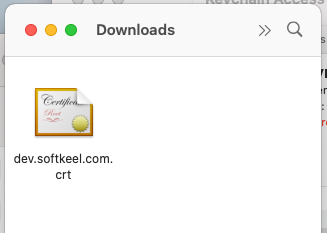
- In order to start the configuration you need to download the Certificate CA file. To download the Certificate CA file, click the "Dowload Certificate CA" button.

- Later, when you download the certificate, go to the folder where you downloaded the certificate. Next, double-click on the certificate file, or open the context menu of the file and click open.

-
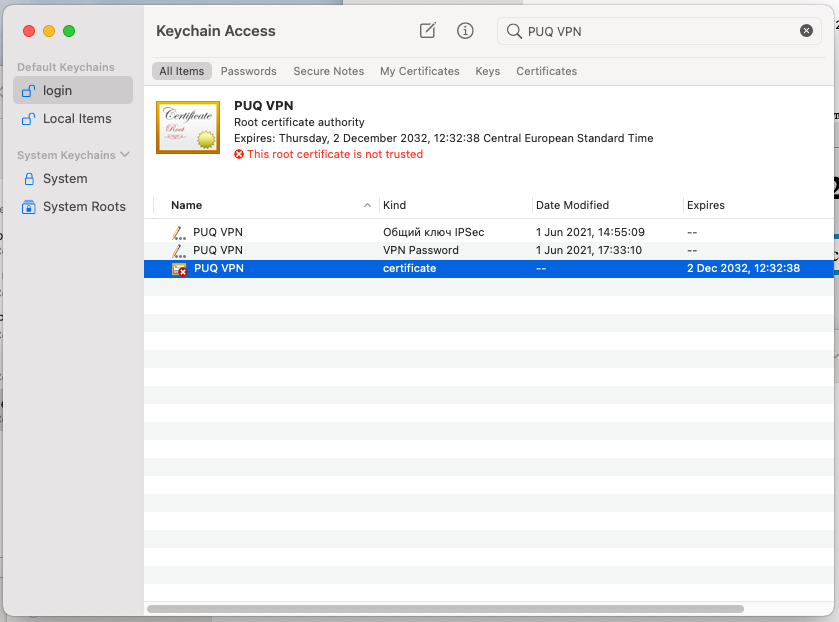
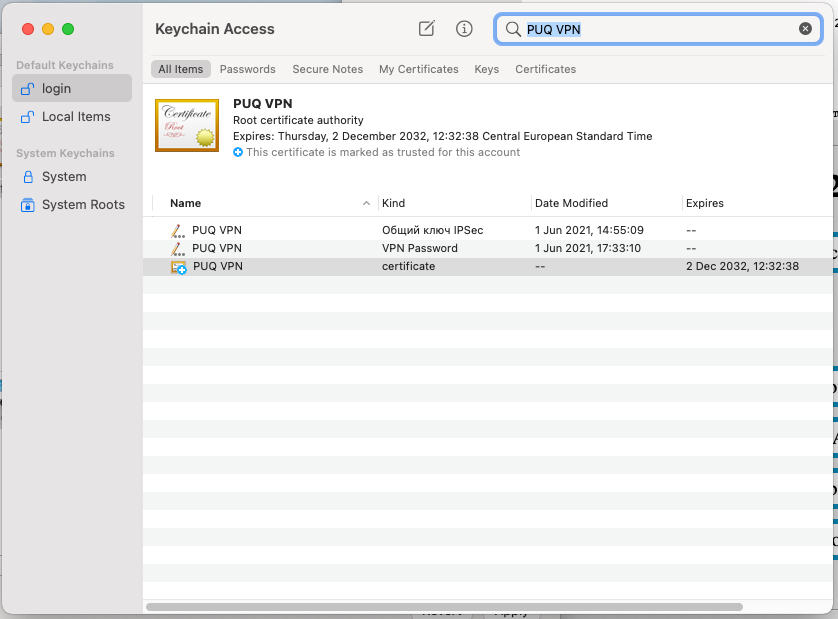
After you open this certificate file, you will be taken to "Keychain Access". Find the certificate you just integrated there. This will be a root certificate, and the certificate will not be trusted.

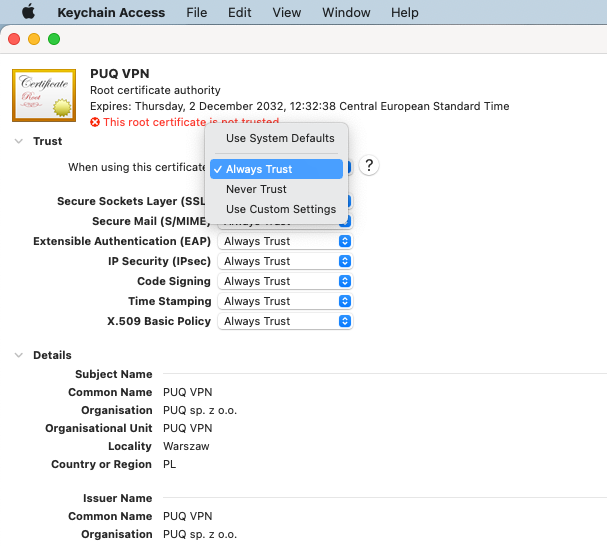
- Next, double-click on it and make the certificate trusted.

- After you close the previous window, you will be prompted to enter your system password in order to store the settings. Note that the certificate is now trusted.

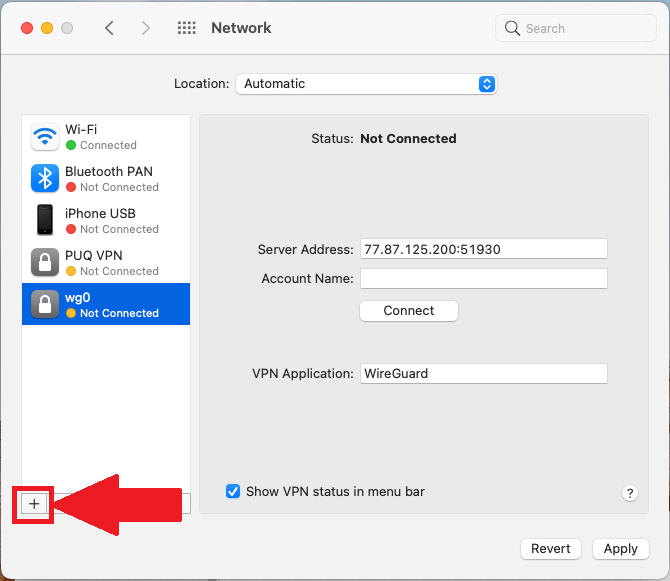
- After installing the certificate, we can proceed to the connection configuration. Open connection settings. Click on the plus button to add a new connection.

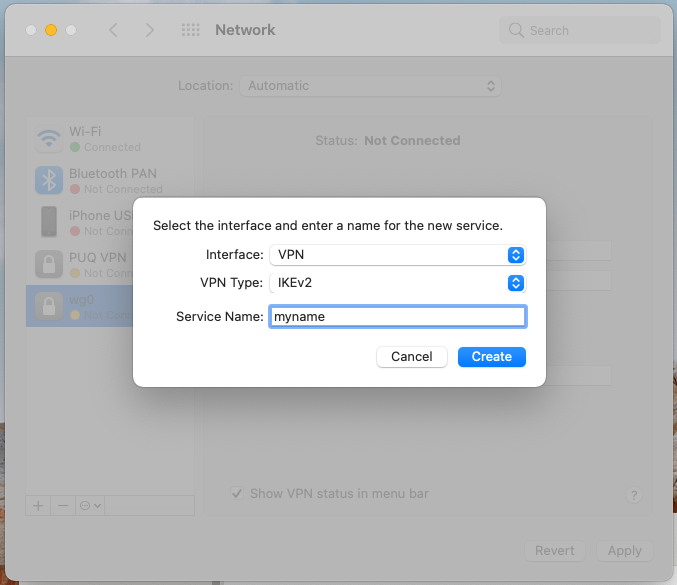
- Create a new IKEv2 connection.

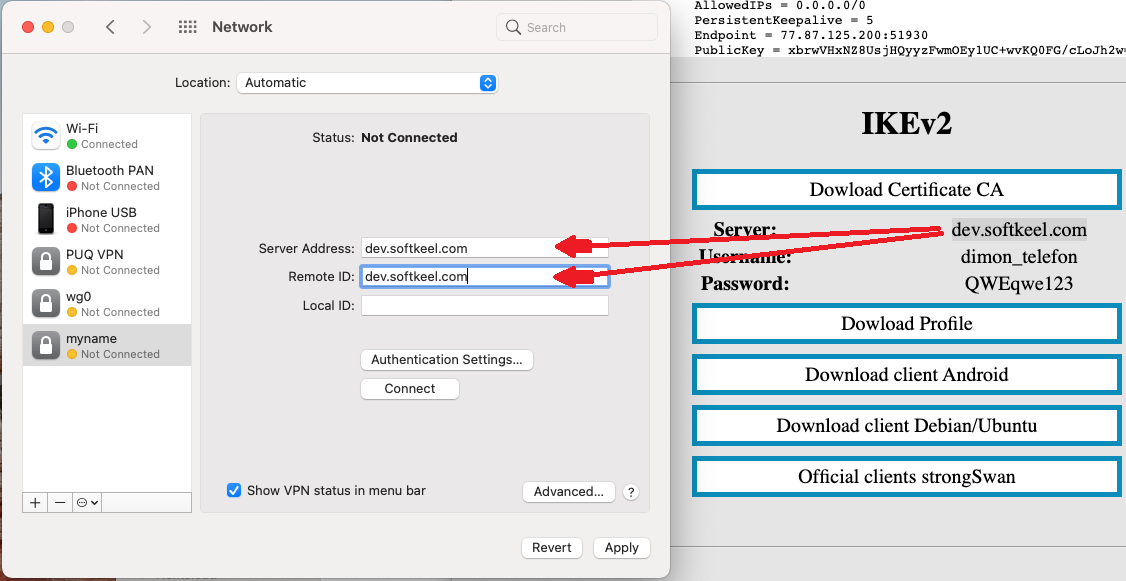
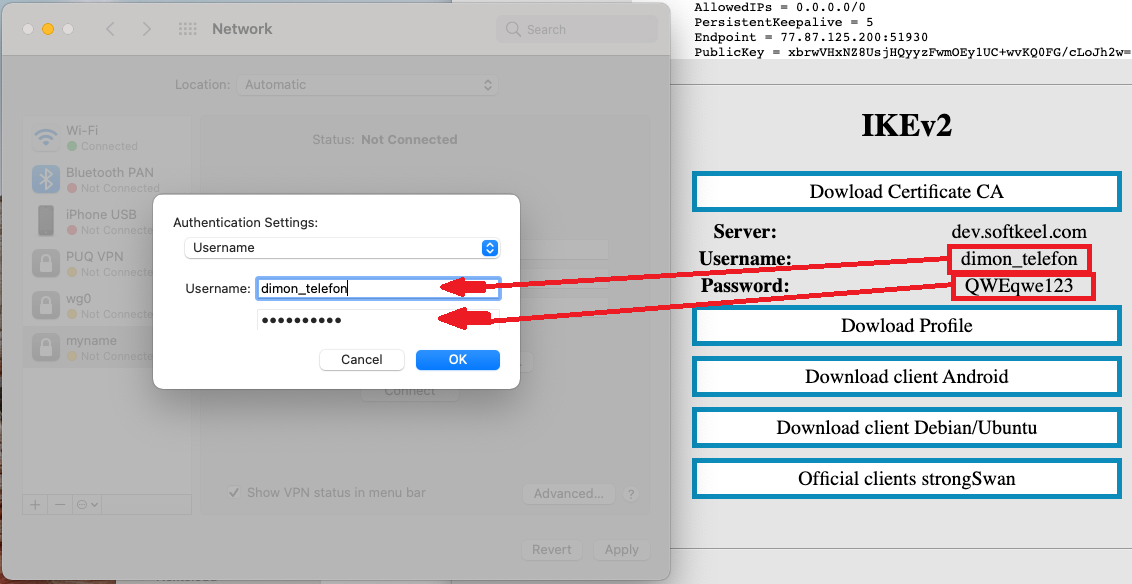
- Enter the data as required. Server address and remote ID.

- Next, click on the Authentication Settings button to enter the Authentication details.

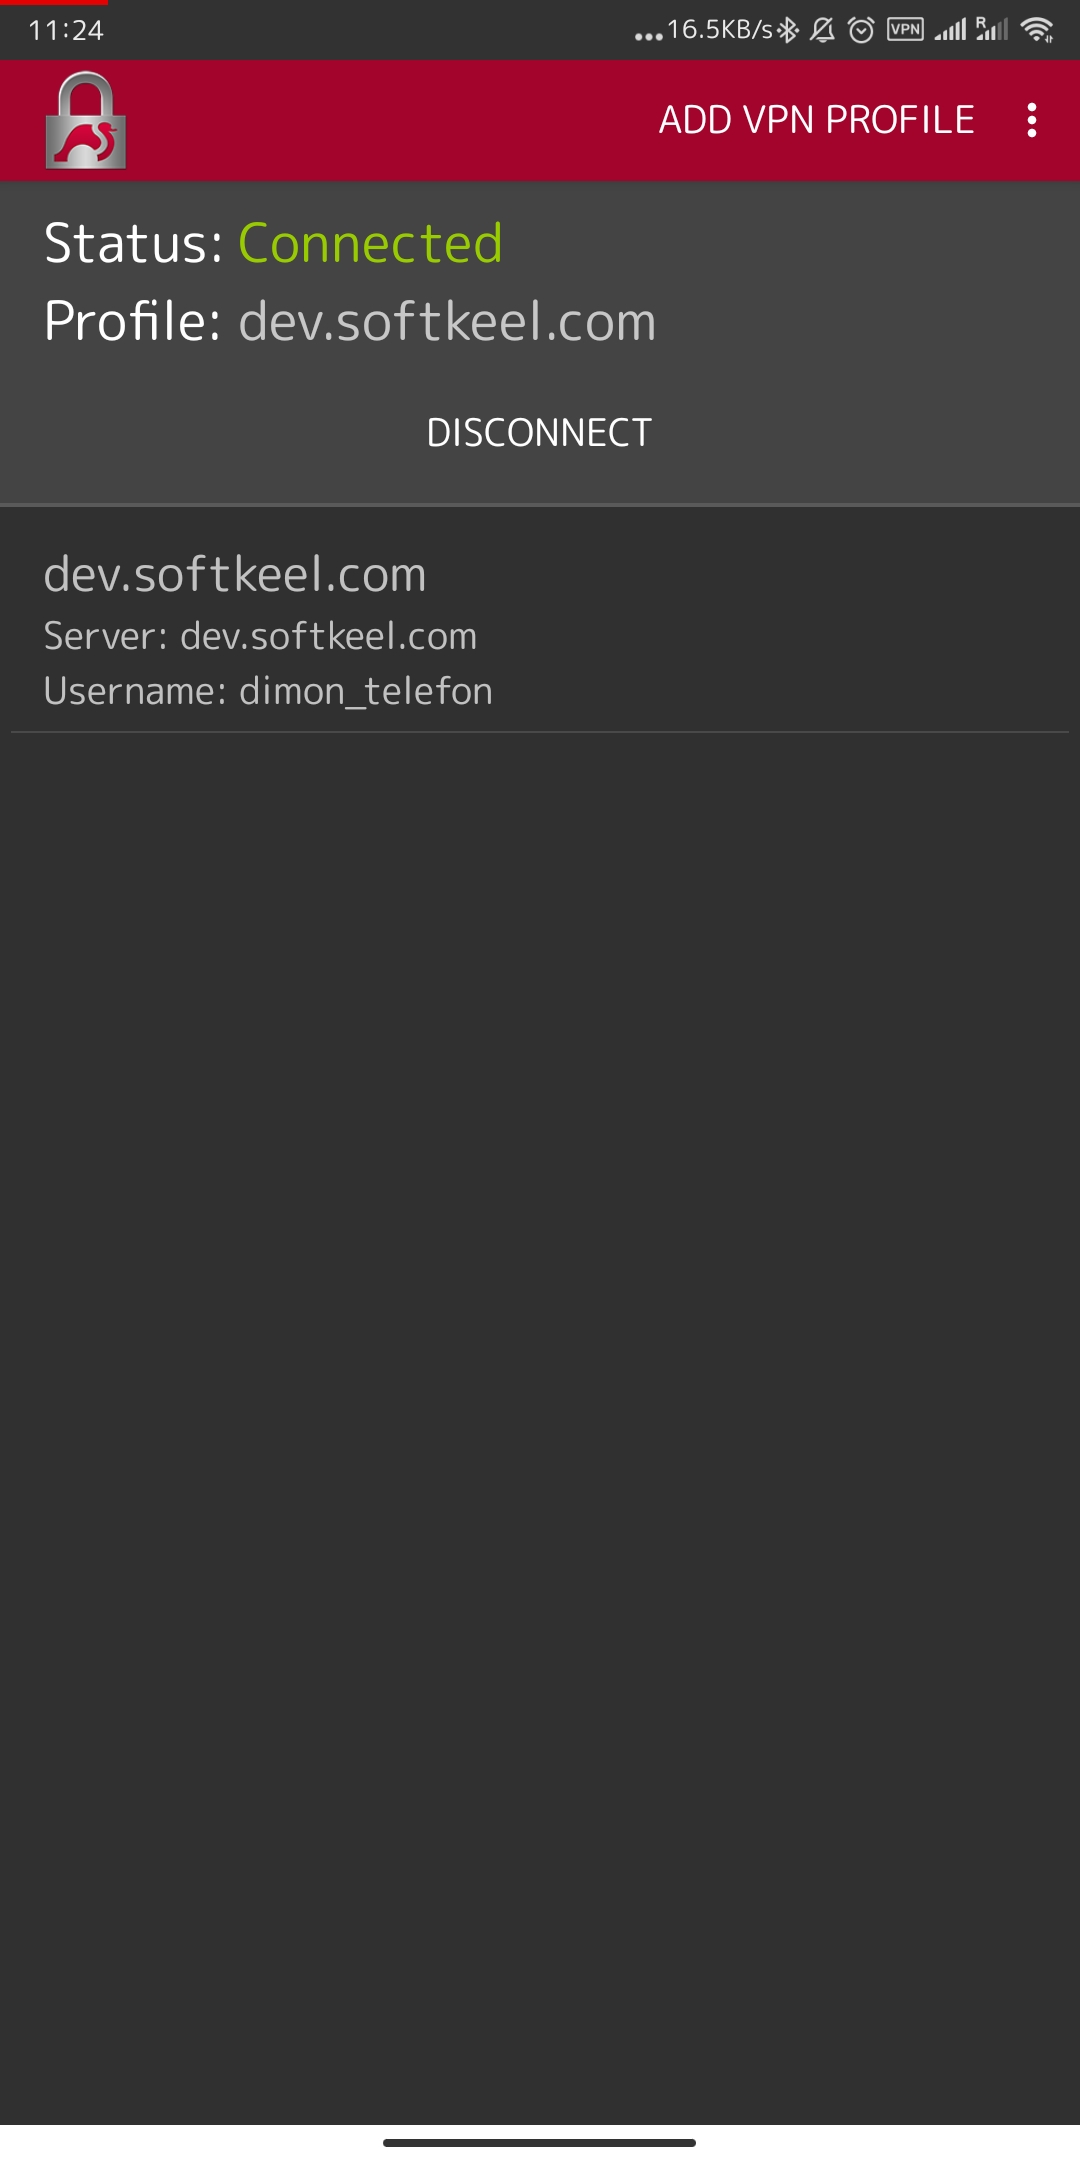
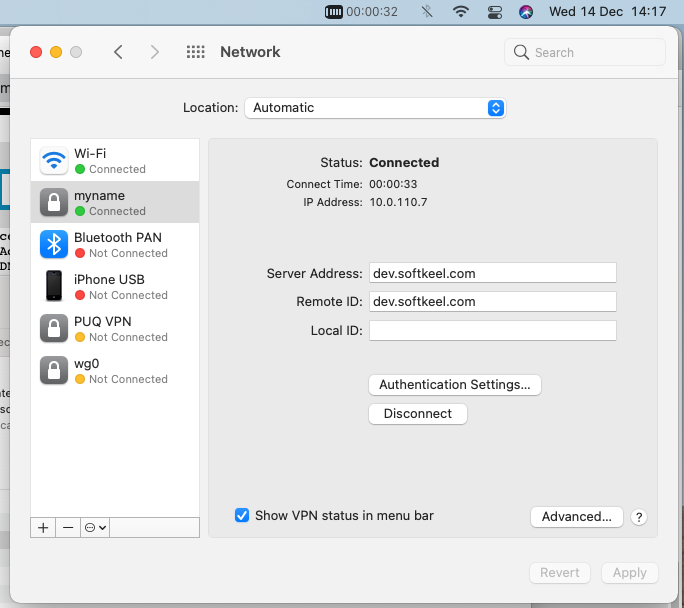
- Save your connection and connect to a new VPN connection. Congratulations, your connection is set up!


Windows IKEv2 client configuration
Order now | Download | FAQ
In order to connect to a VPN, follow these steps:
- Open the link you received in a browser to get instructions and configuration for your new VPN connection. And you will see the following page in the browser window
- In order to configure the VPN connection on Windows. You need to install a certificate. First, download the certificate from the IKEv2 section and save it on your device, for example, in the Downloads folder.

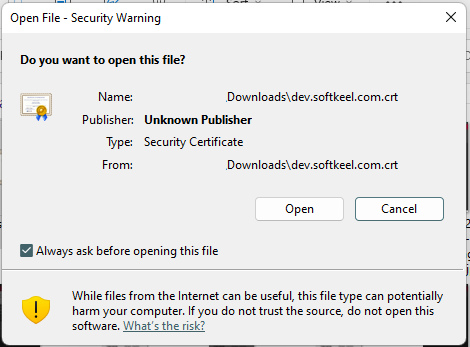
- Go to the download folder, then double-click or in the context menu of the downloaded certificate file, click Open

-
You will see a warning window, click open.

-
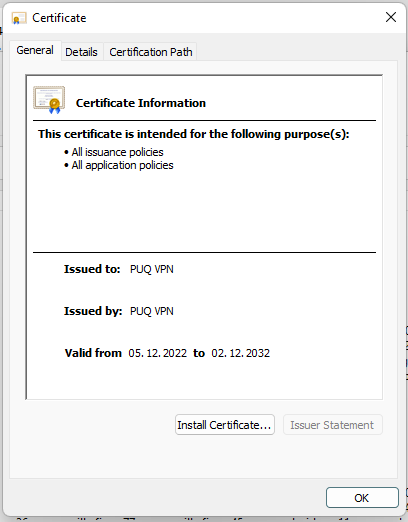
After that, a window will open in which information about the certificate will be described. Click the "Install Certificate" button.

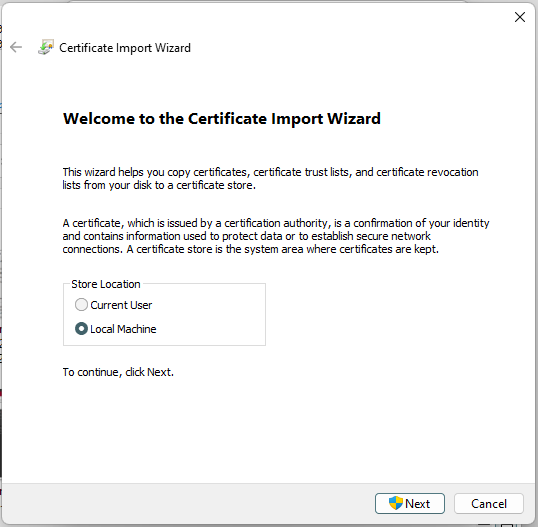
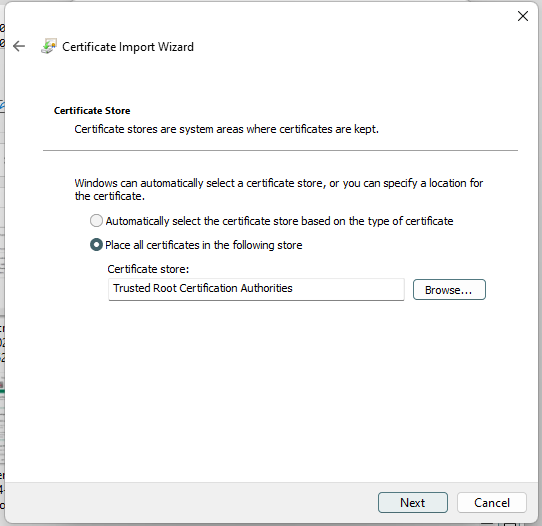
- The Certificate Installation Wizard opens. Follow hints and logic. For example, select "For Local Machine" to have the certificate trusted by all users on your system. Next.

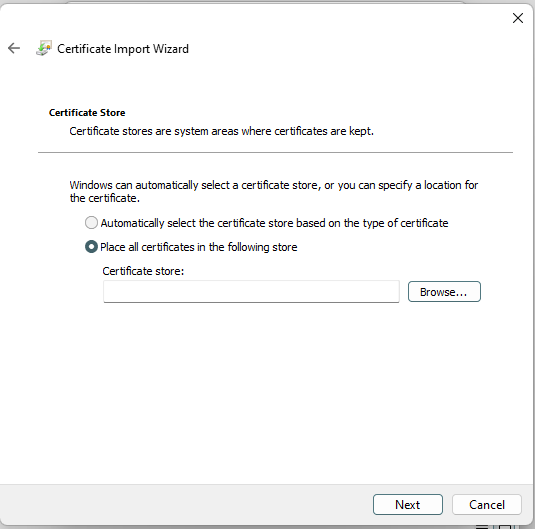
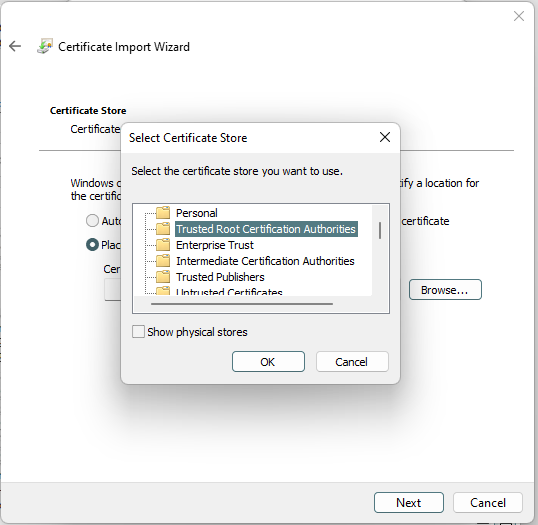
- Select a location to save the certificate. This is the root certificate, so we will save it to the root certificates.


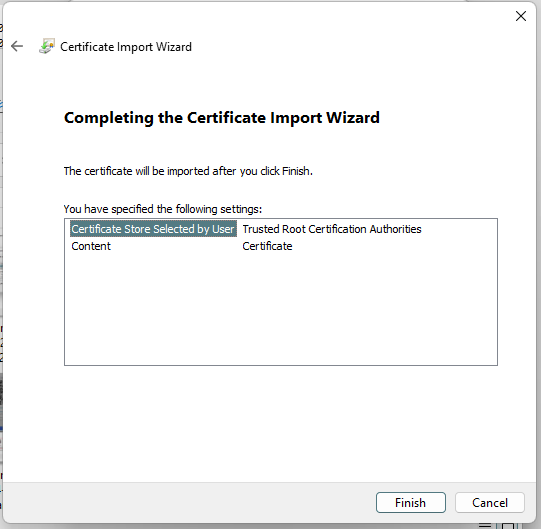
- Check and save settings.

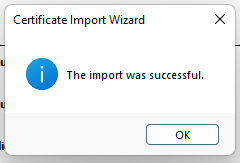
- The system will see us that the certificate was imported successfully.

-
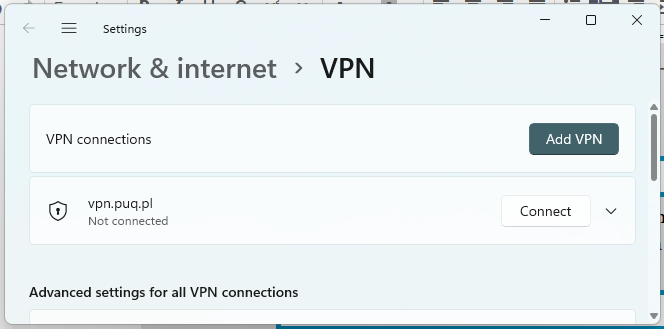
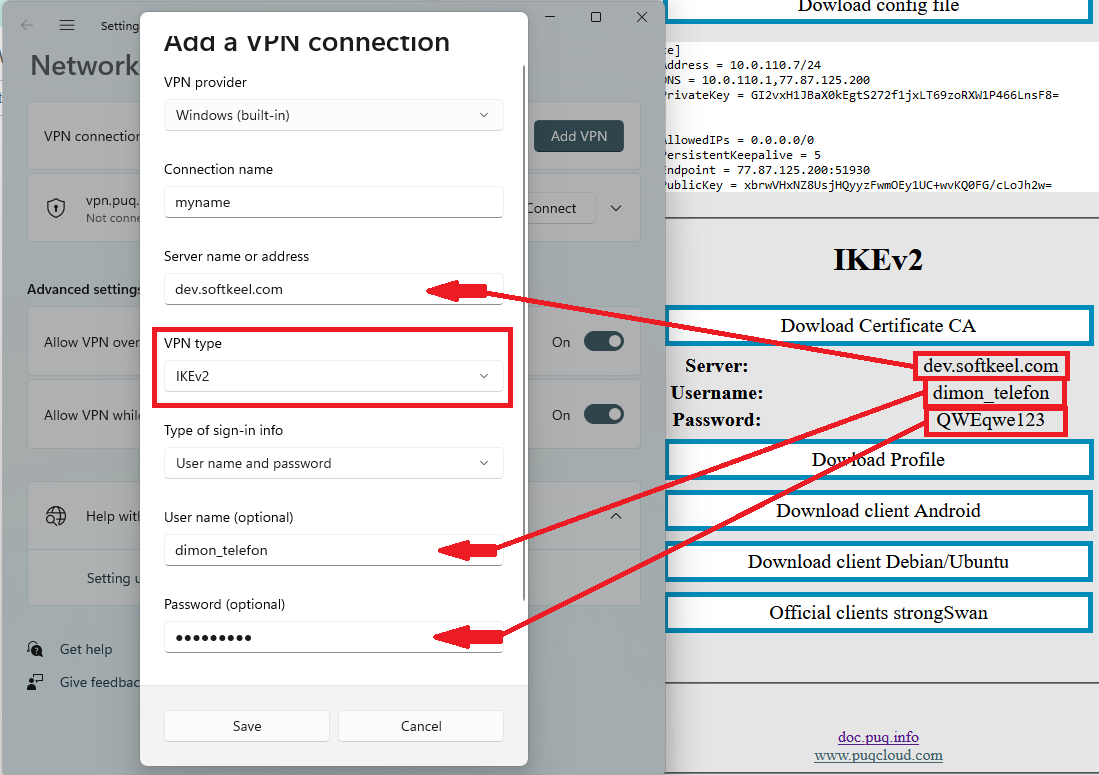
Let's move on to connection settings. We go to the network connection settings in the system parameters and create a new VPN connection.

-
Be sure to select IKEv2 and enter the correct data.

-
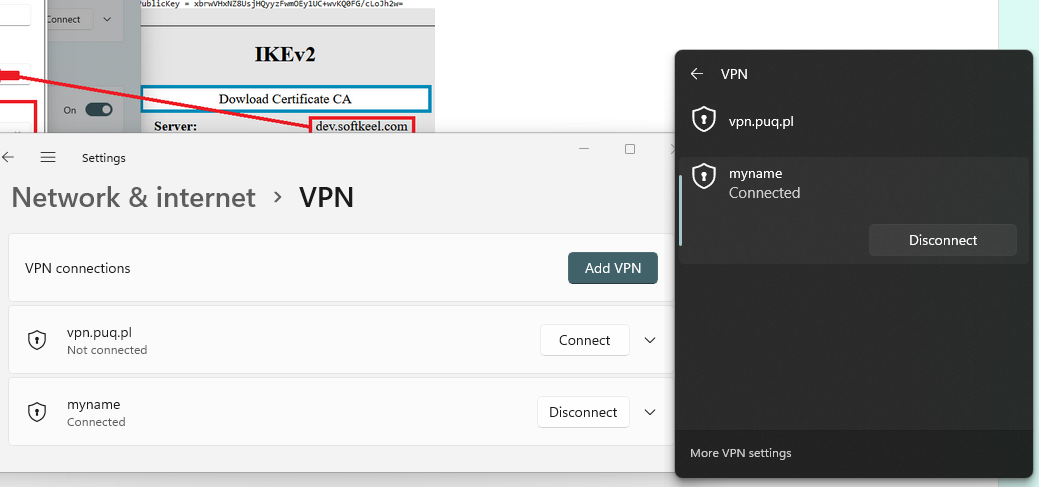
Congratulations! Your connection has been successfully set up!


Linux IKEv2 client configuration
Order now | Download | FAQ
In order to connect to a VPN, follow these steps:
- Open the link you received in a browser to get instructions and configuration for your new VPN connection. And you will see the following page in the browser window
- In order to start the configuration you need install some software, before installing the software, do not forget to update the package list using the command
sudo apt update. After the package list is updated, install additional software:sudo apt install strongswan libcharon-extra-plugins - Next, prepare a certificate to encrypt the connection. You can download the certificate, open the certificate file as text and create a new file at
nano /etc/ipsec.d/cacerts/ca-cert.pem - To prevent automatic connection, use systemctl to disable StrongSwan from starting automatically
sudo systemctl disable --now strongswan-starter - Next, you need to edit or create a file with authentication data
sudo nano /etc/ipsec.secrets
In this file, you need to enter your login and password data from the IKEv2 section
your_username : EAP "your_password" - The next step is to edit the configuration file
nano /etc/ipsec.conf
The contents of the configuration file should be the following
config setup
conn ikev2-rw
right=adres_server
# This should match the `leftid` value on your server's configuration
rightid=adres_server
rightsubnet=0.0.0.0/0
rightauth=pubkey
leftsourceip=%cfg
leftauth=eap-mschapv2
leftid=your_username
eap_identity=%identity
auto=startAttention! Please note that you need to enter your data in the configuration file and the authentication file.
- To activate the connection, enter the command
sudo ipsec startand to disable run the commandsudo ipsec stop
Mikrotik IKEv2 client configuration
Order now | Download | FAQ
Configuring Mikrotik as an IKEv2 Client.
Make sure you have an up to date routerOS system.
Version must be at least: 6.49.7
[admin@VPN-CLIENT] > system package print
Flags: X - disabled
# NAME VERSION SCHEDULED
0 ntp 6.49.7
1 ppp 6.49.7
2 dhcp 6.49.7
3 mpls 6.49.7
4 security 6.49.7
5 advanced-tools 6.49.7
6 system 6.49.7
7 openflow 6.49.7
8 multicast 6.49.7
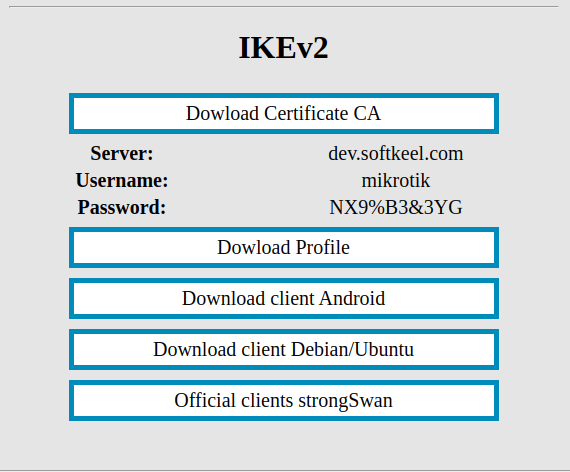
9 routing 6.49.7 Open a one-time link to obtain authorization data and a root certificate.
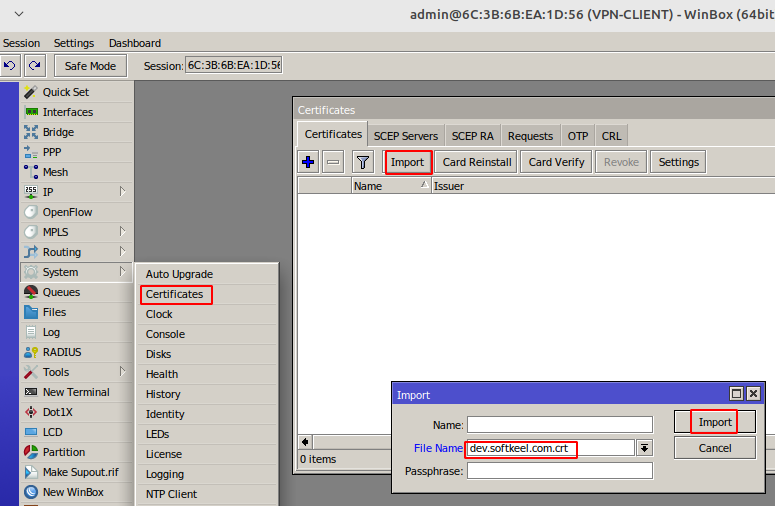
Download the certificate and place it on the Mikrotik router using the Winbox program
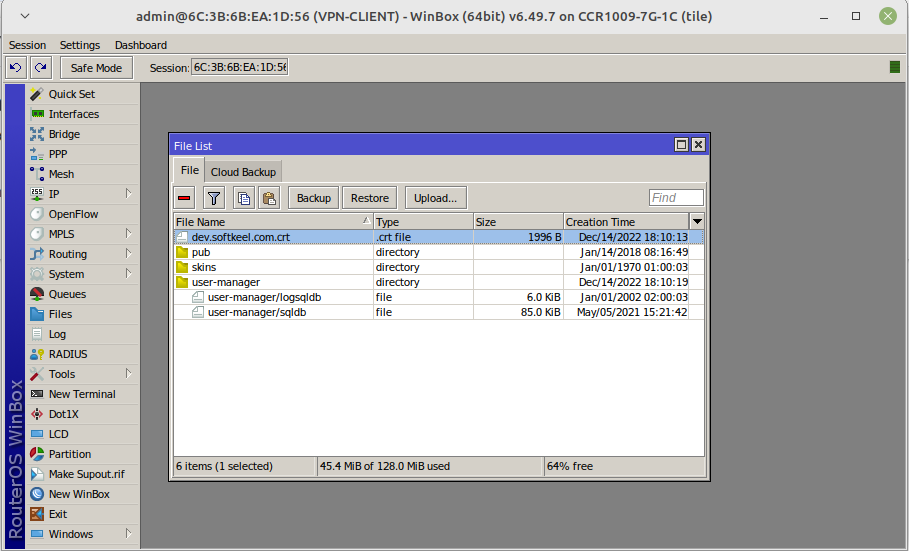
Import the certificate into the system

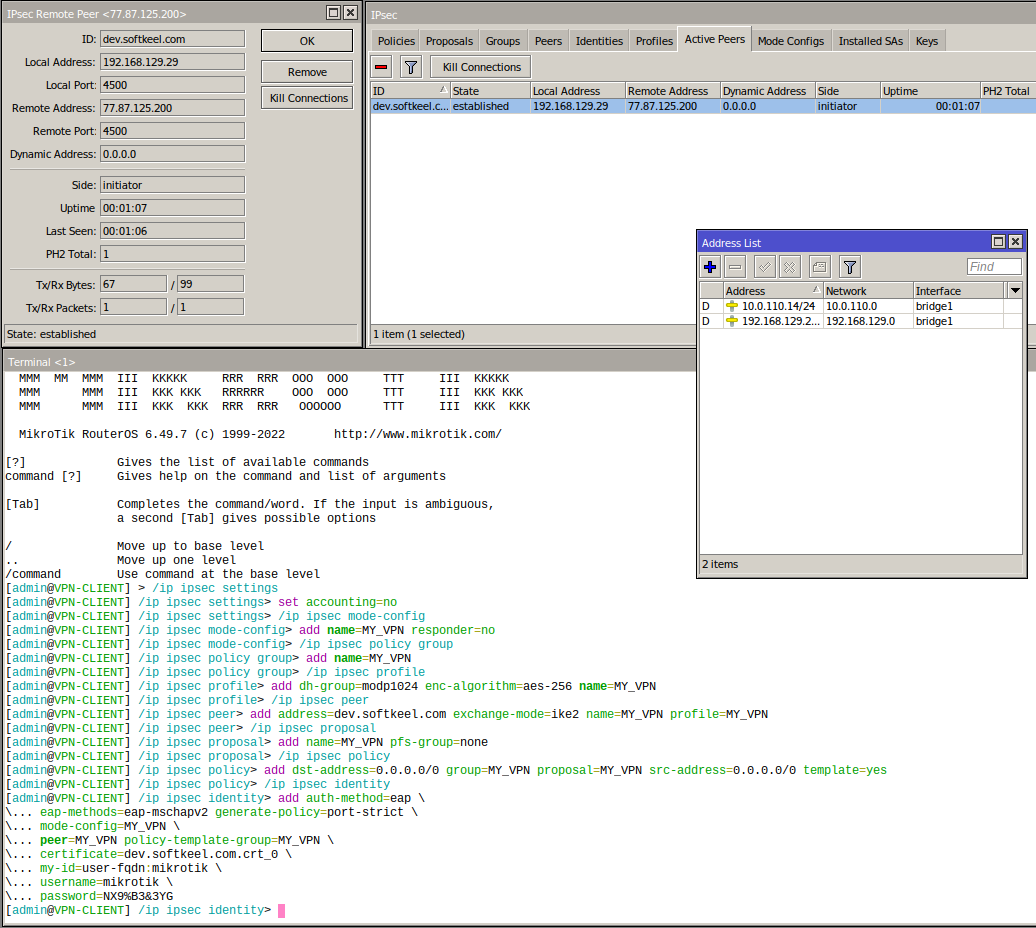
To create an IKEv2 connection, we will use the console
Open a terminal and enter the following commands
the example contains the following data. You need to replace them with your own.
| Server: | dev.softkeel.com | address=dev.softkeel.com |
| Username: | mikrotik | my-id=user-fqdn:mikrotik AND username=mikrotik |
| Password: | NX9%B3&3YG | password=NX9%B3&3YG |
| certificate | dev.softkeel.com.crt_0 | certificate=dev.softkeel.com.crt_0 |
It is a strong recommendation to use only the terminal command line in setup.
We encountered cases when, during the configuration of Mikrotik through winbox, some parameters were not correctly entered into the configuration. Commands entered through the terminal are always correctly processed.
/ip ipsec settings
set accounting=no
/ip ipsec mode-config
add name=MY_VPN responder=no
/ip ipsec policy group
add name=MY_VPN
/ip ipsec profile
add dh-group=modp1024 enc-algorithm=aes-256 name=MY_VPN
/ip ipsec peer
add address=dev.softkeel.com exchange-mode=ike2 name=MY_VPN profile=MY_VPN
/ip ipsec proposal
add name=MY_VPN pfs-group=none
/ip ipsec policy
add dst-address=0.0.0.0/0 group=MY_VPN proposal=MY_VPN src-address=0.0.0.0/0 template=yes
/ip ipsec identity
add auth-method=eap \
eap-methods=eap-mschapv2 generate-policy=port-strict \
mode-config=MY_VPN \
peer=MY_VPN policy-template-group=MY_VPN \
certificate=dev.softkeel.com.crt_0 \
my-id=user-fqdn:mikrotik \
username=mikrotik \
password=NX9%B3&3YG
After the work done, you can see the connection status in the IP->IPsec configuration
You also need to configure the traffic routes you need at your discretion.
iOS IKEv2 client configuration
Order now | Download | FAQ
To connect to the VPN, follow these steps:
- Open the provided link in your browser to get instructions and settings for your new VPN connection. You will see the following page in your browser window.

- To proceed, you need to install the Certificate CA. Click the "Download Certificate CA" button and allow the download of the file.

-
Next, navigate to the following path: Settings -> General -> VPN & Device Management, and wait for the profile to download and appear in this window.

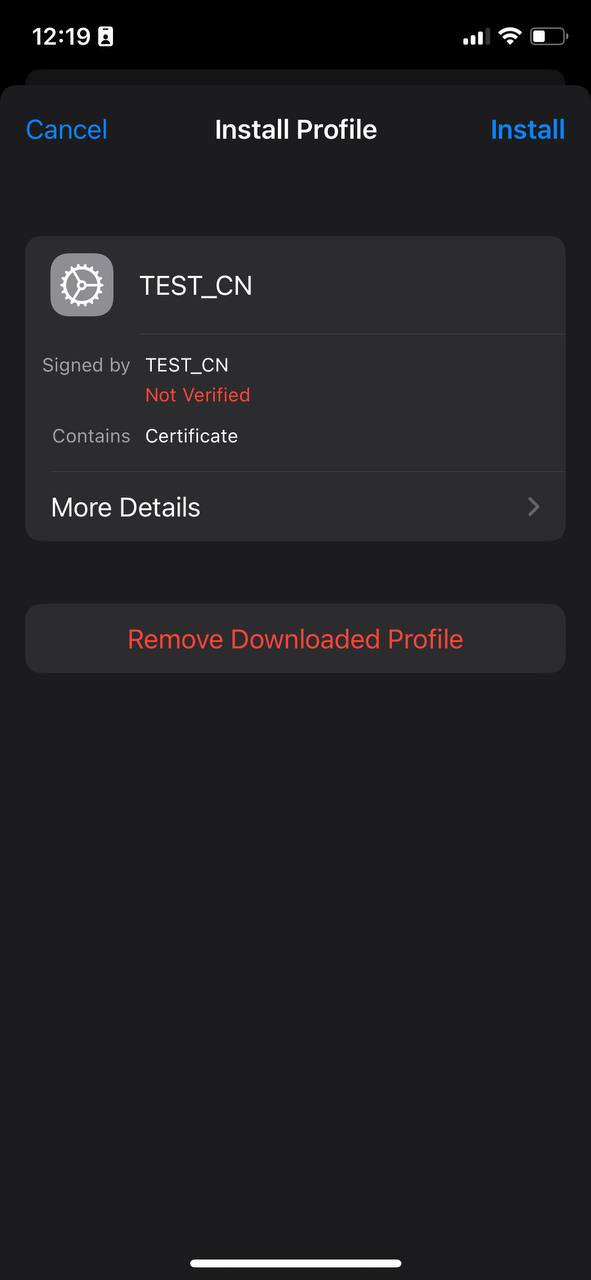
- Tap on the downloaded profile and, click the "Install" button.

- Enter your password.

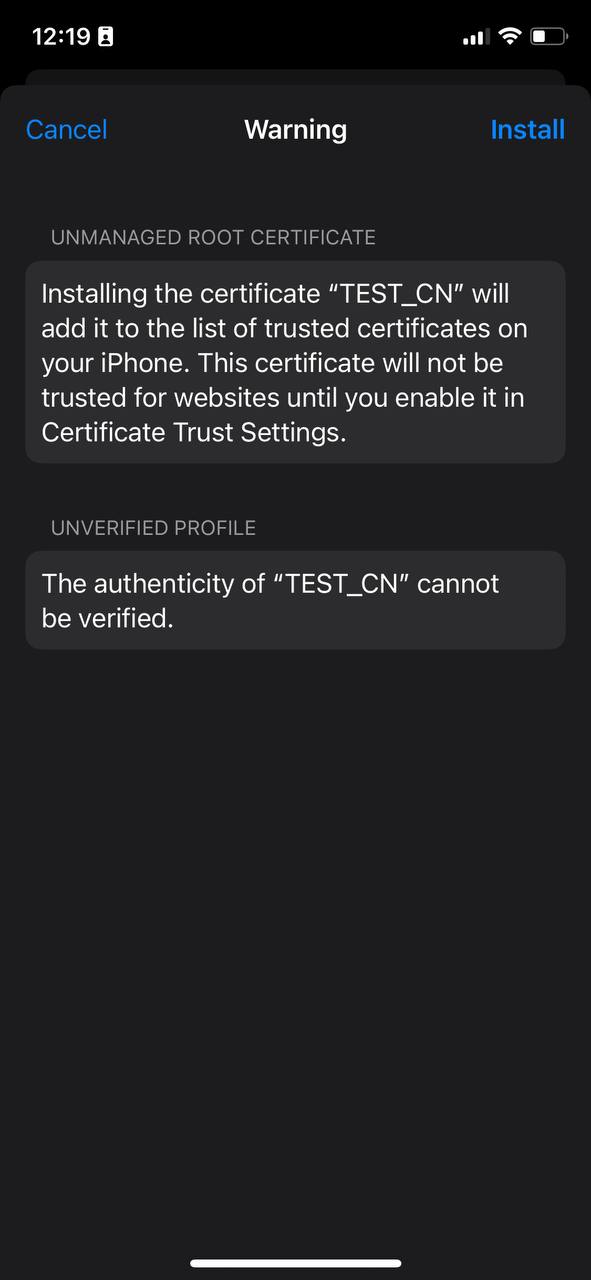
- Read the warning and press the "Install" button

-
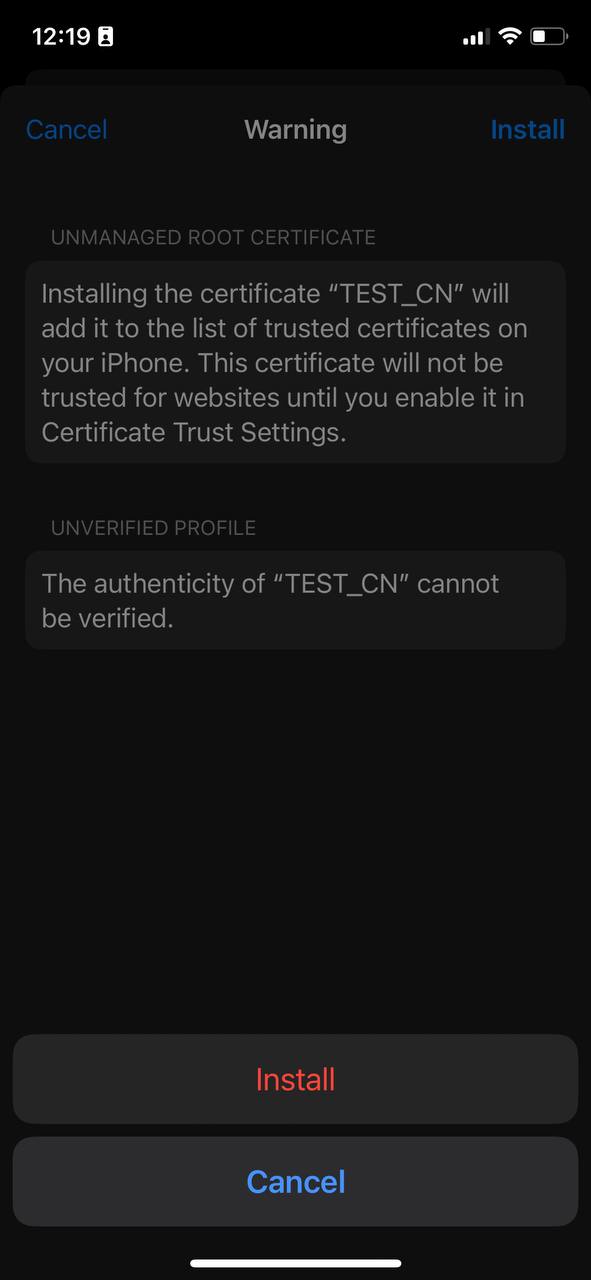
Press "Install" again to confirm.

- A window will appear, showing that the profile has been downloaded and verified.


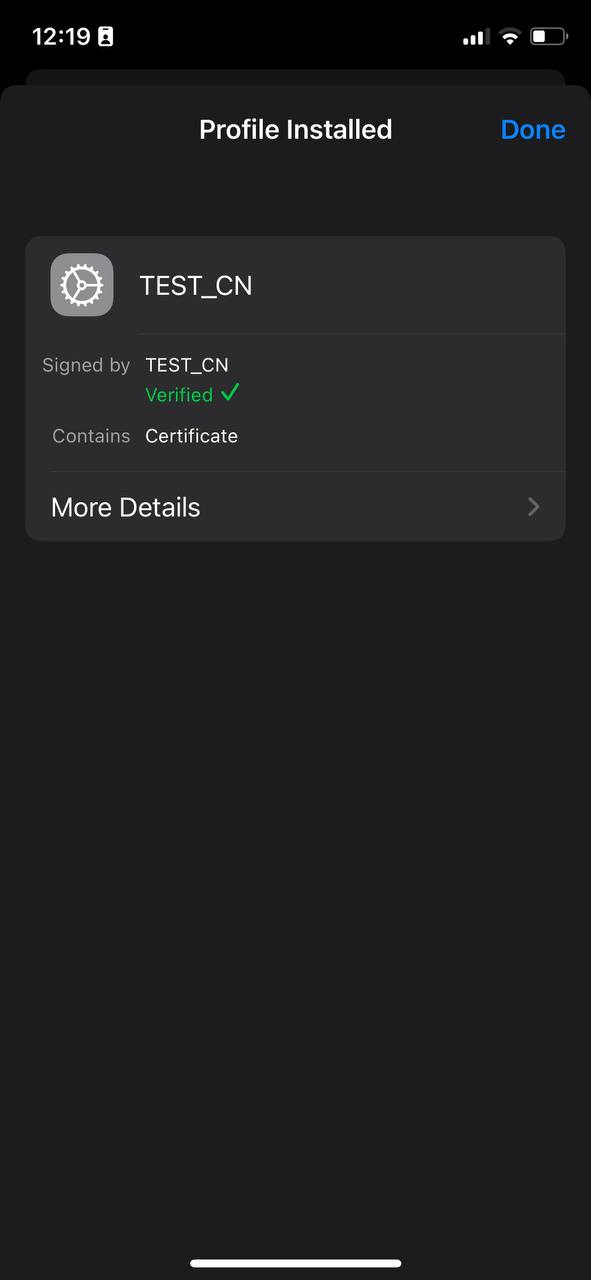
Next, you need to configure the VPN.
- To do this, go to Settings -> General -> VPN & Device Management -> VPN and tap on "Add VPN Configuration..."

-
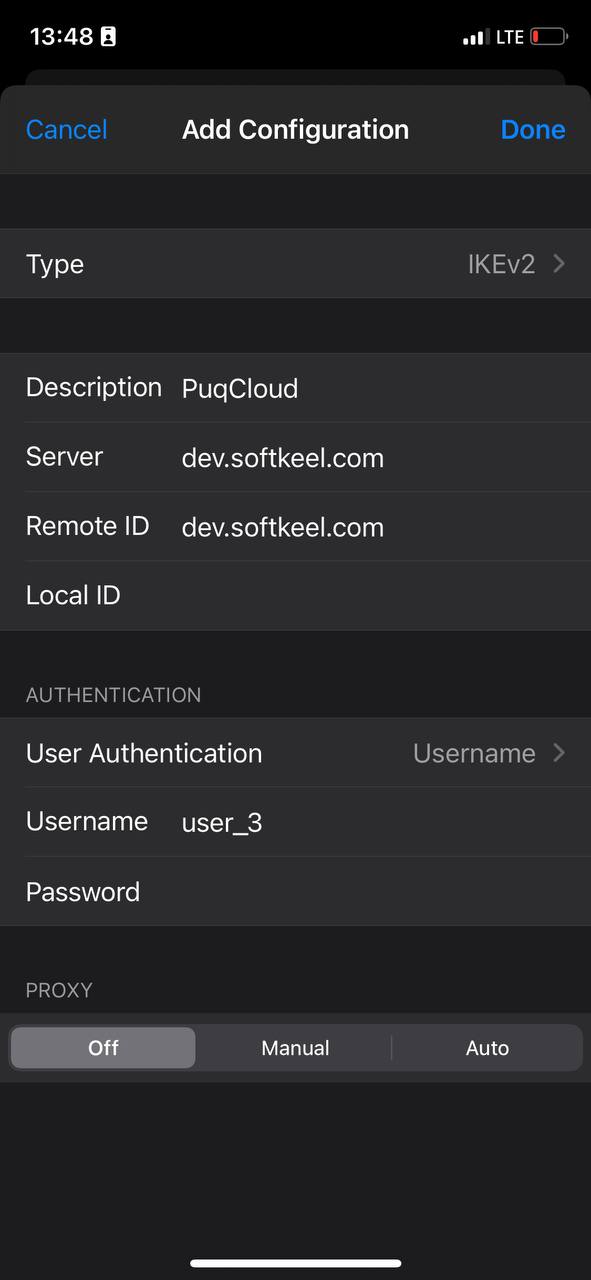
Enter the required details and click "Done."
- Description: [Enter a description for this VPN connection]
- Server: [Enter the server address]
- Remote ID: [Enter the remote ID]
- Username: [Enter your VPN username]
- Password: [Enter your VPN password]
- Type: IKEv2
- Proxy: Off

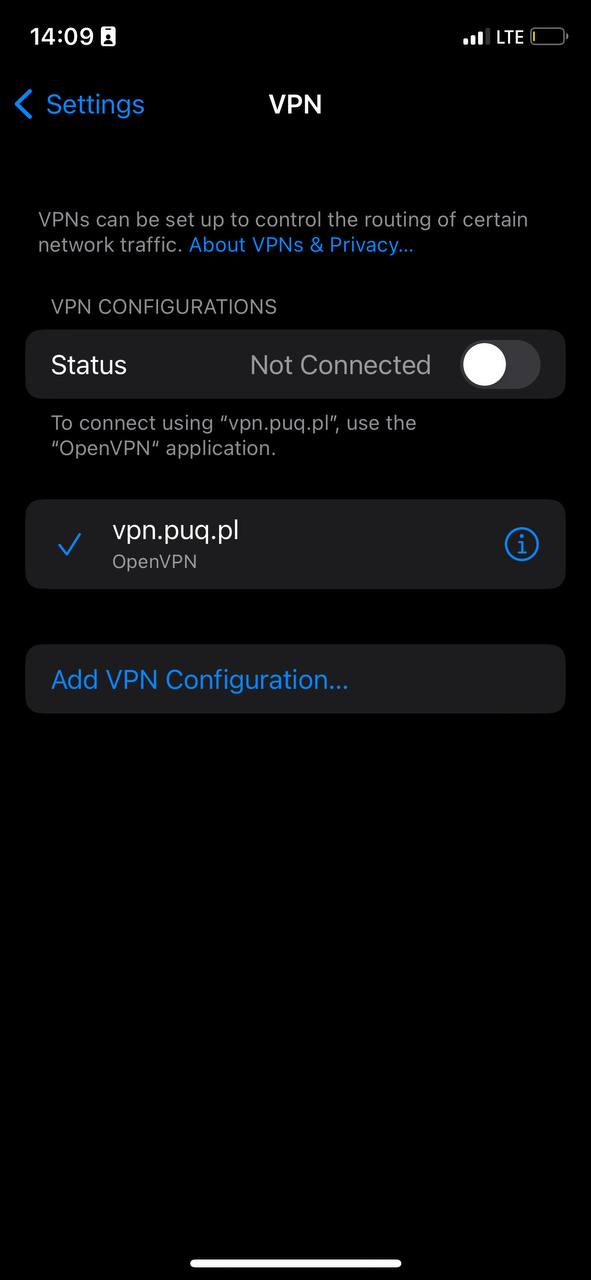
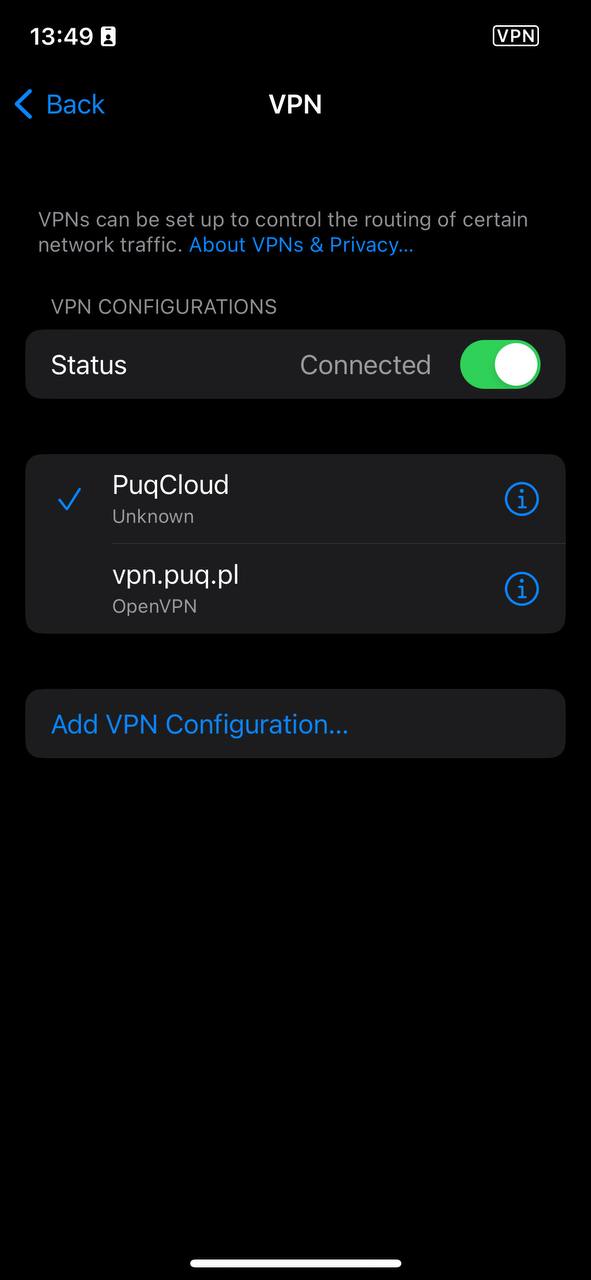
- Finally, select the VPN you added and don't forget to toggle the switch to enable it.

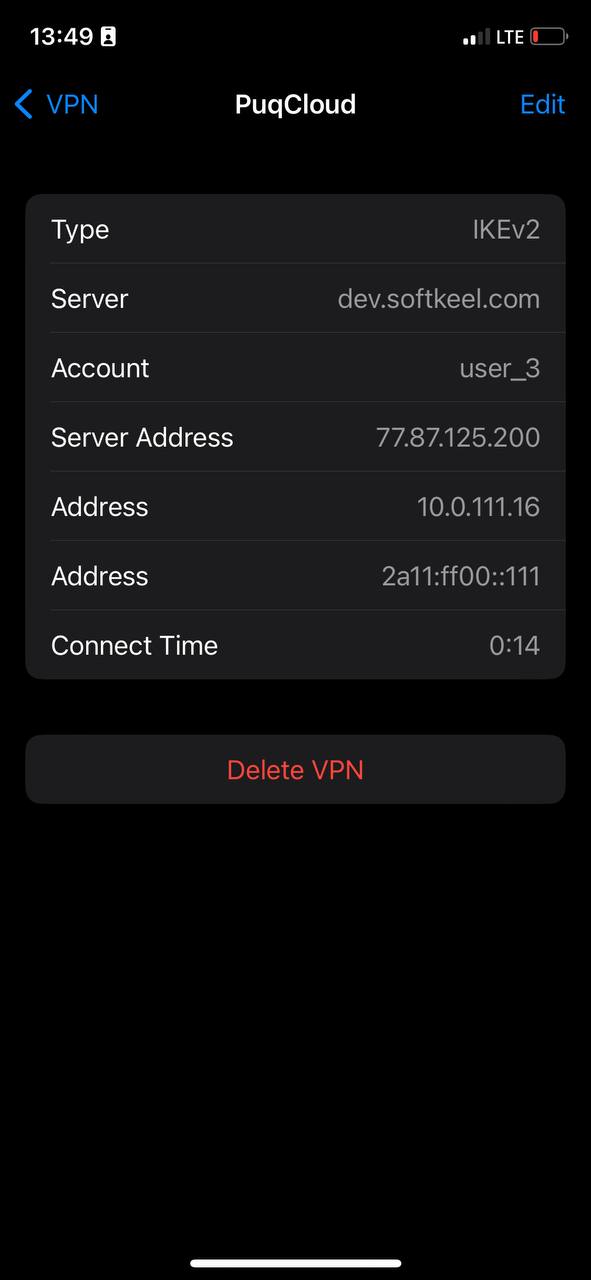
- By tapping on the (i) icon, you can check the information for this VPN or make any necessary changes