IKEv2
- Basic concepts IKEv2 EAP
- Technical requirements and installation
- Create a root certificate
- Import the root certificate
- Create a server certificate
- Advanced settings
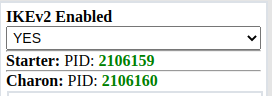
- Enable IKEv2
Basic concepts IKEv2 EAP
Order now | Download | FAQ
Since version 1.2 PUQVPNCP supports VPN protocol IKEv2 implemented with strongSwan
IKEv2 is a protocol that allows you to create direct IPSec tunnels between a server and a client. IPSec provides encryption of network traffic in IKEv2 virtual private networks. IKEv2 is natively supported on a number of platforms (OS X 10.11+, iOS 9.1+, Windows 10) without additional applications and easily resolves client connectivity issues.
For the protocol to work correctly, it is necessary to configure certificates for encryption; using the panel, this process is easy and comes down to pressing literally two buttons.
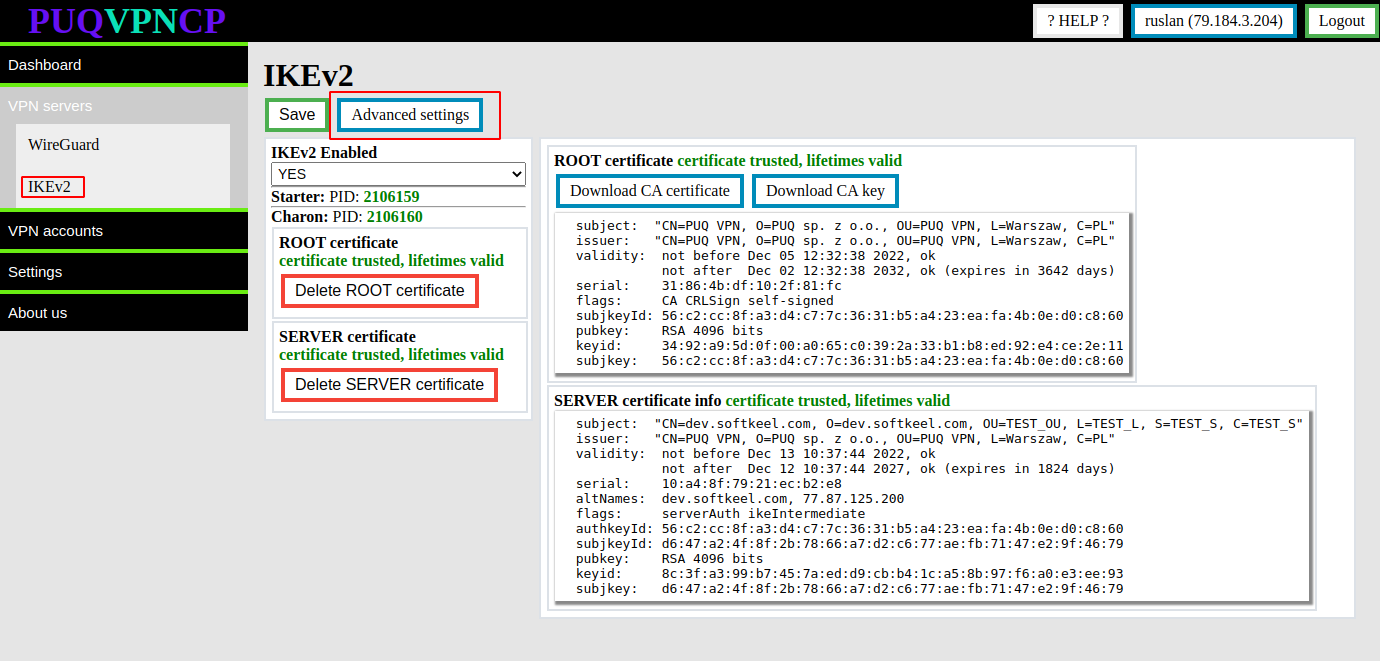
It is worth remembering that the main VPN protocol in the panel is WireGuard, and the IKEv2 protocol is an additional protocol. This means that before using IKEv2, you must configure the WireGuard protocol, and then enable IKEv2 support on each WireGuard interface on which you want to use IKEv2.
IKEv2 protocol available to clients
- Android (Official application from strongSwan)
- iOS (integrated client)
- macOS (integrated client)
- Linux (network-manager-strongswan)
- Windows (integrated client)
Due to the specifics of Microsoft's implementation of the client in Windows, there is a technical nuance that requires you to enter the password twice each time you connect.
Usage features IKEv2 EAP
- To use the IKEv2 EAP protocol, the client must have the domain name of the VPN server, username and password for authorization, and there is a need to import the root certificate to authenticate the server certificate.
- The IKEv2 EAP protocol uses IPSec encryption to encrypt traffic between the client and the server, this imposes a certain load on the server and we recommend taking this into account when choosing server parameters.
- The data transfer rate in the case of rate limiting is lower than declared, due to the fact that all data packets are consistent with the headers that are required for IPsec encryption to work. This is especially noticeable at low limits of 1-10 megabits.
- Due to the technical aspects of VPN client rate limiting, the data rate limit will be taken from the outgoing traffic parameter, this parameter in IKEv2 connections will be for incoming and outgoing traffic
Technical requirements and installation
Order now | Download | FAQ
Technical requirements
- Operating systems: Debian 9+ (amd64), Ubuntu 18+ (amd64)
- Real ip address on server interface
- Domain name for the server
- PUQVPNCP v1.2
- Installed packages strongswan strongswan-pki libstrongswan-extra-plugins
Installation
We issue all comments after logging into the SSH terminal window as the root user.
apt-get update
apt-get upgrade
reboot
apt-get install strongswan strongswan-pki libstrongswan-extra-plugins -yChecking installed packages
Checking the strongSwan
dpkg -s strongswan-starterOutput should looks similar to this:
Package: strongswan-starter
Status: install ok installed
Priority: optional
Section: net
Installed-Size: 610
Maintainer: strongSwan Maintainers <pkg-swan-devel@lists.alioth.debian.org>
Architecture: amd64
Source: strongswan
Version: 5.9.1-1+deb11u3
Depends: adduser, libstrongswan (= 5.9.1-1+deb11u3), lsb-base (>= 3.0-6), debconf (>= 0.5) | debconf-2.0, libc6 (>= 2.27)
Pre-Depends: init-system-helpers (>= 1.54~)
Recommends: strongswan-charon
Conflicts: openswan
Conffiles:
 /etc/apparmor.d/usr.lib.ipsec.stroke 3ddc2d056db9435ba0d421678308bee3
 /etc/init.d/ipsec a7b2d9de5749ee0bebcd6ac3f9fee732
 /etc/ipsec.conf 01485a8658db82dd781f9229f4151661
 /etc/ipsec.secrets d8e074734da10d2ec7bcd9913263d717
 /etc/strongswan.d/charon/stroke.conf effb1b5bc46a7c849754fada75bae0d2
 /etc/strongswan.d/starter.conf 2ba2784c18e268e34cec179d90e38437
Description: strongSwan daemon starter and configuration file parser
 The strongSwan VPN suite uses the native IPsec stack in the standard
 Linux kernel. It supports both the IKEv1 and IKEv2 protocols.
 .
 The starter and the associated "ipsec" script control the charon daemon from
 the command line. It parses ipsec.conf and loads the configurations to the
 daemon.
Homepage: http://www.strongswan.org
Checking the IPSec Version
ipsec versionOutput should looks similar to this:
Linux strongSwan U5.9.1/K5.10.0-10-amd64
University of Applied Sciences Rapperswil, Switzerland
See 'ipsec --copyright' for copyright information.
Checking the pki
pkiOutput should looks similar to this:
strongSwan 5.9.1 PKI tool
loaded plugins: test-vectors pkcs11 tpm aes rc2 sha2 sha1 md5 mgf1 random x509 revocation pubkey pkcs1 pkcs7 pkcs8 pkcs12 dnskey sshkey pem openssl gcrypt af-alg gmp curve25519 hmac drbg curl
usage:
  pki --acert   (-z)  issue an attribute certificate
  pki --dn      (-d)  extract the subject DN of an X.509 certificate
  pki --gen     (-g)  generate a new private key
  pki --issue   (-i)  issue a certificate using a CA certificate and key
  pki --keyid   (-k)  calculate key identifiers of a key/certificate
  pki --pkcs12  (-u)  PKCS#12 functions
  pki --pkcs7   (-7)  PKCS#7 wrap/unwrap functions
  pki --print   (-a)  print a credential in a human readable form
  pki --pub     (-p)  extract the public key from a private key/certificate
  pki --req     (-r)  create a PKCS#10 certificate request
  pki --self    (-s)  create a self signed certificate
  pki --signcrl (-c)  issue a CRL using a CA certificate and key
  pki --verify  (-v)  verify a certificate using the CA certificate
  pki --help    (-h)  show usage information
Create a root certificate
Order now | Download | FAQ
If you already have a root certificate ready, use certificate import. More in the certificate import instructions section.
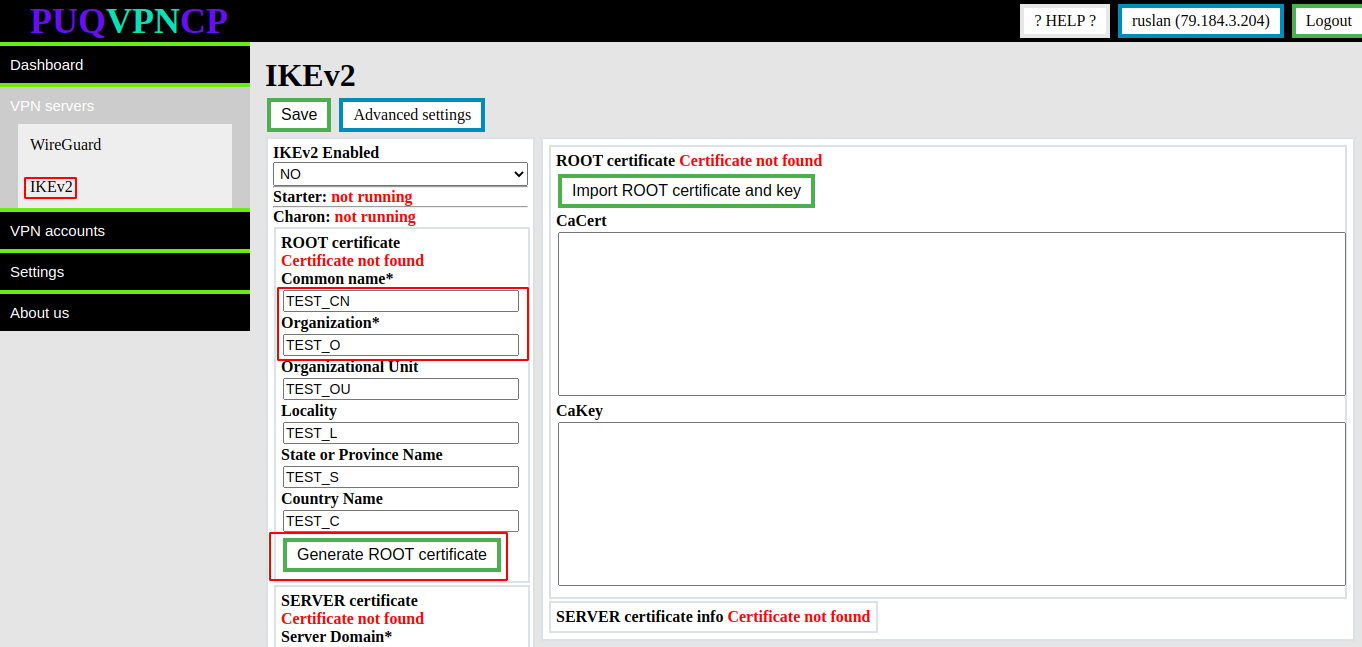
You need to fill in the required fields such as:
- Common name
- Organization
Then click the button Generate ROOT certificate
After these steps, the root certificate and private key will be generated.
Information about the certificate will be available in the same place.
To download the root certificate and private key, you can use the buttons Download CA certificate and Download CA key
To remove the root certificate, use the Delete ROOT certificate button
Import the root certificate
Order now | Download | FAQ
If you don't have a root certificate ready, use the certificate generation option. More in the certificate generation instruction section.
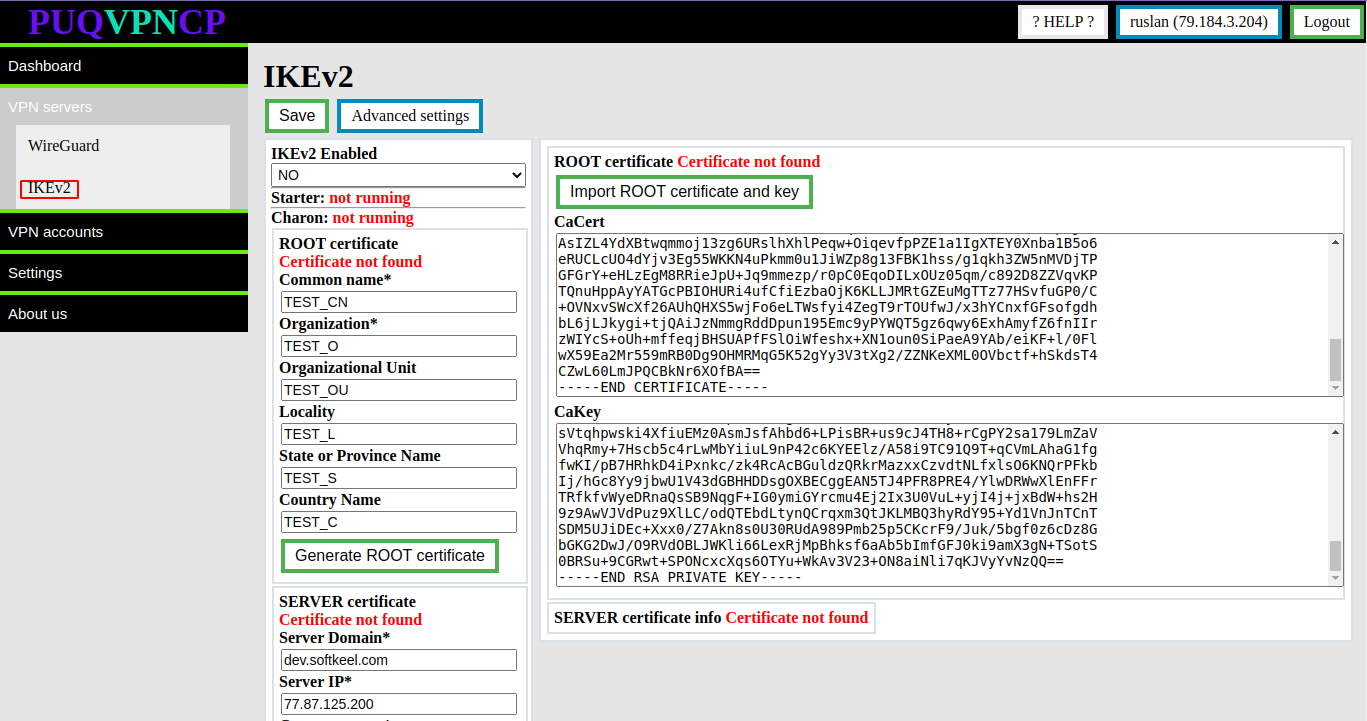
You need to fill in the fields intended for the root certificate and for the private key
- CaCert
- CaKey
To import the root certificate and private key, click the Import ROOT certificate and key button
After these steps, the root certificate and private key will be imported.
Information about the certificate will be available there.
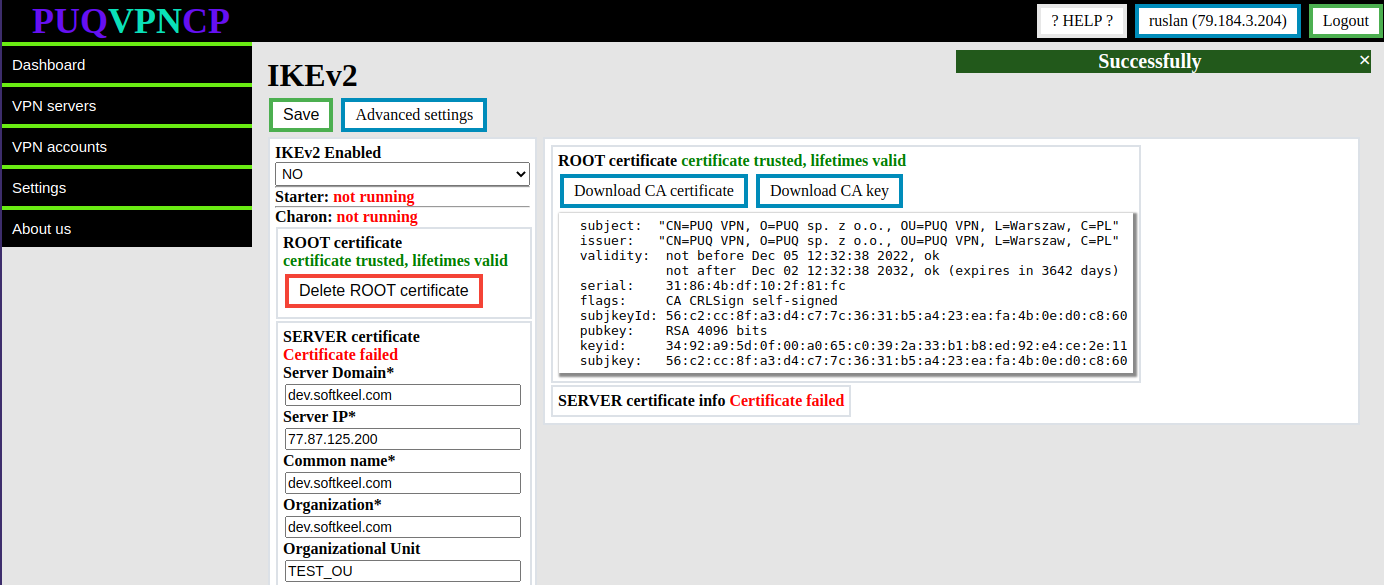
To download the root certificate and private key, you can use the buttons Download CA certificate and Download CA key
To remove the root certificate, use the Delete ROOT certificate button
Create a server certificate
Order now | Download | FAQ
Before creating a server certificate, you must create or import a root certificate.

You need to fill in the required fields such as:
- Server Domain
- Server IP
- Common name
- Organization
Then click the button Generate SERVER certificate
After these steps, the Server certificate and private key will be generated.
Information about the certificate will be available in the same place.
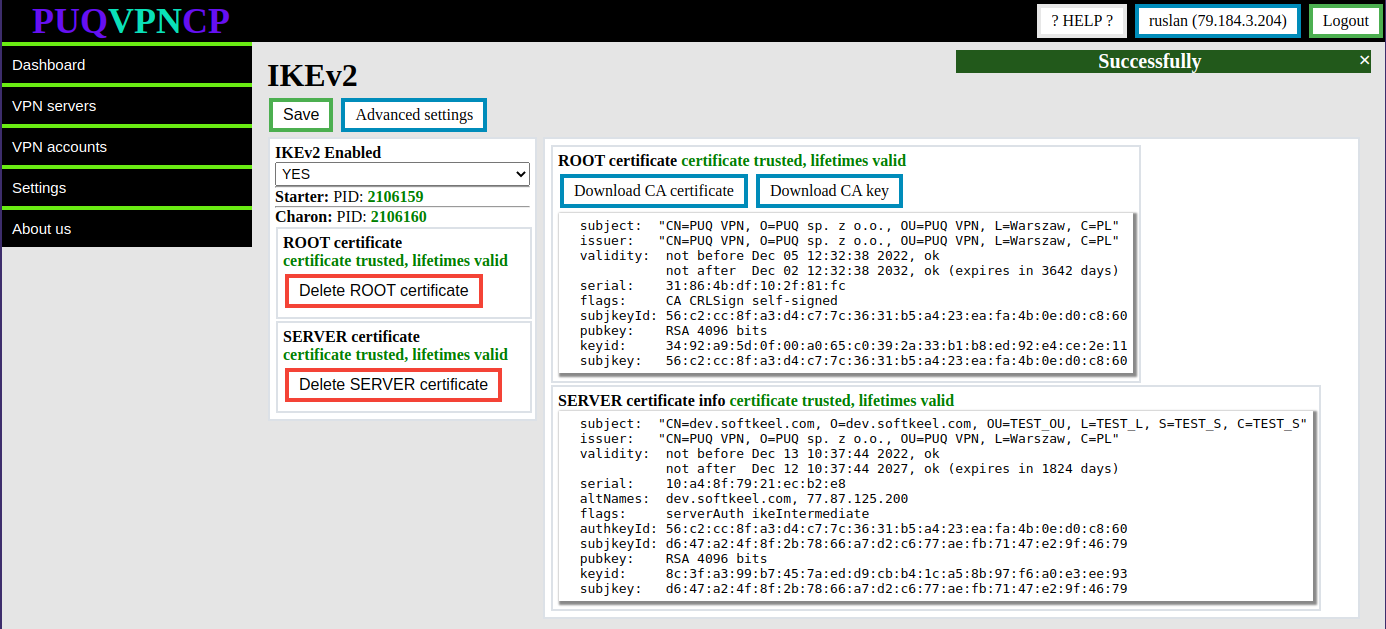
To remove the server certificate, use the Delete SERVER certificate button
After a successful server certificate generation process, the IKEv2 server transitions to the enabled state.
Advanced settings
Order now | Download | FAQ
For more precise server settings, you can use Advanced settings
On this page you can customize the server to suit your needs.
Use the official strongSwan documentation for parameter information
https://wiki.strongswan.org/projects/strongswan/wiki/IpsecConf
Go to the IKEv2 Advanced settings page
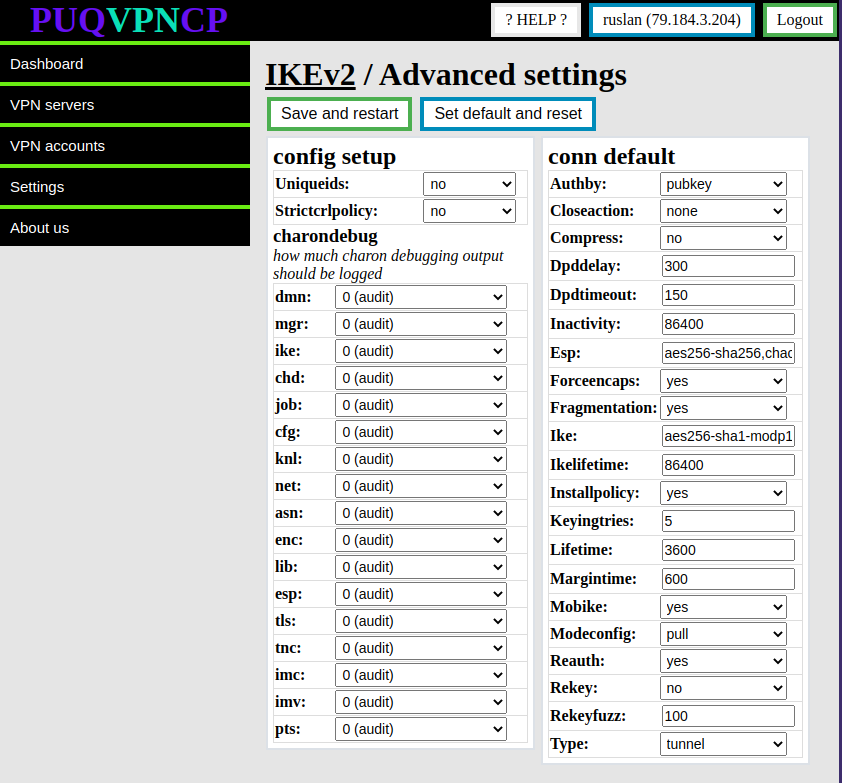
In order to restore the default settings, click the Set default and reset button
Enable IKEv2
Order now | Download | FAQ
It is worth remembering that the main VPN protocol in the panel is WireGuard, and the IKEv2 protocol is an additional protocol. This means that before using IKEv2, you must configure the WireGuard protocol, and then enable IKEv2 support on each WireGuard interface on which you want to use IKEv2.
For the inclusion of the IKEv2 protocol, switch to the configuration of the WireGuard user interface
To enable the IKEv2 protocol, switch to the desired WireGuard interface.

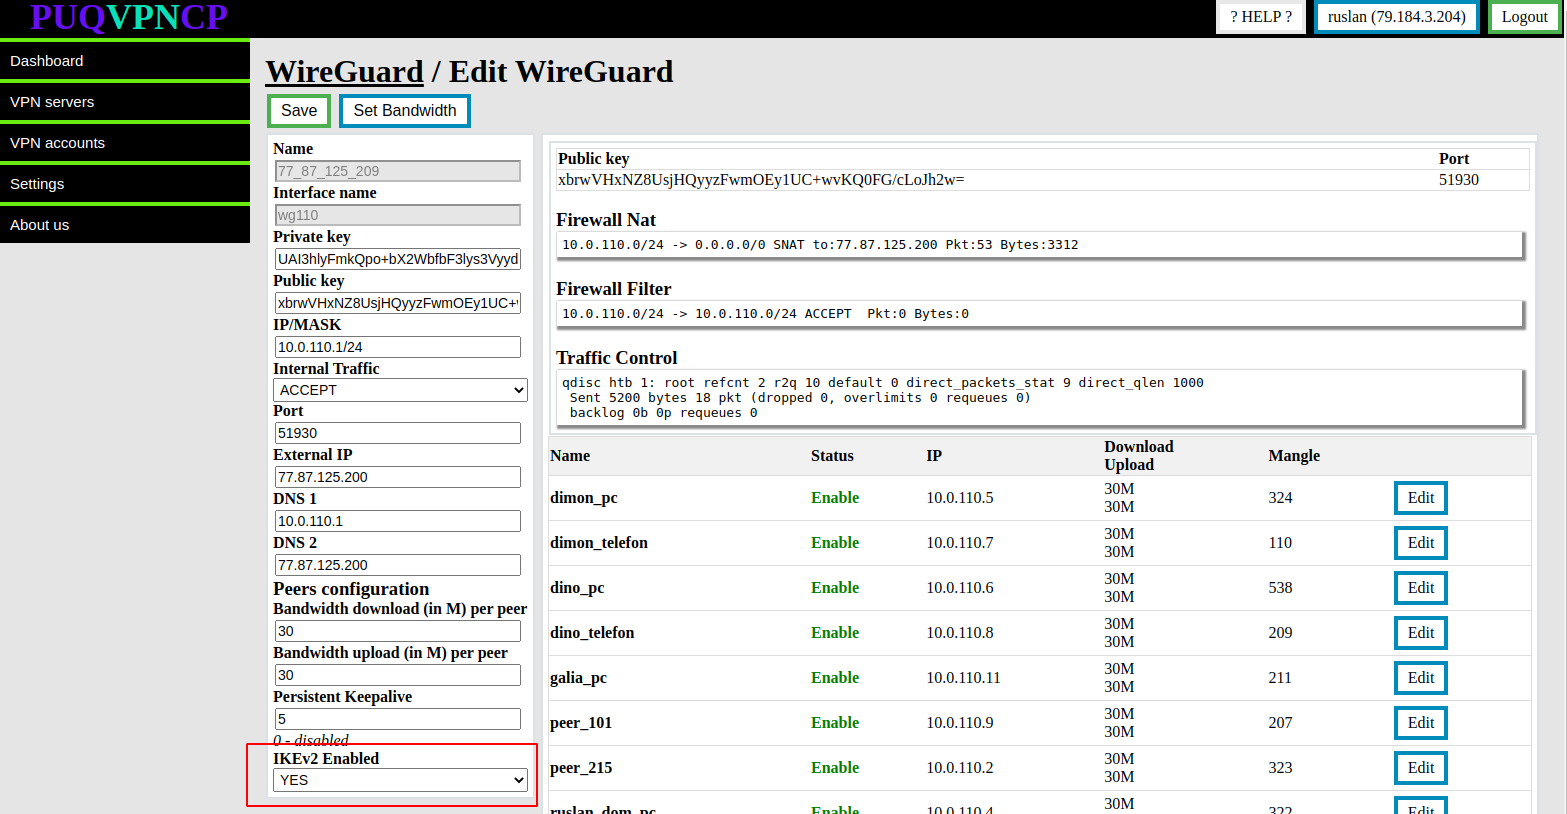
Set the IKEv2 Enabled option to YES to keep the value of the Save button