Installation and configuration guide
- WHMCS setup(install/update)
- Synology part setup guide
- WHMCS part setup guide
- Email Template (puqSynology Notification disk limit)
- Add server (Synology NAS)
- Product Configuration
WHMCS setup(install/update)
Synology module WHMCS
Order now | Download | FAQ
To install and update a module, you must perform one and the same action.
1. Download the latest version of the module.
PHP 8.1
wget http://download.puqcloud.com/WHMCS/servers/PUQ_WHMCS-Synology/PUQ_WHMCS-Synology-latest.zipPHP 7.4
wget http://download.puqcloud.com/WHMCS/servers/PUQ_WHMCS-Synology/php74/PUQ_WHMCS-Synology-latest.zip
All versions are available via link: http://download.puqcloud.com/WHMCS/servers/PUQ_WHMCS-Synology/
2. Unzip the archive with the module.
unzip PUQ_WHMCS-Synology-latest.zip3. Copy and Replace "puqSynology" to "WHMCS_WEB_DIR/modules/servers/"
Synology part setup guide
Synology module WHMCS
Order now | Download | FAQ
Here are the initial steps of configuring Synology devices to prepare them for use with the WHMCS module.
At the beginning, you should prepare the appropriate domain with the correct DNS entries so that you can generate a correct SSL certificate for Your Synology NAS server.
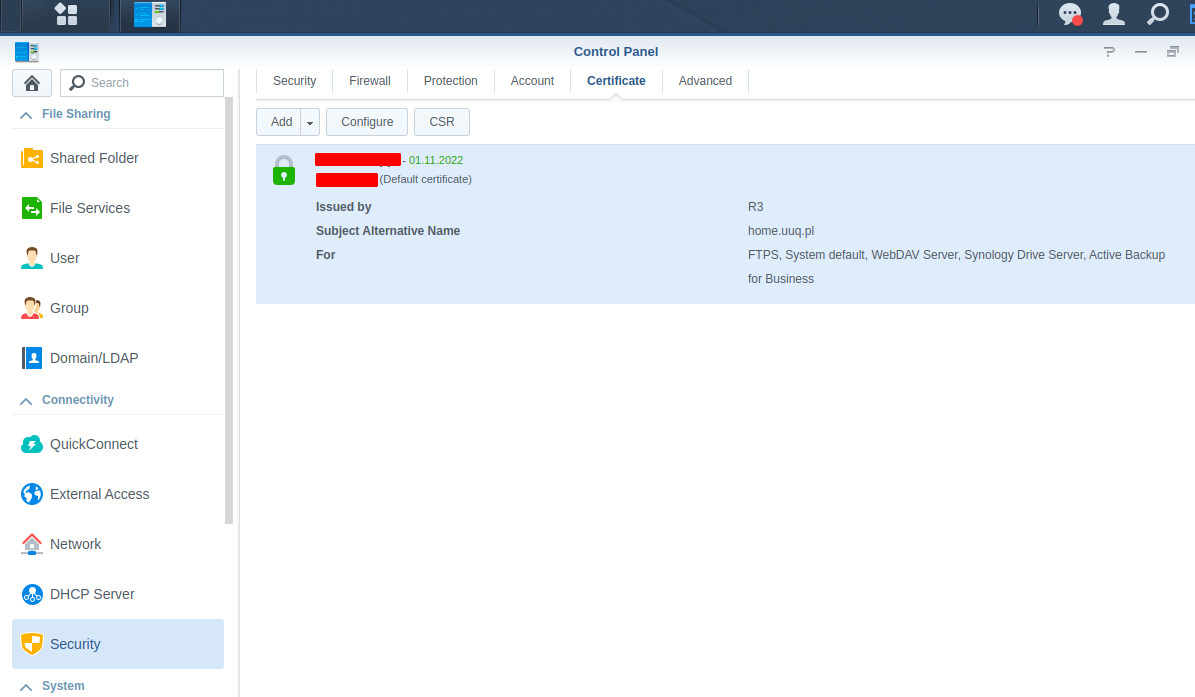
1. Generate an SSL certificate for your domain.
Connect the certificate for all services that will be used in the server.(FTPS, System, Synology Drive, etc...)
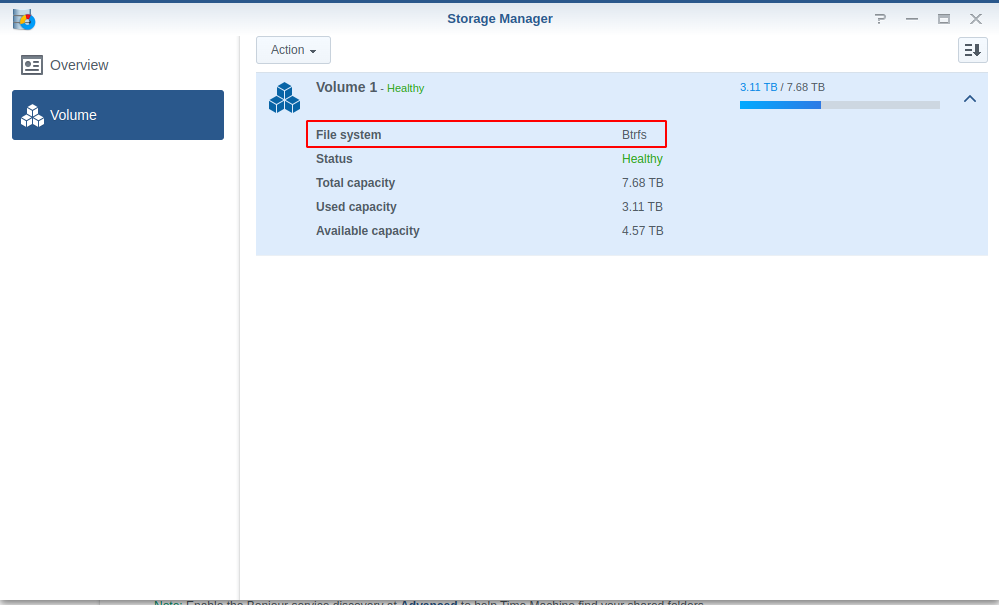
2. Make sure the partition is formatted in BTRFS
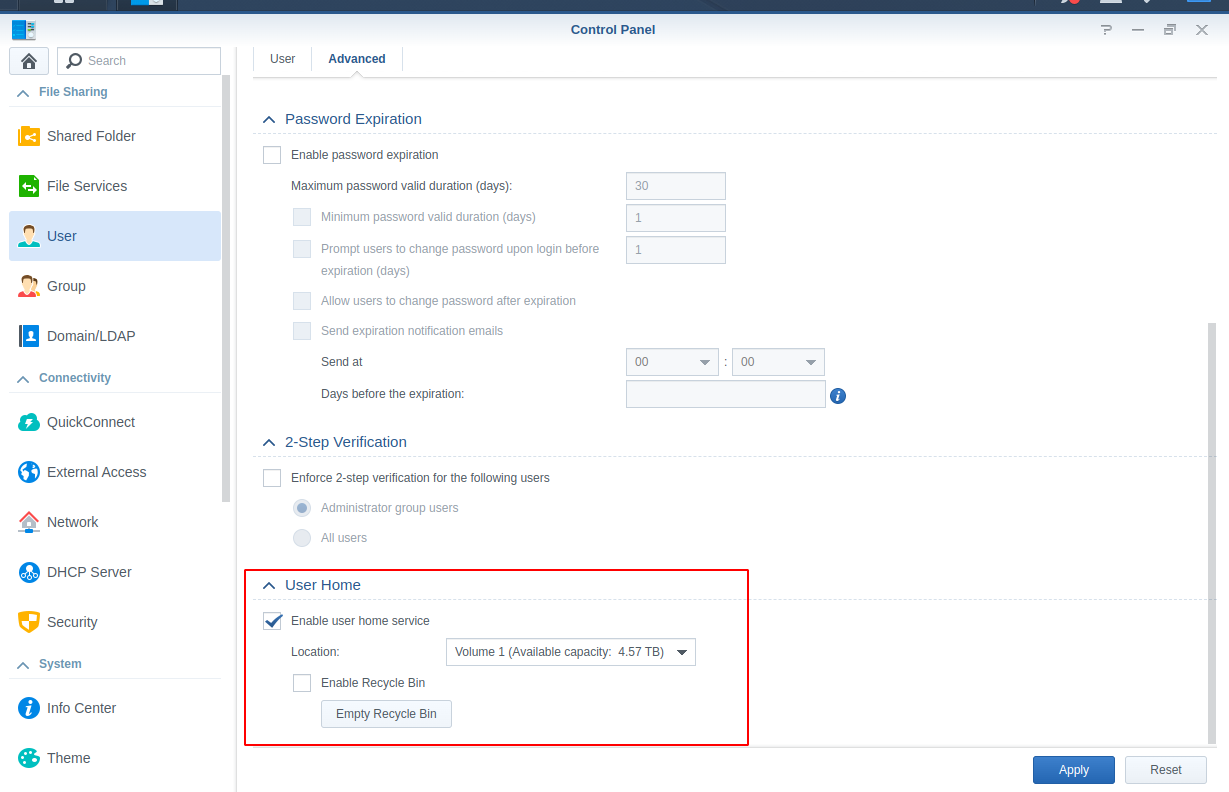
3. Enable the user's home folder.
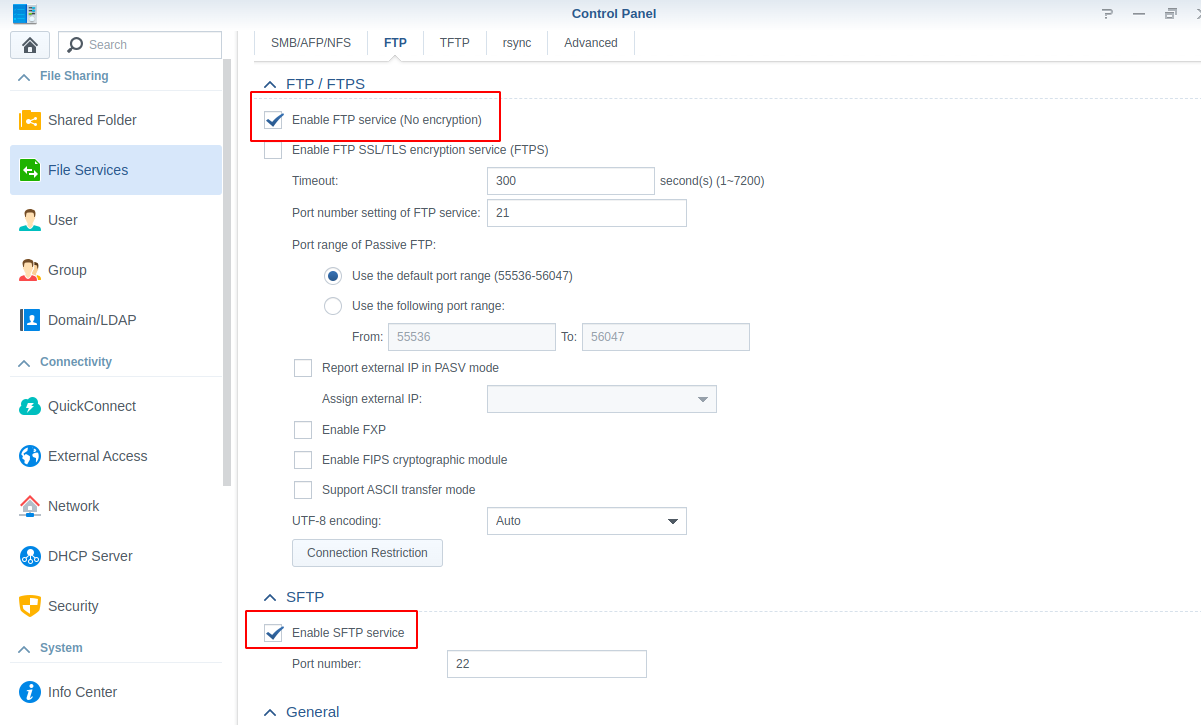
4. Enable all necessary file services (ie: FTP, FTPS, SFTP, etc.).
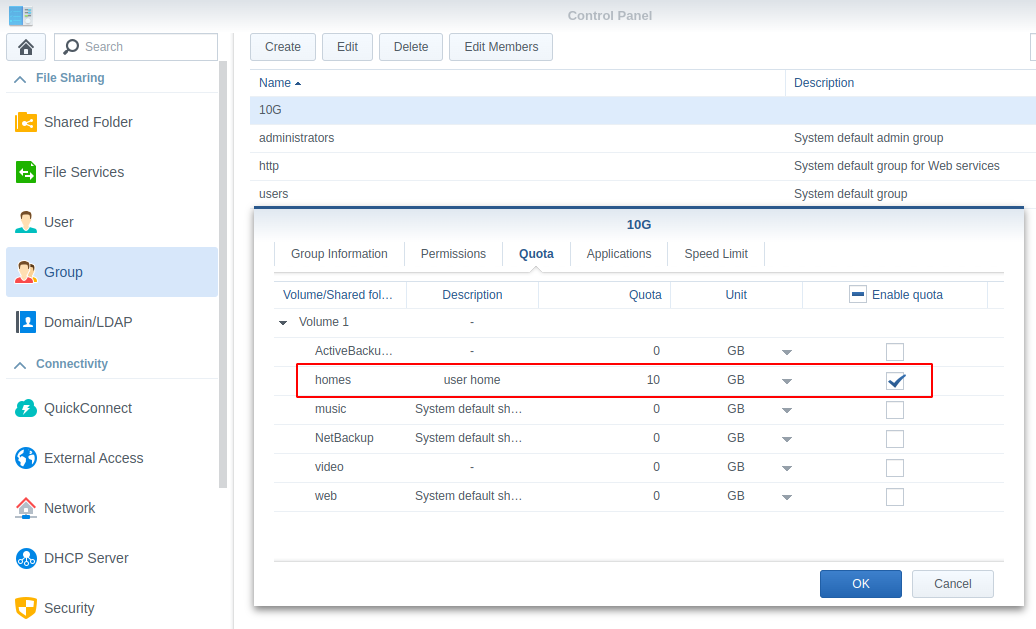
5. Create user groups with the necessary quotas and permissions.

WHMCS part setup guide
Synology module WHMCS
Order now | Download | FAQ
1. Download the latest version of the module.
PHP 8.1
wget http://download.puqcloud.com/WHMCS/servers/PUQ_WHMCS-Synology/PUQ_WHMCS-Synology-latest.zipPHP 7.4
wget http://download.puqcloud.com/WHMCS/servers/PUQ_WHMCS-Synology/php74/PUQ_WHMCS-Synology-latest.zip
All versions are available via link: http://download.puqcloud.com/WHMCS/servers/PUQ_WHMCS-Synology/
2. Unzip the archive with the module.
unzip PUQ_WHMCS-Synology-latest.zip3. Copy "puqSynology" to "WHMCS_WEB_DIR/modules/servers/"
4. Create new server Synology NAS in WHMCS (System Settings->Products/Services->Servers)
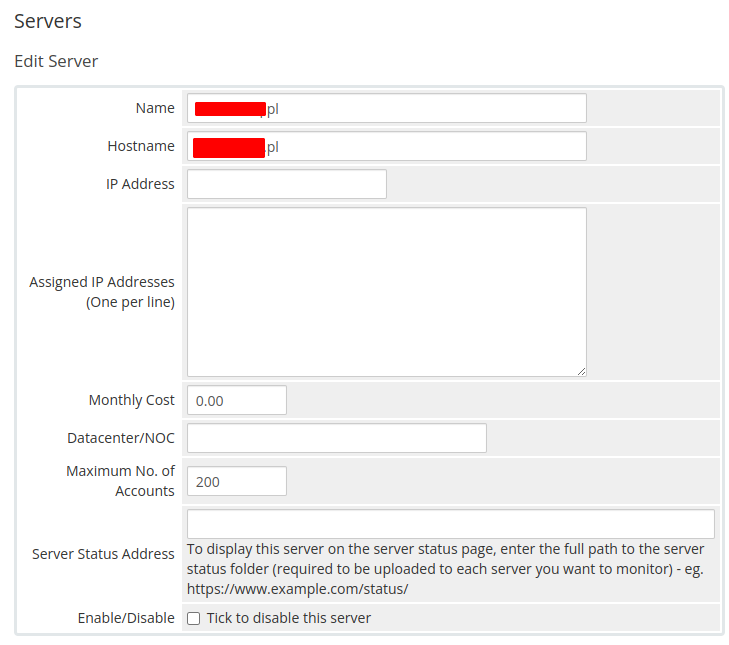
System Settings->Servers->Add New Server- Enter the correct Name and Hostname
- In the Server Details section, select the "PUQ Synology" module and enter the correct username and password for the Synology NAS web interface.
- To check, click the "Test connection" button
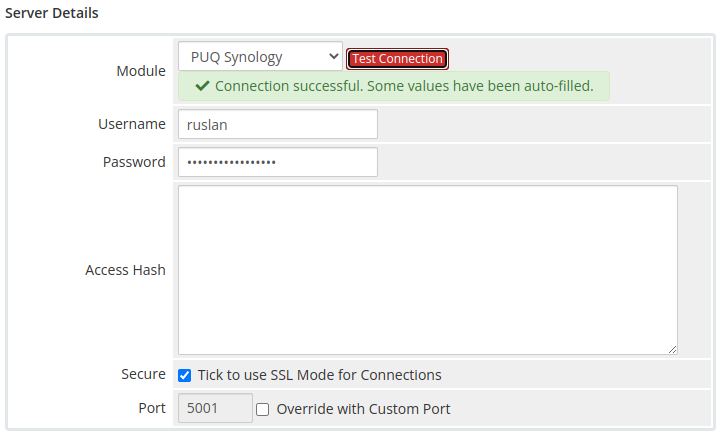
WARNING: ACCESS HASH field Used to store the access key to the server and is updated automatically.
5. Create a new Products/Services
Add new product to WHMCS
System Settings->Products/Services->Create a New ProductIn the Module settings section, select the "PUQ Synology" module
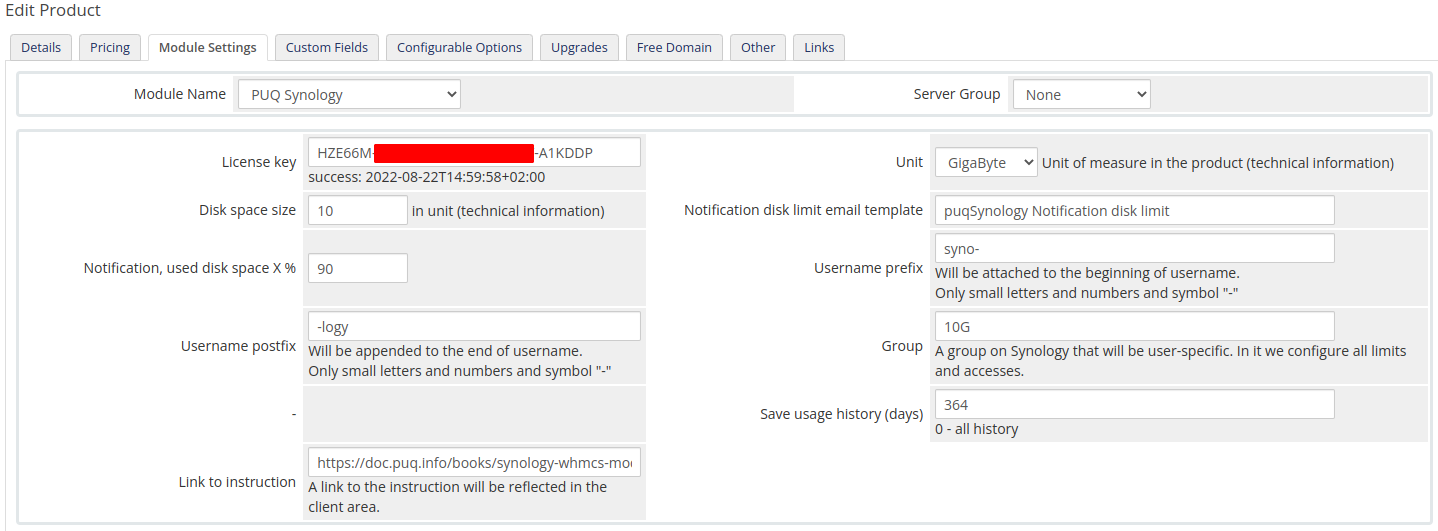
- License key: A pre-purchased license key for the "PUQ Synology" module. For the module to work correctly, the key must be active
- Unit: Packet disk space units
- Disk space size: Disk size in this product
- Notification disk limit email template: Email template that will be sent when the disk quota is exceeded in %
- Notification, used disk space X %: Sets a percentage parameter, after exceeding this parameter a notification will be sent to the user
- Username prefix/Username suffix: Necessary in order to generate a username for the service, in the format: prefix<client_id>-<service_id>suffix
- Group: The group that will be assigned to the user on the server side of the Synology NAS
- Save usage history (days): The number of days it takes to save user disk usage statistics
- Link to instruction: Link to the instruction, if filled out, it will be reflected in the client area
Email Template (puqSynology Notification disk limit)
Synology module WHMCS
Order now | Download | FAQ
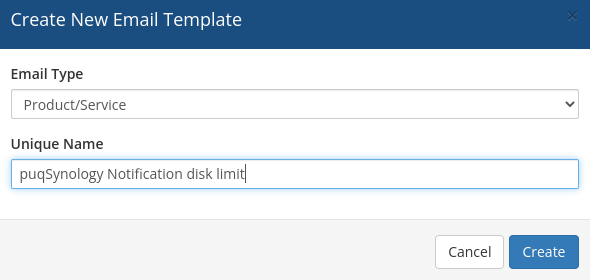
Create an email template for customer notifications.
System Settings->Email Templates->Create New Email Template- Email Type: Product/service
- Unique Name: puqSynology Notification disk limit
Subject:
Disk space usage {$disk_used_percentage} % - {$username}Body:
Dear {$client_name},

This letter informs you that the disk space usage limit is coming to an end.

Product/Service: {$service_product_name}
Due Date: {$service_next_due_date}

Username: {$username}

Disk limit: {$disk_limit_bytes*$unit_coefficient} {$unit}
Disk used: {$disk_used_unit} {$unit} ({$disk_used_percentage} %)
Disk free: {$disk_free_unit} {$unit} ({$disk_free_percentage} %)


{$signature}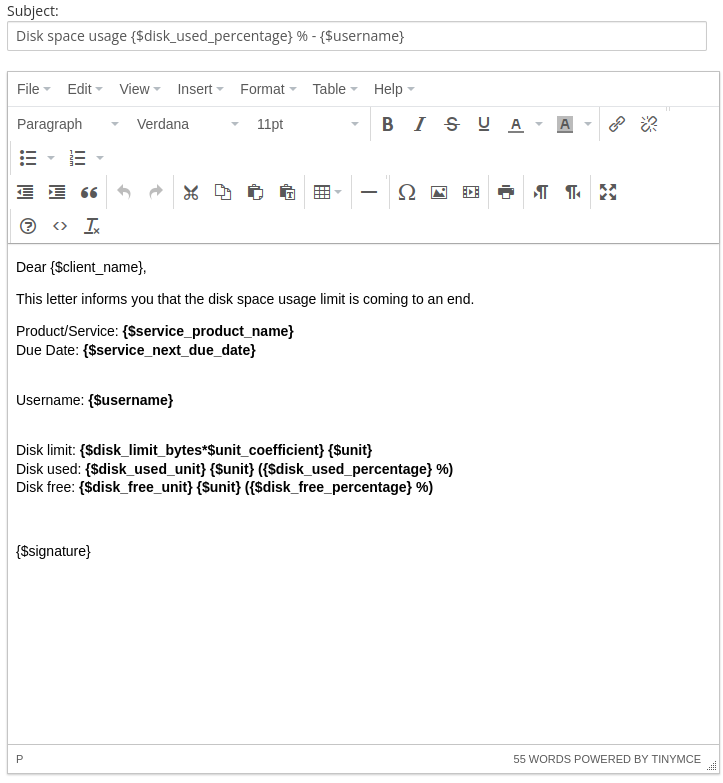
Add server (Synology NAS)
Synology module WHMCS
Order now | Download | FAQ
Add a new server to the system WHMCS.
System Settings->Servers->Add New Server- Enter the correct Name and Hostname
- In the Server Details section, select the "PUQ Synology" module and enter the correct username and password for the Synology NAS web interface.
- To check, click the "Test connection" button
WARNING: ACCESS HASH field Used to store the access key to the server and is updated automatically.
Product Configuration
Synology module WHMCS
Order now | Download | FAQ
Add new product to WHMCS
System Settings->Products/Services->Create a New ProductIn the Module settings section, select the "PUQ Synology" module
- License key: A pre-purchased license key for the "PUQ Synology" module. For the module to work correctly, the key must be active
- Unit: Packet disk space units
- Disk space size: Disk size in this product
- Notification disk limit email template: Email template that will be sent when the disk quota is exceeded in %
- Notification, used disk space X %: Sets a percentage parameter, after exceeding this parameter a notification will be sent to the user
- Username prefix/Username suffix: Necessary in order to generate a username for the service, in the format: prefix<client_id>-<service_id>suffix
- Group: The group that will be assigned to the user on the server side of the Synology NAS
- Save usage history (days): The number of days it takes to save user disk usage statistics
- Link to instruction: Link to the instruction, if filled out, it will be reflected in the client area