**Module is coded ionCube v13**
Supported php version: - php 7.4 WHMCS 8.11.0 - - php 8.1 WHMCS 8.11.0 + - php 8.2 WHMCS 8.11.0 +To install and update a module, you must perform one and the same action.
##### 1. Download the latest version of the module. PHP 8.2 ```Powershell wget http://download.puqcloud.com/WHMCS/servers/PUQ_WHMCS-WireGuard-Business-VPN/php82/PUQ_WHMCS-WireGuard-Business-VPN-latest.zip ``` PHP 8.1 ```Powershell wget http://download.puqcloud.com/WHMCS/servers/PUQ_WHMCS-WireGuard-Business-VPN/php81/PUQ_WHMCS-WireGuard-Business-VPN-latest.zip ``` PHP 7.4 ```Powershell wget http://download.puqcloud.com/WHMCS/servers/PUQ_WHMCS-WireGuard-Business-VPN/php74/PUQ_WHMCS-WireGuard-Business-VPN-latest.zip ```All versions are available: [https://download.puqcloud.com/WHMCS/servers/PUQ\_WHMCS-WireGuard-Business-VPN/](https://download.puqcloud.com/WHMCS/servers/PUQ_WHMCS-WireGuard-Business-VPN/)
##### 2. Unzip the archive with the module. ```Powershell unzip PUQ_WHMCS-WireGuard-Business-VPN-latest.zip ``` ##### 3. Copy and Replace "puqWireGuardBusinessVPN" to "WHMCS\_WEB\_DIR/modules/servers/"After these steps, the first time you connect to the server via the https protocol, the system will request an SSL certificate and automatically renew it if necessary.
ATTENTION. After activating SSL, the system will only work in the https protocol on port 443. A redirect is also set from port 80 to port 443.
To connect to the server via the https protocol, use only the domain that was set in the configuration file. Otherwise, you will get an error that SSL is not working correctly.
#### 6. License configuration is available in the menu item **Settings->License** [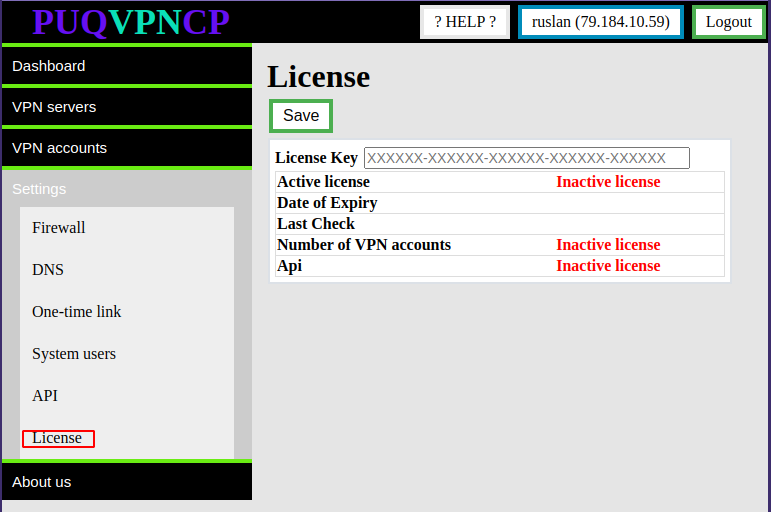](https://doc.puq.info/uploads/images/gallery/2022-11/image-1668763551186.png) By default, the system limit is 50 users and the API is disabled. In order to activate the license key, the key must be entered in the "License Key" field and click on the "Save" button [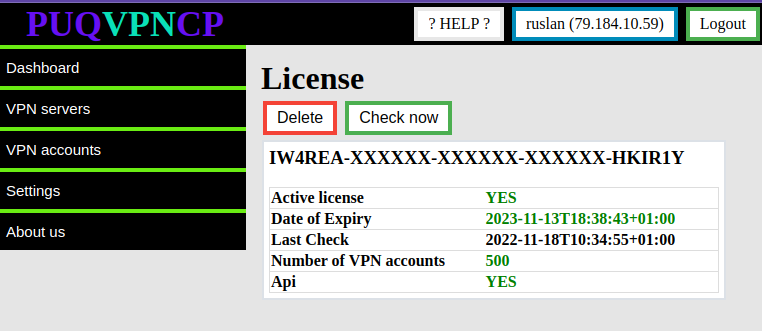](https://doc.puq.info/uploads/images/gallery/2022-11/image-1668764171867.png) #### **7.Creation of access API** To manage API Access Hashs, go to the section Settings->API [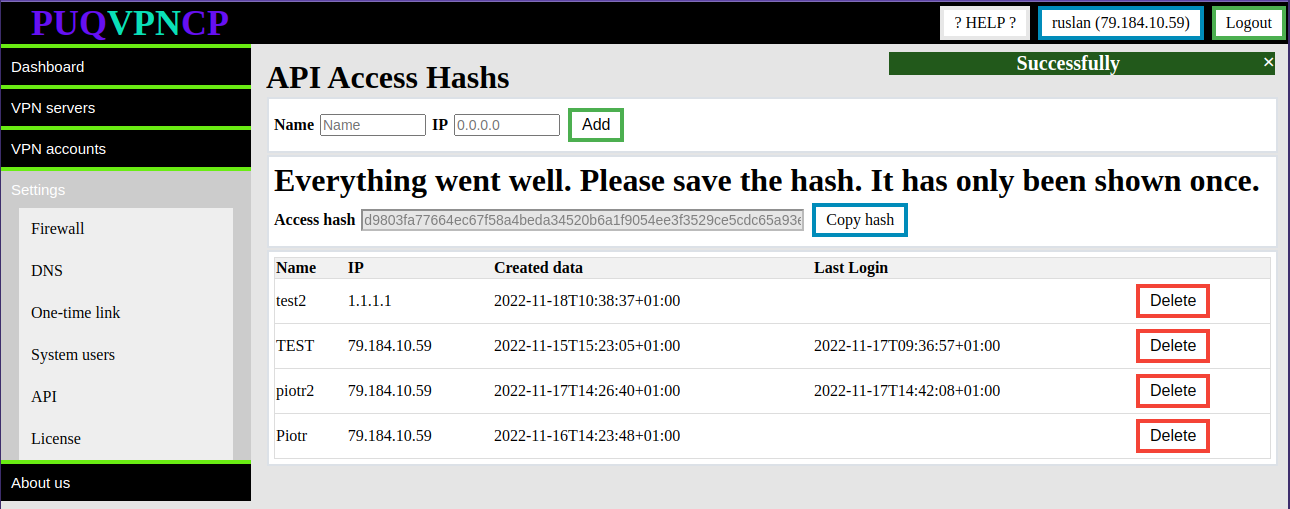](https://doc.puq.info/uploads/images/gallery/2022-11/image-1668764483617.png) **Enter the name and IP address of the WHMCS server and click the ADD button****Attention. The generated Access hash will only be shown once. Copy it, it will be needed during configuration of the product server in the WHMCS system.**
Accept the fact that once the Access Hashs API is created, it will only be shown once. Each API Access Hash only works from a specific IP address.
# Add server (PUQVPNCP) in WHMCS ### WireGuard Business-VPN module **[WHMCS](https://puqcloud.com/link.php?id=77)** ##### [Order now](https://puqcloud.com/whmcs-module-wireguard-business-vpn.php) | [Download](https://download.puqcloud.com/WHMCS/servers/PUQ_WHMCS-WireGuard-Business-VPN/) | [FAQ](https://faq.puqcloud.com/) ##### Add a new server to the system WHMCS. Login to Your WHMCS panel and create new server in WHMCS (*System Settings->Products/Services->Servers*) [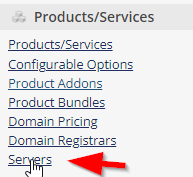](https://doc.puq.info/uploads/images/gallery/2022-09/image-1663142713076.png) ``` System Settings->Servers->Add New Server ``` - Enter the correct **Name** and **Hostname** **Name is just for Your convenience and You can put there anything You like ie: *Mygreat PUQVPNCP routr*****You can choose whatever hostname You want. Valid entries look similar to: vpn.mydomain.com, ourgreatvpn.mydomain.net. You can also dedicate whole domain ie: myVPNservices.com if You like. The important thing is to resolve the choosen IP address of the [PUQVPNCP](https://doc.puq.info/books/puqvpncp/page/description) in DNS server for Your domain.**
- In the **"Assigned IP Addresses field"**, enter a list of IP addresses that will be issued to users. [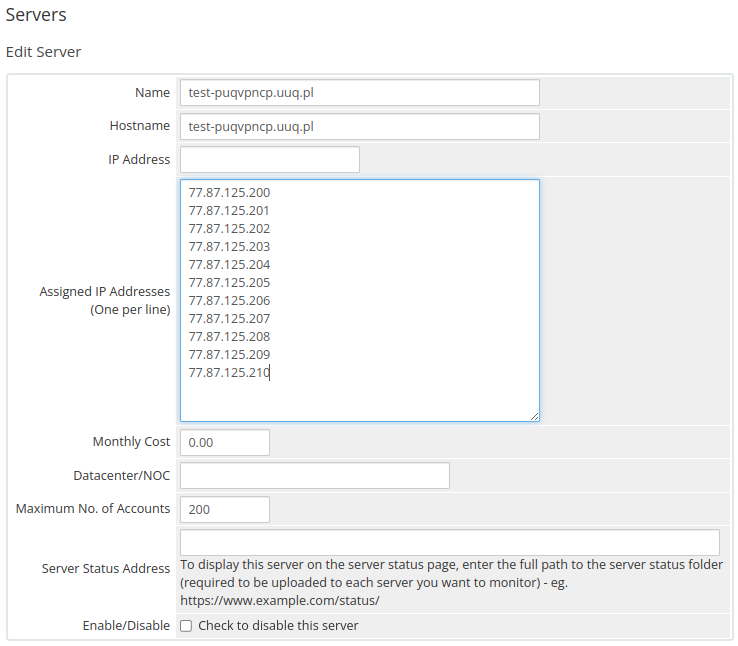](https://doc.puq.info/uploads/images/gallery/2022-11/image-1669286799237.png) ##### ##### Enter the correct data in the Access Hash field - In the **Server Details** section, select the "**PUQ WireGuard Business-VPN**" module and enter the correct API Access Hash. - To check, click the **"Test connection"** button [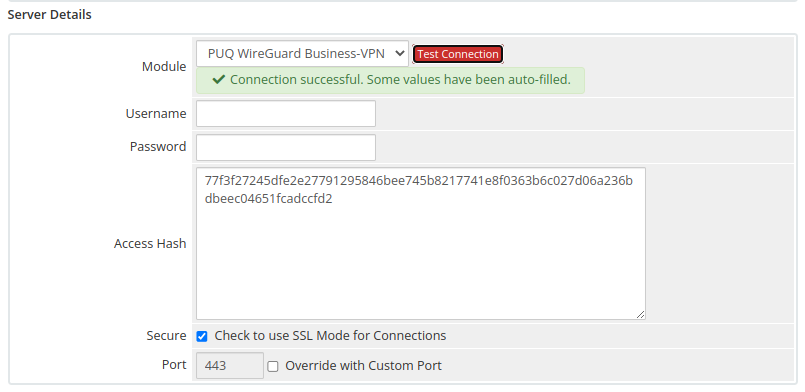](https://doc.puq.info/uploads/images/gallery/2022-11/image-1669287101265.png) # Product Configuration ### WireGuard Business-VPN module **[WHMCS](https://puqcloud.com/link.php?id=77)** ##### [Order now](https://puqcloud.com/whmcs-module-wireguard-business-vpn.php) | [Download](https://download.puqcloud.com/WHMCS/servers/PUQ_WHMCS-WireGuard-Business-VPN/) | [FAQ](https://faq.puqcloud.com/) ##### Add new product to WHMCS ``` System Settings->Products/Services->Create a New Product ``` In the **Module settings** section, select the **"PUQ WireGuard Business-VPN"** module [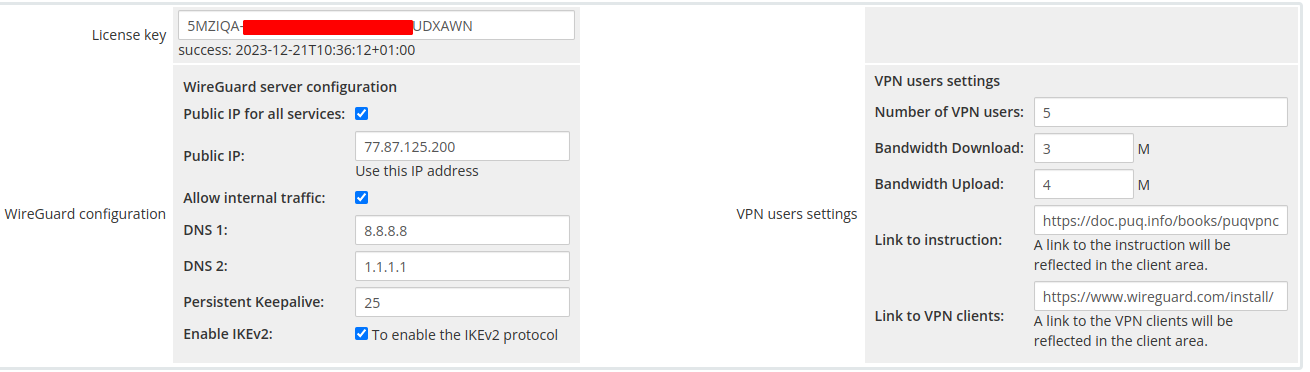](https://doc.puq.info/uploads/images/gallery/2023-01/image-1673191608638.png) - **License key:** A pre-purchased license key for the **"PUQ WireGuard Business-VPN"** module. For the module to work correctly, the key must be active ##### WireGuard configuration - **Public IP for all services -** If you want to assign one public IP address to all services (IP must be configured on the **[PUQVPNCP](https://doc.puq.info/books/puqvpncp/page/description)** server) - **Public IP -** If you want to assign one public IP address to all services (IP must be configured on the **[PUQVPNCP](https://doc.puq.info/books/puqvpncp/page/description)** server) - **Allow internal traffic-** If you want to enable traffic exchange between VPN clients **(package change)** - **DNS1, DNS2 -** DNS servers if they differ from the configuration in the **[PUQVPNCP](https://doc.puq.info/books/puqvpncp/page/description)** panel **(package change)** ##### VPN users settings - **Number of VPN users -** Number of vpn accounts per service **(package change)** - **Bandwidth Download** - Bandwidth Download of VPN accounts **(package change)** - **Bandwidth Upload-** BandwidthUpload of VPN accounts **(package change)** - **Link to instruction-** If you have prepared instructions for your customers on how to use the service, then a link to the instructions is provided here (If filled, it will be shown in the client area) - **Link to VPN clients-** Link to download the VPN client. For example [https://www.wireguard.com/install/](https://www.wireguard.com/install/) (If filled, it will be shown in the client area) - **Persistent Keepalive-** sets the Keepalive parameter in the WireGuard server client configuration **(package change)** - **Enable IKEv2-** Enable IKEv2 protocol support **(package change)**