# PUQVPNCP installation and configuration

### WireGuard VPN module **[WHMCS](https://puqcloud.com/link.php?id=77)**

#####  [Order now](https://panel.puqcloud.com/index.php?rp=/store/whmcs-module-wireguard-vpn) | [Download](https://download.puqcloud.com/WHMCS/servers/PUQ_WHMCS-WireGuard-VPN/) | [FAQ](https://faq.puqcloud.com/)

##### Official documentation:  
  
[PUQVPNCP Documentation](https://doc.puq.info/books/puqvpncp/page/description)  
[PUQVPNCP Download](https://download.puqcloud.com/cp/puqvpncp/)  
[PUQVPNCP Order now](https://panel.puqcloud.com/index.php?rp=/store/puqvpn)

#### **1. Install the required packages**

```shell
apt-get update
apt-get install wireguard wireguard-dkms wireguard-tools -y
apt-get install iproute2 iptables -y
apt-get install bind9 -y
```

#### 2. **Download the latest version of the package**

[https://download.puqcloud.com/cp/puqvpncp/](https://download.puqcloud.com/cp/puqvpncp/)

#### 3. Install the puqvpncp package

```shell
wget https://download.puqcloud.com/cp/puqvpncp/puqvpncp_1.1-2_amd64.deb
dpkg -i puqvpncp_1.1-2_amd64.deb
```

#### 4. After installation, connect to your server via a web browser.

http://SERVER\_IP:8098  
Username: admin  
Password: admin

[![image-1669217804065.png](https://doc.puq.info/uploads/images/gallery/2022-11/scaled-1680-/image-1669217804065.png)](https://doc.puq.info/uploads/images/gallery/2022-11/image-1669217804065.png)

[![image-1668690609770.png](https://doc.puq.info/uploads/images/gallery/2022-11/scaled-1680-/image-1668690609770.png)](https://doc.puq.info/uploads/images/gallery/2022-11/image-1668690609770.png)

#### **5. Enable SSL Let’s Encrypt** 

**Requirements**

- The active domain name that resolves the server's IP address
- Port 80 and 443 are always open, and not busy with another process

**In order for the system to start the procedure for obtaining an SSL certificate from Let's Encrypt, it is necessary.**

**In the configuration file, enable the use of SSL and enter the domain name.**

```shell
nano /etc/puqvpncp/puqvpncp.conf 
```

```shell
LetsEncrypSSL=yes
Domain=XXXXXX.XXX
```

Restart the **PUQVPNCP** service

```shell
service puqvpncp restart
```

<p class="callout info">After these steps, the first time you connect to the server via the https protocol, the system will request an SSL certificate and automatically renew it if necessary.</p>

<p class="callout warning">ATTENTION. After activating SSL, the system will only work in the https protocol on port 443.   
A redirect is also set from port 80 to port 443.</p>

<p class="callout warning">To connect to the server via the https protocol, use only the domain that was set in the configuration file.   
Otherwise, you will get an error that SSL is not working correctly.</p>

#### 6. License configuration is available in the menu item **Settings-&gt;License**

[![image-1668763551186.png](https://doc.puq.info/uploads/images/gallery/2022-11/scaled-1680-/image-1668763551186.png)
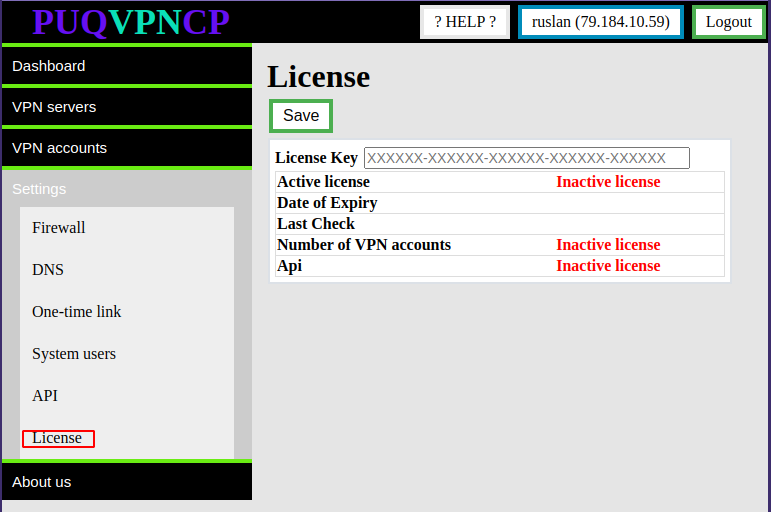
](https://doc.puq.info/uploads/images/gallery/2022-11/image-1668763551186.png)

By default, the system limit is 50 users and the API is disabled.

In order to activate the license key, the key must be entered in the "License Key" field and click on the "Save" button

[![image-1668764171867.png](https://doc.puq.info/uploads/images/gallery/2022-11/scaled-1680-/image-1668764171867.png)
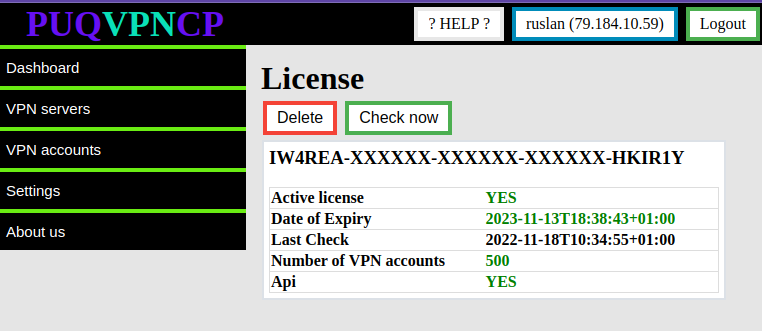
](https://doc.puq.info/uploads/images/gallery/2022-11/image-1668764171867.png)

#### **7.Creation of access API**

To manage API Access Hashs, go to the section Settings-&gt;API

[![image-1668764483617.png](https://doc.puq.info/uploads/images/gallery/2022-11/scaled-1680-/image-1668764483617.png)
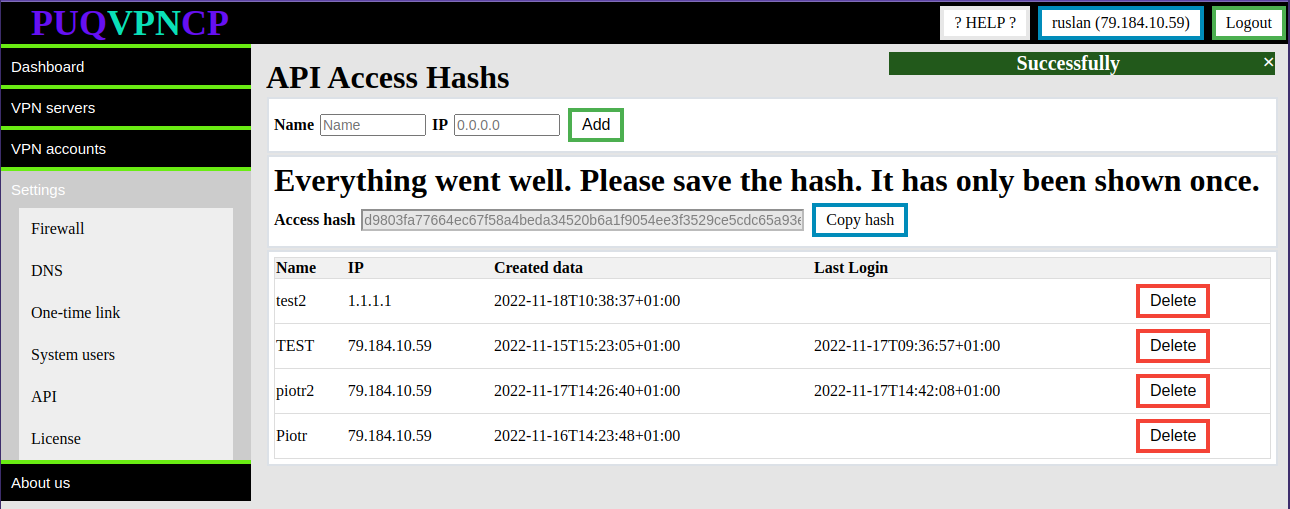
](https://doc.puq.info/uploads/images/gallery/2022-11/image-1668764483617.png)

**Enter the name and IP address of the WHMCS server and click the ADD button**

<p class="callout warning">**Attention.   
The generated Access hash will only be shown once. Copy it, it will be needed during configuration of the product server in the WHMCS system.**</p>

<p class="callout info">Accept the fact that once the Access Hashs API is created, it will only be shown once.  
Each API Access Hash only works from a specific IP address.</p>

#### **8. Creation of access API**

Add new WireGuard is available in the menu item **VPN servers-&gt;WireGuard-&gt;Click Create**

[![image-1669367825882.png](https://doc.puq.info/uploads/images/gallery/2022-11/scaled-1680-/image-1669367825882.png)
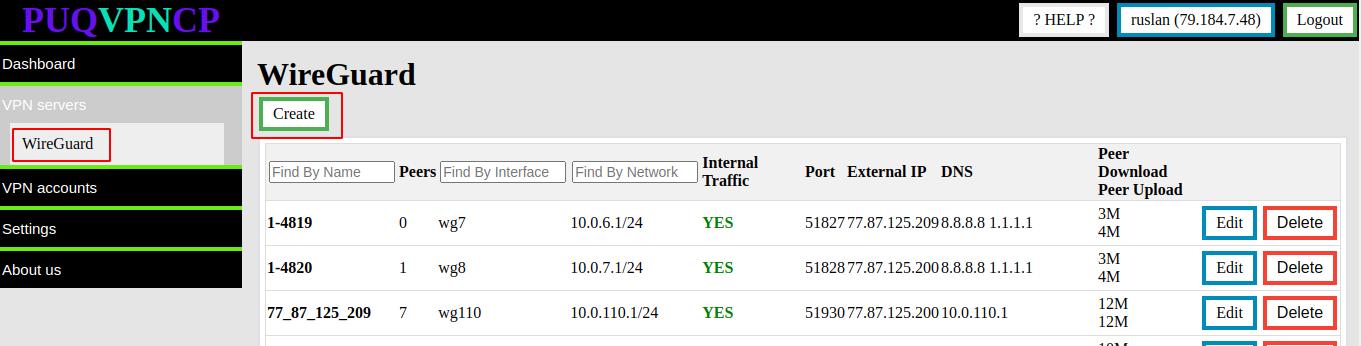
](https://doc.puq.info/uploads/images/gallery/2022-11/image-1669367825882.png)

[![image-1669367860027.png](https://doc.puq.info/uploads/images/gallery/2022-11/scaled-1680-/image-1669367860027.png)
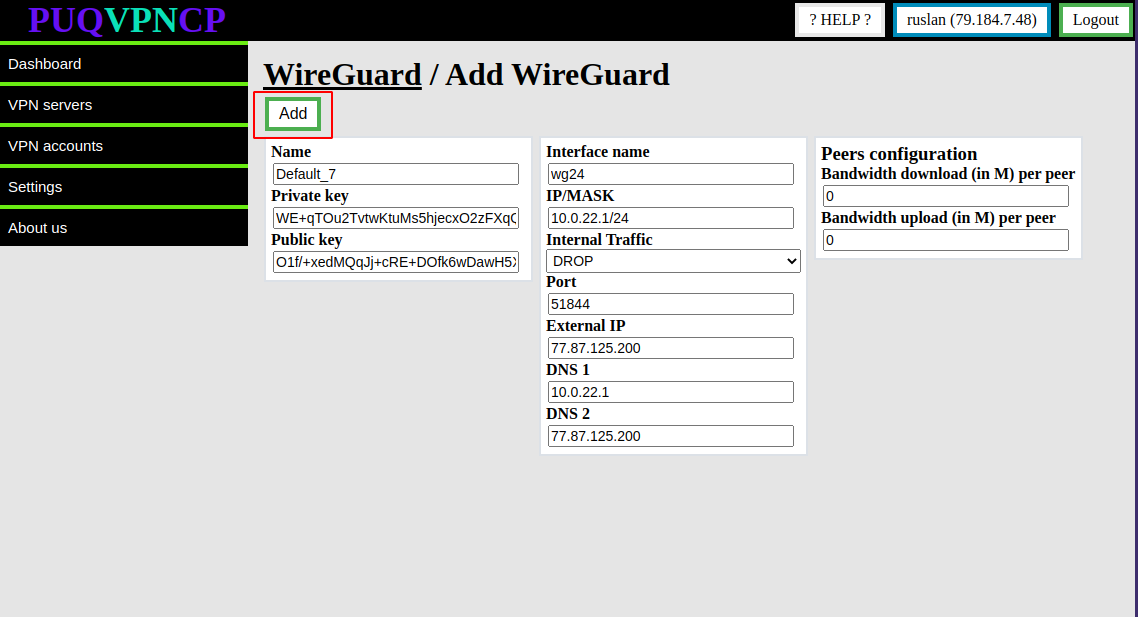
](https://doc.puq.info/uploads/images/gallery/2022-11/image-1669367860027.png)

Enter or edit the parameters of the new server/interface and click the **ADD** button