Product Configuration
ReverseDNS module WHMCS
Order now | Download | FAQ
Add new product to WHMCS
System Settings->Products/Services->Create a New ProductIn the Module settings section, select the "PUQ ReverseDNS" module
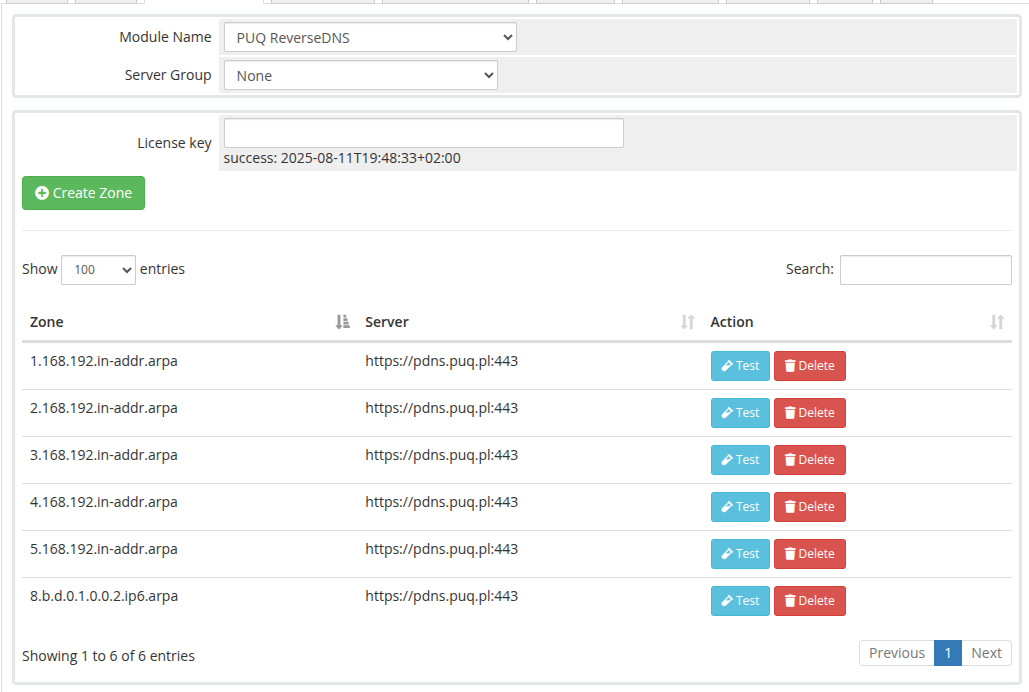
In the product settings, you must assign all rDNS zones that should be available for this product.
It is strongly recommended to include all reverse zones for IP addresses that are used in your services — such as virtual machines, dedicated servers, or other offerings.
Important:
If a reverse zone is not added to the product configuration, the client will not be able to manage rDNS records for IPs within that zone.
Those IP addresses will not even be visible in the client area.
In other words, clients can only manage rDNS records for IPs that belong to the zones explicitly added to the product settings. All other IPs will be hidden from view and unavailable for modification rDNS record.
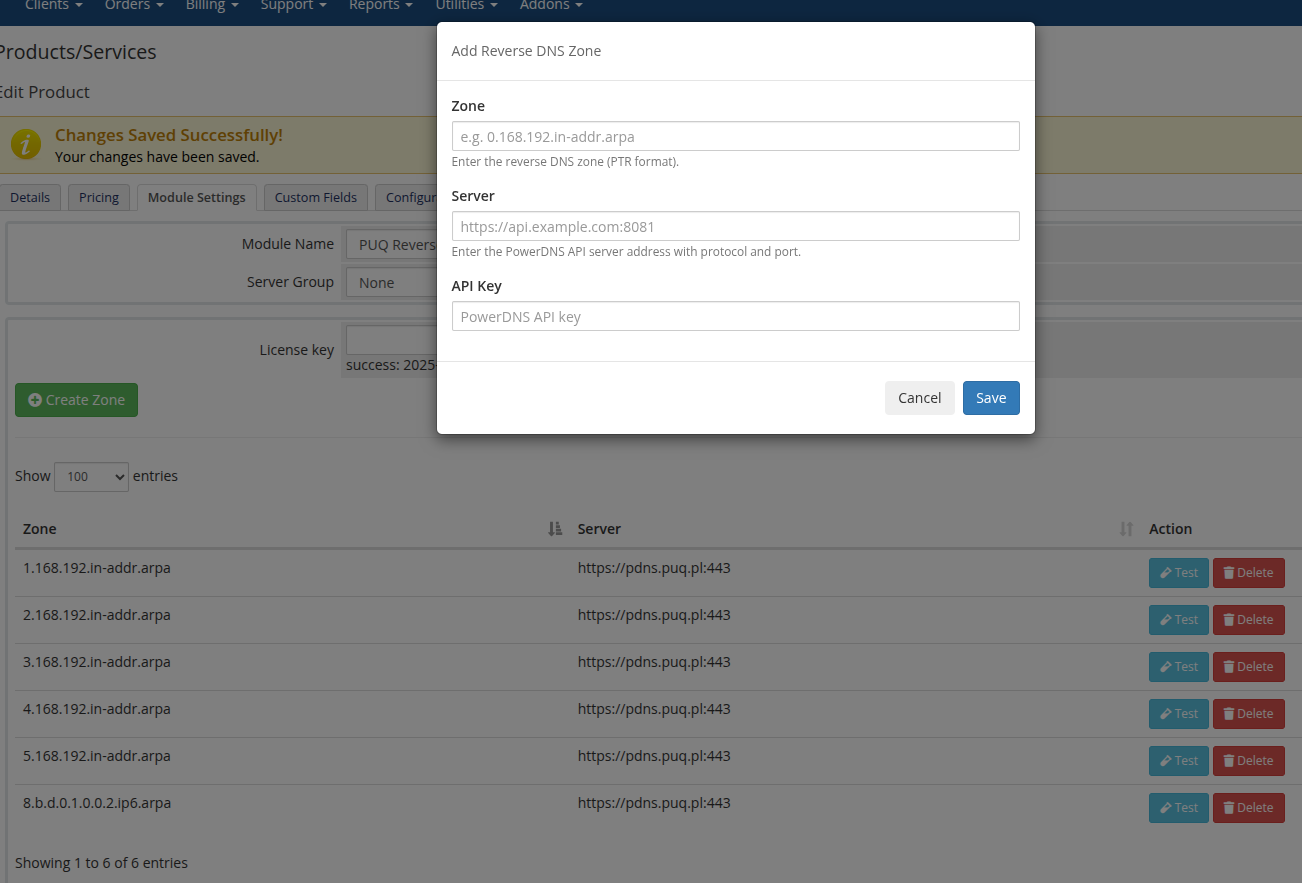
To add a new rDNS zone, click the "Add Zone" button. A popup window will appear where you can enter the required zone details.
Fields to fill:
-
Zone
For IPv4, enter the reverse zone in the format:1.168.192.in-addr.arpa— this corresponds to a /24 subnet.For IPv6, enter the zone in /64 format like:
8.b.d.0.1.0.0.2.ip6.arpa -
Server
Enter the hostname or IP address of the PowerDNS server or Admin PowerDNS panel. -
API Key
Provide the API key used to authenticate with the PowerDNS server.
These settings allow the module to connect and manage the specified reverse DNS zone.
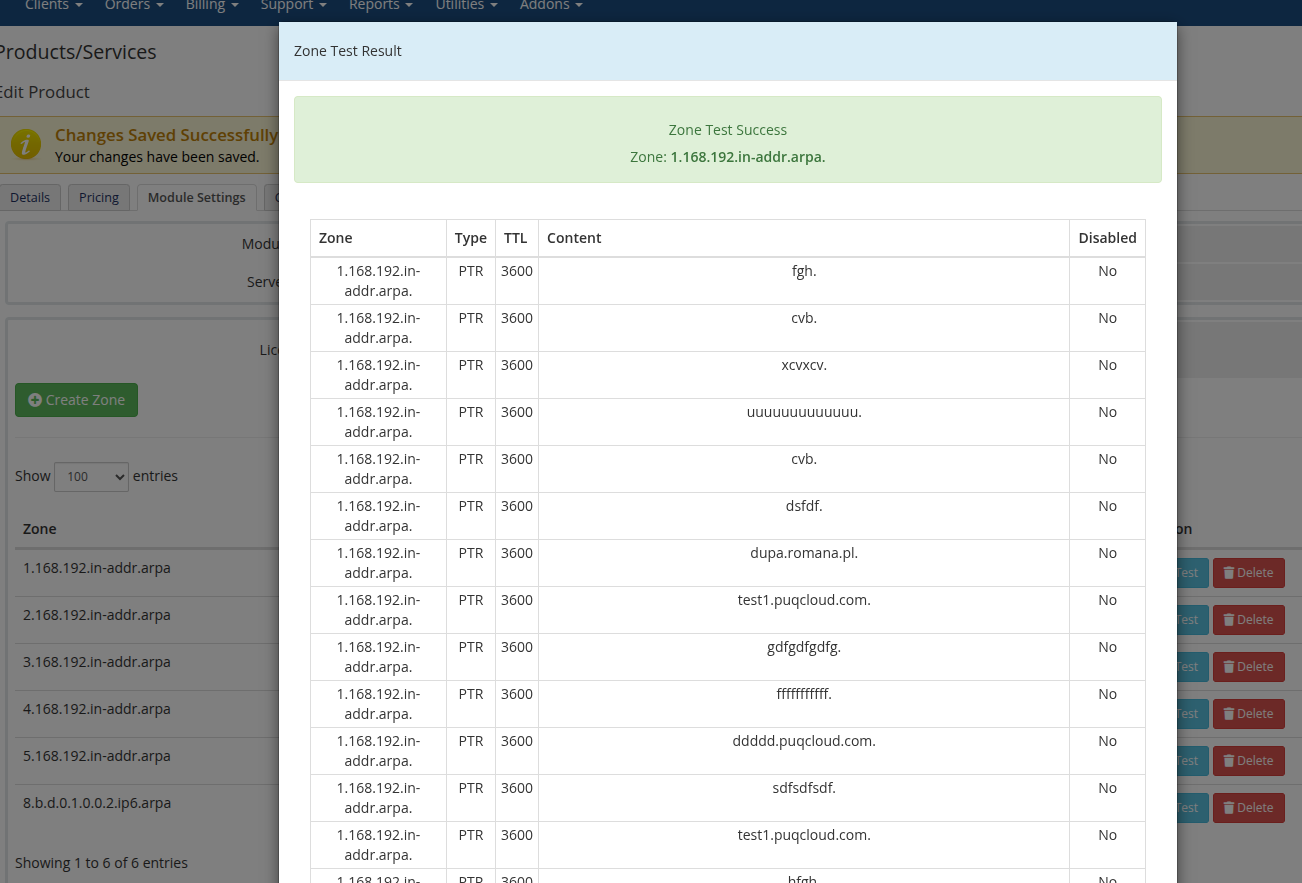
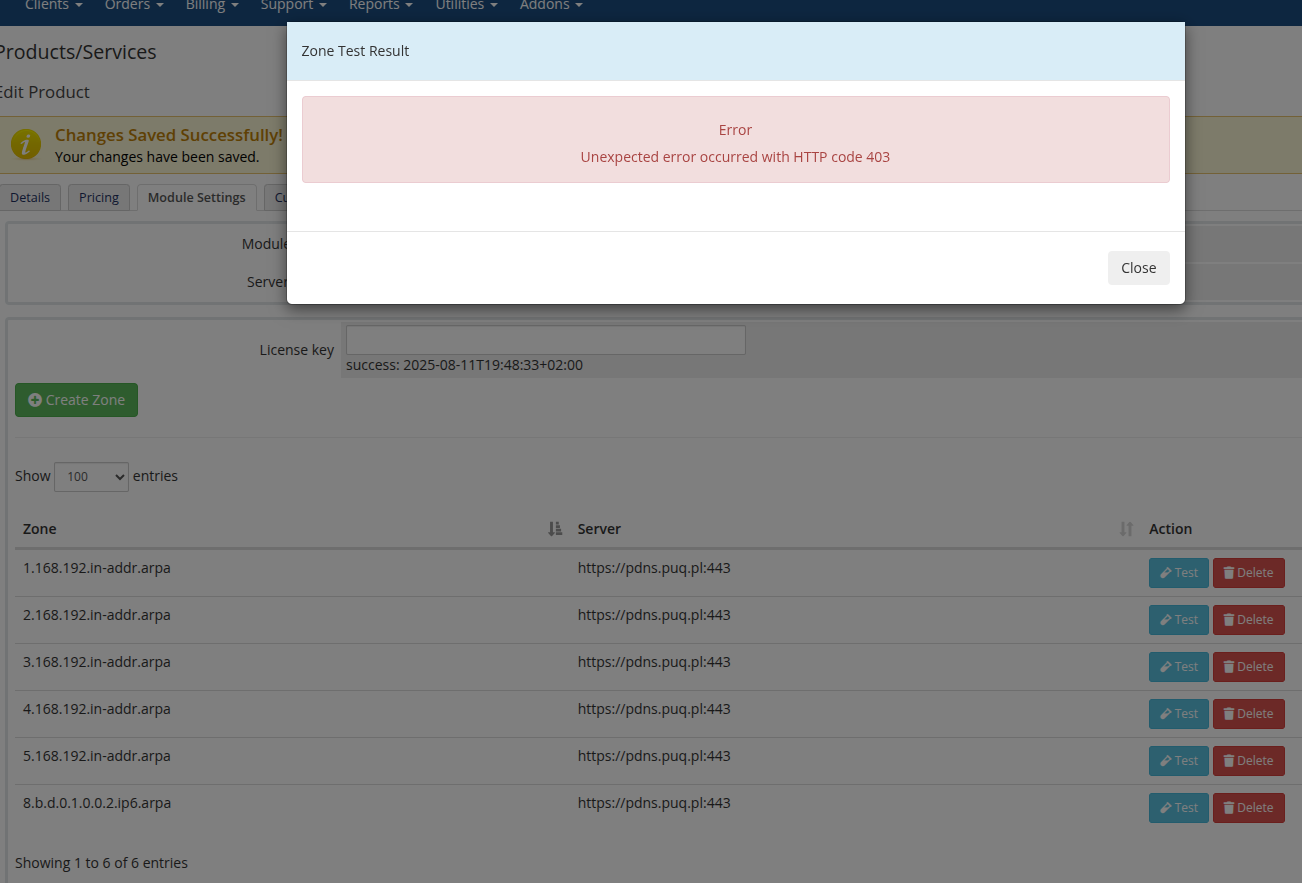
To verify the availability of a zone and the connection to the PowerDNS server, use the "Test" button.
When clicked, a modal window will appear displaying the result:
-
If the connection is successful, the modal will show a list of records retrieved from the specified zone.
-
If there is an error, the modal will display detailed error information, helping you diagnose connectivity or configuration issues.