Mikrotik preparation and configuration
Business-VPN module WHMCS
Order now | Download | FAQ
Note: Enter the following commands one by one and wait for the command to complete.
I. Check RouterOS version
Make sure that the version of RouterOS is 7+
system/package/print II. Enabling HTTPS Create your own root CA on your router
/certificate
add name=LocalCA common-name=LocalCA key-usage=key-cert-sign,crl-sign
III. Sign the newly created CA certificate
/certificate
sign LocalCA
IV. Create a new certificate for Webfig (non-root certificate)
Note: as common-name=XXX.XXX.XXX.XXX You enter public IP adddress of the router.
/certificate
add name=Webfig common-name=XXX.XXX.XXX.XXX
V. Sign the newly created certificate for Webfig
/certificate
sign Webfig ca=LocalCA
VI. Enable SSL (www-ssl) and specify to use the newly created certificate for Webfig
/ip service
set www-ssl certificate=Webfig disabled=no
VII. Enable api-ssl and specify to use the newly created certificate for Webfig
 /ip service
 set api-ssl certificate=Webfig disabled=no
VIII. Enable VPN server
To enable the VPN server
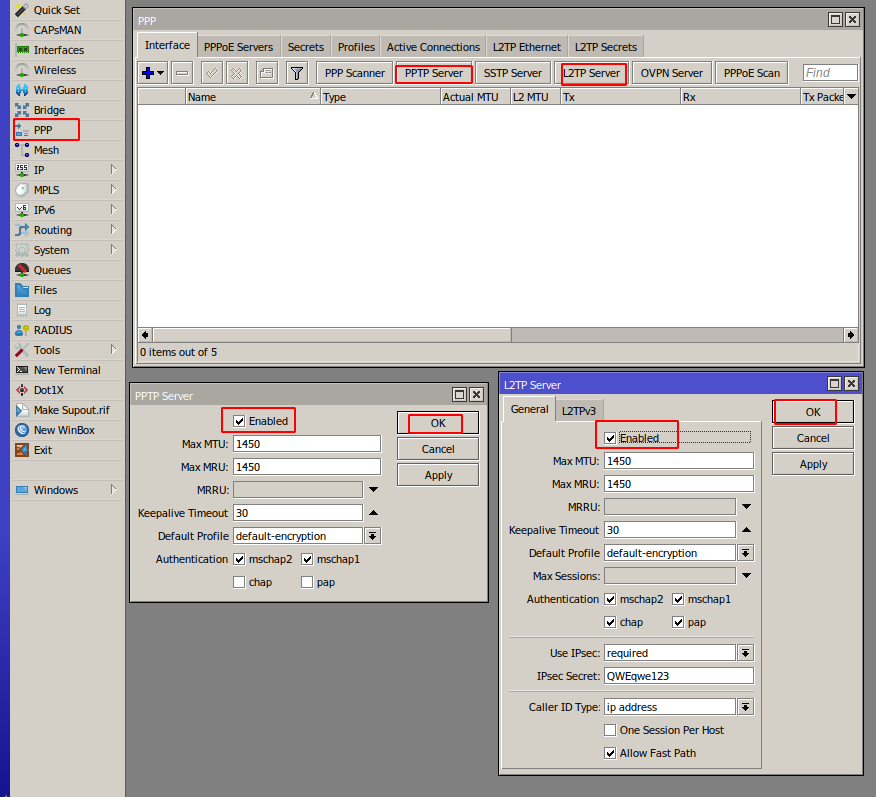
No Comments