Setup guide: WHMCS setup
Digital Product module WHMCS
Order now | Download | FAQ
Module is coded ionCube v13
Supported php version:
- php 7.4 WHMCS 8.11.0 -
- php 8.1 WHMCS 8.11.0 +
- php 8.2 WHMCS 8.11.0 +
To install and update a module, you must perform one and the same action.
1. Download the latest version of the module.
PHP 8.2
wget http://download.puqcloud.com/WHMCS/servers/PUQ_WHMCS-Digital-Product/php82/PUQ_WHMCS-Digital-Product-latest.zipPHP 8.1
wget http://download.puqcloud.com/WHMCS/servers/PUQ_WHMCS-Digital-Product/php81/PUQ_WHMCS-Digital-Product-latest.zipPHP 7.4
wget http://download.puqcloud.com/WHMCS/servers/PUQ_WHMCS-Digital-Product/php74/PUQ_WHMCS-Digital-Product-latest.zipAll versions are available via link: http://download.puqcloud.com/WHMCS/servers/PUQ_WHMCS-Digital-Product
2. Unzip the archive with the module.
unzip PUQ_WHMCS-Digital-Product-latest.zip3. Copy and Replace "puqDigitalProduct" to "WHMCS_WEB_DIR/modules/servers/"
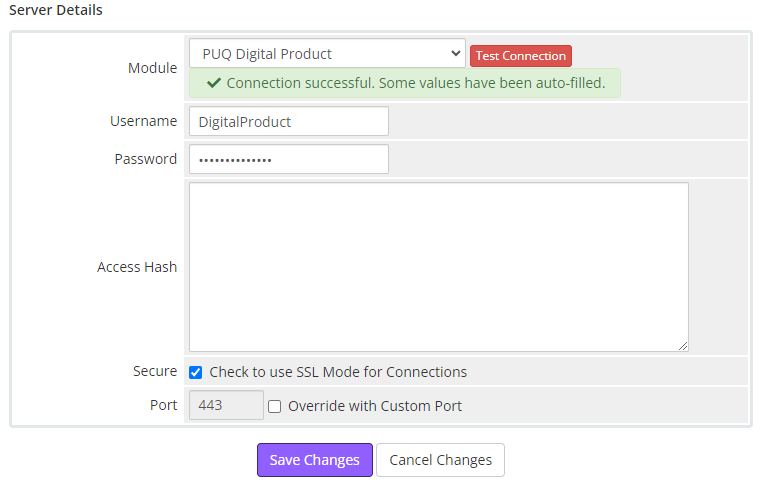
4. Create new server Nextcloud in WHMCS (System Settings->Products/Services->Servers)
System Settings->Servers->Add New Server- Enter the correct Name and Hostname

- In the Server Details section, select the "PUQ Digital Product" module and enter the correct username and password for the Nextcloud web interface.
- To check, click the "Test connection" button
5. Create a new Products/Services
System Settings->Products/Services->Create a New ProductIn the Module settings section, select the "PUQ Digital Product" module
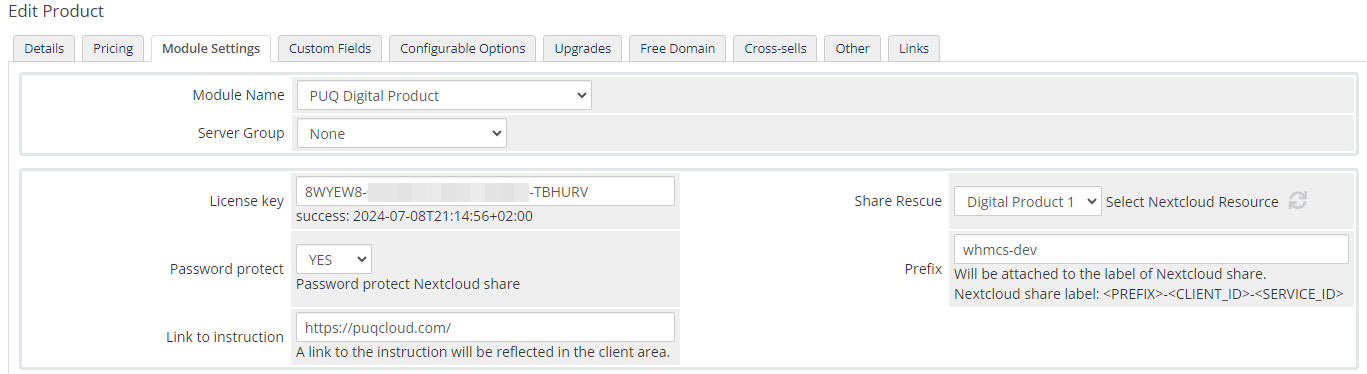
- License key: A pre-purchased license key for the "PUQ Digital Product" module. For the module to work correctly, the key must be active
- Share Rescue: Select the folder on the Nextcloud server that you offer as a Digital Product for downloading by the client after payment
- Password protect: If you want to protect the client's individual share with a password then select YES
- Prefix: The prefix is required to identify the client's shared link. An entry with the structure <PREFIX>-<CLIENT_ID>-<SERVICE_ID> will be added to the description of the shared link on the nextcloud server to facilitate searching if necessary
- Link to instruction: Link to the instruction, if filled out, it will be reflected in the client area