Setup guide: WHMCS setup
System requirements
The module is encoded with ionCube.
| Requirement | Minimum |
|---|---|
| PHP | 8.2 or higher |
| WHMCS | 9.x or higher |
| ionCube Loader | v13 or newer (v14, v15) |
Older module versions for WHMCS 8
- PHP 7.4: https://download.puqcloud.com/WHMCS/servers/PUQ_WHMCS-MinIO-S3/php74/
- PHP 8.1: https://download.puqcloud.com/WHMCS/servers/PUQ_WHMCS-MinIO-S3/php81/
To install and update a module, you must perform one and the same action.
Step 1 — Download
wget http://download.puqcloud.com/WHMCS/servers/PUQ_WHMCS-MinIO-S3/php82/PUQ_WHMCS-MinIO-S3-latest.zip
All versions available via: http://download.puqcloud.com/WHMCS/servers/PUQ_WHMCS-MinIO-S3/
Step 2 — Extract
unzip PUQ_WHMCS-MinIO-S3-latest.zip
Step 3 — Deploy
Copy and replace the puqMinIOS3 directory from PUQ_WHMCS-MinIO-S3 to WHMCS_WEB_DIR/modules/servers/
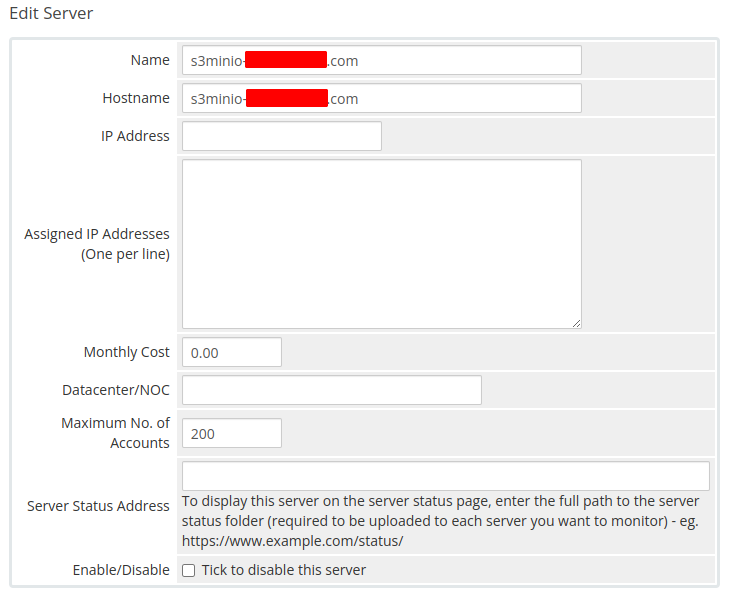
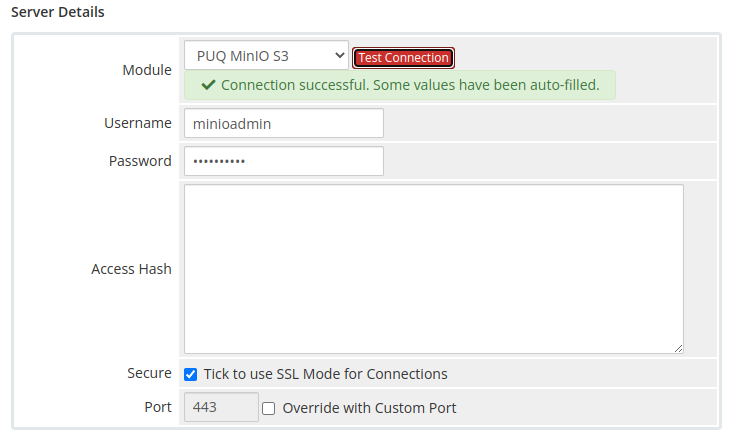
Step 4 — Server Configuration
Create a new MinIO S3 server in WHMCS:
- Click Add New Server
- Enter the correct Name and Hostname
- In the Server Details section, select the PUQ MinIO S3 module and enter the correct username and password for the MinIO web interface
- Click the Test connection button to verify
Step 5 — Create Product
In the Module Settings section, select the PUQ MinIO S3 module and configure the product options.