Service/Product configuration
Nextcloud module WISECP
Order now | Download | FAQ
If you do not have a Service Group where you want to place the new service, you need to create a new Service Group
1. Log in to the administrative area of your WISECP.
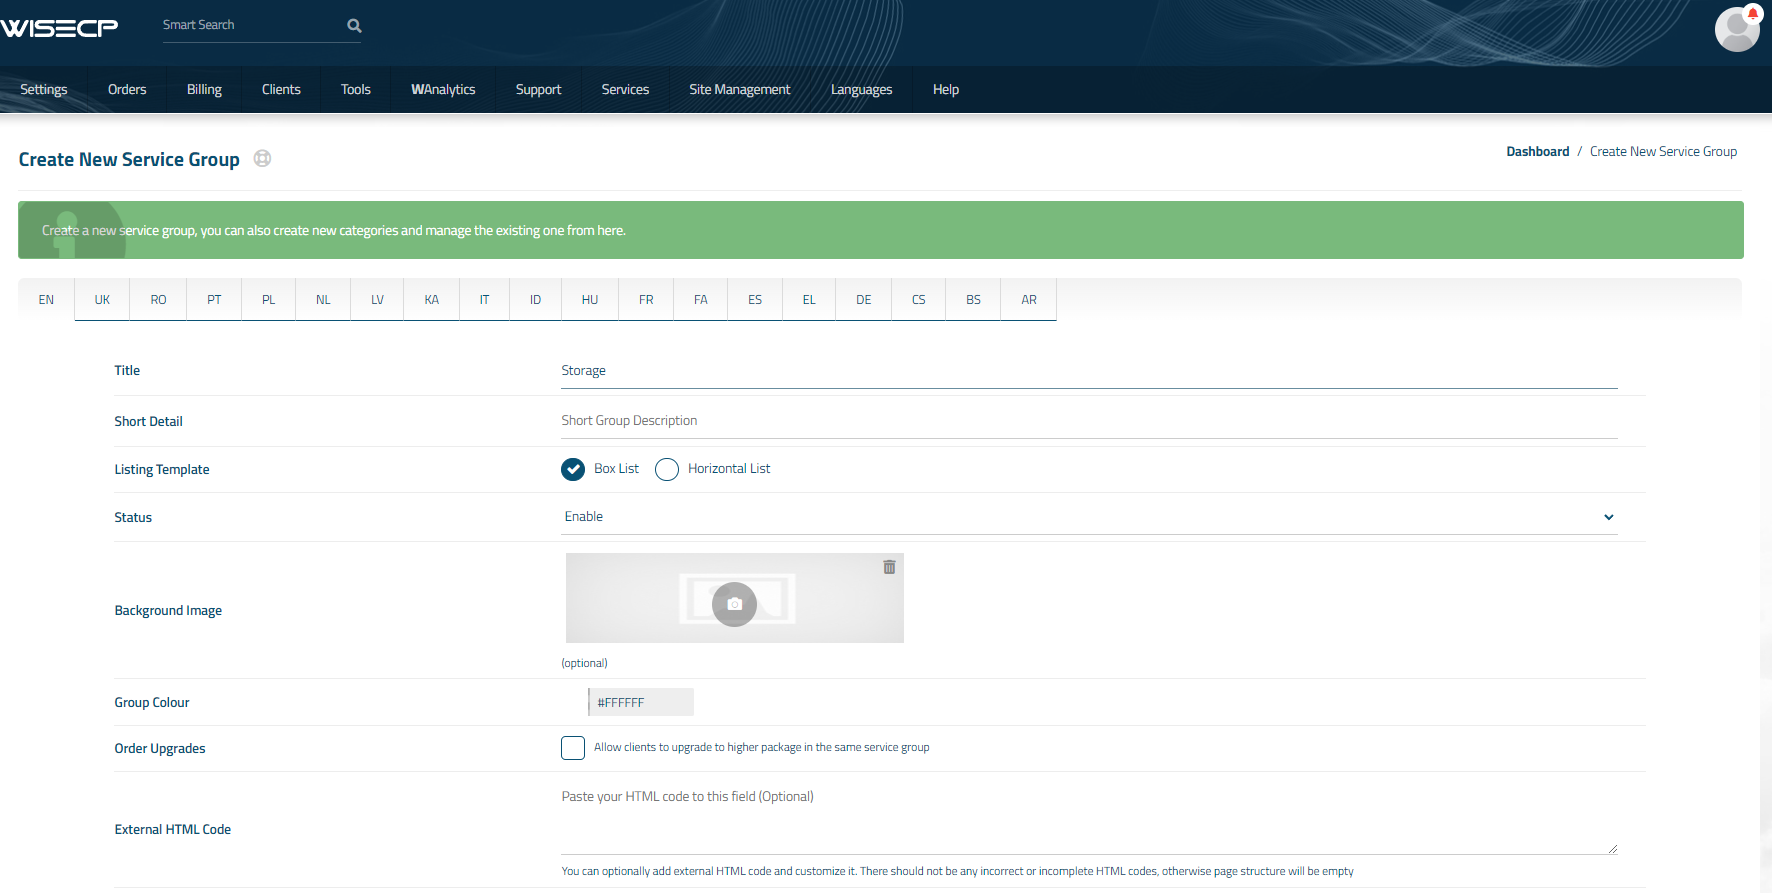
2. Create New Service Group
Go to
Services -> Service Management -> Add GroupEnter all the necessary data and click the 'Create Group' button.
3. Adding a New Service
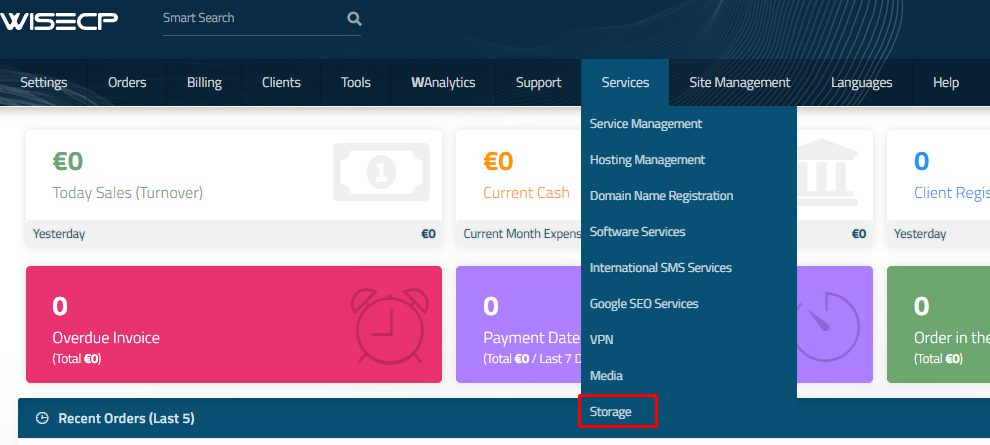
Go to
Services -> our service group where you need to add the new service.In the opened window, click the 'Create New Service' button.
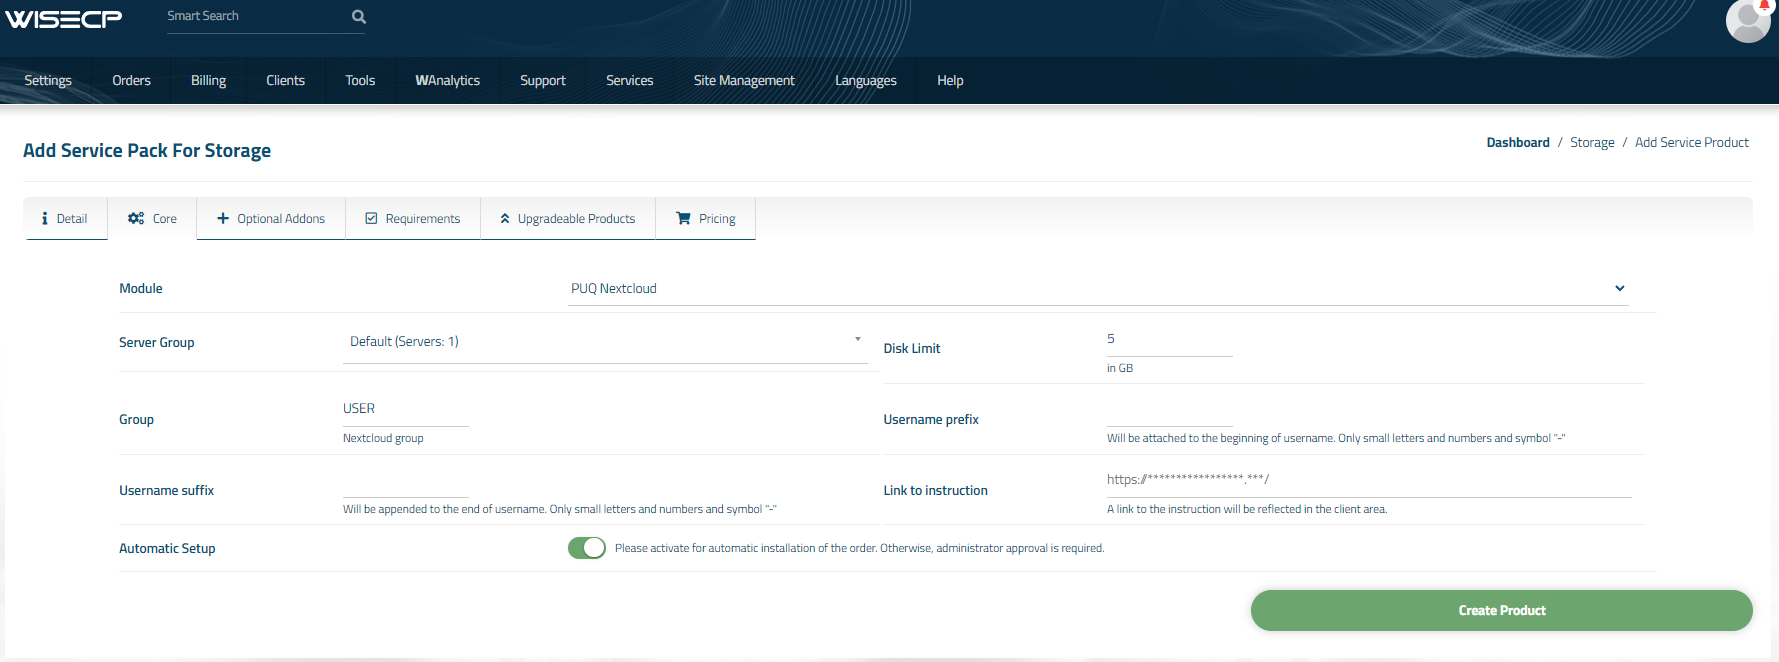
On the opened page, enter all the necessary details for your new service and navigate to the 'Core' tab.
Select the 'PUQ Nextcloud' module from the drop-down list of modules.
4. Fill in the configuration options according to your preferences.
- Server Group is the group of servers from which a server will be chosen for provisioning the service
- Disk Limit: is the disk space quota that is issued to the user
- Group: is the group that will be assigned to the user
- Username Prefix will be added at the beginning of the username during user creation and is used for uniqueness
- Username Suffix will be added at the end of the username during user creation and is also used for uniqueness
-
Link to Instruction Provide the link to the instruction for the service, and it will be displayed in the client area as a separate button
-
Link to VPN Clients Provide the link to the page for downloading VPN clients for the service, and it will be displayed in the client area as a separate button
-
Automatic Setup Please activate for automatic installation of the order. Otherwise, administrator approval is required.


No Comments