Add a Jellyfin server in WHMCS
Jellyfin module WHMCS
Order now | Download | Community
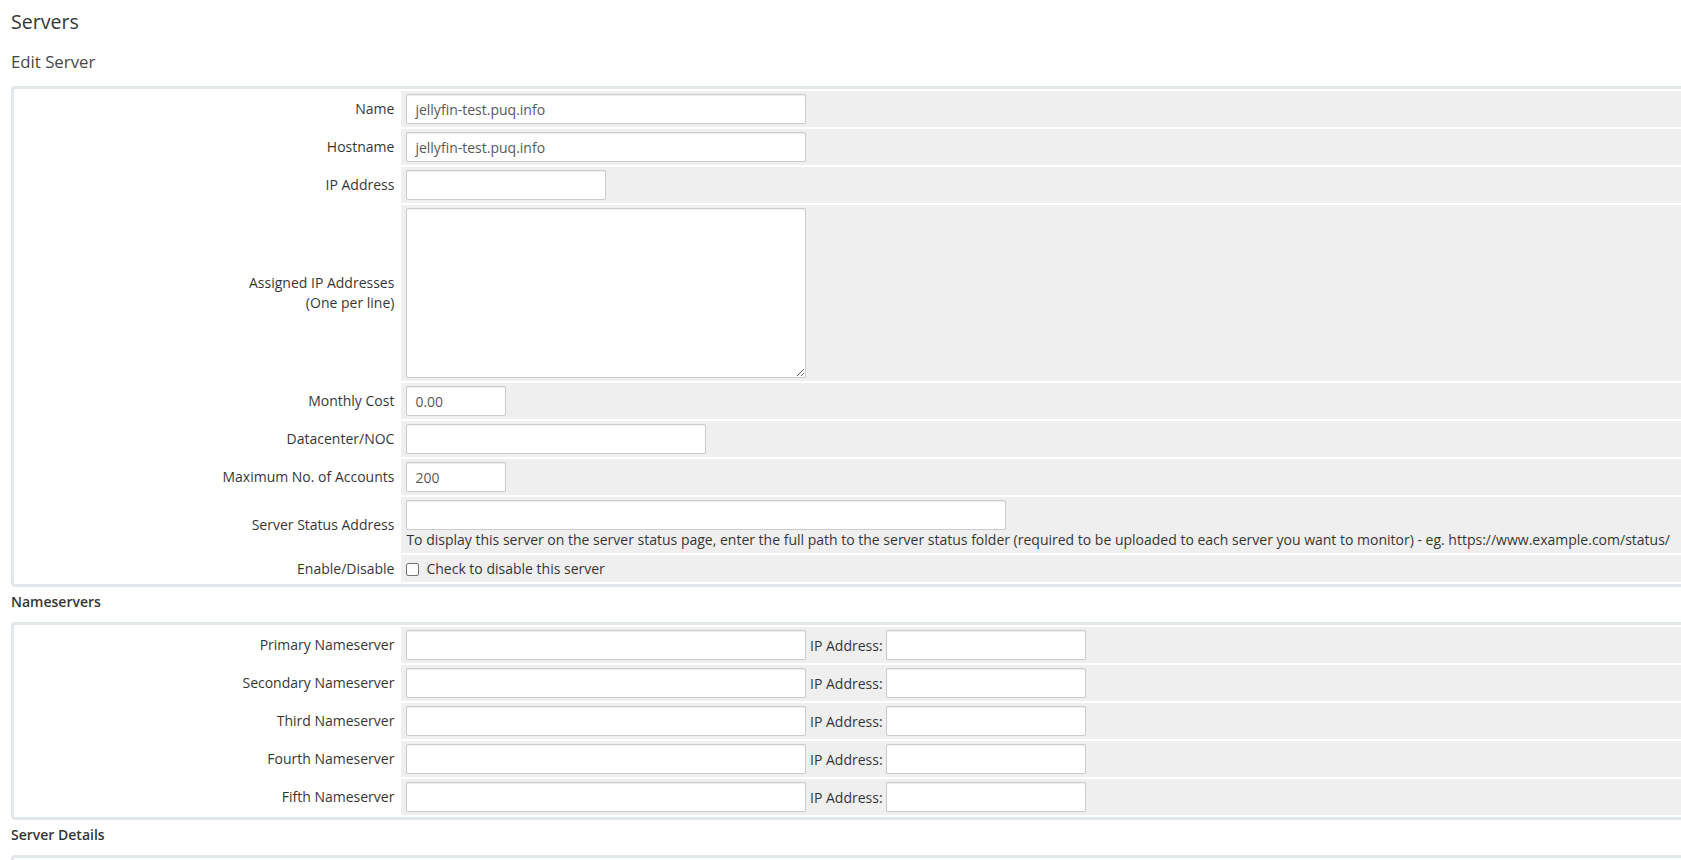
Configure the connection to your Jellyfin server under Setup → Products/Services → Servers → Add New Server.
| Field | Value |
|---|---|
| Hostname / IP Address | The Jellyfin server hostname or IP. |
| Secure (SSL) | Enable if Jellyfin is served over HTTPS. |
| Port | Jellyfin port (default 8096, or 443 when SSL is enabled). |
| Username | A Jellyfin administrator username. |
| Password | That administrator's password. |
| Access Hash | A Jellyfin API key (Dashboard → API Keys). |
| Type / Module | PUQ Jellyfin. |
In the Server Details section select Module → PUQ Jellyfin and fill in the Username, Password and Access Hash (API key), tick Secure for SSL and set the Port.
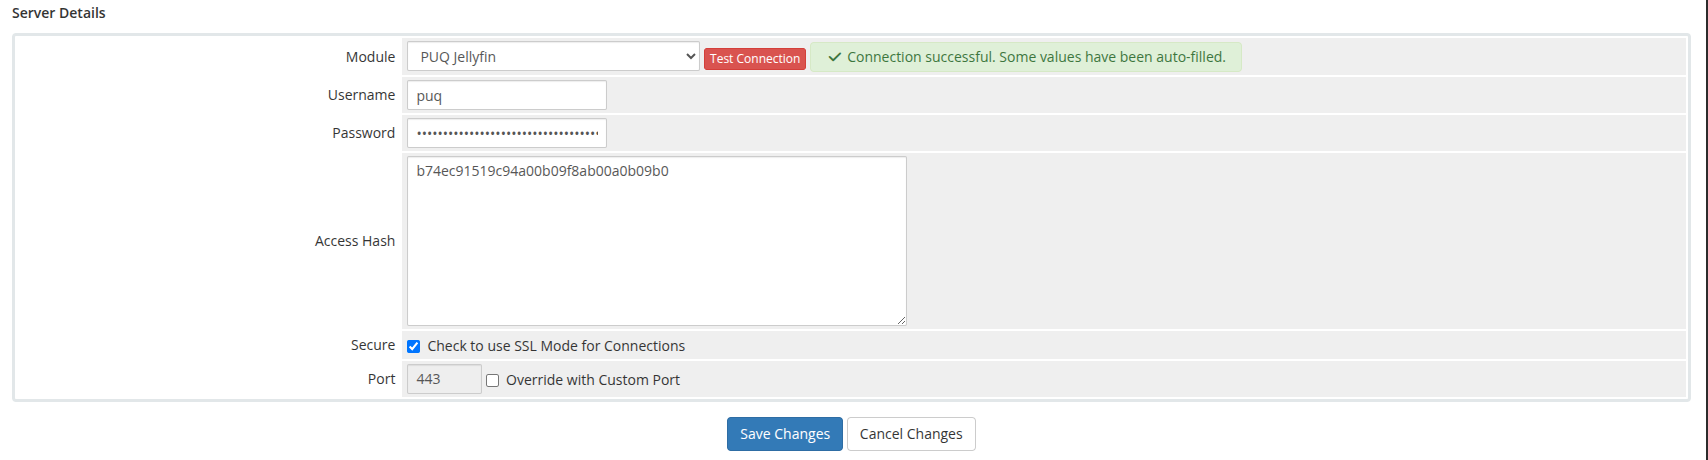
Use Test Connection to confirm WHMCS can reach Jellyfin and authenticate. The module authenticates with the username/password + API key to obtain an access token, then calls System/Info to verify connectivity.
Assign the server (or a server group containing it) to your Jellyfin product under the product's Module Settings.