Add server (PUQVPNCP panel)
PUQVPNCP module WHMCS
Order now | Download | COMMUNITY | PUQVPNCP
Add a PUQVPNCP panel to WHMCS
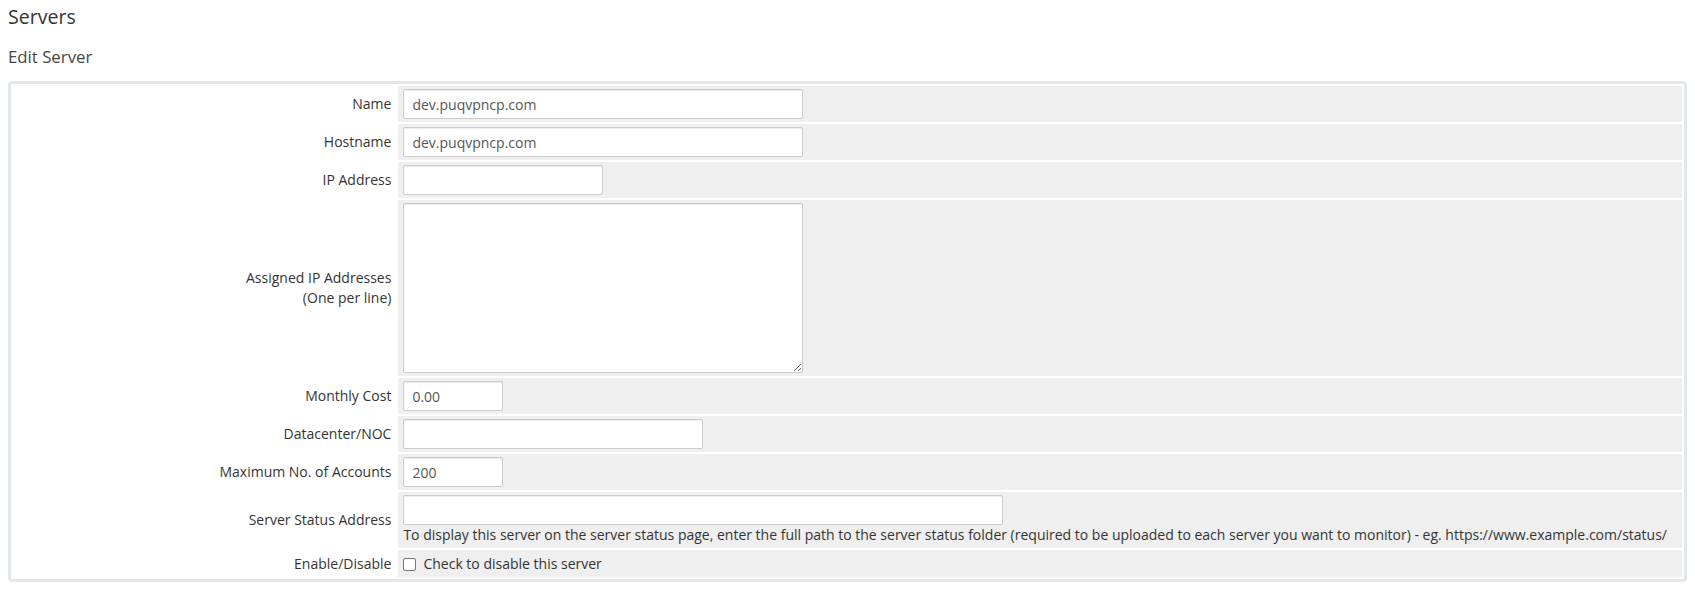
Step 1 — General settings
-
Name — a descriptive label (e.g.
VPN Frankfurt). -
Hostname — the panel's fully-qualified hostname (e.g.
vpn-fra.example.com). - IP — optional; used as fallback if hostname is empty.
-
Port — leave empty for the default
80/443, or enter a custom port. - Secure — check when the panel is served over HTTPS (strongly recommended). SSL verification is enabled when this is checked.
 04-add-server-1.png
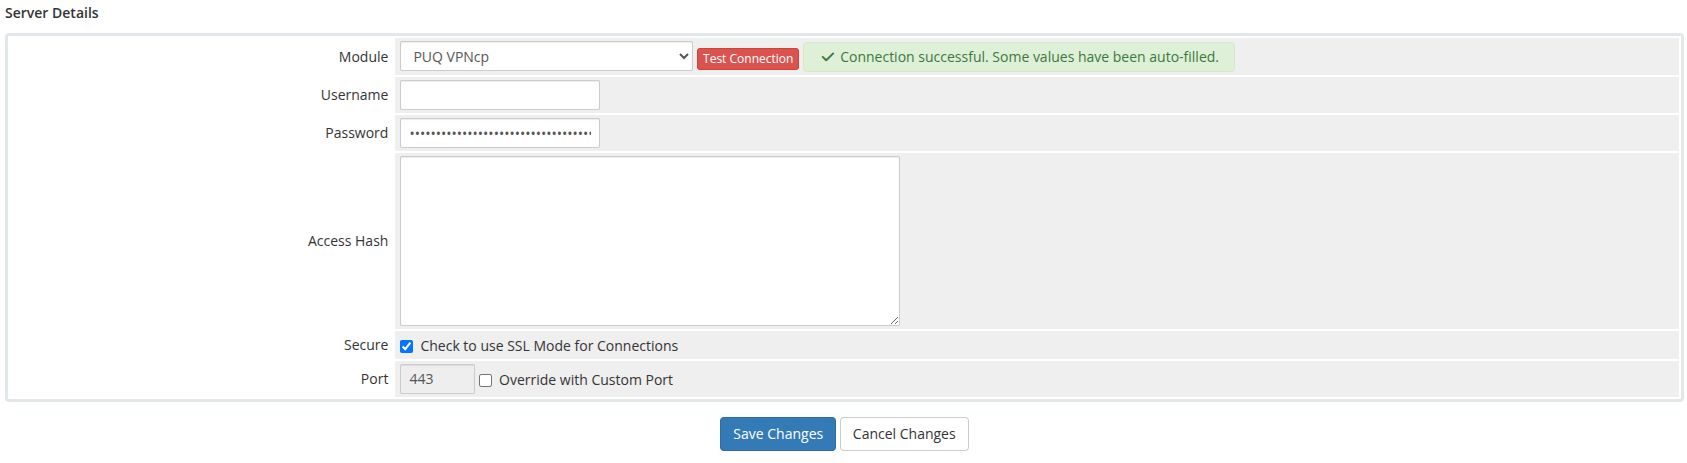
Step 2 — Module settings
- Server Details section, Type dropdown: select puqVPNcp.
- Leave Username empty (not used).
- Paste the panel's API token into the Password field — this is what the module sends as
Authorization: Bearer <token>for every API call. - Click Test connection — it calls
/api/v1/system/status,/api/v1/licenseand/api/v1/networkand returns OK on success.
 05-add-server-2.png
Important: The API token must have permissions to manage clients, query networks and read system status.
Step 3 — Assign to a server group
For multi-server deployments, add the server to a WHMCS server group. Products bound to that group will list networks from every reachable server in it on the VPN Networks tree of the product configuration page — pick which server → network pairs are allowed for that product.