Setup guide — PUQVPNCP panel
PUQVPNCP module WHMCS
Order now | Download | COMMUNITY | PUQVPNCP
Before you can connect WHMCS, you need a running PUQVPNCP panel, an API token that WHMCS will use for every operation, and at least one VPN network with the protocols you want to expose enabled. This page walks through both.
1. Panel reachability
- The panel must be reachable from the WHMCS server over the network.
- HTTPS is strongly recommended. If you use a self-signed certificate, remember that SSL verification is enabled when the Secure checkbox is ticked on the WHMCS server record — use a publicly trusted certificate, or place the panel behind a reverse-proxy with one.
2. Issue an API token
The module authenticates to the panel with a Bearer token issued from the admin's profile page.
Step 1 — Open Profile
Click your username in the top-right corner of the panel and select Profile.
 26-puqvpncp-profile-menu.png
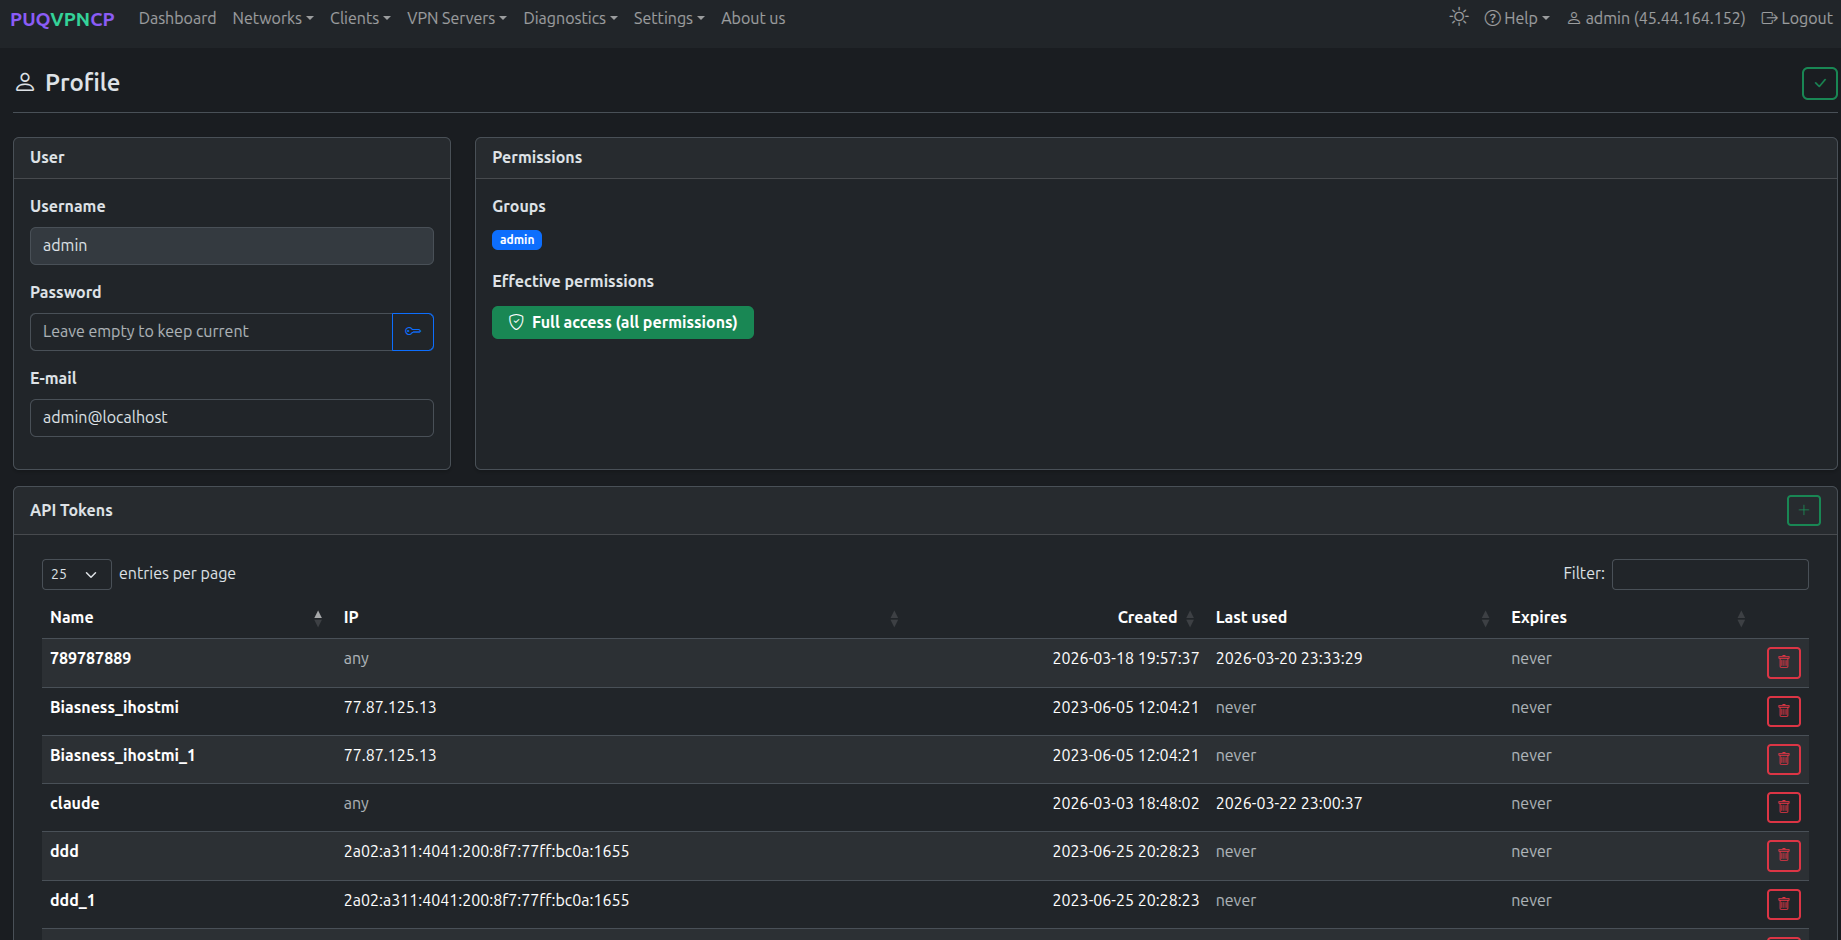
Step 2 — Open the API Tokens section
Scroll down to the API Tokens card. Click the green + button on the right to create a new token.
 27-puqvpncp-profile-tokens.png
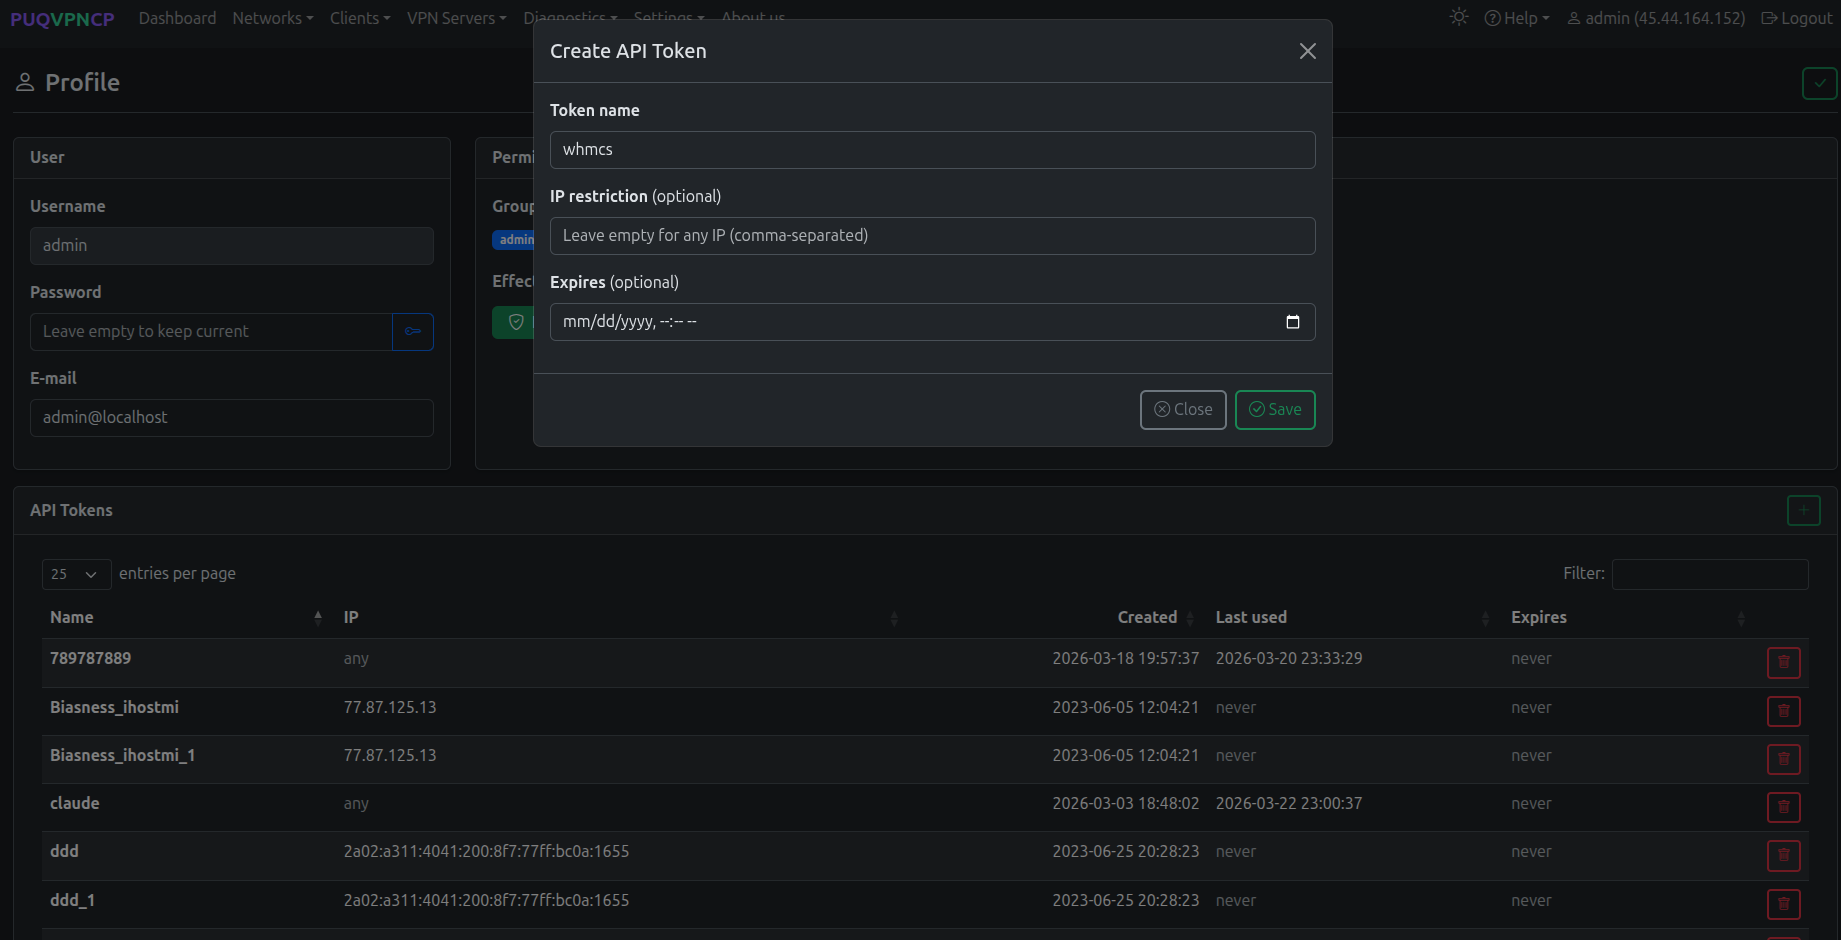
Step 3 — Create the token
Fill in the modal:
-
Token name — a label that identifies the consumer, e.g.
whmcs. - IP restriction (optional) — a comma-separated list of IPs allowed to use this token. Leave empty to accept the token from any IP, or set it to your WHMCS server's IP for tighter security.
- Expires (optional) — an expiration date. Leave empty for a non-expiring token.
Click Save.
 28-puqvpncp-token-create.png
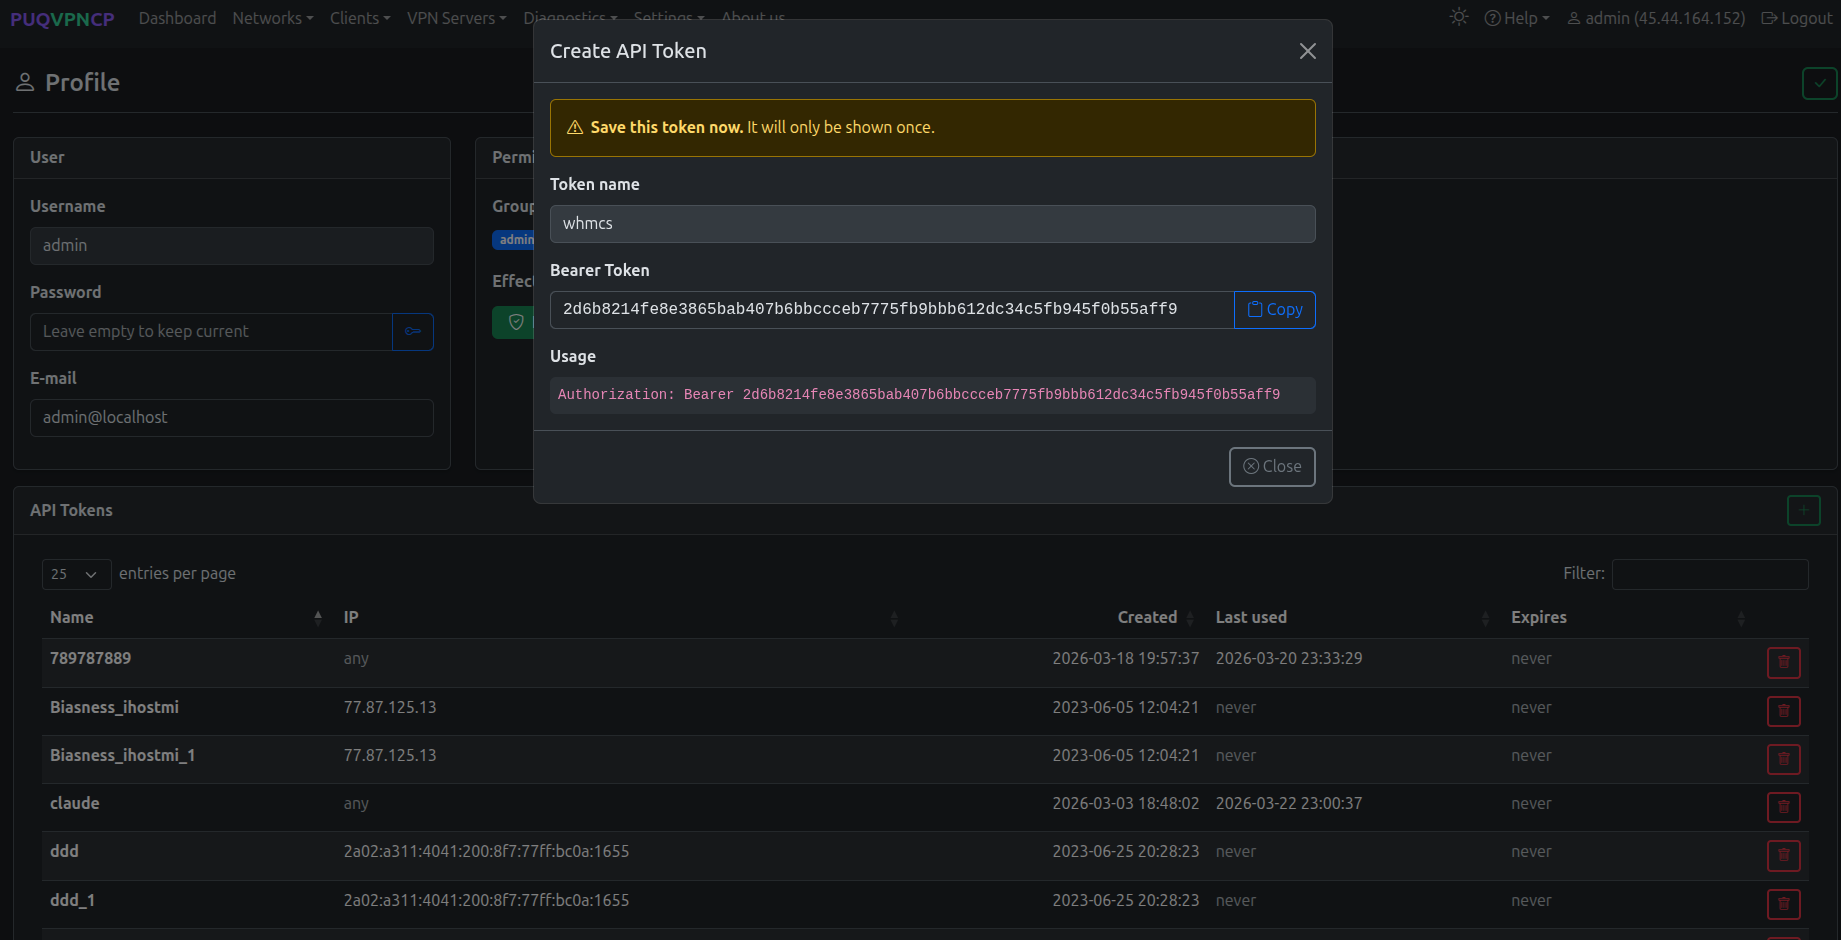
Step 4 — Copy the Bearer token
The next dialog shows the Bearer Token. Click Copy and store it somewhere safe — the token is shown only once and cannot be retrieved later. If you lose it, delete the token and generate a new one.
 29-puqvpncp-token-bearer.png
The token grants the user's effective permissions — the
admingroup used in the screenshot has full access. For tighter control, create a dedicated user/permission group on the panel and issue a token for that user instead.
You will paste this token into the Password field of the WHMCS server record — see Add server.
3. Create a VPN network
The module needs at least one VPN network on the panel. On the WHMCS product configuration page, every available network is listed as a tickable server → network pair.
Step 1 — Open the Networks list
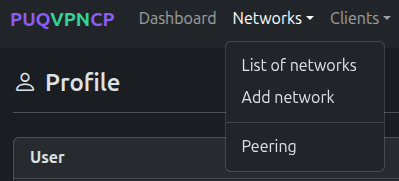 30-puqvpncp-networks-menu.png
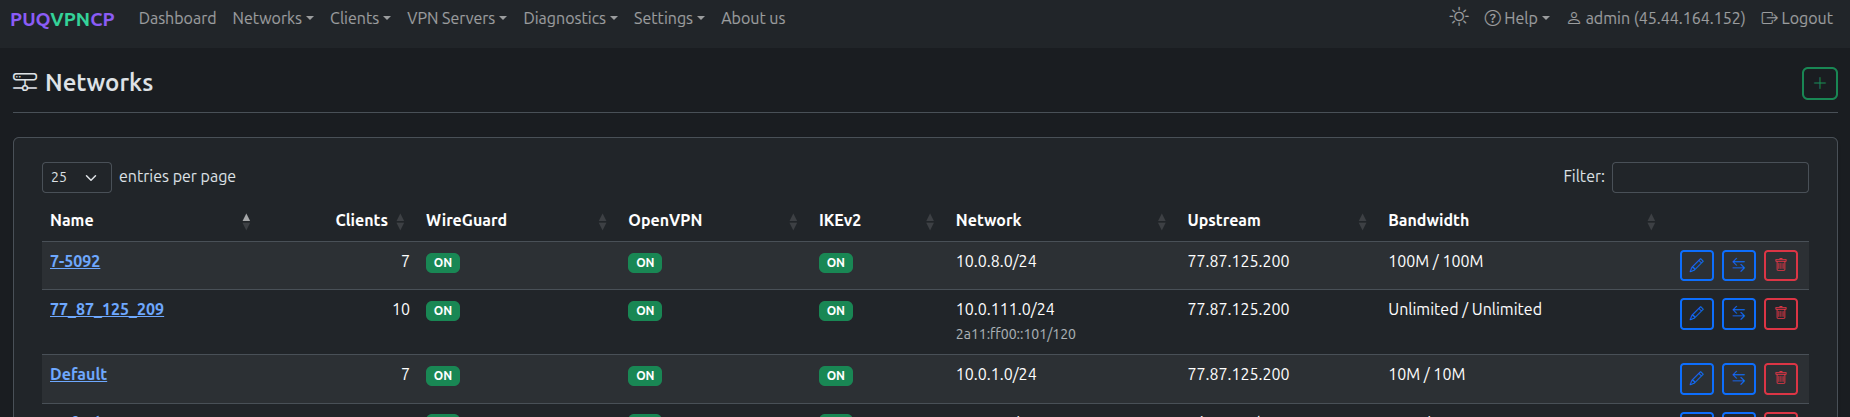
The list shows every existing network with the status of WireGuard / OpenVPN / IKEv2, the IPv4 subnet, the upstream interface and the bandwidth caps.
 31-puqvpncp-networks-list.png
Step 2 — Add a network
Click the green + button in the top-right corner of the Networks page. Fill the Create form:
- Name — internal identifier of the network (used in the WHMCS product configuration).
- Description (optional) — human-readable note.
-
Subnet (IPv4 CIDR) — VPN subnet that will be assigned to clients (e.g.
10.0.6.0/24). - WireGuard IP / OpenVPN IP / IKEv2 IP — gateway addresses for each protocol inside the subnet.
- Upstream — the host network interface used as the egress for this VPN network.
- VPN Domain (optional) — overrides the global VPN Domain in all client configs for this network.
- DNS 1 / DNS 2 — DNS servers pushed to clients.
-
Bandwidth Download / Upload — network-wide caps in Mbit/s (
0= unlimited). - Disable NAT — leave unchecked unless you route the VPN subnet upstream yourself.
Click the green ✓ in the top-right to save. Protocols (WireGuard / OpenVPN / IKEv2) are configured after the network is created.
 32-puqvpncp-network-create.png
Step 3 — Enable protocols on the network
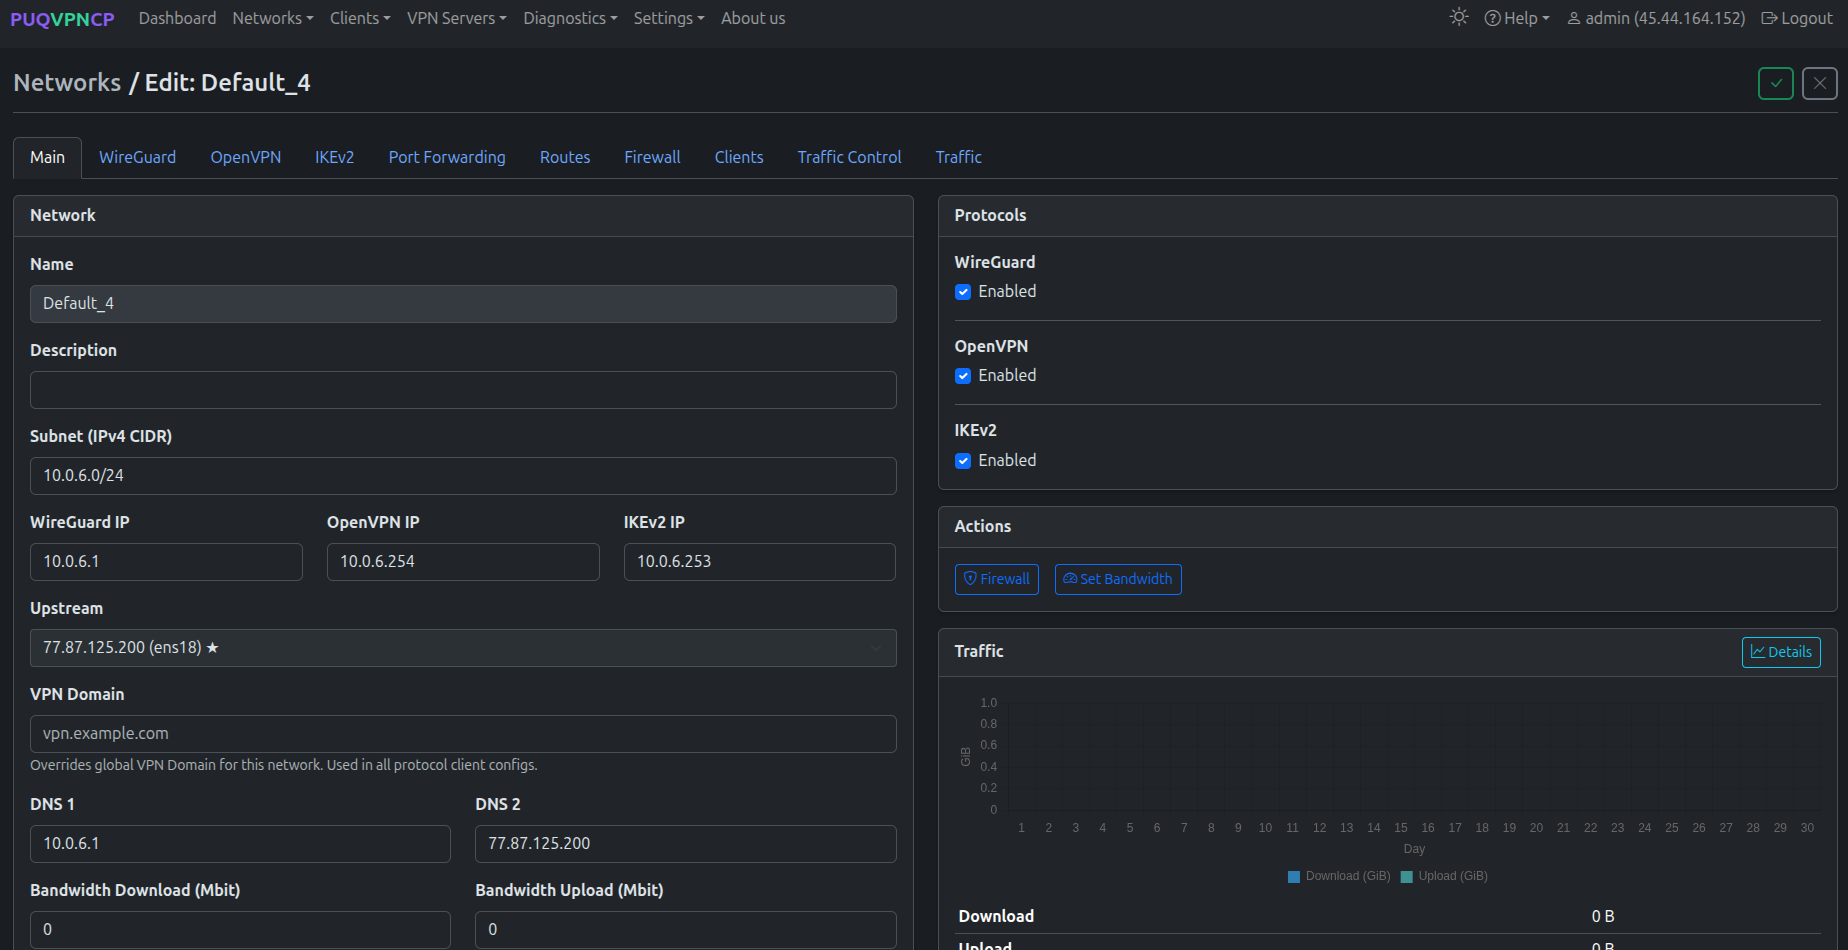
After saving, you land on the network's Edit page with a row of tabs (Main / WireGuard / OpenVPN / IKEv2 / Port Forwarding / Routes / Firewall / Clients / Traffic Control / Traffic) and a Protocols card on the right.
Tick Enabled for every protocol you want to offer to customers via WHMCS. The WHMCS module reads this state from GET /api/v1/network/{name} — disabled protocols are hidden in the client area and shown greyed-out (with a tooltip) in the admin service tab.
 33-puqvpncp-network-edit-protocols.png
Open each protocol-specific tab (WireGuard, OpenVPN, IKEv2) to fine-tune ports, ciphers, MTU and other parameters as needed. Defaults are sensible for most deployments.
What's next
- Add the panel to WHMCS — see Add server.
- Configure a WHMCS product backed by this panel — see Product configuration.