Product configuration
PUQVPNCP module WHMCS
Order now | Download | COMMUNITY | PUQVPNCP
Create the product
After saving, the module injects a PUQ VPNcp settings panel below the standard module fields. All settings are persisted as JSON in configoption24 of the product record.
 06-product-configuration.png
License key
Paste your licence key into the License key field. The status row underneath shows the result of the most recent verification (success: <timestamp> or an error). The module re-checks the licence on every product page render and caches the result for the validity period encoded in the licence response.
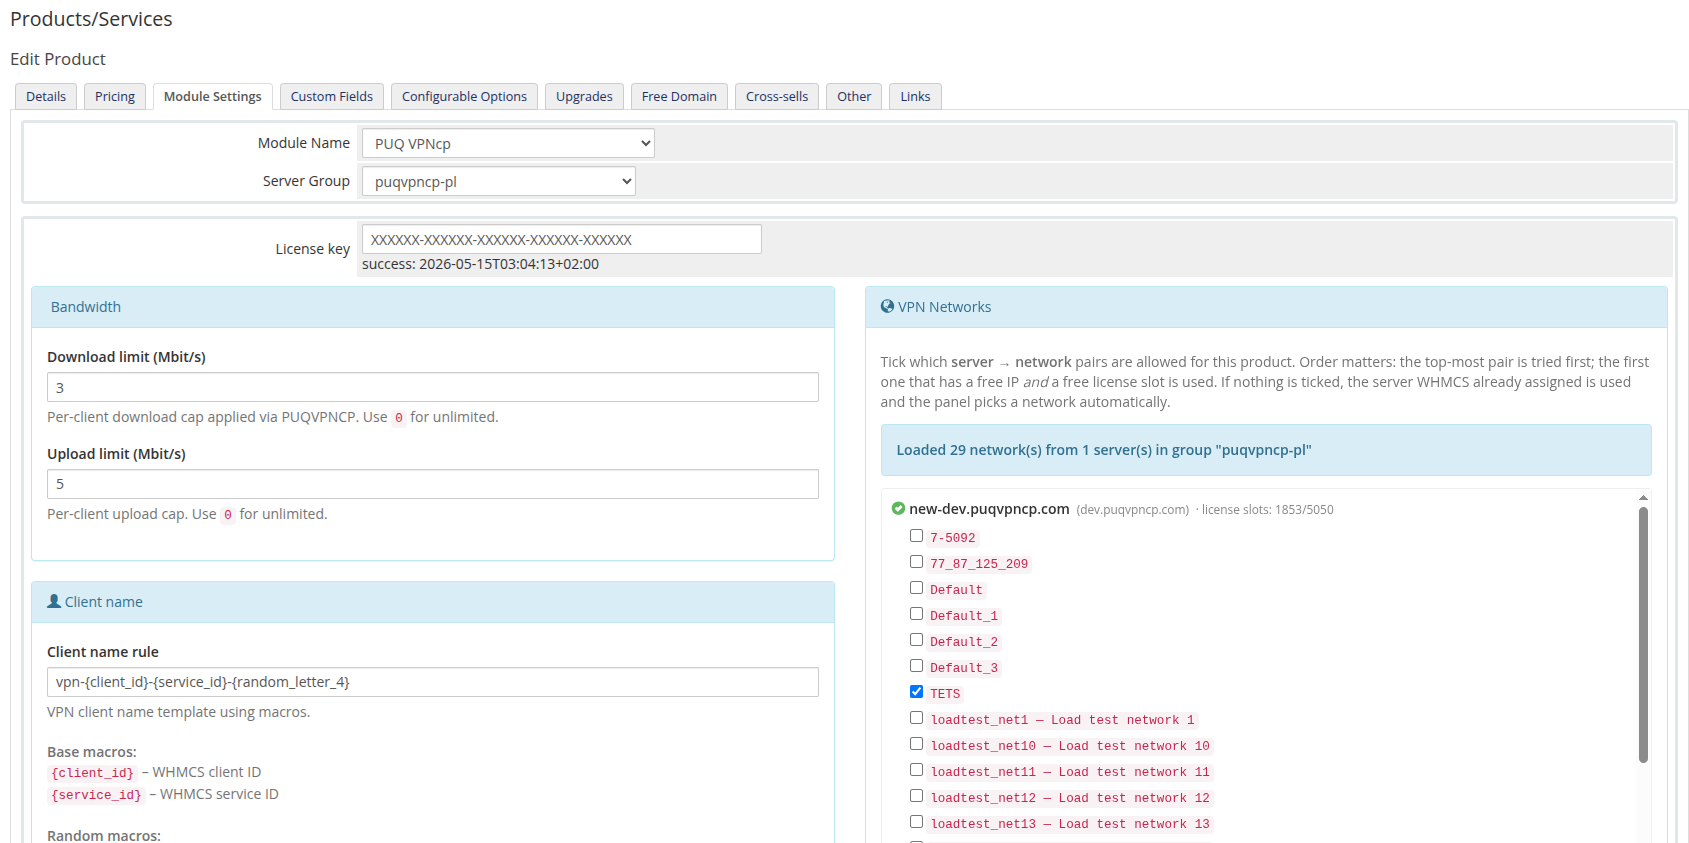
Bandwidth
 07-product-config-bandwidth.png
-
Download limit (Mbit/s) — per-client download cap.
0= unlimited. -
Upload limit (Mbit/s) — per-client upload cap.
0= unlimited.
The module applies these via PUT /api/v1/client/{name} right after creating the client. The POST /api/v1/client create call does not accept bandwidth fields — the limits are always pushed through the follow-up update.
If the bandwidth update fails, the freshly created client is rolled back with DELETE /api/v1/client/{name} so billing never starts charging for an uncapped VPN.
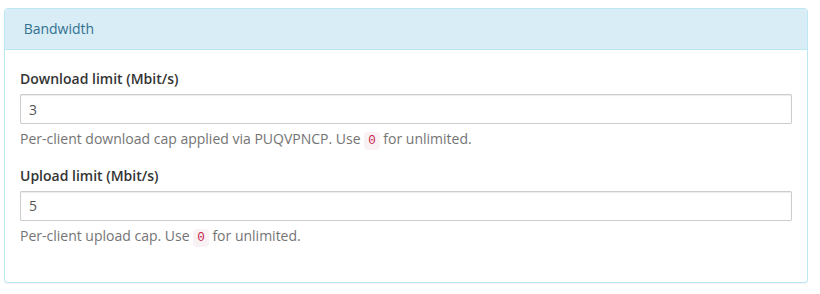
Client name
 08-product-config-client-name.png
-
Client name rule — template used to generate the VPN client identifier. Default:
vpn-{client_id}-{service_id}-{random_letter_4}.
Available macros:
Base macros
-
{client_id}— WHMCS client ID -
{service_id}— WHMCS service ID
Random macros
-
{random_digit_N}— N random digits (e.g.{random_digit_5}) -
{random_letter_N}— N random lowercase letters
Date & time macros
-
{unixtime},{year},{month},{day},{hour},{minute},{second}
If the generated name already exists in tblhosting.username, the module appends -1, -2, … until it finds a free one.
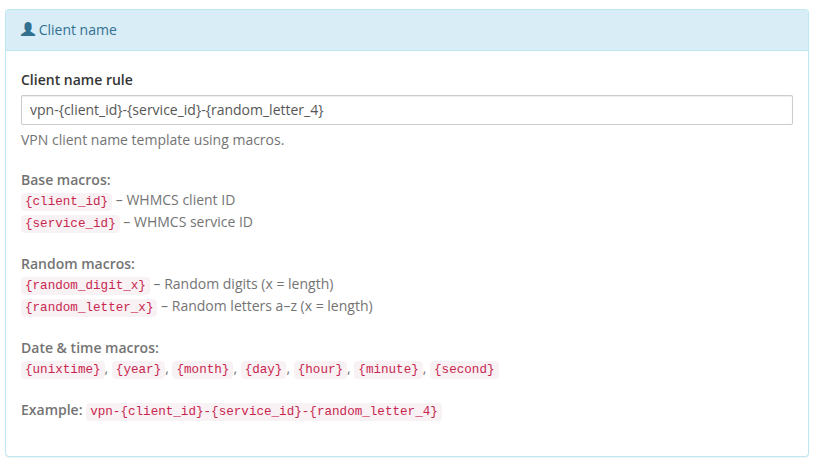
Client Area
 09-product-config-client-area.png
- Link to instruction — optional URL shown as a User manual button at the top of the client-area home screen. Leave empty to hide the button.
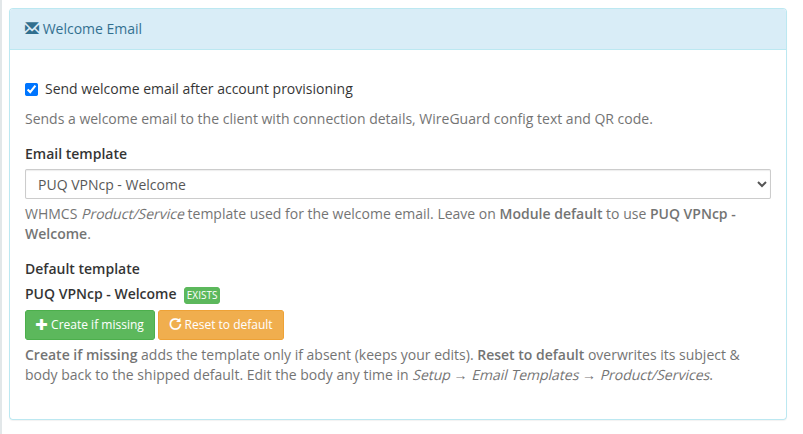
Welcome Email
 34-product-config-welcome-email.png
Send the customer everything they need to connect the moment their service goes live — automatically.
- Send welcome email after account provisioning — when ticked, the module emails the client right after the VPN account is created. The message includes the connection details, the full WireGuard config text and an inline QR code, plus a direct link to manage the service.
- Email template — which WHMCS Product/Service email template to send. Leave it on Module default to use the bundled PUQ VPNcp - Welcome template, or pick any of your own templates.
-
Default template — a one-click manager for the bundled template:
- Create if missing — adds the PUQ VPNcp - Welcome template only if it does not exist yet (your edits are never overwritten). The badge shows EXISTS once it is in place.
- Reset to default — restores the shipped subject and body (use it if you edited the template and want to start over).
You can edit the template body any time in Setup → Email Templates → Product/Services. It supports these merge variables: {$puq_client_name}, {$puq_vpn_ip}, {$puq_vpn_username}, {$puq_vpn_password}, {$puq_wg_config}, {$puq_wg_qr_html}, {$puq_service_url}.
The template is also auto-created on the first send if it is still missing, so the feature works even if you never touch the buttons.
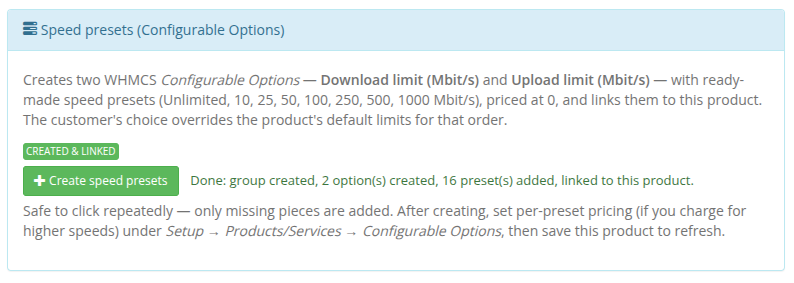
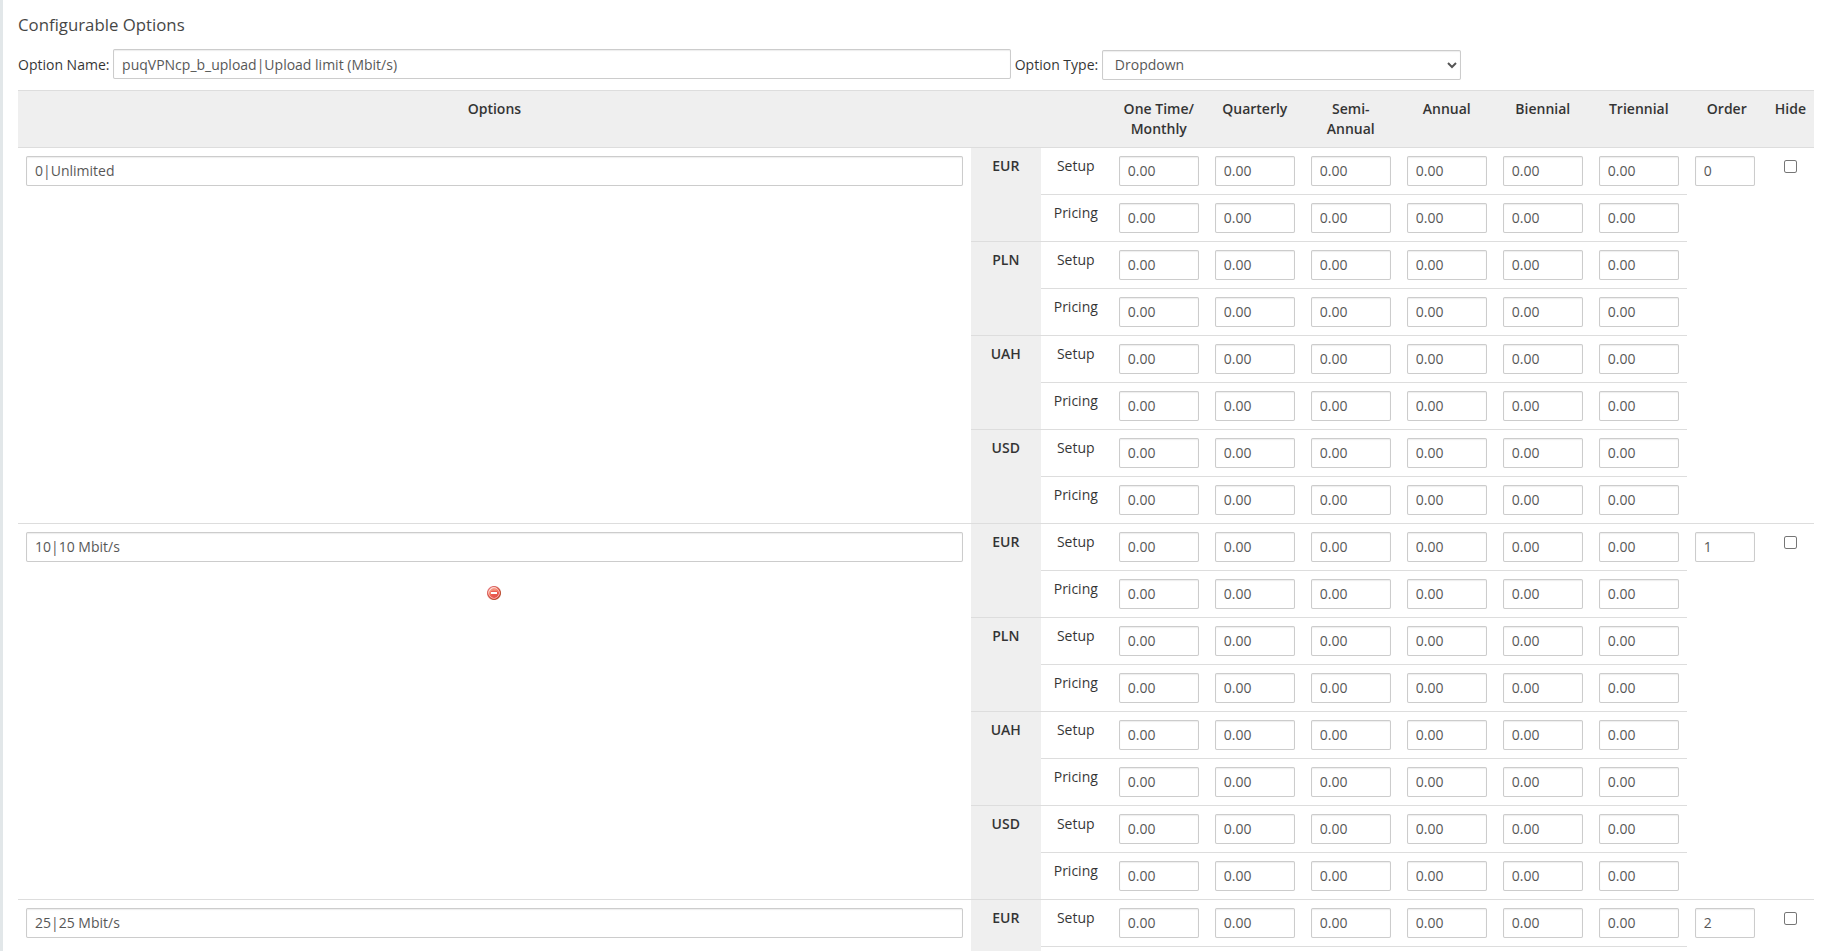
Speed presets (Configurable Options)
 35-product-config-speed-presets.png
WHMCS Configurable Options let your customers choose their own download/upload speed at order time and change it later through an upgrade/downgrade — turning a single product into a whole speed-tier line-up. The module reads the selected values and applies them to the VPN client, overriding the product's default bandwidth.
Setting these up by hand is fiddly, so the module does it for you with one button.
One-click creation
Click Create speed presets and the module instantly builds and links everything:
- a configurable-option group PUQ VPNcp - Speed presets;
- two dropdown options — Download limit (Mbit/s) and Upload limit (Mbit/s);
- ready-made presets in each: Unlimited, 10, 25, 50, 100, 250, 500, 1000 Mbit/s, priced at
0in every currency; - a link from the group to the current product.
What gets created
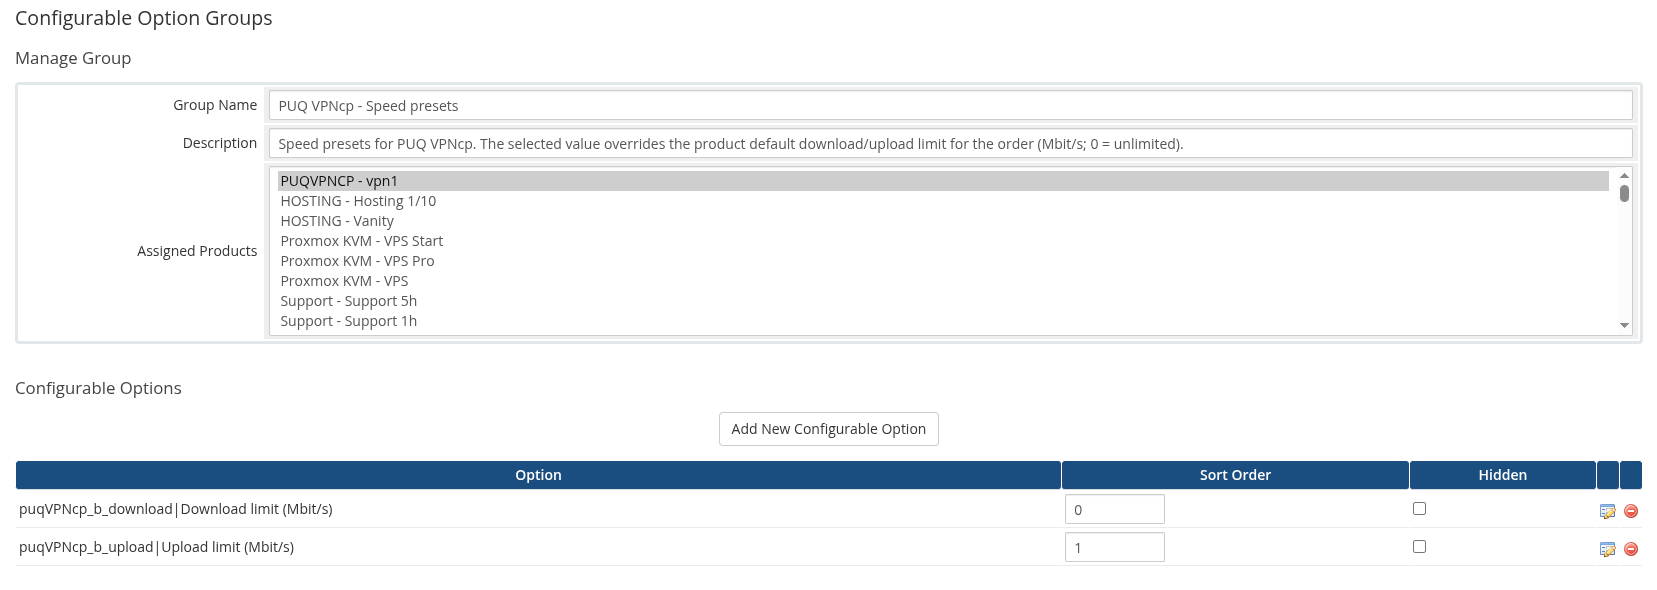
| Option Name | Type | Reads as | Preset sub-options (value|label) |
|---|---|---|---|
puqVPNcp_b_download|Download limit (Mbit/s) |
Dropdown | per-client download cap (Mbit/s) | 0|Unlimited, 10|10 Mbit/s, 25|25 Mbit/s, 50|50 Mbit/s, 100|100 Mbit/s, 250|250 Mbit/s, 500|500 Mbit/s, 1000|1000 Mbit/s |
puqVPNcp_b_upload|Upload limit (Mbit/s) |
Dropdown | per-client upload cap (Mbit/s) | same set as above |
The text before the | is the internal name the module matches on; the text after the | is what the customer sees. The sub-option value 0 means Unlimited.
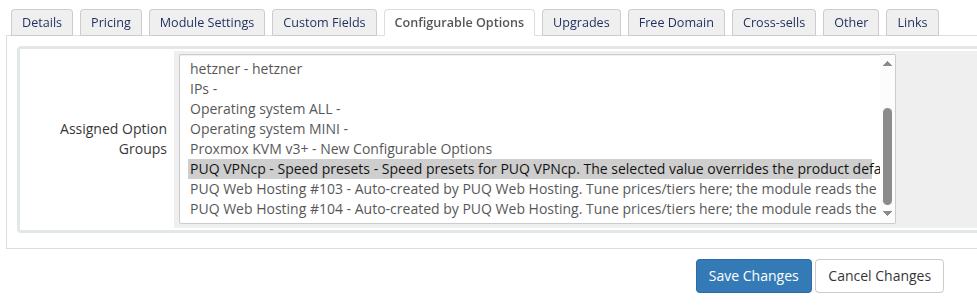 36-configurable-options-assigned.png
The group appears on the product's Configurable Options tab (already ticked under Assigned Option Groups) and under System Settings → Products/Services → Configurable Options.
 37-configurable-options-group.png
Pricing the tiers
By default every preset is free (0.00), so customers can switch speeds at no cost. To monetise faster tiers, open each option and set per-cycle pricing on the sub-options — for example charge more for 500 Mbit/s than for 50 Mbit/s.
 38-configurable-options-download.png
 39-configurable-options-upload.png
After changing pricing, save the product to refresh the panel status.
How the value is applied
| Priority | Source | When used |
|---|---|---|
| 1 (wins) | Configurable Option selection | whenever the option is assigned to the service (including 0 = unlimited) |
| 2 | Product Bandwidth default (Module Settings) | when no speed option is assigned |
On provisioning and on every upgrade/downgrade (WHMCS calls the module's change-package routine for configurable-option changes too), the module pushes the resolved b_download / b_upload to the panel via PUT /api/v1/client/{name}. So a customer who upgrades from 100 Mbit/s to 500 Mbit/s gets the new speed applied automatically, with no manual work for you.
Adding the speed options is optional. Skip the button and every service simply uses the product's Bandwidth defaults.
VPN Networks
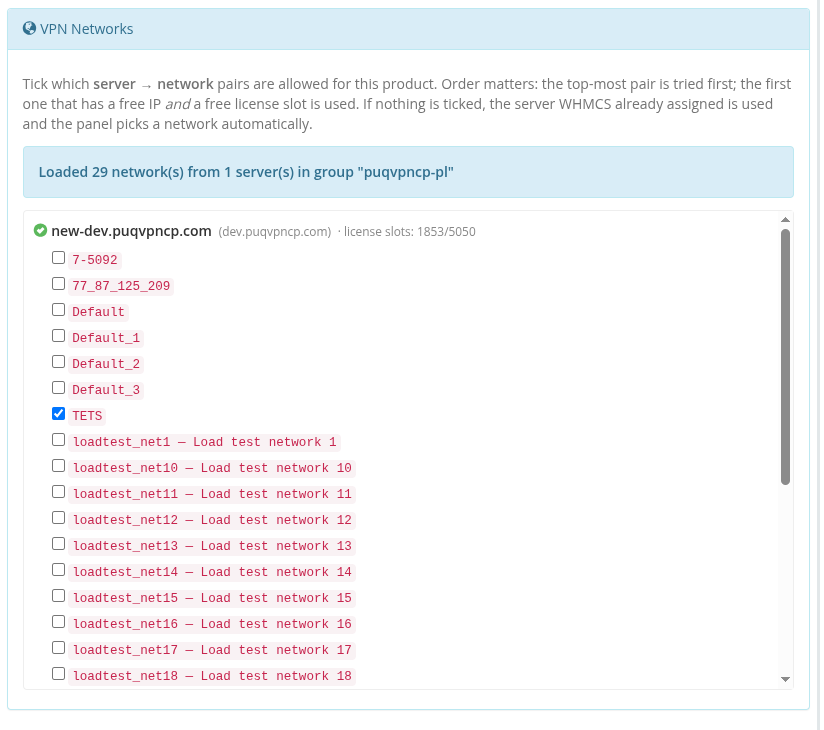 10-product-config-vpn-networks.png
On opening the product, the module contacts every enabled puqVPNcp server in the product's server group and calls GET /api/v1/network on each. The UI then shows a per-server tree — unreachable servers remain visible with their error so you can see exactly what went wrong. License-slot capacity (used / total) is displayed next to each reachable server.
Each checkbox is a server → network pair. Ticking the same network name on two different servers creates two independent pairs.
How a server and network are picked at deploy time
- The module reads all ticked pairs in the order they appear in the list (top to bottom).
- For each pair it checks (a) free licence slots on that server (
count_accounts < count_accounts_availablefromGET /api/v1/system/status) and (b) at least one free IP on the network (GET /api/v1/network/{name}/available_ip). -
The first pair that passes both checks wins. The service is reassigned (
tblhosting.serveris updated) to the selected server, and the client is created on the selected network viaPOST /api/v1/client. - If nothing is ticked,
network_nameis omitted from the create call and the panel of the server WHMCS already picked decides automatically. - If ticks exist but none is deployable (every chosen server is out of slots or every chosen network is full), provisioning fails — nothing is silently created on a wrong network.
Because order matters, put your preferred pairs at the top.
If the whole group is unreachable a red banner appears at the top of the section; previously saved ticks are preserved through hidden inputs so your configuration is not lost when you re-save the product.
Metric Billing (optional)
 11-product-config-metric-billing.png
The module ships a WHMCS Usage Billing provider with two metrics:
- Bandwidth Usage Download (GB)
- Bandwidth Usage Upload (GB)
Enable the metrics on the product's Pricing tab to charge customers per GB of traffic. The provider pulls daily totals directly from the panel via GET /api/v1/client/{name}/traffic/{Y}/{m} and reports them in gigabytes for the current calendar month. No local accumulation table is used — values come live from the panel each time WHMCS runs the usage-billing cron.