 Skip to main content
Product Configuration
Synology module WHMCS
Order now | Download | Community
Add a new product to WHMCS
System Settings -> Products/Services -> Create a New Product
In the Module Settings section, select the PUQ Synology module and the Server Group that contains your Synology server, then click Save Changes. The module then renders its modern configuration panel.
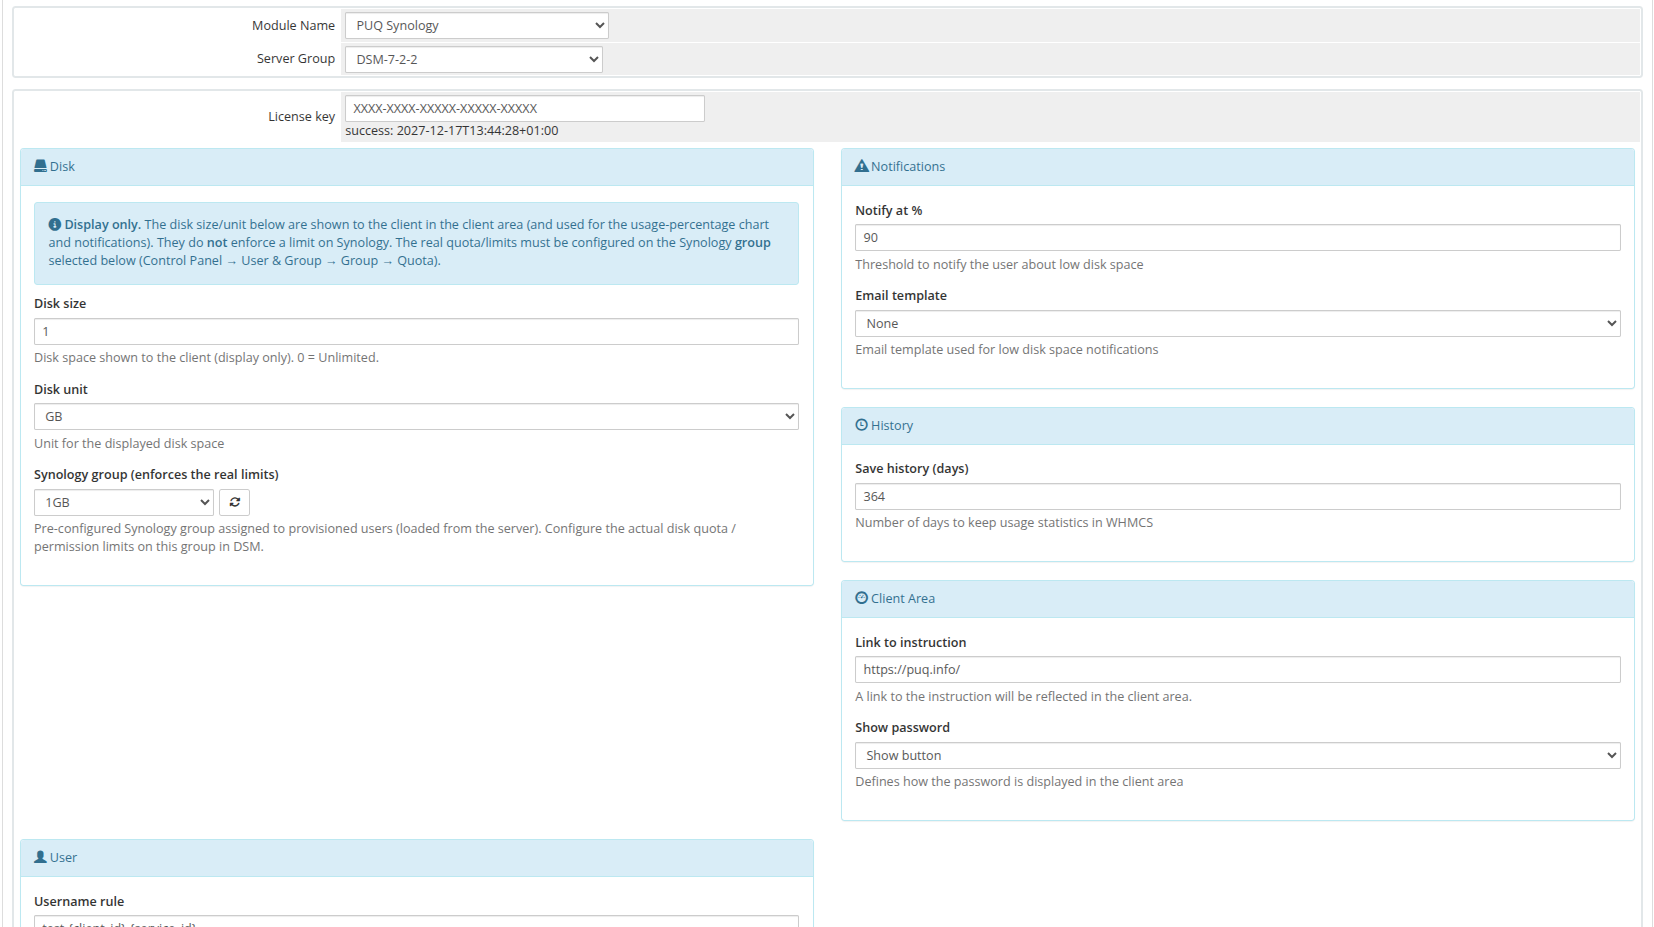 14-product-configuration-overview.png
Note: Select the Server Group and save the product first — the Synology group drop-down (in the Disk section) is populated live from the server assigned to that group.
At the top of the panel:
- Module Name — the provisioning module (PUQ Synology).
- Server Group — the WHMCS server group whose Synology server this product is provisioned on.
- License key — your pre-purchased PUQ Synology license key. The validation status and the paid-through date are shown right below the field; the key must be active for the module to work.
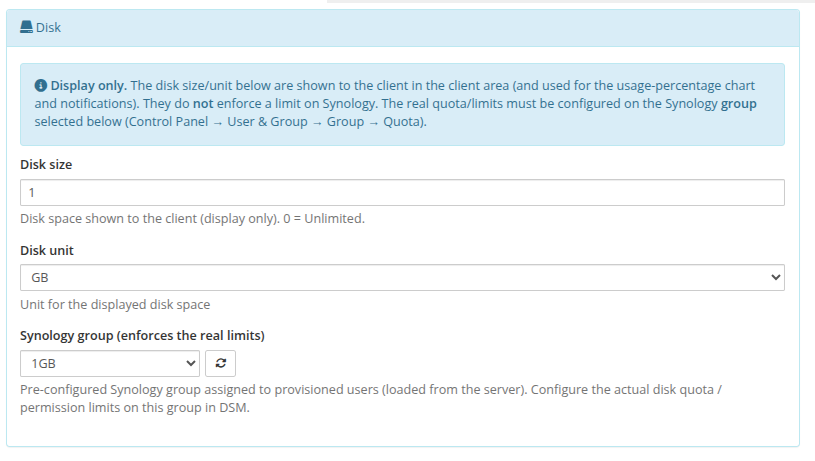
Disk
 20-product-config-disk.png
Note: Display only. The disk size/unit are shown to the client in the client area (and used for the usage-percentage chart and notifications). They do not enforce a limit on Synology. The real quota/permission limits must be configured on the Synology group selected here (Control Panel → User & Group → Group → Quota).
-
Disk size — disk space shown to the client (display only).
0= Unlimited. - Disk unit — unit (MB / GB / TB) for the displayed disk space.
- Synology group (enforces the real limits) — the pre-configured Synology group assigned to provisioned users, chosen from a live drop-down of the groups that actually exist on the server. Use the refresh button to reload the list. Configure the real disk quota / permissions on this group in DSM.
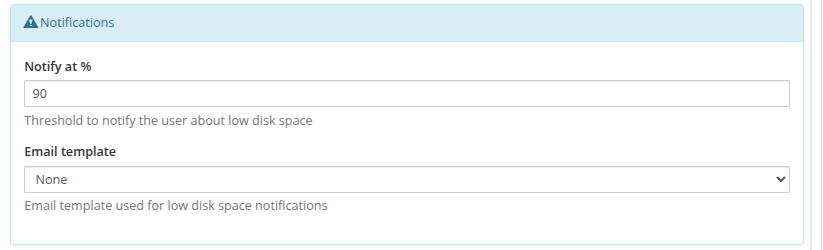
Notifications
 21-product-config-notifications.png
- Notify at % — usage threshold; when a client exceeds it, a low-disk-space notification is sent.
-
Email template — the WHMCS email template used for low-disk-space notifications (
Noneto disable).
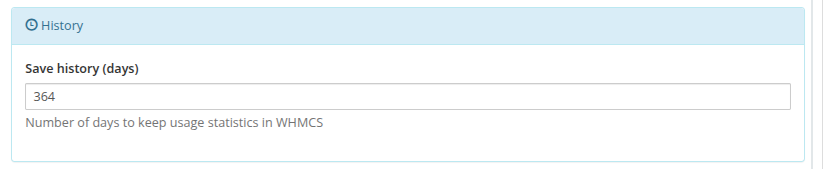
History
 22-product-config-history.png
- Save history (days) — how many days of disk-usage statistics to keep in WHMCS.
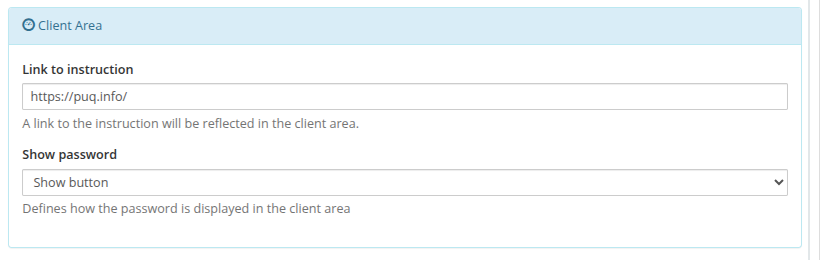
Client Area
 23-product-config-client-area.png
- Link to instruction — an optional URL; when set, a User manual button is shown in the client area.
- Show password — how the password is presented in the client area (Show button / plain text / hidden).
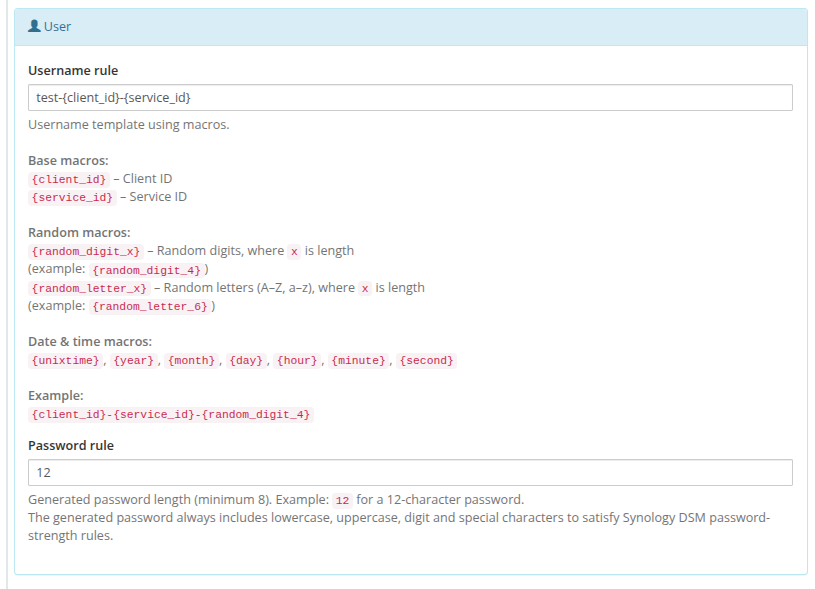
User
 24-product-config-user.png
-
Username rule — template for the generated username, using macros:
- Base:
{client_id},{service_id} - Random:
{random_digit_x},{random_letter_x}(where x is the length, e.g.{random_digit_4}) - Date & time:
{unixtime},{year},{month},{day},{hour},{minute},{second} - Example:
{client_id}-{service_id}-{random_digit_4} - The generated name is automatically normalised to be Synology/DSM compliant, and collisions with other services are resolved automatically.
- Base:
-
Password rule — generated password length (minimum 8), e.g.
12. The generated password always includes lowercase, uppercase, digit and special characters to satisfy the Synology DSM password-strength rules.