 Skip to main content
WHMCS part setup guide
Synology module WHMCS
Order now | Download | Community
1. Download the latest version of the module
Choose the build that matches your server's PHP version:
PHP 8.2
wget https://download.puqcloud.com/WHMCS/servers/PUQ_WHMCS-Synology/php82/PUQ_WHMCS-Synology-latest.zip
PHP 8.1
wget https://download.puqcloud.com/WHMCS/servers/PUQ_WHMCS-Synology/php81/PUQ_WHMCS-Synology-latest.zip
PHP 7.4
wget https://download.puqcloud.com/WHMCS/servers/PUQ_WHMCS-Synology/php74/PUQ_WHMCS-Synology-latest.zip
Note: All versions are available here: https://download.puqcloud.com/WHMCS/servers/PUQ_WHMCS-Synology/
2. Unzip the archive with the module
unzip PUQ_WHMCS-Synology-latest.zip
3. Copy "puqSynology" to "WHMCS_WEB_DIR/modules/servers/"
4. Add the Synology NAS server in WHMCS
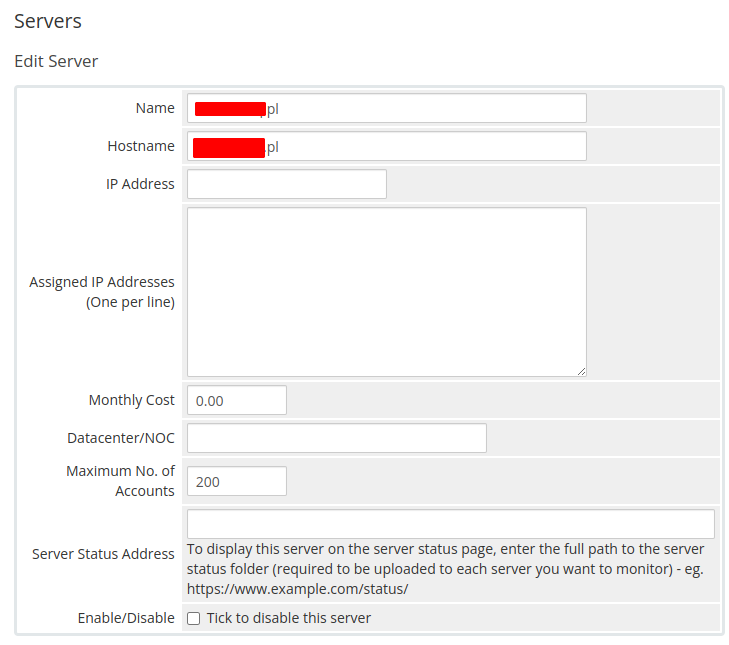
System Settings -> Servers -> Add New Server
- Enter the correct Name and Hostname
- In the Server Details section, select the PUQ Synology module and enter the correct username and password of the Synology DSM account.
- Click Test connection to verify.
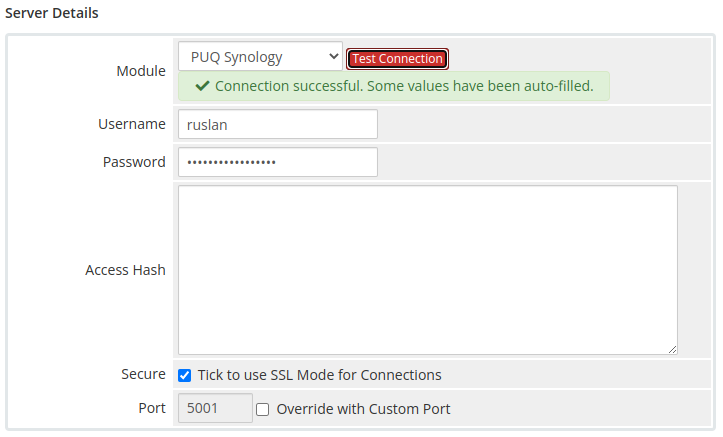
Warning: The ACCESS HASH field is used to store the server access key and is updated automatically — do not edit it manually.
For more details, see Add server (Synology NAS).
5. Create the product
System Settings -> Products/Services -> Create a New Product
In the Module Settings section, select the PUQ Synology module and the Server Group that contains your Synology server, then click Save Changes to load the configuration panel.
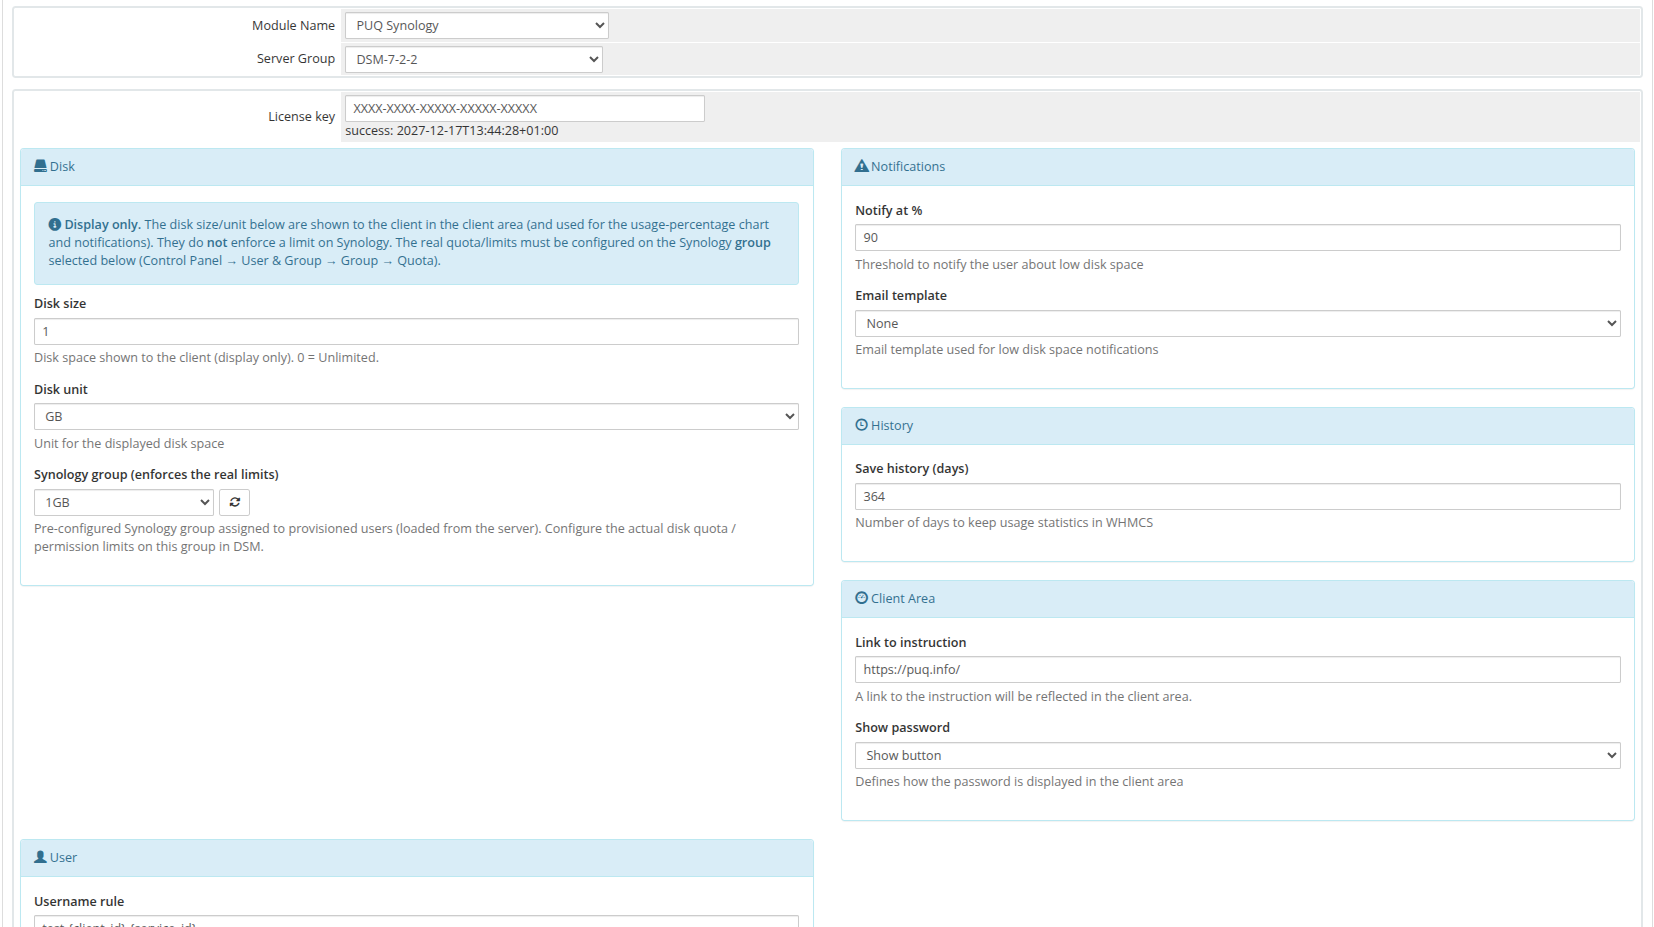
Every setting in this panel (License key, Disk, Synology group, Notifications, History, Client Area and User rules) is described in detail on the Product Configuration page.