 Skip to main content
02. Installation
System Requirements
| Requirement | Minimum |
|---|---|
| OS | Debian 12/13 or Ubuntu 22.04+ (amd64) |
| CPU | 1 core (2+ recommended for 500+ clients) |
| RAM | 512 MB (2+ GB recommended) |
| Disk | 1 GB free space |
| Network | Public IPv4 address, root access |
Required Packages
The panel automatically manages its dependencies, but the following packages must be available in the system repositories:
| Category | Packages |
|---|---|
| VPN Protocols | wireguard, wireguard-tools, amneziawg-dkms, amneziawg-tools, openvpn, easy-rsa, strongswan, strongswan-pki |
| Network & Firewall | iproute2, iptables, ipset |
| DNS | bind9, bind9-utils |
| Monitoring | rsyslog, telegraf |
| Security | openssl |
| Utilities | procps, uuid-runtime, bash, grep, gawk |
Note: You can verify all dependencies after installation using Settings > Environment page.
Installation
Step 1: Download
Download the latest .deb package:
wget https://puqvpncp.com/download/puqvpncp_latest_amd64.deb
All versions are available at: https://puqvpncp.com/download/
Step 2: Install Dependencies
apt update && apt install -y wireguard wireguard-tools openvpn easy-rsa \
  strongswan strongswan-pki iproute2 iptables ipset \
  bind9 bind9-utils rsyslog telegraf openssl \
  procps uuid-runtime bash grep gawk
Optional: AmneziaWG (Anti-Censorship DPI Bypass)
To enable AmneziaWG, install the kernel module and tools for your distribution:
Debian 12 (Bookworm):
On Debian 12, the Ubuntu 22.04 (
jammy) PPA must be used because Debian 12 hasglibc 2.36, whereas packages fromnoblerequirelibc6 >= 2.38. The keyring is saved directly in.ascformat without needinggpg:
apt-get update && apt-get install -y curl build-essential dkms linux-headers-$(uname -r)
mkdir -p /etc/apt/keyrings
curl -fsSL "https://keyserver.ubuntu.com/pks/lookup?op=get&search=0x75C9DD72C799870E310542E24166F2C257290828" -o /etc/apt/keyrings/amnezia.asc
echo "deb [signed-by=/etc/apt/keyrings/amnezia.asc] https://ppa.launchpadcontent.net/amnezia/ppa/ubuntu jammy main" > /etc/apt/sources.list.d/amnezia.list
apt-get update && apt-get install -y amneziawg-dkms amneziawg-tools
modprobe amneziawg
Debian 13 (Trixie):
On Debian 13, use the Ubuntu 24.04 (
noble) PPA:
apt-get update && apt-get install -y curl build-essential dkms linux-headers-$(uname -r)
mkdir -p /etc/apt/keyrings
curl -fsSL "https://keyserver.ubuntu.com/pks/lookup?op=get&search=0x75C9DD72C799870E310542E24166F2C257290828" -o /etc/apt/keyrings/amnezia.asc
echo "deb [signed-by=/etc/apt/keyrings/amnezia.asc] https://ppa.launchpadcontent.net/amnezia/ppa/ubuntu noble main" > /etc/apt/sources.list.d/amnezia.list
apt-get update && apt-get install -y amneziawg-dkms amneziawg-tools
modprobe amneziawg
Ubuntu (22.04 / 24.04 LTS):
add-apt-repository -y ppa:amnezia/ppa
apt-get update && apt-get install -y amneziawg-dkms amneziawg-tools
modprobe amneziawg
Alternative on Ubuntu (without add-apt-repository):
mkdir -p /etc/apt/keyrings
curl -fsSL "https://keyserver.ubuntu.com/pks/lookup?op=get&search=0x75C9DD72C799870E310542E24166F2C257290828" -o /etc/apt/keyrings/amnezia.asc
echo "deb [signed-by=/etc/apt/keyrings/amnezia.asc] https://ppa.launchpadcontent.net/amnezia/ppa/ubuntu $(. /etc/os-release && echo $VERSION_CODENAME) main" > /etc/apt/sources.list.d/amnezia.list
apt-get update && apt-get install -y amneziawg-dkms amneziawg-tools
modprobe amneziawg
Verify AmneziaWG installation:
dkms status            # Should output: amneziawg/..., ...: installed
lsmod | grep amneziawg # Should display loaded kernel module
awg --version          # Should display awg tools version
Tip: If the kernel module failed to compile or after a kernel update, run:
apt-get install -y build-essential dkms linux-headers-$(uname -r) && dpkg-reconfigure amneziawg-dkms && modprobe amneziawg
Step 3: Install PUQVPNCP
dpkg -i puqvpncp_latest_amd64.deb
This will:
- Install the
puqvpncpbinary to/usr/sbin/puqvpncp - Create the configuration directory
/etc/puqvpncp/ - Create the data directory
/usr/local/puqvpncp/ - Install and enable the
puqvpncpsystemd service
Step 4: Start the Service
systemctl start puqvpncp
Step 5: Access the Web Interface
Open your browser and navigate to:
http://<your-server-ip>:8098
Default credentials:
| Field | Value |
|---|---|
| Username | admin |
| Password | admin |
Important: Change the default password immediately after first login via Settings > System Users.
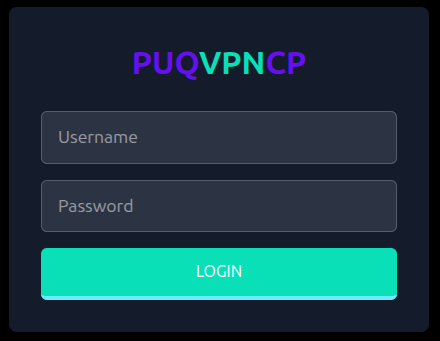 Login page -- enter your username and password
Configuration File
The main configuration file is located at /etc/puqvpncp/puqvpncp.conf. It is created automatically on first start with default values. Format: Key=Value, one per line. Lines starting with # are comments.
# The port on which the WWW server will be set up. (Default: 8098)
WebPort=8098

# The IPv4 or IPv6 on which the WWW server will be set up. (Default: 0.0.0.0)
WebIP=0.0.0.0

# The IPv4 or IPv6 address from which you can login to the web console.
# Supports multiple IPs delimited by comma. (Default: 0.0.0.0)
AllowedWebIP=0.0.0.0

# Directory for log files (Default: /var/log/puqvpncp/)
LogDir=/var/log/puqvpncp/

# Directory for data files (Default: /usr/local/puqvpncp/)
DataDir=/usr/local/puqvpncp/

# SSL certificate support Let's Encrypt yes/no (Default: no)
# If this option is enabled, then the panel is accessible on the standard port 443.
# The port in the non-ssl protocol is not serviced
LetsEncrypSSL=no

# Domain for SSL certificate generation
# Be sure to check that the domain resolves the IP address of this server
Domain=

# Remove tabs in the Wireguard client configuration.
# Sometimes necessary to support non-official Wireguard clients.
DeleteTabsFromConfig=no

# Session timeout in minutes (Default: 720)
SessionTimeout=720

# Log level: INFO, WARN, ERROR, DEBUG (Default: INFO)
LogLevel=INFO

# Trusted proxy IPs (comma-separated). Leave empty for default Gin behavior.
# Set to 'none' to trust no proxies.
TrustedProxies=

# HTTP request timeout in seconds (Default: 30)
HttpTimeout=30
| Parameter | Default | Description |
|---|---|---|
| WebPort | 8098 |
Web interface port. Ignored when LetsEncrypSSL=yes (uses 443) |
| WebIP | 0.0.0.0 |
Listen address (IPv4 or IPv6) |
| AllowedWebIP | 0.0.0.0 |
Restrict access to specific IPs (comma-separated). 0.0.0.0 = allow all |
| LogDir | /var/log/puqvpncp/ |
Log files directory |
| DataDir | /usr/local/puqvpncp/ |
Application data directory (networks, clients, configs) |
| LetsEncrypSSL | no |
Enable Let's Encrypt SSL (yes/no). Requires Domain to be set |
| Domain | (empty) | Domain for SSL certificate. Must resolve to this server's IP |
| DeleteTabsFromConfig | no |
Remove tabs from WireGuard client configs (for non-official clients) |
| SessionTimeout | 720 |
Web session timeout in minutes (12 hours) |
| LogLevel | INFO |
Logging verbosity: DEBUG, INFO, WARN, ERROR |
| TrustedProxies | (empty) | Comma-separated proxy IPs. none = trust no proxies |
| HttpTimeout | 30 |
HTTP request timeout in seconds |
After enabling
LetsEncrypSSL=yesand settingDomain, restart the service. The web interface switches to port 443 (HTTPS) and obtains a certificate automatically.
Update
Step 1: Download the New Version
wget https://puqvpncp.com/download/puqvpncp_latest_amd64.deb
Step 2: Stop the Service
systemctl stop puqvpncp
Important: The service must be stopped before updating. The binary cannot be overwritten while it is running.
Step 3: Install the Update
dpkg -i puqvpncp_latest_amd64.deb
Step 4: Start the Service
systemctl start puqvpncp
Your configuration and data are preserved during updates.
Uninstallation
systemctl stop puqvpncp
apt remove puqvpncp
Note: Uninstalling the package does not remove your configuration (
/etc/puqvpncp/) or data (/usr/local/puqvpncp/). Remove them manually if needed.