The Vanity Product
PUQ Web Hosting module WHMCS
Order now | Download | Community
With the vanity group ready (previous page), create a WHMCS product that sells from it. Create a normal product (Setup → Products/Services), set its module to PUQ Web Hosting, and point its Server Group at your vanity group.
Step 1 — Set the deployment mode to Vanity
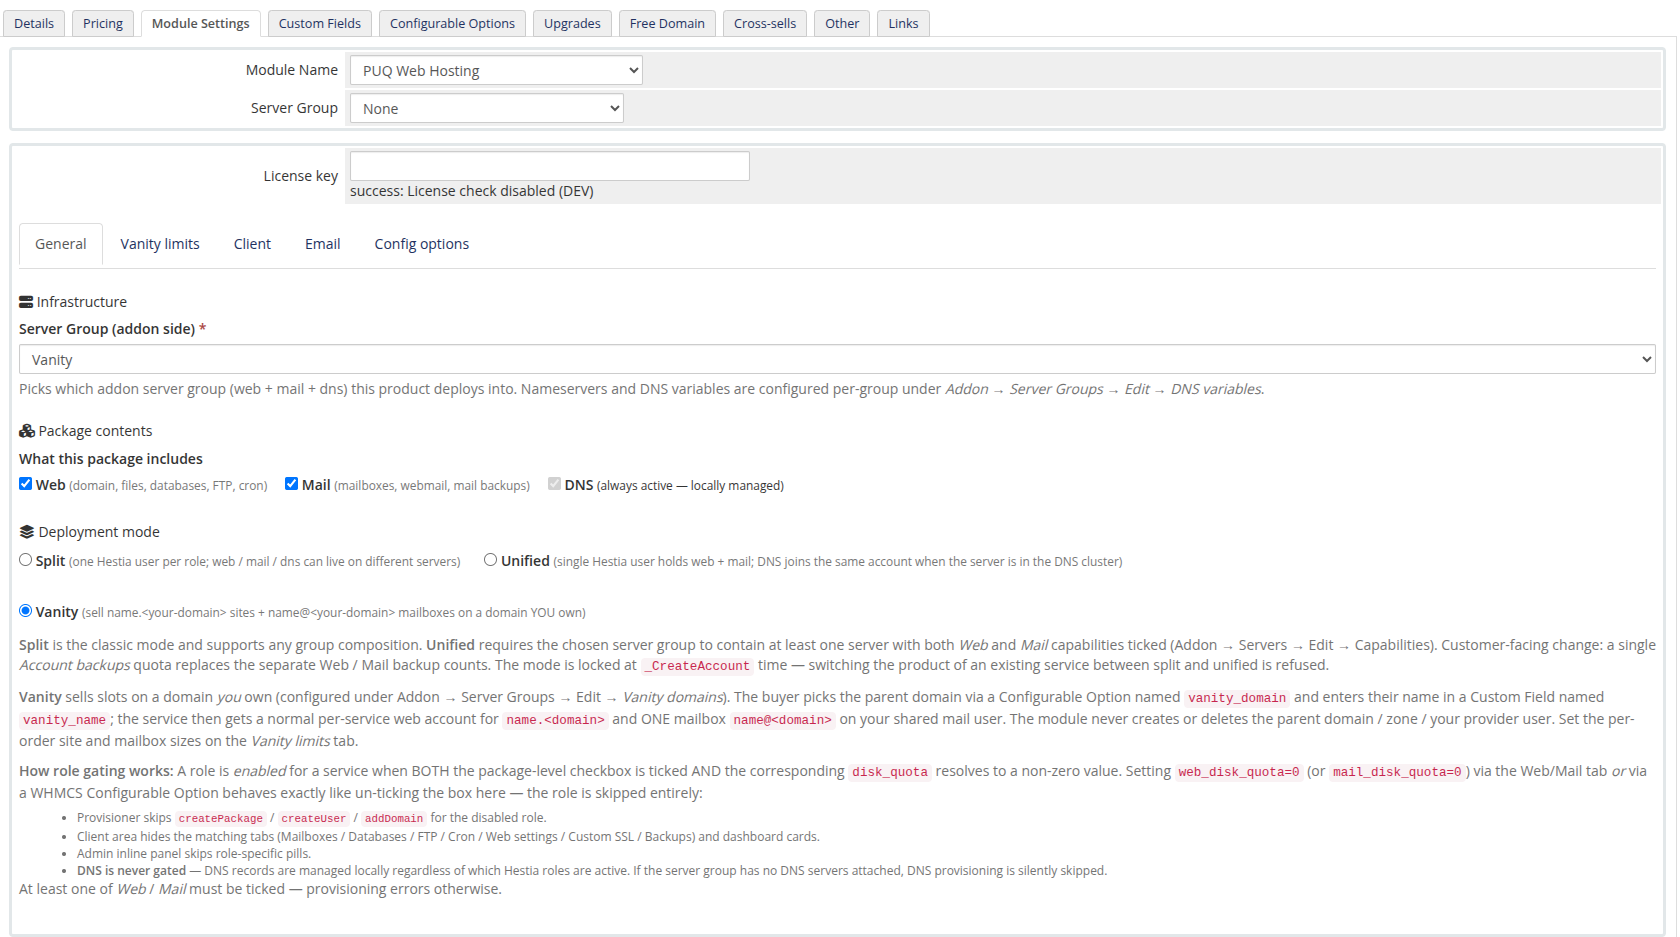
On Module Settings → General, set Deployment mode to Vanity. The limits tabs collapse into a single Vanity limits tab.
Step 2 — Vanity limits
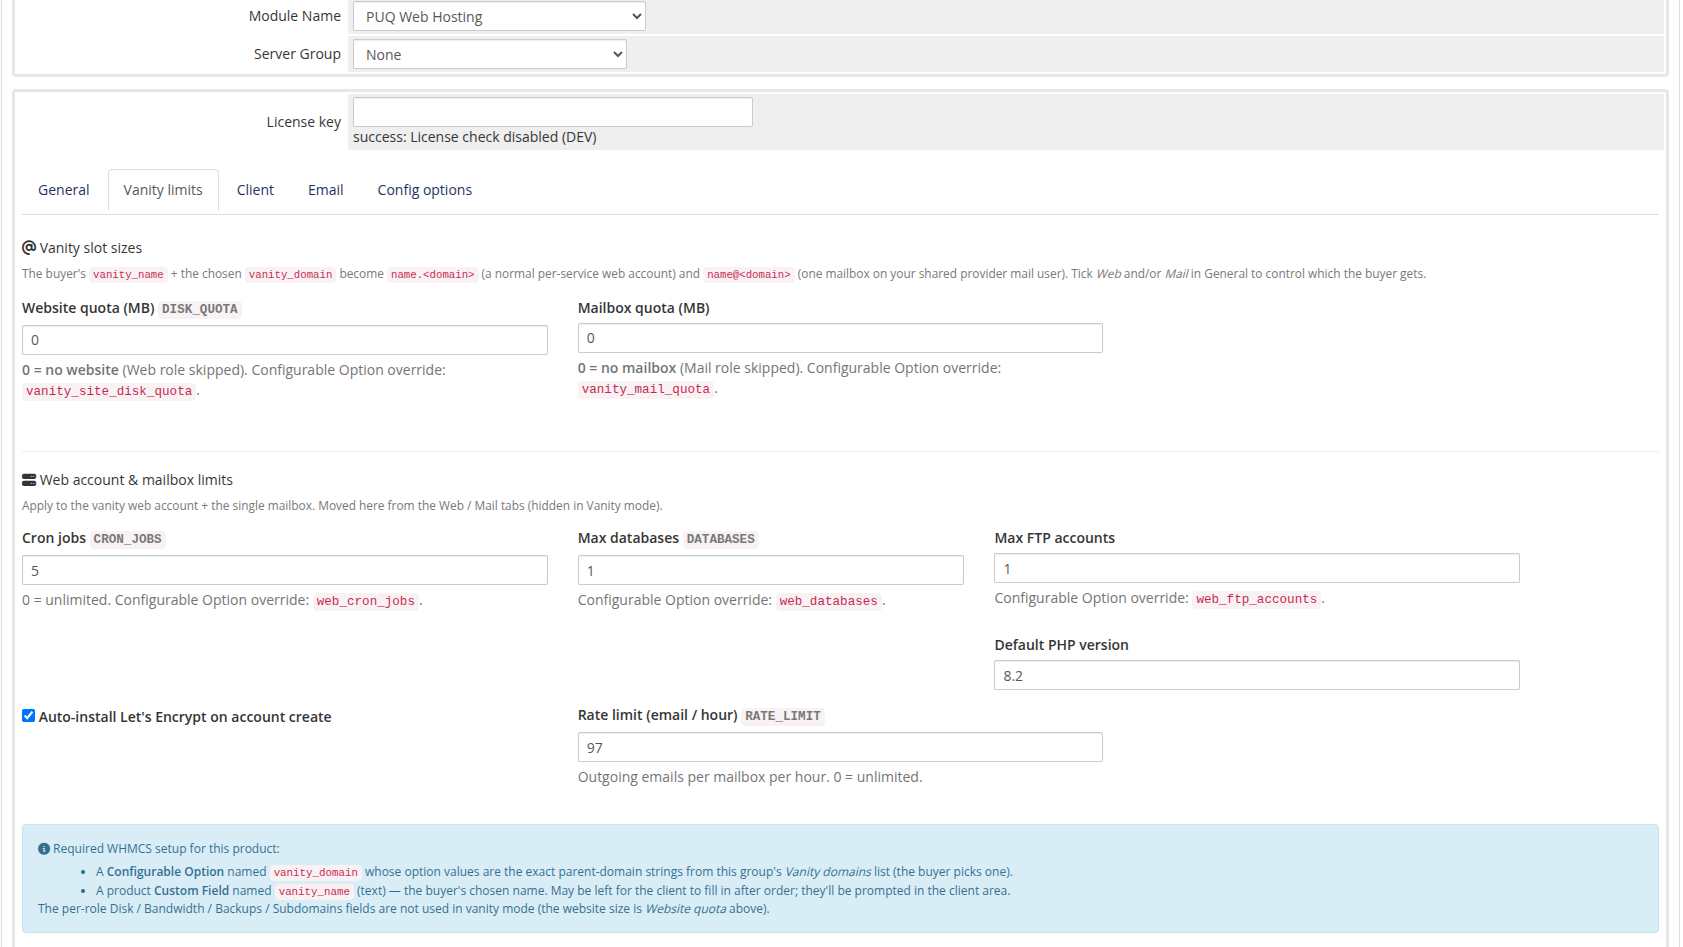
The Vanity limits tab sets the slot sizes and the per‑slot caps:
| Field | Meaning |
|---|---|
| Website quota | Disk for the name.<domain> website. 0 = no website (skip the web role). |
| Mailbox quota | Disk for the single name@<domain> mailbox. 0 = no mailbox (mail‑only off). |
| Cron jobs / Max databases / Max FTP / Default PHP | Caps for the website account (same meaning as normal hosting). |
| Auto‑install Let's Encrypt / Rate limit | Auto‑SSL on the website + outbound mail rate limit. |
Tick Web and/or Mail on the General tab to control which the buyer gets (a website‑only or mailbox‑only vanity product is possible).
Step 3 — Create the Configurable Options & Custom Field
The product needs two things wired into WHMCS so the order form can expose them:
- a Configurable Option named
vanity_domain(its values are the parent‑domain strings from the group's Vanity domains list — this is how the buyer picks which domain), and - a product Custom Field named
vanity_name(text, required — the buyer's chosen name).
The module creates both for you. Open the Config options tab and click Create / sync missing:
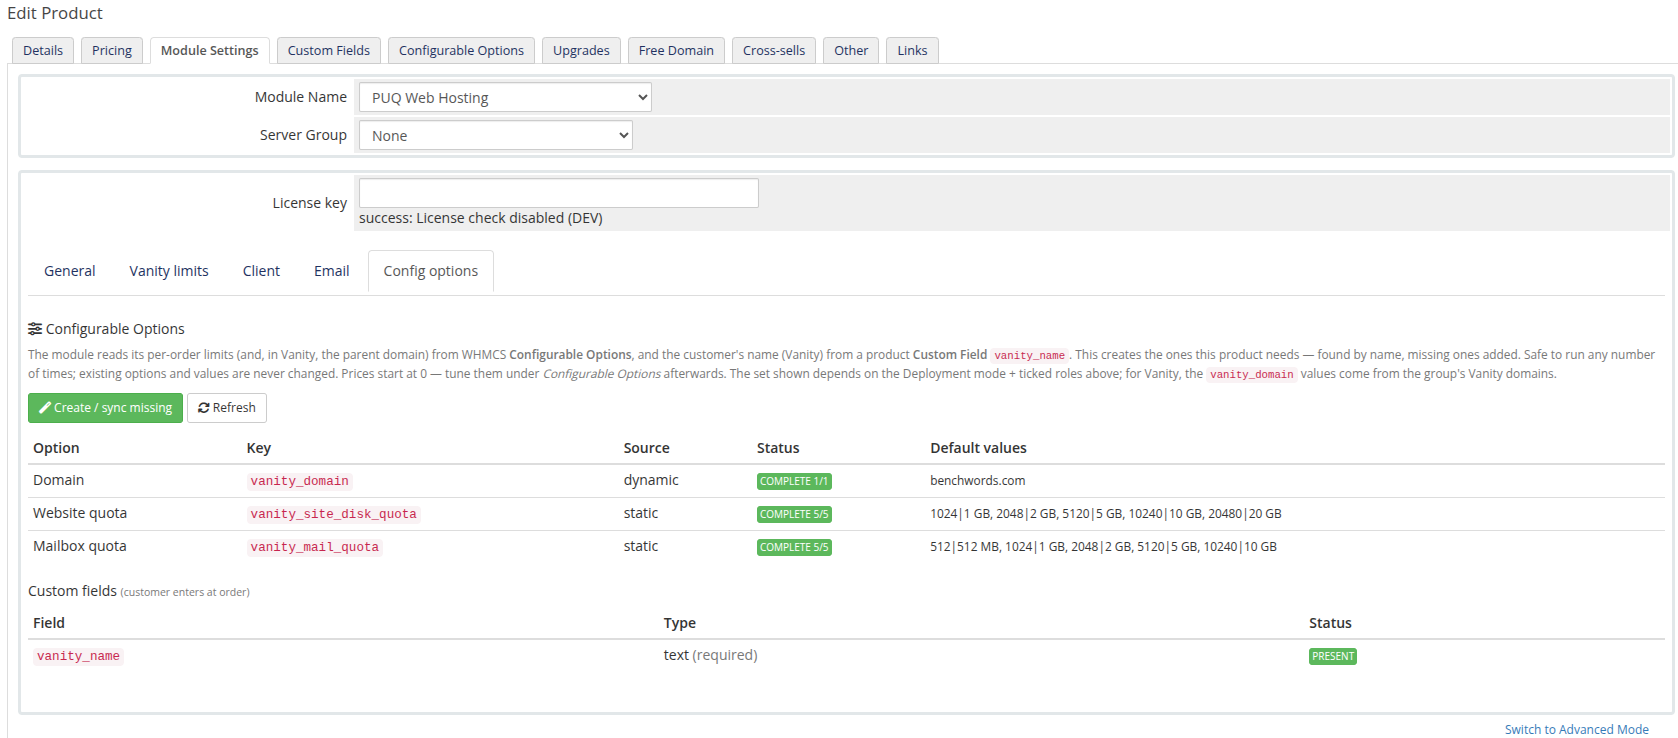
You'll see vanity_domain come up as dynamic (its values come straight from your group's sellable domains), the website/mailbox quota options, and the vanity_name custom field marked PRESENT. It's safe to re‑run any time — existing options and values are never changed. Tune the prices afterwards under WHMCS Configurable Options.
Step 4 — (Optional) client permissions
The Client tab toggles which client‑area actions are visible. For vanity, the relevant control is Mailbox settings — forwards / auto‑responder (the customer gets one fixed mailbox, so "create/delete mailbox" don't apply). Leave DNS/SSL/backup toggles off for a clean vanity experience.
What it looks like to your staff
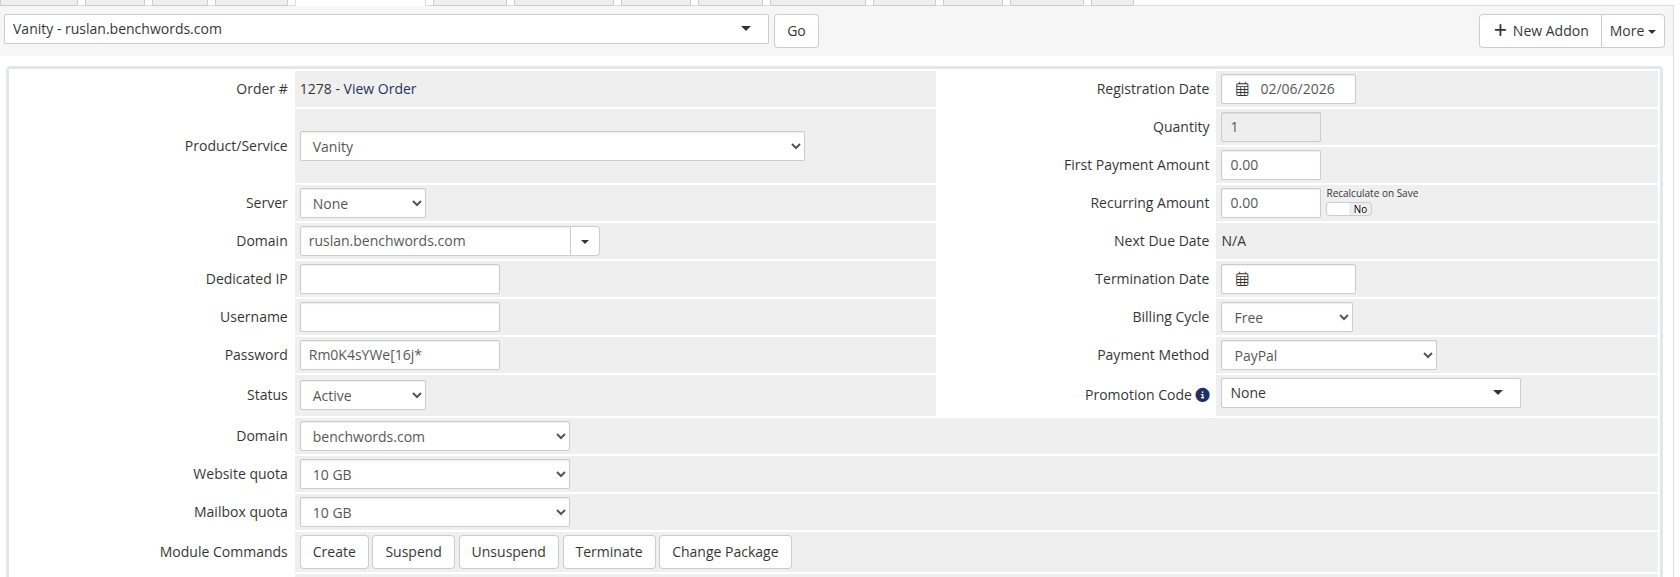
Once a vanity service exists, its WHMCS service page shows the vanity configurable options — the parent Domain, Website quota and Mailbox quota — instead of the full split set:
The product is now ready to sell. The next page walks the buyer's experience and the client area they get.