Setting Up the Vanity Group & Sellable Domains
PUQ Web Hosting module WHMCS
Order now | Download | Community
A vanity offer is built on a special server group whose purpose is Vanity. This page sets up that group and the parent domains you will sell names on.
Step 1 — Make a group a Vanity group
Create a server group (Infrastructure → Server Groups → Add Server Group), open it, and on the General tab set Group purpose to Vanity.
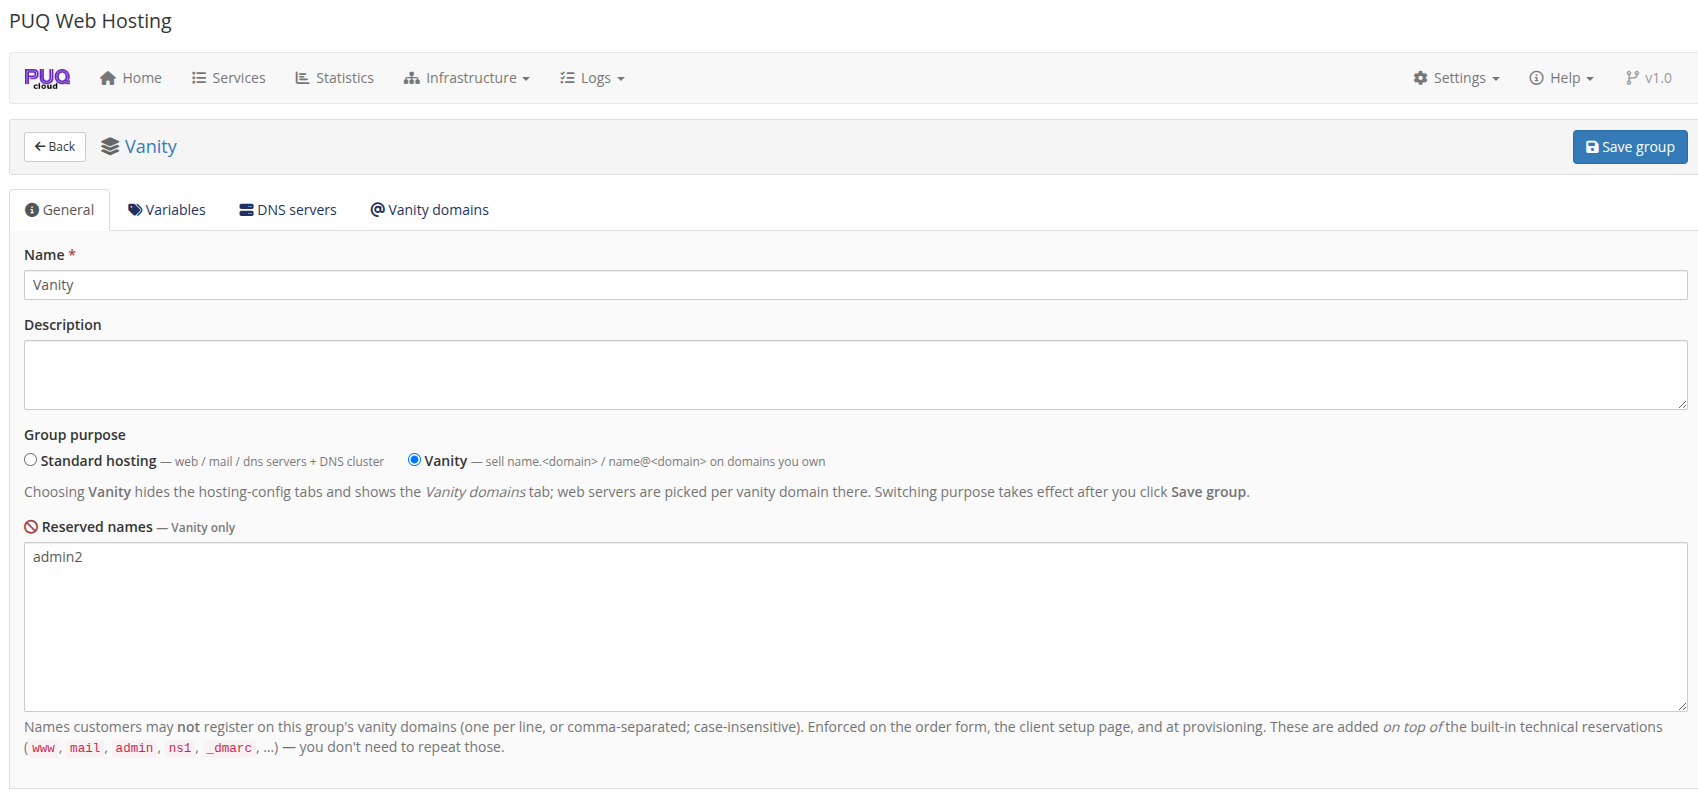
Switching to Vanity changes the group editor: the hosting‑config tabs disappear and a Vanity domains tab appears. A vanity group only has four tabs — General, Variables, DNS servers, Vanity domains.
Reserved names
The General tab has a Reserved names box (one per line). These are names customers may not register on this group's domains (e.g. admin2, your own brand words, etc.). They are enforced on the order form, the client setup page, the API and at provisioning — on top of the built‑in technical reservations (www, mail, admin, ns1, _dmarc, …), which you never need to list yourself.
Step 2 — Attach DNS servers
On the DNS servers tab, tick the nameservers that will carry the subdomain records for this group's domains. Subdomain records are pushed to every attached DNS node (active‑active).
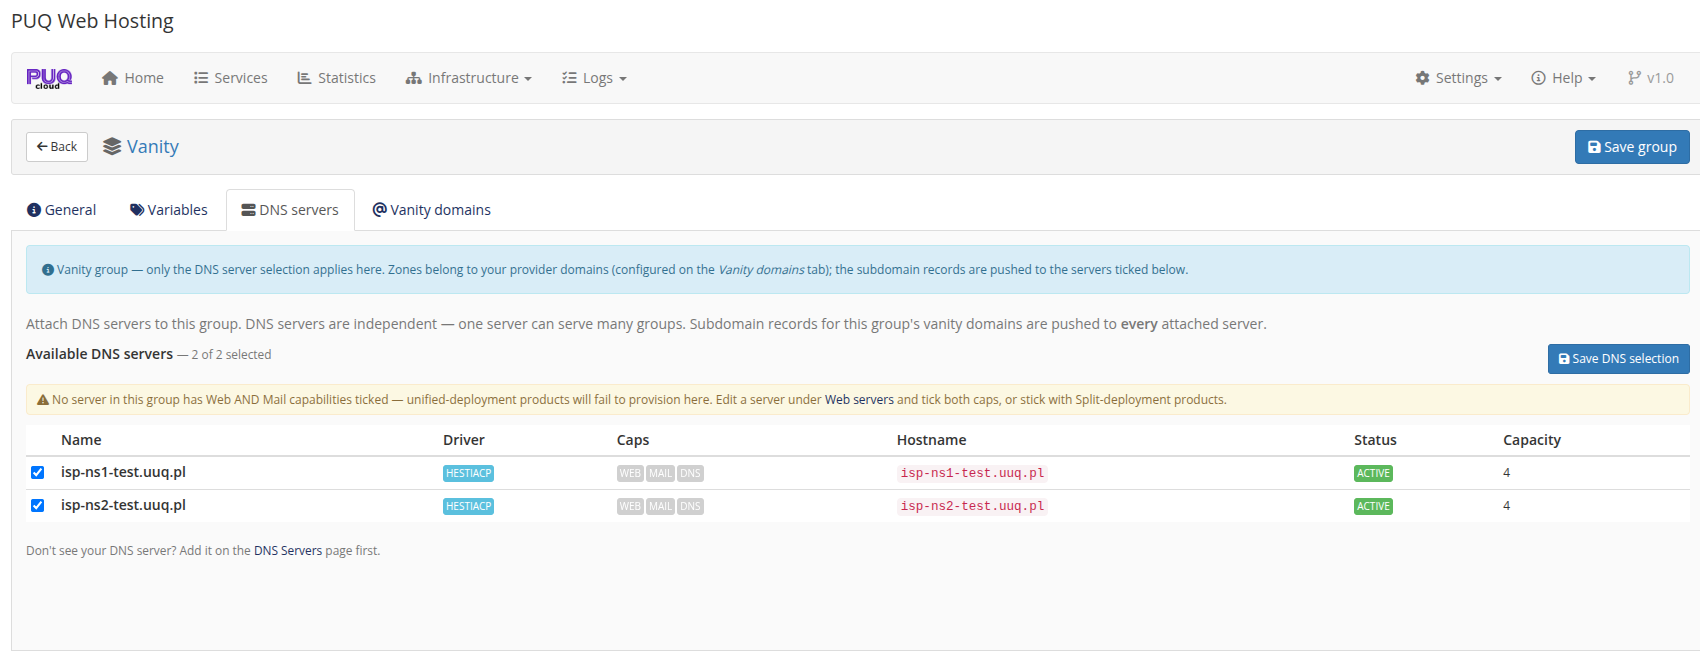
If a domain uses External / wildcard DNS (next step), the module writes no DNS at all and this selection is irrelevant for that domain.
Step 3 — Add the parent domains you sell
Open the Vanity domains tab. This is the core of the setup. Note the banner restating the safety guarantee — the module only adds/removes the per‑service subdomain, one mailbox, and (in push mode) one DNS record; it never touches the parent mail domain, the zone, or your provider Hestia user.
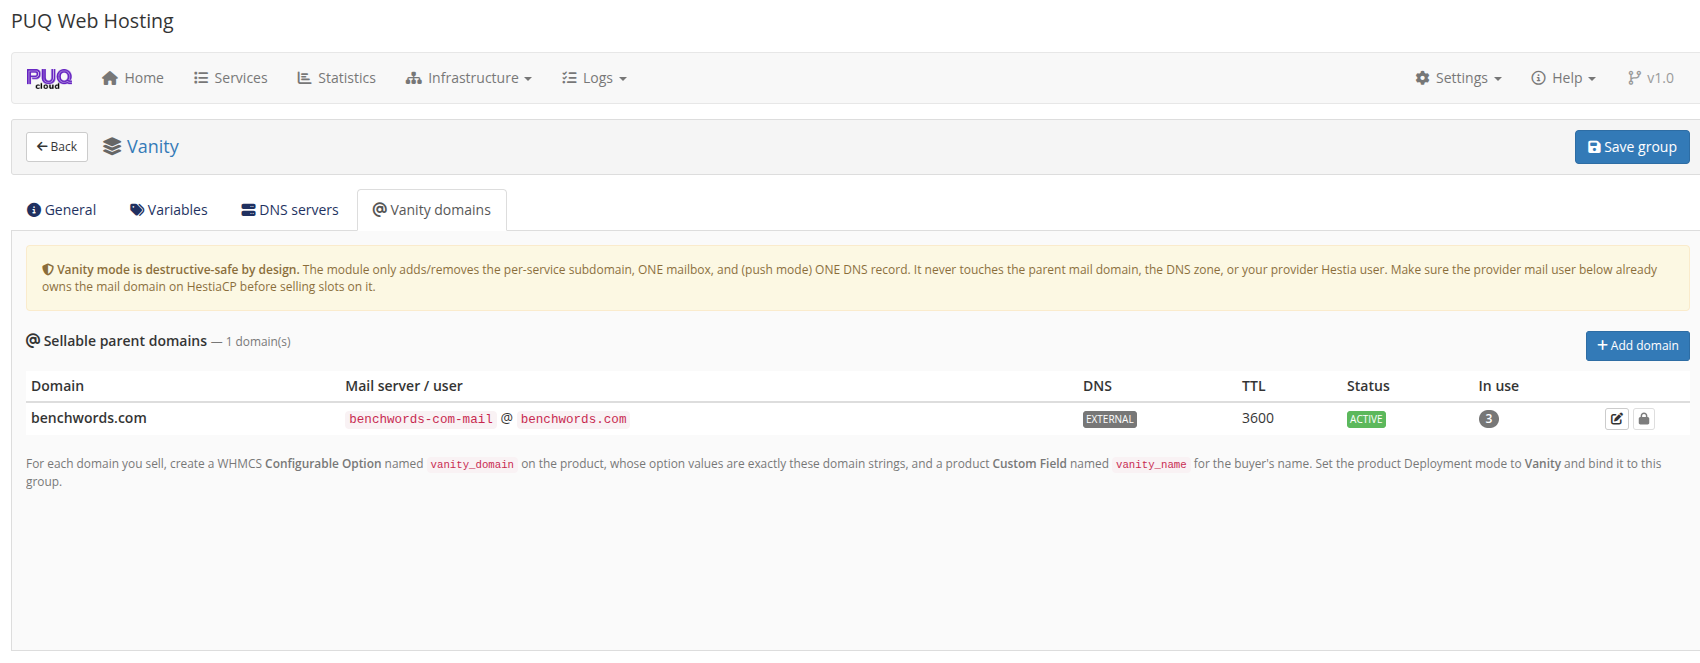
Click Add domain and configure each parent domain:
| Field | What it means |
|---|---|
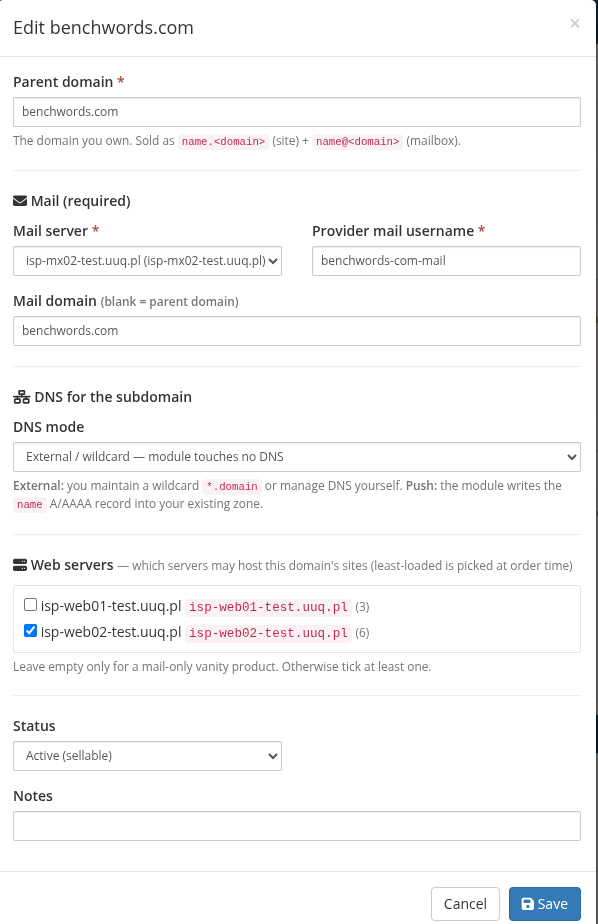
| Parent domain | The domain you own and sell on (e.g. benchwords.com). Sold as name.<domain> (site) + name@<domain> (mailbox). |
| Mail server + Provider mail username | The shared Hestia mail user that already owns the mail domain. This user must already own the mail domain on HestiaCP before you sell slots on it. Every customer mailbox is created on this one user. |
| Mail domain | Usually the parent domain; leave blank to use it. |
| DNS mode | External / wildcard — you maintain a *.domain wildcard (or manage DNS yourself) and the module touches no DNS. Push — the module writes the name A/AAAA record into your existing zone. |
| Web servers | Which Web nodes may host this domain's sites. The least‑loaded ticked node is chosen at order time. Tick at least one (leave empty only for a mail‑only vanity product). |
| Status | Active (sellable) to offer it; otherwise hidden from new orders. |
DNS mode tip: a
*.benchwords.comwildcard A‑record pointing at your web tier is the simplest setup — every newname.benchwords.comresolves immediately with zero per‑order DNS work. Use Push mode only when you need exact per‑name records in a zone the module manages.
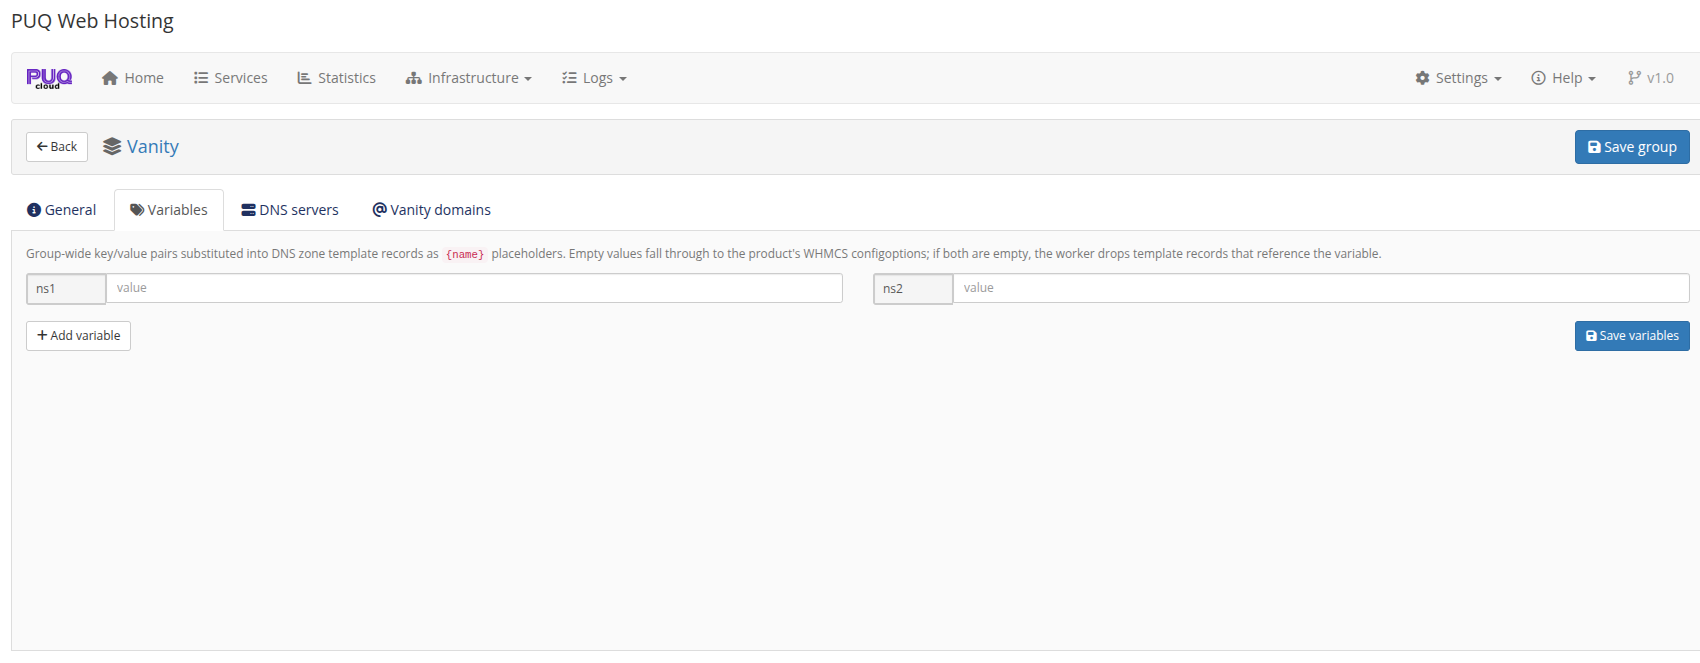
Step 4 — Variables (optional)
The Variables tab works the same as for standard groups — group‑wide {name} values used by DNS zone templates. Most vanity setups don't need it (the subdomain record is the only DNS the module writes). Note that a vanity group shows only four tabs — General / Variables / DNS servers / Vanity domains — the hosting‑config tabs are hidden.
Once the group has at least one Active parent domain with a mail user and a web server, it is ready. The next page wires up the product that sells from it.