Create new server for Proxmox in WHMCS
Proxmox KVM module WHMCS
Order now | Download | FAQ
Preface
For the module to work properly, you must configure the server settings in your main WHMCS panel. This is the place where you register a Proxmox server (or Proxmox cluster) which will then be used by the module to build KVM virtual machines. Here you define access credentials, IP ranges and additional settings.
Attention. If you have only one server, or you do not use server groups, you need to make this server the active default for new signups by opening the server entry in WHMCS and ticking "Make this server the active default for new signups".
Server creation
Log in to your WHMCS panel and create a new Proxmox server:
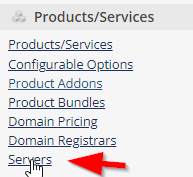
System Settings → Products/Services → Servers → Add New Server
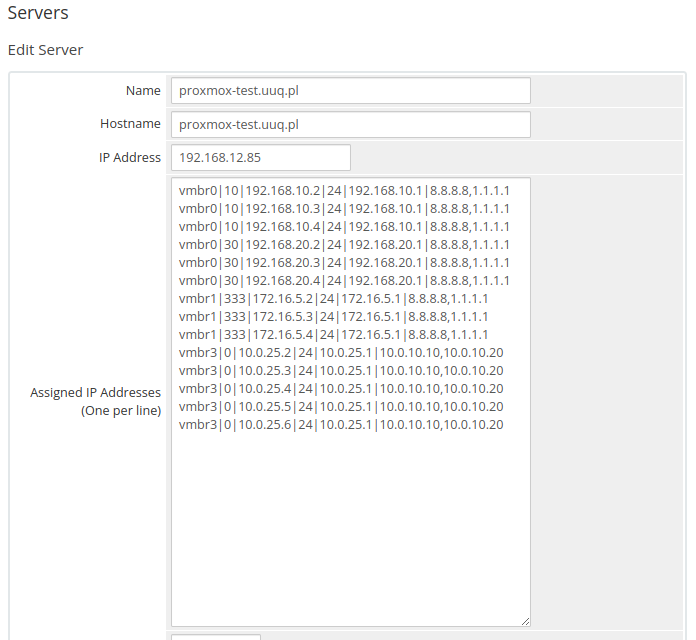
Step 1: Name, Hostname and Assigned IP Addresses
- Enter the correct Name and Hostname of the Proxmox node.
- In the Assigned IP Addresses field enter the list of IP addresses that will be reserved for virtual machines built on this server.
Note. Starting with module version 1.3, the module supports IPv4/IPv6 pools managed in the addon. For new installations this is the recommended way to manage IP addresses — see the IP Pools chapter of this documentation. The "Assigned IP Addresses" field described below is the legacy format and is kept for backward compatibility.
Format to follow in the Assigned IP Addresses field
To define the available pool of IP addresses, enter one line per IP, with fields separated by the | character. Each line has the following structure:
<bridge>|<vlan_tag>|<IP_address>|<net_mask>|<Gateway>|<DNS1>,<DNS2>
| Field | Description |
|---|---|
<bridge> |
The virtual bridge to which the VM network interface is connected (e.g. vmbr0). |
<vlan_tag> |
VLAN tag that will be set on the VM's network card. If VLANs are not used, enter 0. |
<IP_address> |
IPv4 address that will be assigned to the VM. |
<net_mask> |
Network mask in CIDR form (e.g. 24). |
<Gateway> |
Default gateway for the subnet. |
<DNS1>,<DNS2> |
Comma-separated list of DNS servers. |
Example
vmbr0|10|192.168.10.2|24|192.168.10.1|8.8.8.8,1.1.1.1
vmbr0|10|192.168.10.3|24|192.168.10.1|8.8.8.8,1.1.1.1
vmbr0|10|192.168.10.4|24|192.168.10.1|8.8.8.8,1.1.1.1
vmbr0|30|192.168.20.2|24|192.168.20.1|8.8.8.8,1.1.1.1
vmbr0|30|192.168.20.3|24|192.168.20.1|8.8.8.8,1.1.1.1
vmbr0|30|192.168.20.4|24|192.168.20.1|8.8.8.8,1.1.1.1
vmbr1|333|172.16.5.2|24|172.16.5.1|8.8.8.8,1.1.1.1
vmbr1|333|172.16.5.3|24|172.16.5.1|8.8.8.8,1.1.1.1
vmbr1|333|172.16.5.4|24|172.16.5.1|8.8.8.8,1.1.1.1
vmbr3|0|10.0.25.2|24|10.0.25.1|10.0.10.10,10.0.10.20
vmbr3|0|10.0.25.3|24|10.0.25.1|10.0.10.10,10.0.10.20
vmbr3|0|10.0.25.4|24|10.0.25.1|10.0.10.10,10.0.10.20
vmbr3|0|10.0.25.5|24|10.0.25.1|10.0.10.10,10.0.10.20
vmbr3|0|10.0.25.6|24|10.0.25.1|10.0.10.10,10.0.10.20
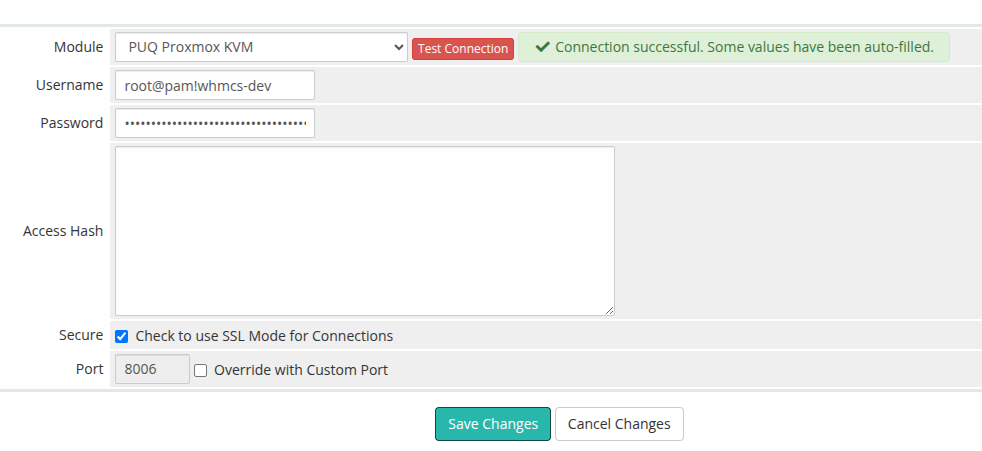
Step 2: Server Details — module and credentials
In the Server Details section select the PUQ Proxmox KVM module and enter the correct credentials for the Proxmox API. Then click Test connection to verify.
Attention. Starting from module version 2.3, authentication has been changed to token-based.
- Username — Proxmox token ID in the format
root@pam!whmcs-dev- Password — the token secret value
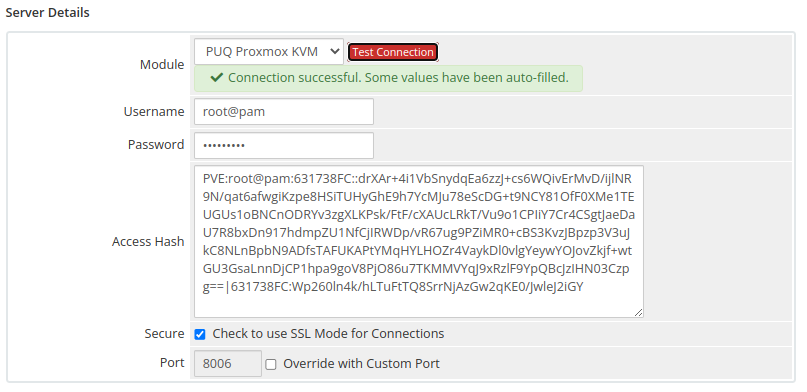
If you are using a version earlier than 2.3, enter the Proxmox username in the format
root@pamin the Username field and the corresponding password in the Password field.During operation, the module will automatically fill in the Access Hash field. You do not need to fill it manually.
Version 2.3+ — Token authentication
Version 2.2 and earlier — Password authentication
Creating a Proxmox API Token
- Log in to the Proxmox web UI.
- Go to Datacenter → Permissions → API Tokens.
- Click Add.
- Select the User (e.g.
root@pam). - Enter a Token ID (e.g.
whmcs). - Uncheck Privilege Separation if the token should inherit the user's full permissions. If privilege separation is enabled, you must assign permissions to the token itself.
- Click Add.
- Copy the generated token secret immediately — it is displayed only once and cannot be retrieved later.
The resulting username for WHMCS will look like root@pam!whmcs and the password will be the token secret (a UUID-like string).
Step 3: Make the server default (single-server installs)
If you have only one Proxmox server, or you do not use server groups, open the server entry and tick "Make this server the active default for new signups". Otherwise newly ordered products will not be assigned to this server automatically.

Test Connection
After saving the server configuration, always use the Test Connection button to verify:
- Network connectivity to the Proxmox host on port 8006
- Authentication credentials are valid (token ID + secret, or username + password)
- The API user / token has sufficient permissions on the target nodes and storages
If the test fails, check:
- The WHMCS server can reach the Proxmox host on port
8006 - The username and password/token are correct
- The Proxmox API service (
pveproxy) is running - No firewall is blocking the connection between WHMCS and Proxmox
Server Groups
You can organize multiple Proxmox servers into Server Groups for automatic server selection during provisioning. This is useful when you have a Proxmox cluster with multiple nodes.
- Go to System Settings → Products/Services → Servers
- Click the Server Groups tab
- Create a new group and assign your Proxmox servers to it
- Set the Fill Type:
- Fill — fills one server before moving to the next
- Round Robin — distributes VMs evenly across servers
- When configuring a product, select the server group instead of a specific server
Tip. When using server groups with a Proxmox cluster, ensure the required storages exist on every node, or enable the VM migration step in the addon settings so the module moves freshly-cloned VMs to the correct target node automatically.