ISO Mount
Proxmox KVM module WHMCS
Order now | Download | FAQ
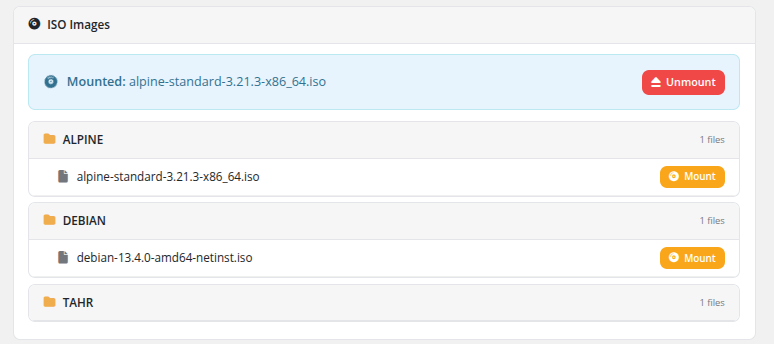
The ISO Mount page allows clients to mount and unmount ISO images on their virtual machine's virtual CD/DVD drive. ISO images are organized into categorized folders for easy browsing.
Currently Mounted ISO
If an ISO image is currently mounted, it is displayed at the top of the page with a highlighted status bar showing the filename (e.g., "Mounted: alpine-standard-3.21.3-x86_64.iso") and an Unmount button to eject it.
Browsing Available ISOs
ISO images are organized into folders by category. Each folder displays:
- Folder name — The category name (e.g., ALPINE, DEBIAN, TAHR), shown with a folder icon
- File count — The number of ISO files in that folder
Inside each folder, individual ISO files are listed with their full filename and a Mount button.
How the categorization works
To keep the ISO list readable the module derives the folder name from the part of the filename before the first - character:
-
Debian-12.5.0-amd64-netinst.iso→ folder Debian -
alpine-standard-3.21.3-x86_64.iso→ folder alpine -
myimage.iso(no dash at all) → folder OTHER
Follow this convention when uploading ISOs to your Proxmox ISO storage. PUQcloud publishes a set of pre-built ISO images that are named in this convention and ready to use — see the ISO storage on files.puqcloud.com.
Mounting an ISO
Unmounting an ISO
- Locate the currently mounted ISO at the top of the page.
- Click the Unmount button.
- The ISO is ejected from the virtual CD/DVD drive.
Use Cases
- Recovery operations — Boot from a rescue ISO to repair a broken system
- Manual OS installation — Install an operating system from an ISO image
- Additional software — Mount driver or utility ISOs for installation
- Diagnostics — Boot diagnostic tools (e.g., memtest, disk utilities)
Important Notes
- The ISO mount feature must be enabled in the product's Client Area Permissions by the administrator.
- Available ISO images are sourced from the ISO storage configured in the Proxmox product settings. Only ISOs uploaded by the administrator to that storage will appear.
- To boot from a mounted ISO, the VM's boot order may need to be configured to include the CD/DVD drive.
- Only one ISO can be mounted at a time. Mounting a new ISO will replace the currently mounted one.