Install VNCproxy and noVNC
Proxmox KVM module WHMCS
Order now | Download | FAQ
Preface
The module supports the ability to connect to and use a browser-based console to manage a specific KVM virtual machine. To connect to the VM console we use third-party software.
noVNC — the open-source VNC client. noVNC is both a VNC client JavaScript library and an application built on top of that library. It runs well in any modern browser, including mobile browsers (iOS and Android).
- Project site: https://novnc.com
- Project GitHub: https://github.com/novnc/noVNC
As we only use an external project, we do not take any responsibility for data leaks, hacks, etc.
The PUQ vncwebproxy binary itself is written in Go and uses the following libraries:
- go-vncproxy (MIT License)
- gin (MIT License)
- golang.org/x/net/websocket (BSD License)
How it works
The vncwebproxy sits between the client browser and your Proxmox server. It terminates the WebSocket from noVNC and forwards traffic to the Proxmox VNC port.
- The proxy must have stable network connectivity to the Proxmox server; TCP ports 5900–5999 to Proxmox are sufficient.
- If you use a domain name (not an IP) for the Proxmox server in the WHMCS server settings, that domain must resolve correctly from the vncproxy host as well.
- Each console session uses a one-time authentication ticket generated on demand and validated by the Proxmox API before the connection is established.
- All traffic between the client browser and the proxy is encrypted with SSL/TLS.
Public PUQcloud proxy (default)
If you have any difficulties setting up your own proxy, you can use the public PUQcloud vncproxy server. However, we strongly recommend setting up and using your own vncproxy server — this way you retain full control over performance and security.
| Setting | Value |
|---|---|
| noVNC WEB proxy server | vncproxy.puqcloud.com |
| noVNC WEB proxy key | puqcloud |
| WEB ports | 80 / 443 |
| VNC ports | 5900–5999 |
These values go into the WHMCS product settings under Module Settings → Integrations Configuration:
| Setting | Description |
|---|---|
| noVNC Proxy Domain | The URL of your noVNC proxy (e.g. https://vncproxy.puqcloud.com) |
| noVNC Proxy Key | Authentication key configured on the proxy (e.g. puqcloud) |
Installation process — your own VNCproxy server
The sections below describe the full installation of a dedicated vncproxy server. The example uses Debian 11 and the domain vncproxy.puqcloud.com — in your own deployment, substitute your domain everywhere.
Step 1: Domain definition
First, choose a domain name for the vncproxy server (in our example: vncproxy.puqcloud.com). Create an A/AAAA record in your DNS pointing to the server's public IP address. Wait until the record propagates before requesting the SSL certificate.
Step 2: Prepare the server
Provision a VM or dedicated host with your favorite Linux distribution — the example uses Debian 11. Make sure the server can reach your Proxmox nodes on TCP ports 5900–5999, and that inbound ports 80/443 are open for clients.
Update the package database:
sudo apt update
Install the NGINX web server, Certbot and zip:
sudo apt install certbot nginx python3-certbot-nginx zip -y
Step 3: Download the noVNC client
cd /root/
wget https://github.com/novnc/noVNC/archive/refs/tags/v1.3.0.zip
unzip v1.3.0.zip
cp -R noVNC-1.3.0/* /var/www/html/
rm v1.3.0.zip
rm -r noVNC-1.3.0/
After this step, opening http://vncproxy.puqcloud.com/vnc.html will load the noVNC client page.
Step 4: Generate an SSL certificate with Certbot
certbot --nginx -d vncproxy.puqcloud.com
To renew the certificate automatically, add a cron job:
crontab -e
0 12 * * * /usr/bin/certbot renew --quiet
Step 5: NGINX virtual host configuration
Edit the default site configuration:
nano /etc/nginx/sites-available/default
Use the following config — remember to replace vncproxy.puqcloud.com with your own domain:
server {
    listen 80 default_server;
    listen [::]:80 default_server;

    root /var/www/html;

    index index.html index.htm index.nginx-debian.html;

    server_name _;

    location / {
        try_files $uri $uri/ =404;
    }
}

server {

    root /var/www/html;

    index index.html index.htm index.nginx-debian.html;
    server_name vncproxy.puqcloud.com; # managed by Certbot

    location / {
        try_files $uri $uri/ =404;
    }

    listen [::]:443 ssl ipv6only=on; # managed by Certbot
    listen 443 ssl; # managed by Certbot
    ssl_certificate /etc/letsencrypt/live/vncproxy.puqcloud.com/fullchain.pem; # managed by Certbot
    ssl_certificate_key /etc/letsencrypt/live/vncproxy.puqcloud.com/privkey.pem; # managed by Certbot
    include /etc/letsencrypt/options-ssl-nginx.conf; # managed by Certbot
    ssl_dhparam /etc/letsencrypt/ssl-dhparams.pem; # managed by Certbot

    location /vncproxy {
        proxy_pass http://127.0.0.1:8080/vncproxy;
        proxy_http_version 1.1;
        proxy_set_header Upgrade $http_upgrade;
        proxy_set_header Connection "Upgrade";
        proxy_set_header Host $host;
        proxy_set_header    X-Real-IP        $remote_addr;
        proxy_set_header    X-Forwarded-For  $proxy_add_x_forwarded_for;
    }
}

server {
    if ($host = vncproxy.puqcloud.com) {
        return 301 https://$host$request_uri;
    } # managed by Certbot

    listen 80 ;
    listen [::]:80 ;
    server_name vncproxy.puqcloud.com;
    return 404; # managed by Certbot
}
Reload NGINX:
service nginx restart
Step 6: Install the vncwebproxy binary
Download the PUQ vncwebproxy binary from the official download server and make it executable:
apt-get install screen -y
cd /root/
wget https://download.puqcloud.com/WHMCS/servers/PUQ_WHMCS-Proxmox-KVM/vncproxy/vncwebproxy
chmod +x vncwebproxy
Step 7: Run the proxy
Run the script inside a screen session so it keeps running in the background. The first argument is a unique key — this is exactly the value you will later put into the noVNC Proxy Key field in the WHMCS module.
screen
./vncwebproxy puqcloud
After a successful launch you can watch the request log directly in the console:
root@vncproxy:~# ./vncwebproxy puqcloud
[./vncwebproxy puqcloud]
proxmox-test.uuq.pl59002022/09/11 19:11:08 [vncproxy][debug] ServeWS
2022/09/11 19:11:08 [vncproxy][debug] request url: /vncproxy/proxmox-test.uuq.pl/5900/d91bac199c2ce79392d8e175076e3780
2022/09/11 19:11:13 [vncproxy][info] close peer
[GIN] 2022/09/11 - 19:11:13 | 200 |  4.740249024s |   79.184.10.217 | GET      "/vncproxy/proxmox-test.uuq.pl/5900/d91bac199c2ce79392d8e175076e3780"
Detach from screen with Ctrl+A then D. Reattach later with screen -r.
Step 8: Configure WHMCS
In the WHMCS product settings, under Module Settings → Integrations Configuration, fill in:
-
noVNC Proxy Domain →
https://vncproxy.your-domain.tld -
noVNC Proxy Key → the key you passed to
./vncwebproxy(in our example:puqcloud)
Save the product and try opening the console from the client area.
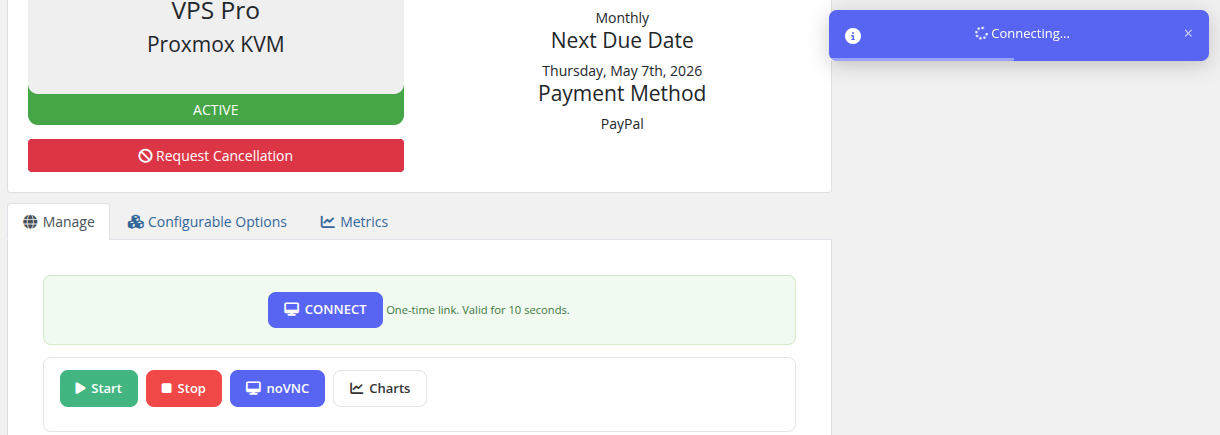
Client Access
When noVNC is configured, clients see a Console button in their VM management area. Clicking it opens a new browser window with the noVNC console, providing full keyboard and mouse access to the virtual machine.
Security
The security configuration of the vncproxy server should meet your own standards. A few mandatory points:
- Allow inbound TCP 80/443 from the internet (clients need HTTPS access to noVNC).
- Allow outbound TCP 5900–5999 from the vncproxy host to your Proxmox nodes.
- Keep the OS, NGINX and the
vncwebproxybinary up to date. - Each console session uses a one-time ticket — tickets are generated on demand, expire after a short period, and are validated against the Proxmox API before the connection is established.
- All traffic between the client browser and the proxy is encrypted via SSL/TLS (Let's Encrypt certificate).
Do not forget that for correct operation you must allow HTTPS to the proxy and outgoing connections from the proxy to the Proxmox server.