DNS Manager — Servers
PUQcloud Panel
Order Now | Download | FAQ
1) Purpose of this section
In Servers you connect your real DNS servers to PUQcloud. Then you attach these servers to Server Groups, and groups power your Zones (create/update records, reload zones, import/export).
Path: Settings → DNS Manager → Servers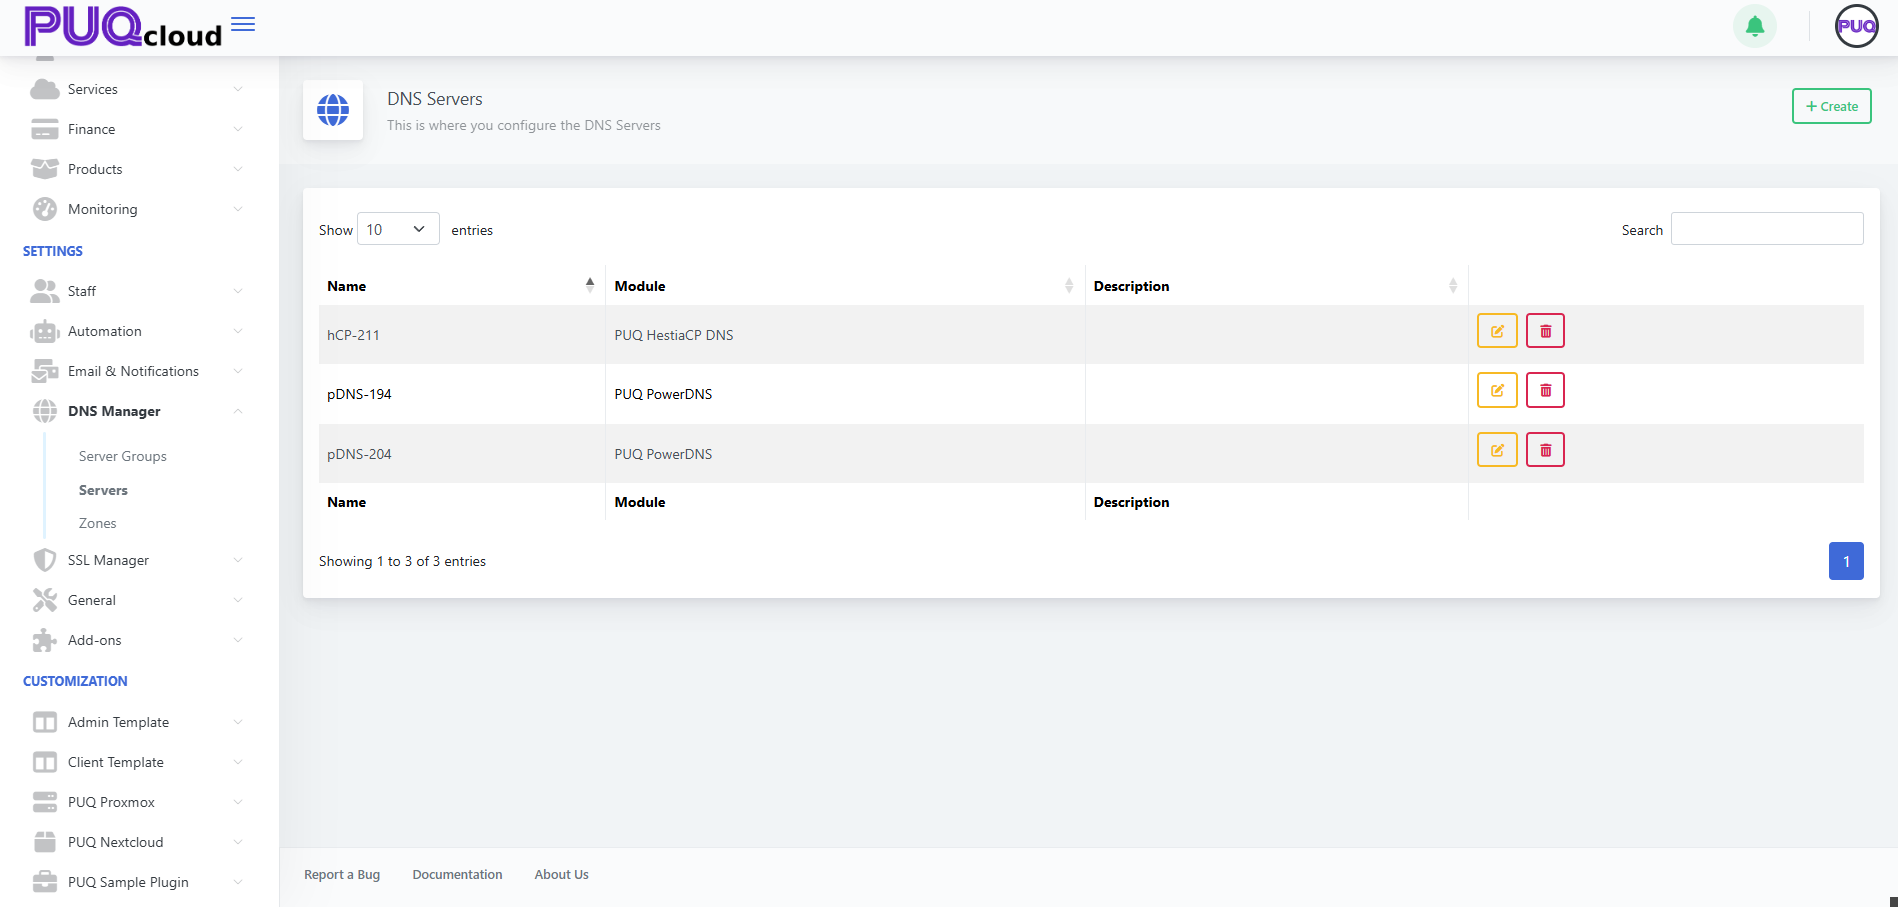
2) Supported modules
PUQcloud integrates via pluggable modules:
• PUQ PowerDNS
Direct integration with the PowerDNS HTTP API (typically port 8081). The panel creates/updates zones and records through the REST API and provides Save and Test to confirm connectivity and show the PowerDNS version.
Use when: you run your own PowerDNS authoritative servers and want fast, transparent automation (including ACME/SSL “tech zone” workflows).
• PUQ HestiaCP DNS
Manages zones/records via the HestiaCP API. Operations are performed under a HestiaCP user/API key you supply.
Use when: your DNS lives inside HestiaCP and you want to centralize control via PUQcloud.
You can run both modules side-by-side in different Server Groups (handy for migrations or prod/staging separation).
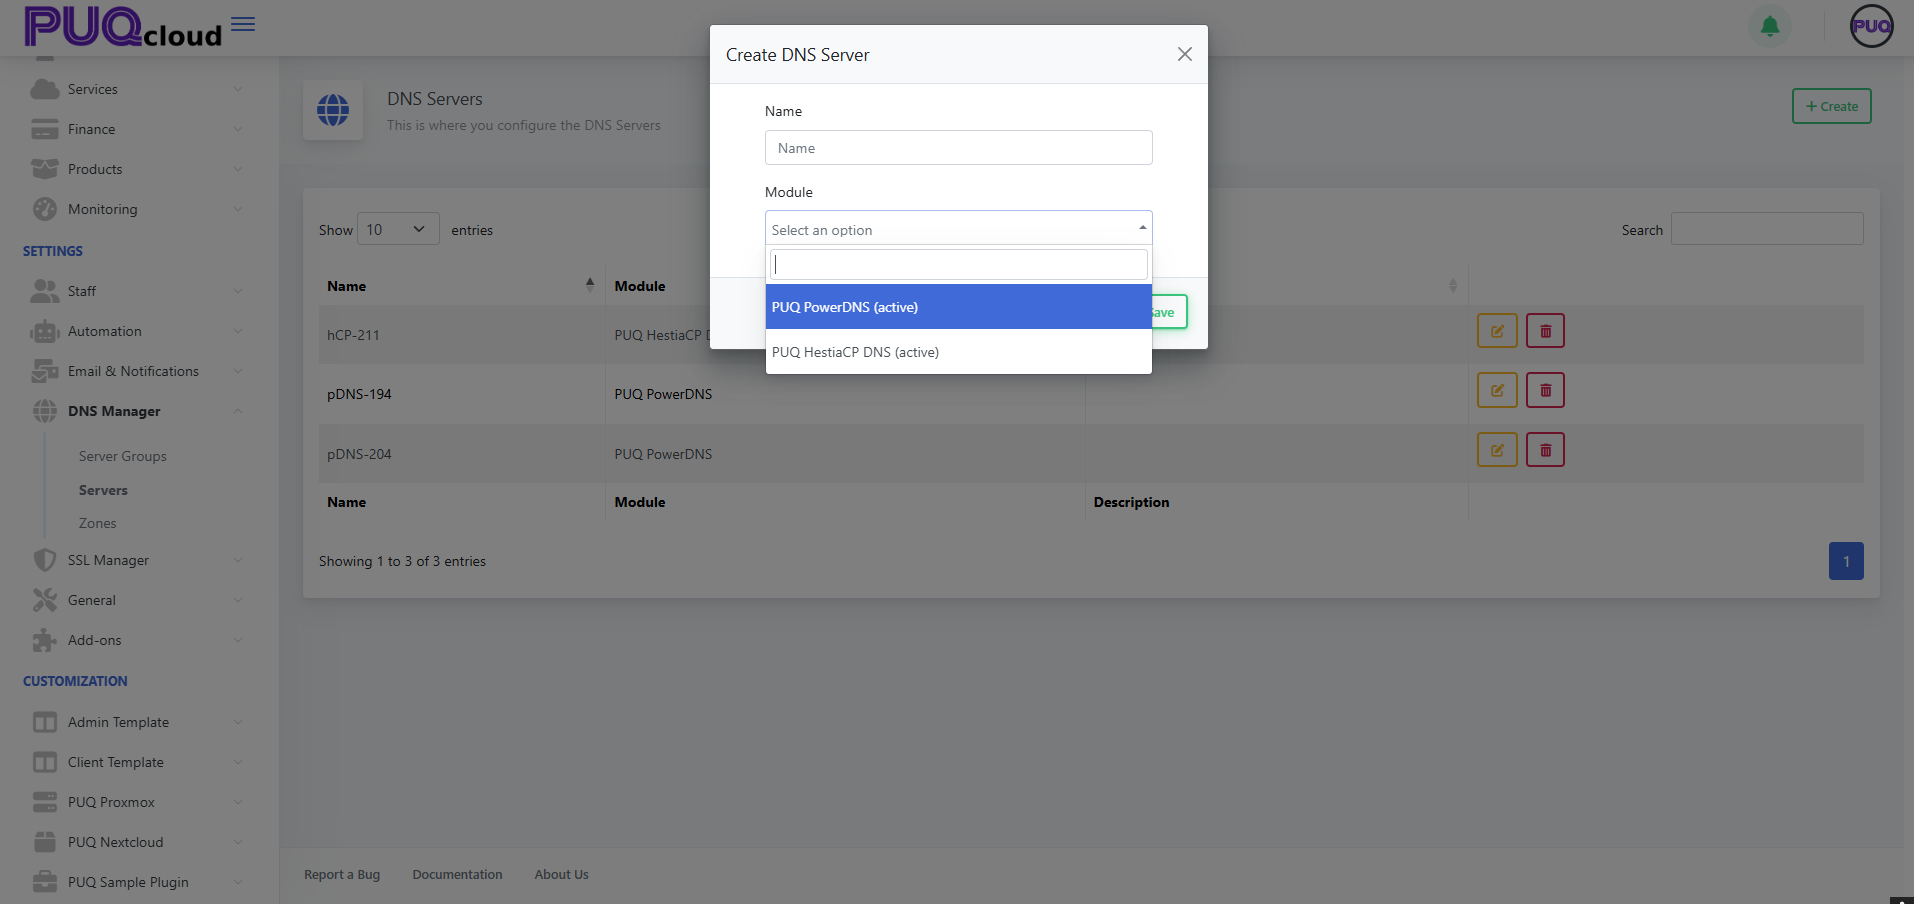
3) Create a server — step by step
-
Open Servers and click + Create.
-
Enter a Name (a friendly label).
-
Choose Module: PUQ PowerDNS or PUQ HestiaCP DNS.
-
Click Save — you’ll land on the edit page with connection fields.
4) Configure PowerDNS (PUQ PowerDNS)
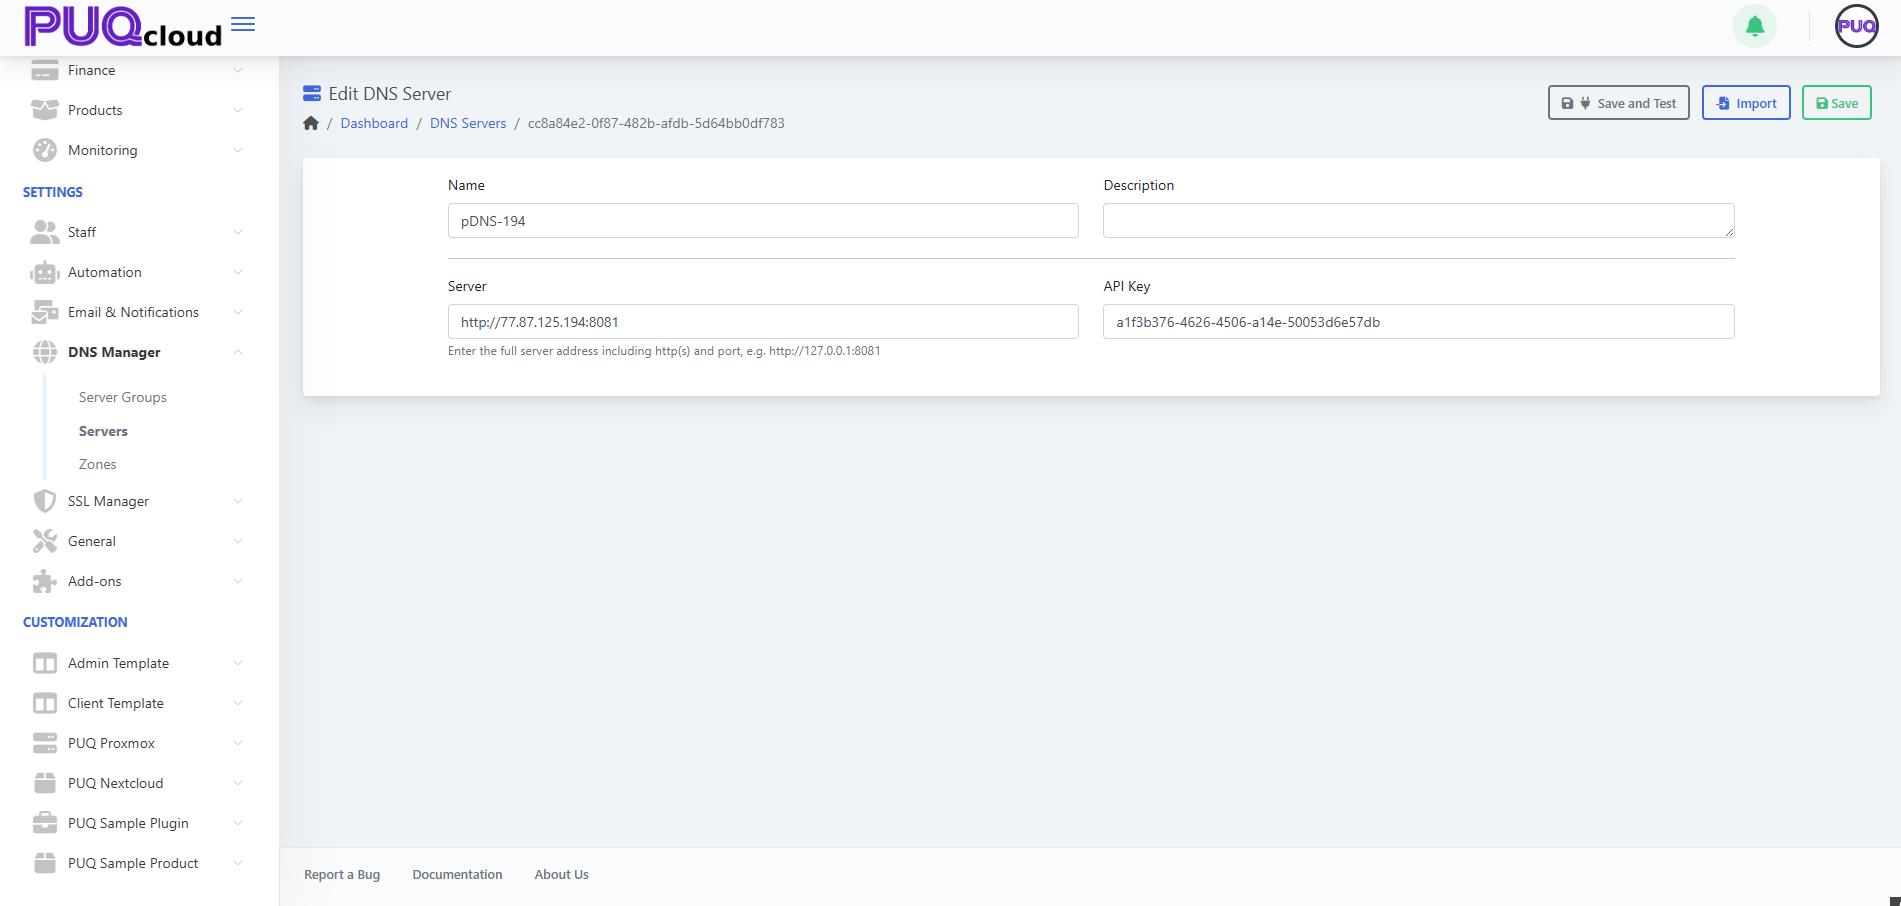
Fields
| Field | What to enter | Example / Tip |
|---|---|---|
| Name | Any friendly name | pDNS-194 |
| Description | Optional note | PowerDNS on dev node |
| Server | Full API URL incl. protocol & port | http://203.0.113.194:8081 or https://dns.example.com:8081 |
| API Key | PowerDNS API token (api-key= in config) |
Create a dedicated key for PUQcloud only |
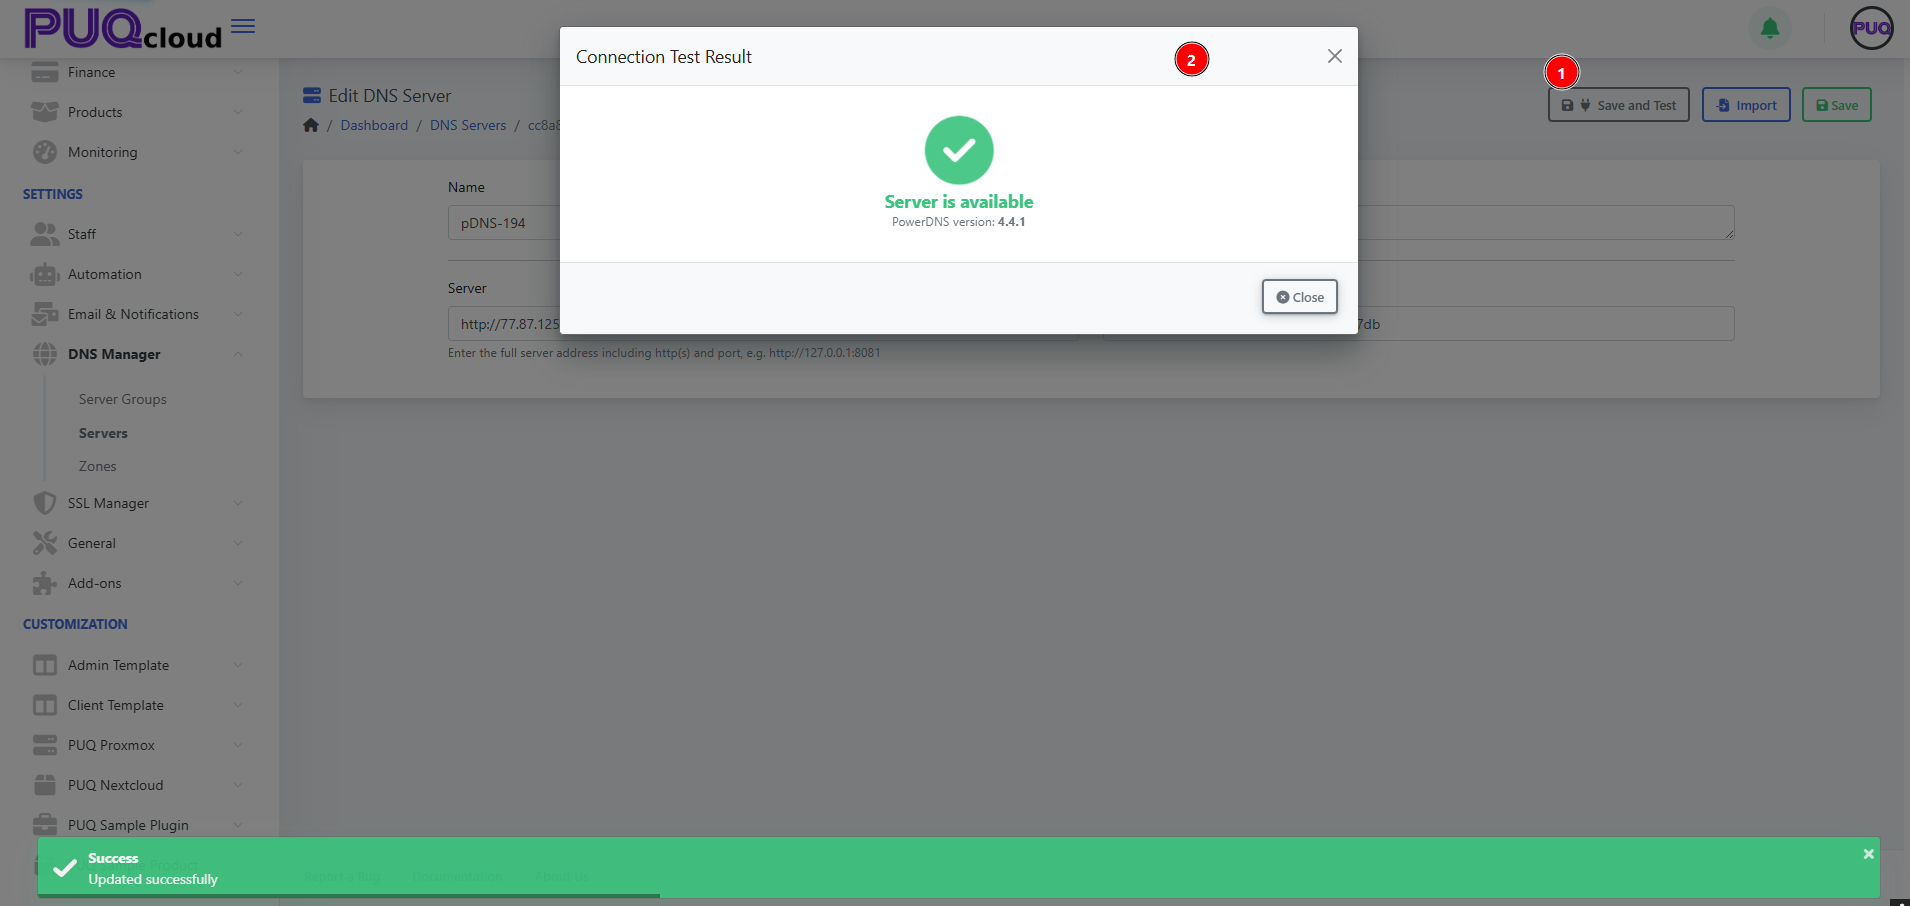
Buttons
-
Save and Test — checks connectivity and displays the PowerDNS version.
-
Import — pulls existing zones from this server (useful on first attach).
-
Save — persists the settings.
Security tips
-
IP-restrict the PowerDNS API to your PUQcloud host.
-
Prefer HTTPS to the API, use a separate API Key with least privilege.
-
Watch PowerDNS logs during imports or bulk changes.
5) Configure HestiaCP (PUQ HestiaCP DNS)
After selecting PUQ HestiaCP DNS, the edit form shows the HestiaCP API connection fields (API URL + authentication parameters according to your HestiaCP setup — token or user/password).
Recommendations:
-
Create a dedicated HestiaCP user/API key for PUQcloud.
-
Confirm the API is enabled and reachable from the PUQcloud host.
-
After Save and Test, verify by creating a test zone under Zones.
6) Add the server to a group
Once the server tests OK, go to Settings → DNS Manager → Server Groups → Edit and add it under DNS Servers for the target group.
Then click Reload All Zones to deploy all group zones onto this newly attached node.
7) Typical scenarios
A. PowerDNS cluster for the ACME tech zone
-
Add 2+ PowerDNS servers (in Servers), test each with Save and Test.
-
Create a group PowerDNS (devns), set NS Domains (e.g.,
devns1.example.com,devns2.example.com), and attach both servers. -
Delegate those NS at your registrar.
-
Create the tech zone
acme.example.comin this group. -
In SSL Manager → Certificate Authorities, select this tech zone as DNS Zone. Done.
B. Migrating from HestiaCP to PowerDNS
-
Connect your PowerDNS servers.
-
Import zones from HestiaCP (use the Import button on PowerDNS or Zones → Export / Import).
-
Create a new Server Group for PowerDNS and Move To switch zones into it.
-
After validation, change domain delegation at the registrar to the new NS.
8) Best practices
-
Redundancy: attach at least two servers to each group (ideally different regions/ASNs).
-
Naming: keep labels clear —
pDNS-194,pDNS-204,hCP-211. -
Always run Save and Test after changing connection params.
-
Keep zone TTL 300–600s during active changes/migrations.
-
Lock down APIs by IP allowlists and use HTTPS where possible.
-
Export zones as backups before bulk operations.
9) Troubleshooting
| Symptom | Likely cause | Fix |
|---|---|---|
| Save and Test fails | Wrong URL/port/key or firewall blocks access | Verify http(s)://host:port, API key, and allow the PUQcloud IP |
| Zone import incomplete | API/user lacks permissions | Grant appropriate rights or use Zones → Import |
| Group zones don’t deploy to the new server | Server not added to Server Group | Add it, then Reload All Zones |
| Different answers from NS nodes | One node out of sync or offline | Check health/logs, Reload All Zones, restore connectivity |