Create and Manage a Product
PUQcloud Panel
Order Now | Download | FAQ
This guide explains how to create, configure, and maintain Products in the PUQcloud Panel, including pricing, attributes, options, and module settings.
Overview
A Product is what your customers buy. Prices, options, and the provisioning module all live under the product.
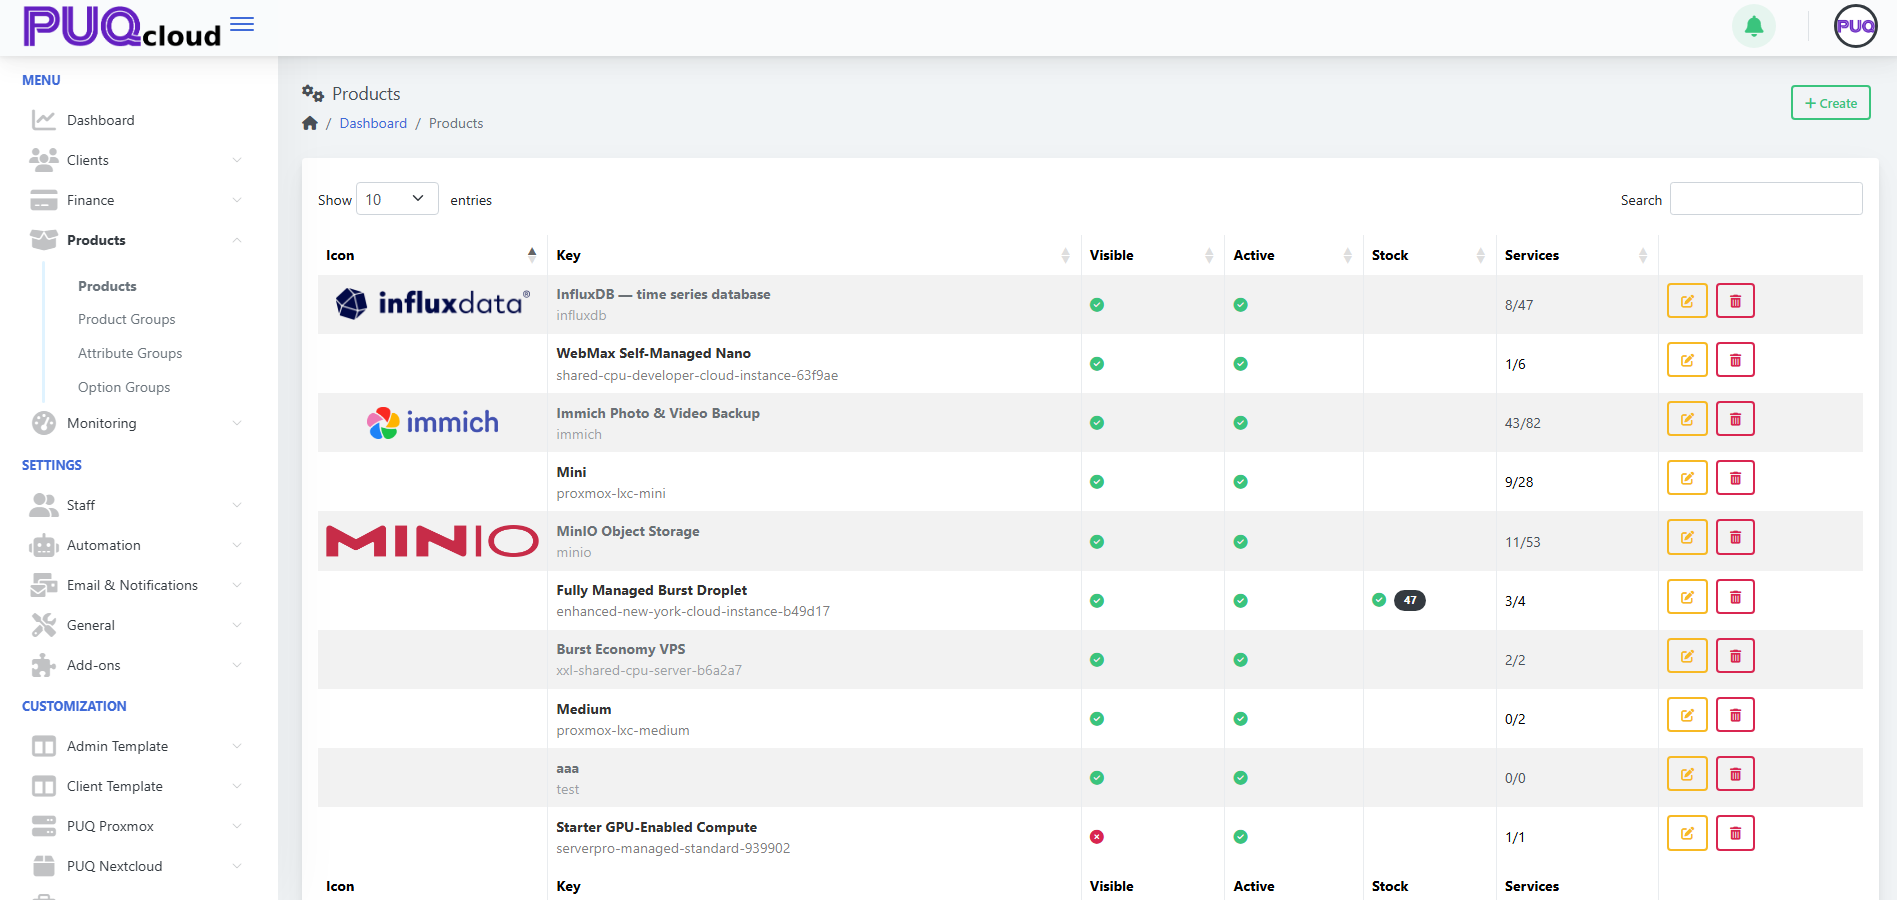
Products List
From Products → Products you’ll see: Icon, Key, Visible, Active, Stock, Services, and actions (Edit, Delete). Use Search to filter.
(Screenshot reference: Products list view)
Actions
-
+ Create — start a new product.
-
Edit — open the product tabs (General, Images, Pricing, Attributes, Options, Module).
-
Delete — remove the product (does not remove existing services already provisioned).
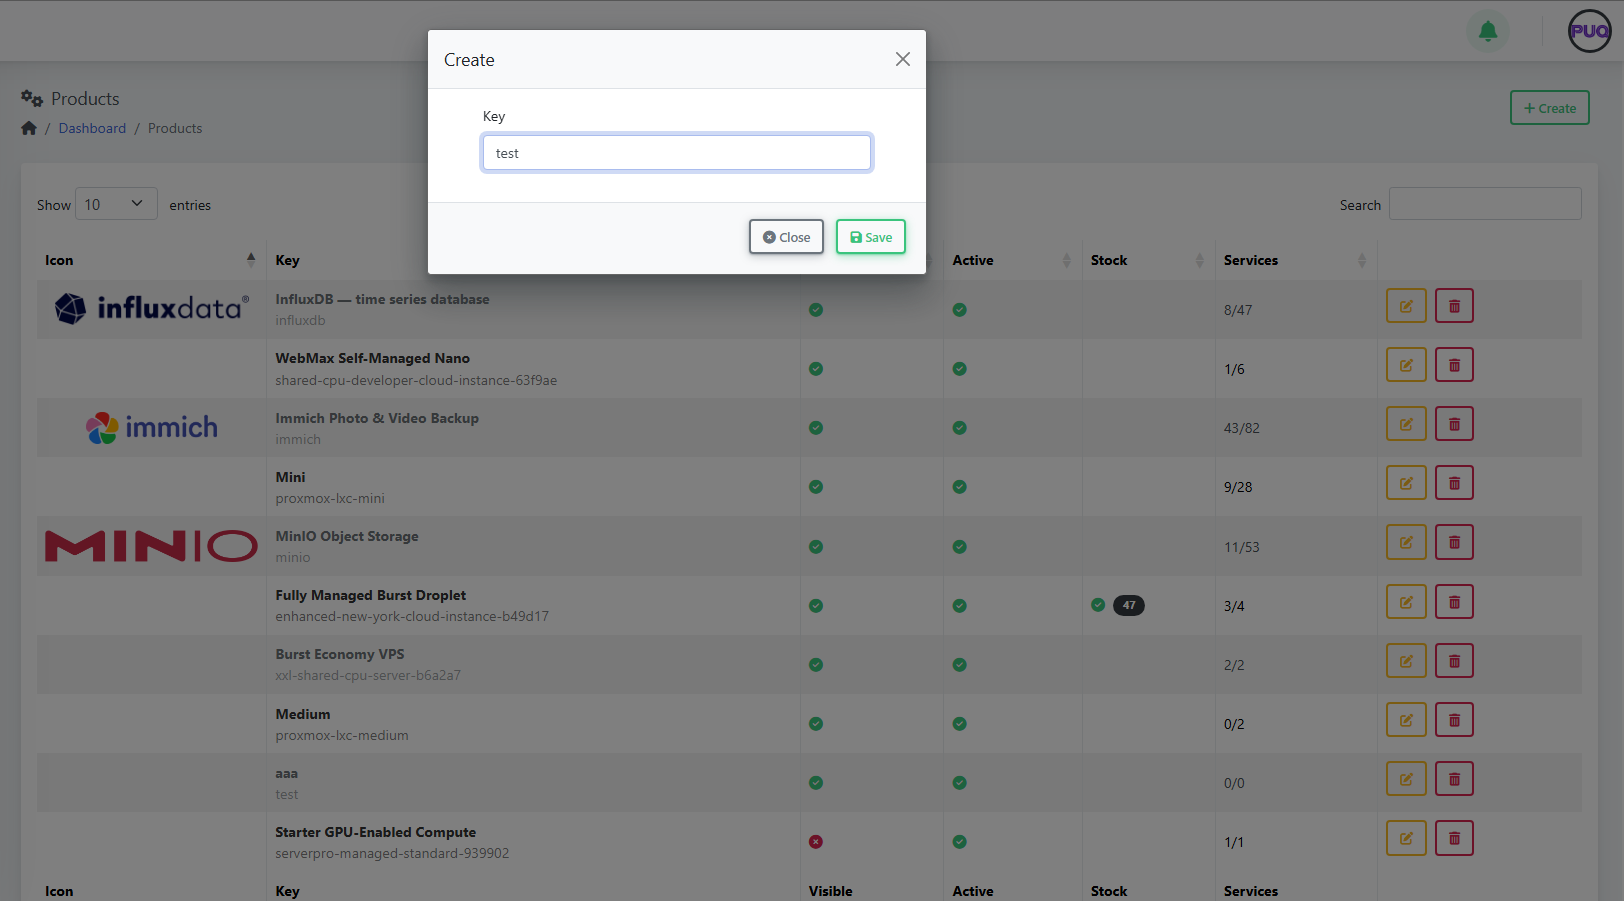
Create a Product
-
Click + Create.
-
Enter a unique Key (e.g.,
influxdb). -
Click Save — the product opens on the General tab for further setup.
(Screenshots: Create Product modal → Product General tab)
Configure the Product
Use the tabs across the top to complete setup.
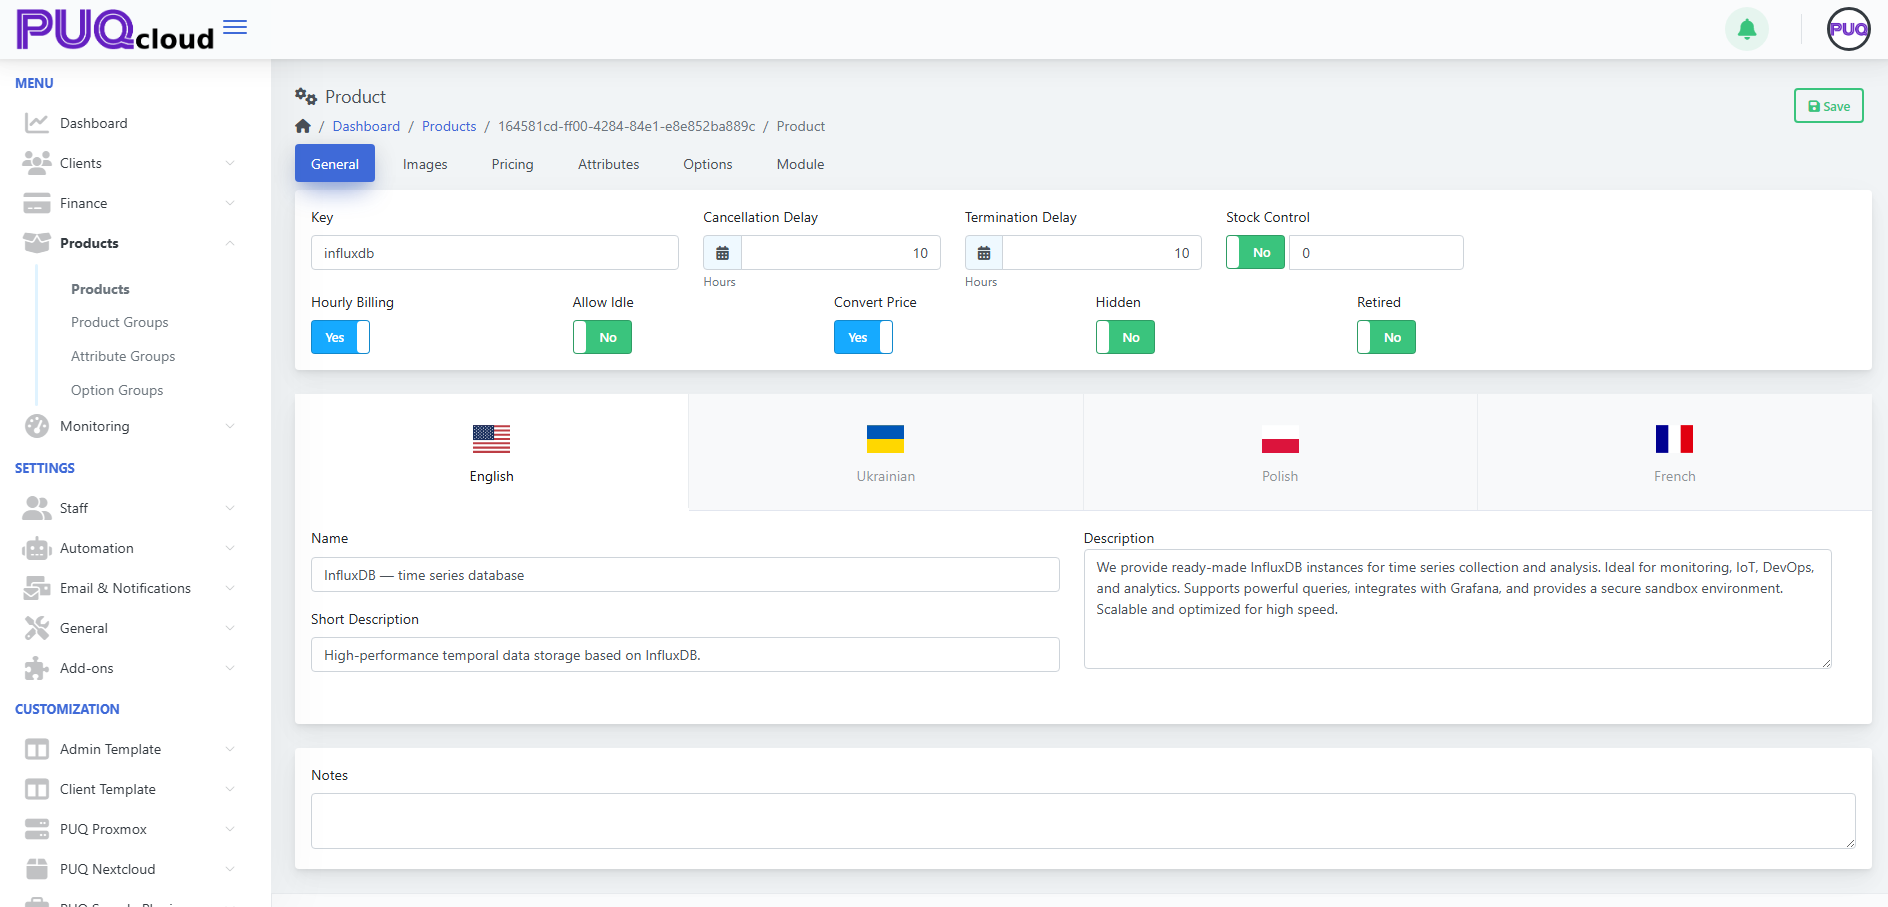
1) General
Fields you’ll see:
-
Key — internal identifier (read-only after creation).
-
Hourly Billing — enable if the product can be charged hourly.
-
Allow Idle — allow an "idle" price tier.
-
Convert Price — auto-convert base currency rates to other currencies.
-
Cancellation Delay / Termination Delay (Hours) — grace windows before cancel/terminate executes.
-
Stock Control — enable and set quantity to track stock.
-
Hidden — hide from storefront/catalog.
-
Retired — prevent new purchases while keeping existing services.
-
Localized content — Name, Short Description, Description per language.
-
Notes — internal notes for admins.
Click Save.
(Screenshot reference: Product → General tab)
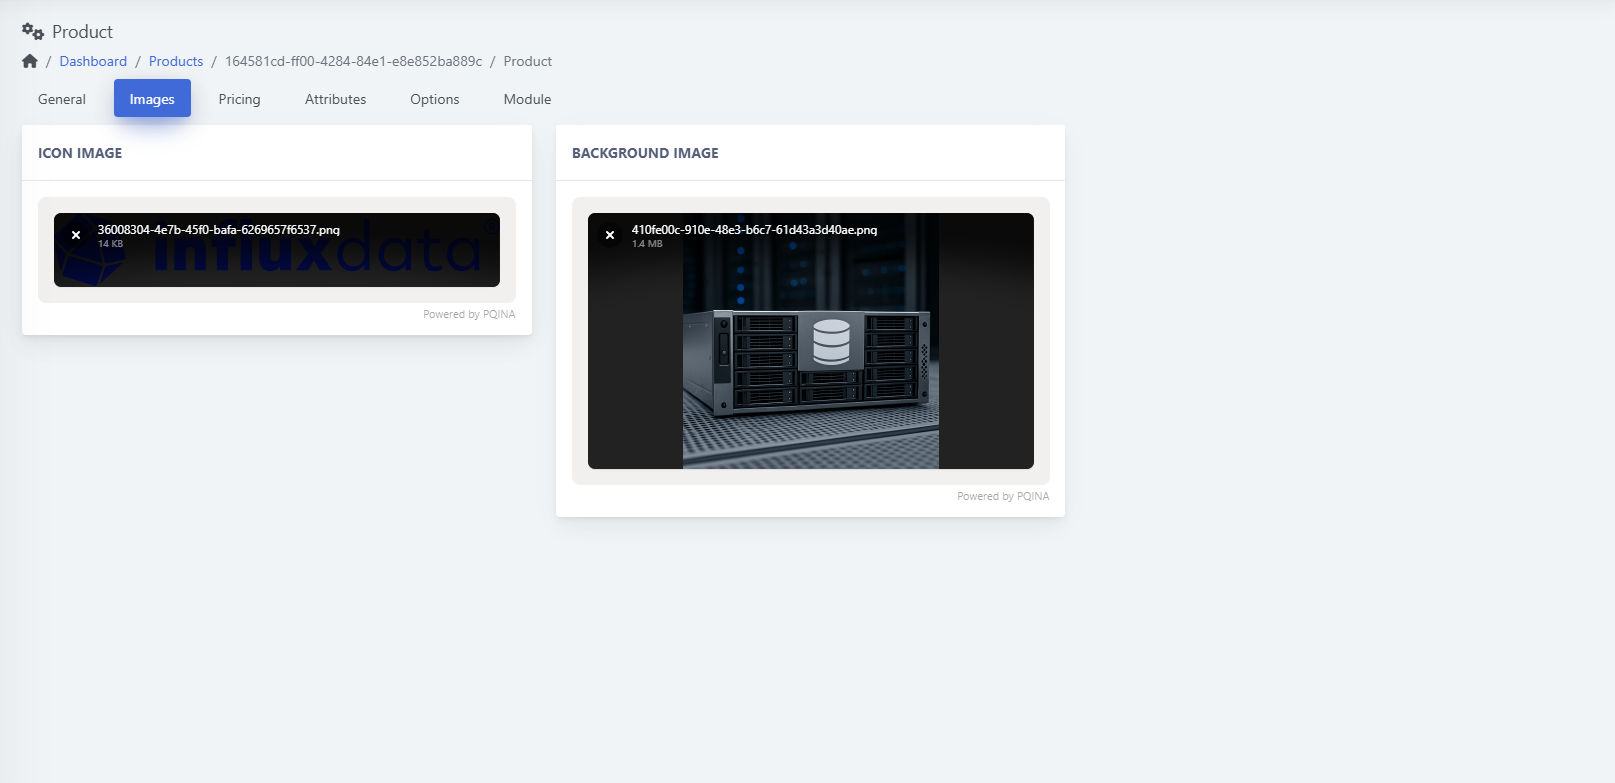
2) Images
-
Icon image — small logo shown in listings.
-
Background image — larger visual used on product pages/cards.
Drag & drop or click to upload, then Save.
(Screenshot reference: Product → Images tab)
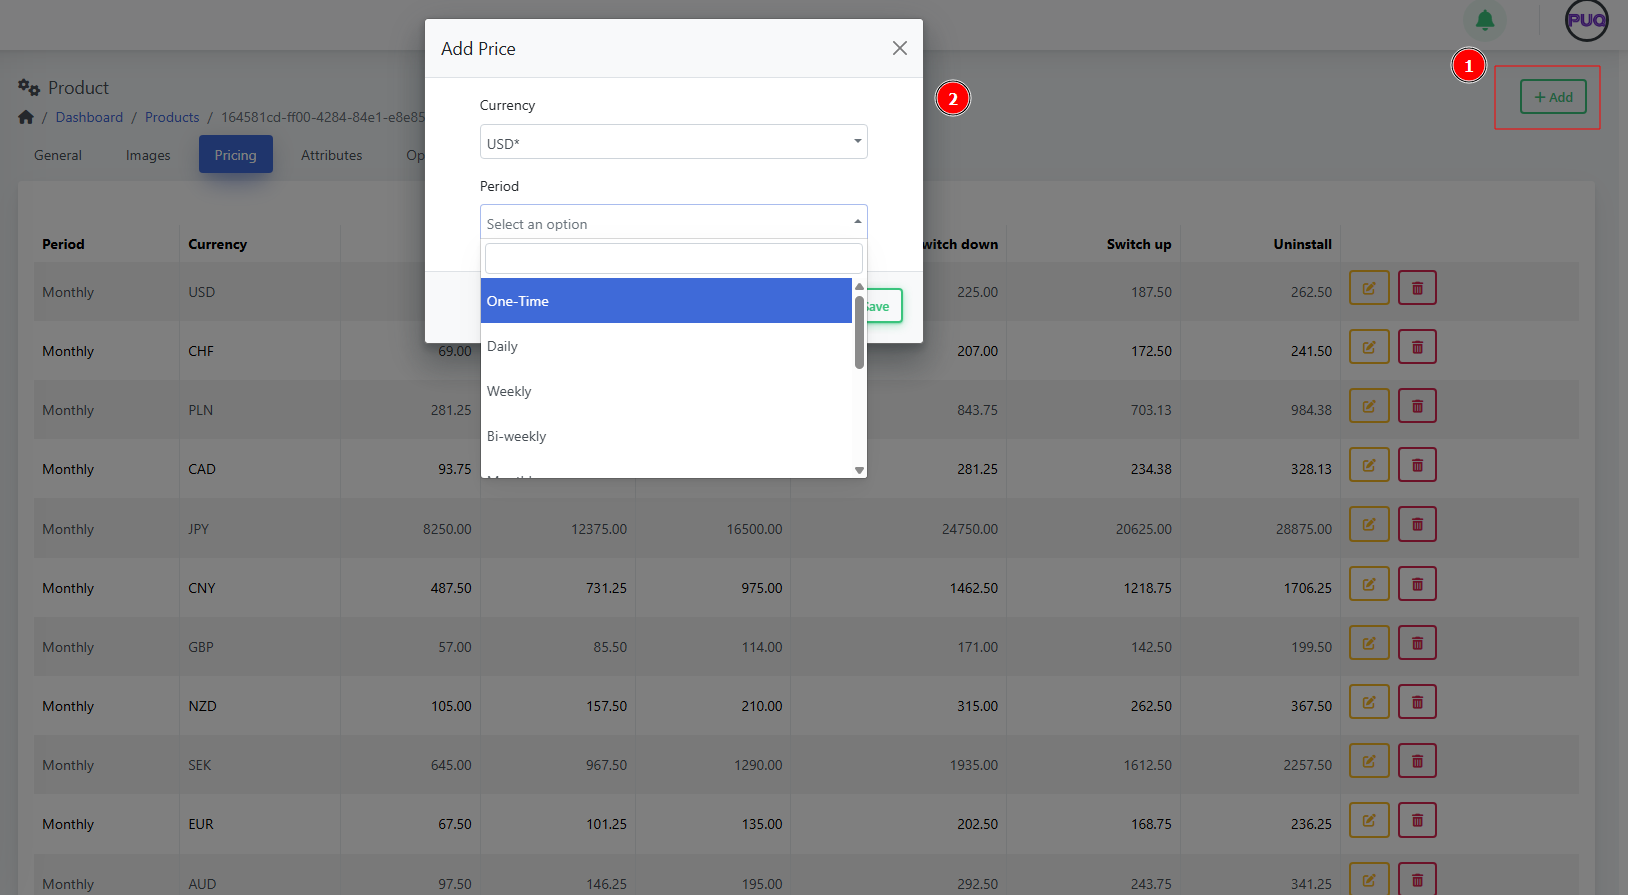
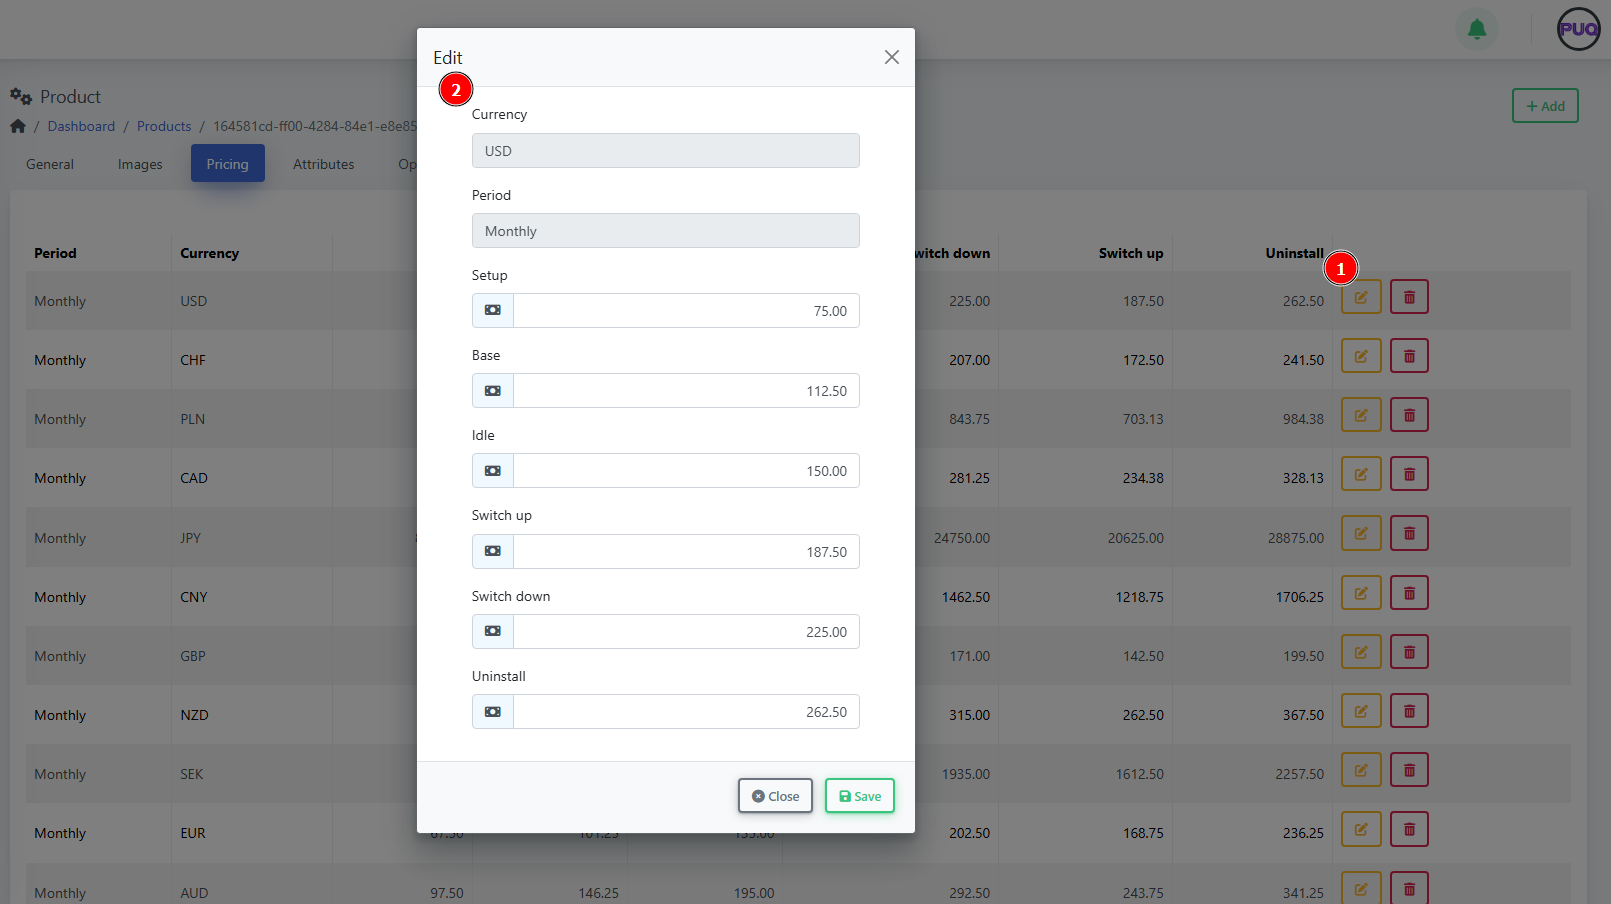
3) Pricing
The table shows Period, Currency, Setup, Base, Idle, Switch down, Switch up, Uninstall with Edit/Delete actions.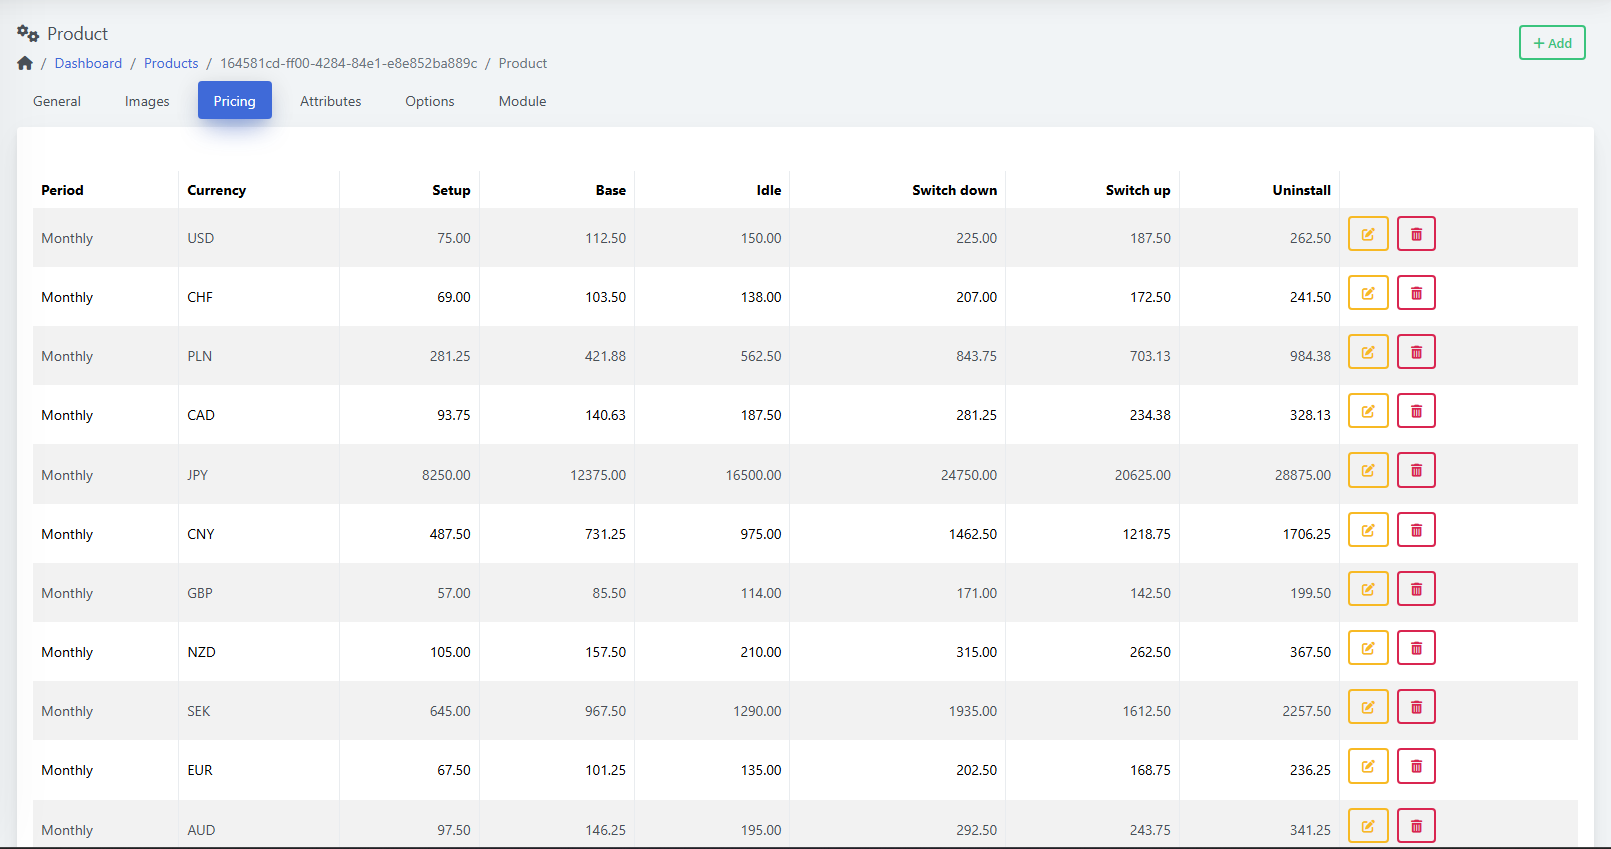
Add a price
-
Click + Add.
-
Choose Currency and Period (One‑Time, Daily, Weekly, Bi‑weekly, Monthly, etc.).
-
Enter amounts as needed (Setup, Base, Idle, Switch up/down, Uninstall).
-
Save.

Edit a price
-
Click the Edit icon on a row, adjust amounts, Save.

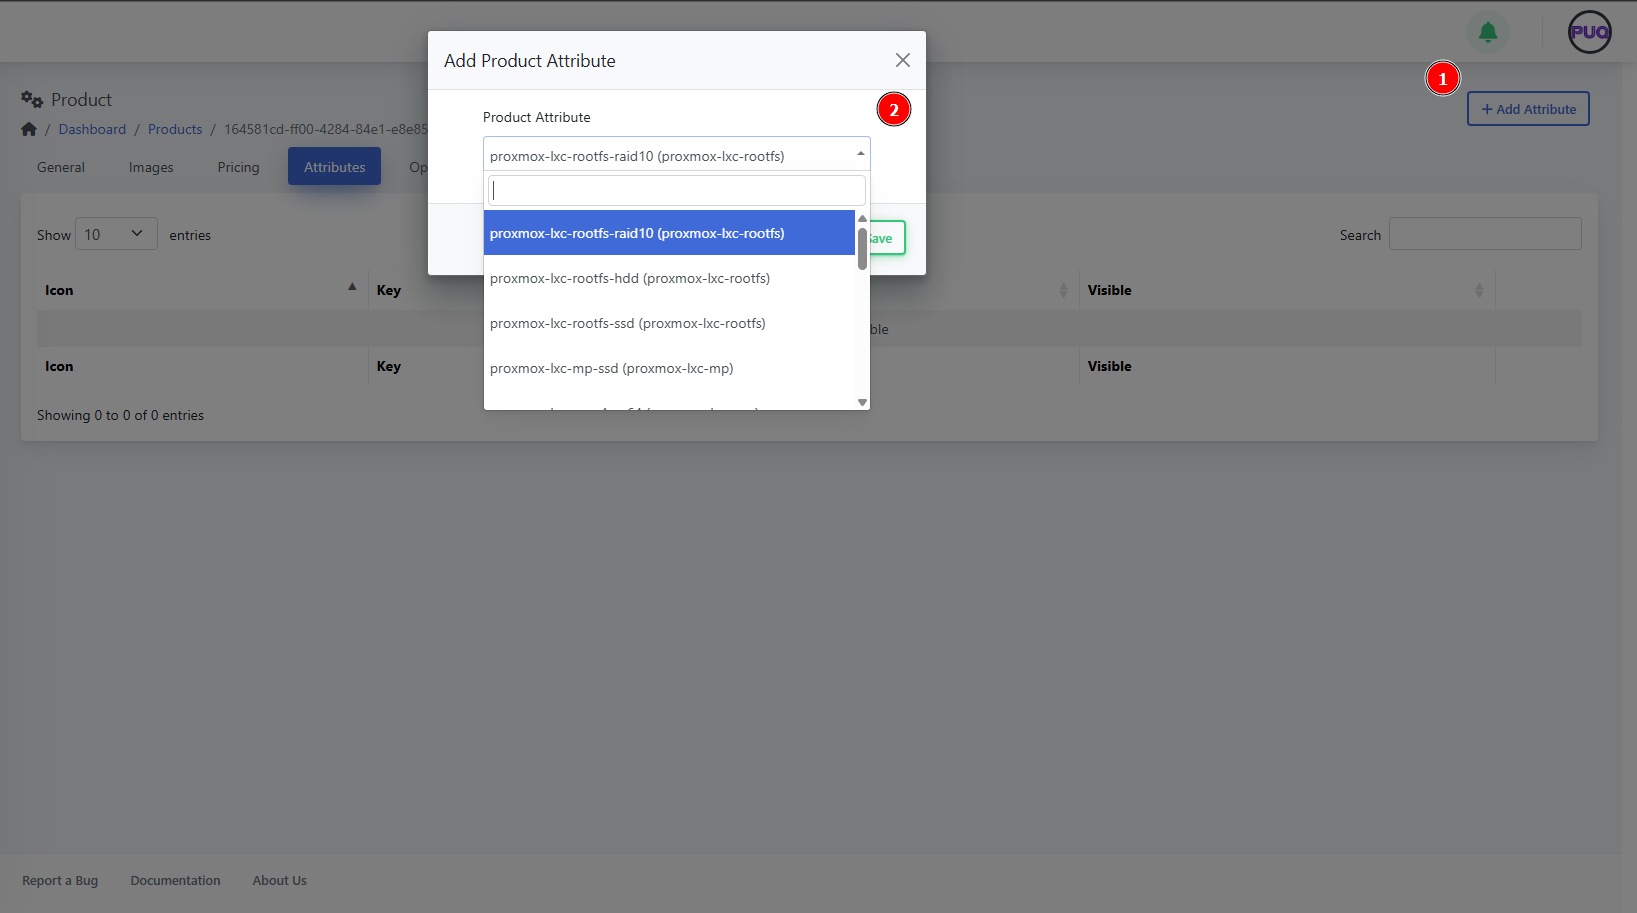
4) Attributes
Attach predefined attributes that describe or parameterize the product (often used by modules or displayed to customers).

Add an attribute
-
Open Attributes and click + Add Attribute.
-
Pick an item from the dropdown list (e.g.,
proxmox-lxc-rootfs-raid10). -
Save.
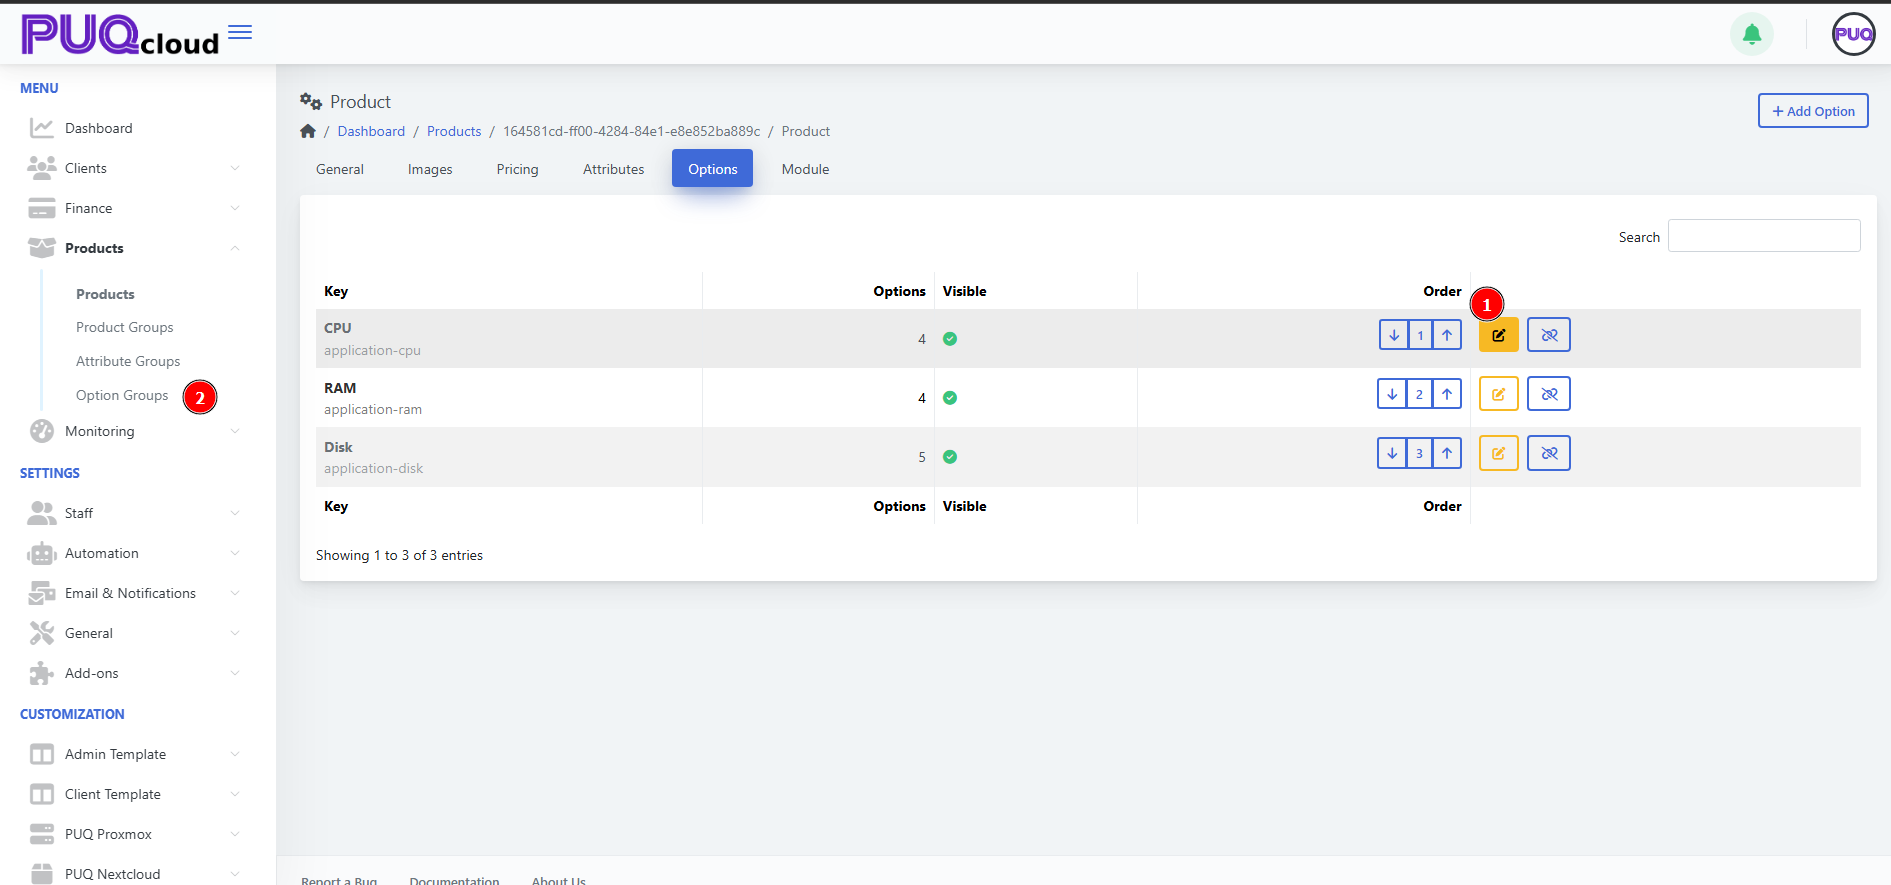
5) Options
Link option groups like CPU, RAM, Disk to let customers configure variants during order.
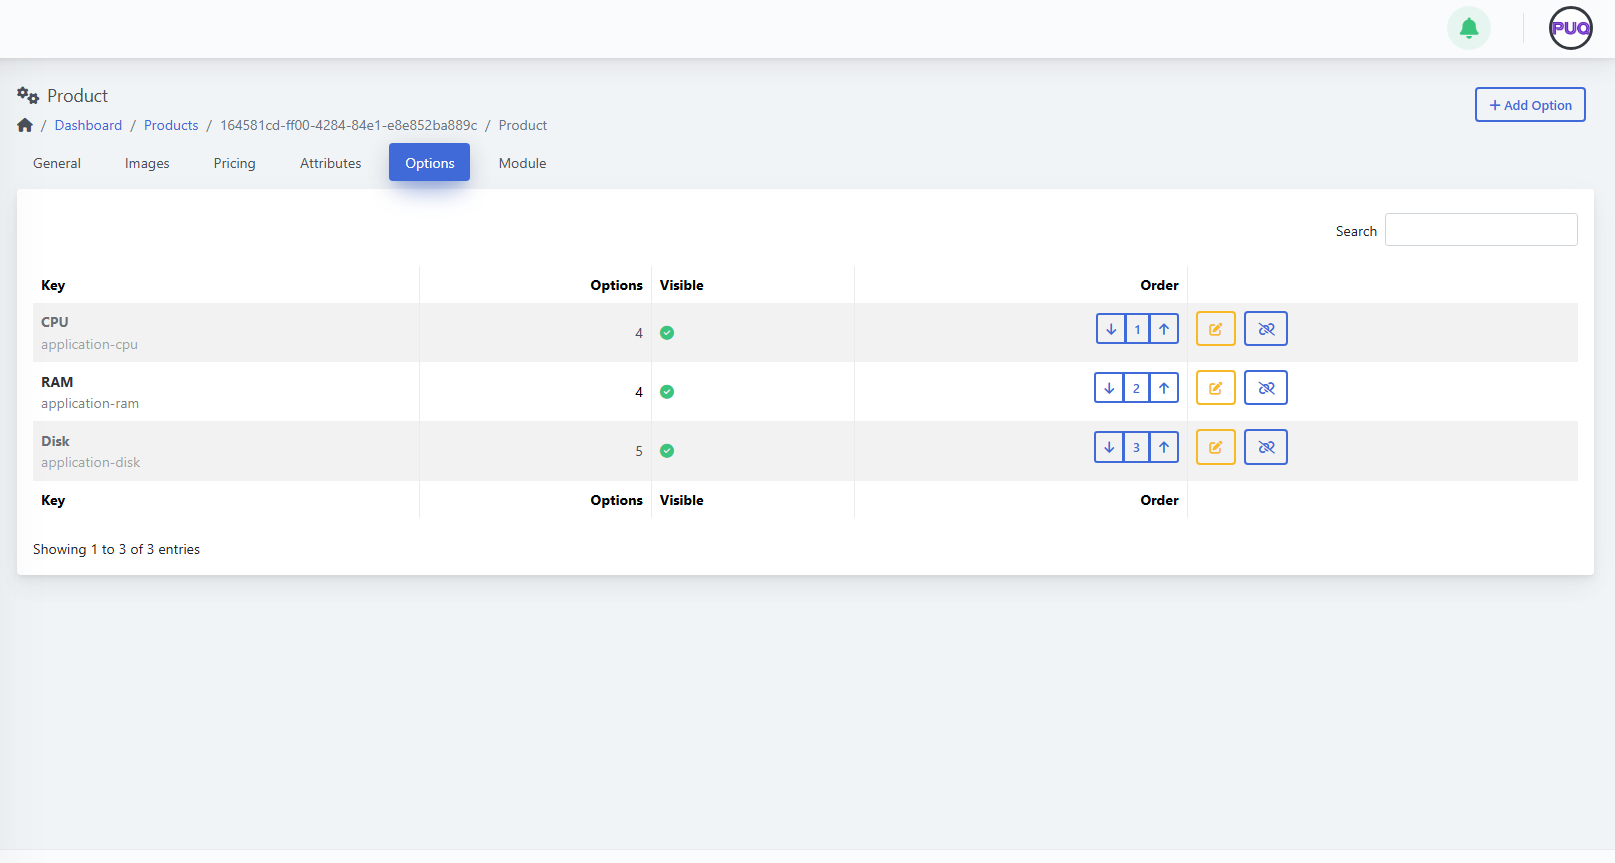
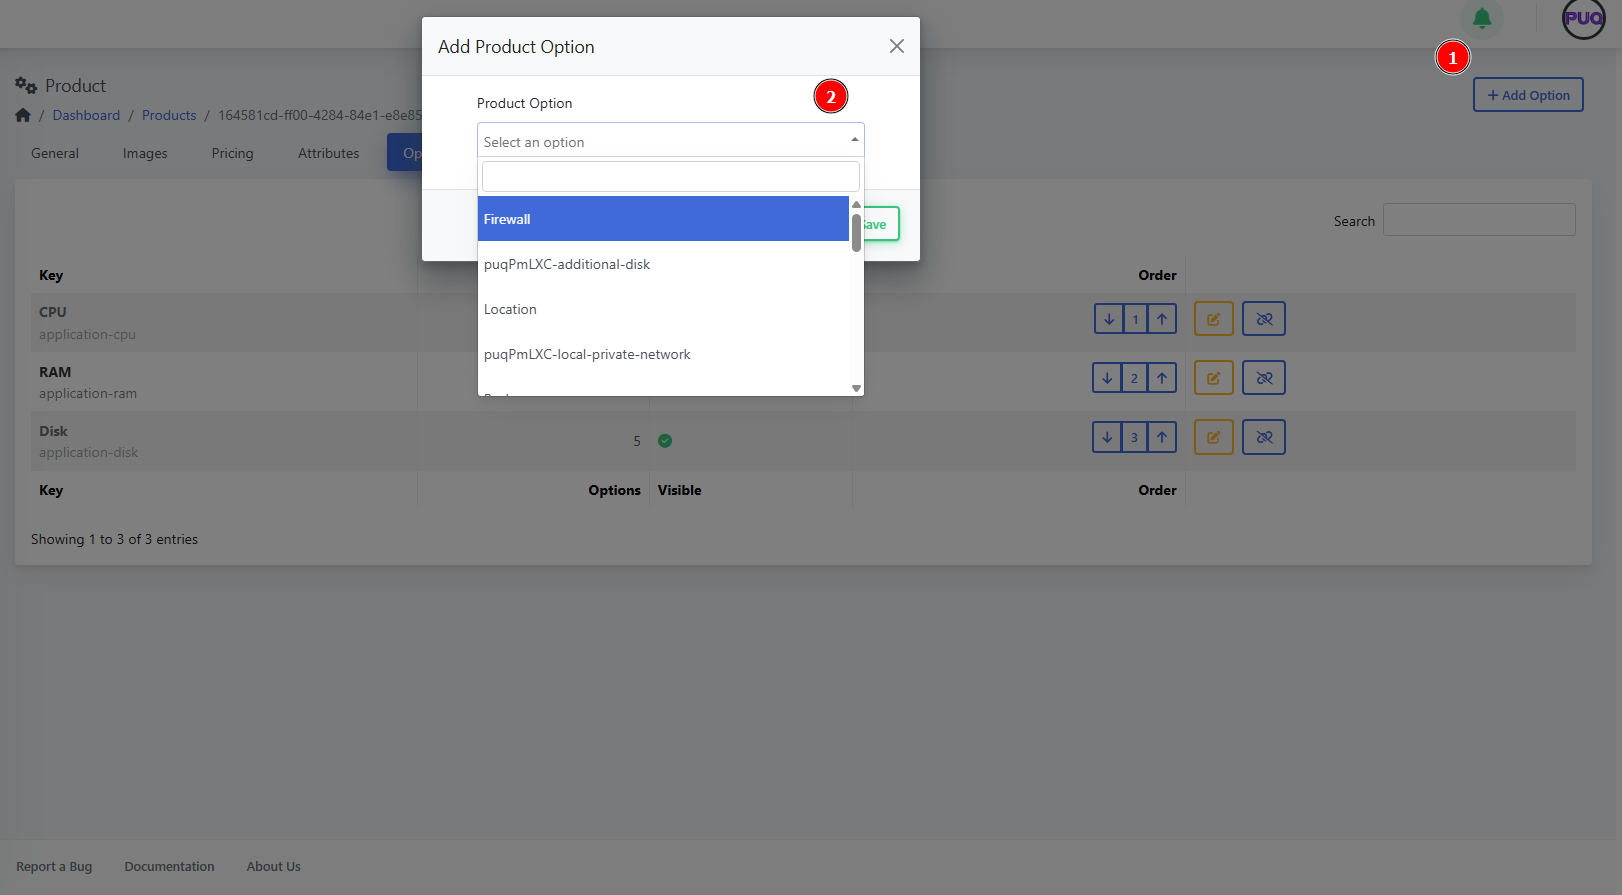
Add an option group
-
Open Options and click + Add Option.
-
Select a group (e.g., Firewall, Location, Additional Disk) and Save.
Manage option groups
-
Order — use the up/down arrows to change display order.
-
Edit — open the option group editor.
-
Hide/Show — toggle visibility for this product.
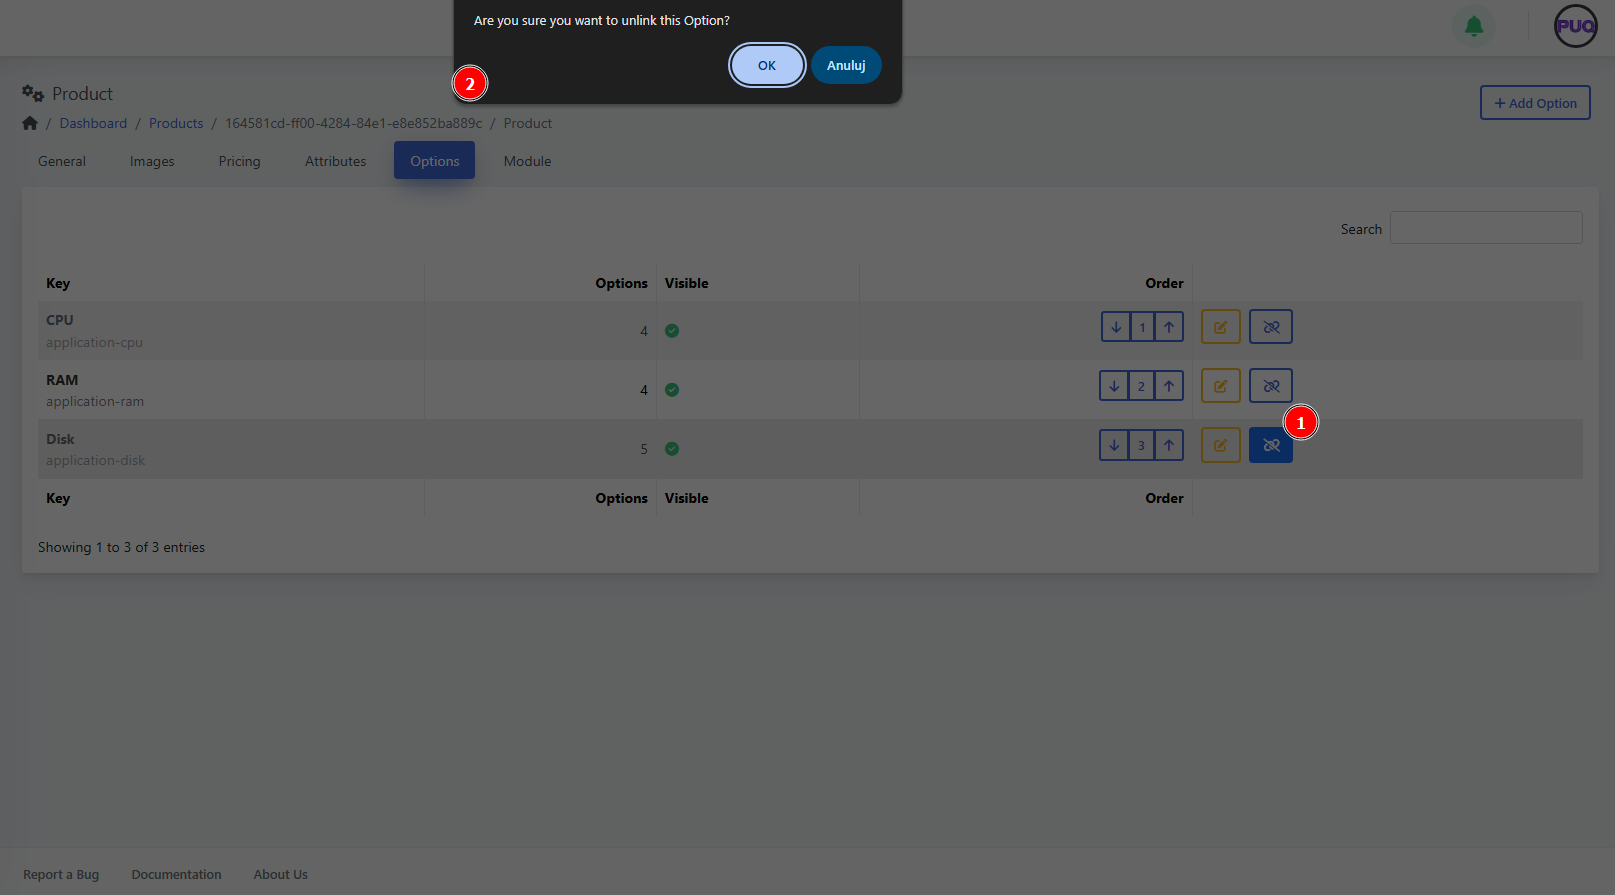
-
Unlink — detach the group from this product (confirm in the dialog).
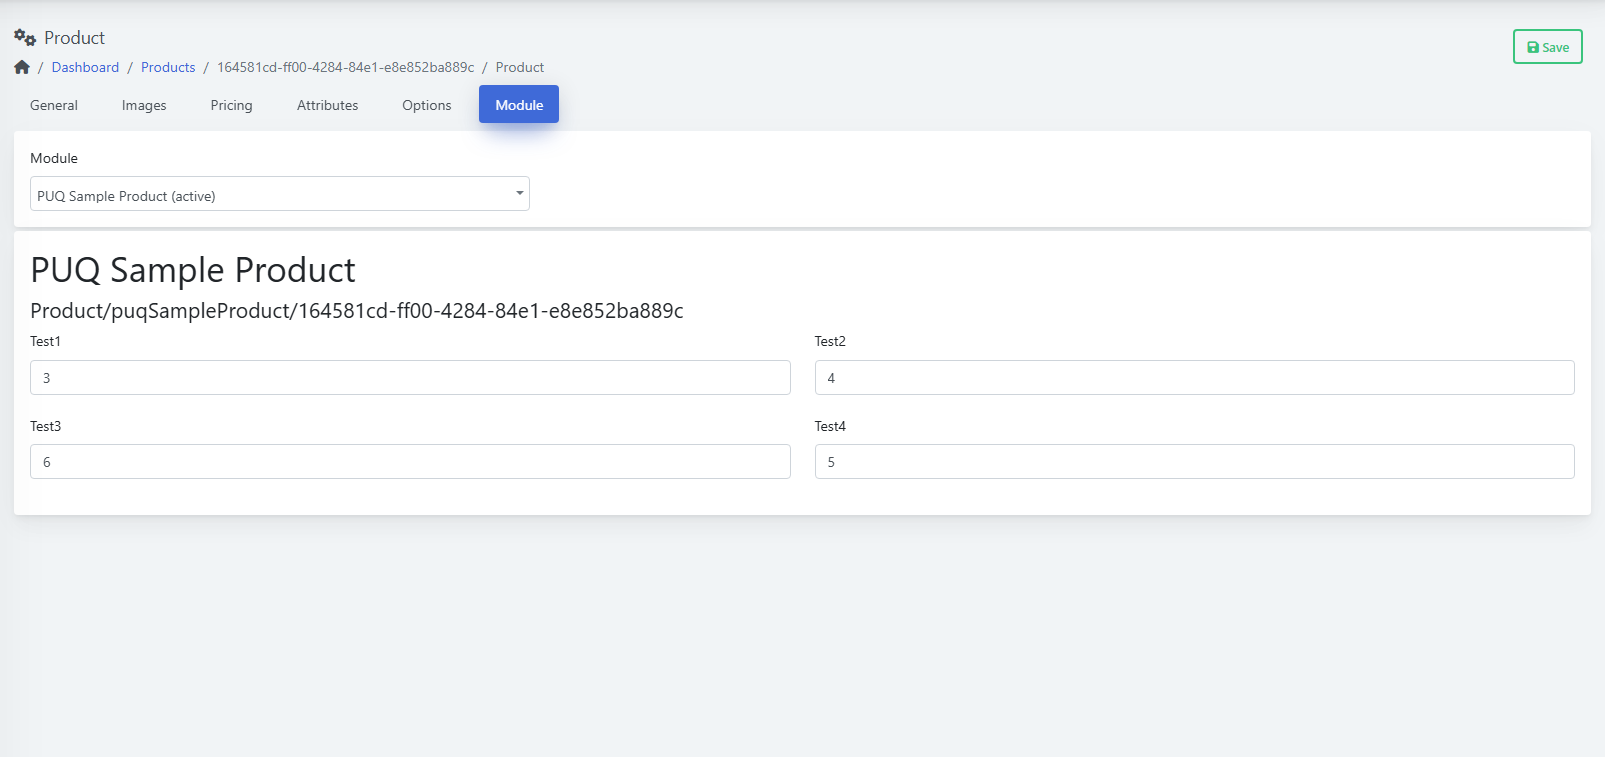
6) Module
Choose the provisioning module and fill in any required fields. Each module exposes its own parameters.
-
Go to Module.
-
Pick the Module from the dropdown (e.g., PUQ Sample Product (active)).
-
Complete the module fields.
-
Click Save.
(Screenshot reference: Module tab)
Manage Visibility & Lifecycle
Best Practices
Troubleshooting
-
Product not visible on site → Check Hidden and Retired toggles; ensure at least one Price exists.
-
Options missing at checkout → Verify the groups are linked and visible for this product.
-
Provisioning fails → Confirm Module is selected and all required fields are filled; review module logs.
-
Wrong currency shown → Check the Pricing table and Convert Price setting.