Manage Notification Senders in the Admin Area
PUQcloud Panel
Order Now | Download | FAQ
Use this guide to add, edit, and configure the channels your system uses to send emails/alerts (PHP mailer, SMTP, Bell, etc.).
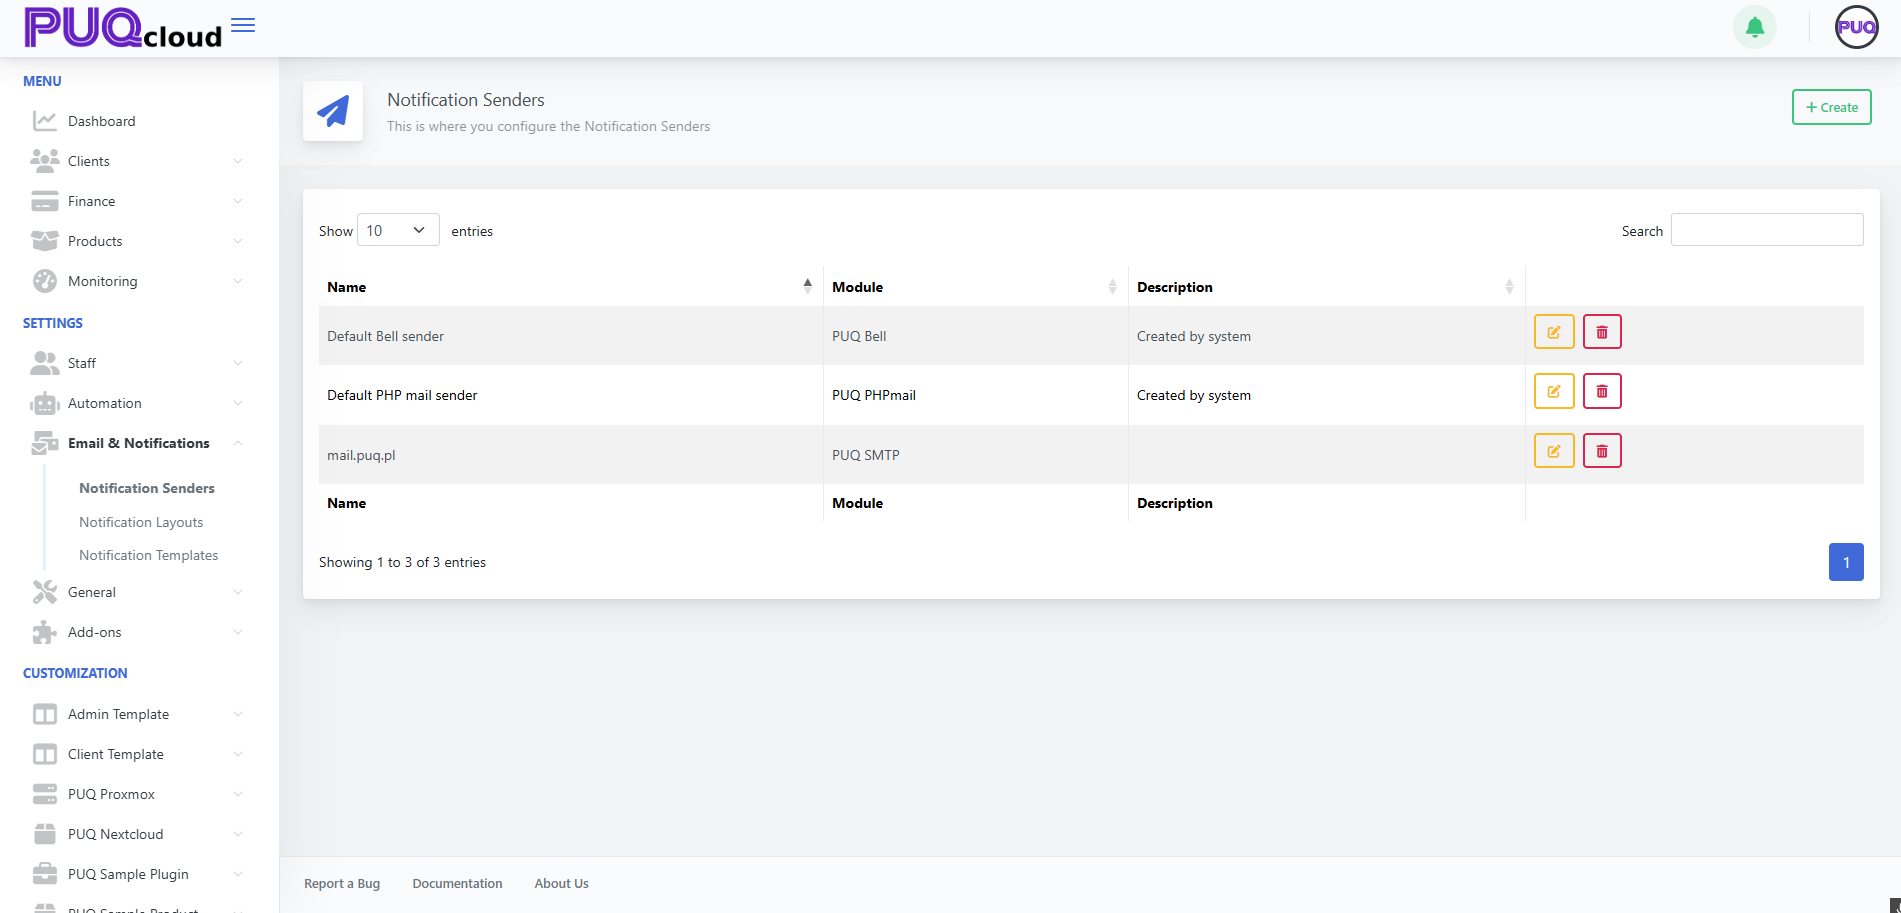
Open the Notification Senders page
-
In the Admin Area, go to Email & Notifications → Notification Senders.
-
You’ll see all existing senders with their Module (delivery method) and quick actions.
Notification Senders list with Edit/Delete actions.
Understand sender types (Modules)
When creating a sender you’ll choose a Module:
-
PUQ PHPMailer — uses PHP mail; simple to set up, limited deliverability controls.
-
PUQ SMTP — sends through your mail server (recommended for deliverability).
-
PUQ Bell — internal “bell”/in-app notifications (no email).
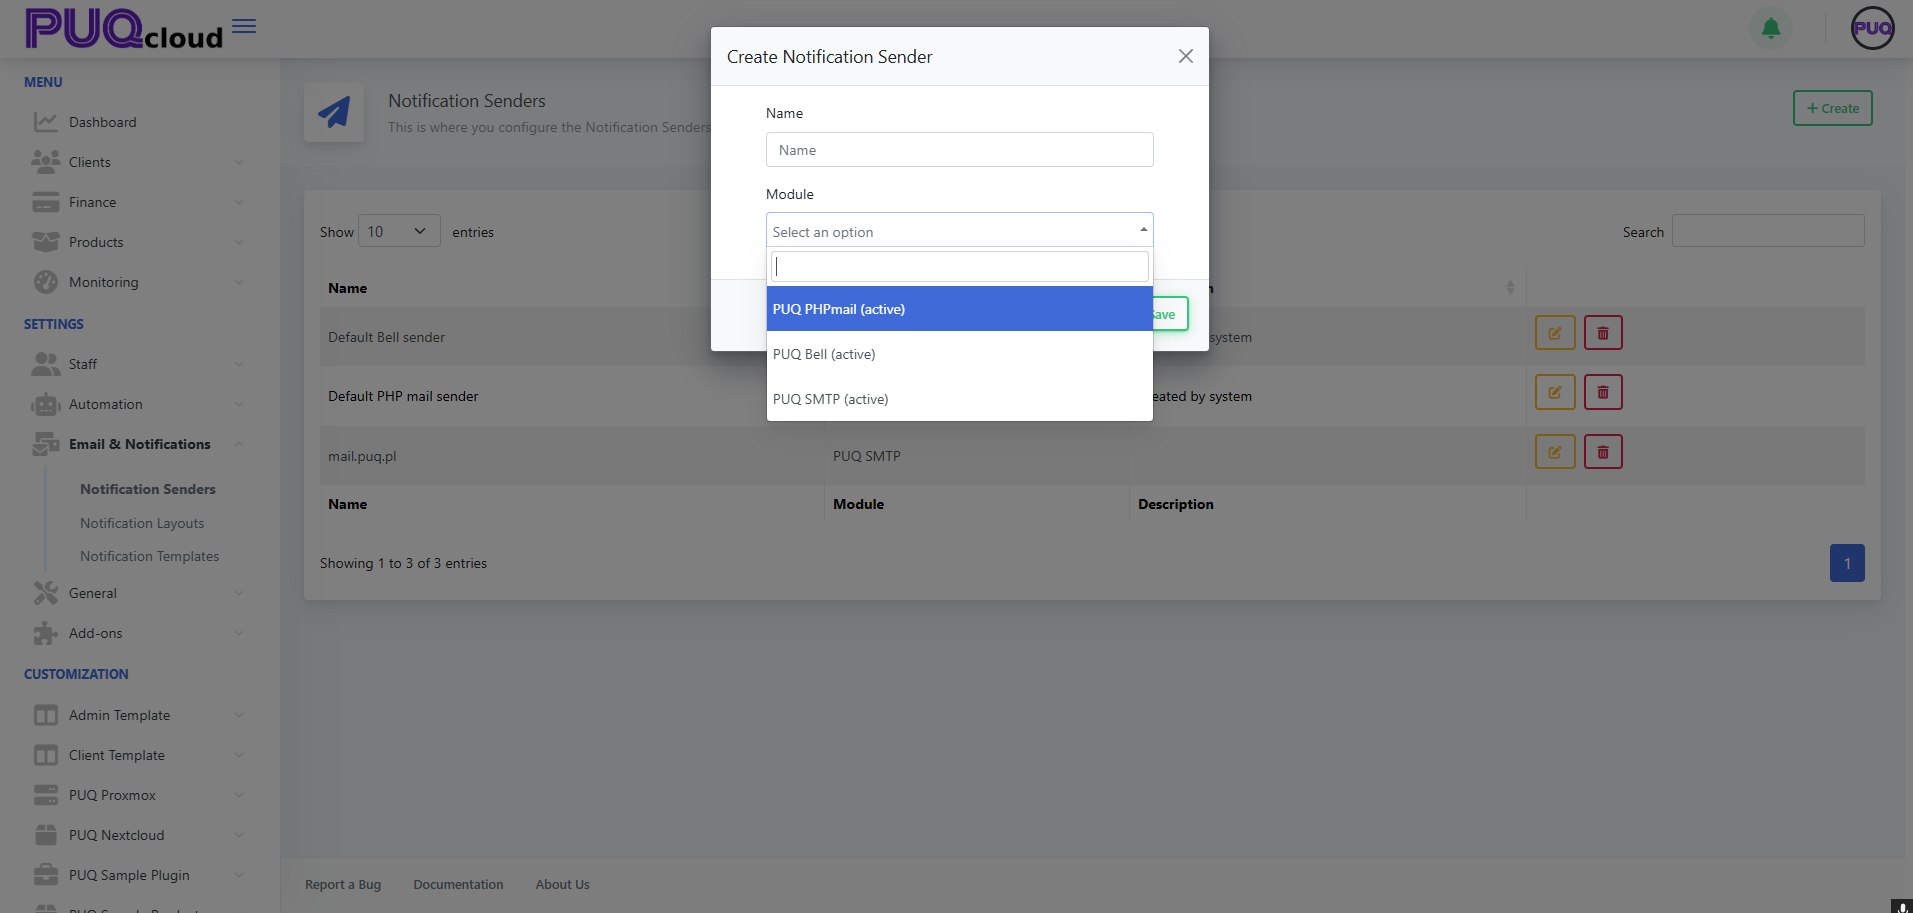
Create a new sender
-
Click + Create (top-right).
-
In the modal, fill Name (e.g., “Support SMTP”) and choose a Module.
“Create Notification Sender” modal with Module dropdown.
Tip: Create one sender per use case (e.g., “System Alerts (SMTP)”, “Marketing (SMTP)”, “In-app Bell”).
Configure SMTP details (if you chose PUQ SMTP)
After saving the modal, you’ll land on the sender’s settings page. Fill the fields:
-
Name / Description — friendly label for admins.
-
Email — the “From” address (often must be a verified mailbox/domain).
-
Sender Name — the “From name” (e.g., “PUQ Cloud”).
-
Server — SMTP host (e.g.,
mail.example.com). -
Port — usually 465 (SSL) or 587 (TLS).
-
Encryption — SSL/TLS/None per your provider.
-
Username / Password — mailbox credentials.
Click Test Connection to verify, then Save.
SMTP sender edit form with Test Connection button.

Deliverability tips
• Use a dedicated subdomain (e.g., mail.example.com).
• Set up SPF, DKIM, and DMARC where you host DNS.
• Match the Email domain with the authenticated SMTP domain.
Edit or remove a sender
-
From the list, click ✏️ Edit to update any field and Save.
-
Click 🗑️ Delete to remove a sender (you’ll be asked to confirm).
Heads-up: If a sender is referenced by a Notification Template or workflow, update those to the new sender before deleting.
Best practices
-
Maintain at least one SMTP sender for production.
-
Keep separate senders for transactional vs marketing mail.
-
Periodically Test Connection after password/host changes.
-
Restrict who can edit senders via Admin Groups/Roles.
Troubleshooting checklist
-
❌ Test Connection fails → verify host/port/encryption; check firewall blocks.
-
📬 Emails land in spam → fix SPF/DKIM/DMARC; use consistent “From” domain; warm up IP if applicable.
-
🔐 Auth errors → re-enter username/password; confirm app-passwords if using Google/Microsoft; ensure 2FA policies allow SMTP.
That’s it! Your Notification Senders are now set up and ready to power templates and automated notifications.