Create and Manage an Attribute Group
PUQcloud Panel
Order Now | Download | FAQ
Product Attribute Groups are collections of attributes (e.g., IPv4, IPv6, 10 Gbps) you can later attach to products. They help standardize feature flags and technical capabilities across multiple products.
Overview
A Product Attribute is a single capability/flag (e.g., IPv6). An Attribute Group is a labeled collection of such attributes.
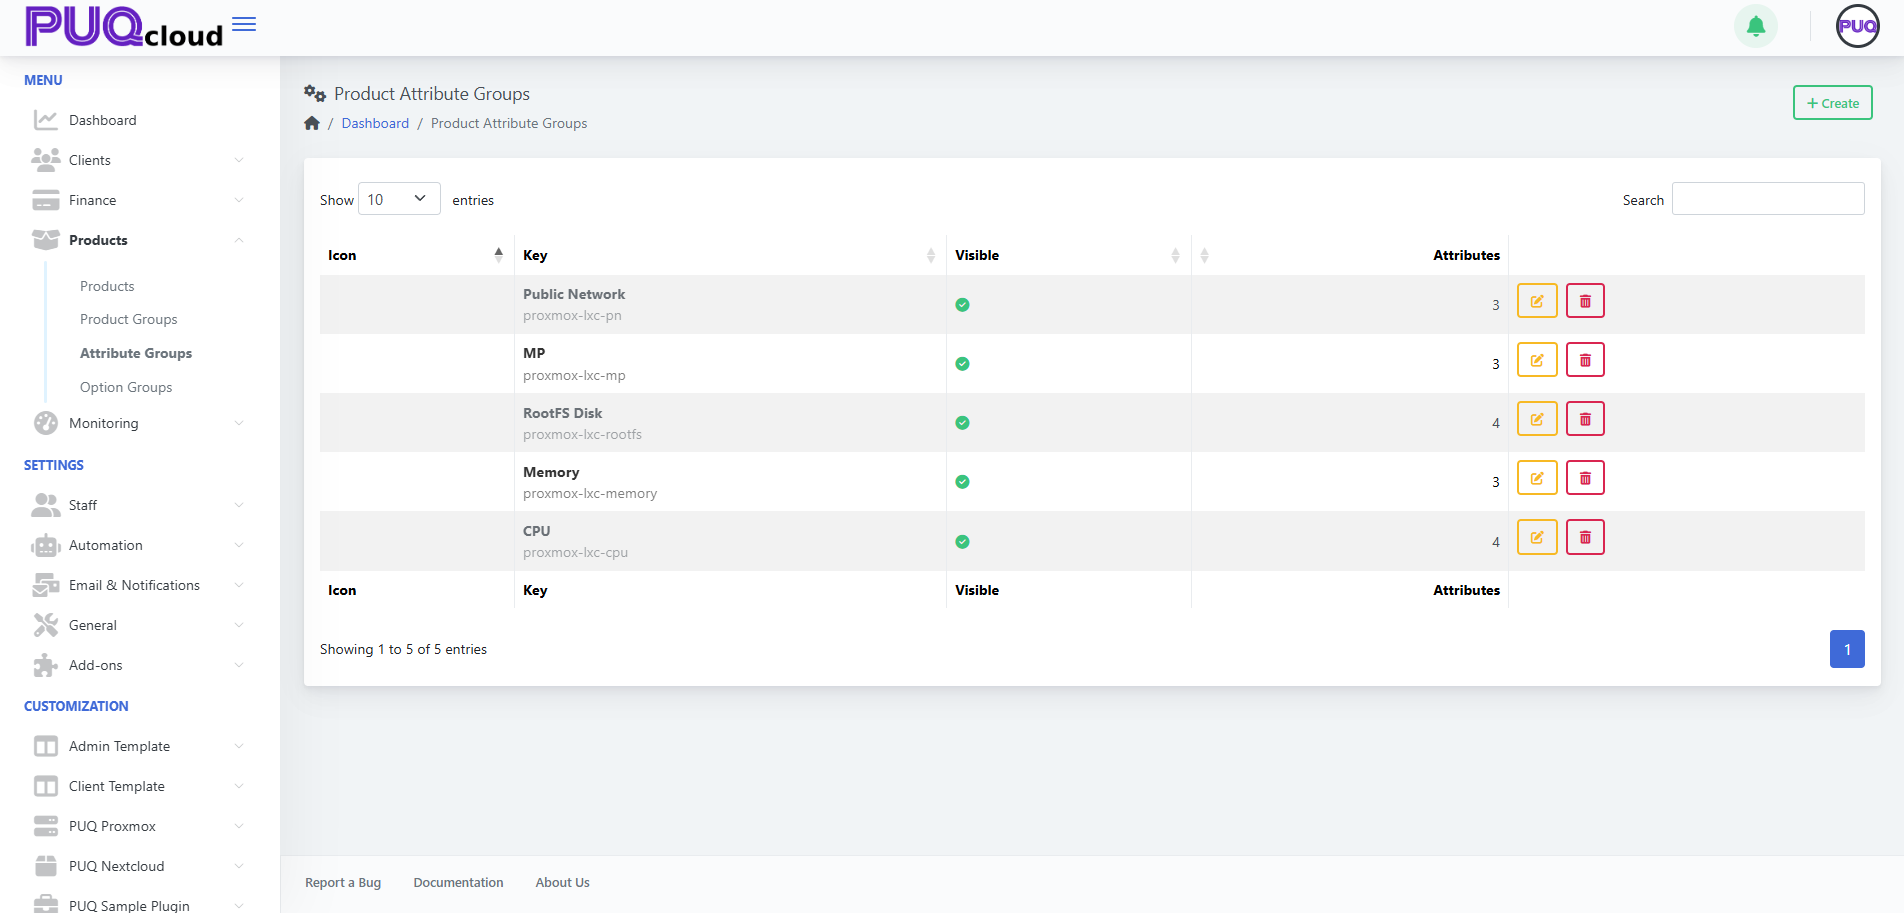
Attribute Groups List
The list shows Icon, Key, Visible, and Attributes (count) with actions Edit and Delete. Use Search to filter.
(Screenshot reference: Attribute Groups list)
Actions
-
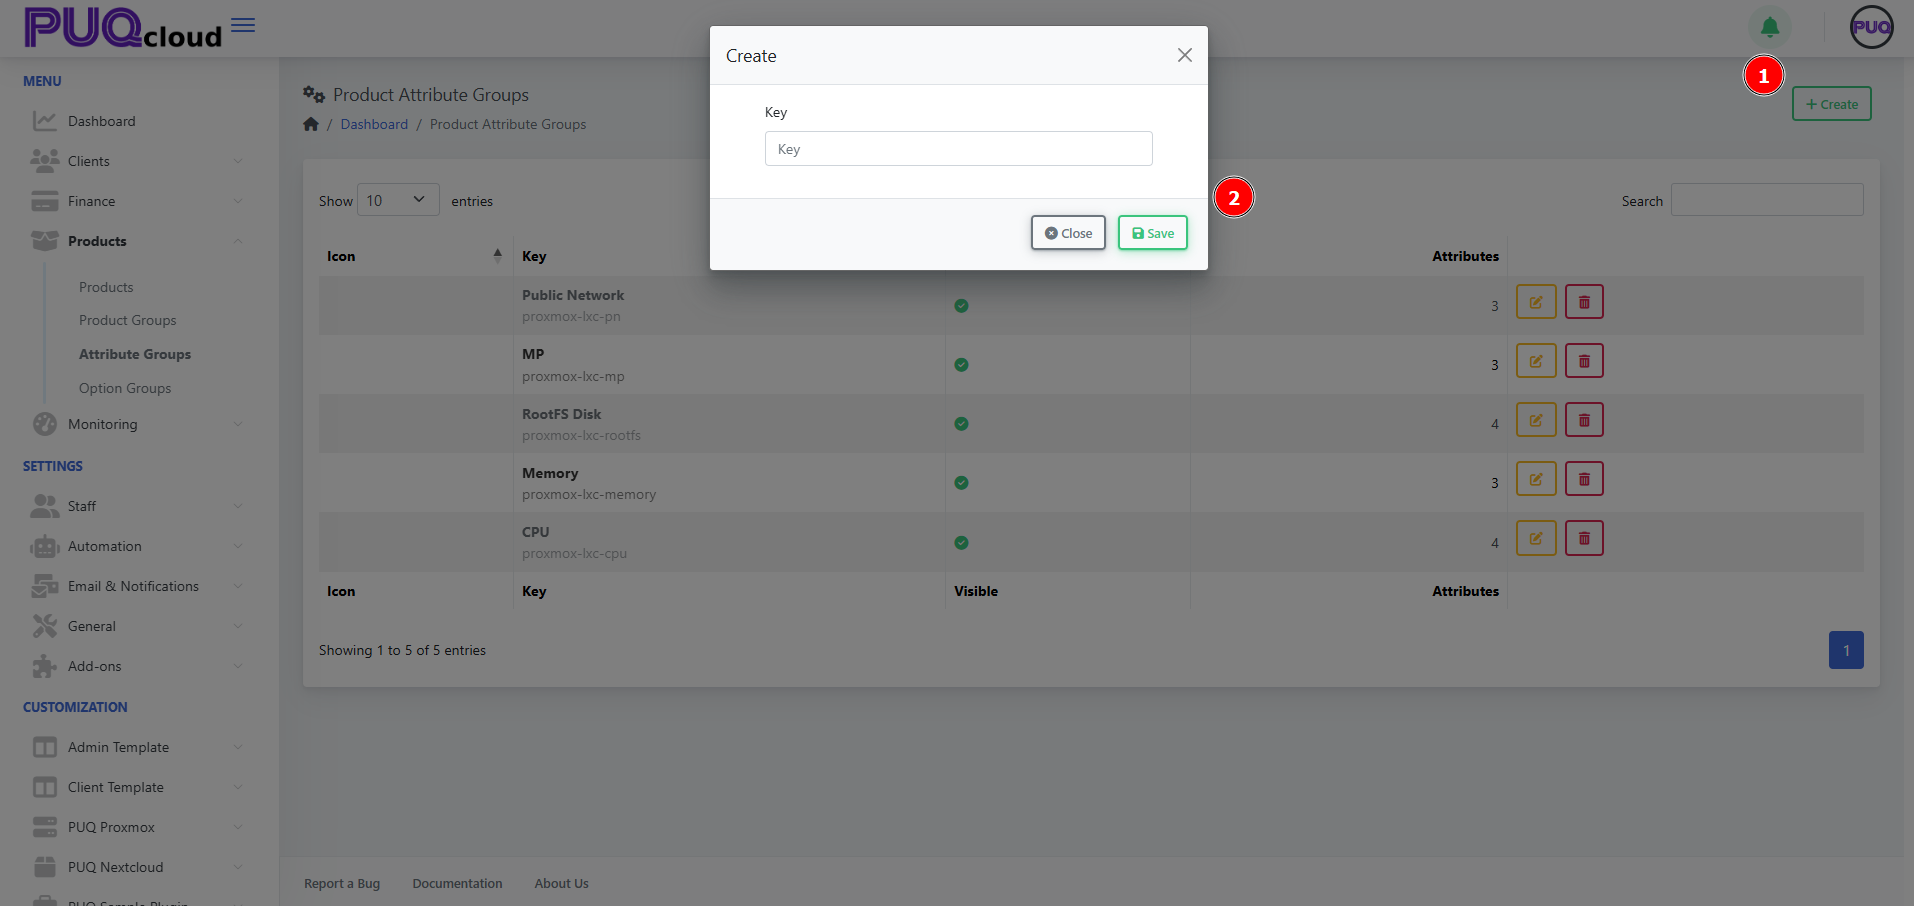
+ Create — add a new attribute group. (Screenshot: Create Group modal)
-
Edit — open tabs General / Images / Attributes.
-
Delete — remove the group (does not remove attributes already linked to products).

Create an Attribute Group
-
Click + Create.
-
Enter a unique Key (e.g.,
proxmox-lxc-pn) and Save.
Configure the Group
Use the tabs across the top.
General tab
-
Key — internal identifier (read‑only after creation).
-
Hidden — hide/show the entire group from selection lists.
-
Localized content — Name, Short Description, and Description per language.
-
Notes — internal notes for admins.
Click Save.
(Screenshot: Attribute Group → General tab)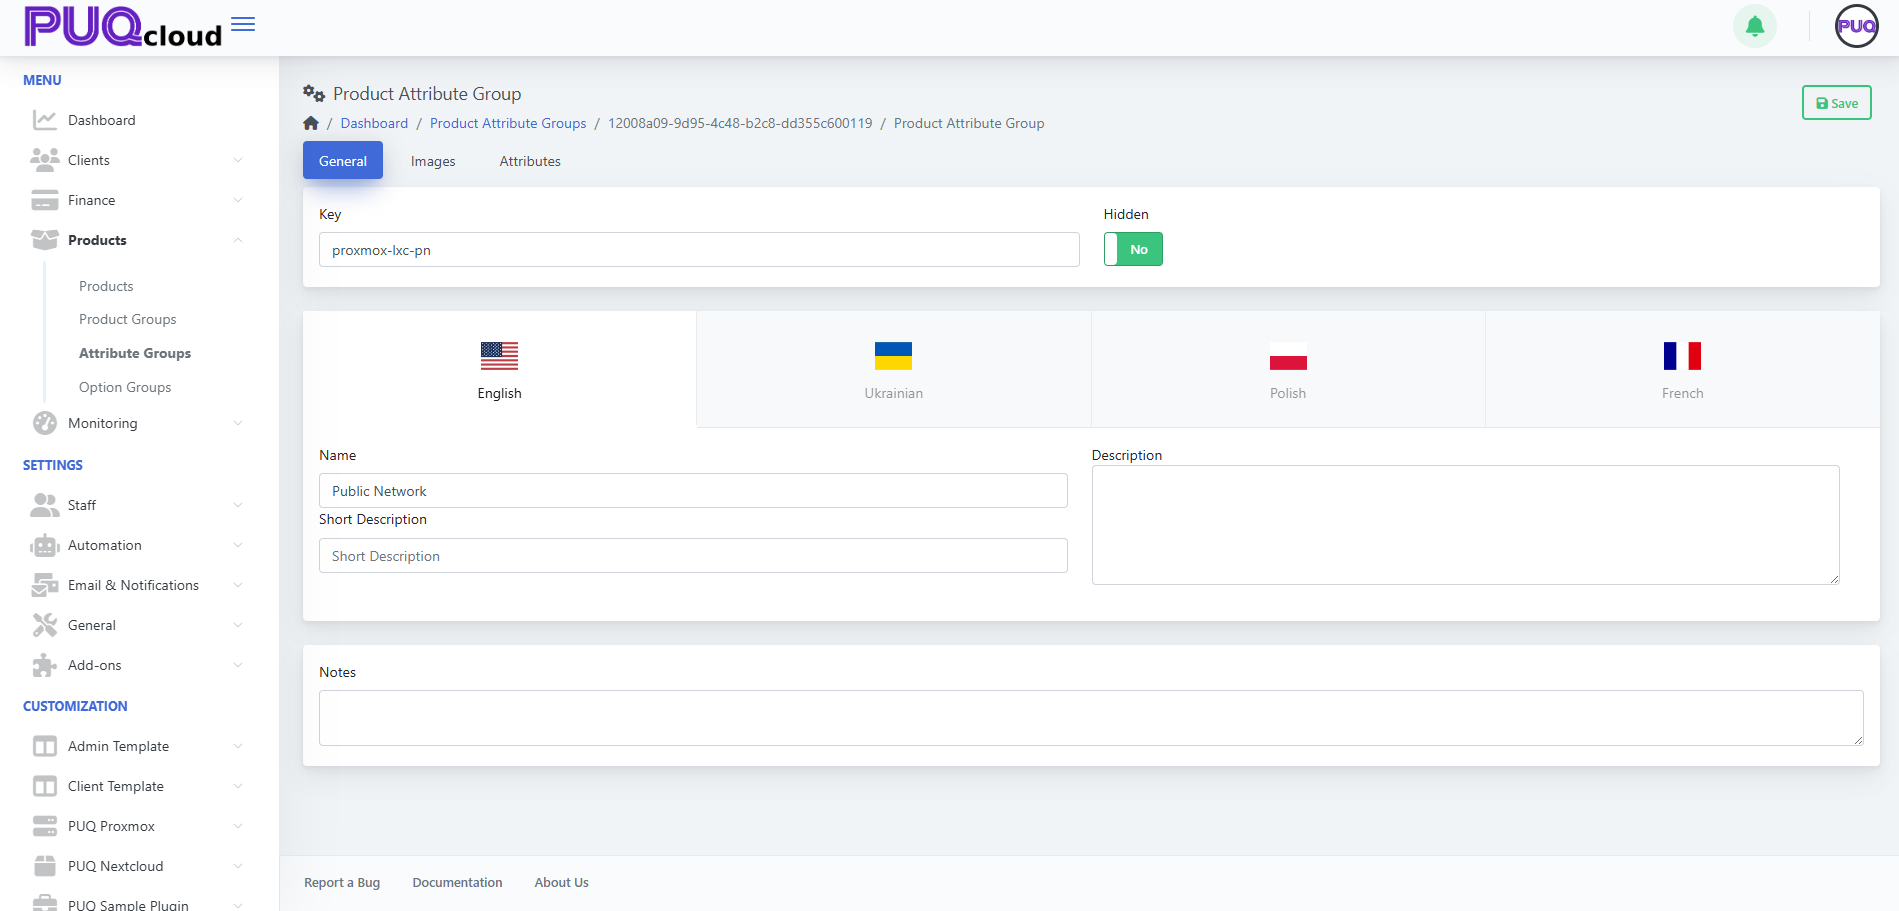

Images tab
Upload visuals representing the group:
-
Icon Image — small logo used in lists/cards.
-
Background Image — larger banner image.
Drag & drop files or Browse, then Save.
(Screenshot: Attribute Group → Images tab)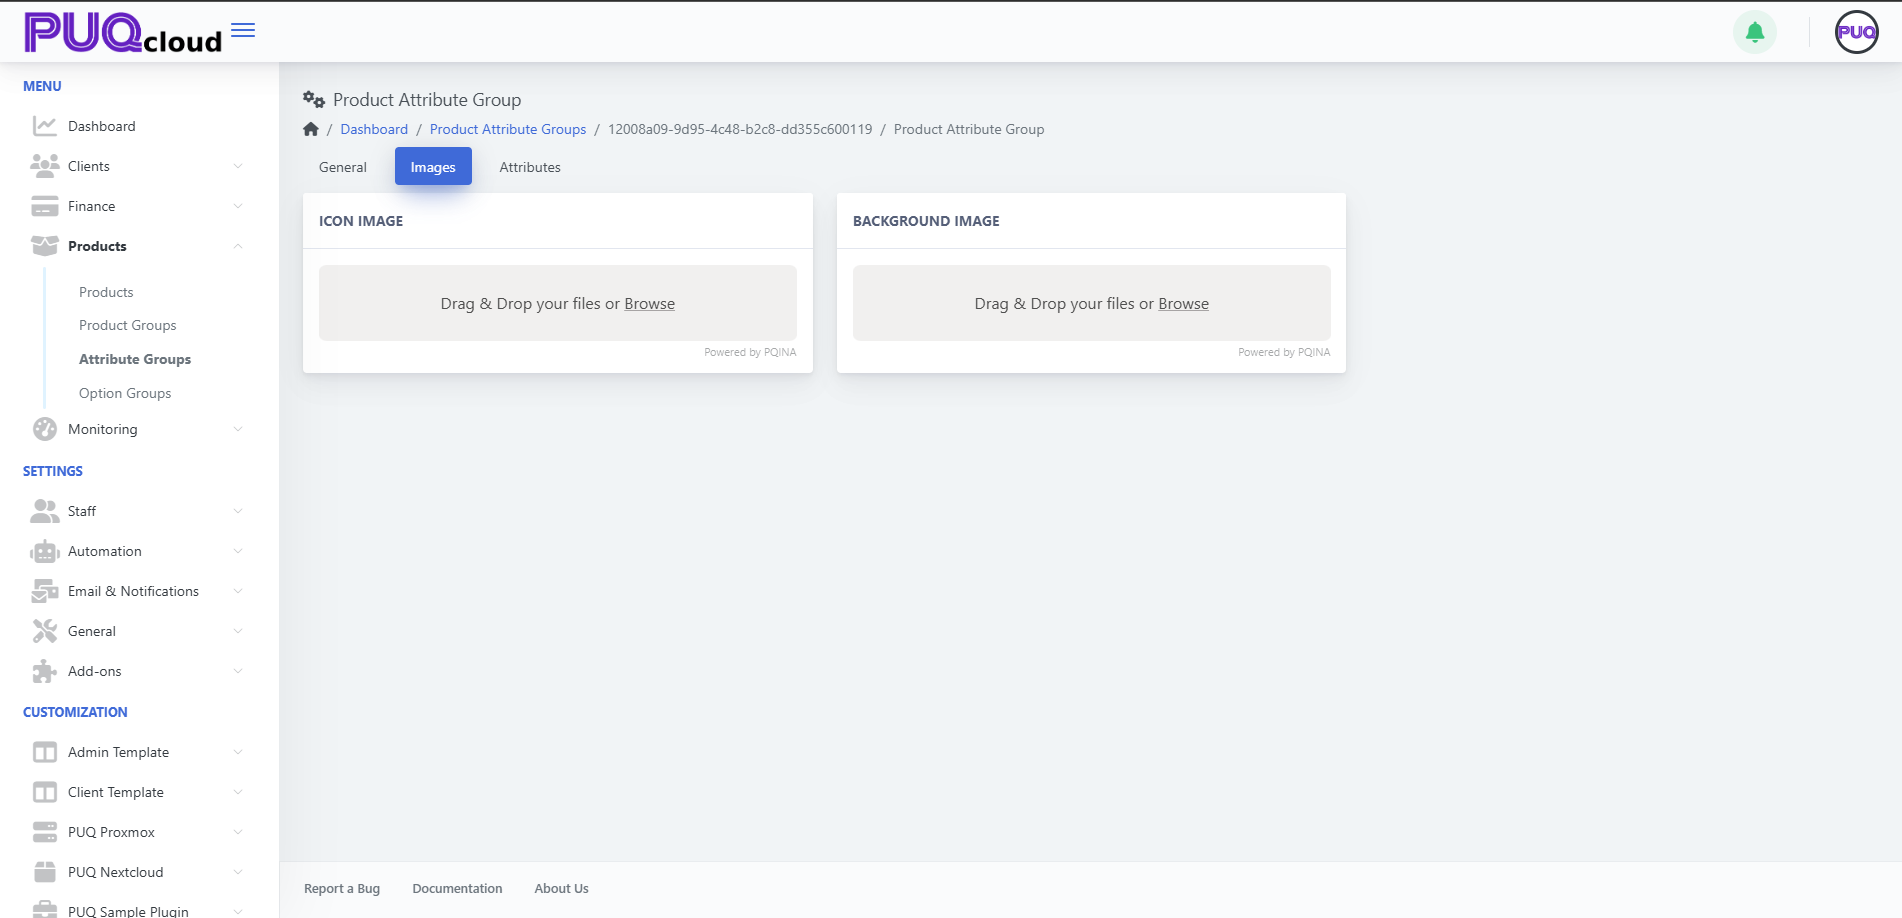

Attributes tab (inside the group)
Add and manage the individual attributes that belong to this group.
You’ll see columns Key and Visible with actions Edit and Delete for each attribute.
Add an attribute
-
Click + Create (top‑right while on the group).
-
Fill out the attribute details (e.g., Key
proxmox-lxc-pn-ipv6, NameIPv6). -
Set Visible as needed and Save.
Edit / Delete
-
Use the Edit (pencil) or Delete (trash) on a row.
(Screenshot: Attribute Group → Attributes tab showing IPv4, IPv6, 10 Gbps)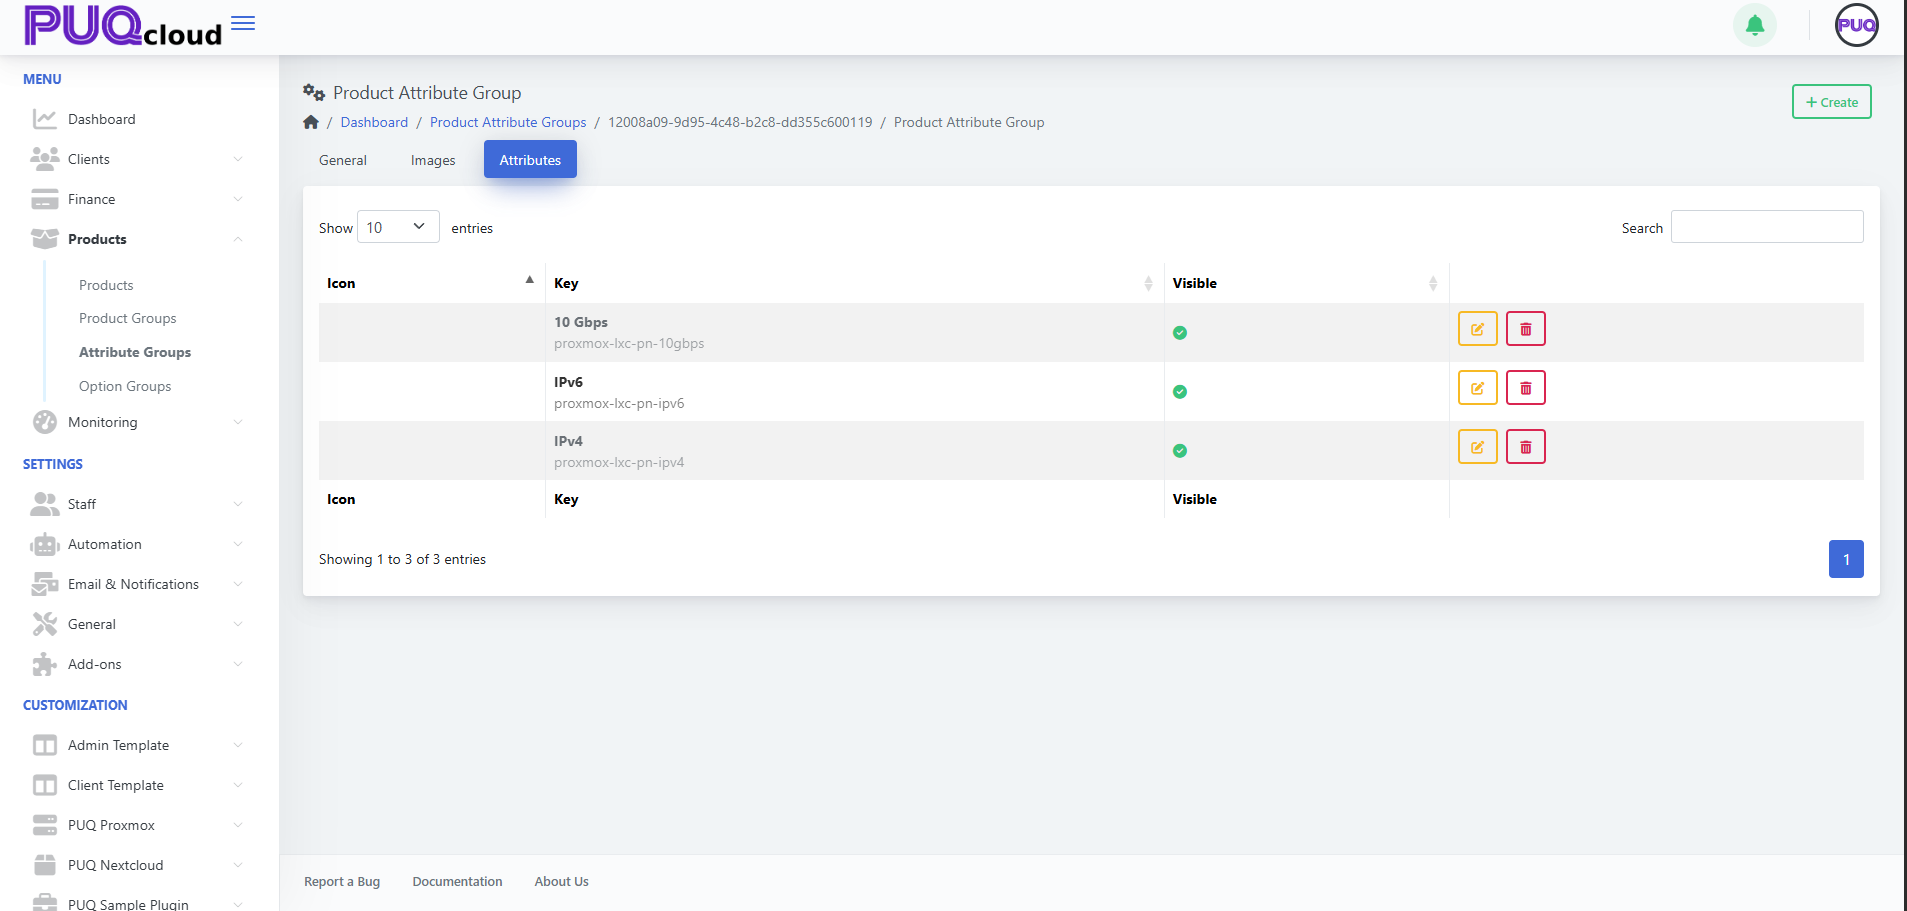

Using Attributes in Products
Once your attributes exist, attach them to products.
-
Open Products → Products, select a product.
-
Go to the product’s Attributes tab.
-
Click + Add Attribute and pick from available attributes (they are organized by their groups).
-
Save the product.
Tip: Consistent keys (e.g., proxmox-lxc-pn-ipv4) make it easier for modules/automation to reference attributes programmatically.
Best Practices
-
Plan the taxonomy: create groups by domain (e.g., Networking, Storage, CPU features).
-
Keep keys stable: avoid renaming keys after products reference them.
-
Localize names/descriptions so storefronts are consistent across languages.
-
Use visibility to stage new attributes before making them selectable.
Troubleshooting
-
Attribute not selectable on a product → Ensure the attribute exists, is Visible, and you’re on the product’s Attributes tab.
-
Old attribute still appears → It may be linked on products; unlink from those products before deletion.
-
Module fails expecting a flag → Verify the attribute Key matches what the module/integration expects (case‑sensitive).
Screenshot References
-
Attribute Groups list page.
-
Create Attribute Group modal.
-
Attribute Group → General tab.
-
Attribute Group → Images tab.
-
Attribute Group → Attributes tab with items (IPv4, IPv6, 10 Gbps).