iOS IKEv2 client configuration
Order now | Download | FAQ
To connect to the VPN, follow these steps:
- Open the provided link in your browser to get instructions and settings for your new VPN connection. You will see the following page in your browser window.
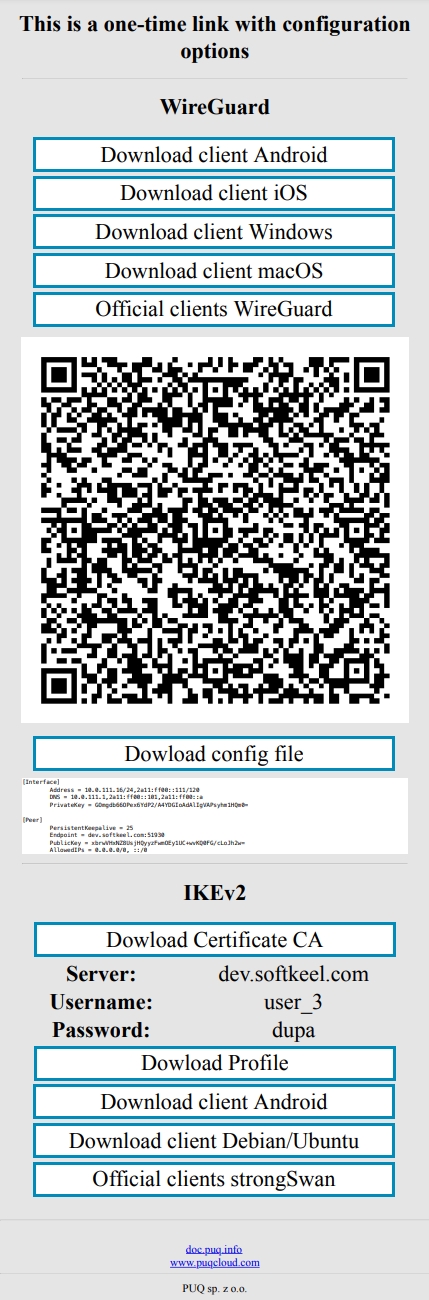
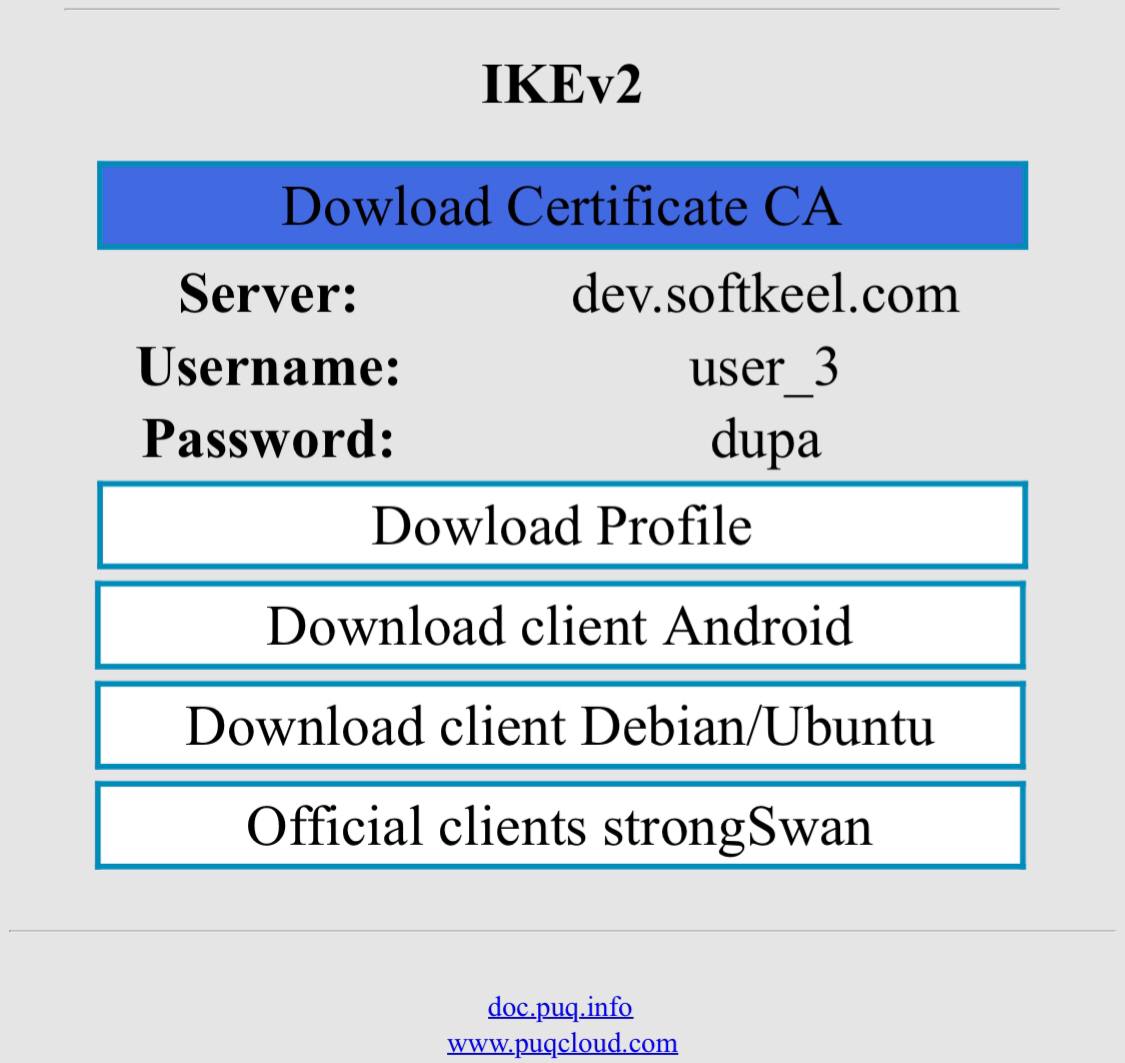
- To proceed, you need to install the Certificate CA. Click the "Download Certificate CA" button and allow the download of the file.
-
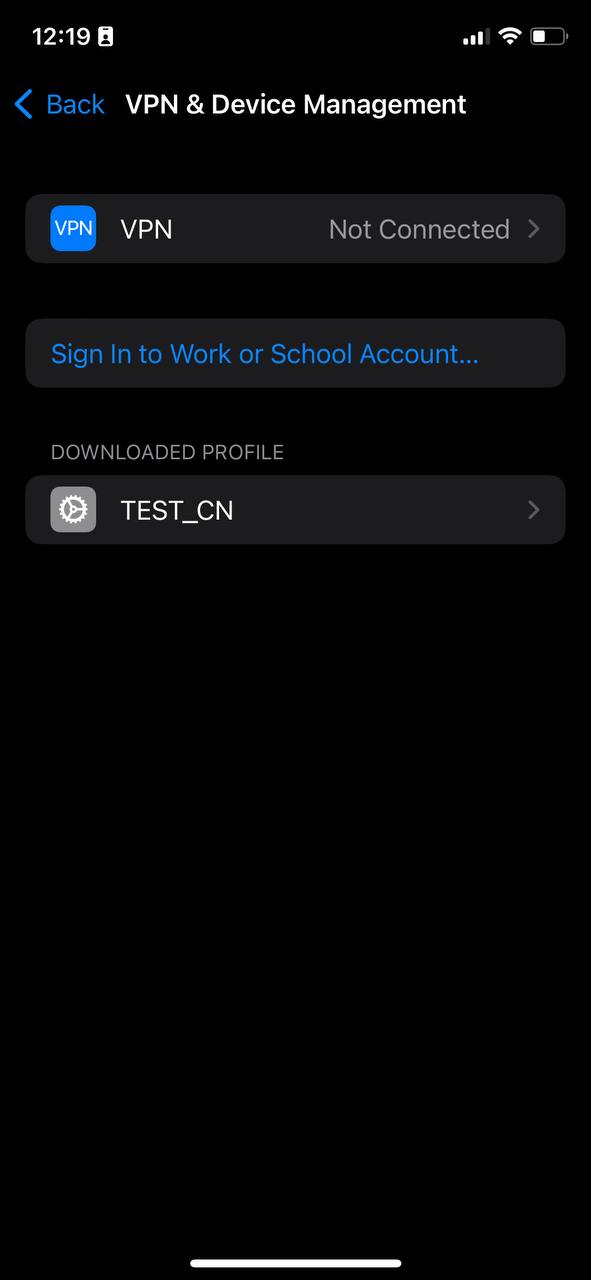
Next, navigate to the following path: Settings -> General -> VPN & Device Management, and wait for the profile to download and appear in this window.

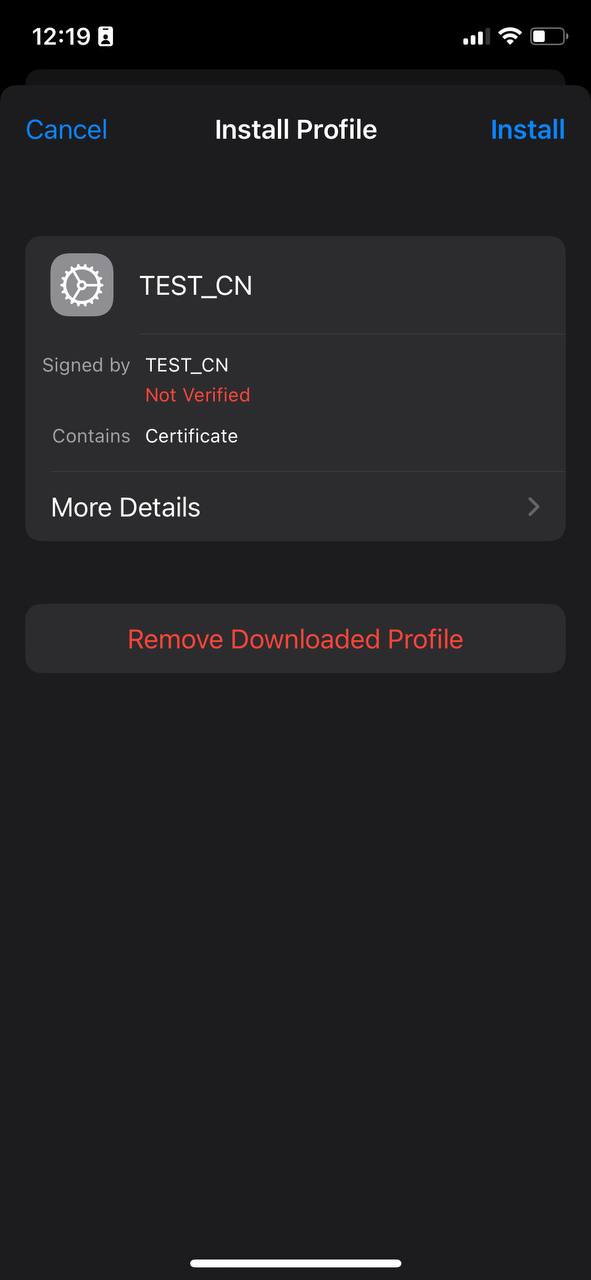
- Tap on the downloaded profile and, click the "Install" button.
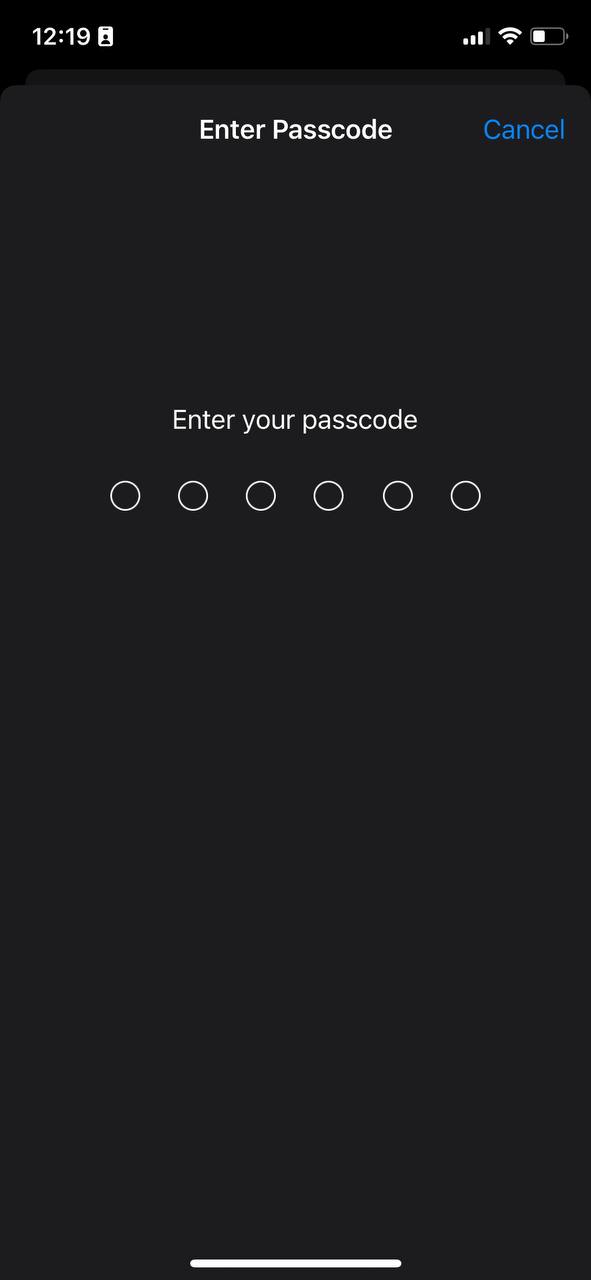
- Enter your password.
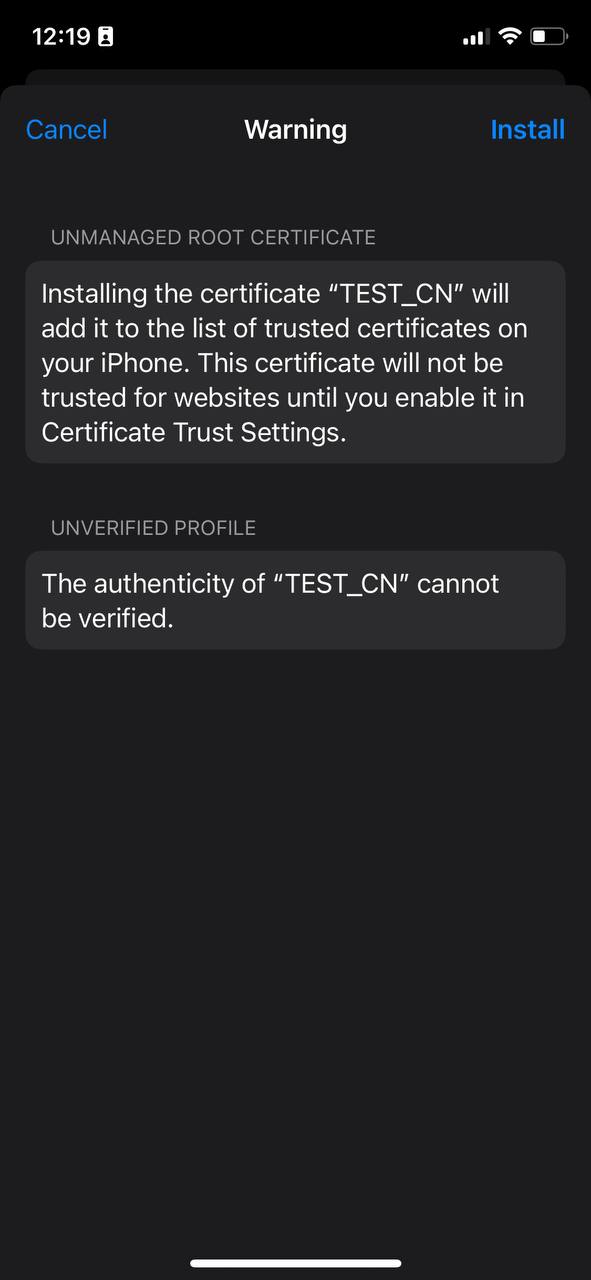
- Read the warning and press the "Install" button
-
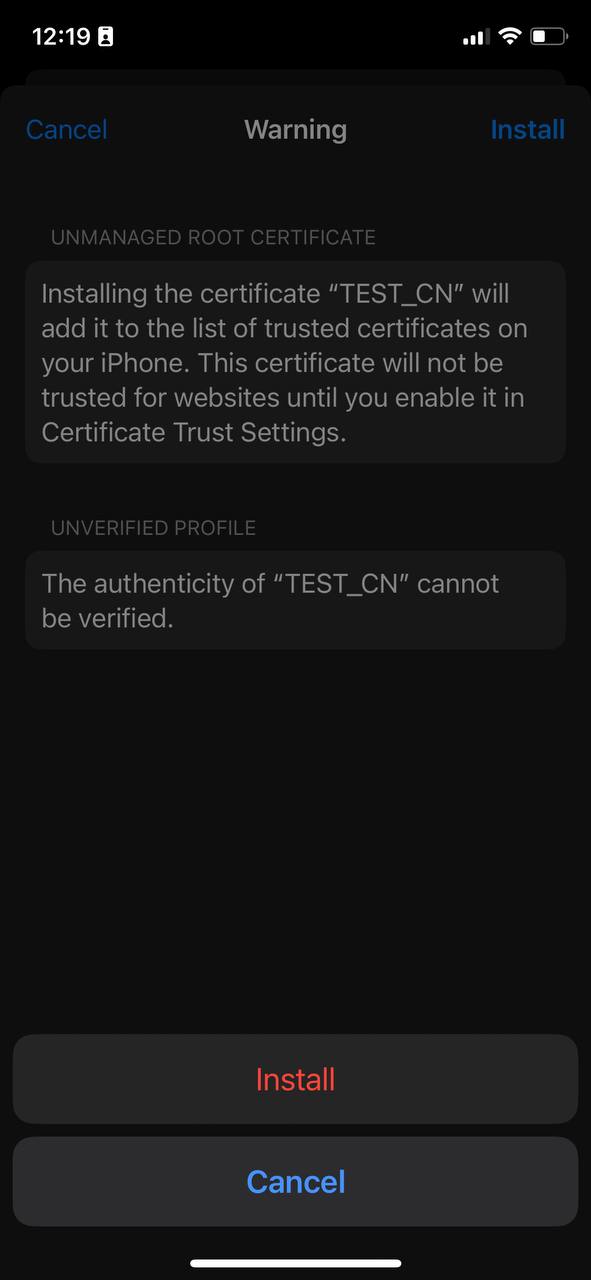
Press "Install" again to confirm.

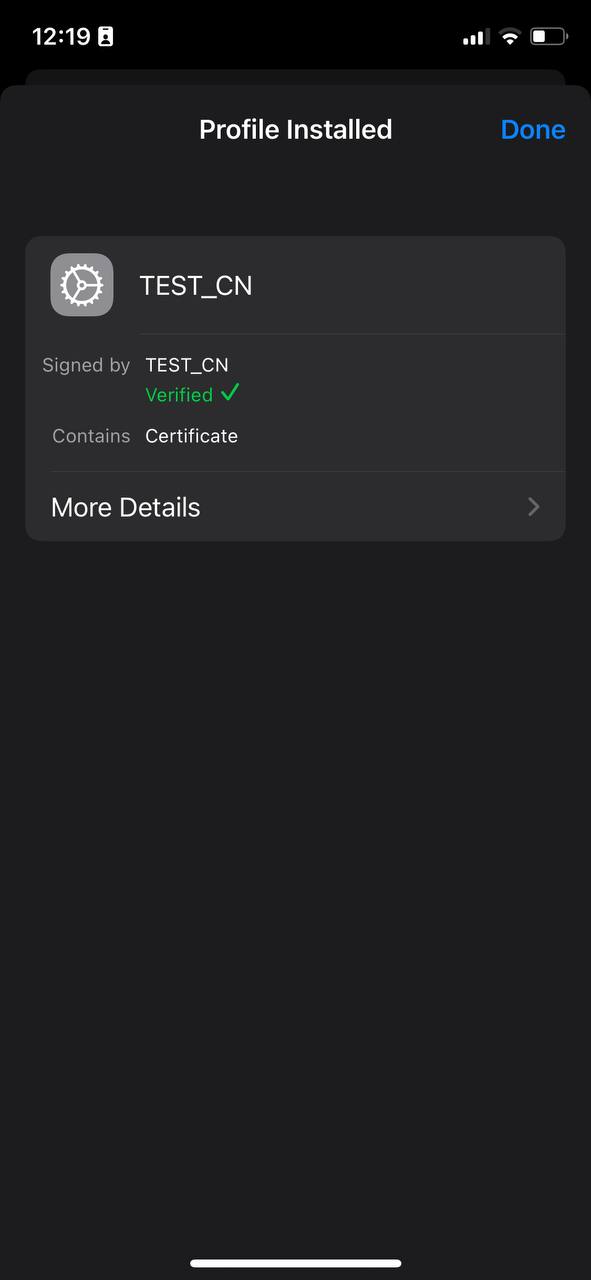
- A window will appear, showing that the profile has been downloaded and verified.


Next, you need to configure the VPN.
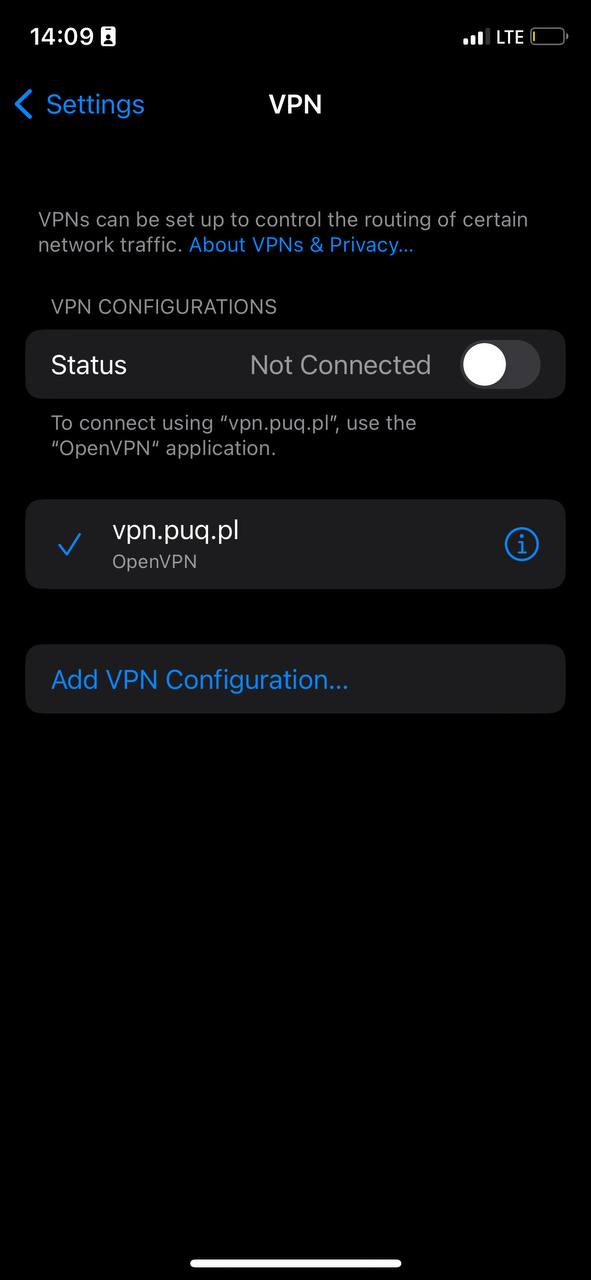
- To do this, go to Settings -> General -> VPN & Device Management -> VPN and tap on "Add VPN Configuration..."

-
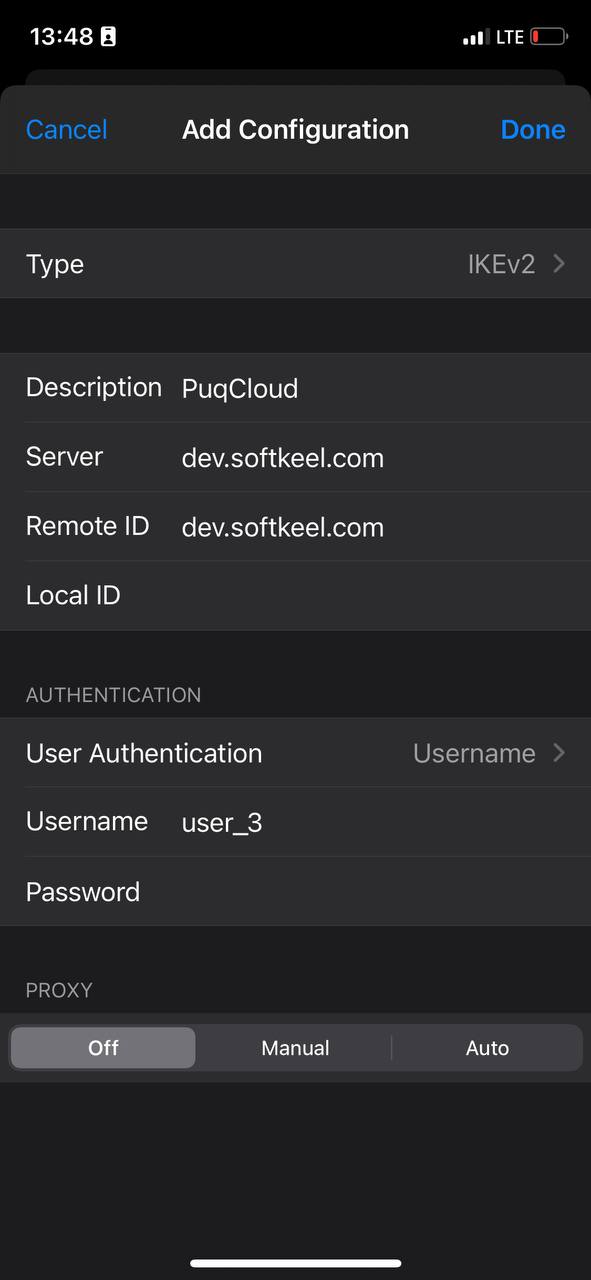
Enter the required details and click "Done."
- Description: [Enter a description for this VPN connection]
- Server: [Enter the server address]
- Remote ID: [Enter the remote ID]
- Username: [Enter your VPN username]
- Password: [Enter your VPN password]
- Type: IKEv2
- Proxy: Off

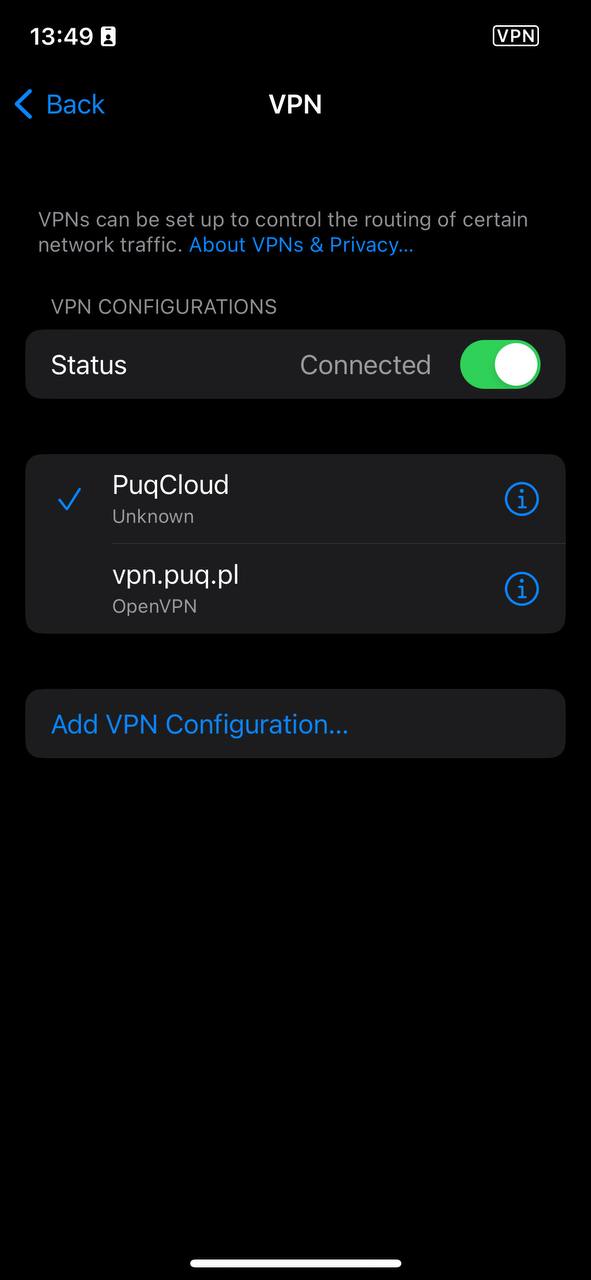
- Finally, select the VPN you added and don't forget to toggle the switch to enable it.

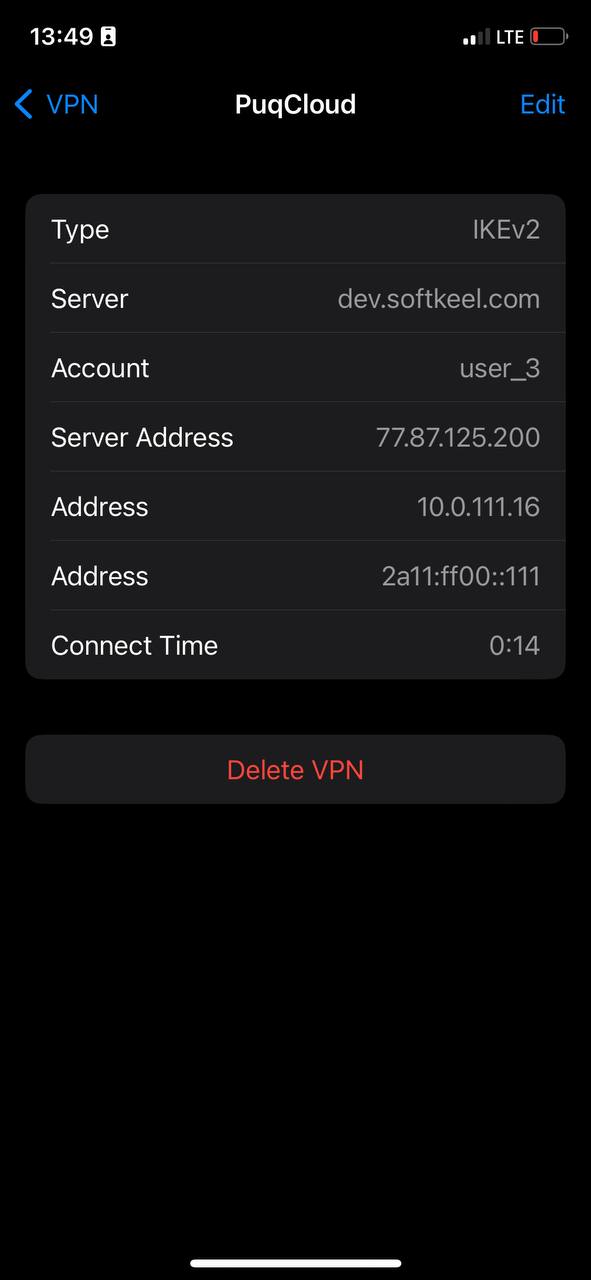
- By tapping on the (i) icon, you can check the information for this VPN or make any necessary changes