Groups Export
PUQ Customization module WHMCS
Order now | Download | FAQ
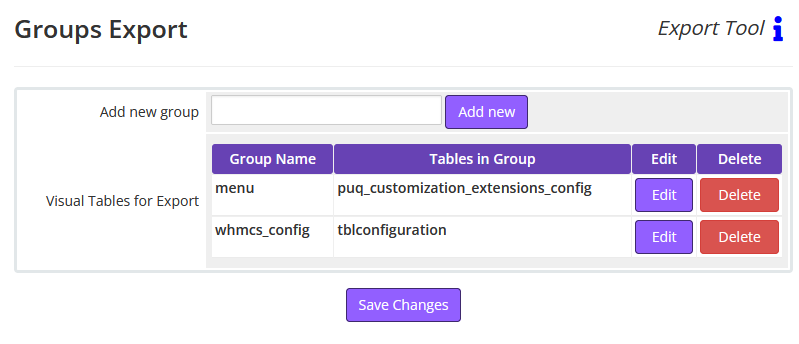
On the "Groups Export" page of the Export Tool, the interface is designed for managing groups of tables that you have set up for exporting data:
1. Add new group: Here, you can create a new group for organizing your tables. Simply type the name of the new group into the text field and click the "Add new" button. This action will create a new group which you can then configure by adding specific tables and setting export conditions.
2. Visual Tables for Export: This section displays the groups that are currently set up for export along with the tables included in each group. For each group listed, there are options to "Edit" or "Delete":
- - Group Name: This column lists the names of the groups you have created, providing an easy reference to manage multiple sets of tables.
- - Tables in Group: Next to each group name, you see the tables that are included in that group. These are the tables whose data you can export using the configurations you have set up for that specific group.
- - Edit: Clicking the "Edit" button next to a group allows you to modify the group's settings. This typically includes changing the tables in the group, adjusting export conditions, or altering access permissions.
- - Delete: If you wish to remove a group entirely, clicking the "Delete" button will remove the group and all associated configurations from the export tool.
Finally, at the bottom of the page, the "Save Changes" button should be clicked after making any changes to commit them to the system.
This page is crucial for organizing your data export activities into manageable groups, which simplifies the process of exporting data from multiple tables and ensures that you can easily access and modify your export settings as needed.