Installation/Update and configuration guide
PUQ Customization module WHMCS
Order now | Download | FAQ
Module is coded ionCube v13
Supported php version:
- php 7.4 WHMCS 8.11.0 -
- php 8.1 WHMCS 8.11.0 +
- php 8.2 WHMCS 8.11.0 +
To install and update a module, you must perform one and the same action.
1. Download the latest version of the module.
PHP 8.2
wget http://download.puqcloud.com/WHMCS/addons/PUQ-Customization/php82/PUQ-Customization-latest.zipPHP 8.1
wget http://download.puqcloud.com/WHMCS/addons/PUQ-Customization/php81/PUQ-Customization-latest.zipPHP 7.4
wget http://download.puqcloud.com/WHMCS/addons/PUQ-Customization/php74/PUQ-Customization-latest.zip
All versions are available via link: http://download.puqcloud.com/WHMCS/addons/PUQ-Customization/
2. Unzip the archive with the module.
unzip PUQ-Customization-latest.zip3. Copy and Replace "puq_customization" to "WHMCS_WEB_DIR/modules/addons/"
4. Login to the admin zone of your WHMCS and go to "Configuration->Addons Modules"
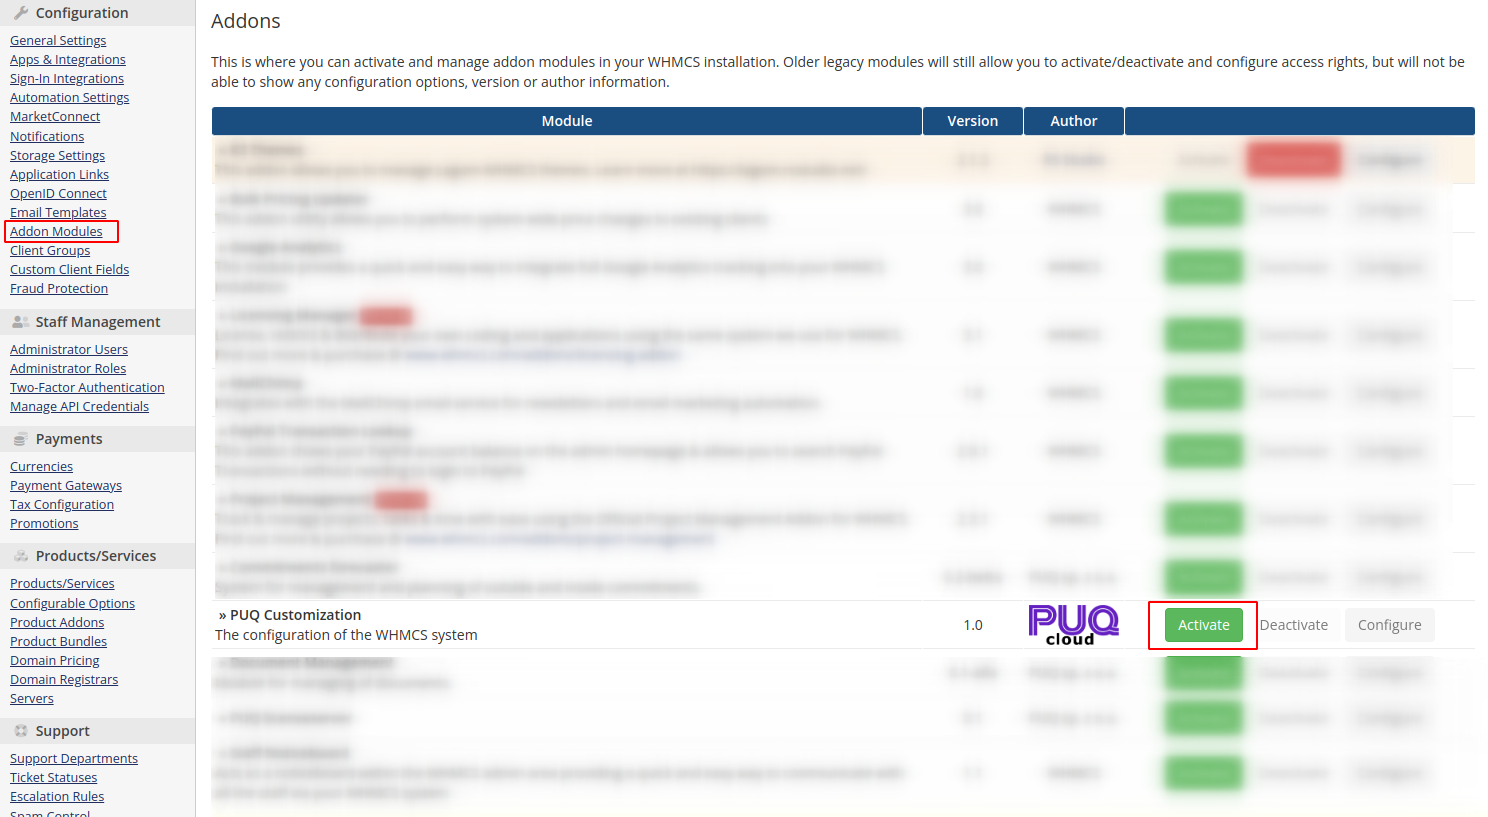
5. From the list of modules, select the "PUQ Customization" module and click the "Activate" button. After these actions, the module will be activated and will create the necessary tables in the database for work.
Note that deactivating a module will delete all tables created by the module.
6. After activation, don't forget to configure module access rights and enter a license key if you want to use all extensions without restrictions.

No Comments